Campaigns
Where Armorama group builds can be discussed, organized, and updates posted.
Where Armorama group builds can be discussed, organized, and updates posted.
Hosted by Darren Baker, Richard S.
Blitz 3: Italy

retiredyank

Joined: June 29, 2009
KitMaker: 11,610 posts
Armorama: 7,843 posts

Posted: Saturday, November 13, 2010 - 10:53 AM UTC
I will be starting my Autoblinda AB 41 tomorrow. I have already built one in 1/72 and look forward to the 1/35 version.

Bigrip74

Joined: February 22, 2008
KitMaker: 5,026 posts
Armorama: 1,604 posts

Posted: Saturday, November 13, 2010 - 04:07 PM UTC
Posted: Sunday, November 14, 2010 - 11:45 AM UTC
Here is my in-progress photo #1 of the 1/35 Tamiya Kettenkraftrad that I am building for this campaign.
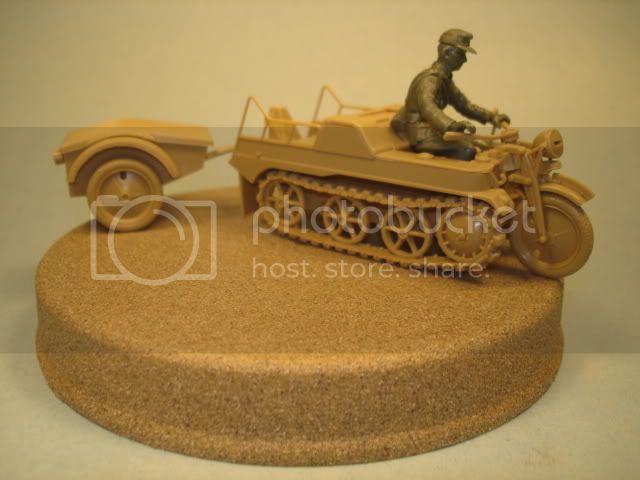
I still have some construction to complete, the remaining road wheels, but I will add them after they are painted. Now that the basic construction is complete I can start on the ground work for the base. Hopefully I will have another in-progress photo soon.
Thanks,
Harv

I still have some construction to complete, the remaining road wheels, but I will add them after they are painted. Now that the basic construction is complete I can start on the ground work for the base. Hopefully I will have another in-progress photo soon.
Thanks,
Harv


Bigrip74

Joined: February 22, 2008
KitMaker: 5,026 posts
Armorama: 1,604 posts

Posted: Sunday, November 14, 2010 - 12:02 PM UTC
Harv, nice job and subject. What is the base made of, I do not think that I have seen the material before.
Bob
Bob
Posted: Sunday, November 14, 2010 - 12:20 PM UTC
Hi Bob,
Thanks for the comments. The base is just a jar lid painted with textured spray paint.
Here is a link for your scout car. There are some pictures of the interior to show you the seat colors.
http://toadmanstankpictures.com/m3a1scout.htm
Thanks again,
Harv
Thanks for the comments. The base is just a jar lid painted with textured spray paint.
Here is a link for your scout car. There are some pictures of the interior to show you the seat colors.
http://toadmanstankpictures.com/m3a1scout.htm
Thanks again,
Harv

ltb073

Joined: March 08, 2010
KitMaker: 3,662 posts
Armorama: 3,078 posts

Posted: Sunday, November 14, 2010 - 02:43 PM UTC
Quoted Text
Gabriel, I like what you did to that 55 gal. bbl.
I have to agree that barrel looks good
@ Bob nice progress on the Scout Car,
@ Harv looks like you gonna drive off the top there, hold on
 looking forward to seeing more guys
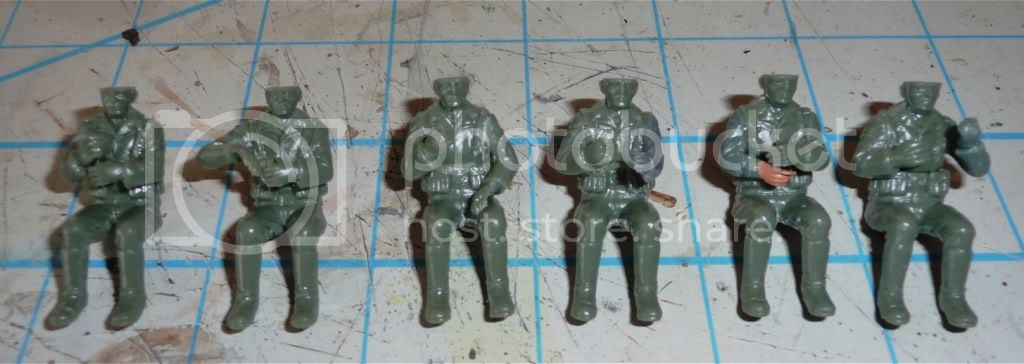
Here is where I'm at. The six guys in the rear were all the same as the guy on the left, so i went through the spare box to find some different arms
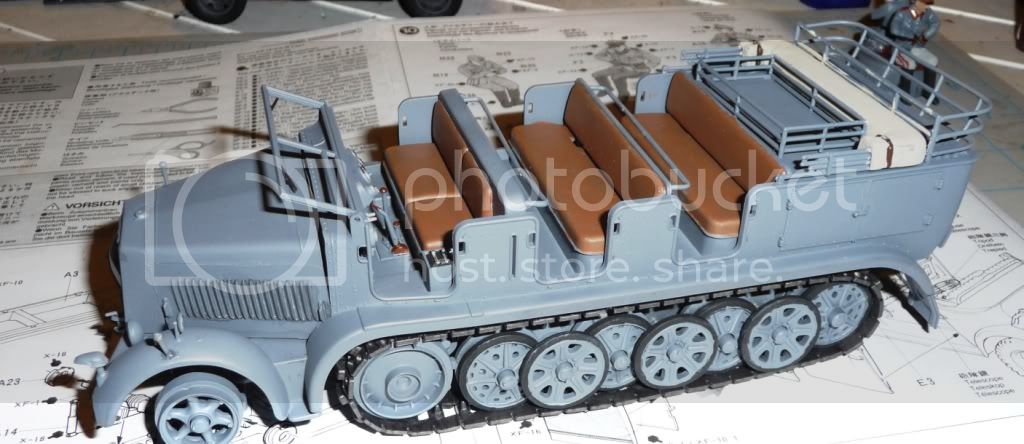
I got some paint on the beast as well
Keep the progress going guys many other good campaigns are a coming


Bigrip74

Joined: February 22, 2008
KitMaker: 5,026 posts
Armorama: 1,604 posts

Posted: Sunday, November 14, 2010 - 02:56 PM UTC
Sal, those seats look really good, what color/paint did you use? As for the crew they all look a little brainless  without their helmets.
Bob
 without their helmets.
Bob
Posted: Sunday, November 14, 2010 - 09:36 PM UTC
Nice looking M3, Bob. Some good progress - looking forward to see it with weathering.
Nice basis for a small viginette, Randy.
I have made some progress on my small Matchbox Panther. The kit fits together well, but the lack of detail is stunning. Very basic, but also very nostalgic.
I will make it into a Pz. Rgt. 26 Panther from the Italian front. I will shamelessly steal the guidelines from the Dragon 1/35 kit on how to do this. To make it just a little detailed I will have to add some turret top armour, front and rear fenders, and some track hangers on the rear hull sides.
More to follow.
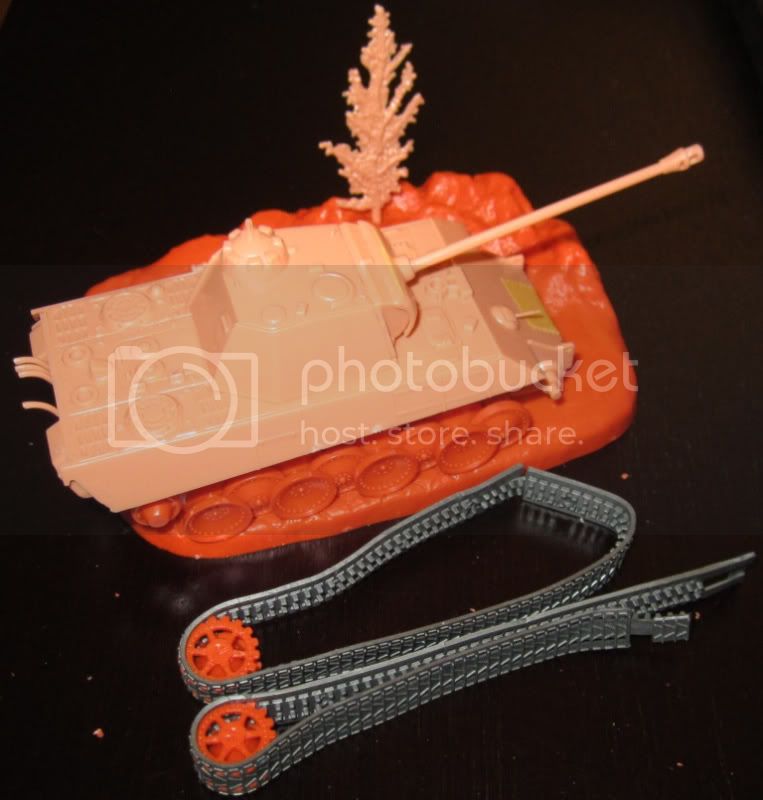
Nice basis for a small viginette, Randy.
I have made some progress on my small Matchbox Panther. The kit fits together well, but the lack of detail is stunning. Very basic, but also very nostalgic.

I will make it into a Pz. Rgt. 26 Panther from the Italian front. I will shamelessly steal the guidelines from the Dragon 1/35 kit on how to do this.
 To make it just a little detailed I will have to add some turret top armour, front and rear fenders, and some track hangers on the rear hull sides.
More to follow.

ltb073

Joined: March 08, 2010
KitMaker: 3,662 posts
Armorama: 3,078 posts

Posted: Sunday, November 14, 2010 - 11:02 PM UTC
Quoted Text
Sal, those seats look really good, what color/paint did you use? As for the crew they all look a little brainlesswithout their helmets.
Bob
Thanks Bob, Its Model Masters Enamel, Military Brown. I will add a black acrylic wash to it to weather it up a bit like I did for my Steyr 1500A in the Soft Skin Campaign. Brainless is how I feel sometimes when painting figures

tominizer

Joined: September 26, 2006
KitMaker: 210 posts
Armorama: 81 posts

Posted: Wednesday, November 17, 2010 - 02:09 AM UTC
Guys, great progress by all!!!
I wish I could say the same. Still stuck finishing up existing projects. I hopefully can get some time in this week to get them further down the road and hopefully finished shortly. Then it will be time to dig into the stash and finally decide on what to do for this campaign.
I wish I could say the same. Still stuck finishing up existing projects. I hopefully can get some time in this week to get them further down the road and hopefully finished shortly. Then it will be time to dig into the stash and finally decide on what to do for this campaign.
Posted: Wednesday, November 17, 2010 - 02:32 PM UTC
Here is in-progress photo #2.
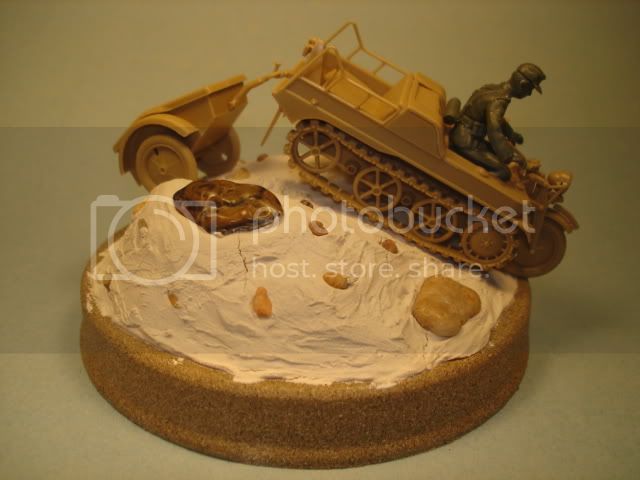
I just wanted to show you the start of the ground work. I will be adding sand, gravel, dead grass and some cactus.
I am thinking about calling it "Short Cut - Italy 1943".
I will post another photo soon.
Thanks,
Harv

I just wanted to show you the start of the ground work. I will be adding sand, gravel, dead grass and some cactus.
I am thinking about calling it "Short Cut - Italy 1943".
I will post another photo soon.
Thanks,
Harv


Bigrip74

Joined: February 22, 2008
KitMaker: 5,026 posts
Armorama: 1,604 posts

Posted: Wednesday, November 17, 2010 - 04:06 PM UTC
Hey! Harv, that is quite the lid opener. I like the hill, what is it made of and I still like that base so much that I may just do one.
Bob
Bob
Posted: Thursday, November 18, 2010 - 08:02 AM UTC
Quoted Text
I like the hill, what is it made of
Thanks Bob,
I used floral foam for the basic shape and then covered it with drywall mud. I smoothed it out to the basic shape I wanted and added the rocks while it was still wet. Not much to it.
Harv


retiredyank

Joined: June 29, 2009
KitMaker: 11,610 posts
Armorama: 7,843 posts

Posted: Friday, November 19, 2010 - 12:21 AM UTC
Here is my AB41 in Italian service. There are two small parts missing and I intend to make a vignette using the kit.

IMG]http://i832.photobucket.com/albums/zz242/capnluki/IMG_0973.jpg[/IMG]


IMG]http://i832.photobucket.com/albums/zz242/capnluki/IMG_0973.jpg[/IMG]


flakman

Joined: October 09, 2010
KitMaker: 18 posts
Armorama: 17 posts

Posted: Saturday, November 20, 2010 - 06:54 AM UTC
nice progress on your Autoblinda Matt
I tryed to purchase the kits I wanted on JBmodel but they say that they don't have them in stock. Is there other sites that sell these kits
I tryed to purchase the kits I wanted on JBmodel but they say that they don't have them in stock. Is there other sites that sell these kits


retiredyank

Joined: June 29, 2009
KitMaker: 11,610 posts
Armorama: 7,843 posts

Posted: Saturday, November 20, 2010 - 08:00 PM UTC
[/quote] I tryed to purchase the kits I wanted on JBmodel but they say that they don't have them in stock. Is there other sites that sell these kits  [/quote]
Which kits are you looking for?
 [/quote]
Which kits are you looking for?
Posted: Sunday, November 21, 2010 - 03:54 AM UTC
Here is another update on my project. I haven't done much other than work on the base. I did add the rolled up tarp to the Kettenkraftrad but that is all.
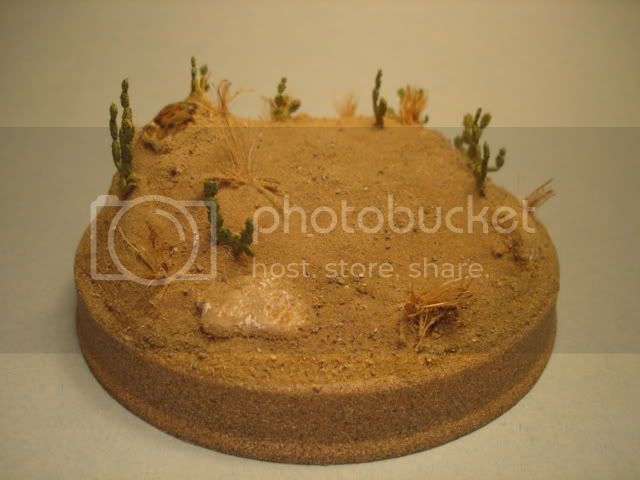
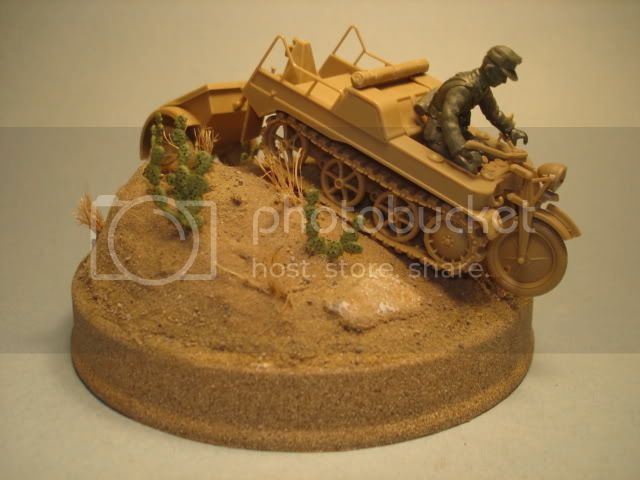
Thanks,
Harv


Thanks,
Harv

Zaltar

Joined: May 03, 2008
KitMaker: 272 posts
Armorama: 264 posts

Posted: Sunday, November 21, 2010 - 03:58 AM UTC
Wow, Randy, I love the composition in such a small area! 
zaltar

zaltar
flakman

Joined: October 09, 2010
KitMaker: 18 posts
Armorama: 17 posts

Posted: Sunday, November 21, 2010 - 05:25 AM UTC
Quoted Text
I tryed to purchase the kits I wanted on JBmodel but they say that they don't have them in stock. Is there other sites that sell these kits  [/quote]
Which kits are you looking for?[/quote] Its the Voyager PE set for the Tamiya kit with two bicycles and the metal mags and rounds from Voyager or Griffon models (it was on the third page).

Posted: Wednesday, November 24, 2010 - 02:01 AM UTC
Quoted Text
Wow, Randy, I love the composition in such a small area!
Thank you for the kind feedback Zaltar, I appreciate it.
I wasn't sure how it would turn out or how everything would look on that small of a base. Now I just need to get to work on the Kettenkraftrad and the figure. The base was the easy part!!
Thanks again,
Harv

ltb073

Joined: March 08, 2010
KitMaker: 3,662 posts
Armorama: 3,078 posts

Posted: Wednesday, November 24, 2010 - 02:24 AM UTC
@ matt, The Autoblinder looks good what brand kit was that
@ randy, looking good what did you make the cactus out of?
haven't made much progress on mine to busy with the holiday coming up maybe today
@ randy, looking good what did you make the cactus out of?
haven't made much progress on mine to busy with the holiday coming up maybe today


Bigrip74

Joined: February 22, 2008
KitMaker: 5,026 posts
Armorama: 1,604 posts

Posted: Thursday, November 25, 2010 - 12:40 PM UTC
Posted: Saturday, November 27, 2010 - 10:12 AM UTC
Looks good, Bob. This M3 has definitely taken some abuse in the field. The finish looks gloss, but maybe thats the light. Otherwise a mat coat of Varnish might tie everything together.
Thanks for participating
Thanks for participating


retiredyank

Joined: June 29, 2009
KitMaker: 11,610 posts
Armorama: 7,843 posts

Posted: Saturday, November 27, 2010 - 10:51 AM UTC
Where is the official gallery link? I would like to go ahead and call my ab41 finished, but can't seem to find the link. Thanks. Matt

Bigrip74

Joined: February 22, 2008
KitMaker: 5,026 posts
Armorama: 1,604 posts

Posted: Saturday, November 27, 2010 - 11:00 AM UTC
Thanks for the comments Jesper, I now see ( I did not review the photos before posting) that I did not spray enough clear flat on the wheels especially and it also looks like I was heavy handed with the weathering. So more practice is needed for my future builds.
Bob
Bob
 |


