Campaigns
Where Armorama group builds can be discussed, organized, and updates posted.
Tiger Campaign
ltb073
Visit this Community
New York, United States
Joined: March 08, 2010
KitMaker: 3,662 posts
Armorama: 3,078 posts
Posted: Sunday, January 02, 2011 - 06:43 AM UTC
Hi Guys,
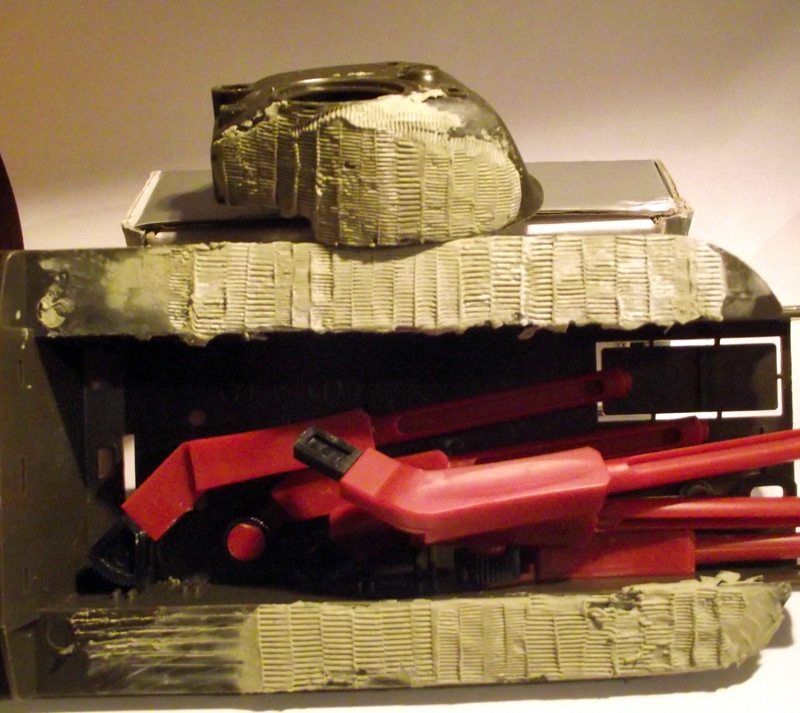
Ok I removed the wax and tried Jeremy's method of Squadron White putty mixed with nail polish remover. i finished all areas of hull may tackle the turret tormorrow
Photobucket

I also thinned out the side skirt and cut them into sections, there has got to be an easier way to make Zim
Bigrip74
Visit this Community
Texas, United States
Joined: February 22, 2008
KitMaker: 5,026 posts
Armorama: 1,604 posts
Posted: Sunday, January 02, 2011 - 10:40 AM UTC
@ Sal: the Zim is looking good and remember the next time will be easier, and then the next .

@ Wouter: your build is looking good so far, how was the assembly?

Bob
thebear
Visit this Community
Quebec, Canada
Joined: November 15, 2002
KitMaker: 3,960 posts
Armorama: 3,579 posts
Posted: Monday, January 03, 2011 - 09:48 AM UTC
Good job guys keep up the good work.. Sal zimmerit can be a pain to add and you're doing fine...
Wouter..good start on your initial ..Tamiya cut a few corners but it's not a bad kit ..
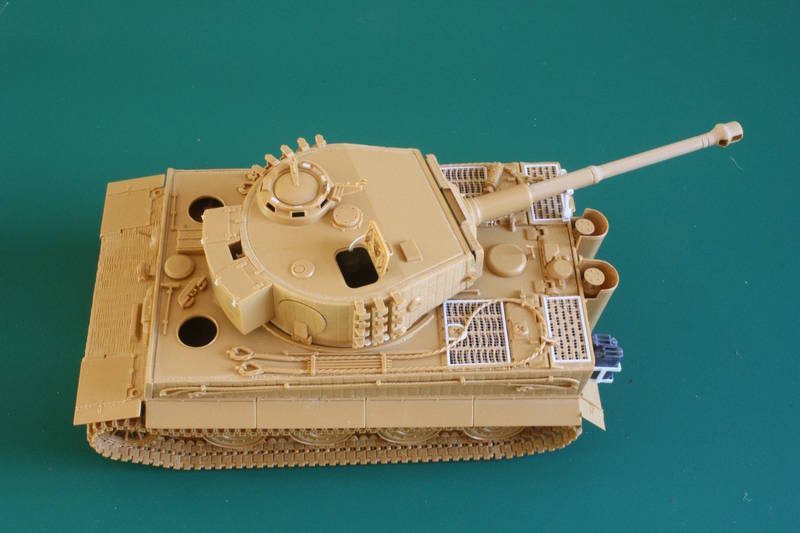
I didn't get much done during the holidays but here's what I did do ...built up and painted the radiators and fan section that will be about as visable as a needle in a haystack... Just did a very quick job on them (on top of that there ia another piece that covers the gas tanks!!!)


I also built up th jack and changed the handle using fine wire...

I was going to change the clamp for a PE one but after a bit of cleaning up with an exacto knife it'll look just fine as is..

Not much but hey!

Rick
BigCat
Visit this Community
Quebec, Canada
Joined: October 15, 2010
KitMaker: 12 posts
Armorama: 11 posts
Posted: Monday, January 03, 2011 - 05:12 PM UTC
Hi Rick. I thought the fuel tanks and fan blades were supposed to be silver.
My Tiger is almost finished building. I still have a small problem with the front missing zimmerit. Then some photos and I will begin painting.
Cheers!
vonHengest
Visit this Community
Texas, United States
Joined: June 29, 2010
KitMaker: 5,854 posts
Armorama: 4,817 posts
Posted: Monday, January 03, 2011 - 05:28 PM UTC
Peter: Awesome choice, the 512th had some great looking machines! Which markings are you going to be shooting for, I'm guessing X7?

Sal: How did you like that method? I find creating zimm from scratch to be a major PITA as well

Richard: I agree about the jack, good call

BigCat: with a name like that I'm really looking forward to seeing your build
ltb073
Visit this Community
New York, United States
Joined: March 08, 2010
KitMaker: 3,662 posts
Armorama: 3,078 posts
Posted: Tuesday, January 04, 2011 - 02:24 AM UTC
Jeremy, It went on smother and gave me more time to work with it but no matter what I did my fingers still went numb Now I just have a small portion of the turret to finish, should get to it today Then hopefully some more pic's
curseoftheundead
Visit this Community
New York, United States
Joined: June 04, 2007
KitMaker: 40 posts
Armorama: 38 posts
Posted: Tuesday, January 04, 2011 - 07:44 AM UTC
Jeremy:

Yep, I'm looking to do "X7". I'm doing a small dio to try to recreate a still from the surrender video where a troop laden X7 moves off the parade grounds past a group of watchful GIs lounging on their jeep.

best, P

vonHengest
Visit this Community
Texas, United States
Joined: June 29, 2010
KitMaker: 5,854 posts
Armorama: 4,817 posts
Posted: Tuesday, January 04, 2011 - 08:00 AM UTC
Sal: I'm glad it helped out, and I fear the numb hand syndrome is inherent to homemade zimm... I bought a couple of tools to try out for zimm, but I'm pretty sure that my hand will be at least partially asleep by the time I finish a panzer's hull

P: Right on! I know which video you are talking about, and that's a good choice
exer
Visit this Community
Dublin, Ireland
Joined: November 27, 2004
KitMaker: 6,048 posts
Armorama: 4,619 posts
Posted: Tuesday, January 04, 2011 - 09:10 AM UTC
Okay I'm ready to jump in with both feet- This will be my first Tiger (Not counting the Airfix one I built in 1978), I plan on doing two in tandem two, Tamiya's Late version and DML's 3 in 1 6406.
I plan on adding zimmerit using the Modelkasten Zimmerit Coating Applicator.

Are there any diagrams online showing the different variations in patterns and sizes of zimmerit on Tiger 1s?

Some photos show larger Zimmerit ridges on the turret compared to those on the hull.
BigCat
Visit this Community
Quebec, Canada
Joined: October 15, 2010
KitMaker: 12 posts
Armorama: 11 posts
Posted: Tuesday, January 04, 2011 - 03:12 PM UTC
BigCat: with a name like that I'm really looking forward to seeing your build [/quote]

Actually Jeremy the name Big Cat was given to me by a fellow modeler when I began building a 1/48 Catalina a few years ago It also helps that I am 6'2 and 250.
So when my friend Rick The Bear (Who actually looks the part) dragged me into this campaign I thought of reviving the old name...
Bluestab
Visit this Community
South Carolina, United States
Joined: December 03, 2009
KitMaker: 2,160 posts
Armorama: 1,906 posts
Posted: Wednesday, January 05, 2011 - 11:18 AM UTC
Okay I figured I'd go ahead and put this up. It's the 1/35 Academy Early Tiger 1 (no interior). I'll probably try to keep it as "out of the box" as possible, though I want to replace the tracks and probably add a bit here and there as I go. I haven't decided on the scheme. Maybe Wittman's S04 or A02 of Grossdutschland.
vonHengest
Visit this Community
Texas, United States
Joined: June 29, 2010
KitMaker: 5,854 posts
Armorama: 4,817 posts
Posted: Wednesday, January 05, 2011 - 03:14 PM UTC

Quoted Text


Quoted Text

BigCat: with a name like that I'm really looking forward to seeing your build


Actually Jeremy the name Big Cat was given to me by a fellow modeler when I began building a 1/48 Catalina a few years ago It also helps that I am 6'2 and 250.
So when my friend Rick The Bear (Who actually looks the part) dragged me into this campaign I thought of reviving the old name...


Very cool either way you cut it, I'm a big fan of Catalinas as well
You guys sound like you you're having to much fun with scale modeling, and that's a good thing
BigSmitty
Visit this Community
Minnesota, United States
Joined: October 01, 2008
KitMaker: 597 posts
Armorama: 439 posts
Posted: Wednesday, January 05, 2011 - 06:10 PM UTC
It's been a while since I posted an update. Busy week between Christmas and New Year's Day, and getting back to a more normal routine. I actually have PROGRESS photos this time...

The assemblies:


The indy tracks in the upper left aren't glued together yet. I only got 60 cleaned up before my butt went numb on my seat..

Mantle Zimmerit detail:


I realized the kit had a Cavalier Tiger I Zimm kit in the bottom of it (got it off eBay) and used the kit. MAN it's nice. I screwed up some places, but it comes with a Zimm tool so I can touch up later on.

Zimm piece for the rear hull:


Turret Escape Hatch Zimm:


The Cavalier set is paper thin resin for the zimmerit pieces, with a resin mantle for the gun, and a resin escape hatch for the right side of the turret, along with the aforementioned zimm tool. It's an Aussie company and I am very impressed. They are still in business (this kit is almost a decade old) and make generic Zimm pieces as well as specific kit Zimm sets. Almost all 1/35 but they are making some nice 1/48 stuff from what I saw earlier.

Everything is dry fit (upper hull, lower hull, turret and gun) for now. I have to figure out how to add some depth to the engine grills, as looking in them now shows a whole lot of empty. I may just cardstock them in and paint it black, not sure. All the wheels are painted and ready for install. I should be priming and basecoating by the end of the week, hopefully.
spacewolfdad
Visit this Community
England - West Midlands, United Kingdom
Joined: May 23, 2010
KitMaker: 642 posts
Armorama: 593 posts
Posted: Thursday, January 06, 2011 - 12:31 AM UTC
Hi Matt,

Really enjoyed seeing your post and I think the zimmerit set is first rate. I was interested in your comment about 'no depth' to what was beneath the grills and thinking of putting card stock to blank them off. I had a sudden idea ( ) that I have never seen done anywhere and might work for larger scale models (I do mostly Braille and the problem doesn't really arise). Get a good photo of the interior of the Tiger engine bay (in colour) and reduce/enlarge to 1/35, then stick it under the grilles with a bit of a spacer to give depth. You then should have something to look at through the grilles. This is just a thought, you can rubbish it if you want, I won't be offended.

All the best,

Paul
ltb073
Visit this Community
New York, United States
Joined: March 08, 2010
KitMaker: 3,662 posts
Armorama: 3,078 posts
Posted: Thursday, January 06, 2011 - 03:14 AM UTC
Hi Guys some great work here, got my Tiger all primed and ready for some paint
@ Matt, the Zim looks great and a lot better then my home made stuff, wish I would have know about that company before I attempted to make mine

@ Paul, I like your idea I may try it if I see emptiness under my grills
Hopefully I get a chance to put the base coat on tomorrow
barkingdigger
Staff MemberAssociate Editor
ARMORAMA
#013
Visit this Community
England - East Anglia, United Kingdom
Joined: June 20, 2008
KitMaker: 3,981 posts
Armorama: 3,403 posts
Posted: Thursday, January 06, 2011 - 03:20 AM UTC
Matt & Paul,

Once the necessary screens are placed over those grills I think a black view-block should do the trick. I scratched up some fans for a 1:35 Panther (similar grills covered by mesh screens) a while back and was then crushed to find I couldn't really see them!

Tom
BigSmitty
Visit this Community
Minnesota, United States
Joined: October 01, 2008
KitMaker: 597 posts
Armorama: 439 posts
Posted: Thursday, January 06, 2011 - 07:10 AM UTC
Here's my problem:


As you can see, nothing underneath the grills. No screens provided, so I either have to shell out or scratch something to cover them.

So I may have to venture over to the LHS to see if there is a cheap way for me to fix these issues. I shouldn't complain. The kit had a $20 Cavalier Zimmerit kit in that I didn't know about, so technically I'm still $20 ahead, right?
GewoonWouter
Visit this Community
Antwerpen, Belgium
Joined: March 31, 2010
KitMaker: 227 posts
Armorama: 123 posts
Posted: Thursday, January 06, 2011 - 07:39 AM UTC
Matt: The zimmerit looks great so far mate, really nice work on that.
About the fact that nothing is underneath the grilles: it was the same thing with mine: I just sprayed the inside matt black

I continued a bit on my Tiger, this kit really falls together and is much less complicated than my Dragon Tiger. I tried to make some new weld beds on the hull, trying different methods like milliput, styrene rod and stretched sprue (all three methods are new to me)

I also started on the fenders. First time making hinges, and boy, I was glad having the hinges tool from Griffon
After that I did the wingnuts next to the ballmount. Well, wingnut that is, since I lost one to the carpetmonster . Maybe I should try to inflict some battledamage next to the fender?


ballmount with one wingnut


right fender

first try at the weld using milliput

cheers fella's
barkingdigger
Staff MemberAssociate Editor
ARMORAMA
#013
Visit this Community
England - East Anglia, United Kingdom
Joined: June 20, 2008
KitMaker: 3,981 posts
Armorama: 3,403 posts
Posted: Thursday, January 06, 2011 - 08:24 AM UTC
Matt,

You can get AM screens, or make them if you can find suitable mesh. I got lucky and found some plastic lacey table mats in the "wedding" section of a local craft super-store, and now have enough screening for all the Tigers in the Third Reich! Here is some on an Italeri Tiger I built last year - I framed them with .010x.020 Evergreen strips...


Either way it really improves the look of a Tiger.

Tom
spacewolfdad
Visit this Community
England - West Midlands, United Kingdom
Joined: May 23, 2010
KitMaker: 642 posts
Armorama: 593 posts
Posted: Thursday, January 06, 2011 - 08:34 AM UTC

Quoted Text

Matt & Paul,

Once the necessary screens are placed over those grills I think a black view-block should do the trick. I scratched up some fans for a 1:35 Panther (similar grills covered by mesh screens) a while back and was then crushed to find I couldn't really see them!

Tom


Hi Tom,
Not being a large scale modeller I haven't encountered the problem Matt has. Like you, when I put PE screens on engine vents there is little to be seen in Braille Scale, but I wasn't sure about 1/35. Fortunately I am building the Academy Tiger with full interior, so the problem doesn't arise. I do think manufacturers could include a relief style blank, similar to those in the Dragon 1/72 kits to fit under the grilles, or is there an opportunity in the after-market area to be exploited here.

All the best,

Paul
barkingdigger
Staff MemberAssociate Editor
ARMORAMA
#013
Visit this Community
England - East Anglia, United Kingdom
Joined: June 20, 2008
KitMaker: 3,981 posts
Armorama: 3,403 posts
Posted: Thursday, January 06, 2011 - 08:47 AM UTC
Hi Paul,

There's no end of AM stuff for 1:35 Tigers! I'm just too cheap to buy it... (I'd bet there are ready-made low-relief radiator sections out there that could be slid into position after painting. After all, if I've thought it up, odds are somebody else has already beat me to it!)

Italeri's Tiger comes with a whole lotta nothing under the grills, but they give an engine block to put under the solid hatch in the middle...

Tom
thebear
Visit this Community
Quebec, Canada
Joined: November 15, 2002
KitMaker: 3,960 posts
Armorama: 3,579 posts
Posted: Thursday, January 06, 2011 - 11:17 AM UTC


So when my friend Rick The Bear (Who actually looks the part)

Hey ! I resemble that remark!

Rick
BigSmitty
Visit this Community
Minnesota, United States
Joined: October 01, 2008
KitMaker: 597 posts
Armorama: 439 posts
Posted: Thursday, January 06, 2011 - 11:25 AM UTC
Tom,

Thanks for the idea on the screens. I have some mesh that I used to fix up some windows around the house (the square mesh to keep bugs out, etc) and dug it out. Made the frames for the right side for the inlet and exhaust. I'll see how the windowscreen mesh looks scale wise. I may have some brash mesh lurking somewhere as well. I know I saw it the other day, still in the plastic baggie with the cardboard backing...
thebear
Visit this Community
Quebec, Canada
Joined: November 15, 2002
KitMaker: 3,960 posts
Armorama: 3,579 posts
Posted: Thursday, January 06, 2011 - 11:36 AM UTC
Great work guys ! Matt the zimmerit looks great and I agree it's a lot easier than doing it yourself ..I would remove the zimmerit behind the mufflers though as Big Cat did on his ... And don't forget to add the second hole in the gun mantlet as only the final model tigers had the monocular sight ..
Wouter excellent job ob those fenders ...I give up when it comes to hinges!!
Hey guys don't worry about seeing inside ..some good old flat black paint will do just fine...
Matt ,Tamiya makes a set of grills for their tiger kits ..they can't be that expensive..


Pat the best article I've ever read about the different types of zimmerit is right here on Armorama ...hope you got a couple of hours to read the whole post!!

https://armorama.kitmaker.net/forums/131182&page=1


Rick
exer
Visit this Community
Dublin, Ireland
Joined: November 27, 2004
KitMaker: 6,048 posts
Armorama: 4,619 posts
Posted: Thursday, January 06, 2011 - 11:35 PM UTC
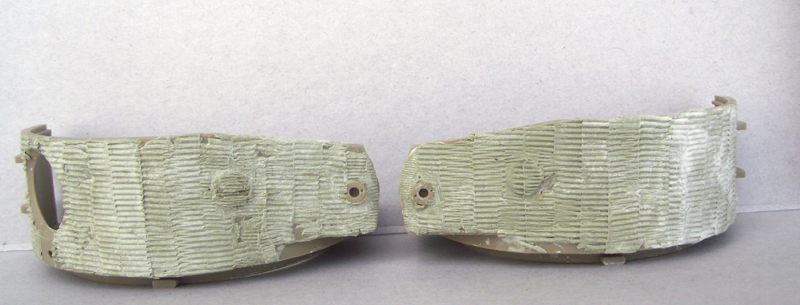
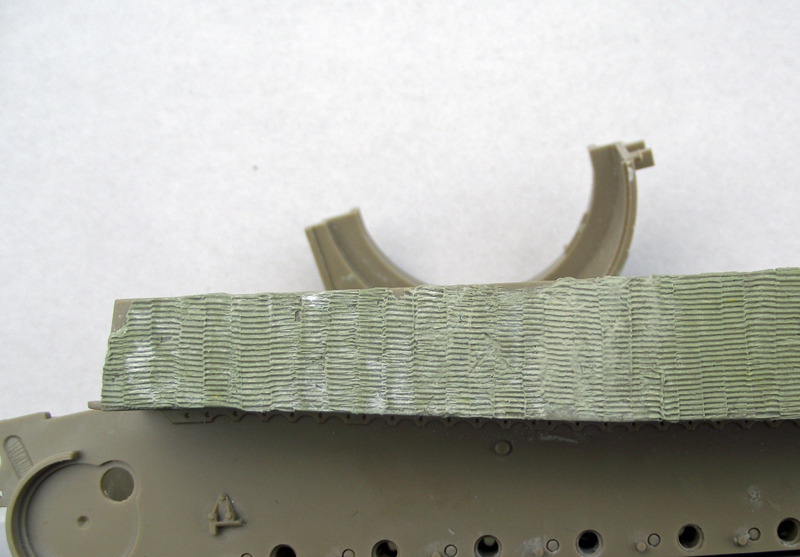
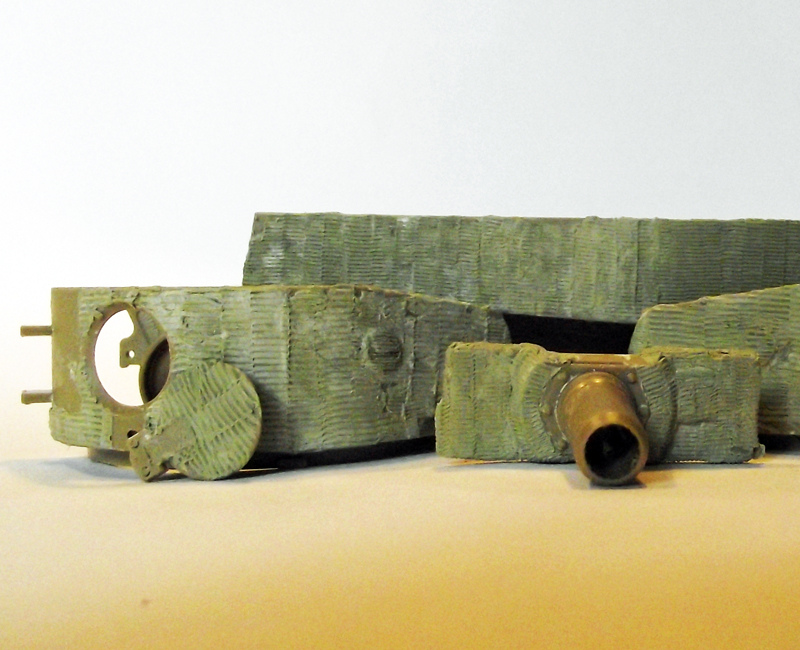
Thanks Craig I've been pouring over Phil's blog. I had a go at the zimmerit after some trial and error on an old Nichimo Sherman (All it's good for). The method I ended up using was to roll the milliput out as thin as possible on a surface sprinkled with talc then peel it off with a scalpel, wet it and transfer it to the model. I roughed up the surface to provide a key for the milliput and pushed it into place using a damp brush. I trimmed it in situ and then used the modelkasten tools, dipping them in water to stop them sticking, I went over it several times.


Tiger turret


Any comments welcome