Art of the Battlefield (artillery)
England - South West, United Kingdom
Joined: October 03, 2011
KitMaker: 9 posts
Armorama: 8 posts
Posted: Monday, March 05, 2012 - 07:05 AM UTC
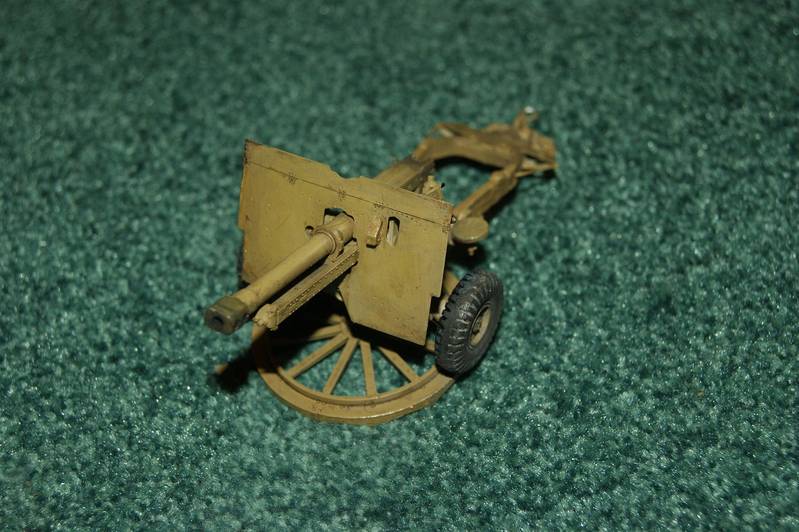
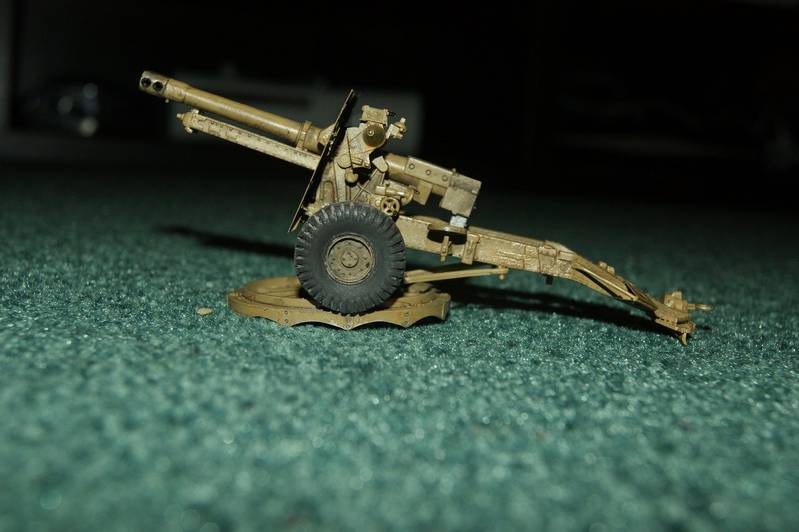
Finished my 25 pdr not the most impressive kit but im hoping to eventually put it into a diorama.


Hawaii, United States
Joined: August 27, 2006
KitMaker: 1,646 posts
Armorama: 1,557 posts
Posted: Monday, March 05, 2012 - 09:02 AM UTC
Keo: excellent effort. thanks for sharing.
Sean: great build. Looks fantastic.
Paul: I'm not seeing your images.
I've managed the base paint on mine.

Happy Modelling, -zon

"Certainty of death.
Small chance of sucess.
What are we waiting for?"
-Gimli, Return of the King.
New York, United States
Joined: March 08, 2010
KitMaker: 3,662 posts
Armorama: 3,078 posts
Posted: Wednesday, March 07, 2012 - 02:50 AM UTC
Great job Paul and Sean nice finish to both

@ Paul you still need to post a photo in the campaign gallery
@ Zon looking good there keep at it

Ok I just checked the gallery we have 10 people not including Paul above who have finished and posted photos in the gallery. We have 67 enlistee, so wee need you guys to get those kits finished only 25 days left the clock is ticking


Active Campaigns on the bench:
Operation Fall Gelb - Pz.Kpfw. IV Ausf. C
Engineering the Future - M-26 Recovery Vehicle
115 Campaigns completed
Singapore / 新加坡
Joined: March 05, 2010
KitMaker: 81 posts
Armorama: 79 posts
Posted: Friday, March 09, 2012 - 05:03 PM UTC
I've faced some issues with the 1/72 Hummel kit from Dragon. My kit did not have the guide slots on the hull that would allow precise placement of braces to hold the side armor plates that would form the fighting compartment. I reckon that figuring this our on my own would take me longer time to build this kit. Hence I decided to put this kit in storage and deal with it at a later time.
I decided to switch to the Italeri 1/72 Bishop Mk. 1 kit:

Will commence build by today:

This kit was first made by ESCI. Below are the sprue shots:


Now off to the bench to start my build! Will be posting my progress in the coming days...
Hawaii, United States
Joined: August 27, 2006
KitMaker: 1,646 posts
Armorama: 1,557 posts
Posted: Saturday, March 10, 2012 - 10:07 AM UTC
Sal: thanks for the comment.
Paul: nice looking build. Congrats
Happy Modelling, -zon

"Certainty of death.
Small chance of sucess.
What are we waiting for?"
-Gimli, Return of the King.

#009
England - South East, United Kingdom
Joined: March 03, 2003
KitMaker: 686 posts
Armorama: 258 posts
Posted: Sunday, March 11, 2012 - 06:18 AM UTC
IPMS Number 10278
MAFVA Number 8588
theaveragemodeller.com
http://bulldogs.kitmaker.net/

#009
England - South East, United Kingdom
Joined: March 03, 2003
KitMaker: 686 posts
Armorama: 258 posts
Posted: Sunday, March 11, 2012 - 08:24 AM UTC
IPMS Number 10278
MAFVA Number 8588
theaveragemodeller.com
http://bulldogs.kitmaker.net/

#009
England - South East, United Kingdom
Joined: March 03, 2003
KitMaker: 686 posts
Armorama: 258 posts
Posted: Monday, March 12, 2012 - 01:16 AM UTC
IPMS Number 10278
MAFVA Number 8588
theaveragemodeller.com
http://bulldogs.kitmaker.net/

#009
England - South East, United Kingdom
Joined: March 03, 2003
KitMaker: 686 posts
Armorama: 258 posts
Posted: Monday, March 12, 2012 - 01:23 AM UTC
IPMS Number 10278
MAFVA Number 8588
theaveragemodeller.com
http://bulldogs.kitmaker.net/

#009
England - South East, United Kingdom
Joined: March 03, 2003
KitMaker: 686 posts
Armorama: 258 posts
Posted: Tuesday, March 13, 2012 - 01:05 AM UTC
IPMS Number 10278
MAFVA Number 8588
theaveragemodeller.com
http://bulldogs.kitmaker.net/
Auckland, New Zealand
Joined: June 01, 2011
KitMaker: 1,716 posts
Armorama: 1,638 posts
Posted: Thursday, March 15, 2012 - 03:09 PM UTC
Dew to time problems i am not going to have to time to build the model i was going to use in this campaign , which was the DML 10.5cm Grasshopper , so instead its going to be a Alan Pak 43 and now heres the pics needed to start


Will start building this thing tonight since its an easy one to knock out fast .
Phill

I know the voices ain't real but they do come up with some great ideas
Never trust a man who left alone with a tea cozy and doesn't try it on ( Billy Connolly )
Overkill is often very understated
Nordjylland, Denmark
Joined: January 30, 2006
KitMaker: 613 posts
Armorama: 508 posts
Posted: Friday, March 16, 2012 - 11:17 PM UTC
New York, United States
Joined: March 08, 2010
KitMaker: 3,662 posts
Armorama: 3,078 posts
Posted: Saturday, March 17, 2012 - 01:51 AM UTC
Quoted Text
Iíll have to ask for some help here at the end. Iíve previously gone this fare in a campaign but never received a badge. Iíve noticed that a reminder of loading pictures in an album is a condition to get the badge. Would someone please give instructions on this?
@Kenneth nice finish there It looks really good, there is tutorial for posting photos but I am on my I-pad and don't know how to cut and paste to get you the link

Sorry
@ Jason that was a quick one looking forward to see it finished

@Phill, you are going to need to work quickly on that 1 as well

Active Campaigns on the bench:
Operation Fall Gelb - Pz.Kpfw. IV Ausf. C
Engineering the Future - M-26 Recovery Vehicle
115 Campaigns completed
New York, United States
Joined: March 08, 2010
KitMaker: 3,662 posts
Armorama: 3,078 posts
Posted: Saturday, March 17, 2012 - 05:41 AM UTC
Quoted Text
Iíll have to ask for some help here at the end. Iíve previously gone this fare in a campaign but never received a badge. Iíve noticed that a reminder of loading pictures in an album is a condition to get the badge. Would someone please give instructions on this?
Ok on my laptop and found the link
https://armorama.kitmaker.net/forums/120940&page=1Hope that helps

Active Campaigns on the bench:
Operation Fall Gelb - Pz.Kpfw. IV Ausf. C
Engineering the Future - M-26 Recovery Vehicle
115 Campaigns completed
England - East Anglia, United Kingdom
Joined: August 12, 2005
KitMaker: 14,499 posts
Armorama: 11,675 posts
Posted: Saturday, March 17, 2012 - 06:57 PM UTC
Hi Kenneth,
Nice work, looks excelent.
Al
'Action this Day'
Winston Spencer Churchill
Auckland, New Zealand
Joined: June 01, 2011
KitMaker: 1,716 posts
Armorama: 1,638 posts
Posted: Saturday, March 17, 2012 - 09:36 PM UTC
Well Sal mate you said i had to work quickly on that 1 ,order heard and understood , and here's the pics to prove it

All in all less than 14 hours to build the worst kit i have ever worked on ,,I'll explain that more in detail in a mo ,,but here's the pics


Now about this kit ,, imagine a kit where 99% of everything didn't fit properly, imagine a kit where quality control doesn't exist and you have a pretty good idea what this one is like .
I will never build this kit again and the barrel i replaced is wasted with this alloy one , that is the best part of the entire kit .
I will finish it for this campaign but what happens to it after this i do not care , i am so going to get the Trumpeter one

that will make me feel better

Phill

I know the voices ain't real but they do come up with some great ideas
Never trust a man who left alone with a tea cozy and doesn't try it on ( Billy Connolly )
Overkill is often very understated
Singapore / 新加坡
Joined: March 05, 2010
KitMaker: 81 posts
Armorama: 79 posts
Posted: Saturday, March 17, 2012 - 11:52 PM UTC
Here's my update for this week on my 1/72 Bishop Mk.1:
1) I started assembly of individual sections of this kit:
a) the 25lbs gun:

b)The turret and Hull:


2) Later this week, I've completed assembly of the different sections and got them spray-painted with grey primer:

a) The Gun Section:

b) Lower Hull and Running Gear:

c) Underneath of the Upper Hull:

Will be painting these sections then assemble the tracks with the Running Gear and hopefully get this model completed by next week.
Hawaii, United States
Joined: August 27, 2006
KitMaker: 1,646 posts
Armorama: 1,557 posts
Posted: Sunday, March 18, 2012 - 11:29 AM UTC
Jason: always good to have extra artillery lying around

The build looks good.
Phil: you're a mad-man. she's looking good at the end of the day though!
Kenneth: the M109 looks really good. I particularly like the muzzle cover.
Marcos: coming along nicely.
Happy Modeling, -zon

"Certainty of death.
Small chance of sucess.
What are we waiting for?"
-Gimli, Return of the King.
Armed Forces Europe, United States
Joined: February 27, 2011
KitMaker: 47 posts
Armorama: 18 posts
Posted: Tuesday, March 20, 2012 - 07:16 AM UTC
I just found this build but realize that I'm late to the party. I have a Revell Snark (box scale) that I would like to build. I believe it is 1/80 scale, is it acceptable as a build for this Campaign? It (certainly was designed to make a loud boom from a couple of thousand miles).
Thanks,
Brent Arritt
Quoted Text
Ok the line starts here: We have (11) so I will submit it to the higher ups.
1. sfctur1 (thomas turschmann)
2. ltb073 (Sal)
3. barkingdigger (Tom)
4. GaryKato (Gary Kato)
5. Jasonbee71 (Jason D Bettis)
6. Dangeroo (Stefan Halter)
7. Whitey (Axel)
8. Krowa_ (Marek)
9. mj (Mike Nachman)
10. captnenglish (Matthew Hauck)
11. Bigrip74 (Bob Rippy)
Date: ? (October 1 2011 - April 1 2012) if they agree.
Rules:
1. Artillery focused campaign.
2. Any era: as long as the projectile was tossed by an explosive charge (propellants can be black powder, cartdrige, bag powder, or rocket) form a distance that two armies do not physically reach out and touch each other.
3. Scale: 1/72 - 1/35
4. As long as it made the earth move, shake, or topple trees, buildings, or whole armies.
5. Movement: (horse, selfpropelled, towed, dropped by chute, moved my hand power)
6. Dioramas: incouraged.
7. Share ideas and tips to help each other.
8. Post photo with that day newspaper on starting date.
9. At least two (2) in progress photos.
10. (1) photo posted into the gallery.
11. If you dont have fun then dont come to the party.
Bob
New York, United States
Joined: March 08, 2010
KitMaker: 3,662 posts
Armorama: 3,078 posts
Posted: Tuesday, March 20, 2012 - 10:59 AM UTC
Quoted Text
I just found this build but realize that I'm late to the party. I have a Revell Snark (box scale) that I would like to build. I believe it is 1/80 scale, is it acceptable as a build for this Campaign? It (certainly was designed to make a loud boom from a couple of thousand miles).
Thanks,
Brent Arritt
Brent, The SM-62 Snark was a intercontinental cruise missile with a nuclear warhead. Artillery is more of an infantry support weapon, which I dont think you would want you infantry near a nuclear warhead. So that fgacy coupled with the fact that there are only 11 days left in the campaign i am going to have to say that the SM-62 Snark does not qualify here, sorry

Active Campaigns on the bench:
Operation Fall Gelb - Pz.Kpfw. IV Ausf. C
Engineering the Future - M-26 Recovery Vehicle
115 Campaigns completed
Armed Forces Europe, United States
Joined: February 27, 2011
KitMaker: 47 posts
Armorama: 18 posts
Posted: Tuesday, March 20, 2012 - 04:12 PM UTC
Thank you for the quick reply on the Snark.
Maybe another build.
Brent
Wisconsin, United States
Joined: September 11, 2009
KitMaker: 1,917 posts
Armorama: 735 posts
Posted: Wednesday, March 21, 2012 - 01:52 AM UTC
Brent,
There are plenty of campaigns to get pulled into, as you're finding out, I'm sure.
I don't see anything else immediately for the Snark, but wait a year or two and something always comes up.
Cheers!
-Sean H.

Current: model railroad layout
Stalled a while ago:
. 1950's Chrome, WW II Twins
Last completed: Police Car
Auckland, New Zealand
Joined: June 01, 2011
KitMaker: 1,716 posts
Armorama: 1,638 posts
Posted: Wednesday, March 21, 2012 - 08:02 PM UTC
Hey guys ..some pics for ya of this terrible pile of crap Alan Pak43

now its painted its looking pretty good ,,damn it !!
Guess i'll have to keep it after all


Should start weathering it tomorrow now my AK Interactive goodies have gotten here

Phill

I know the voices ain't real but they do come up with some great ideas
Never trust a man who left alone with a tea cozy and doesn't try it on ( Billy Connolly )
Overkill is often very understated
Nordrhein-Westfalen, Germany
Joined: May 26, 2008
KitMaker: 1,168 posts
Armorama: 256 posts
Posted: Wednesday, March 21, 2012 - 08:21 PM UTC
I like it a lot!
It turns out to be a good one, if one has the stamina to take it all the way to completion!
Cheers,
Guido
AKA "Tailor" -VMF'06 - German Gamblers
http://www.youtube.com/channel/UCk8zhb1sc4Pe3BRLqq3d-SQ
Auckland, New Zealand
Joined: June 01, 2011
KitMaker: 1,716 posts
Armorama: 1,638 posts
Posted: Wednesday, March 21, 2012 - 10:02 PM UTC
Guido ,, Cheers for that mate ,, trust me on this ..a nightmare to put together ,really was ..now paint has been thrown at it,its looking pretty good .
Man its strange how that worked out lol
Phill

I know the voices ain't real but they do come up with some great ideas
Never trust a man who left alone with a tea cozy and doesn't try it on ( Billy Connolly )
Overkill is often very understated


 Sorry
Sorry


 that will make me feel better


 The build looks good.


