Campaigns
Where Armorama group builds can be discussed, organized, and updates posted.
THE ATLANTIC WALL!
VLADPANZER
Visit this Community
Lebanon
Joined: December 20, 2010
KitMaker: 568 posts
Armorama: 549 posts
Posted: Friday, June 10, 2011 - 06:58 AM UTC
Great, looking forward to some pictures!!

For the concrete floor I suggest u cut the shape out of thin styrofoam and then coat it with a thin layer of plaster to give it the texture!

Gorizont
Visit this Community
Sachsen, Germany
Joined: November 28, 2007
KitMaker: 1,462 posts
Armorama: 1,289 posts
Posted: Saturday, June 18, 2011 - 09:49 AM UTC
Yes, Vladimir, you wiill see some pictures from me.
Thanks for the the tip/ hint with the plaster. I also had the idea, but I was not sure.

The images:
Photobucket

For sawing I used a spetial tool.
Photobucket


also notice some details.


My printed DIN A4 sheet... possible I will use one, 2 or a few more images friom this.
Any ideas?


The wood-parts in detail:


And the very special book, which I have to rework. (in size)

The edges of the map were made with a pencil.


greetings...
Soeren

edit:
When I see some of my images, I can see some bad "artifacts".
But I hope, you can see the details.
The images were saved in jpg-format with 60 percent "detail".
Possibly the file-size-reducing is the problem. (60 instead of 100)

edit2:
I deleted one image and uploaded a new one.
But as I see.. no change in the image. :-(
HARV
#012
Visit this Community
Wyoming, United States
Joined: November 07, 2003
KitMaker: 3,098 posts
Armorama: 1,236 posts
Posted: Saturday, July 09, 2011 - 07:53 AM UTC
Here is what I plan on using for my project.


I want to show two German officers examining the horizon while standing near the bunker.

Thanks,

Randy
TUGA
#034
Visit this Community
Setubal, Portugal
Joined: April 26, 2002
KitMaker: 1,718 posts
Armorama: 1,130 posts
Posted: Saturday, July 09, 2011 - 10:14 AM UTC
HI,

I've been out of modelling for some time but, now things are better and I've allready time for modelling.

Can I still enter the Campaign ?

I've two/three projects related to bunkers in my stash and I think the campaign will be a good return to me.

All the best for yours projects


GaryKato
Visit this Community
California, United States
Joined: December 06, 2004
KitMaker: 3,694 posts
Armorama: 2,693 posts
Posted: Saturday, July 09, 2011 - 01:25 PM UTC
The campaign ends June 6, 2012 so there is plenty of time for you to enter.
VLADPANZER
Visit this Community
Lebanon
Joined: December 20, 2010
KitMaker: 568 posts
Armorama: 549 posts
Posted: Sunday, August 14, 2011 - 07:21 AM UTC
Nice work Soeren, I am looking forward to your progress!!
Randy I am looking forward to see how the diorama will look!!
Jose I hope to see you join this campaign …

As for me I have only started on my plans, so I will be starting my work on this diorama soon enough …

TUGA
#034
Visit this Community
Setubal, Portugal
Joined: April 26, 2002
KitMaker: 1,718 posts
Armorama: 1,130 posts
Posted: Monday, August 15, 2011 - 04:25 AM UTC
Hi,

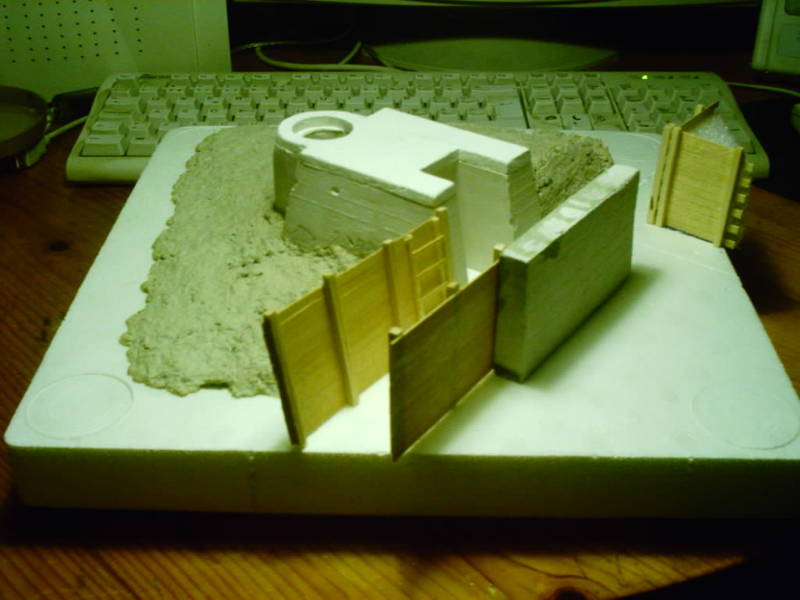
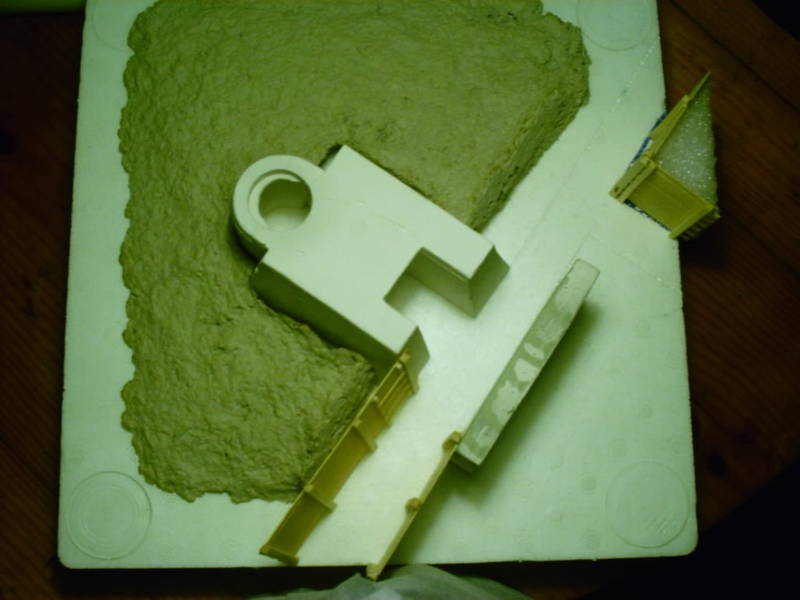
Some photos of my work so far.

I'm using the PLUS Models #044

The base has 30 x 30 cm and it's covered with a paste made with paper melt in water and mixed in a blender ( don't tell SWMBO)

On the back I'm making a trench with wood panels.


Comments welcome

VLADPANZER
Visit this Community
Lebanon
Joined: December 20, 2010
KitMaker: 568 posts
Armorama: 549 posts
Posted: Monday, August 29, 2011 - 09:40 PM UTC
Looking good Jose, hehehe looks like you made your own celluclay! It looks really nice, will the ground reach the top of the wooden wall, because I can see a ladder on the left side of the bunker. Looking forward to your progress!

Regards,
roman
Visit this Community
Slovakia
Joined: July 20, 2004
KitMaker: 99 posts
Armorama: 95 posts
Posted: Tuesday, September 06, 2011 - 08:50 AM UTC
atlantic wall tobruk with Hotchkiss H-35 turret

tobruk - scratch, turret from trumpeter H-35

will be part of bigger diorama from sword beach


beefy66
Visit this Community
England - North East, United Kingdom
Joined: October 22, 2007
KitMaker: 971 posts
Armorama: 280 posts
Posted: Tuesday, September 06, 2011 - 11:16 PM UTC
Roman Great idea and finnish with the balse wood and lego frame to keep in place one for the tip book that, wil have to see if i can find some of my kids old lego to give it a go
Cheers Keith
Gorizont
Visit this Community
Sachsen, Germany
Joined: November 28, 2007
KitMaker: 1,462 posts
Armorama: 1,289 posts
Posted: Wednesday, September 07, 2011 - 08:21 AM UTC
Looks great, José and Roman!
I also use wood for my dio.
And great looking concrete!

Hmm, "paper mixed in a blender" sounds good!
I also have to fill and cover some parts on my DIN A4-sized diorama later. (29,7cm x 21,0cm)
Possibly this can be a solution.


A long time I didn´t continued my both dioramas. (10cmK18 and the soviet venus lander)
But on the Atlantic-wall dio the last steps were (if I remember correcty ) making another smaller version of a book and completing the wooden panels.
I don´t think, that I will use propaganda-posters on the scene.
But I will try to add some small parts on the wooden walls. (for tools and other things)
I didn´t bought any figures yet.

After a small research I found possible places, where the shown photo (published by Ace-models) was made.
At one of the few places on the channel-coast in france!
In a big pdf-file I found (possibly correct) information about types of defences along the A-wall for the documented places.

greetings...
Soeren
SGTJKJ
#041
Visit this Community
Kobenhavn, Denmark
Joined: July 20, 2006
KitMaker: 10,069 posts
Armorama: 4,677 posts
Posted: Wednesday, September 07, 2011 - 02:26 PM UTC
Nice looking bunker, Roman. Cast just like the real ones.

Looking forward to see more.
Gorizont
Visit this Community
Sachsen, Germany
Joined: November 28, 2007
KitMaker: 1,462 posts
Armorama: 1,289 posts
Posted: Saturday, September 10, 2011 - 06:21 AM UTC
Some images from me:


The book was rescaled, and the frontside is already known.
Now I have a smaller version of it.


The US-tanker (Tamiya M1 Abrams-kit with mine-plow) is just as a size-comparison.

The table was made from matchsticks and my "standard"- used wood.
(paint-mixer-sticks)
It´s good to work with it!


And an overview:
Possibly the vertical "holders" are to thick. (in wideness)


greetings...
Soeren
TUGA
#034
Visit this Community
Setubal, Portugal
Joined: April 26, 2002
KitMaker: 1,718 posts
Armorama: 1,130 posts
Posted: Saturday, September 10, 2011 - 09:36 AM UTC
Hi,


Quoted Text

Looks great, José and Roman!
I also use wood for my dio.
And great looking concrete!

Hmm, "paper mixed in a blender" sounds good!
I also have to fill and cover some parts on my DIN A4-sized diorama later. (29,7cm x 21,0cm)
Possibly this can be a solution.

......

Soeren


I have cut by hand some newspaper pages in small pieces and put them on hot water, after, when at normal temperature, I put the mixture on a blender so that it turns into a paste, after I add some white glue and applied it on the base.

I will do several layers because it shrinks when it becames dry. HTH


Some nice jobs going on


I think my trench it's too straight and square, so I will redraw it, What do you think ?


jccraemer
Visit this Community
North Carolina, United States
Joined: December 24, 2007
KitMaker: 462 posts
Armorama: 262 posts
Posted: Saturday, September 10, 2011 - 10:17 AM UTC
not in this campaign but I thought this was motviating. It was built in 1988. I did it in around 4 months with plywood, paper mache, sand scale unkown


VLADPANZER
Visit this Community
Lebanon
Joined: December 20, 2010
KitMaker: 568 posts
Armorama: 549 posts
Posted: Sunday, September 11, 2011 - 11:27 PM UTC
@ Roman: That is a beautiful tobruk, It’s nice to see someone scratch building a bunker! May I just ask: did u use cement or something else (something lighter perhaps)?
@ Soeren: Some good progress on your side, personally I don’t think the vertical pieces are too thick!
@ John: That is one impressive dio, a very large one too! I don’t think I could ever build something that big! Would be nice to have you in this campaign!

I hope that next time I will have something to post about my progress!

Looking forward to all your builds!!
RedwingNev
Visit this Community
England - East Midlands, United Kingdom
Joined: February 07, 2004
KitMaker: 911 posts
Armorama: 348 posts
Posted: Wednesday, September 14, 2011 - 12:04 AM UTC
Not in this campaign, though following it with intrest.

As an aside, here's an interesting article on the preservation of The Atlantic Wall

http://www.bbc.co.uk/news/world-europe-10632543
Gorizont
Visit this Community
Sachsen, Germany
Joined: November 28, 2007
KitMaker: 1,462 posts
Armorama: 1,289 posts
Posted: Tuesday, September 20, 2011 - 09:15 AM UTC
Hmm, I think I will change the wooden walls.
Some are to long, and for "filling the gaps" I will use my previous used mix of "white-glue", water and the fine wood for the earth-based parts and some more.
I will see, what´s the result.
Also I will cut some of the wooden walls and I will make new vertical holders.

Also in 2 weeks, again we have the yearly model-exposition in my city, on which I want to look for good figures. ("modell-hobby-spiel")
My planned figures are from MiniArt.
I will see, if I find them.

greetings...
Soeren
Gorizont
Visit this Community
Sachsen, Germany
Joined: November 28, 2007
KitMaker: 1,462 posts
Armorama: 1,289 posts
Posted: Friday, September 30, 2011 - 06:39 AM UTC
Hi to all!
Today I bought MiniArt´s "german soldiers at rest".
See MiniArts´webpage:
http://www.miniart-models.com/index.htm?/35062.htm

It seems to be a nice kit, but the instructions are....
... but I will see, which parts are for which person and some parts seems to be interchangeable for other persons (there are 5 in the kit).... so possible this is the reason for the poor instructions, where and how to place the parts.
Also the chair and the "cooking place" are included.
The chair is a good addition for my diorama. But the cooking place is not useful for me, but possibly the man who uses it.

greetings...
Soeren


Gorizont
Visit this Community
Sachsen, Germany
Joined: November 28, 2007
KitMaker: 1,462 posts
Armorama: 1,289 posts
Posted: Tuesday, October 04, 2011 - 03:39 AM UTC
Small update from me:
I started building the chair of the new bought kit... the sitting officer could be the next step.
Also I have to glue the 2 bis styrofoam-parts onto the base and make the "concrete base/ floor" from mixed white-glue (wood-glue) with water and "gypsum".

After these parts are fixed and dry, I can add the (possibly pre-painted) wooden panels.

greetings...
Soeren
Jerry_larkin
Joined: July 06, 2007
KitMaker: 11 posts
Armorama: 10 posts
Posted: Thursday, November 10, 2011 - 05:12 AM UTC
Hello, I would like to know if the diorama must be historically accurate. I have a couple of airfix combo kits I have purchased over the years. ( D-Day and Guns of Normandy ) I haven't seen anything resembling these gun emplacements. I was thinking of bashing them together and upgrading the details ( AA Guns etc...) with correct ones. From my collection of boxed kits (over 100) and the old parts bin. Let me know if this is acceptable. I have not participated in the social aspect of this site. But after becomming disabled. I have alot more time on my hands. Health permitting. I believe I can meet your deadline. Have a great day. I'll look for your reply in the campaign forum. If you need an e-mail address. Mine is [email protected]
Gorizont
Visit this Community
Sachsen, Germany
Joined: November 28, 2007
KitMaker: 1,462 posts
Armorama: 1,289 posts
Posted: Thursday, November 10, 2011 - 05:55 AM UTC
Hi to all, a small update from me:

I built (glued) the first figure of my MiniArt-kit.
Now I have to say, that the instructions are really okay!
At the first sight it was a "shock" , but after reading and reading, the first figure (the sitting officer) was finishead after some minutes.
Only cleaning the parts was time-consuming some days ago.
Also I should fill some gaps.

The overall result looks very good and it was possible, to use Revell´s plastic-standard glue.
My "super-glue" (not CA-based) won´t work here.

Next parts could be building the other figures and trying to change arms or legs to get other positions for this scene.
But... I will see.

Also I didn´t started glueing the walls to the styrofoam-parts or to the base and also I didn´t made a real "concrete-looking" base.

greetings...
Soeren
VLADPANZER
Visit this Community
Lebanon
Joined: December 20, 2010
KitMaker: 568 posts
Armorama: 549 posts
Posted: Friday, November 11, 2011 - 07:59 AM UTC
Hi again,

@Jerry: Although it’s not historically accurate, I think I will allow it as it is in fact on the topic! Just try to make it as realistic as possible!! Welcome aboard!!

@ Soeren: Good to hear of your progress, looking forward to some pictures!

@ Neil: It is an interesting topic, I would love a house like that!!

As for me I can no longer build what I had originally planned for this campaign. I was planning to build a 501 personnel shelter bunker (I am still planning to build it as I have all the plans and research ready, just not for the campaign), but unfortunately all the hardware stores here are out of balsa wood and other materials I was going to use to make the interior. So now I have to find a new bunker to work on, one that has little/no interior details.

Hope to see your progress soon!!
Jerry_larkin
Joined: July 06, 2007
KitMaker: 11 posts
Armorama: 10 posts
Posted: Friday, November 11, 2011 - 10:13 AM UTC
Thanks Vlad, I do have my work cut out for me! I've gotten out the micro files, and dremel tool and am going over possible way to make this as realistic as I can. Something Dad would approve of. It was dark when he flew over. Don't think he had a good view on his trip...
SGTJKJ
#041
Visit this Community
Kobenhavn, Denmark
Joined: July 20, 2006
KitMaker: 10,069 posts
Armorama: 4,677 posts
Posted: Sunday, December 18, 2011 - 03:48 PM UTC
I have started on my entry for this campaign. The Verlinden FLAK bunker. A very nice kit that is simple and easy to work with. I will incorporate a tank or similar at a later date in the "dead" space of the diorama, although I have not figured out the details yet.

I will do the diorama in a display case to keep the dust out after completion. I just hope the end result justifies a display case

More to follow.