Good evening, very nice work on the tracks martin.
steph
Campaigns
Where Armorama group builds can be discussed, organized, and updates posted.
Where Armorama group builds can be discussed, organized, and updates posted.
Hosted by Darren Baker, Richard S.
Dragon OOB Campaign
steph2102

Joined: April 23, 2011
KitMaker: 735 posts
Armorama: 606 posts

Posted: Tuesday, February 14, 2012 - 05:31 AM UTC
Posted: Tuesday, February 14, 2012 - 05:56 AM UTC
Martin, great job on the tracks. It has got to feel great to have them done and looking good!
Posted: Tuesday, February 14, 2012 - 08:43 AM UTC
Thanks Steph Charlie and Bob.
bwiber

Joined: August 03, 2008
KitMaker: 436 posts
Armorama: 320 posts

Posted: Tuesday, February 14, 2012 - 05:20 PM UTC
Hi all....
Well, a bit of paint has been shot around the place and some of it even landed on the Panzer IIIJ!

I shot the entire model in the Italian Dark Brown you see on the tools, then with Afrika Dunkelgrau. I have to admit I have never used something like the Italian Dark Brown as a base for a lighter color... and I like the way it came out.
It might not be obvious as the color seems to change from photo to photo, but the brown has preshaded the recesses, and I shot a couple extra light coats on the centers of panels, etc. Now to let it dry good and solid before I start doing detail painting, etc.
Oh, and the white square to the lower left corner of the turret hatches is where the door stop used to be.... Looks like it is time to crawl around the floor looking for the lost part..... or if all else fails, I will have to actually sweep the floor!
Bob
Well, a bit of paint has been shot around the place and some of it even landed on the Panzer IIIJ!


I shot the entire model in the Italian Dark Brown you see on the tools, then with Afrika Dunkelgrau. I have to admit I have never used something like the Italian Dark Brown as a base for a lighter color... and I like the way it came out.
It might not be obvious as the color seems to change from photo to photo, but the brown has preshaded the recesses, and I shot a couple extra light coats on the centers of panels, etc. Now to let it dry good and solid before I start doing detail painting, etc.
Oh, and the white square to the lower left corner of the turret hatches is where the door stop used to be....
 Looks like it is time to crawl around the floor looking for the lost part..... or if all else fails, I will have to actually sweep the floor!
Bob
Posted: Wednesday, February 15, 2012 - 12:46 AM UTC
@ Sal Just spent a hour or so building PE antenna housing and guard bar. Wife thought it would look better remodelled through the hoover!!!! 
Will have to improvise on such a small piece but it won't be strictly OOB.
Martin

Will have to improvise on such a small piece but it won't be strictly OOB.

Martin

bwiber

Joined: August 03, 2008
KitMaker: 436 posts
Armorama: 320 posts

Posted: Thursday, February 16, 2012 - 10:37 AM UTC
Quoted Text
Hi all....

Oh, and the white square to the lower left corner of the turret hatches is where the door stop used to be....Looks like it is time to crawl around the floor looking for the lost part..... or if all else fails, I will have to actually sweep the floor!

Bob
I happen to have taken a good look at the tank this morning.... the door stop is laying on the top of the hull just under where it broke off. It is easily seen in the photo.


So, I didn't even have to sweep the floor!!

Bob
steph2102

Joined: April 23, 2011
KitMaker: 735 posts
Armorama: 606 posts

Posted: Friday, February 17, 2012 - 03:34 AM UTC
hello, here is my progress. the first coat of paint, do not mount the tires on the wheels before painting is a mistake. I have to repaint all because by setting the tires on the wheels, the color green Ecaille


Whiskey_1

Joined: November 22, 2008
KitMaker: 279 posts
Armorama: 272 posts

Posted: Friday, February 17, 2012 - 11:06 PM UTC
So I`m not the only one with problems regarding fragile parts breaking off. Ah well: Murphy`s curse of the butterfingers I guess.
Bob: I like the color you got on there. nice light base for weathering.
Steph: Itz gone green! what coffee do you people drink that you are so lightning fast.
Believe it or not, I got some paint on as well...


Just the interior of the turret. Most of it is coated in Lifecolor white. Second time shooting that stuff and I`m starting to get the hang of how to shoot it and liking it all the better for that. By now I have some yellow filter on there. It`s a little too heavy in some places, but those will not be noticed so easily.
Bob: I like the color you got on there. nice light base for weathering.
Steph: Itz gone green! what coffee do you people drink that you are so lightning fast.
Believe it or not, I got some paint on as well...


Just the interior of the turret. Most of it is coated in Lifecolor white. Second time shooting that stuff and I`m starting to get the hang of how to shoot it and liking it all the better for that. By now I have some yellow filter on there. It`s a little too heavy in some places, but those will not be noticed so easily.
ltb073

Joined: March 08, 2010
KitMaker: 3,662 posts
Armorama: 3,078 posts

Posted: Saturday, February 18, 2012 - 02:02 AM UTC
Quoted Text
@ Sal Just spent a hour or so building PE antenna housing and guard bar. Wife thought it would look better remodelled through the hoover!!!!
Will have to improvise on such a small piece but it won't be strictly OOB.
Martin
Guys lost parts that Murphy got to is fine to scratch build, what I didnt want here was entire reworks of turrets because the proper # of bolt heads were off or the weld seams didn't look right
 Also keep in mind that the last rule was to have fun
With that said I love the progress that everyone is making here, you guys are doing a great job and Martin that track hell you were in looks like you came through fine

I made some progress as well, base coat of Tamiya XF-60 and the Redbrown added


I need to spray on the green next then gule the whole thing together, the hull is just dry fitted and I also started on the tracks
 But now wife is home for the next 5 days and has a big honey do list so I dont know how much more I will get finished


spacewolfdad

Joined: May 23, 2010
KitMaker: 642 posts
Armorama: 593 posts

Posted: Saturday, February 18, 2012 - 11:09 AM UTC
Hi Folks,
I have just enlisted in this campaign, it is a wonderful idea and has made me find out some stuff in my stash that I never looked like building. Anyway here are the obligatory start pictures:

I will definitely be building this little gem...I have done one before and it was a treat to build, I think I will do it with a winter whitewash, just to try out the 'hairspray technique'.

I found this at the bottom of my stash and think this would be an ideal opportunity to get it done. Also.....

I found this as well and if there is time I will try to get this finished.

The date-line....
I hope to get started on these this week and will post my progress, I am looking forward to doing the figures as it has been a while since I did any.
All the best,
Paul
I have just enlisted in this campaign, it is a wonderful idea and has made me find out some stuff in my stash that I never looked like building. Anyway here are the obligatory start pictures:

I will definitely be building this little gem...I have done one before and it was a treat to build, I think I will do it with a winter whitewash, just to try out the 'hairspray technique'.

I found this at the bottom of my stash and think this would be an ideal opportunity to get it done. Also.....

I found this as well and if there is time I will try to get this finished.

The date-line....
I hope to get started on these this week and will post my progress, I am looking forward to doing the figures as it has been a while since I did any.
All the best,
Paul
paxtonm

Joined: February 06, 2007
KitMaker: 89 posts
Armorama: 61 posts

Posted: Saturday, February 18, 2012 - 05:31 PM UTC
So here's some more progress on the M7 Priest
Here are the parts and completed assembly for the rear of the crew compartment


I think the rifling inside the gun tube is incredible

Here are all of the parts for the gun tube assembly and the completed assembly


And a pretty nifty drivers seat. I, of course, snapped the post off of the seat and had to reassemble it!


Here are the parts and completed assembly for the rear of the crew compartment


I think the rifling inside the gun tube is incredible

Here are all of the parts for the gun tube assembly and the completed assembly


And a pretty nifty drivers seat. I, of course, snapped the post off of the seat and had to reassemble it!


JonDicks

Joined: October 13, 2009
KitMaker: 223 posts
Armorama: 224 posts

Posted: Saturday, February 18, 2012 - 09:06 PM UTC
Made a good start last week and this weekend. Had to use a little filler to get the front hull to join correctly, as after everything seemed to line up there was a large gap at the glacis plate joint.

I used some filler where the barrel "tub" joins the front armour and on the rear armour plate joints. This may of course not be the models fault, I am prepared to take all blame

Otherwise no real issues picked up.
I used some filler where the barrel "tub" joins the front armour and on the rear armour plate joints. This may of course not be the models fault, I am prepared to take all blame

Otherwise no real issues picked up.

Whiskey_1

Joined: November 22, 2008
KitMaker: 279 posts
Armorama: 272 posts

Posted: Saturday, February 18, 2012 - 09:52 PM UTC
Yet more join our fold! Nice kit ya got there, Paul.
Micheal: M7 looks to be a nice kit. Breaking stuff off is part of the game. I`m hoping my towing cable hooks stay in place when I sand em this time.
Jon: Nice progress on the Jagdpanther. I have been in love with that shape since I was ten.
Sal: good going on the paint: think you`ve nailed the colors. Quite a bit of overspray though. Have you tried using kneadtite or kneadable eraser to mask you pattern (mask the edges and fill out the centres with cut-to-size paper). Also the section on the vehicle`s left front fender looks a little odd to me.
ltb073

Joined: March 08, 2010
KitMaker: 3,662 posts
Armorama: 3,078 posts

Posted: Sunday, February 19, 2012 - 05:53 AM UTC
Quoted Text
Sal: good going on the paint: think you`ve nailed the colors. Quite a bit of overspray though. Have you tried using kneadtite or kneadable eraser to mask you pattern (mask the edges and fill out the centres with cut-to-size paper). Also the section on the vehicle`s left front fender looks a little odd to me.
@Benjamin, I dont know what kneadtite or kneadable eraser is
 most of the over spray was caused by the cheap craft store acrylic paint that I was using and a lot of it got covered with the OD green that i sprayed on it, pictures later, i left off the front portion of the fender on the left side maybe that is why it looks weird
@ Paul, some nice kits there welcome to the campaign

@ Michael and Jon, nice progress guys keep at it

Posted: Sunday, February 19, 2012 - 03:46 PM UTC
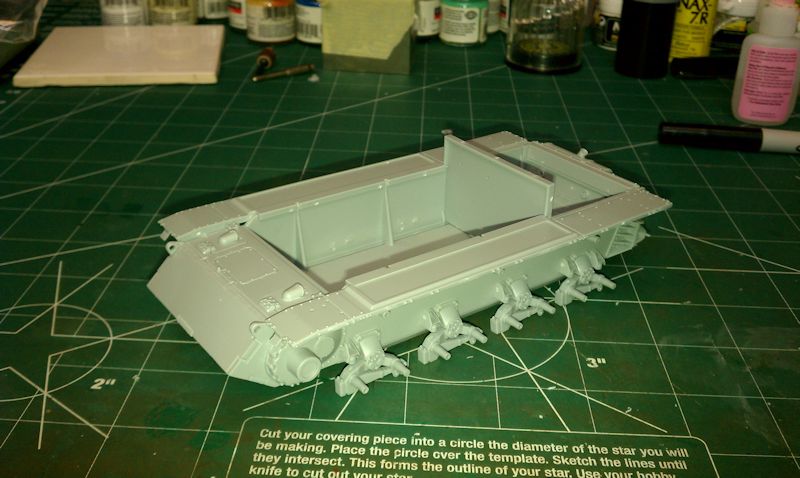
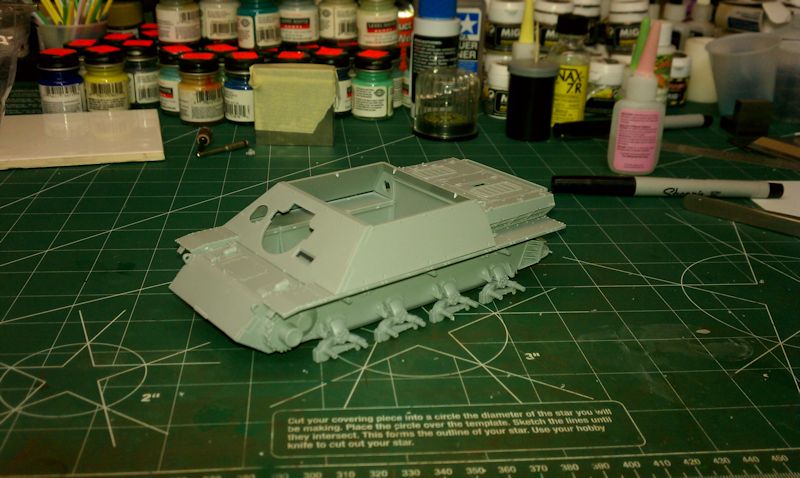
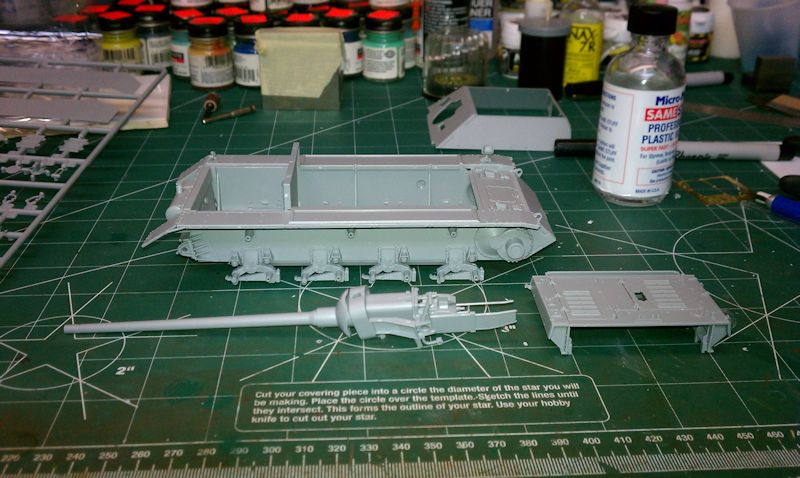
Just wanted to put up some photo's of what I have accomplished up to this point. This has been a very relaxing build and really can't wait to get to the painting and weathering phase. 


Posted: Sunday, February 19, 2012 - 05:02 PM UTC
Ok,
This is my first post as I just found and joined the site.
I have not built a kit in some 20 years (though I still kept buying them ) and I just recently got the urge to start building again.
Finding this campaign fits what I was planing to build, normally I tend to add too much detail but after doing research on a kit I have I decided to just build the kit.
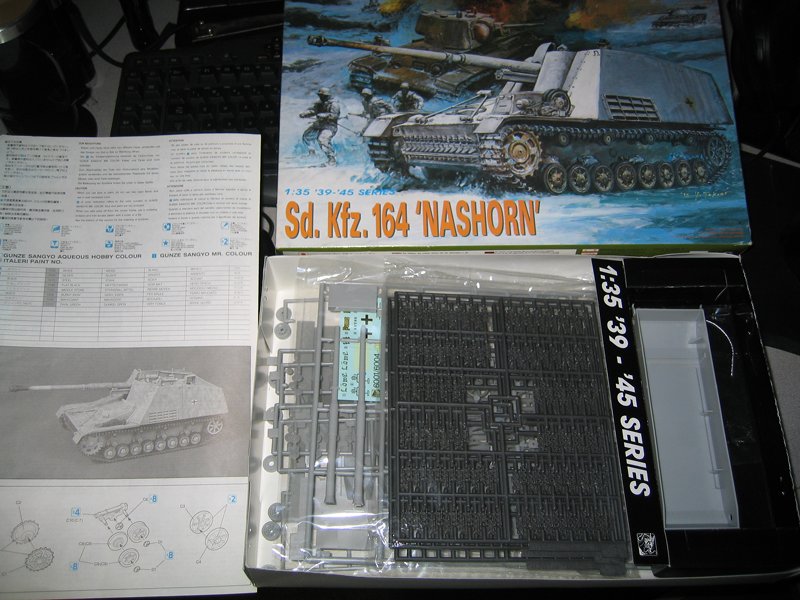
The kit I am doing is the Nashorn #6001 I believe it was Dragons first kit and is a dfficult build, we will see.
Cheers Rob.
This is my first post as I just found and joined the site.
I have not built a kit in some 20 years (though I still kept buying them
 ) and I just recently got the urge to start building again.
Finding this campaign fits what I was planing to build, normally I tend to add too much detail
 but after doing research on a kit I have I decided to just build the kit.
The kit I am doing is the Nashorn #6001 I believe it was Dragons first kit and is a dfficult build, we will see.

Cheers Rob.

Whiskey_1

Joined: November 22, 2008
KitMaker: 279 posts
Armorama: 272 posts

Posted: Sunday, February 19, 2012 - 11:07 PM UTC
Quoted Text
I dont know what kneadtite or kneadable eraser is
Apologies first since I should have written kneadatite. It`s a company that produces various putties. They also seem to have a sort of blu-tack . Kneadable eraser is a simple artist supply which honors its name. Most office supply stores should carry the stuff and any artists supplies shop that doesn`t sell these is not worth its salt.

There are other masking solutions popping up left and right, for example panzer putty, which is purpose designed. These things are good ways to mask soft-edge camouflage patterns
Posted: Monday, February 20, 2012 - 06:44 AM UTC
Welcome aboard Rob,that nashorn looks like a great kit.Look forward to seeing your progress.
@ Steph, Thats a brilliant colour green, who's it by?
Primed the Firefly, ready to start painting.
@ Steph, Thats a brilliant colour green, who's it by?
Primed the Firefly, ready to start painting.
steph2102

Joined: April 23, 2011
KitMaker: 735 posts
Armorama: 606 posts

Posted: Monday, February 20, 2012 - 08:10 AM UTC
good evening,
Martin, the color is a mixture of olive drab and desert yellow tamiya of they are matt. but the picture they laziness earlier satin. Benjamin, I have some free time this week , nice interior turret. to hide the painting, I use the dough modeling has taken my daughter (the paste is water soluble). Michael I am pressing to see the assembly of your M7.
steph
Martin, the color is a mixture of olive drab and desert yellow tamiya of they are matt. but the picture they laziness earlier satin. Benjamin, I have some free time this week
 , nice interior turret. to hide the painting, I use the dough modeling has taken my daughter (the paste is water soluble). Michael I am pressing to see the assembly of your M7.
steph

paxtonm

Joined: February 06, 2007
KitMaker: 89 posts
Armorama: 61 posts

Posted: Monday, February 20, 2012 - 09:11 AM UTC
Steph,
I'll get some more pictures up tonight of the subassemblies together.
I launched a three part assembly into the unplumbed depths of the unknown in my workshop. I am sure it is right next to the M1 AIM commander's cupula that disappeared. What makes this tolerable is how awesome Dragon's customer service is. I used their online system and have the parts less than a week later with only postage as the expense.
Michael
steph2102

Joined: April 23, 2011
KitMaker: 735 posts
Armorama: 606 posts

Posted: Monday, February 20, 2012 - 09:42 AM UTC
good evening,
michael, it interesting to know that a dragon efficient after-sales service, it surely will be able to serve in the future has many of us.
steph
michael, it interesting to know that a dragon efficient after-sales service, it surely will be able to serve in the future has many of us.
steph

paxtonm

Joined: February 06, 2007
KitMaker: 89 posts
Armorama: 61 posts

Posted: Monday, February 20, 2012 - 04:06 PM UTC
As promised, here is another update.
This is my progress on the drivers seat. From looking at references, I am pretty sure the seat cushion and back should be black.

The next two pictures are of the gun assembly and shields. The placement of the shields is pretty sketchy, as there aren't any positive placement cues in the instructions. I still have to put the two sighting assemblies on. They are the pieces I received from Dragon this weekend, and I don't want to put them on until I have to, as they are pretty fragile. Also, I masked the breech after painting it steel. It looks pretty bright, but I plan to dampen the color with some grey or black pastel.


This my placement of the interior front hull and transmission assembly. I masked the glue areas and painted, as it looks like it would be pretty tight to try and airbrush after assembly.

The last two for today are the upper front hull exterior and interior. The pieces for this have great, solid attachment guides and are very solid.


That's all for tonight! I am open for any constructive or construction criticism.
This is my progress on the drivers seat. From looking at references, I am pretty sure the seat cushion and back should be black.

The next two pictures are of the gun assembly and shields. The placement of the shields is pretty sketchy, as there aren't any positive placement cues in the instructions. I still have to put the two sighting assemblies on. They are the pieces I received from Dragon this weekend, and I don't want to put them on until I have to, as they are pretty fragile. Also, I masked the breech after painting it steel. It looks pretty bright, but I plan to dampen the color with some grey or black pastel.


This my placement of the interior front hull and transmission assembly. I masked the glue areas and painted, as it looks like it would be pretty tight to try and airbrush after assembly.

The last two for today are the upper front hull exterior and interior. The pieces for this have great, solid attachment guides and are very solid.


That's all for tonight! I am open for any constructive or construction criticism.

c5flies

Joined: October 21, 2007
KitMaker: 3,684 posts
Armorama: 2,938 posts

Posted: Monday, February 20, 2012 - 05:15 PM UTC
Just joined up, hopefully I'll finish this one as I haven't had much luck lately. Going to do one of my favorites:
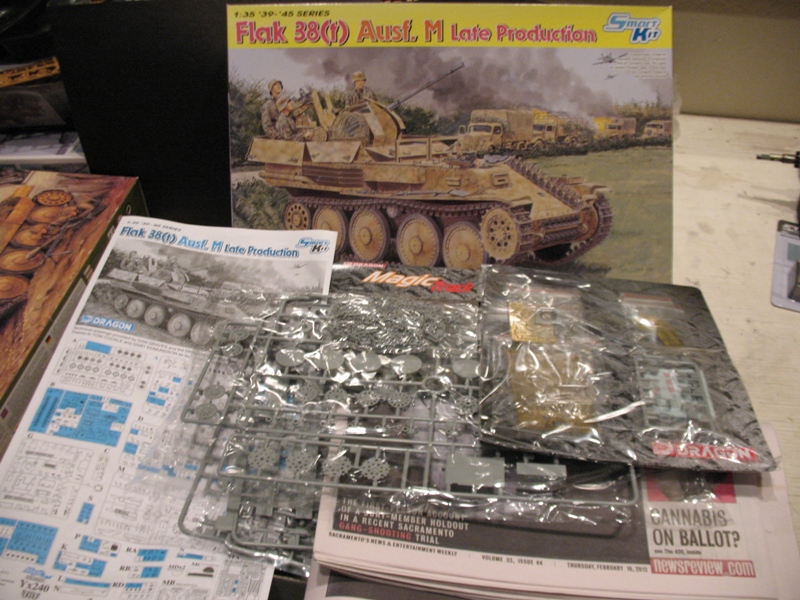
and a pic of the latest paper we had lying around:
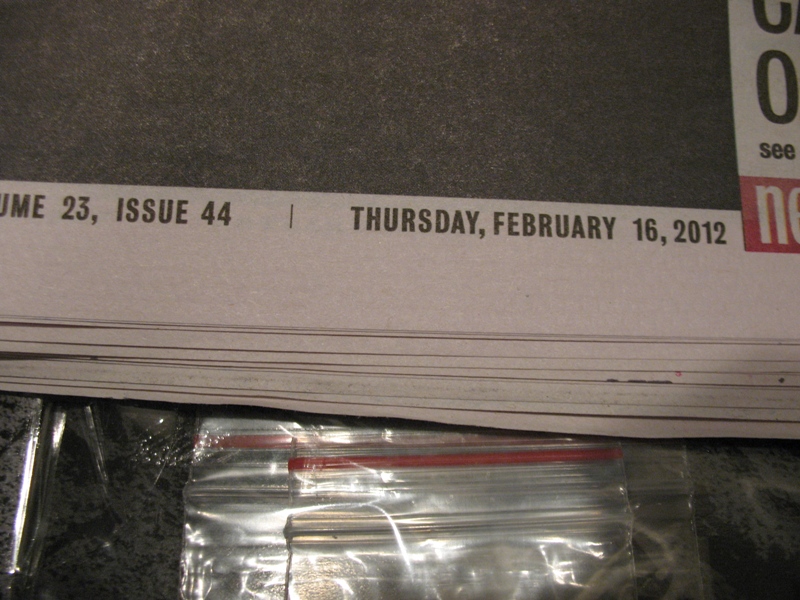
Hope to have some progress soon, looks like many of you are off to a quick start

and a pic of the latest paper we had lying around:

Hope to have some progress soon, looks like many of you are off to a quick start


paxtonm

Joined: February 06, 2007
KitMaker: 89 posts
Armorama: 61 posts

Posted: Tuesday, February 21, 2012 - 04:48 PM UTC
Tonight's progress doesn't look like much, but took about an hour and a half! Placing the decals on the ammo tubes takes a little bit of finesse to weave it between the tubes where there are three rows.
I sprayed the olive drab, coated with Future, applied the decal, and gave it a touch of decal setting solution.

I painted the road wheels and idler earlier, but am just now getting around to posting them. I painted the black first, and then used a drafting template to spray the olive drab. On the all steel wheels, I sprayed the OD, made a flat circle template, and sprayed the steel paint.


If I'm posting too much detail, please let me know!
I sprayed the olive drab, coated with Future, applied the decal, and gave it a touch of decal setting solution.

I painted the road wheels and idler earlier, but am just now getting around to posting them. I painted the black first, and then used a drafting template to spray the olive drab. On the all steel wheels, I sprayed the OD, made a flat circle template, and sprayed the steel paint.


If I'm posting too much detail, please let me know!

Whiskey_1

Joined: November 22, 2008
KitMaker: 279 posts
Armorama: 272 posts

Posted: Tuesday, February 21, 2012 - 09:55 PM UTC
Quoted Text
If I'm posting too much detail, please let me know!
There is such a thing as too much detail? ...news to me
 . It`s great progress. Gotta admire how you got the decals on there. I could get seizures just thinking about the prospect. Do you use Vallejo Violet Brown for your OD by any chance?
As for my progress...I did some wahses yesterday. This is only the second model I did them on so I`m not really sure about how it turned out. I`m thinking that a medium brown wash might have been better. All comments and critique are more than welcome


 |


