Ok Guys everyone's build is looking great
@ Jan sorry to here about your paint problem, I hate when that happens
@ Bob, Is your Tobruk PzIII finished dont forget to upload a photo to the gallery if it is
As far as my Jagdtiger goes I added the finishing touches this morning please let me know what you all think before I apply my final dull coat to it
and my reference photo of Jagdtiger 331 that I used
Campaigns
Where Armorama group builds can be discussed, organized, and updates posted.
Hosted by Darren Baker, Richard S.
Dragon OOB Campaign
ltb073
New York, United States
Joined: March 08, 2010
KitMaker: 3,662 posts
Armorama: 3,078 posts
Joined: March 08, 2010
KitMaker: 3,662 posts
Armorama: 3,078 posts
Posted: Saturday, March 10, 2012 - 06:49 AM UTC
JonDicks
Queensland, Australia
Joined: October 13, 2009
KitMaker: 223 posts
Armorama: 224 posts
Joined: October 13, 2009
KitMaker: 223 posts
Armorama: 224 posts
Posted: Saturday, March 10, 2012 - 06:41 PM UTC
Camo paint on. I used a mix of various colours for both the green and brown. Nothing very scientific, I was just looking for a faded look.
Next is the detailed painting and decals.
bwiber
Washington, United States
Joined: August 03, 2008
KitMaker: 436 posts
Armorama: 320 posts
Joined: August 03, 2008
KitMaker: 436 posts
Armorama: 320 posts
Posted: Sunday, March 11, 2012 - 10:09 AM UTC
Hi all....
The builds are really looking good, and I am picking up ideas and pointers from all...
However, I am declaring my Panzer IIIJ complete....
Hit it with the matt earlier today, and just finished posting a couple of shots in the campaign gallery....
Keep up the great work, and I will be checking back...
Bob
Tojo72
North Carolina, United States
Joined: June 06, 2006
KitMaker: 4,691 posts
Armorama: 3,509 posts
Joined: June 06, 2006
KitMaker: 4,691 posts
Armorama: 3,509 posts
Posted: Sunday, March 11, 2012 - 11:56 AM UTC
Excellent work Sal,every one you do gets better and this one is real sweet
paxtonm
Ohio, United States
Joined: February 06, 2007
KitMaker: 89 posts
Armorama: 61 posts
Joined: February 06, 2007
KitMaker: 89 posts
Armorama: 61 posts
Posted: Sunday, March 11, 2012 - 04:52 PM UTC
Bob,
You didn't miss anything! There are no casting numbers on the bogies.
Michael
You didn't miss anything! There are no casting numbers on the bogies.
Michael
Quoted Text
@Michael;
Ref your Priest - and no sort of criticism of any sort intended - But am I missing something, or did the Dragon miss something...?
I was looking at your close-ups of the suspension units. I see no casting numbers on any of the bits! I just built the rather older Dragon M4A2 "Tarawa" Shermie kit - onliest Shermie-type I've ever done to-date - and that older D kit has lots of nice little casting numbers on the suspension bits. So, I figured those were a feature of both those types of US-made suspensions and of Dragon kits thereof. Does this Priest "SmartKit" not come with such markings? Just F-my-I!
Thanks!
Bob
PS: I am one of those prime-all-in-black guys for the reasons you have indicated!
Posted: Sunday, March 11, 2012 - 08:15 PM UTC
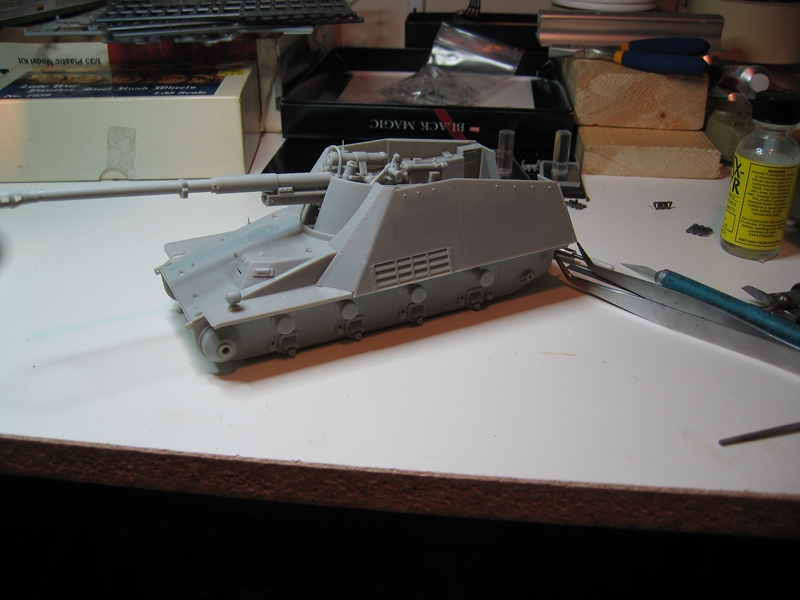
Got some more done.
Most of the upper hull is finished but for some filling then it's just the tracks to do.
Cheers Rob.
Most of the upper hull is finished but for some filling then it's just the tracks to do.
Cheers Rob.
ltb073
New York, United States
Joined: March 08, 2010
KitMaker: 3,662 posts
Armorama: 3,078 posts
Joined: March 08, 2010
KitMaker: 3,662 posts
Armorama: 3,078 posts
Posted: Monday, March 12, 2012 - 02:29 PM UTC
Congratulations to Bob on being the 1st one finished, very nice build there
@Anthony, thanks for the complements all the suggestions direction that I am getting from guys here are starting to help me, I think
@ Rob nice progress looking good
@Jon nice camo work, you jagdpanther is looking cool
I should get the dull coat on tomorrow
@Anthony, thanks for the complements all the suggestions direction that I am getting from guys here are starting to help me, I think
@ Rob nice progress looking good
@Jon nice camo work, you jagdpanther is looking cool
I should get the dull coat on tomorrow
vonMarshall
United Kingdom
Joined: July 30, 2010
KitMaker: 192 posts
Armorama: 165 posts
Joined: July 30, 2010
KitMaker: 192 posts
Armorama: 165 posts
Posted: Tuesday, March 13, 2012 - 12:47 AM UTC
Work, family and house moving have got in the way of modelling for a while but I am back at the bench now and this campaign really appealed.
I have a couple of Panzer III’s in my stash, the Pz.III J 2-in-1 kit that Bob has built so beautifully and a Cyber Hobby Pz.III L.Tp. I do have some Fruils and Aber barrels so my plan is to build the J with all the bling and for this campaign I will build the L.Tp straight out of the box.
These will actually be my first Dragon kits and also my first attempt at a few weathering tricks and painitng ideas I have read about so am looking forward to this learning curve.
Posted: Tuesday, March 13, 2012 - 10:02 AM UTC
@ Sal brilliant build it looks so much better for those extra spots.
@ Bob, very neat build .
just learning so much from other peoples builds.
My progress
base coat on, gloss varnish on decals on and slowly drying.
sorry for the poor lighting.
looking forward to seeing other peoples progress.
Martin
@ Bob, very neat build .
just learning so much from other peoples builds.
My progress
base coat on, gloss varnish on decals on and slowly drying.
sorry for the poor lighting.
looking forward to seeing other peoples progress.
Martin
bwiber
Washington, United States
Joined: August 03, 2008
KitMaker: 436 posts
Armorama: 320 posts
Joined: August 03, 2008
KitMaker: 436 posts
Armorama: 320 posts
Posted: Tuesday, March 13, 2012 - 10:16 AM UTC
@Noel... Sweet kit.... have one sitting in the stack for a special project.
@Martin... The bottom photo looks like the CO's jeep in Nam. Special OD with black mixed in and his driver spent most of his time polishing it (in a combat area) and working on his tan. I think lighting is something most of us fight with.
@Sal.... I just get impatient and cut corners. Yes, it does turn around and bite me ever so often. Luckily I got away with it this time.
@Rob... Looks good, you have to love that barrel. Almost did this one for the build. As for the track, I wish you luck because that is about the only thing that kept mine together long enough to get them on...
Later all,
Bob
ltb073
New York, United States
Joined: March 08, 2010
KitMaker: 3,662 posts
Armorama: 3,078 posts
Joined: March 08, 2010
KitMaker: 3,662 posts
Armorama: 3,078 posts
Posted: Tuesday, March 13, 2012 - 12:29 PM UTC
@ Martin, Thanks for the suggestion and the complement, I am really pleased with the way it turned out. I shot it with some dull coat today and will get a Pic in the gallery soon. By the way I'm really liking the way your Sherman is looking, can't wait to see it finished
@ Rob, I agree with Bob you will need some luck , tape and glue to keep those tracks together, I wish you the best
@ Noel, That is a cool looking kit what do you plan on doing with the DS Catus I want it to go with my next DAK build
@ Rob, I agree with Bob you will need some luck , tape and glue to keep those tracks together, I wish you the best
@ Noel, That is a cool looking kit what do you plan on doing with the DS Catus I want it to go with my next DAK build
paxtonm
Ohio, United States
Joined: February 06, 2007
KitMaker: 89 posts
Armorama: 61 posts
Joined: February 06, 2007
KitMaker: 89 posts
Armorama: 61 posts
Posted: Tuesday, March 13, 2012 - 03:24 PM UTC
So, after a minor surgery and a brief recouperation...
The .50 cal is finished. It is a pretty neat sub-assembly and can be left to pivot up and down as the socket and pin hold pretty tightly.
I put the grab handles on. Some of them I put on twice since, if you aren't acutely aware of their presence at all times, they're pretty easy to break off! I don't know what the purpose of the long curved rail is.
The rear with the air filters(?) and fenders installed. It is nice detail, but it will all be covered by the back plate and only visible if picked up.
Lastly, I forgot to install the strip of bolts on the front. Luckily, it was an error from which I could recover pretty easily!
That's all for now!
vonMarshall
United Kingdom
Joined: July 30, 2010
KitMaker: 192 posts
Armorama: 165 posts
Joined: July 30, 2010
KitMaker: 192 posts
Armorama: 165 posts
Posted: Tuesday, March 13, 2012 - 09:27 PM UTC
Quoted Text
@ Noel, That is a cool looking kit what do you plan on doing with the DS Catus I want it to go with my next DAK build
Hi Sal... if you really want them you can have them! PM me your address and I will throw them in the post to you.
Posted: Wednesday, March 14, 2012 - 01:07 AM UTC
@Bob, @Sal,
Thanks for the encouragment.
I have been using a small square file to open up the two slots in each track, they seem to stay together a lot better. I decided to use a flat base so the only concern is the top run of track where it droops between the wheels.
Cheers Rob.
Thanks for the encouragment.
I have been using a small square file to open up the two slots in each track, they seem to stay together a lot better. I decided to use a flat base so the only concern is the top run of track where it droops between the wheels.
Cheers Rob.
bwiber
Washington, United States
Joined: August 03, 2008
KitMaker: 436 posts
Armorama: 320 posts
Joined: August 03, 2008
KitMaker: 436 posts
Armorama: 320 posts
Posted: Wednesday, March 14, 2012 - 05:21 AM UTC
Sal,
Send me your address and I will ship you the cactus from my kit. You may as well have a real cactus garden for your build... I am going to be doing a Stalingrad vehicle and don't think that was one of the hazards they faced there...
Bob
Send me your address and I will ship you the cactus from my kit. You may as well have a real cactus garden for your build... I am going to be doing a Stalingrad vehicle and don't think that was one of the hazards they faced there...
Bob
GaryKato
California, United States
Joined: December 06, 2004
KitMaker: 3,694 posts
Armorama: 2,693 posts
Joined: December 06, 2004
KitMaker: 3,694 posts
Armorama: 2,693 posts
Posted: Wednesday, March 14, 2012 - 11:19 AM UTC
Quoted Text
I don't know what the purpose of the long curved rail is.
This looks like a rail to go over the fighting compartment. A canvas tarp is put over the rails to keep bad weather out.
tread_geek
Ontario, Canada
Joined: March 23, 2008
KitMaker: 2,847 posts
Armorama: 2,667 posts
Joined: March 23, 2008
KitMaker: 2,847 posts
Armorama: 2,667 posts
Posted: Saturday, March 17, 2012 - 06:46 AM UTC
Greetings all.
It's nice to see some really great progress in this campaign. I've been raather busy getting my build review of this kit ready and submitted. The actual full review has been submitted and should be up shortly. As I didn't totally complete the build (decals, weathering), you'll have to wait for that until I post here.
First up is a couple of comparison shots between the Late and early versions.
As you can see, all the difference is in the rear of the tank. Next are two pictures from the upcoming review of the model with all the parts on. The two hatches are just dry fit for the pictures as I'm not sure how I'll display them (open, closed or one of each). Due to an unfortunate accident with my older airbrush, I had to strip the model and redo the paint. I still have a couple of spots to touch up so no decals or other work until after that is done.
That's it for now, comments and questions always welcome.
Cheers,
Jan
Posted: Saturday, March 17, 2012 - 09:42 PM UTC
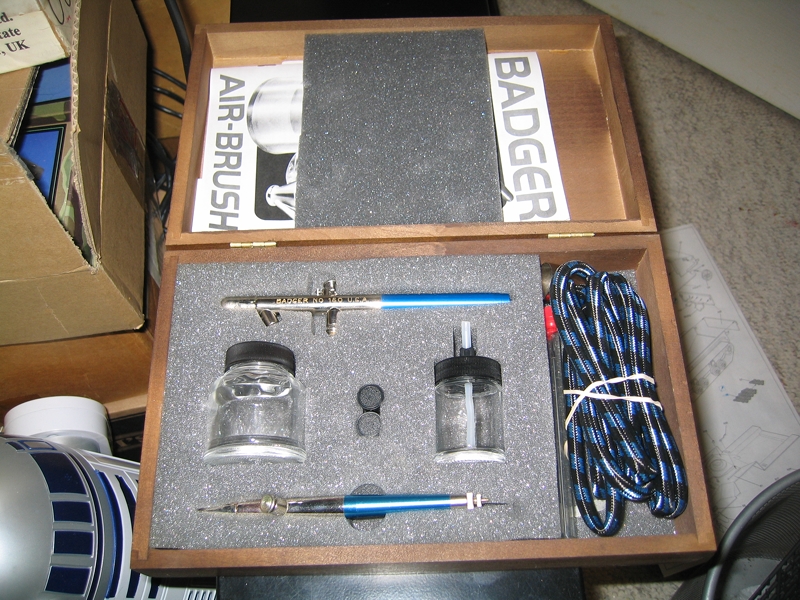
Working on the tracks and I found where I put my airbrushes.
Cheers Rob.
Cheers Rob.
Posted: Sunday, March 18, 2012 - 07:44 PM UTC
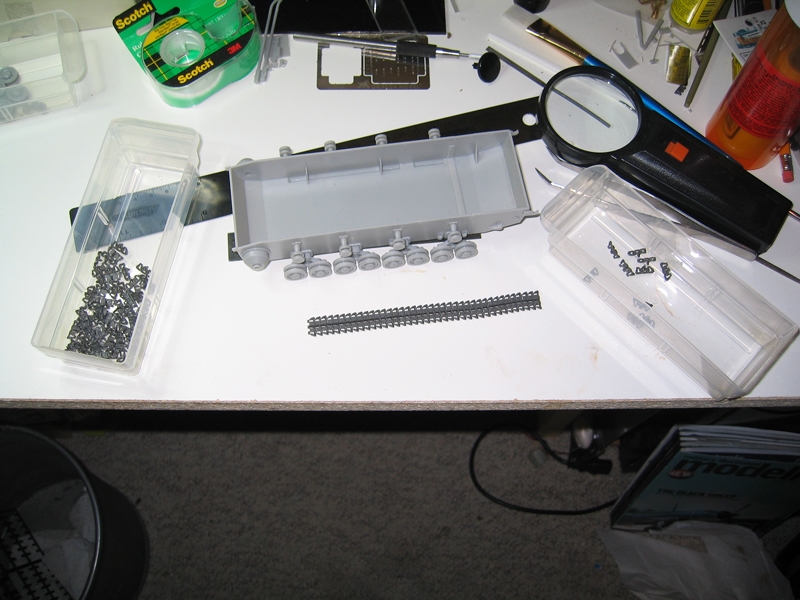
Well,
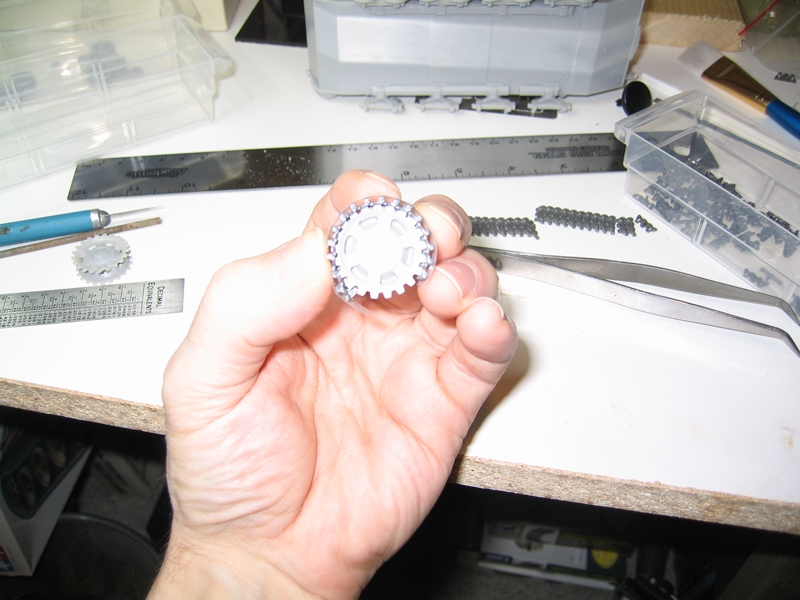
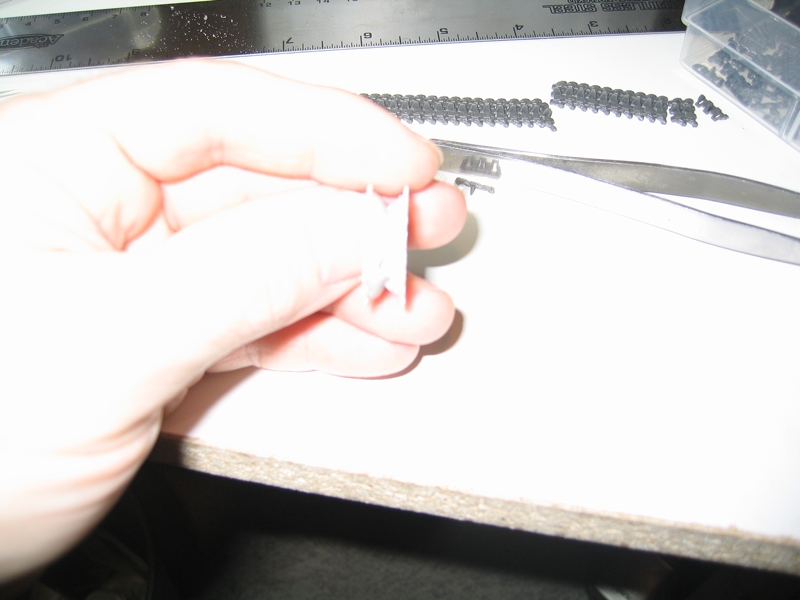
After getting half of the tracks ready I started working out how to go about mounting them, that's when I discovered that the drive wheels are too narrow and the track does dot sit right on them. (The pics are not the best).
Cheers Rob.
After getting half of the tracks ready I started working out how to go about mounting them, that's when I discovered that the drive wheels are too narrow and the track does dot sit right on them. (The pics are not the best).
Cheers Rob.
panzerbob01
Louisiana, United States
Joined: March 06, 2010
KitMaker: 3,128 posts
Armorama: 2,959 posts
Joined: March 06, 2010
KitMaker: 3,128 posts
Armorama: 2,959 posts
Posted: Monday, March 19, 2012 - 01:53 AM UTC
Rob;
Hi!
I confess that I have been watching your tackling of that old Nashorn kit 6001 with certain "unhappy expectation"... It has a long and seemingly evil reputation that I suspect was earned fair... and those sprockets have been in that reps list before.
As far back as 2003, Neville Lord did a build of it and did several corrections along the way - those sprockets being one - they were known then to be too narrow.
His fix, and, IF you have the parts, easily also your's, is to replace them with better and wider sprockets from another older Dragon kit - I think he actually sourced some from an old StuG III A, which apparently has a spare set! He noted that they could also be had from other old Dragon Pz. III kits.
Of course, this being an "OOTB" build...
Lacking a spare set, you can fix this one pretty easily by cutting the sprocket apart and adding in some spacer to make it wider. I would expect that this route should fit OK into the rules for this OOTB....
IF you do decide to fix them this way; remember that you will loose some plastic from the saw-cut itself... and you'll want to add some to your spacer to make up for this. I went down this route once and conveniently overlooked the fact that the saw actually removed some of the plastic !
PS: IF you want a few other tips on this beast that are pretty easy... Google the kit and follow the leads to see N. Lord's build tips (2003 post).
Bob
Hi!
I confess that I have been watching your tackling of that old Nashorn kit 6001 with certain "unhappy expectation"... It has a long and seemingly evil reputation that I suspect was earned fair... and those sprockets have been in that reps list before.
As far back as 2003, Neville Lord did a build of it and did several corrections along the way - those sprockets being one - they were known then to be too narrow.
His fix, and, IF you have the parts, easily also your's, is to replace them with better and wider sprockets from another older Dragon kit - I think he actually sourced some from an old StuG III A, which apparently has a spare set! He noted that they could also be had from other old Dragon Pz. III kits.
Of course, this being an "OOTB" build...
Lacking a spare set, you can fix this one pretty easily by cutting the sprocket apart and adding in some spacer to make it wider. I would expect that this route should fit OK into the rules for this OOTB....
IF you do decide to fix them this way; remember that you will loose some plastic from the saw-cut itself... and you'll want to add some to your spacer to make up for this. I went down this route once and conveniently overlooked the fact that the saw actually removed some of the plastic !
PS: IF you want a few other tips on this beast that are pretty easy... Google the kit and follow the leads to see N. Lord's build tips (2003 post).
Bob
Posted: Monday, March 19, 2012 - 11:15 AM UTC
Thanks Bob.
Actually I have Neville Lord's review printed out and seem to have missed the bit about the sprocket (it ended up at the bottom of page 3) I knew this was not a very good kit that is one of the reasons for doing it OOB, I am usually at the other end of the spektrum ie trying to add too much detail.
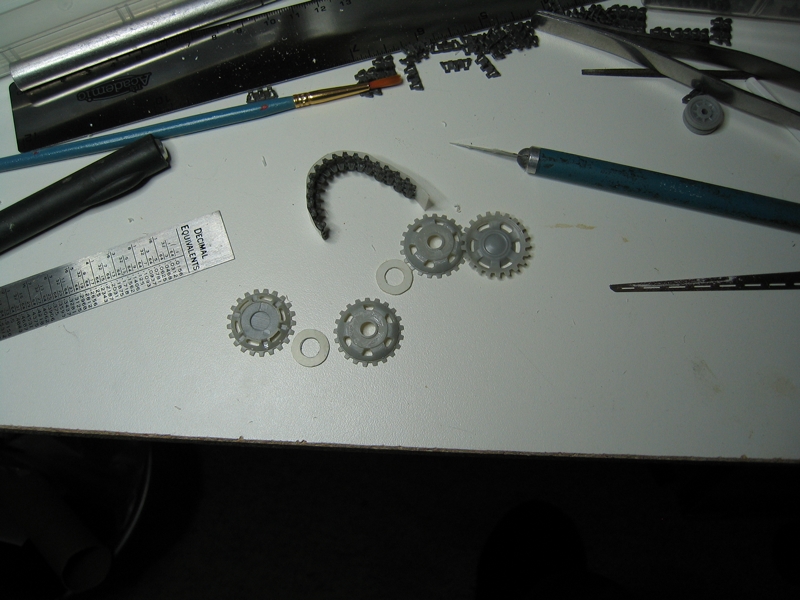
Your comments mirrored what I did, I first looked through my kits to see if any came whith spares (no luck) so I cut one apart and am working on the right thickness of shim to use. Funny thing is I am sure I checked this when putting them together.
Cheers Rob.
Posted: Tuesday, March 20, 2012 - 12:25 PM UTC
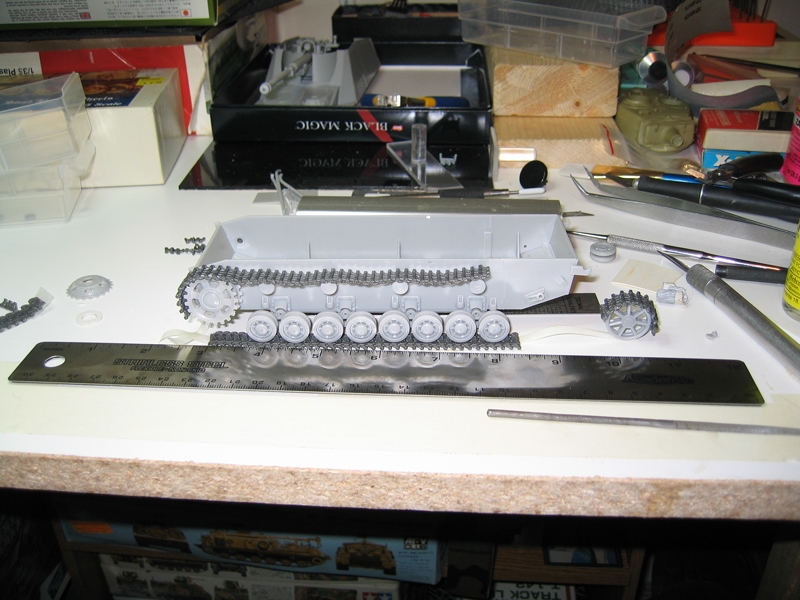
Got the sprockets sorted out and started putting the track together.
Cheers Rob.
Cheers Rob.
Posted: Saturday, March 24, 2012 - 07:32 AM UTC
Well I figured I should get started, so here is my kit, Dragon JagdPanzer IV l/48 Early Production. I will be adding zimmerit, using Milliput. So lets get going.
Posted: Saturday, March 24, 2012 - 10:19 AM UTC
Nice choice, Kevin. Looking forward to follow your zimmerit treatment. Please make sure to share your progress.
I have made a little more progress on my StuG IIIG. Next is some camouflage. More to follow
Posted: Saturday, March 24, 2012 - 12:57 PM UTC
Nice looking Stug, I have one in my stash, will have to get it out soon.
Well here is the first evening of work on the JagdPanzer. Running gear add and zim on the lower hull.