Auckland, New Zealand
Joined: June 01, 2011
KitMaker: 1,716 posts
Armorama: 1,638 posts
Posted: Saturday, June 09, 2012 - 09:38 AM UTC
Hahahahahaha oh crap man ,, brought brand new and bloody near burn the house down

and you damn skippy they GOING to replace it ,,buy Japanese ,,always works

Now the chain .. no idea about the LPI rating but i will tell you everything which is on the packet

Its RBmodel 1,30 x 1,75 086 02 chain 1 meter length ,,they make a nice little range of different sizes and man they are cheap too ..brought the whole series that RB make

Phill

I know the voices ain't real but they do come up with some great ideas
Never trust a man who left alone with a tea cozy and doesn't try it on ( Billy Connolly )
Overkill is often very understated

#226
British Columbia, Canada
Joined: February 20, 2012
KitMaker: 1,909 posts
Armorama: 1,066 posts
Posted: Saturday, June 09, 2012 - 02:11 PM UTC
Looking good guys!
Got a little work done, mostly cleanup and done during breaks at work.

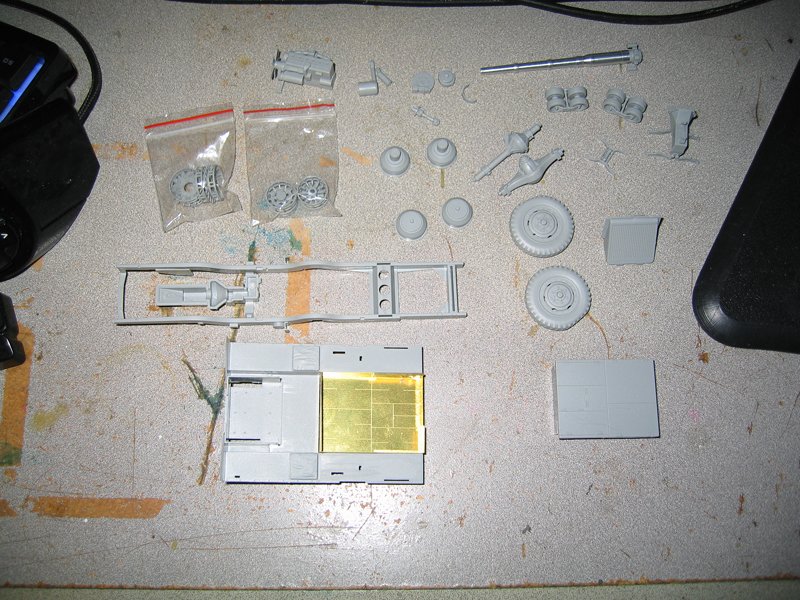
I have also been looking through the PE I have and what I will and won't be using on this, I am considering building 2 or all 3 of the kits I have at once.
I have a question though, on the oval cutouts in the suspension when was that change made?
Cheers Rob.
Anything without guns is a target!
27 completed campaigns and counting :)
Texas, United States
Joined: March 17, 2006
KitMaker: 1,117 posts
Armorama: 1,115 posts
Posted: Saturday, June 09, 2012 - 02:28 PM UTC
Well here is my latest update now that I’m back on track. Got the basic painting of the interior done tonight. I’ve used Vallejo model air olive drab for the base coat, followed by fading using the same paint with a bit of sand yellow mixed in. I plan to keep the weathering to an absolute minimum since the Netherlands only receive 40 out of 200 when Java fell to the Japanese in 42. I did install Verlinden’s radio set to the side hull and added some wiring for the radio and the antenna. More to follow very soon.
Chris


On the workbench:
T-62M
ZTZ 99 MBT
Lav-25A2 with MILES Gear
M7 Priest X2
Indiana, United States
Joined: June 10, 2005
KitMaker: 6,188 posts
Armorama: 5,960 posts
Posted: Saturday, June 09, 2012 - 07:48 PM UTC
Quoted Text
Hahahahahaha oh crap man ,, brought brand new and bloody near burn the house down  and you damn skippy they GOING to replace it ,,buy Japanese ,,always works
Now the chain .. no idea about the LPI rating but i will tell you everything which is on the packet 
Its RBmodel 1,30 x 1,75 086 02 chain 1 meter length ,,they make a nice little range of different sizes and man they are cheap too ..brought the whole series that RB make 
Phill 
"Putting out fires" MEANT, solving and correcting problems created by other incompetent individuals. Not actual fires and NOT burning anything down. I could tell you a story about buying Japanese, but that IS another story.
And, so who's skippy?

Hahahahahaha oh crap man!

~ Jeff
Antwerpen, Belgium
Joined: March 31, 2012
KitMaker: 224 posts
Armorama: 67 posts
Posted: Saturday, June 09, 2012 - 08:40 PM UTC
Hello all,
First let me say that a lot of nice work is being showed here.
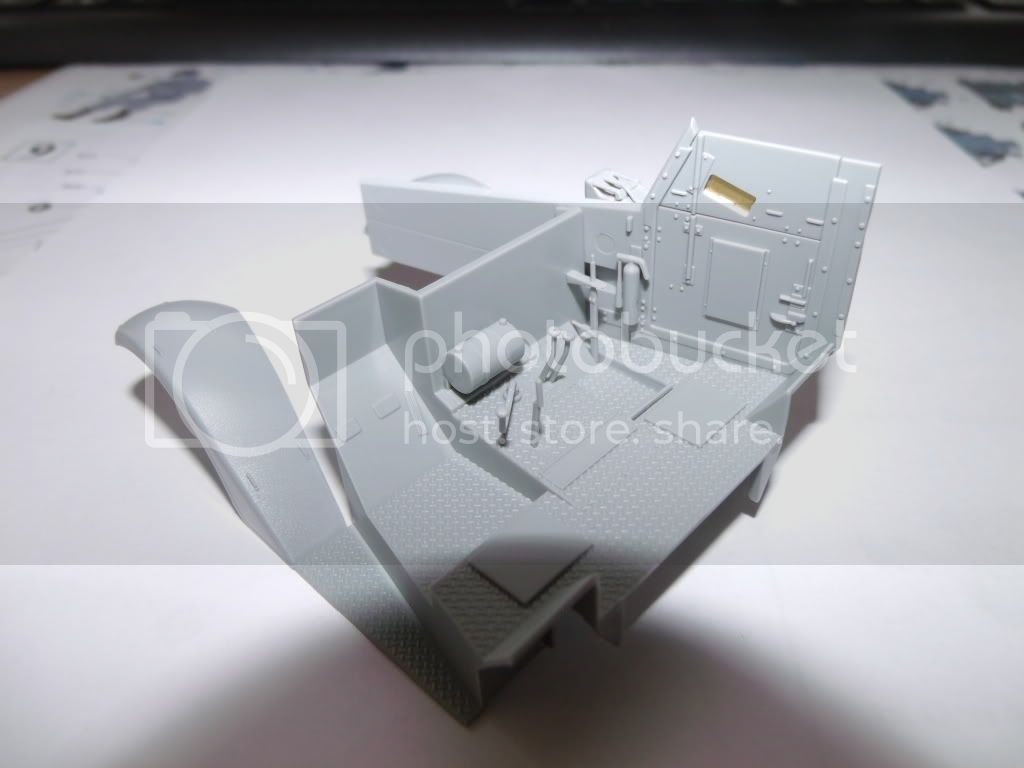
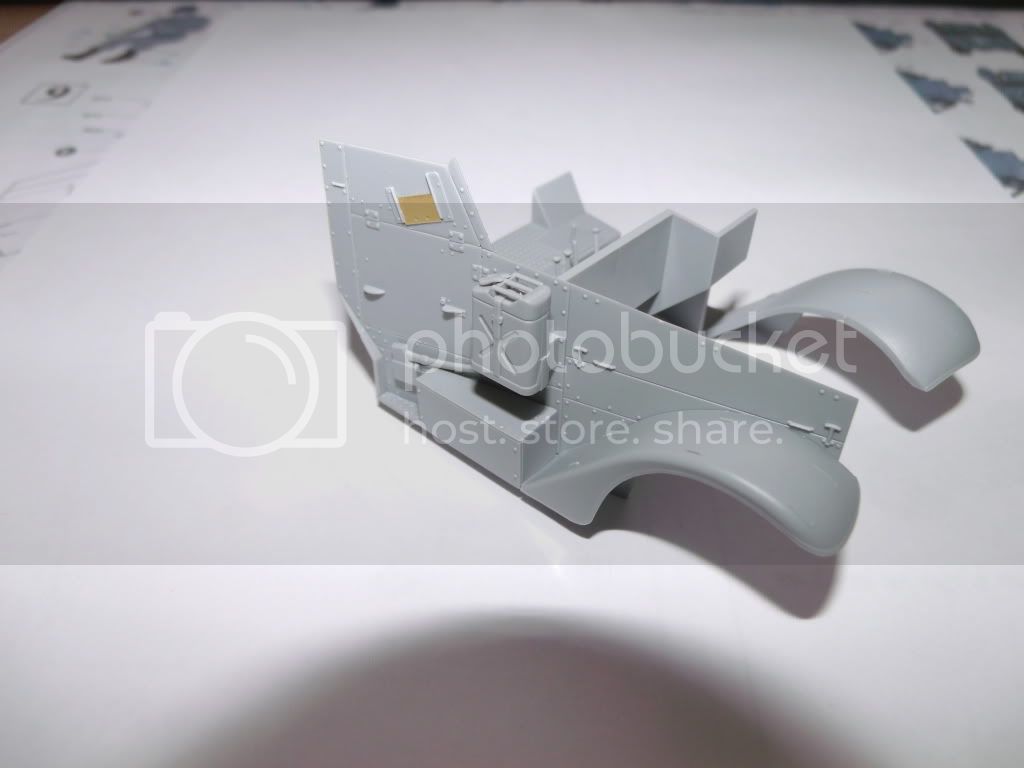
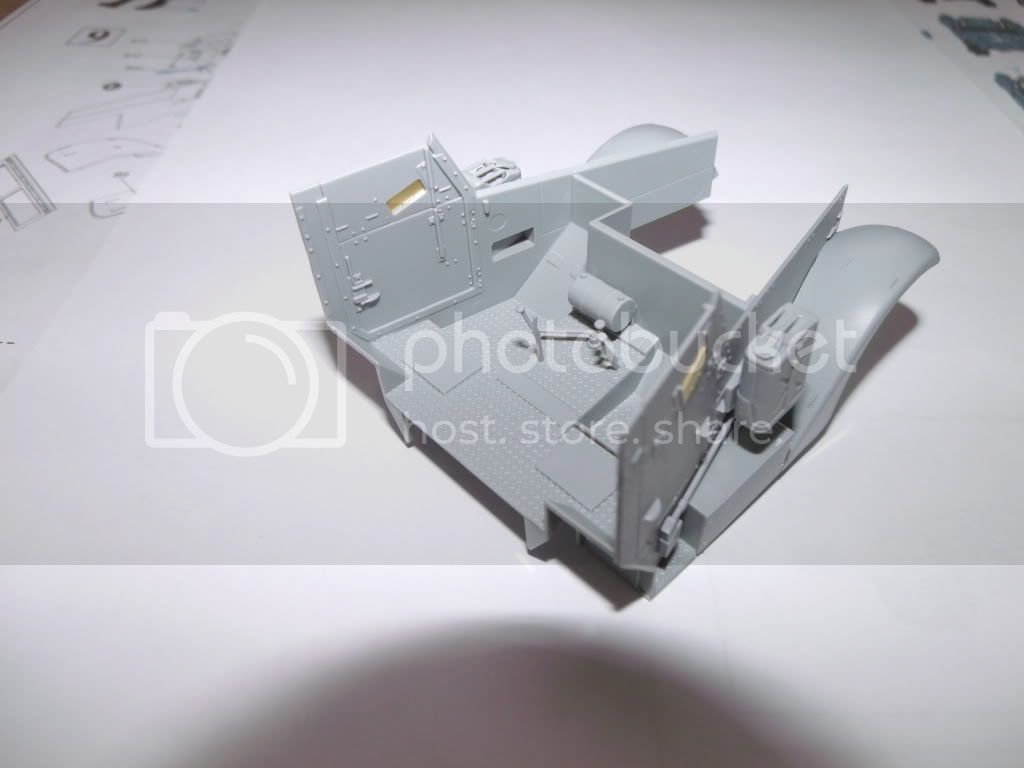
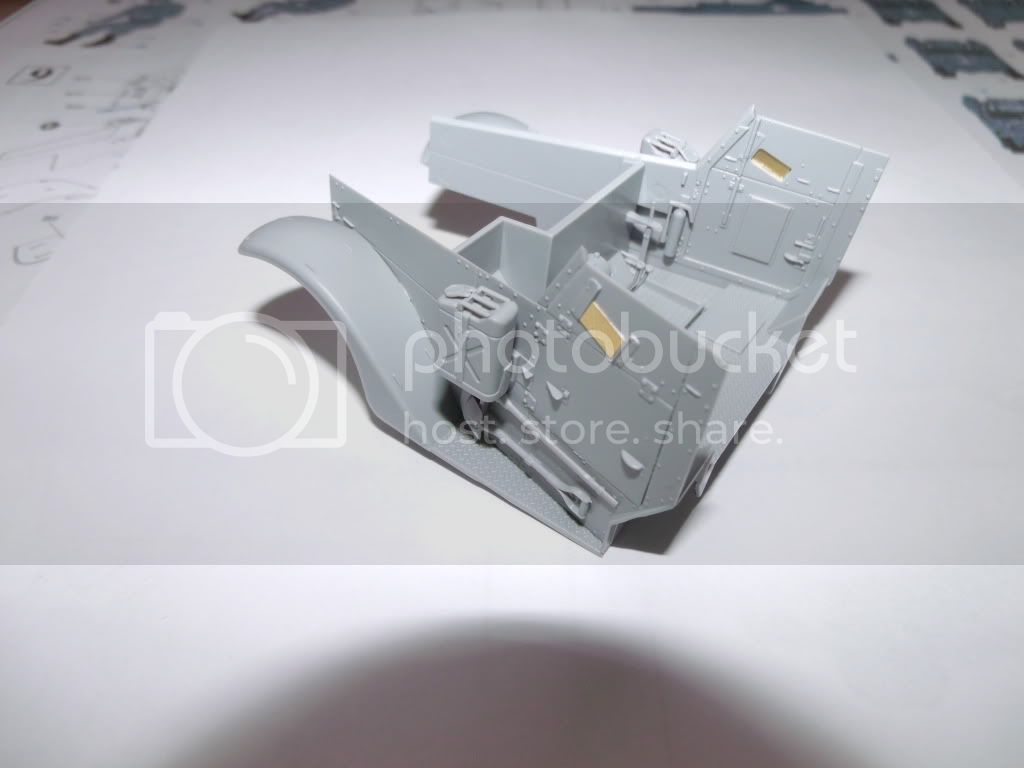
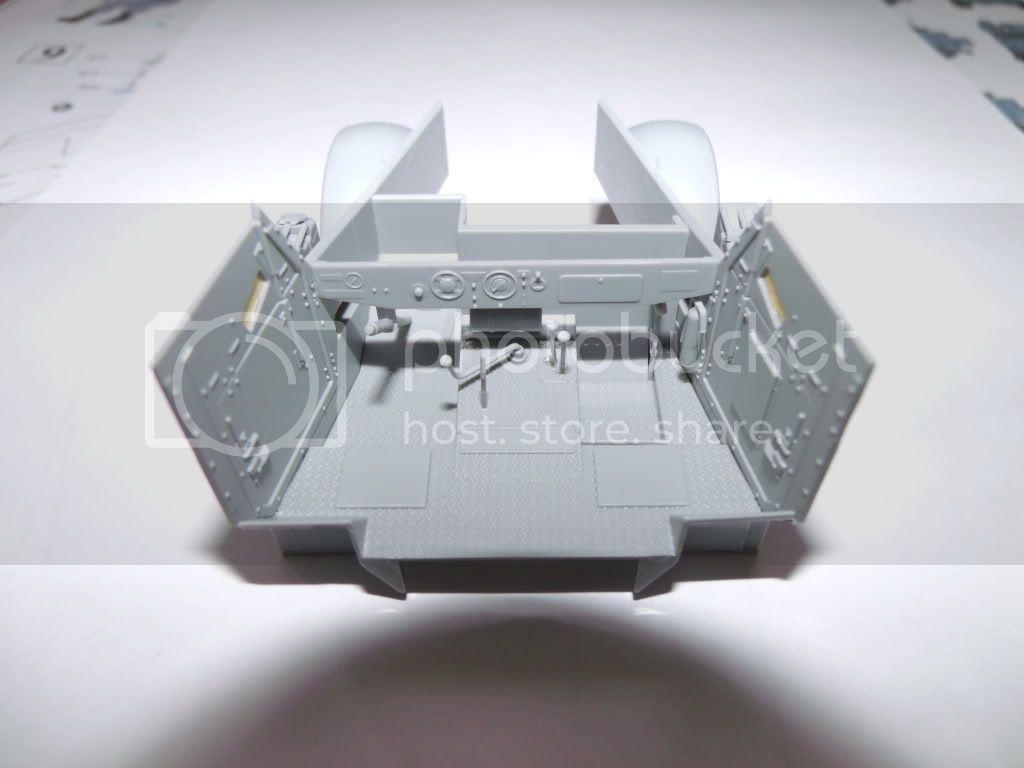
Now my update, i start working on the drivers cabin.
Here are the pics, not that the seats are not glued on yet, for ease of painting later.
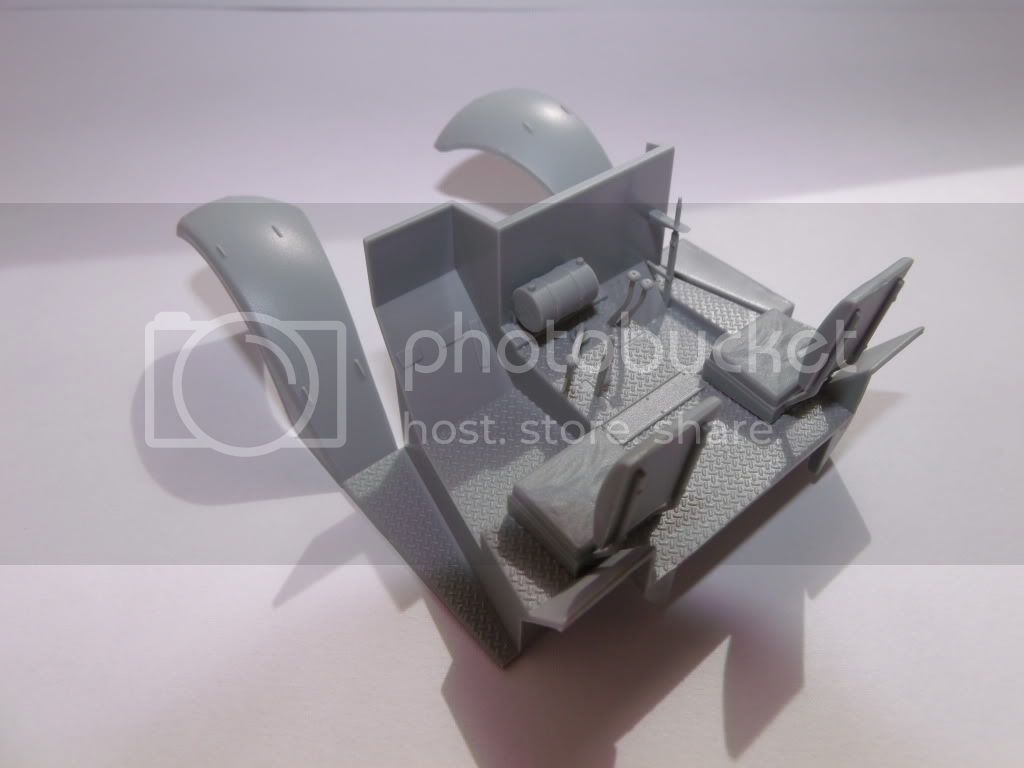
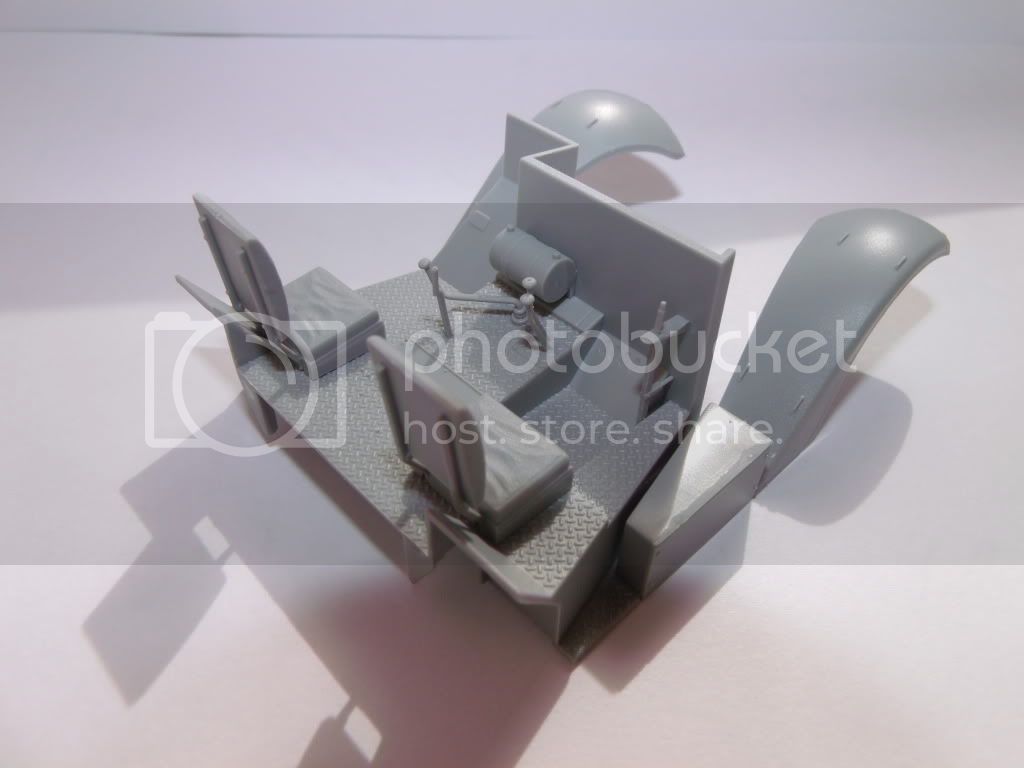
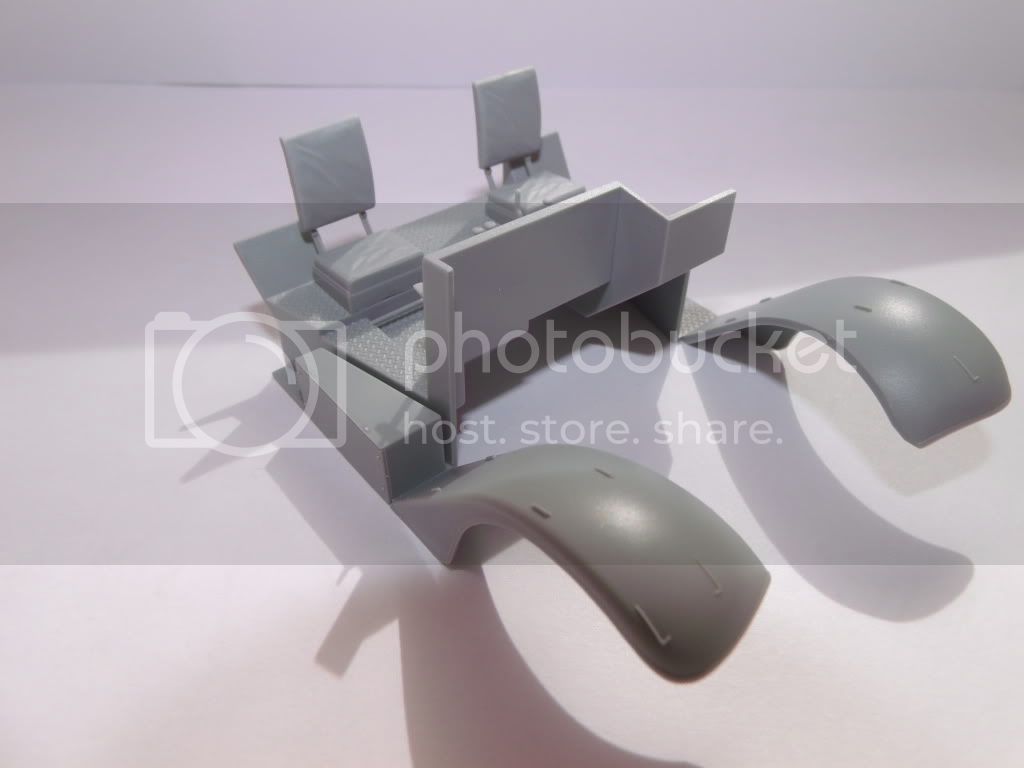
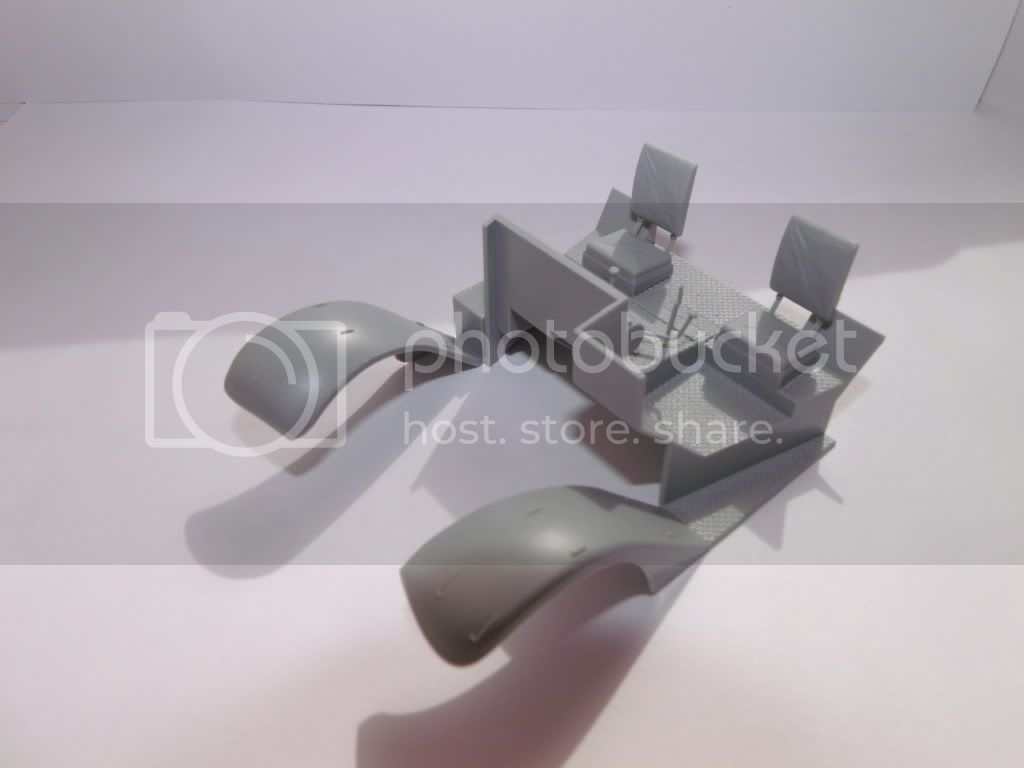
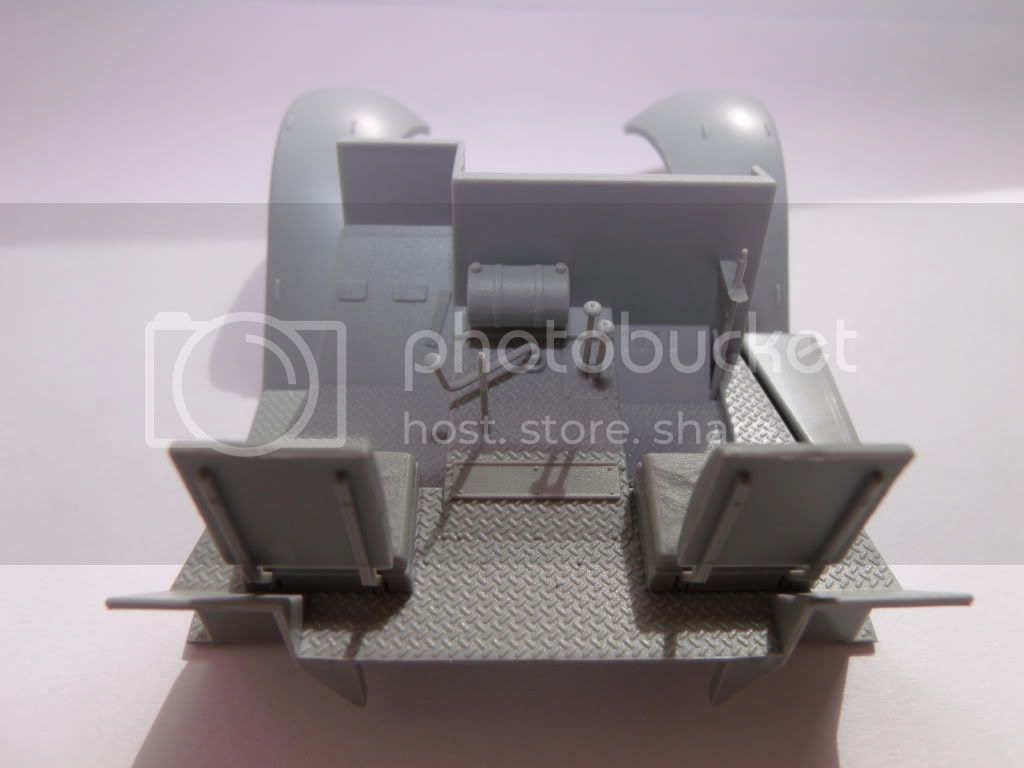
And here cabin dryfitted to the chassis:
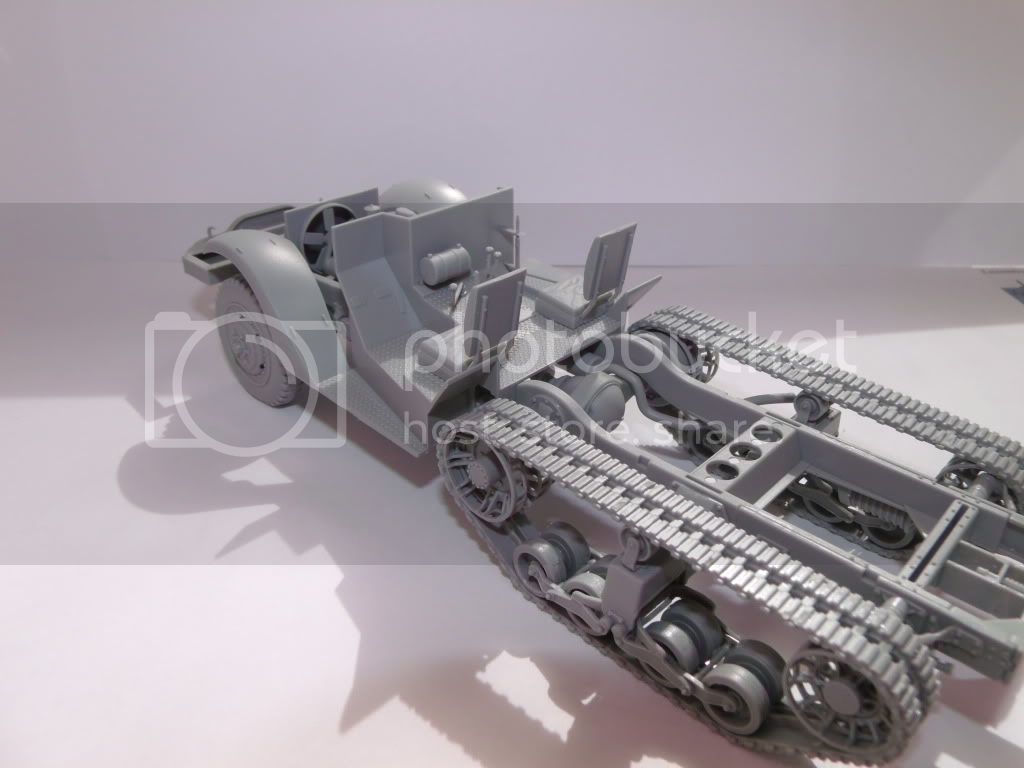
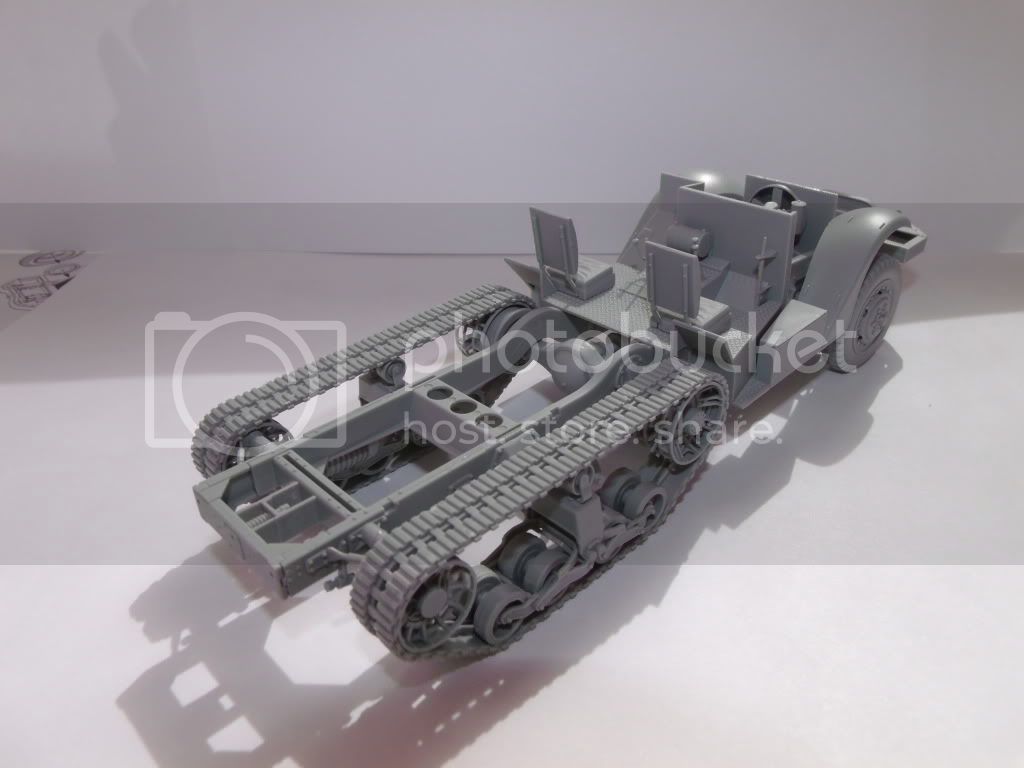
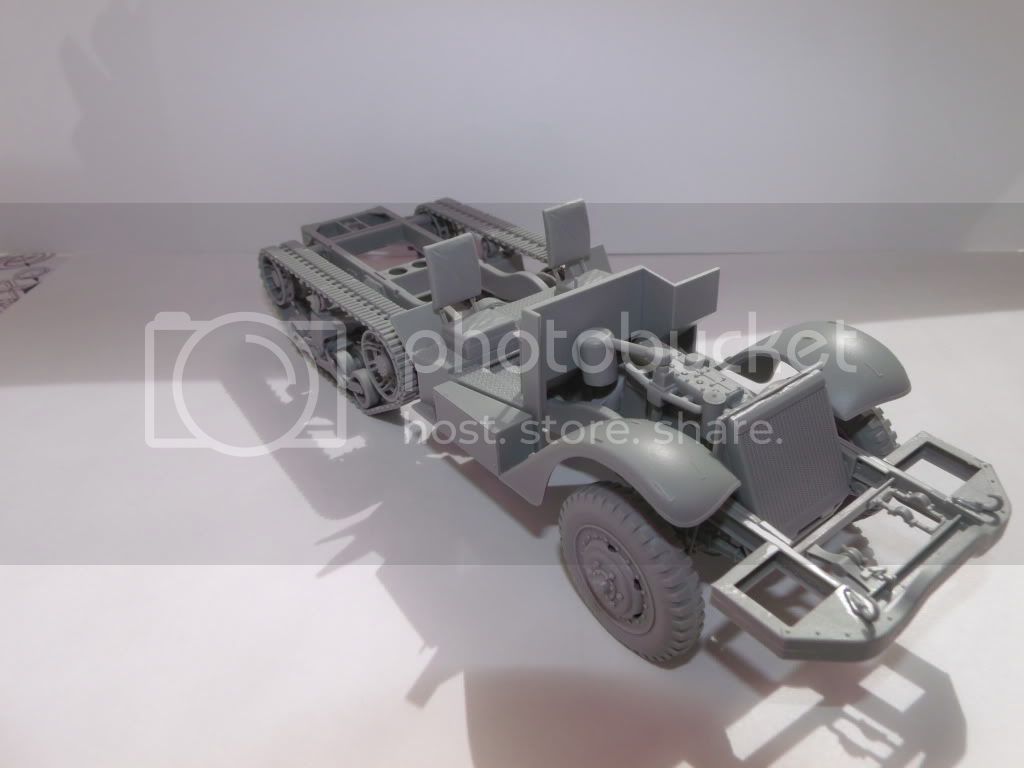
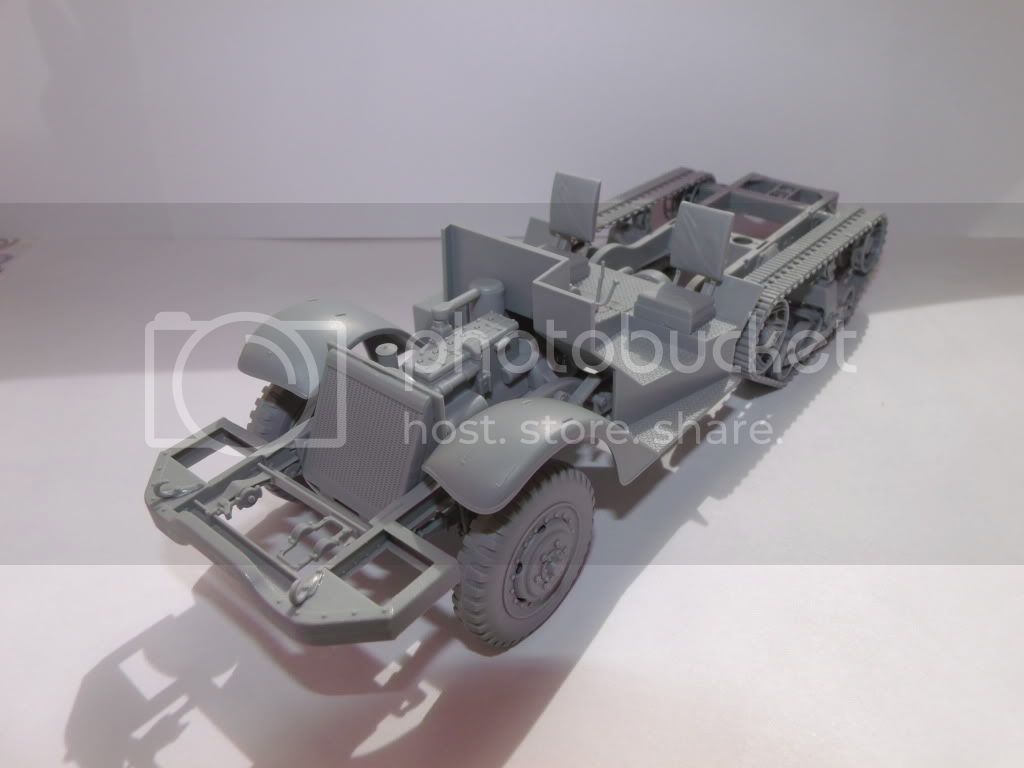
That is were i am now,
later guys

Auckland, New Zealand
Joined: June 01, 2011
KitMaker: 1,716 posts
Armorama: 1,638 posts
Posted: Saturday, June 09, 2012 - 08:41 PM UTC
Quoted Text
"Putting out fires" MEANT, solving and correcting problems created by other incompetent individuals. Not actual fires and NOT burning anything down. I could tell you a story about buying Japanese, but that IS another story.
And, so who's skippy?  Hahahahahaha oh crap man!
~ Jeff
Jeff ,, while putting out fires means solving problems here in NZ putting out fires means exactly that ..putting out a fire ,solving a problem here means fixing other wallies cock ups ..little bit of slang misunderstanding going on here i think mate

Oh damn skippy means means damn right ..thought you might have known that since it was a US Marine who told me it ..liked it ever since ,might be a southern thing .
Phill
I know the voices ain't real but they do come up with some great ideas
Never trust a man who left alone with a tea cozy and doesn't try it on ( Billy Connolly )
Overkill is often very understated
Indiana, United States
Joined: June 10, 2005
KitMaker: 6,188 posts
Armorama: 5,960 posts
Posted: Saturday, June 09, 2012 - 09:18 PM UTC
Oh my FG!
That is so FF I about fell off my F uncomfortable chair here LMFAO!


Hahahahahaha oh crap man!

~ Jeff

Indiana, United States
Joined: June 10, 2005
KitMaker: 6,188 posts
Armorama: 5,960 posts
Posted: Saturday, June 09, 2012 - 09:30 PM UTC
Sorry for going off-track (get it) on my half-track Campaign effort.
I promise some progress pictures soon!

But I am bummed I have to go through this whole delivery operation again when I have a multitude of things I want to do this weekend, STILL!!!
One of them is at least do a little building, because you know if you're a Father you won't get much done next Sunday.
I know it's only $580.00, but it's still $580.00 and I couldn't use it?
UGH!!!!!!!!!!!!!!!!!!!!!!!!!!!!!!!!!!!!
~ Jeff

Auckland, New Zealand
Joined: June 01, 2011
KitMaker: 1,716 posts
Armorama: 1,638 posts
Posted: Saturday, June 09, 2012 - 09:33 PM UTC
I know the voices ain't real but they do come up with some great ideas
Never trust a man who left alone with a tea cozy and doesn't try it on ( Billy Connolly )
Overkill is often very understated
New York, United States
Joined: March 08, 2010
KitMaker: 3,662 posts
Armorama: 3,078 posts
Posted: Sunday, June 10, 2012 - 02:52 AM UTC
Active Campaigns on the bench:
Operation Fall Gelb - Pz.Kpfw. IV Ausf. C
Engineering the Future - M-26 Recovery Vehicle
115 Campaigns completed
Antwerpen, Belgium
Joined: March 31, 2012
KitMaker: 224 posts
Armorama: 67 posts
Posted: Sunday, June 10, 2012 - 03:11 AM UTC
execellent progress Sal

Indiana, United States
Joined: June 10, 2005
KitMaker: 6,188 posts
Armorama: 5,960 posts
Posted: Sunday, June 10, 2012 - 03:28 AM UTC
Sweet work there Sal! Is that an extension on the front of the truck? Never seen it that far extended before. AND, I like the mortar facing that rear direction too!
What time are you swinging by to pick me up for the beerfest?

Okay ... a little too far out of your way, so have a few for me!
~ Jeff
Joel_W
 Associate Editor
New York, United States
Joined: December 04, 2010
KitMaker: 11,666 posts
Armorama: 1,143 posts
Posted: Sunday, June 10, 2012 - 04:17 AM UTC
You guys are making tremendous progress, while I've done next to nothing yet other then study the instruction sheet. I'm hoping to finish this build in less then 3 months, then follow it up with another one.

On my Workbench:
Monogram 1/24 scale 427 Shelby Cobra
Just Completed:
Beemax 1/24 scale BMW M3 E30 1992 Evolution II

#073
Pennsylvania, United States
Joined: October 05, 2002
KitMaker: 2,659 posts
Armorama: 1,512 posts
Posted: Sunday, June 10, 2012 - 07:51 AM UTC
Hey Guys
let me say I'm following your builds closely and they look great. I have a few of these to build myself.
Sal.
Your kit looks great, but I feel I should mention that I don't think the front ditching roller is on correctly.
I checked out my kit directions for my M2A1 (similar kit) and the diagram shows that the round bit you can see at the rear of the bumper assembly that you have even with the grill, should actually be back over the front axle and the bumper should be right in front of the grill.
the storage adds to it nicely.
Delbert

Just Your Everyday Average Model Builder
MichaelSatin
 Campaigns Administrator
Colorado, United States
Joined: January 19, 2008
KitMaker: 3,909 posts
Armorama: 510 posts
Posted: Sunday, June 10, 2012 - 09:23 AM UTC
Well, much against my better judgment, I've enlisted in this campaign. It's against my better judgement because:
1. I've been watching the builds and I know I can't really stack up to the great work I've been seeing here

2. I've got way too much to do already!

But I just can't pass up the opportunity! As I suggested before, I will be using the Dragon 1/35 M3 Halftrack kit:
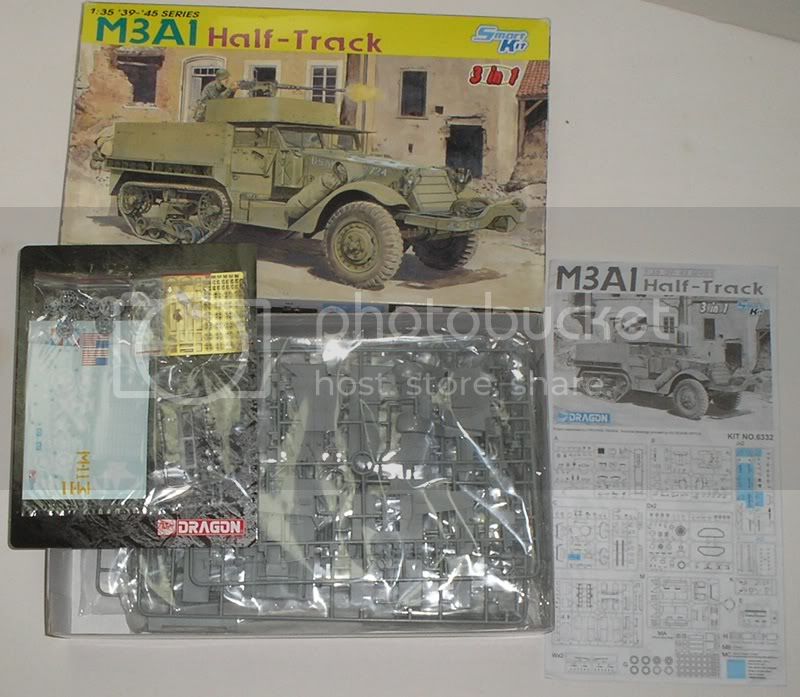
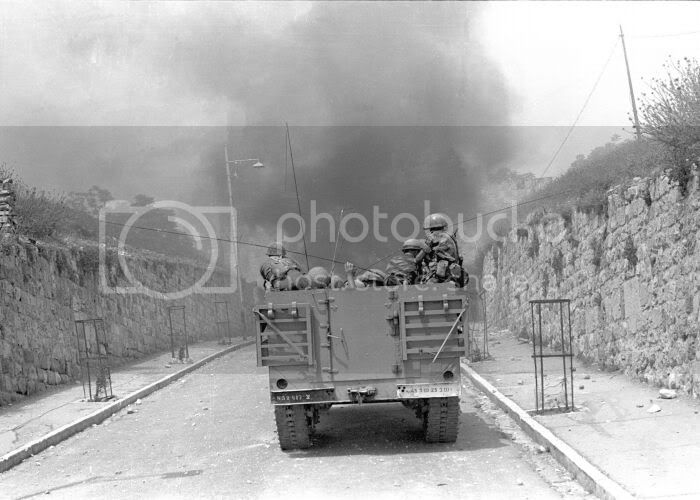
to build Col. Motta Gur's command halftrack during the Battle for Jerusalem in 1967. Gur commanded the 55th Paratroop Brigade during the break-through into the Old City. I have these three period photos:
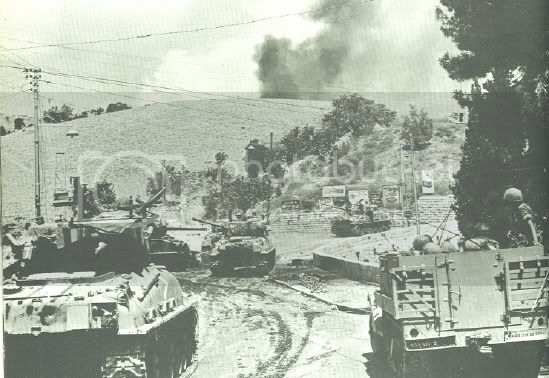
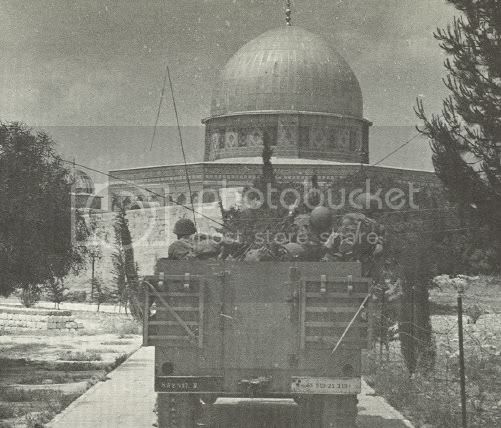
and this one of how it looks today:
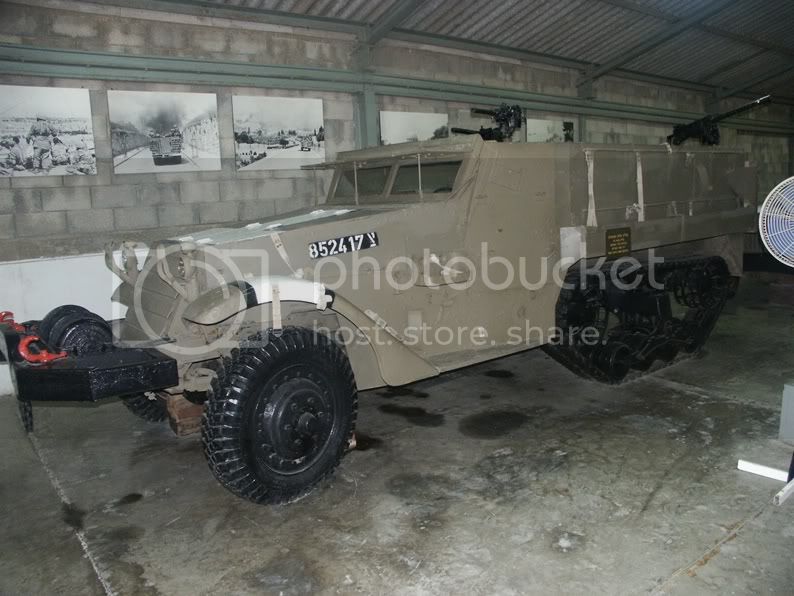
From what I can make out, it had no armament and no antennae during the war, I think all the antennae we can see were from backpack radios. Also, I think I can assume that the running gear and winch, etc. were not painted black at the time.
Oh well, here goes!
Michael
On the bench:
Sorta depends on your definition of "on the bench"...
Michigan, United States
Joined: October 17, 2010
KitMaker: 627 posts
Armorama: 571 posts
Posted: Sunday, June 10, 2012 - 10:15 AM UTC
Okay, a little late, but here is my entry. The 1/35 Dragon M2A1 (kit #6329). I am not quite ready to start, trying to finish my Trumpy E-100 Jagdpanzer. So just to prove not started, here are the requisite photos. Not planning to add any extras to it (at least right now) and not sure which markings I will do.
In box, wrapped with todays (June 10th, 2012) paper.
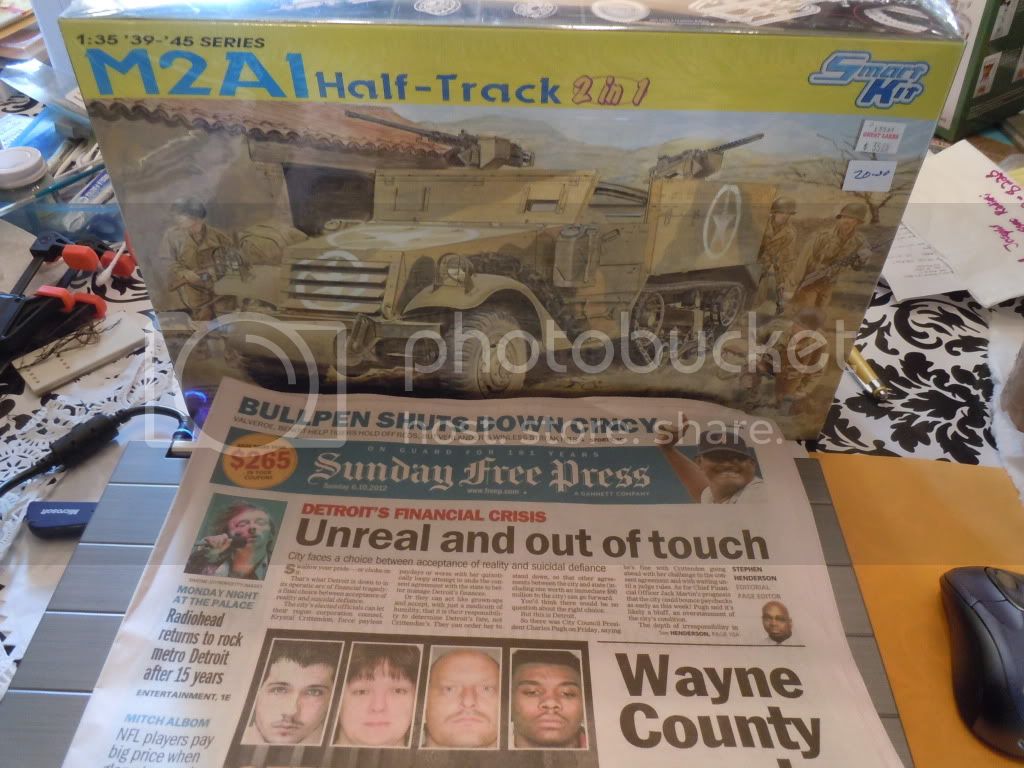
Close up paper

Lots of plastic!
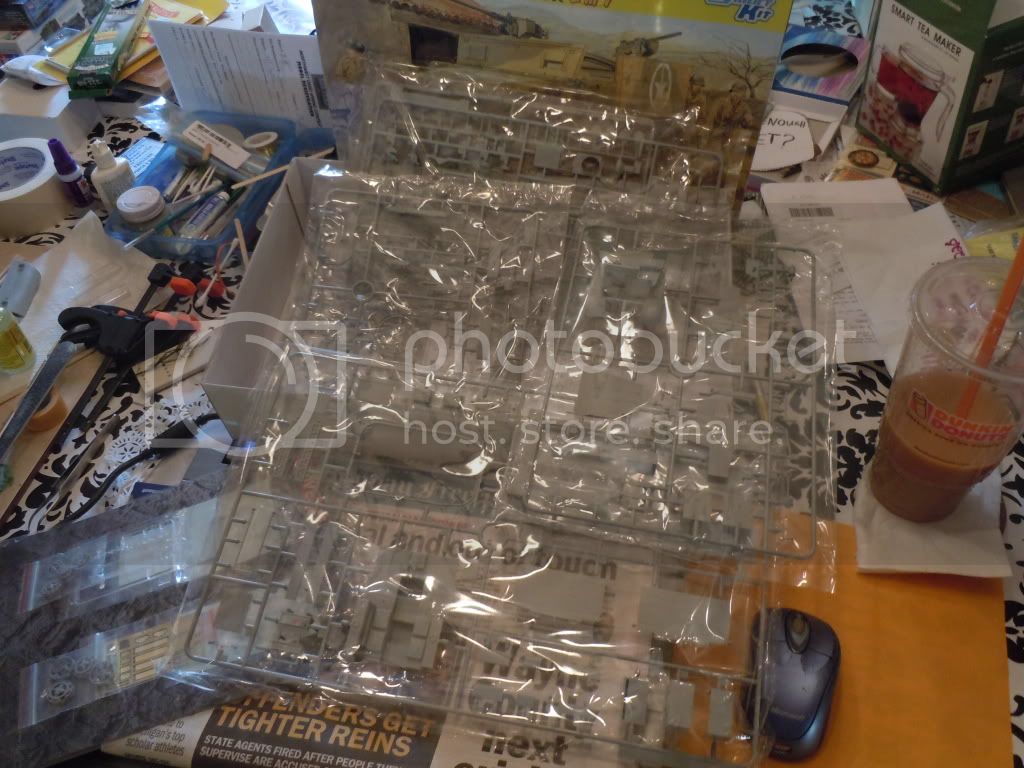
Cheers,
John

#226
British Columbia, Canada
Joined: February 20, 2012
KitMaker: 1,909 posts
Armorama: 1,066 posts
Posted: Sunday, June 10, 2012 - 01:15 PM UTC
I have a question though, on the oval cutouts in the suspension when was that change made?
Cheers Rob.[/quote]
I don't know if anyone saw my question, so am posting it again.

Cheers Rob.
Anything without guns is a target!
27 completed campaigns and counting :)
Indiana, United States
Joined: June 10, 2005
KitMaker: 6,188 posts
Armorama: 5,960 posts
Posted: Sunday, June 10, 2012 - 02:12 PM UTC
Alright John, it's never too late to join!! Dunkin Doughnuts powered, huh?

That's my kinda snack!
I almost changed my mind (I do that a lot) to a ZVEZDA M-3 Armored Scout Car, but after seeing all these neat DML tracked trucks I decided not to. If I finish early I may show the build right here.
~ Jeff
Joel_W
 Associate Editor
New York, United States
Joined: December 04, 2010
KitMaker: 11,666 posts
Armorama: 1,143 posts
Posted: Sunday, June 10, 2012 - 11:32 PM UTC
Just started gluing up the engine last night, and thought about adding some details to it. Then, after looking once again at the instruction sheet from what I can see, that once the engine/transmission is built and installed, you can't see it even if you turn over the model as it seats in a cradle. Is this correct, or am I missing something?
On my Workbench:
Monogram 1/24 scale 427 Shelby Cobra
Just Completed:
Beemax 1/24 scale BMW M3 E30 1992 Evolution II
New York, United States
Joined: March 08, 2010
KitMaker: 3,662 posts
Armorama: 3,078 posts
Posted: Monday, June 11, 2012 - 01:10 AM UTC
Quoted Text
Just started gluing up the engine last night, and thought about adding some details to it. Then, after looking once again at the instruction sheet from what I can see, that once the engine/transmission is built and installed, you can't see it even if you turn over the model as it seats in a cradle. Is this correct, or am I missing something?
Joel, you are correct the engine and tranny are not seen at all as you will notice in the photos below unless you leave the hood up

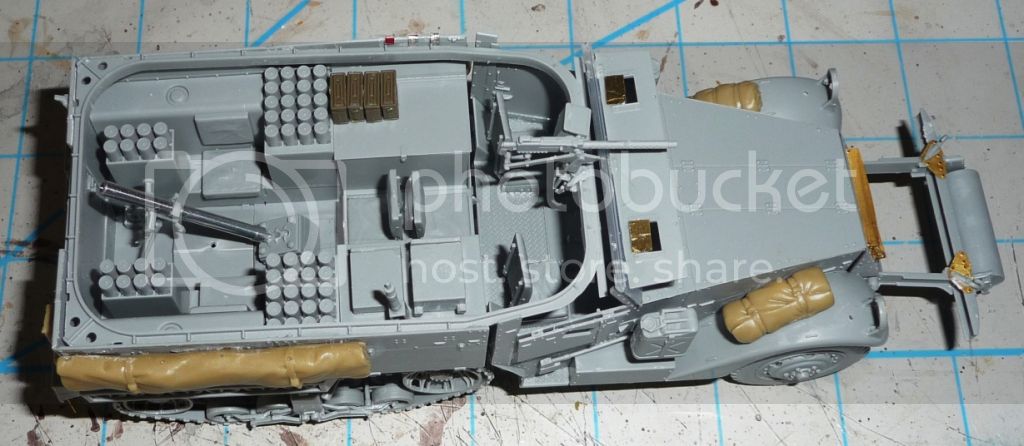
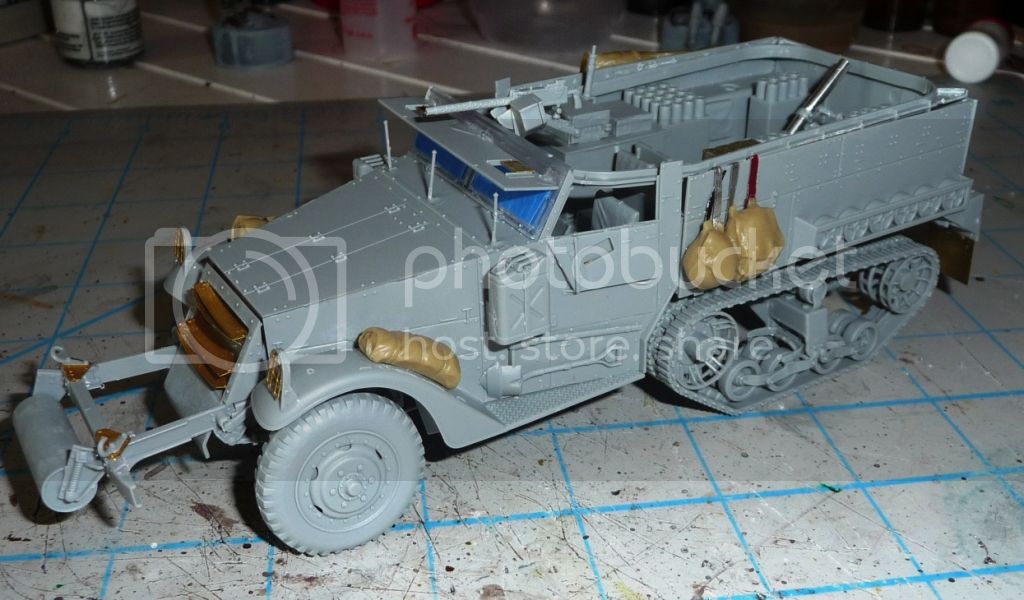
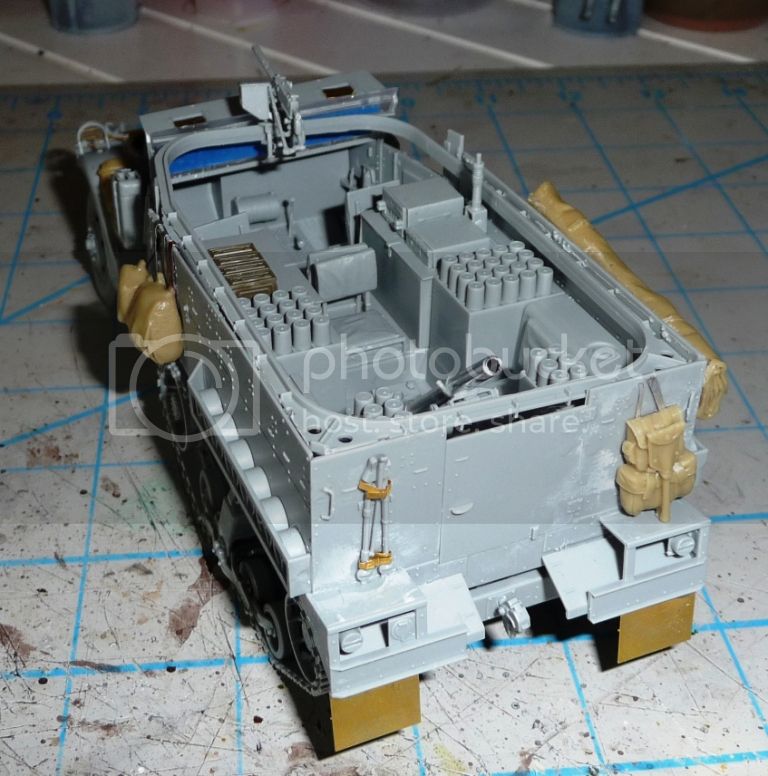
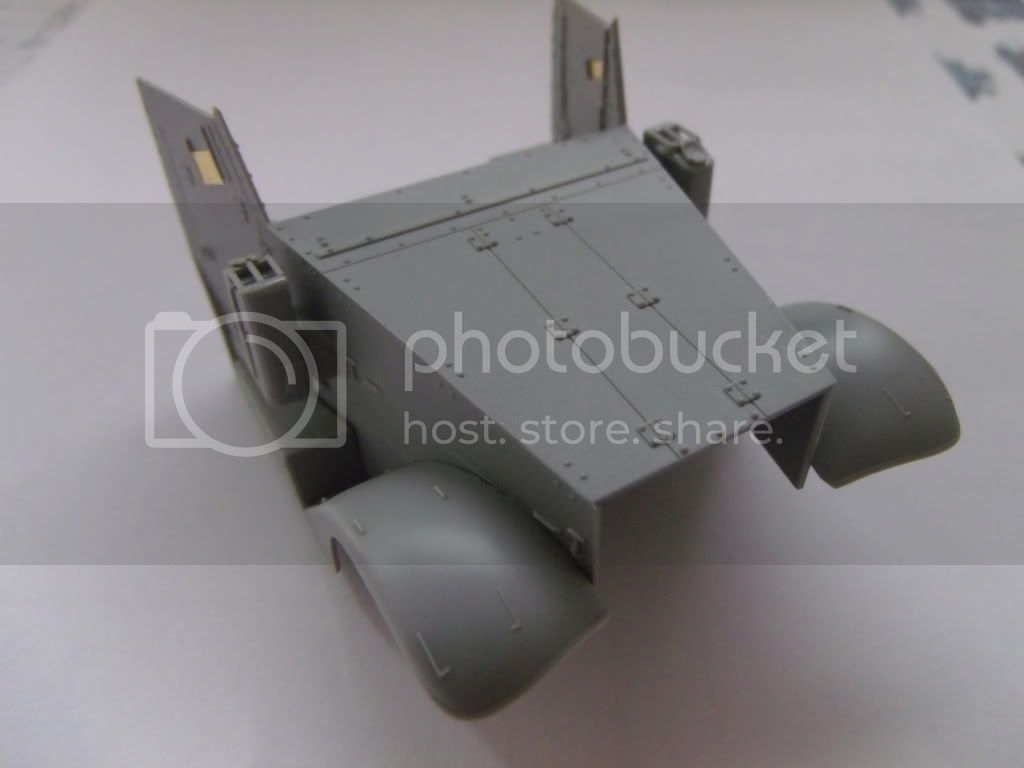
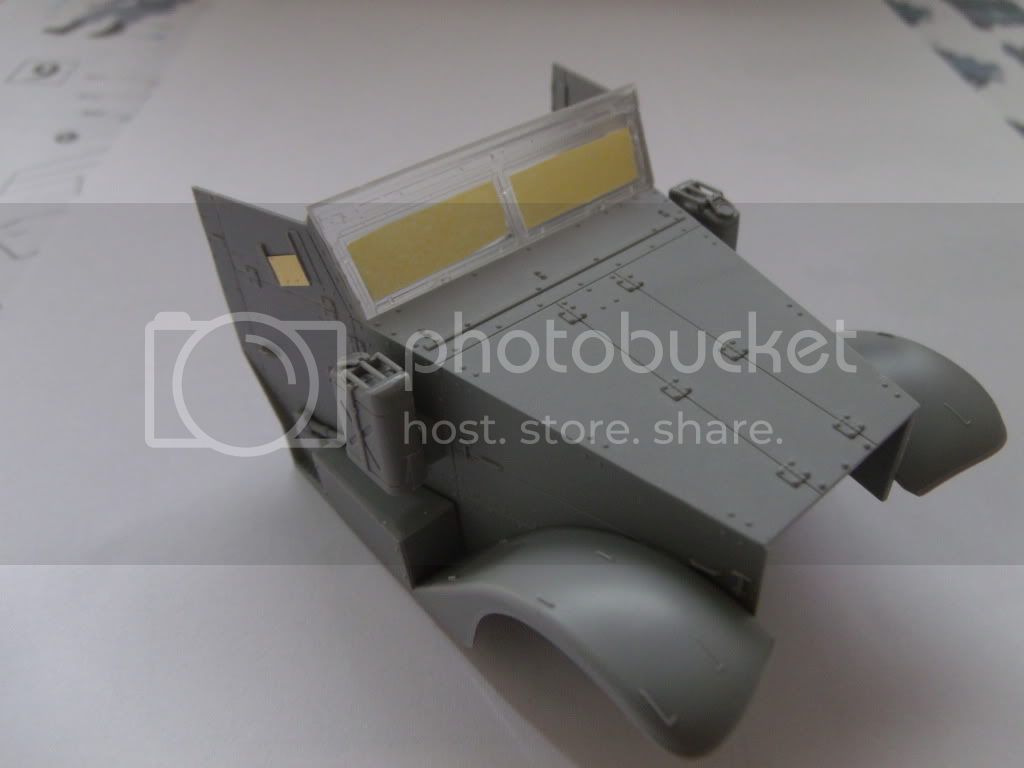
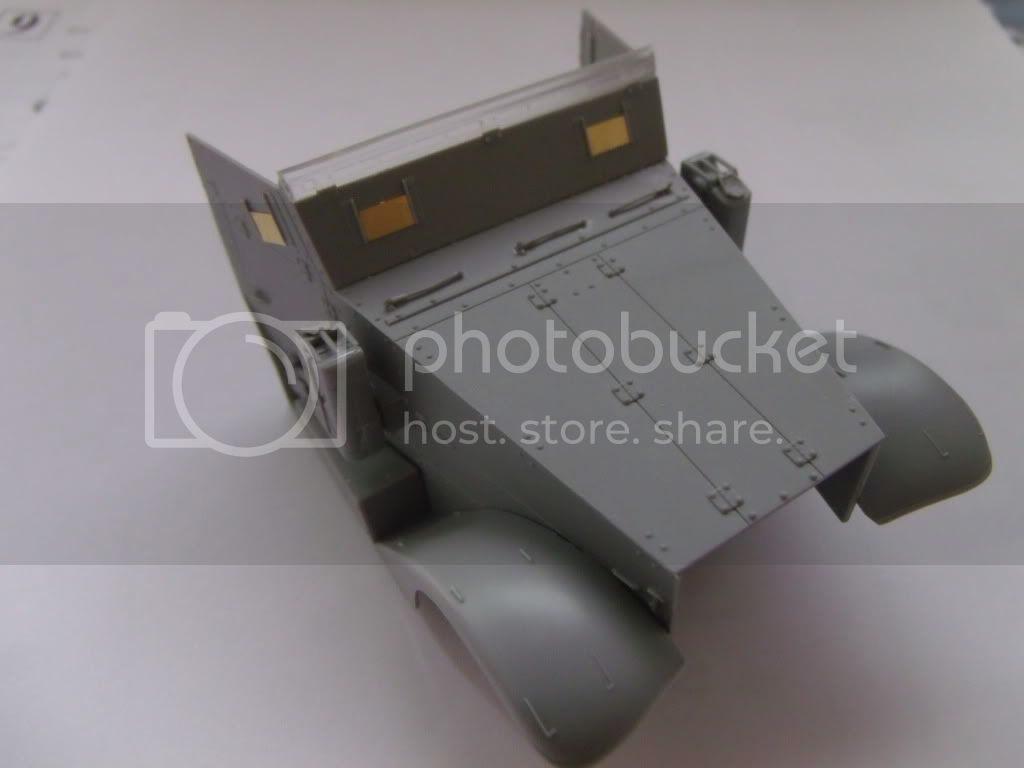
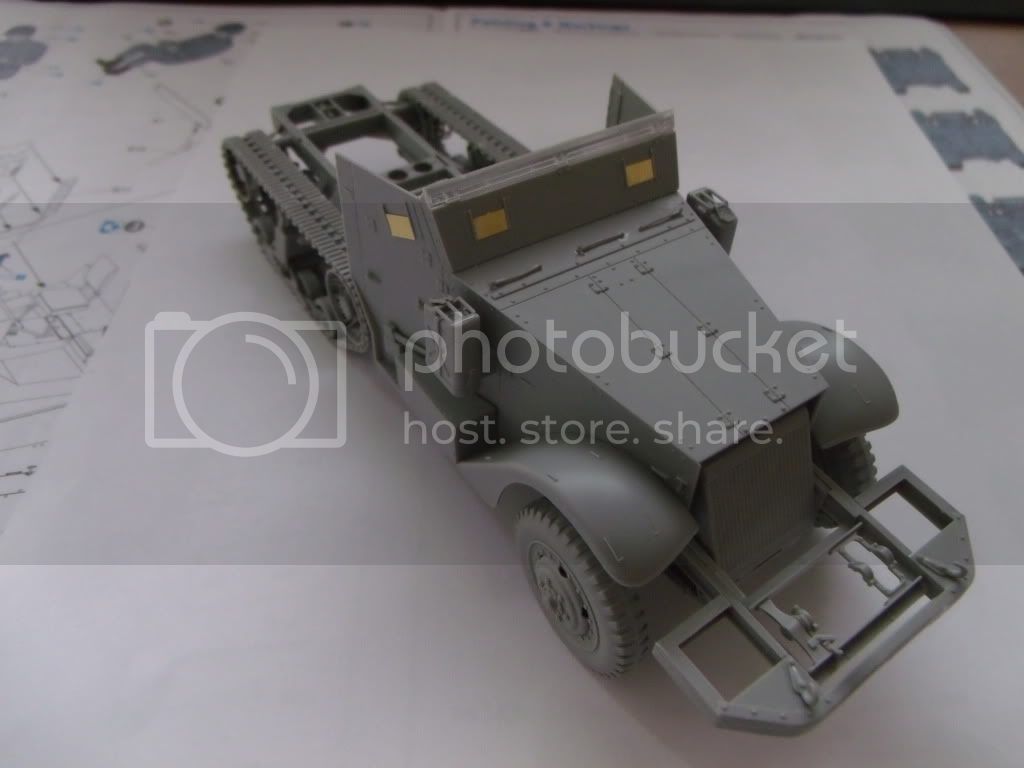
And Yes guys I thought the front roller looked a little to far out there, and I will blame that on the poor instruction sheet that I mentioned earlier


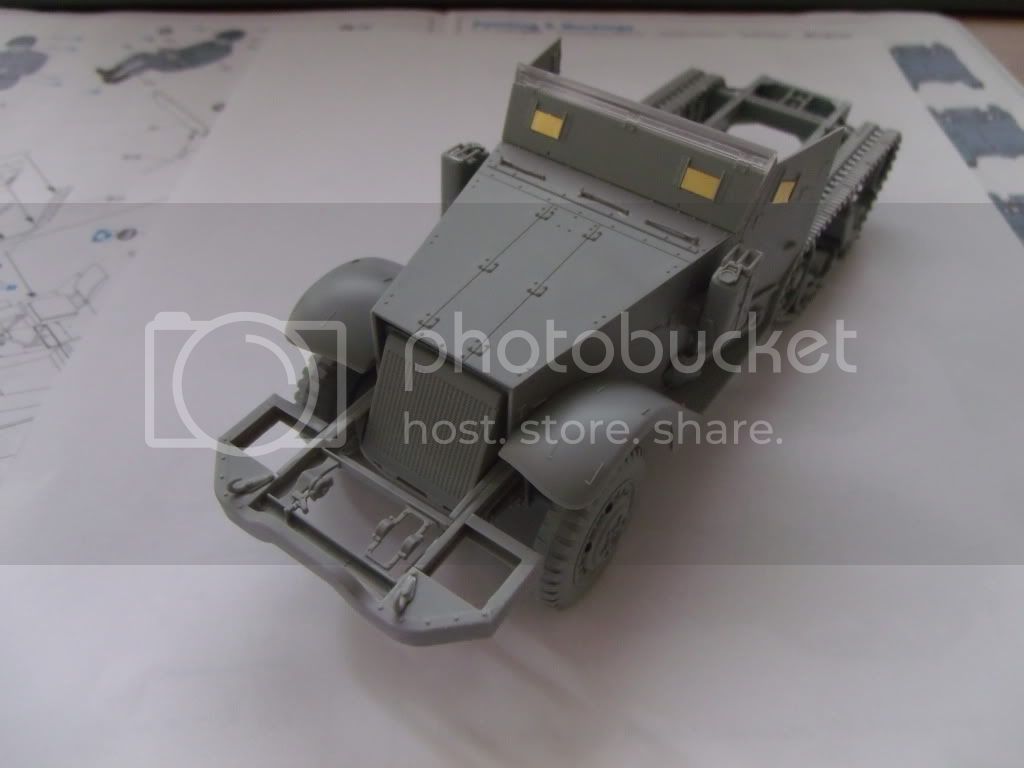
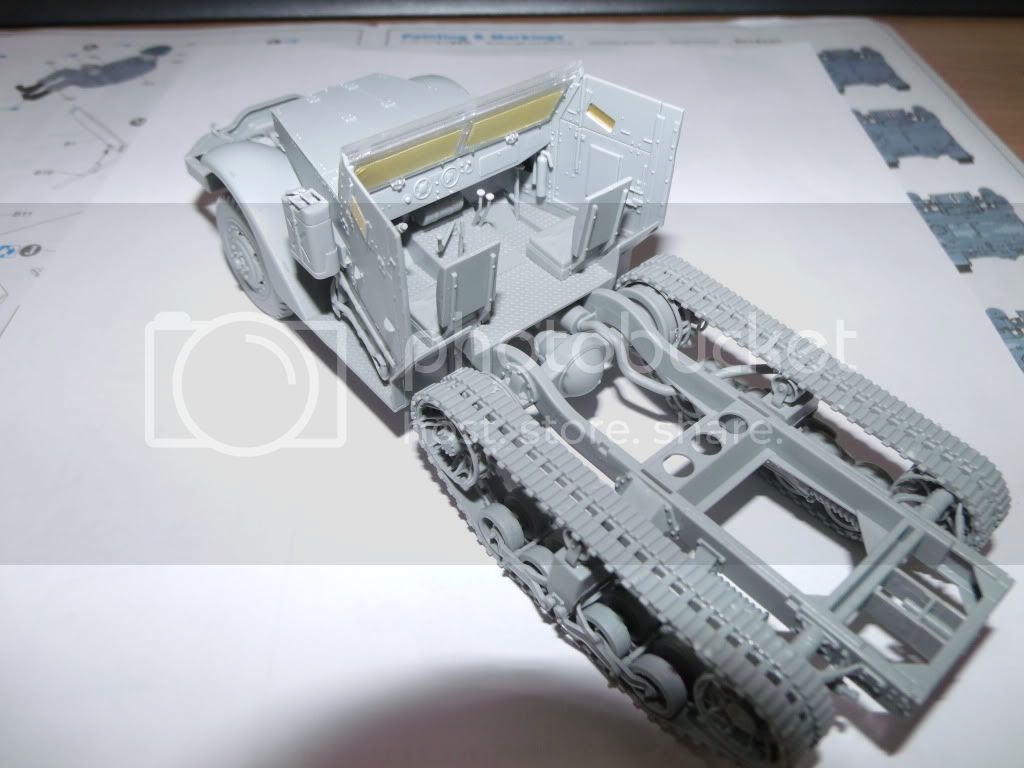
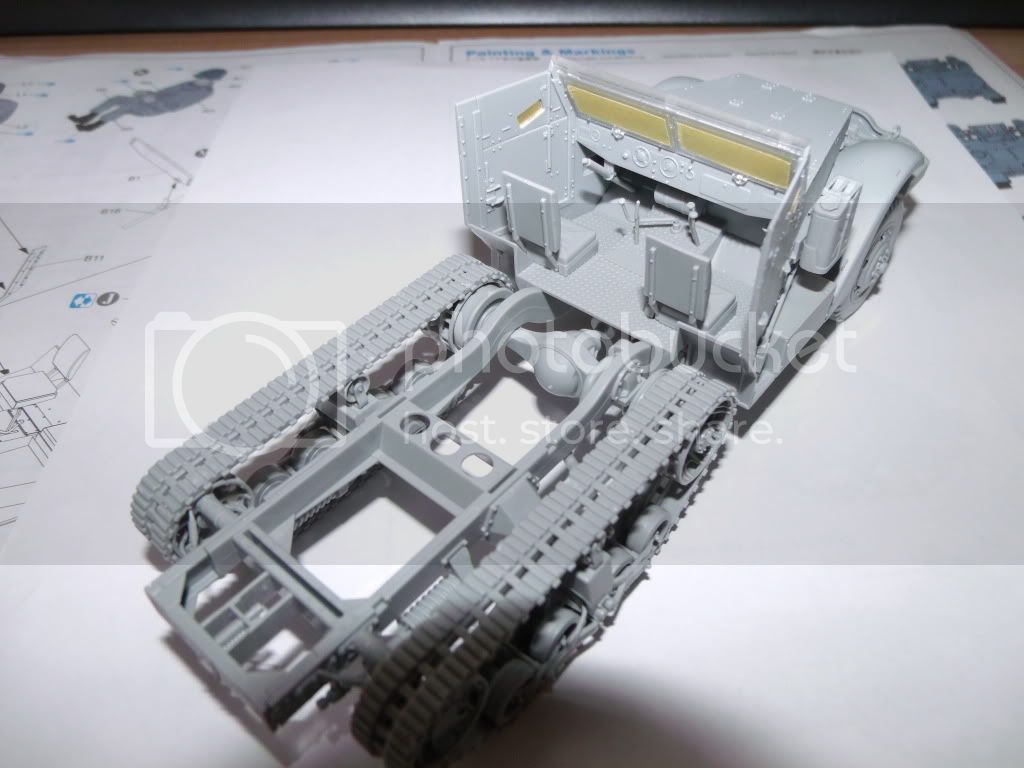
But I am happy to report that surgery was preformed this morning and the correction was made. I also chose to get rid of the grill that used the PE slats and go with the closed plastic 1 as I feel it has more detail to it

So here is the repair
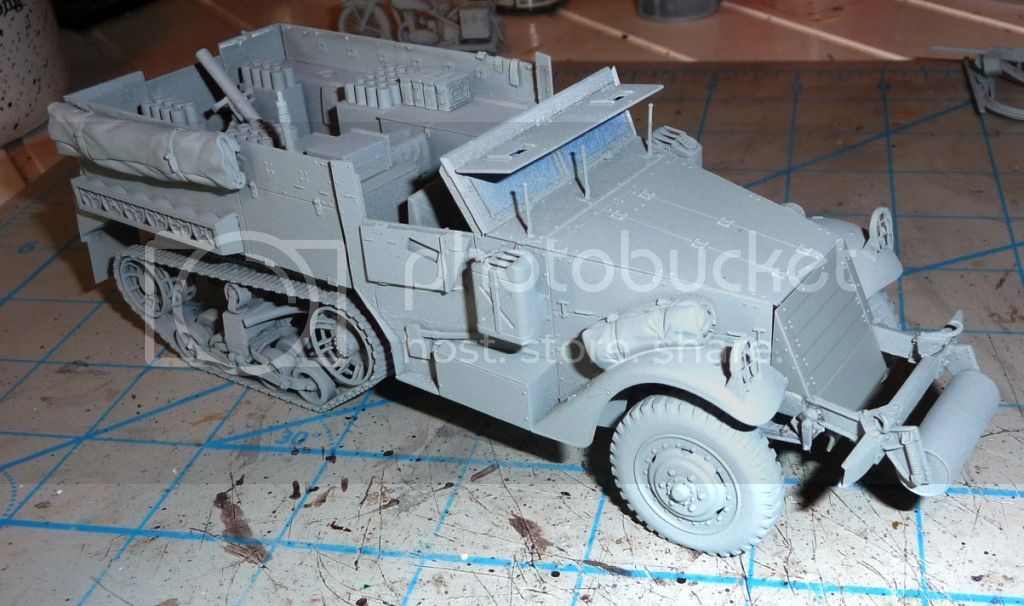
Body parts are still dry fit onto the chassis
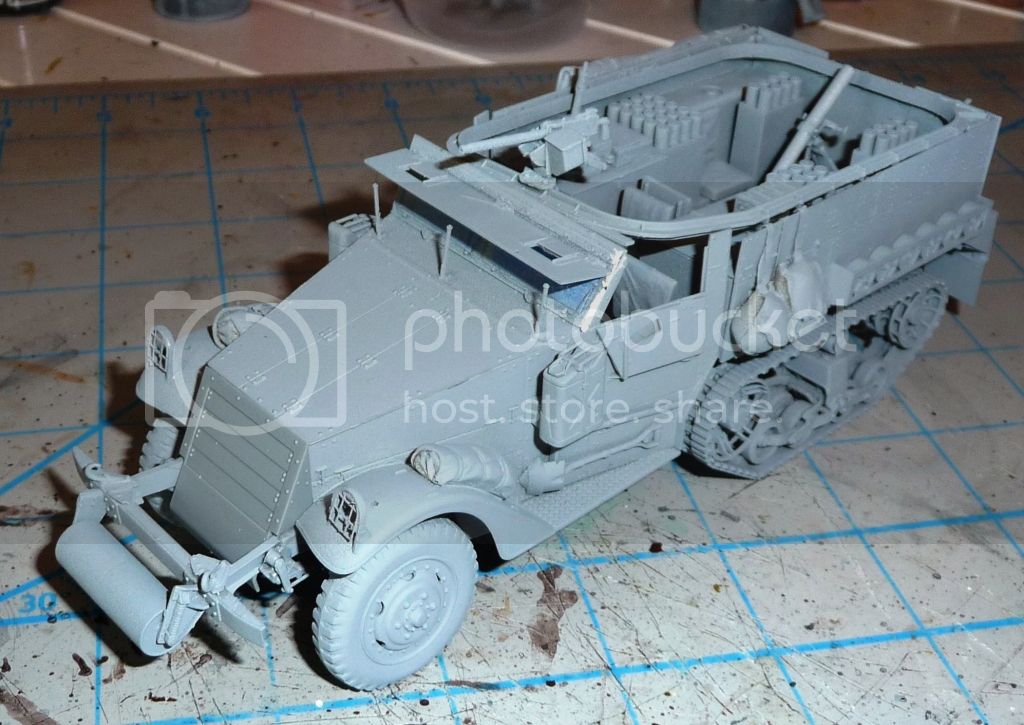
1st coat of OD was sprayed on it this morning as well, so now it will still at least a day. Maybe Ill get some paint on the driver today and start on my D-Day build as well

Active Campaigns on the bench:
Operation Fall Gelb - Pz.Kpfw. IV Ausf. C
Engineering the Future - M-26 Recovery Vehicle
115 Campaigns completed
Antwerpen, Belgium
Joined: March 31, 2012
KitMaker: 224 posts
Armorama: 67 posts
Posted: Monday, June 11, 2012 - 03:44 AM UTC

#186
Texas, United States
Joined: May 24, 2006
KitMaker: 771 posts
Armorama: 750 posts
Posted: Monday, June 11, 2012 - 04:08 AM UTC
Quoted Text
I have a question though, on the oval cutouts in the suspension when was that change made?
Cheers Rob.
I don't know if anyone saw my question, so am posting it again.

Cheers Rob.[/quote]
Rob, I'll look that one up when I get home tonight, but I believe that they were standard from the very beginning. I just got done applying the Griffon update set with the ovals, drain plugs etc this weekend. It was a lot easier than I thought it would be, and really dresses up the kit a lot. I'll try to post some pics tonight.
Tony, Sal and everyone else, nice builds so far!

#186
Texas, United States
Joined: May 24, 2006
KitMaker: 771 posts
Armorama: 750 posts
Posted: Monday, June 11, 2012 - 07:21 AM UTC
I've pretty much finished the chasis and suspension. I'll paint it and the tracks seperately and then put it all together.

I used the Griffon Model update set (L35A035)and it was much easier to use than I thought it would be. Hope you guys like it.


Sorry if the pictures are fuzzy, but they are really close up!

#073
Pennsylvania, United States
Joined: October 05, 2002
KitMaker: 2,659 posts
Armorama: 1,512 posts
Posted: Monday, June 11, 2012 - 07:51 AM UTC
Hello everyone..
Looking good Tony.. love your step by step..
Sal....
Looking good and your making more progress than me, but I have to say I don't think that front roller is quite correct yet..
Here is a photo from my M2A1 kit showing step 7 which shows the placement of the roller and it will be much farther back with the end of the kit piece right above the front axle

I also found a photo of a M4 showing the roller from the side..

Delbert....
Just Your Everyday Average Model Builder
Antwerpen, Belgium
Joined: March 31, 2012
KitMaker: 224 posts
Armorama: 67 posts
Posted: Monday, June 11, 2012 - 05:52 PM UTC
Quoted Text
Looking good Tony.. love your step by step..
Delbert....
Thanks Delbert,
So far everything goes together well, I just need to pay attention, as the instruction are not always correct, but that is common on DML kits these days.
Greet
Tony

 and you damn skippy they GOING to replace it ,,buy Japanese ,,always works


