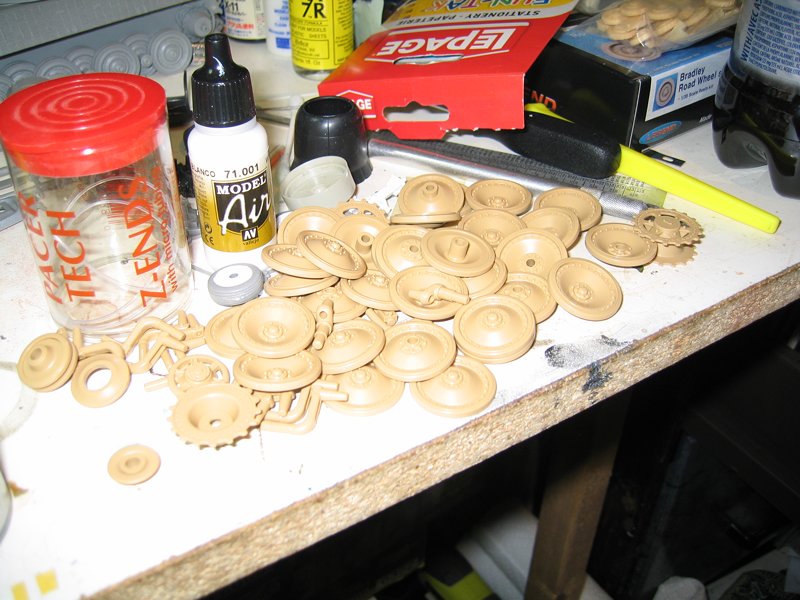
Cool, and the 8´s are two 3´s never thought of that.
Paul
Campaigns
Where Armorama group builds can be discussed, organized, and updates posted.
Hosted by Darren Baker, Richard S.
Big Cats Mk II Campaign
1721Lancers
England - East Anglia, United Kingdom
Joined: March 21, 2012
KitMaker: 1,673 posts
Armorama: 1,640 posts
Joined: March 21, 2012
KitMaker: 1,673 posts
Armorama: 1,640 posts
Posted: Friday, April 05, 2013 - 05:16 AM UTC
bulivyf
Vendor
Praha, Czech Republic
Joined: April 03, 2006
KitMaker: 2,450 posts
Armorama: 2,409 posts
Joined: April 03, 2006
KitMaker: 2,450 posts
Armorama: 2,409 posts
Posted: Monday, April 08, 2013 - 02:55 AM UTC
Hi all,
Today I buy Panther Ausf.G w/steel wheels.
Now I started build.
Today I buy Panther Ausf.G w/steel wheels.
Now I started build.
Nito74
Lisboa, Portugal
Joined: March 04, 2008
KitMaker: 5,386 posts
Armorama: 4,727 posts
Joined: March 04, 2008
KitMaker: 5,386 posts
Armorama: 4,727 posts
Posted: Monday, April 08, 2013 - 03:01 AM UTC
Quoted Text
Hi all,
Today I buy Panther Ausf.G w/steel wheels.
Now I started build.
That's a great kit Miloslav !
gratulace !
Glad you can join this Campaign !
geogeezer
Arizona, United States
Joined: February 17, 2011
KitMaker: 263 posts
Armorama: 258 posts
Joined: February 17, 2011
KitMaker: 263 posts
Armorama: 258 posts
Posted: Wednesday, April 10, 2013 - 03:58 PM UTC
Hi All
Here's an update on my M18 Hellcat build. This is my first AFV kit, and although the quality and detailing are generally very good, the instructions are ambiguous and puzzling. One would think that among the millions of Chinese living on Taiwan who speak excellent English, AFV could find at least one who could write their instructions. Example: B36, B37, B40 Could be adjust the track tighten! or, on page 15, Gun burrel (sic). Another quibble is for some unknown reason, parts which could easily have been molded in one piece must be assembled from two very tiny bits, such as the cocking handle on the .50 Browning MG, although the trigger was molded as part of the grip. Why the top of the hull has two fuel filler caps molded as part of the hull but a third identical filler is a separate part to be glued on is a mystery.
Still, it's coming along, in spite of the instructions, or lack of them. I've resolved a number of problems by checking an M18 on the Jacques Littlefield collection website, a really great source of detailed photos.
The picture below shows the upper and lower hull and the road wheels, sprockets, 76 mm rounds, etc. The transmission and differential are provided, but nothing connects it to the axles. That's all out of sight with the hatches closed but it is a curious omission.
The next two photos show the turret and the parts suspended beneath it, right side up and upside down.
Comments and criticism are welcome.
Cheers
Dick
Nito74
Lisboa, Portugal
Joined: March 04, 2008
KitMaker: 5,386 posts
Armorama: 4,727 posts
Joined: March 04, 2008
KitMaker: 5,386 posts
Armorama: 4,727 posts
Posted: Thursday, April 11, 2013 - 12:11 AM UTC
Great work so far Richard !!
bulivyf
Vendor
Praha, Czech Republic
Joined: April 03, 2006
KitMaker: 2,450 posts
Armorama: 2,409 posts
Joined: April 03, 2006
KitMaker: 2,450 posts
Armorama: 2,409 posts
Posted: Friday, April 12, 2013 - 05:22 AM UTC
Nito74
Lisboa, Portugal
Joined: March 04, 2008
KitMaker: 5,386 posts
Armorama: 4,727 posts
Joined: March 04, 2008
KitMaker: 5,386 posts
Armorama: 4,727 posts
Posted: Friday, April 12, 2013 - 05:38 AM UTC
Nice job Miloslav,
I like the textured tank side & front panels.
bulivyf
Vendor
Praha, Czech Republic
Joined: April 03, 2006
KitMaker: 2,450 posts
Armorama: 2,409 posts
Joined: April 03, 2006
KitMaker: 2,450 posts
Armorama: 2,409 posts
Posted: Saturday, April 13, 2013 - 01:22 AM UTC
bulivyf
Vendor
Praha, Czech Republic
Joined: April 03, 2006
KitMaker: 2,450 posts
Armorama: 2,409 posts
Joined: April 03, 2006
KitMaker: 2,450 posts
Armorama: 2,409 posts
Posted: Sunday, April 14, 2013 - 04:55 AM UTC
Posted: Sunday, April 14, 2013 - 10:22 AM UTC
Well,
After a great deal of sanding the zimmerit is now thin enough to install I am not pleased with the fit of the piece for the glacis, the machine gun opening is shifted up and to one side and at the bottom it's shifted to the other side. I'll make it work also got all the road wheels cleaned and started assembling the lower hull.
Cheers Rob.
After a great deal of sanding the zimmerit is now thin enough to install I am not pleased with the fit of the piece for the glacis, the machine gun opening is shifted up and to one side and at the bottom it's shifted to the other side. I'll make it work also got all the road wheels cleaned and started assembling the lower hull.
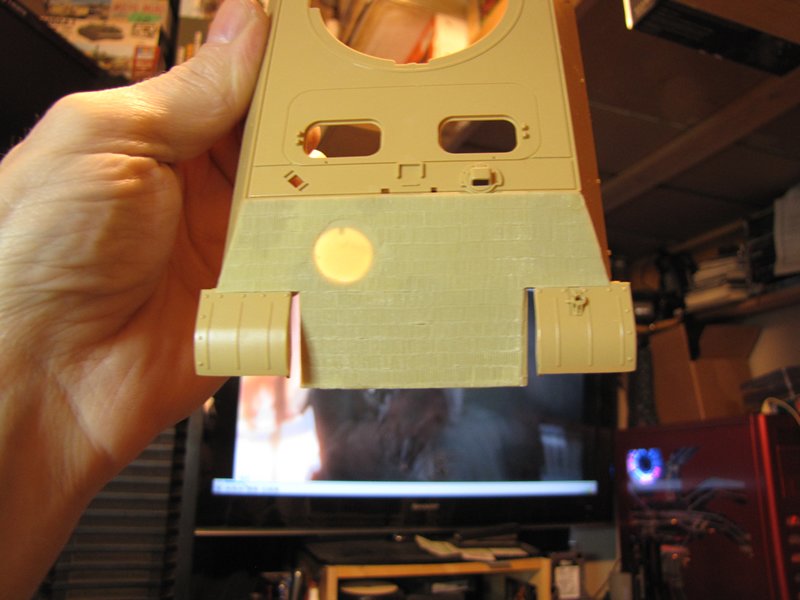
Cheers Rob.
jkb_sprint
Thessaloniki, Greece / Ελλάδα
Joined: April 23, 2012
KitMaker: 402 posts
Armorama: 394 posts
Joined: April 23, 2012
KitMaker: 402 posts
Armorama: 394 posts
Posted: Monday, April 15, 2013 - 09:24 PM UTC
Sal, that's a nice scene you have set there. Good work.
John, i love the camo man it looks great, as well as the weatheing.
Miloslav, nice work. Both cats look great! Waiting to see more.
Rob, good start. I always hate the road wheels part on Panthers and Tigers... , kind of boring. But they always give a very nice and different look from other tanks.
Richard, that Hellcat looks really good. Nice and clean work. Looking forward to see some paint on it.
My Leo is finished. That's the best pics i could get. I will try to get some better ones if i can for the campaign gallery.
John, i love the camo man it looks great, as well as the weatheing.
Miloslav, nice work. Both cats look great! Waiting to see more.
Rob, good start. I always hate the road wheels part on Panthers and Tigers... , kind of boring. But they always give a very nice and different look from other tanks.
Richard, that Hellcat looks really good. Nice and clean work. Looking forward to see some paint on it.
My Leo is finished. That's the best pics i could get. I will try to get some better ones if i can for the campaign gallery.
bulivyf
Vendor
Praha, Czech Republic
Joined: April 03, 2006
KitMaker: 2,450 posts
Armorama: 2,409 posts
Joined: April 03, 2006
KitMaker: 2,450 posts
Armorama: 2,409 posts
Posted: Tuesday, April 16, 2013 - 09:25 AM UTC
Quoted Text
Sal, that's a nice scene you have set there. Good work.
John, i love the camo man it looks great, as well as the weatheing.
Miloslav, nice work. Both cats look great! Waiting to see more.
Rob, good start. I always hate the road wheels part on Panthers and Tigers... , kind of boring. But they always give a very nice and different look from other tanks.
Richard, that Hellcat looks really good. Nice and clean work. Looking forward to see some paint on it.
My Leo is finished. That's the best pics i could get. I will try to get some better ones if i can for the campaign gallery.
Very nice Leo
bulivyf
Vendor
Praha, Czech Republic
Joined: April 03, 2006
KitMaker: 2,450 posts
Armorama: 2,409 posts
Joined: April 03, 2006
KitMaker: 2,450 posts
Armorama: 2,409 posts
Posted: Tuesday, April 16, 2013 - 09:27 AM UTC
bulivyf
Vendor
Praha, Czech Republic
Joined: April 03, 2006
KitMaker: 2,450 posts
Armorama: 2,409 posts
Joined: April 03, 2006
KitMaker: 2,450 posts
Armorama: 2,409 posts
Posted: Tuesday, April 16, 2013 - 09:30 AM UTC
Posted: Tuesday, April 16, 2013 - 10:02 AM UTC
Miloslav,
WOW! Very nice!
Cheers Rob.
WOW! Very nice!
Cheers Rob.
geogeezer
Arizona, United States
Joined: February 17, 2011
KitMaker: 263 posts
Armorama: 258 posts
Joined: February 17, 2011
KitMaker: 263 posts
Armorama: 258 posts
Posted: Tuesday, April 16, 2013 - 05:23 PM UTC
Hi all
A brief update on the M18 Hellcat. Most of the work on the hull and turret is finished, and I gave it a coat of OD paint. The tracks were painted with steel and then aged with rapid rust. The drive sprockets will go on last as clearance for mounting the tracks is very tight.
The first photo is looking down on the hull, turret, and tracks.
The photo below is the left side view of the hull.
Left side view of the turret. I used a spray can cap to support the turret for painting, because the parts beneath are fragile and easily broken. To my surprise, it was a perfect fit. Something similar might be done if one were mounting a tank turret in a diorama of the defenses on the Normandy coast in 1844, or at the Panzer training school where tank turrets were mounted on concrete bases.
Head-on view of hull and turret. I did the weld seam on the bow with a thin strip of styrene and shaped it with a hot blade in a soldering iron. I'm not too happy with the result and may redo it.
The next step is a coat of Future and then decals. This M18 will carry the markings of the 705th Tank Destroyer Battalion which had a major role in the defense of Bastogne in late December, 1944. I haven't yet decided whether to weather it only with mud, as would have been the case at the beginning of the battle, or use whitewash and bedsheets, which were used a few days later following a heavy snow.
More to come soon.
Cheers
Dick
Nito74
Lisboa, Portugal
Joined: March 04, 2008
KitMaker: 5,386 posts
Armorama: 4,727 posts
Joined: March 04, 2008
KitMaker: 5,386 posts
Armorama: 4,727 posts
Posted: Wednesday, April 17, 2013 - 05:51 AM UTC
Nice work on those Panthers & Hellcat !
Great job guys !!!
Great job guys !!!
vdejarnette
Maryland, United States
Joined: February 25, 2013
KitMaker: 209 posts
Armorama: 33 posts
Joined: February 25, 2013
KitMaker: 209 posts
Armorama: 33 posts
Posted: Thursday, April 18, 2013 - 01:47 AM UTC
Update on my Wildcat.
The top side was painted using Vallejo Acrylics from the WII USN Aircraft box set. Decals are from VMF 223 in 1942. The side of the fuselage that can't be seen is still awaiting decals, but the other three sides are done. Almost ready for weathering!
Posted: Friday, April 19, 2013 - 04:21 PM UTC
Beautiful paint job, Miroslav. The armor looks like there are a lot of scratches in it. What is the story behind the groves in the armour?
Not even a Panther tank that has been sitting outside for 50+ years has those kinds of groves in the armor. See link HERE
Nice progress on the Hellcat, Richard.
Great looking Leopard 2, John. That camouflage really came out nice.
Not even a Panther tank that has been sitting outside for 50+ years has those kinds of groves in the armor. See link HERE
Nice progress on the Hellcat, Richard.
Great looking Leopard 2, John. That camouflage really came out nice.
bulivyf
Vendor
Praha, Czech Republic
Joined: April 03, 2006
KitMaker: 2,450 posts
Armorama: 2,409 posts
Joined: April 03, 2006
KitMaker: 2,450 posts
Armorama: 2,409 posts
Posted: Friday, April 19, 2013 - 07:38 PM UTC
Quoted Text
Beautiful paint job, Miroslav. The armor looks like there are a lot of scratches in it. What is the story behind the groves in the armour?
Not even a Panther tank that has been sitting outside for 50+ years has those kinds of groves in the armor. See link HERE
Nice progress on the Hellcat, Richard.
Great looking Leopard 2, John. That camouflage really came out nice.
another photos
jkb_sprint
Thessaloniki, Greece / Ελλάδα
Joined: April 23, 2012
KitMaker: 402 posts
Armorama: 394 posts
Joined: April 23, 2012
KitMaker: 402 posts
Armorama: 394 posts
Posted: Saturday, April 20, 2013 - 12:40 AM UTC
Quoted Text
Great looking Leopard 2, John. That camouflage really came out nice.
Thanks a lot Jesper.
Van, your Wildcat looks really good. Which color did you use for the upper surfaces? It looks very nice.
Richard, nice work on the Hellcat. As for the weathering camo issue, i would say that since M 18's surfaces are rather flat/plain, a whitewash or a nice white sheet camo would make it even more interesting. Anyway you chose to build it is a nice tank!
vdejarnette
Maryland, United States
Joined: February 25, 2013
KitMaker: 209 posts
Armorama: 33 posts
Joined: February 25, 2013
KitMaker: 209 posts
Armorama: 33 posts
Posted: Sunday, April 21, 2013 - 08:20 AM UTC
John, I used Vallejo Model Air 71.109 (Blue Gray M-485/ FS35189). I really like the Model Air products I have used from Vallejo so far. With a little bit of primer they seem to be much more durable than tamiya acrylics which I've found tend to magnify any finger prints you may get on it and flake/scratch easily.
The last Microsol coat is drying on the starboard fuselage insignia where there were a couple problems with wrinkles (why do decal problems tend to happen on the very last one you have to lay down?). I hope to hit it with one last gloss coat to seal the decals and then weather it this week. Almost done!
Mcleod
Alberta, Canada
Joined: April 07, 2010
KitMaker: 1,028 posts
Armorama: 45 posts
Joined: April 07, 2010
KitMaker: 1,028 posts
Armorama: 45 posts
Posted: Sunday, April 21, 2013 - 10:08 AM UTC
geogeezer
Arizona, United States
Joined: February 17, 2011
KitMaker: 263 posts
Armorama: 258 posts
Joined: February 17, 2011
KitMaker: 263 posts
Armorama: 258 posts
Posted: Friday, April 26, 2013 - 08:06 AM UTC
Hi all ,
Making a little progress with the M 18 Hellcat. Coated with Future, decals added, tools and accessories mounted. As is often the case when my models are nearing completion, adding another part results in breaking off two, and that happened as I was installing the tracks. Broke off both idler wheels . My language on that occasion came close to melting the plastic hull. I had to drill out the mounts and wheels and replaced the broken axles with bits of brass tube. Anyway, they're fixed and don't wobble any more.
The photo below shows the left side of the little beast. The canvas mantlet cover was made from tissue moistened with white glue diluted with water and shaped while wet.
The head-on view below shows the mantlet cover and the tow cable. The cable was made from multi-strand picture wire which was chucked in a hand drill and twisted a bit more to tighten it up and make it look more like cable. The cable ends are kit parts, attached with CA glue. I also replaced the fittings to which the cable is attached. The parts supplied in the kit are very different from the shackles shown in combat photos. The white area on the right side of the glacis is glare from the shiny Future coat, not paint.
The picture below shows the right side with tools etc. The folded tripod for the .50 Browning MG was replaced with one .50 MG on the top of the turret will go on last because it is fragile and easily broken off.
The photo below shows the rear of the M 18 with tools etc.
The M 18 with the turret turned and ready for business.
After the decals were sealed and it was too late to correct matters, I saw in the photos that some of the decals are slightly askew, but a splash of mud will fix that. Doctors bury their mistakes, architects plant ivy, and model builders cover them with mud and stowage.
Next step, get rid of the gloss, paint the mantlet cover, and add some stowage. Comments and criticism are always welcome.
Cheers,
Dick
Making a little progress with the M 18 Hellcat. Coated with Future, decals added, tools and accessories mounted. As is often the case when my models are nearing completion, adding another part results in breaking off two, and that happened as I was installing the tracks. Broke off both idler wheels . My language on that occasion came close to melting the plastic hull. I had to drill out the mounts and wheels and replaced the broken axles with bits of brass tube. Anyway, they're fixed and don't wobble any more.
The photo below shows the left side of the little beast. The canvas mantlet cover was made from tissue moistened with white glue diluted with water and shaped while wet.
The head-on view below shows the mantlet cover and the tow cable. The cable was made from multi-strand picture wire which was chucked in a hand drill and twisted a bit more to tighten it up and make it look more like cable. The cable ends are kit parts, attached with CA glue. I also replaced the fittings to which the cable is attached. The parts supplied in the kit are very different from the shackles shown in combat photos. The white area on the right side of the glacis is glare from the shiny Future coat, not paint.
The picture below shows the right side with tools etc. The folded tripod for the .50 Browning MG was replaced with one .50 MG on the top of the turret will go on last because it is fragile and easily broken off.
The photo below shows the rear of the M 18 with tools etc.
The M 18 with the turret turned and ready for business.
After the decals were sealed and it was too late to correct matters, I saw in the photos that some of the decals are slightly askew, but a splash of mud will fix that. Doctors bury their mistakes, architects plant ivy, and model builders cover them with mud and stowage.
Next step, get rid of the gloss, paint the mantlet cover, and add some stowage. Comments and criticism are always welcome.
Cheers,
Dick
Nito74
Lisboa, Portugal
Joined: March 04, 2008
KitMaker: 5,386 posts
Armorama: 4,727 posts
Joined: March 04, 2008
KitMaker: 5,386 posts
Armorama: 4,727 posts
Posted: Friday, April 26, 2013 - 08:58 AM UTC
Great work Rob !!
John, that Leo is great ! Congrats, I love the camo !
Miloslav, those Panthers are fantastic, great camo on the 244 and the texture on the turret on the 211 looks great !
Looking forward to see them finished !
Van, that Hellcat is looking good.
Ben, what a tiny Tiger.. show us the paint job !
Richard, great job on the M18.
Despite the setbacks your Hellcat is superb !