Campaigns
Where Armorama group builds can be discussed, organized, and updates posted.
Paper panzer's, campaign
Nito74
Visit this Community
Lisboa, Portugal
Joined: March 04, 2008
KitMaker: 5,386 posts
Armorama: 4,727 posts
Posted: Sunday, April 28, 2013 - 07:55 AM UTC

Quoted Text


Quoted Text

Welcome Miloslav,

Never saw a Panther with a 150mm assault gun... is it the same as used in the Brummbar ?

Your conversion changes the gun and mantlet ?

You are on a Panther fever lately, Big Cats Camp, Paper Pzrs Camp...


I like Panther. This is my favorite tank.
My very old conversion included Turret & mantlet w/gun (recommended for Tamiya Panther G)
I have still two Panthers. One with 5,5cm AA turret and one wit Flakvierling 4x20mm


Those are also your conversions ?

Can you post some photos of the turret?
Since you recommend it for the Tamiya kit will it fit the Dragon hull ?
bulivyf
Visit this Community
Praha, Czech Republic
Joined: April 03, 2006
KitMaker: 2,450 posts
Armorama: 2,409 posts
Posted: Tuesday, April 30, 2013 - 11:51 PM UTC
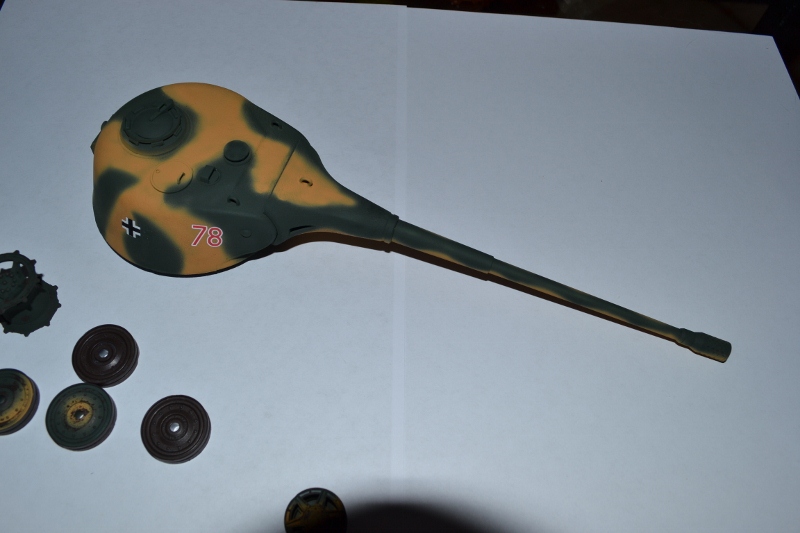
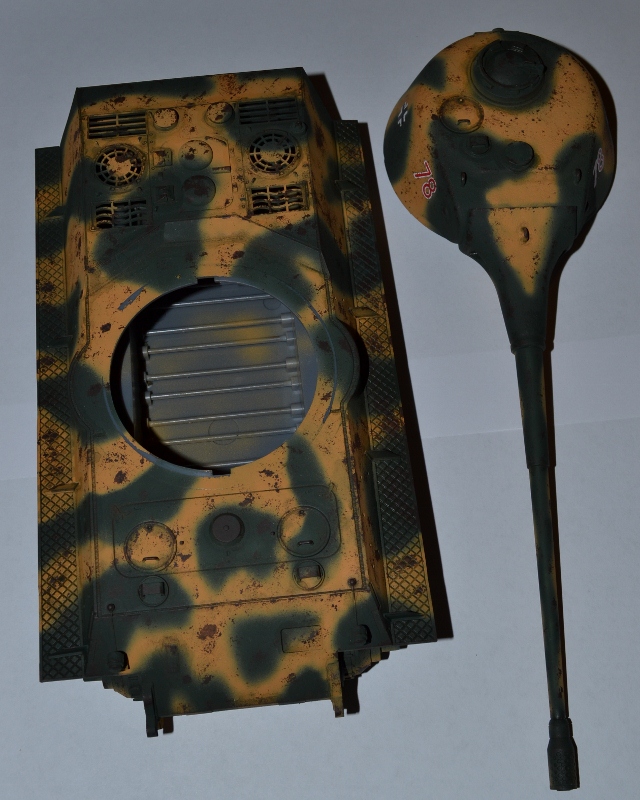
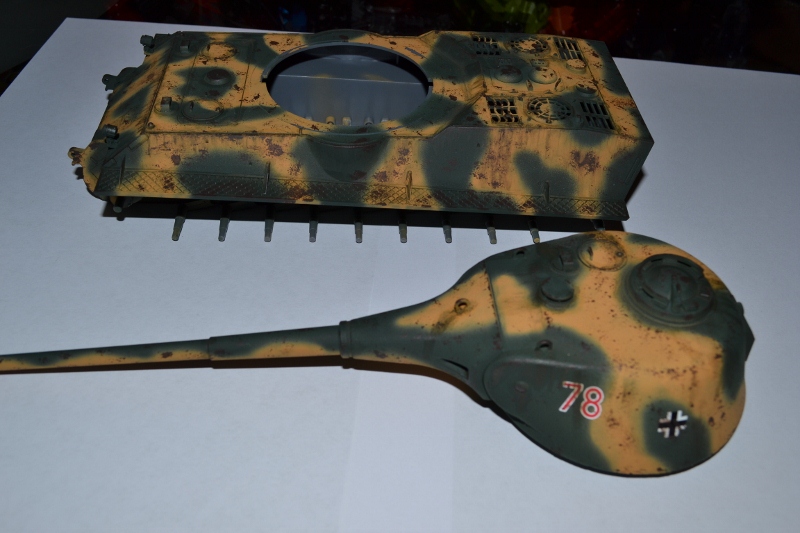
Small update, turret before paint.


MLD
Visit this Community
Vermont, United States
Joined: July 21, 2002
KitMaker: 3,569 posts
Armorama: 2,070 posts
Posted: Wednesday, May 01, 2013 - 01:14 AM UTC
Mine is built and sitting in the box waiting for a block of time to paint/weather. Hopefully I finish here and not in another 'gettr done'...

Mike
tatbaqui
Staff MemberNews Writer
ARMORAMA
#040
Visit this Community
Metro Manila, Philippines
Joined: May 06, 2007
KitMaker: 2,713 posts
Armorama: 2,451 posts
Posted: Thursday, May 09, 2013 - 06:37 PM UTC
Hello,

I have been working on my Trumpeter E-25 entry on an on-and-off basis following my start-up pic from about two months back.

After going through the instructions, I told myself that it should be a nice, simple build such that I might be able to finish the major portions (except the tracks of course) over a weekend. I surely progressed quite fast, and was quite happy that the fit was generally good.

Too good, but some are so good the fit was just sooo tight! The first casualty was the connecting stub for one of the idler assemblies. I broke it following a dry-fit test. Not good for starters I thought -- but I was able to do a fix:


I didn’t bother to fill the gaps on the suspension sub-assemblies since they’d be well hidden once the road wheels are in place. I even marked the sub-assemblies so as to avoid confusion during the installation.

Cheerfully humming along, I proceeded to complete the suspension – glue here, glue there. I then left it to set overnight. Actually I didn’t look at it till after a couple of days. Somehow, it didn’t seem right:


Maybe my eyes were playing tricks on me so I tried (really tried) to fit the roadwheels praying all should be well, but...

So I went back to the instructions – pored over it a couple of times, and silently cursed on how I could have let it happen. I guessed that smart number system of mine contributed to glaring errors. Well, I also thought the instructions were somewhat vague and confusing.

Anyways so much for that – either it goes to the bin, or I go work on a fix. I’ve looked at other E-25 builds / blogs, and got a better idea on how the suspension should be when assembled correctly.

As it was already too late to de-install the sub-assemblies, the hack saw came to the rescue:


Next was to re-position the suspension bits. Took extra time as I kept on having dry runs just to be really sure as I may no longer have another chance at it.

The end-result looks awful and surely nothing to be proud of – but I thought it was better than any other solution. Again, it is good that the road wheels completely cover the suspension details.


Tried on the road wheels. One or two seem to be a bit off. Overall I think I was able to pull it off. I was also happy to note that it sits level on the surface.


What I thought to be an easy weekend build, turned out to be an ordeal. But am quite happy that the kit didn't go to waste. I guess the lesson learned here is not to take things for granted – a build may look simple enough, but it pays to be extra mindful.

To date I have built part of the tracks, and I am currently working to finish some bits on the upper infrastructure. More update pics to come.

Cheers,

Tat
MLD
Visit this Community
Vermont, United States
Joined: July 21, 2002
KitMaker: 3,569 posts
Armorama: 2,070 posts
Posted: Thursday, May 09, 2013 - 11:55 PM UTC
I had a similar problem with mine, but caught it before the glue set. Poor direction indeed. That's my story and I'm sticking to it.
Also, heads up the tracks are almost too short so the idler gets pulled when installing them

Mike
tatbaqui
Staff MemberNews Writer
ARMORAMA
#040
Visit this Community
Metro Manila, Philippines
Joined: May 06, 2007
KitMaker: 2,713 posts
Armorama: 2,451 posts
Posted: Friday, May 10, 2013 - 10:54 AM UTC
Thanks for the heads-up Mike.

I take it that you were referring to the vinyl (or whatever) tracks? Anyways, I've planned to use the indy links provided -- from the last time I counted it should be more than enough... we'll see

Cheers,

Tat
tatbaqui
Staff MemberNews Writer
ARMORAMA
#040
Visit this Community
Metro Manila, Philippines
Joined: May 06, 2007
KitMaker: 2,713 posts
Armorama: 2,451 posts
Posted: Saturday, May 11, 2013 - 01:30 AM UTC
Hello,

As I was going through the motions of fixing my suspension problem, I was also trying to see through what would be a good option for the upper infrastructure. I finally settled on the one with the small turret on top.

The suggested muffler / exhaust layout didn’t appeal to me as much so I looked around on what can be done.

Most of the builds I’ve seen used what was provided with the kit; though I recall seeing one modded with flammenvichters (?). In the end I took inspiration from Mike Rinaldi’s E-25 posted at the ML gallery.

Started with this:


However, as the kit had extra bits for on-board tools, I thought I’d put some of it to use. I’ve also decided not to use the front + rear fender guards -- so the jack block had to find a place at the back. Thus my final configuration came up as:


My attempt to bend wires for the camo / foliage loops:


Just like the jack block the Bosch lamp had to find a new spot. Actually I could have just left it out, but since I’m on the roll for re-configuring stuff on this build, ‘might as well do some more of it.

Well, here's where my wire-bending skills come to a full stop, so I went back to the more familiar stretched sprue


Initially I thought it was awkward to place it beside the driver’s vision slit, so I first looked for some reference pics. I was able to google a Tiger and a Panther with a similar setup, so I guess it was good to go. Though for sure my references were not as close (and high) as I have placed it...

Next for me would be to install the indy tracks. I’m sure there should be some leftover links left that I can use to hang as spares.

Cheers,

Tat
Nito74
Visit this Community
Lisboa, Portugal
Joined: March 04, 2008
KitMaker: 5,386 posts
Armorama: 4,727 posts
Posted: Wednesday, May 29, 2013 - 10:59 PM UTC
Tat, your E-25 is looking great !
Very nice work !

Removed by original poster on 05/30/13 - 11:42:52 (GMT).
PantherF
Visit this Community
Indiana, United States
Joined: June 10, 2005
KitMaker: 6,188 posts
Armorama: 5,960 posts
Posted: Thursday, May 30, 2013 - 01:34 AM UTC
I'd say everyone has done a great job on their project.

It was a Campaign worth saving for sure!


Oh yes! I'll be working on a ribbon for this Campaign very soon, (There's only 1 month left!!!) unless one of you have a design that you want to use? I am an equal opportunist! I'm thinking of just a PP letters in a green background. How's that sound?


~ Jeff
ltb073
Visit this Community
New York, United States
Joined: March 08, 2010
KitMaker: 3,662 posts
Armorama: 3,078 posts
Posted: Thursday, May 30, 2013 - 04:07 AM UTC

Quoted Text

I'd say everyone has done a great job on their project.

It was a Campaign worth saving for sure!


Oh yes! I'll be working on a ribbon for this Campaign very soon, (There's only 1 month left!!!) unless one of you have a design that you want to use? I am an equal opportunist! I'm thinking of just a PP letters in a green background. How's that sound?


~ Jeff


Yes defiantly worth saving I really enjoyed this one
As for a ribbon, not that I know how to make one, how would that PP look on a blueprint background
PantherF
Visit this Community
Indiana, United States
Joined: June 10, 2005
KitMaker: 6,188 posts
Armorama: 5,960 posts
Posted: Thursday, May 30, 2013 - 04:16 AM UTC
I thought about the blueprint/drawings background too Sal, but at that size it won't stand out like you think it would so I just thought a green would be best.

Unless I could be proven wrong?


~ Jeff
tatbaqui
Staff MemberNews Writer
ARMORAMA
#040
Visit this Community
Metro Manila, Philippines
Joined: May 06, 2007
KitMaker: 2,713 posts
Armorama: 2,451 posts
Posted: Thursday, May 30, 2013 - 11:38 AM UTC
John, thanks for feedback! Been very slow on this one, build and pics in all. Anyways I got some benchtime last night, and was able to fill and sand the slots where the fenders should be attached. Will do a final check tonight and I guess it should be off to washing and primer.

Jeff, Sal, and all -- how about pics as alternative ribbon choices?


The PP can replace the balkenkreuz. Either green or blue background should work (I think ). Anyways, I just thought I'd add to adding to the choices list.

Cheers,

Tat
DazzaD
Visit this Community
South Australia, Australia
Joined: June 17, 2007
KitMaker: 235 posts
Armorama: 232 posts
Posted: Friday, June 14, 2013 - 05:05 PM UTC
G'day guys, I am so late in to this campaign that I will post my build just for the fun of it.

My Amusing Hobby Lowe finally turned up (after several weeks of questions). I had been waiting so long for it to turn up, I got stuck into it that night. The kit was extremely easy to build and was much higher quality than I was expecting!

I had the kit built in one day and a single layer of cammo the next, all before I realized I hadn't taken a single picture! The kit is coming together so well and quickly that I have been at it solid for the past few days...

Anyway dribble over time for pictures!

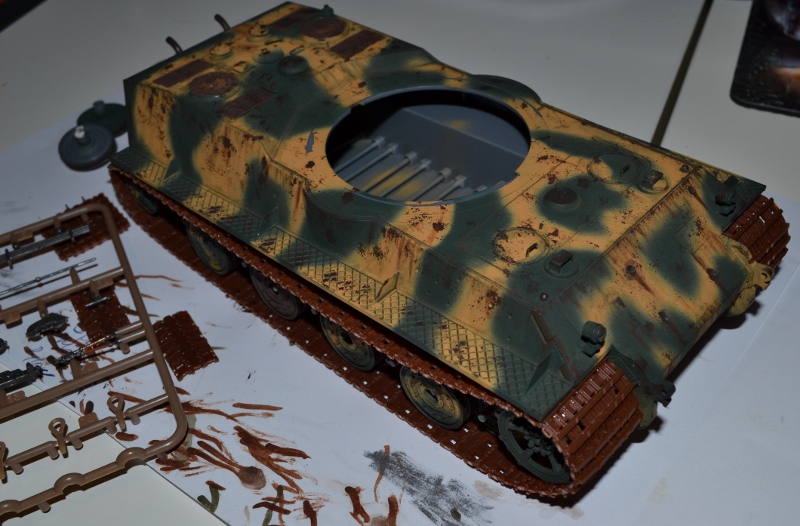
Cammo down:


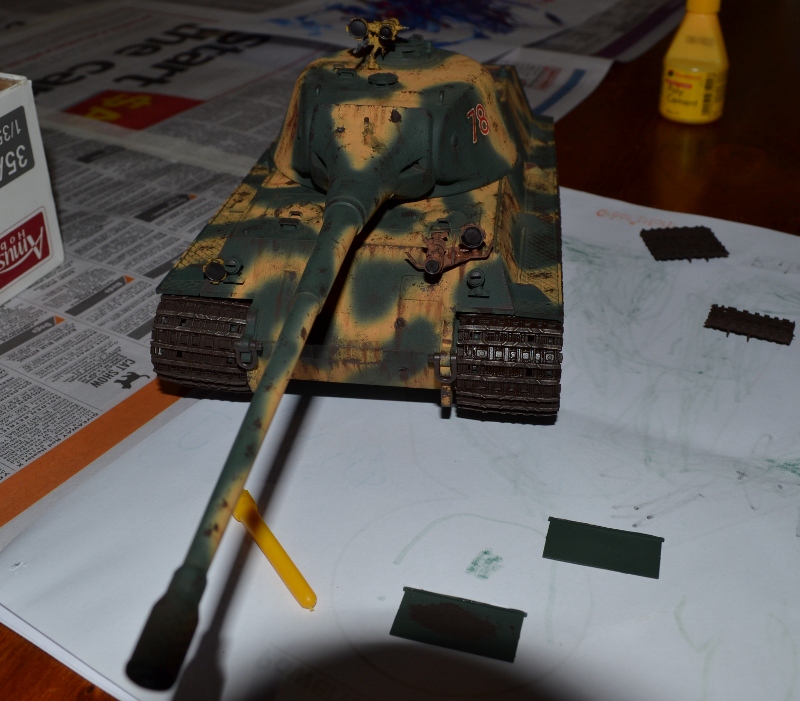
This is my first model I have used AK products on AND LOVING THE EFFECTS! It is something new to experiment with and is looking better than any other model I have built. At this rate it will be my fastest build every AND best! With Chipping added:


With a pin wash added:
DazzaD
Visit this Community
South Australia, Australia
Joined: June 17, 2007
KitMaker: 235 posts
Armorama: 232 posts
Posted: Friday, June 14, 2013 - 05:24 PM UTC
Bugger forgot to click the button on that post this morning!

It is hard to put this kit down now I am playing with the AK gear. Finally getting the results I have been wanting in all my past kits.

Here is todays work...
Some AK Grime streaking:


Some extra grime and rust streaking:


Here is where all my day went today...
One layer on the tracks (still wet but I am not impressed so far but they might look better when dry.)
I built, painted and added the night Vision mods from 'Great Wall Hobby' (Still needs work)
Added some battle damage (shell strikes) and chipped/streaked them.
PantherF
Visit this Community
Indiana, United States
Joined: June 10, 2005
KitMaker: 6,188 posts
Armorama: 5,960 posts
Posted: Friday, June 14, 2013 - 10:27 PM UTC
Tat, that looks great! I'll see what I can do with it!

And DazzaD... man does that look great! I have been interested in that kit but you have made it look better than one can ever expect!


~ Jeff
PantherF
Visit this Community
Indiana, United States
Joined: June 10, 2005
KitMaker: 6,188 posts
Armorama: 5,960 posts
Posted: Saturday, June 15, 2013 - 04:14 AM UTC
Okay... award has been created and placed!


~ Jeff
DazzaD
Visit this Community
South Australia, Australia
Joined: June 17, 2007
KitMaker: 235 posts
Armorama: 232 posts
Posted: Monday, June 17, 2013 - 09:26 PM UTC
Thanks Jeff, I can highly recommend this kit!

I was thinking a kit from a new company was going to be 50/50 at best. This thing when together like any dragon kit I have built and came out looking just as good.

I am actually looking at getting the amusing hobby VK3002 and Leopard next. I have all the 'normal' panzers built and only the paper ones left. These guys are making all the models I need!

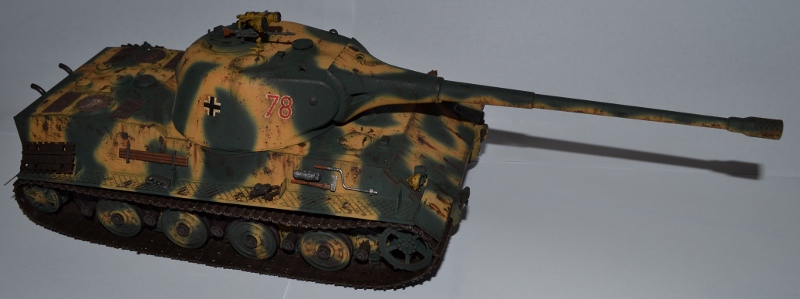
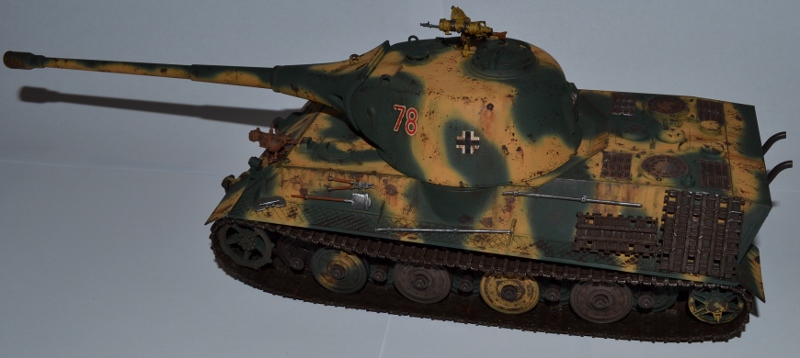
Well, I am callin this one done. Added a little more weathering and tools...


ltb073
Visit this Community
New York, United States
Joined: March 08, 2010
KitMaker: 3,662 posts
Armorama: 3,078 posts
Posted: Monday, June 17, 2013 - 11:09 PM UTC
Hey guys just checked in and there is some great work going on
@Dazzad that Panzer looks great what kit is it and what scale outstanding job
@ Tat and Jeff ribbon looks cool too nice progress Tat
DazzaD
Visit this Community
South Australia, Australia
Joined: June 17, 2007
KitMaker: 235 posts
Armorama: 232 posts
Posted: Tuesday, June 18, 2013 - 03:16 PM UTC
G'day Sal, thanks mate. The kit is the Amusing Hobby 35A005 Lowe 1/35 scale.

Much better kit than I was expecting and the detail was very high. Was one of those kits that just builds itself and then you are disappointed when you finish it so fast
Nito74
Visit this Community
Lisboa, Portugal
Joined: March 04, 2008
KitMaker: 5,386 posts
Armorama: 4,727 posts
Posted: Saturday, June 22, 2013 - 11:28 AM UTC
Great paintjob DazzaD !
DazzaD
Visit this Community
South Australia, Australia
Joined: June 17, 2007
KitMaker: 235 posts
Armorama: 232 posts
Posted: Sunday, June 23, 2013 - 06:38 PM UTC
Thanks mate!

I am now trawling the internet for a cheap VK3002 from Amusing for my next one
MLD
Visit this Community
Vermont, United States
Joined: July 21, 2002
KitMaker: 3,569 posts
Armorama: 2,070 posts
Posted: Monday, June 24, 2013 - 06:23 AM UTC
The E-50 is built and pre-shaded and primed.
not sure how much dk yellow/green I am going to use over this coat.
Will probably pick out a few 'standard' fittings in Dk Yellow for sure, headlight, etc


upper hull is obviously not glued down yet, still have not decided on fenders either.


It's gotten to be a cliche, but I am going to do the dk grey semi-gloss barrel here as well.


The base color is Vallejo Calvary Brown 822(?) lightened up for the panel edges and centers with Vallejo Ivory.I had a third, lighter shade prepared ahead of time, but it started to gel up while I was using these two and I chose to stop here.

24hr cure time, and it's dr yellow and late war light green time.

Mike
Nito74
Visit this Community
Lisboa, Portugal
Joined: March 04, 2008
KitMaker: 5,386 posts
Armorama: 4,727 posts
Posted: Monday, June 24, 2013 - 06:55 AM UTC
I like it Mike.
Very nices colours / tones , I did the same kit for this Campaign.
DazzaD
Visit this Community
South Australia, Australia
Joined: June 17, 2007
KitMaker: 235 posts
Armorama: 232 posts
Posted: Monday, June 24, 2013 - 11:52 AM UTC
Nice paint job Mike, the shading looks really good.

I keep going over board with my first cammo coat which totally cancels out the pre-shading. Need to get better at that... practice makes perfect I guess