Nice work John. I just love Panzer grey.
Pete
Campaigns
Where Armorama group builds can be discussed, organized, and updates posted.
Where Armorama group builds can be discussed, organized, and updates posted.
Hosted by Darren Baker, Richard S.
Panzers Return!
Posted: Friday, November 15, 2013 - 02:02 AM UTC
vanize

Joined: January 30, 2006
KitMaker: 1,954 posts
Armorama: 629 posts

Posted: Friday, November 15, 2013 - 02:41 AM UTC
Here is the kit I've slowly been working on for about a month, Tamiya's Panzer III L in 1/35:

sorry for the delay, but i had to acquire yet another proprietary USB cable for my camera (nayone ever heard of the benefits of standardization??? cellphone companies can do it, why not camera companies?)
anyway, the basic construction goes fast. My only modification so far is to introduce weld seams in some spots and build up the classic tamiya weld trenches in others:

quick question: by IPMS rules, does adding weld beads knock a model out of the OOTB competition category? I suppose it does, despite being a minor thing.

sorry for the delay, but i had to acquire yet another proprietary USB cable for my camera (nayone ever heard of the benefits of standardization??? cellphone companies can do it, why not camera companies?)
anyway, the basic construction goes fast. My only modification so far is to introduce weld seams in some spots and build up the classic tamiya weld trenches in others:

quick question: by IPMS rules, does adding weld beads knock a model out of the OOTB competition category? I suppose it does, despite being a minor thing.

retiredyank

Joined: June 29, 2009
KitMaker: 11,610 posts
Armorama: 7,843 posts

Posted: Friday, November 15, 2013 - 03:03 AM UTC
I wouldn't consider weld beads a minor thing.
vanize

Joined: January 30, 2006
KitMaker: 1,954 posts
Armorama: 629 posts

Posted: Friday, November 15, 2013 - 03:14 AM UTC
well, they do take some time to be sure! but they are small... that sense of minor.
Pytagoras

Joined: December 03, 2012
KitMaker: 300 posts
Armorama: 285 posts

Posted: Friday, November 15, 2013 - 04:04 AM UTC
Those welds are pretty! 
Tiny progress update on my Pzkpfw II:
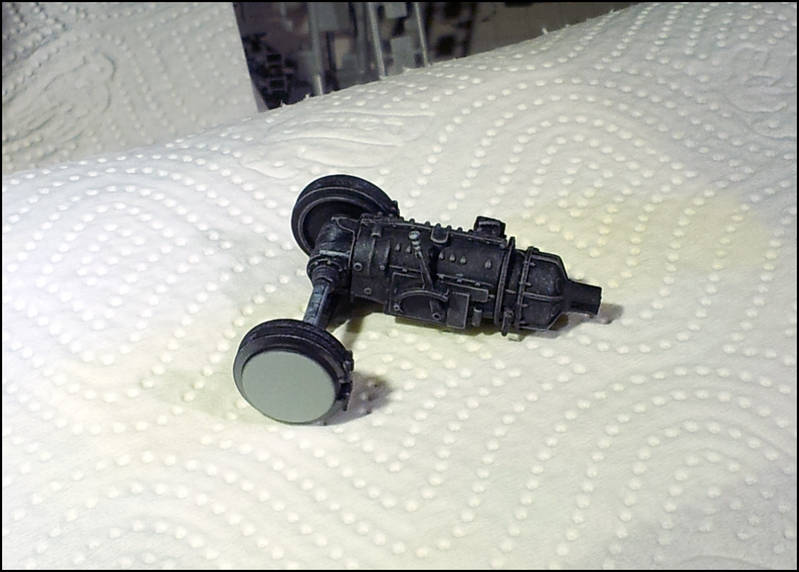
Build is going great at the moment. Some minor adjustments needed for the interior bits, but it should turn out just fine. Still haven't decided on color for the general interior of the tank, though.

Tiny progress update on my Pzkpfw II:

Build is going great at the moment. Some minor adjustments needed for the interior bits, but it should turn out just fine. Still haven't decided on color for the general interior of the tank, though.
Nito74

Joined: March 04, 2008
KitMaker: 5,386 posts
Armorama: 4,727 posts

Posted: Friday, November 15, 2013 - 06:39 AM UTC
Got 1 side of the tracks done. Will let it dry.
Tomorrow I'll touch some paint up, weather them and start the other side...
Photos soon.
For those planning to build this Pz II J, the image on the instructions for the track link count is way off... at least 10 or 12 extra links. Will keep tabs on the other side and let you know the exact number..
Tomorrow I'll touch some paint up, weather them and start the other side...
Photos soon.
For those planning to build this Pz II J, the image on the instructions for the track link count is way off... at least 10 or 12 extra links. Will keep tabs on the other side and let you know the exact number..

nng-nng

Joined: October 22, 2013
KitMaker: 380 posts
Armorama: 376 posts

Posted: Friday, November 15, 2013 - 12:38 PM UTC
construction is almost done by now... went a bit crazy on the hatches (will proof that with pics later), and came to the skirts... that got me a bit thinking but i think I solved the mysterium 

the normal skirts were mounted on brackets using 4 screws per mounting/8 per plate, these seem to be missing on my vehicle, but you can see the remaining holes on the firt three plates (marked with blue). The last Plate seems to lack these, so might be some kind of a replacemet.
All plates share a pair of (maybe) bolts, so this must be the way they´re attatched to the vehicle, not a nice construction, but one that worked

Posted: Friday, November 15, 2013 - 02:50 PM UTC
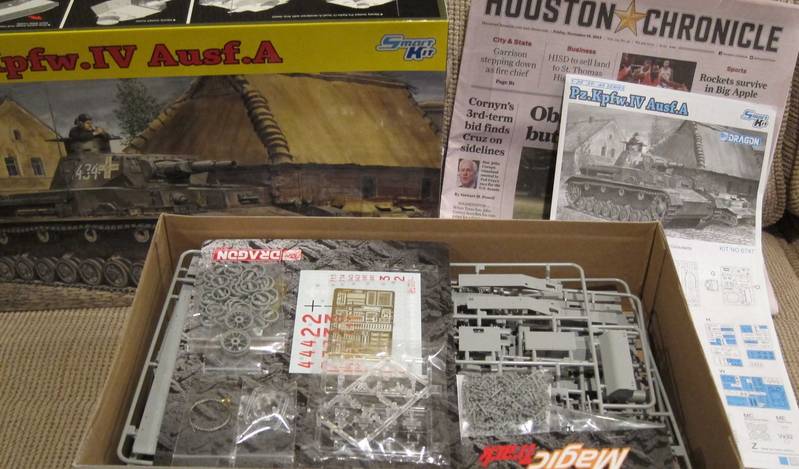
Here are my startup photos for the Pz IV Ausf A

Tom


Tom
alewar

Joined: December 27, 2006
KitMaker: 773 posts
Armorama: 765 posts

Posted: Saturday, November 16, 2013 - 04:06 AM UTC
FirstSergeant

Joined: January 02, 2012
KitMaker: 139 posts
Armorama: 65 posts

Posted: Saturday, November 16, 2013 - 04:22 AM UTC
Greetings,
These are in progress photos of my Tiger I Late Production. Two are of the tank in primer, two more in paint with some wash applied. More photos to come...


Regards,
Firstsergeant
These are in progress photos of my Tiger I Late Production. Two are of the tank in primer, two more in paint with some wash applied. More photos to come...
Regards,
Firstsergeant
Posted: Saturday, November 16, 2013 - 04:57 AM UTC
Alvaro,
nice job on the Pz III. I love those early Pz III's and you're doing a nice job on this one!
nice job on the Pz III. I love those early Pz III's and you're doing a nice job on this one!
Nito74

Joined: March 04, 2008
KitMaker: 5,386 posts
Armorama: 4,727 posts

Posted: Saturday, November 16, 2013 - 07:18 AM UTC
Great work that early PzIII !!
Here's my progress on the tiny Panzer:
Tracks !


Fresh coat of Panzer Grey on the turret:

Tracks covered, added a few tiny PE parts and Primed !!


Here's my progress on the tiny Panzer:
Tracks !


Fresh coat of Panzer Grey on the turret:

Tracks covered, added a few tiny PE parts and Primed !!


retiredyank

Joined: June 29, 2009
KitMaker: 11,610 posts
Armorama: 7,843 posts

Posted: Saturday, November 16, 2013 - 07:20 AM UTC
John: Nice progress on your little panzer.
I should have nice weather, in a few days. I'll try and finish up the running gear, hopefully start on the tracks.
I should have nice weather, in a few days. I'll try and finish up the running gear, hopefully start on the tracks.
Nito74

Joined: March 04, 2008
KitMaker: 5,386 posts
Armorama: 4,727 posts

Posted: Saturday, November 16, 2013 - 07:47 AM UTC
Quoted Text
John: Nice progress on your little panzer.
I should have nice weather, in a few days. I'll try and finish up the running gear, hopefully start on the tracks.
Thanks Matt !
I'm planning very light weathering on this one.
Filter & light wash. Nothing too fancy, OOF (Out of the Factory)

Posted: Saturday, November 16, 2013 - 07:48 AM UTC
OK guys, I'm calling this one done. Here are the final pictures, along with one of it with its "stable mate", a Panzer III Ausf. N from the same time period.


Been a fun campaign, and I'm looking forward to seeing some of the excellent builds still going on cross the finish line!
Been a fun campaign, and I'm looking forward to seeing some of the excellent builds still going on cross the finish line!

retiredyank

Joined: June 29, 2009
KitMaker: 11,610 posts
Armorama: 7,843 posts

Posted: Saturday, November 16, 2013 - 08:03 AM UTC
Guy: Nice choice of camo. And, it looks the part.
Posted: Saturday, November 16, 2013 - 08:12 AM UTC
Quoted Text
Guy: Nice choice of camo. And, it looks the part.
Thanks Matt, and no plastic tow cables this time! I took your advice to heart and ended up using model ship rope. Worked pretty well.
alewar

Joined: December 27, 2006
KitMaker: 773 posts
Armorama: 765 posts

Posted: Saturday, November 16, 2013 - 12:31 PM UTC
Guy:
Thanks for your comments, I like your Pz IV, and more the III N, a hard to find now this kit.
Well done!
Regards
Alvaro
Thanks for your comments, I like your Pz IV, and more the III N, a hard to find now this kit.
Well done!
Regards
Alvaro
alewar

Joined: December 27, 2006
KitMaker: 773 posts
Armorama: 765 posts

Posted: Saturday, November 16, 2013 - 02:08 PM UTC
John, what kind of paint did you use for primer?. I still search for one that really works. Here, its hard to find some paints like Tamiya or Gunze ones
Regards,
Alvaro
Regards,
Alvaro
Nito74

Joined: March 04, 2008
KitMaker: 5,386 posts
Armorama: 4,727 posts

Posted: Saturday, November 16, 2013 - 03:05 PM UTC
Quoted Text
John, what kind of paint did you use for primer?. I still search for one that really works. Here, its hard to find some paints like Tamiya or Gunze ones
Regards,
Alvaro
Hi Alvaro,
I use this :

Petro

Joined: November 02, 2003
KitMaker: 984 posts
Armorama: 846 posts

Posted: Saturday, November 16, 2013 - 03:21 PM UTC
Nice work on that pair of panzers Guy.
Pytagoras

Joined: December 03, 2012
KitMaker: 300 posts
Armorama: 285 posts

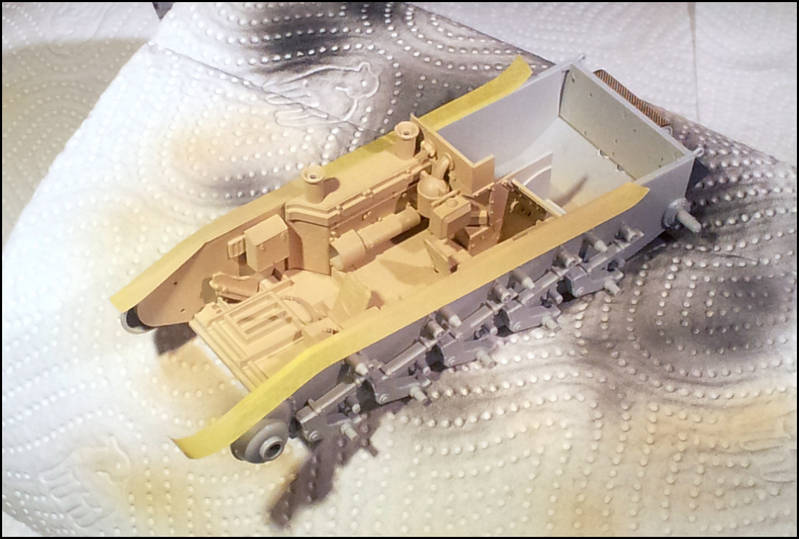
Posted: Sunday, November 17, 2013 - 04:12 AM UTC
Airbrushed the base interior color in my Pzkpfw II B:

Nito74

Joined: March 04, 2008
KitMaker: 5,386 posts
Armorama: 4,727 posts

Posted: Sunday, November 17, 2013 - 07:32 AM UTC
I added the fenders, gave 2 Washes on the tracks too.


You can also see the turret, painted and with some light weathering.
Then I already had primed & painted the last PE details for the fenders.
But some paint got scratched so will have to prime and paint them again.


So I'll let it all dry, repaint the PE parts, add the rest of the equipment, spare track holders & decals and re-filter everything and some light pin wash.
Stay tuned !!!
Almost forgot the link number...
There are 31 x 2 R1 parts ( single link ), the instructions layout says you will use 11 R1 parts for each side.
So I should have 20 extra single links... nope. got 8 left, so you'll end up using some extra 12.


You can also see the turret, painted and with some light weathering.
Then I already had primed & painted the last PE details for the fenders.
But some paint got scratched so will have to prime and paint them again.


So I'll let it all dry, repaint the PE parts, add the rest of the equipment, spare track holders & decals and re-filter everything and some light pin wash.
Stay tuned !!!
Almost forgot the link number...
There are 31 x 2 R1 parts ( single link ), the instructions layout says you will use 11 R1 parts for each side.
So I should have 20 extra single links... nope. got 8 left, so you'll end up using some extra 12.

alewar

Joined: December 27, 2006
KitMaker: 773 posts
Armorama: 765 posts

Posted: Sunday, November 17, 2013 - 11:34 AM UTC
Thanks John
Regards,
Alvaro
Regards,
Alvaro
ZAPanzer

Joined: September 12, 2012
KitMaker: 88 posts
Armorama: 49 posts

Posted: Sunday, November 17, 2013 - 10:03 PM UTC
 |


