Humvees-start your engines!-Official Thread
New Jersey, United States
Joined: October 10, 2003
KitMaker: 783 posts
Armorama: 637 posts
Posted: Monday, November 13, 2006 - 12:53 AM UTC
Quoted Text
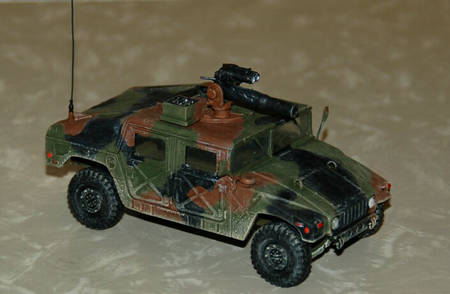
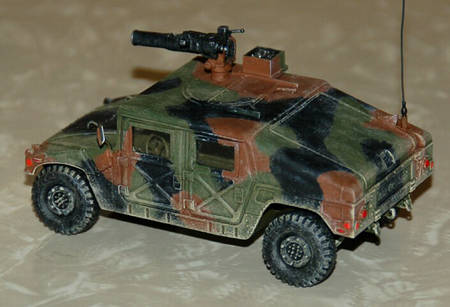
Gary-Your Marine recon humvee looks really ace! I love all the little details, and the crew figures are spot on. The guntruck is also looking very good. Remember all those humvee ideas I proposed I would do, well ive not even finished on yet! oops!
Thanks Rob

I am sorry to hear you havent been able to finish yours yet. I was really looking forward to seeing the Dumvee from Pro Art. I had been kicking around building that one for some time, but never got around to it. Well, you still have another 6-7 weeks to finish those up. I started another gun truck. I picked the kit up on Ebay for $12 shipped, so I couldnt pass it up. So, now I have to finish the M998 gun truck, finish the hardtop gun truck, and I have yet to start the M998 Amazing Grace. But the latter should be a relatively quick build as it doesnt require any real kit bashing or photo etching. So, if all goes well, I should be done with all 4 by the end of the campaign. Then I can start my M1A1 AIM.

England - West Midlands, United Kingdom
Joined: May 19, 2006
KitMaker: 99 posts
Armorama: 98 posts
Posted: Monday, November 13, 2006 - 05:43 PM UTC
England - East Anglia, United Kingdom
Joined: October 09, 2005
KitMaker: 2,556 posts
Armorama: 2,199 posts
Posted: Monday, November 13, 2006 - 06:03 PM UTC
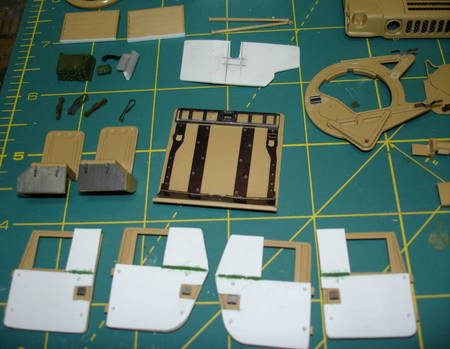
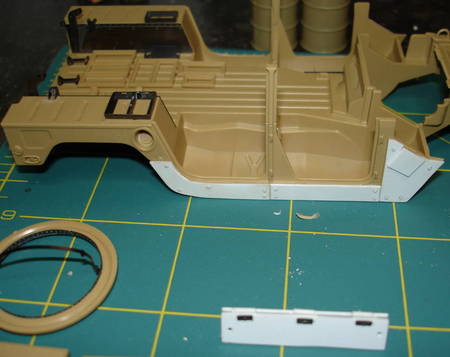
Gareth-It looks like you have some good work going there. Are those doors and things from Verlinden?? I look forward to seeing your progress. AS to your photography, try using a white backdrop and place the model on some white card, get a modelling light and position it away from the modle but so it casts some light onto it without creating too many shadows. Its best not to picture stuff on the sort of surface you ahve, with lots of different coours and clutter about. If the white card doesnt work use some black card, you need to use opposing colours so limited shadows are created and the detail is clearer.
Gary-I think I'll try and get my Dumvee done, by the way it wasnt using the pro art set, mine was done scratch built. Maybe I will post some pics this week and try to get a little done today. Ive got rather distracted with MIGs Hilux and actually traded my other Tamiya humvee model for a load of Taliban figs to go with the Hilux. If I can get one done it will be an achievment!
'As all else failed we raised our fists and weapons,
Not born as soldiers, but driven to the end'
New Jersey, United States
Joined: October 10, 2003
KitMaker: 783 posts
Armorama: 637 posts
Posted: Monday, November 13, 2006 - 07:19 PM UTC
Gareth, is that MIG's M998 conversion?? It is looking really nice so far. Like AFV Rob said though, try using a white or light colored backdrop when taking photos of a dark colored model. I'm not the best photographer either LOL Mostly because there is no real good light source in my house most of the time. Also, personally, I tend to keep towels and cloth away from my works in progress because the lint from them has a strange way of winding up in your paint job

Well, cant wait to see it finished.
Rob, you were "scratch building" that Dumvee?!?! Wow! Thats a lot of work and patience! But then again, you definitely have that talent. I recall the detailed interior pictures of that Bradley you were working on. Superb. Did you finish that one yet? I saw that Hi Lux kit. Looks sweet. How is it to build???
Well everyone, keep building, we've got a bit more then 7 weeks to finish these up! Have fun!

England - West Midlands, United Kingdom
Joined: May 19, 2006
KitMaker: 99 posts
Armorama: 98 posts
Posted: Monday, November 13, 2006 - 08:44 PM UTC
hi Rob,hi Gary,thanks for the advice and ill give that a go,and thanks for you words of enguragment iv never sshown my work to anyone and now i cant wait to get it finished and show every one,yes Gary its the MIG M998 conversion.
How does the scoring at the end of the campain work?
talk to you again
Alberta, Canada
Joined: October 13, 2004
KitMaker: 1,683 posts
Armorama: 1,248 posts
Posted: Tuesday, November 14, 2006 - 02:24 AM UTC
I am husband to Rosemary, the Barbarian Queen Of The North!
"Veni, Vidi, Velcro".... ("I came, I saw, I stuck around")
New Jersey, United States
Joined: October 10, 2003
KitMaker: 783 posts
Armorama: 637 posts
Posted: Tuesday, November 14, 2006 - 05:55 AM UTC
Wow, nice build Bob. How did you manage to hollow out the barrel of the Mk19 and the M16 receiver??

Alberta, Canada
Joined: October 13, 2004
KitMaker: 1,683 posts
Armorama: 1,248 posts
Posted: Tuesday, November 14, 2006 - 08:23 PM UTC
Thanks Gary
I wanted to show the M16 without the mag so I cut it off and drilled out what was left with a small drill bit in my trusty pin vise. I then cleaned the rest out with the point of a number 11 blade and a fine square-ended needle file. The Mk19 was a different story. I took too much away from the muzzle before I re-checked my references and realized I had to put some back. I used fine stretched sprue, some liquid Glue (Ambroid Pro-Weld to the rescue again) and sanded it back to shape. All the weapons are drilled out in the usual manner with a small drill bit and pin vise.
I have a set of very fine needle files that I had for so long I don't even remember where I got them. They are among the handiest tools that I have.
I'll try and post some close-up shots this weekend....

Bob
I am husband to Rosemary, the Barbarian Queen Of The North!
"Veni, Vidi, Velcro".... ("I came, I saw, I stuck around")
Removed by original poster on 11/15/06 - 22:36:43 (GMT).
Removed by original poster on 11/16/06 - 00:18:00 (GMT).
Ohio, United States
Joined: June 04, 2005
KitMaker: 627 posts
Armorama: 455 posts
Posted: Tuesday, November 14, 2006 - 10:07 PM UTC
New Jersey, United States
Joined: October 10, 2003
KitMaker: 783 posts
Armorama: 637 posts
Posted: Wednesday, November 15, 2006 - 05:59 AM UTC
Quoted Text
Thanks Gary
I wanted to show the M16 without the mag so I cut it off and drilled out what was left with a small drill bit in my trusty pin vise. I then cleaned the rest out with the point of a number 11 blade and a fine square-ended needle file. The Mk19 was a different story. I took too much away from the muzzle before I re-checked my references and realized I had to put some back. I used fine stretched sprue, some liquid Glue (Ambroid Pro-Weld to the rescue again) and sanded it back to shape. All the weapons are drilled out in the usual manner with a small drill bit and pin vise.
I have a set of very fine needle files that I had for so long I don't even remember where I got them. They are among the handiest tools that I have.
I'll try and post some close-up shots this weekend....

Bob
Thats pretty clever hjow you did the M16 receiver. I cant say I have seen anyone do that before. I also drill out my barrels whenever possible, but I can never seem to get the pin vise perfectly centered enough to go so far as to see the holes in the flash suppressors. Yours came out very well. nice touch!

England - West Midlands, United Kingdom
Joined: May 19, 2006
KitMaker: 99 posts
Armorama: 98 posts
Posted: Thursday, November 16, 2006 - 03:56 PM UTC
hey rob,if i enter more than one model do they all count or is it just one?
England - East Anglia, United Kingdom
Joined: October 09, 2005
KitMaker: 2,556 posts
Armorama: 2,199 posts
Posted: Thursday, November 16, 2006 - 05:05 PM UTC
You can enter in as many models as you want, its not really a competition but more of a group build, as long as you get at least one model complete you will get a campaign ribbon to signify you have completed this build.
'As all else failed we raised our fists and weapons,
Not born as soldiers, but driven to the end'
New Jersey, United States
Joined: October 10, 2003
KitMaker: 783 posts
Armorama: 637 posts
Posted: Thursday, November 16, 2006 - 08:30 PM UTC
Here are a few more in progress pictures of Humvee #2
Here is a good picture of the rear straps, scratch built shocks and springs, and chasis attached to the body
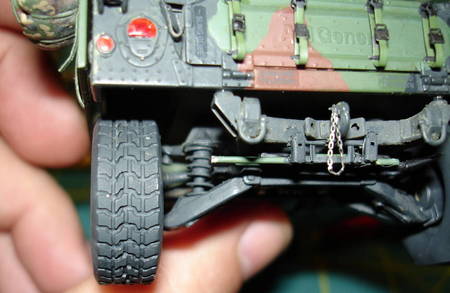
In this picture, you can see the scratch built winch cable, the scratch built front shocks and springs, and the tires turned. You'll notice the right tire turns a bit more then the left as they would in real life.
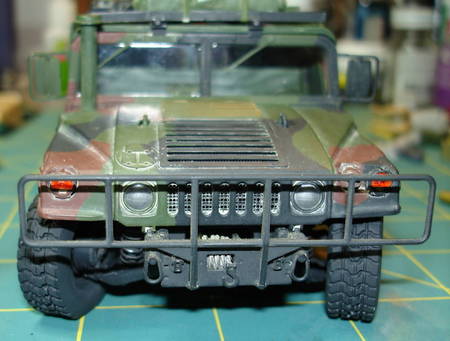
Here is the cab interior. Its kinda hard to see (and photograph) the seat belts.
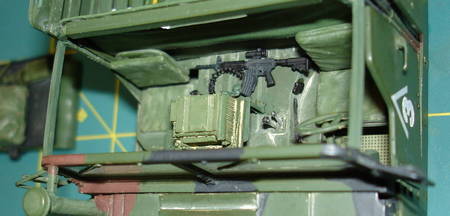
This is just an overall profile shot of the whole thing.
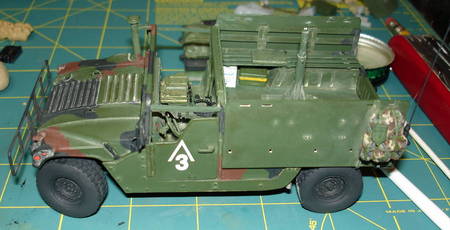
Hope you guys like the pictures

New Jersey, United States
Joined: October 10, 2003
KitMaker: 783 posts
Armorama: 637 posts
Posted: Thursday, November 16, 2006 - 08:37 PM UTC
Indiana, United States
Joined: January 28, 2004
KitMaker: 2,716 posts
Armorama: 1,864 posts
Posted: Friday, November 17, 2006 - 01:21 AM UTC
Gary, that is very impressive. Keep it up.
Jeff
Sua Sponte - Ranger Challenge 2006
A person does not grow old and wise but for surviving the dumb "stuff" when they were young.
Life is tough. It's tougher still if you're stupid.
England - East Anglia, United Kingdom
Joined: October 09, 2005
KitMaker: 2,556 posts
Armorama: 2,199 posts
Posted: Friday, November 17, 2006 - 07:25 PM UTC
Damnit Gary! Your progress is fantastic, I wish I could stay focused on a project!!!!! The guntruck looks simply fantastic and very cool! The scratch work you have done is superb. The M1114 is also looking very good, I cant wait to see it finished. I really will try and finish my Dumvee but im feeling as bit lazy at the moment and cant be bothered with any scratch building

'As all else failed we raised our fists and weapons,
Not born as soldiers, but driven to the end'
New Jersey, United States
Joined: October 10, 2003
KitMaker: 783 posts
Armorama: 637 posts
Posted: Friday, November 17, 2006 - 10:22 PM UTC
Hey, thanks jeff! Howe is your 1114 coming along?? The previous pictures looked very promising.

Thanks Rob

I know what you mean about staying focused. Believe me, it hasnt been easy to stay focused LOL At the moment, I have Dragon's M1A1 AIM staring at me along with Trumpeters LAV with photo etch, Academy's M113 with photo etch, and an M923 Big Foot with updated tires and photo etch I am going to be building into a gun truck. So I have my projects lined up LOL every time I sit down to continue working, its like theyre calling me "Pssst......over here....Its me the AIM, start building me" I feel like a drug addict but with models LOL
Well, hope everyone else is having as much fun with this campaign as I am . Cyas later!

Indiana, United States
Joined: January 28, 2004
KitMaker: 2,716 posts
Armorama: 1,864 posts
Posted: Saturday, November 18, 2006 - 01:57 AM UTC
Gary, my humvee going fine. I'll make an update when I get home next week for break.
Jeff
Sua Sponte - Ranger Challenge 2006
A person does not grow old and wise but for surviving the dumb "stuff" when they were young.
Life is tough. It's tougher still if you're stupid.
Queensland, Australia
Joined: April 15, 2006
KitMaker: 915 posts
Armorama: 797 posts
Posted: Saturday, November 18, 2006 - 05:12 PM UTC
Jeff,
I am at the same stage.
I will have further update with the figures finally in the Humvee (hmmwv)

Its harder not trying to switch over to other projects .
Cheers
Michael
Virginia, United States
Joined: July 17, 2006
KitMaker: 1,558 posts
Armorama: 1,159 posts
Posted: Sunday, November 19, 2006 - 07:56 AM UTC
I've finished my Academy M1025. It is built straight OOB. The only extra is the guitar string I used as an antenna.
Here it is.


Hope you all like it.
Ohio, United States
Joined: June 04, 2005
KitMaker: 627 posts
Armorama: 455 posts
Posted: Sunday, November 19, 2006 - 09:05 AM UTC
Quoted Text
I've finished my Academy M1025. It is built straight OOB. The only extra is the guitar string I used as an antenna.
I learn something new everyday. Do you use a particular guage of guitar string for your antennas?
The Hummer is excellent!
Gary


Virginia, United States
Joined: July 17, 2006
KitMaker: 1,558 posts
Armorama: 1,159 posts
Posted: Monday, November 20, 2006 - 05:43 AM UTC
Quoted Text
I learn something new everyday. Do you use a particular guage of guitar string for your antennas?
The Hummer is excellent!
Gary 

Thanks for the compliment!
I used an acoustic guitar "1st E" string, whatever that means. The package says it is .012", but I don't know for sure--it looked about right. I read somewhere that a low E is the right thickness for modern antennas, so I got a packet of guitar strings from a music store. I am totally ignorant about music in general and guitars in particular, so when they asked me what type of strings I wanted, I said, and I quote, "ummm, the cheapest ones."

The string I used has a very thin coiled wire sheath that will make for a good antenna base for models that don't come with one. I made the ball on the tip by dipping the wire in a puddle of white glue and letting it dry while upside down.
Ontario, Canada
Joined: April 01, 2006
KitMaker: 470 posts
Armorama: 367 posts
Posted: Monday, November 20, 2006 - 06:07 AM UTC
Hi Lucas
I think it was smart to just ask for the cheapest ones. You don't want to get some big expensive brand name when you are just going to chop it up for a model. I play bass, and it costs me about $40 to get a decent set of strings. That's 10 each!! I imagine decent or good guitar strings would be about the same or more.
 I am sorry to hear you havent been able to finish yours yet. I was really looking forward to seeing the Dumvee from Pro Art. I had been kicking around building that one for some time, but never got around to it. Well, you still have another 6-7 weeks to finish those up. I started another gun truck. I picked the kit up on Ebay for $12 shipped, so I couldnt pass it up. So, now I have to finish the M998 gun truck, finish the hardtop gun truck, and I have yet to start the M998 Amazing Grace. But the latter should be a relatively quick build as it doesnt require any real kit bashing or photo etching. So, if all goes well, I should be done with all 4 by the end of the campaign. Then I can start my M1A1 AIM.


