Campaigns
Where Armorama group builds can be discussed, organized, and updates posted.
Under New Management
mark197205
Visit this Community
England - East Midlands, United Kingdom
Joined: November 10, 2003
KitMaker: 1,593 posts
Armorama: 1,465 posts
Posted: Thursday, June 07, 2007 - 01:08 AM UTC

Quoted Text

Anyone interested. I have a Bison Decals sheet for the Beute panzer 747(r) {7 X T34/76 & 2 X T34 /85}. I have cut out 2 of the white and 2 of the black w/white outline crosses. The rest of the sheet is untouched. PM me if interested.
Got the hull and turret built. Details and suspension up next. The 3 tone camo may be a bit of a challenge as I am use to straight OD!
Will post photos soonest.

Doug


Hey Doug, I would have said yes if I hadnt ordered that same sheet about a week ago....
mark197205
Visit this Community
England - East Midlands, United Kingdom
Joined: November 10, 2003
KitMaker: 1,593 posts
Armorama: 1,465 posts
Posted: Thursday, June 07, 2007 - 01:14 AM UTC

Quoted Text

Hi guys,
Mark, i've just signed up for this as I've had an idea up my sleeve for some time now that I will finally start for this campaign.
I won't be telling you guys what it is yet, but i'll just say its out of the ordinary, I don't think it's ever been done before and should make for a great build. My problem is that its going to take several kits to get all the parts I need which I am currently still sourcing! When I get my hands on everything i'll post up here anyway.

Cheers guys and good luck with your builds!

James


Good to have you on board James, I'm very intrigued by what your planning on building, it sounds rather interesting..
I look forward to seeing it come together.
mark197205
Visit this Community
England - East Midlands, United Kingdom
Joined: November 10, 2003
KitMaker: 1,593 posts
Armorama: 1,465 posts
Posted: Thursday, June 07, 2007 - 01:21 AM UTC

Quoted Text

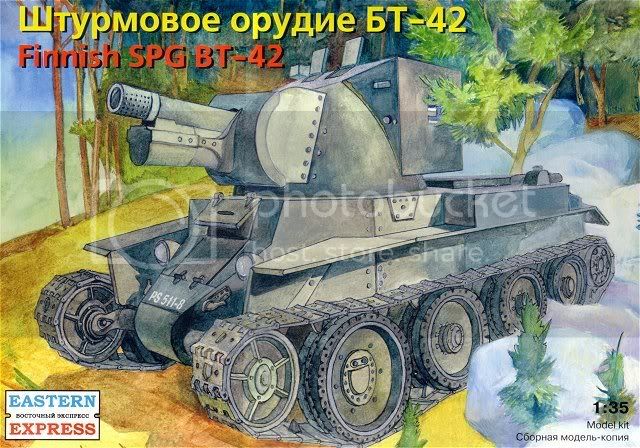
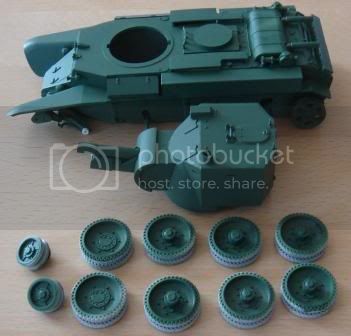
Well, work on my BT-42 progressed well during my day off and the weekend.


The kit builds up nicely except around the main gun and the rear hull. The gaps in the rear hull were so big I had to use 1mm plastic card two places to fill the gaps. The gun is not really that detailed and it is difficult to get the barrel into a completely round shape.

Also to get the stowage boxes right on the fenders took some time and research, but I sorted it out in the end. (in the WiP picture the stowage boxes are not yet installed.) A couple of searches on the internet solved the problem as several pictures were found.


Looking good so far Jesper, it certainly is an interesting looking vehicle, am looking forward to seeing more of it progressing.
novembersong
Visit this Community
Ohio, United States
Joined: July 03, 2006
KitMaker: 370 posts
Armorama: 236 posts
Posted: Thursday, June 07, 2007 - 12:07 PM UTC

Quoted Text

[No worries then Steve, am very interested in the accompanying story you mentioned that goes alongside your T-34.


Ok, heres what my initial my big idea was....

Photo Sharing and Video Hosting at Photobucket


At first, I was just going to replicate the photo, but then I thought maybe I'd do a dio of it at the last second it was going to see light for 62 years, as opposed to the first time it sees light for 62 years.


Besides, it was such a nice model (I actually got it discounted for Twenty dollars!) I couldnt bear to cover the whole thing in gunk.
SGTJKJ
#041
Visit this Community
Kobenhavn, Denmark
Joined: July 20, 2006
KitMaker: 10,069 posts
Armorama: 4,677 posts
Posted: Saturday, June 09, 2007 - 12:32 AM UTC
My BT-42 is moving along slowly but surely I have now given it the base coat and the main ground colour, namely green.


Now I am going through my book references and the internet to determine the other two camouflage colours for the Finnish camouflage. It seems like a very difficult thing to determine.
One colour is described as anything from light sand to sand to light grey to grey to light blue!! Obviously some possibilities there!!
The other colour is described as various shades of brown - from Dark chocolate brown to light brown.

I am expecting to paint it with a light grey and a medium brown. Roughly as the picture below, but with a little darker brown.


More updates to follow....
mark197205
Visit this Community
England - East Midlands, United Kingdom
Joined: November 10, 2003
KitMaker: 1,593 posts
Armorama: 1,465 posts
Posted: Saturday, June 09, 2007 - 01:12 PM UTC
Hey Jesper, looking at the pic of the T-34 and KV-1 you posted there is a clear difference in the colours of the camo so it seems that any of the colours you mentioned would work nicely.
Emeritus
Visit this Community
Uusimaa, Finland
Joined: March 30, 2004
KitMaker: 2,845 posts
Armorama: 808 posts
Posted: Saturday, June 09, 2007 - 10:57 PM UTC

Quoted Text

My BT-42 is moving along slowly but surely I have now given it the base coat and the main ground colour, namely green.


Now I am going through my book references and the internet to determine the other two camouflage colours for the Finnish camouflage. It seems like a very difficult thing to determine.
One colour is described as anything from light sand to sand to light grey to grey to light blue!! Obviously some possibilities there!!
The other colour is described as various shades of brown - from Dark chocolate brown to light brown.

I am expecting to paint it with a light grey and a medium brown. Roughly as the picture below, but with a little darker brown.


More updates to follow....


Looking very good so far!
But don't start choosing the rest of your colors by that photo, those colors are just plain wrong.
Take a look here for authentic colors:
http://www.andreaslarka.net/ps531010/ps531010.html
http://www.andreaslarka.net/ps531008/ps531008.html
They're Stugs but it doesn't matter since the colors used are the same.
Here's another Stug article which has FS. numbers for the 3-color scheme.
http://www.track-link.net/articles/79

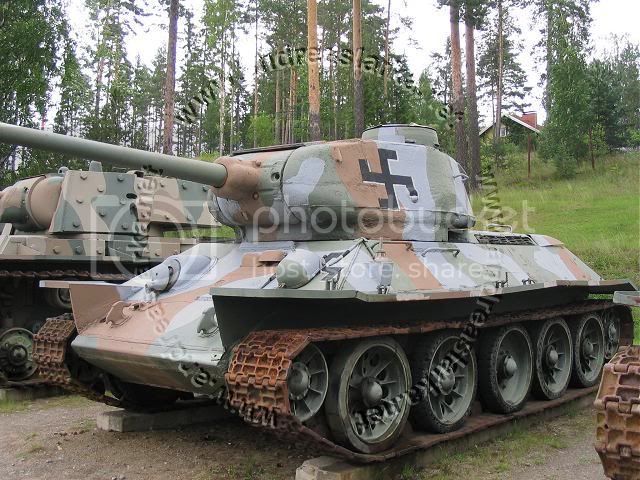
Looking at this thread, I remembered I have a would-be suitable model for this campaign.
Dragon's T-34/85, built as a post-war Finnish vehicle, featuring many scratch-built details, including cut-down fenders, stowage boxes, headlights, roadwheels from a maquette wheel set (except for one), etc.
Basic construction was almost done when I noticed that the kit featured a slightly different gun mantlet. I needed to make little horizontal extensions to the "wings" in the gun mantlet by the barrel. This could have been easily solved earlier, even by buying a new aftermarket mantlet.
Disappointed by this discovery, I boxed the kit for finishing it later and there it has been for a couple of years now.
Here's how it looks now:

And here's the real thing I've used as reference: http://www.andreaslarka.net/ps245003/ps245003.html

But I fear that doesn't really fit in the campaign anymore, since it's been in the making for several years now!
mark197205
Visit this Community
England - East Midlands, United Kingdom
Joined: November 10, 2003
KitMaker: 1,593 posts
Armorama: 1,465 posts
Posted: Sunday, June 10, 2007 - 01:49 AM UTC
Hi Eetu, seeing as you've not touched the kit in a couple of years I am prepared to let you enter it into the campaign, just as long as you keep us up to date with it.
Emeritus
Visit this Community
Uusimaa, Finland
Joined: March 30, 2004
KitMaker: 2,845 posts
Armorama: 808 posts
Posted: Sunday, June 10, 2007 - 03:06 AM UTC

Quoted Text

Hi Eetu, seeing as you've not touched the kit in a couple of years I am prepared to let you enter it into the campaign, just as long as you keep us up to date with it.


That would be nice. Campaigns are such a great way to shrink one's stash.
I'll go and enlist and post some pics of my work on that kit so far.

I'm currently working on two models for the down & low campaign over at Aeroscale, so I'll start working on this T-34 when I get them done.
mark197205
Visit this Community
England - East Midlands, United Kingdom
Joined: November 10, 2003
KitMaker: 1,593 posts
Armorama: 1,465 posts
Posted: Sunday, June 10, 2007 - 05:07 AM UTC

Quoted Text


Quoted Text

Hi Eetu, seeing as you've not touched the kit in a couple of years I am prepared to let you enter it into the campaign, just as long as you keep us up to date with it.


That would be nice. Campaigns are such a great way to shrink one's stash.
I'll go and enlist and post some pics of my work on that kit so far.

I'm currently working on two models for the down & low campaign over at Aeroscale, so I'll start working on this T-34 when I get them done.


No worries Eetu, glad to have you on board.
SGTJKJ
#041
Visit this Community
Kobenhavn, Denmark
Joined: July 20, 2006
KitMaker: 10,069 posts
Armorama: 4,677 posts
Posted: Sunday, June 10, 2007 - 05:36 AM UTC
Hi Eetu, thanks a lot for the info on camouflage. The green and brown look like they fit well with what I planned. However, the colour I identified as light grey seem to be a very light buff.

Great that Mark gave you dispensation and let you enter the T-34/85. It will be interesting to see it in the campaign.

Update to follow soon....
Emeritus
Visit this Community
Uusimaa, Finland
Joined: March 30, 2004
KitMaker: 2,845 posts
Armorama: 808 posts
Posted: Monday, June 11, 2007 - 04:47 AM UTC
Okay, now I got some proper pics taken of my T-34. Here's what has happened so far.
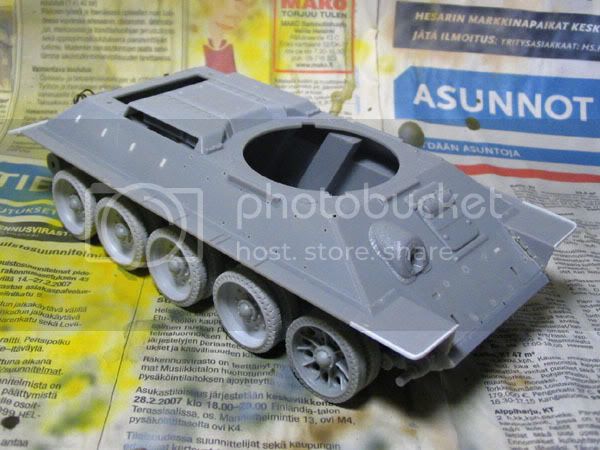

The base kit is Dragon's T-34/85 (Utz mod). Most of the hull's already together. The roadwheels in the kit were almost completely replaced with a maquette wheel set, except for one.
Thinking about it now, it would have probably been easier to hunt around for the same type of solid hub wheels from another dragon kit (or even go so far as to buy a whole kit to donate wheels). If the axle holes had been smaller than on dragon's wheels, it would haven been a simple job to drill and enlarge the holes.
They weren't. I had to plug the holes with sprue and drill new axle holes. This turned out to be tricky. Just marking the absolute center of the wheel was hard, and drilling them wasn't much easier. Without proper tools (drill bench!) getting the holes at a right angle was also hard, leading to less than perfect alignment, which then required me to enlarge the holes again to make them sit right. Because of this, I ended up gluing the wheels in place with 2-part epoxy. This will of course make painting more challencing, but I think I'll be able to pull it off.
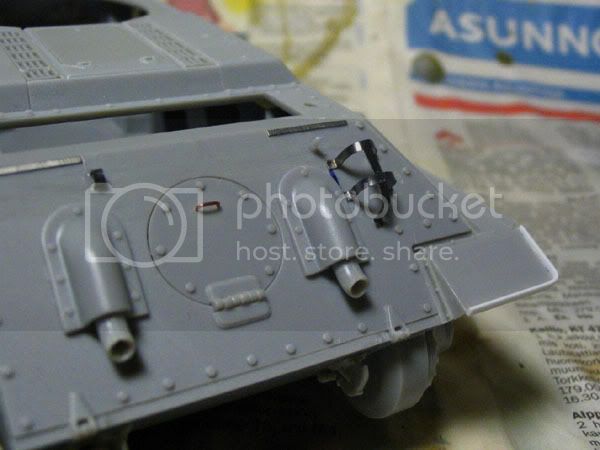
Moving to the rear of the hull, this pic shows the details added to that area. The engine cover hinges have been replaced by scrap PE. That rack next to the right exhaus is also made from PE left-overs. Fenders are cut down and lined with styrene strips. Finally, I replaced the moulded-on solid handle on the engine acces panel with copper wire.
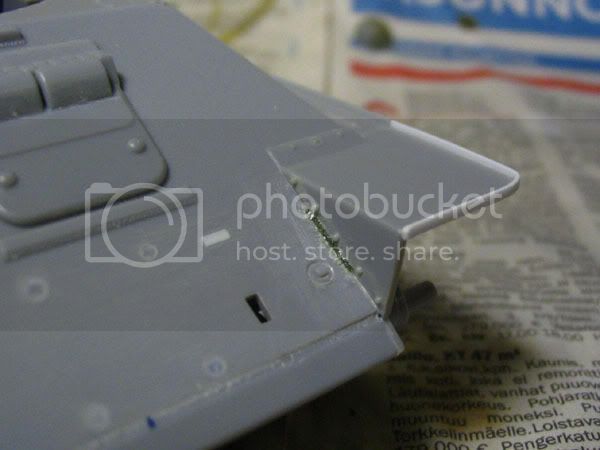
Some kind of a pic, but from the front. Unneeded recessed part locators have been filled, fender shorthened again and a weldseam added between the fender and hull plus several bolts added to the fender itself.
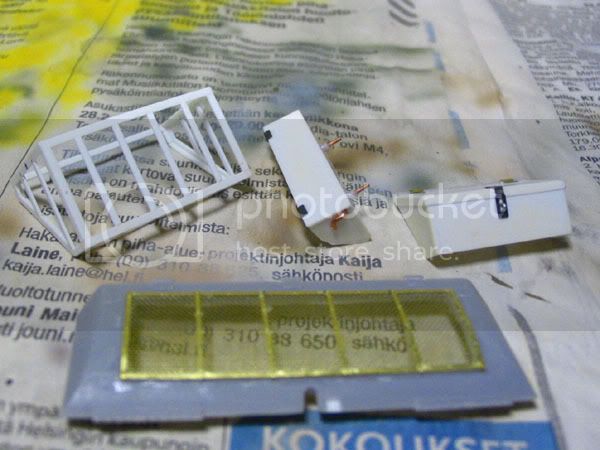
Here's were most of my scratch-building efforts went. That cage-looking stowage container was a real excercise of patience. I must be careful not to accidentally squash it while handling. The two storage boxes were much simpler. Built from sheet styrene, detail made from scrap PE and wire. The etched engine screen is from Aber. I originally built the all-PE cover, but when it was ready for the mesh, I found out it ended up too small. Well, not a big, since it'll be closed. Cutting off the solid screen from the plastic part was simple and the PE mesh replaced the styrene details.
Now if I find good reference, I could build the butterfly louvres behind the cover as well.
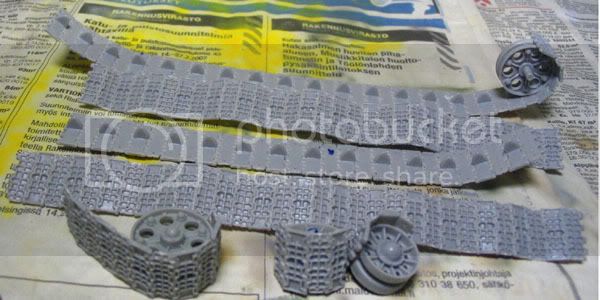
Tracks, nothing spectacular. It's the kit tracks, built in segments and ready to be painted.
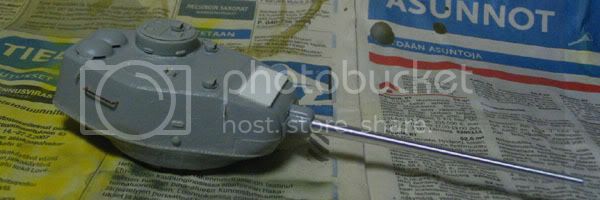
Here's the turret, almost completed. The only aftermarket part used here is the gun barrel. The kit offered 2 hollow halves meant to be glued together. Well, at least there were two locator pins, but I decided to solve the whole issue with some cash.
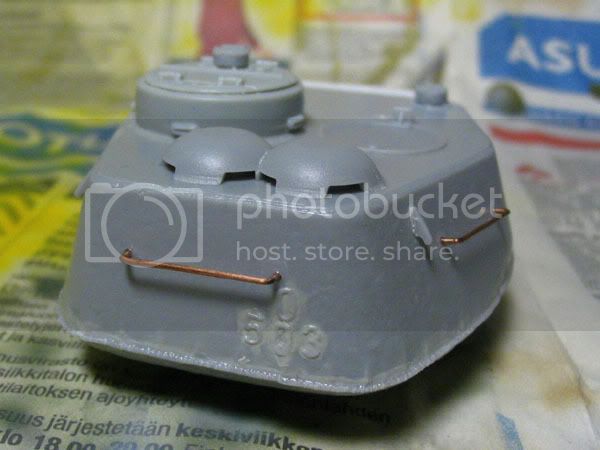
A shot from the back of the turret, showing the added details. The grab handles were all made from copper wire to replace the styrene parts. I made the seam between the turret halves with stretched sprue glued in place, then softened with liquid cement and pressing with a hobby knife blade. The casting numbers are part number shaved off from kit sprues.
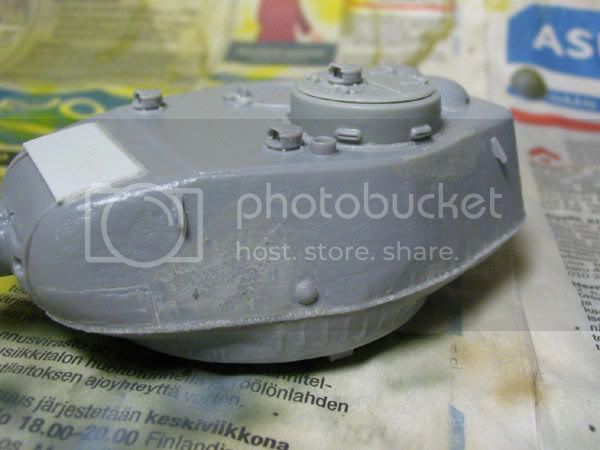
Another pic of the turret, now from the side. Nothing grand going on here, one bulge in the top edge removed and another near the pistol port. Perhaps I'll blend them in some more with some mr. surfacer.
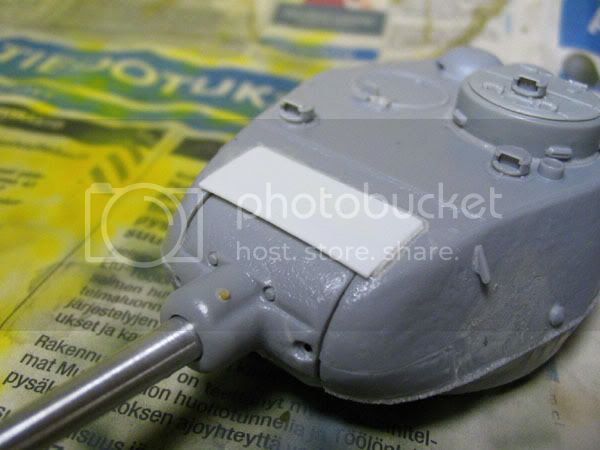
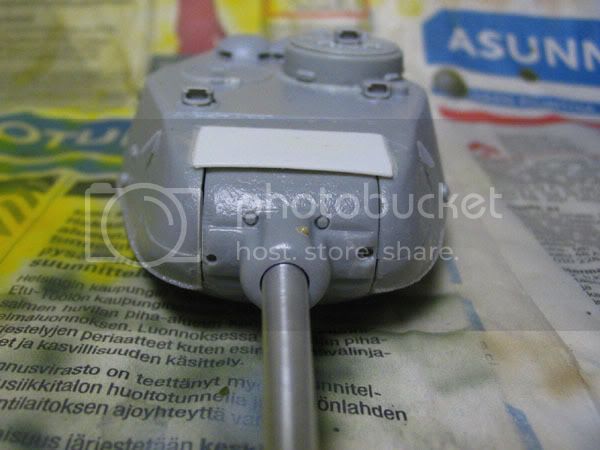
This view shows the new larger rain cover plate made from styrene sheet (with welds again made with stretched sprue). One missing bolt was added to the gun mantlet. (from an academy accessory sprue, IIRC)
Some more work to be done here. It should look like this:
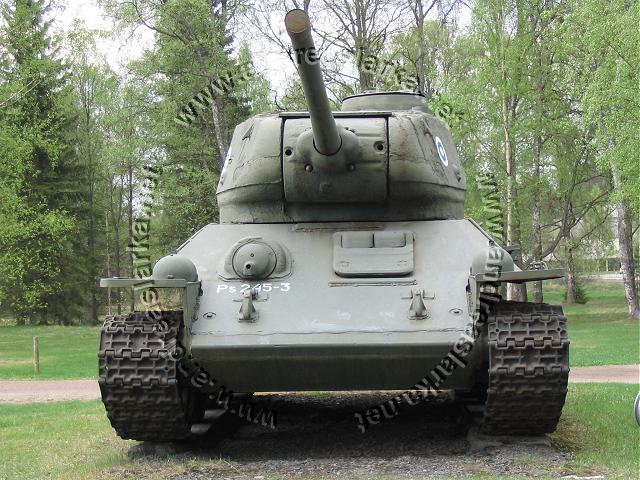
I was thinking about first doing the core of the "wing" extensions from styrene, then gluing them on and blending them in with 2-part putty. How should I do this?
I should have noticed this before construction. A drop-fit resin replacement mantlet would have really hit the spot here.

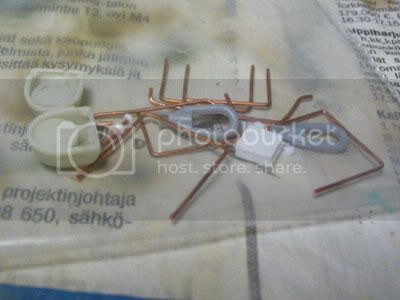
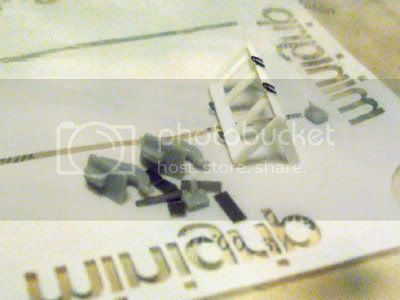
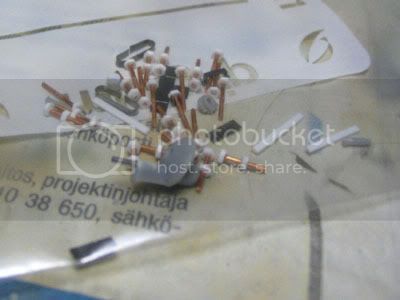
Assorted small detail parts in zip-lock bags. That's a small scratch-built stowage rack in the middle picture. The dome-shaped resin headlights are from JS-models. The hull machine gun barrel I replaced with a hypo needle.
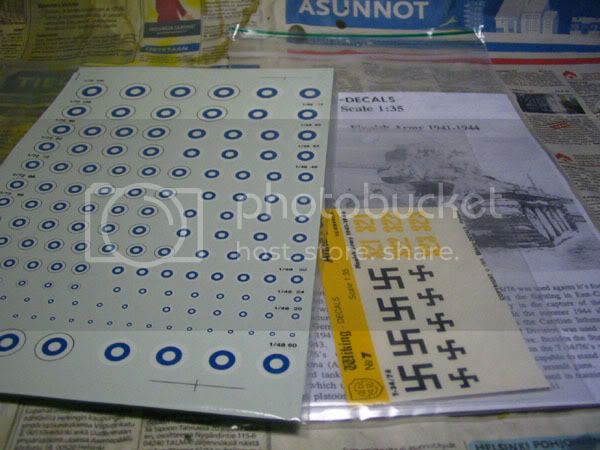
Decals will be a mix of wiking-decals (registry numbers) and Kuivalainen decals (the post-war roundels).
This leaves me with one thing I haven't figured out yet. The overall green color.
What would you suggest? The real thing can be seen here:
http://www.andreaslarka.net/ps245003/ps245003.html
mark197205
Visit this Community
England - East Midlands, United Kingdom
Joined: November 10, 2003
KitMaker: 1,593 posts
Armorama: 1,465 posts
Posted: Monday, June 11, 2007 - 11:35 AM UTC
Looking great so far Eetu, they are a unique set of mods that were carried out on the real thing, your doing a great job of replicating them.
SGTJKJ
#041
Visit this Community
Kobenhavn, Denmark
Joined: July 20, 2006
KitMaker: 10,069 posts
Armorama: 4,677 posts
Posted: Monday, June 11, 2007 - 06:00 PM UTC
Hi Eetu, looks good with your T-34/85.

I cannot really help you with an exact colour match on the T-34/85. I would only recommend that you use a darker colour than on the pictures. It seems like the paint is faded quite a bit. However, that might be the faded look you are going for?

I have some Testors paints that could match pretty good, if you are using this brand I could have a look at the exact numbers later today?
Emeritus
Visit this Community
Uusimaa, Finland
Joined: March 30, 2004
KitMaker: 2,845 posts
Armorama: 808 posts
Posted: Tuesday, June 12, 2007 - 03:44 AM UTC
Thanks for you compliments.

Quoted Text


I cannot really help you with an exact colour match on the T-34/85. I would only recommend that you use a darker colour than on the pictures. It seems like the paint is faded quite a bit. However, that might be the faded look you are going for?

I have some Testors paints that could match pretty good, if you are using this brand I could have a look at the exact numbers later today?


Unfortunately Testors paints aren't very widely available here in Finland. In fact, the only ones I've seen are some grey primer and the pre-thinned airbrush metallics in one LHS.
Take a look here --> http://www.pienoismallit.net/galleria/malli_578/ (all-Finnish site, doesn't matter though)
The builder says he used Tamiya's XF-13 for that KV-I.
I think that looks pretty close to the color on the T-34, if only a bit darker.
Vallejo's paint chart says that matches to their bronze green. I think I have a bottle of that somewhere. If it doesn't match, I'll probably go looking for some XF-13.
dartman
Visit this Community
Washington, United States
Joined: March 09, 2003
KitMaker: 21 posts
Armorama: 14 posts
Posted: Tuesday, June 12, 2007 - 02:15 PM UTC
I'm doing Trumperter's 39(H) 10.5cm. Has anyone heard of any being captured by the allies and and pressed into service? I was thinking of about possibly using Free French markings. If someone has knowledge of this I think it would be an interesting twist. I may still do it anyway.
SGTJKJ
#041
Visit this Community
Kobenhavn, Denmark
Joined: July 20, 2006
KitMaker: 10,069 posts
Armorama: 4,677 posts
Posted: Tuesday, June 12, 2007 - 09:16 PM UTC

Quoted Text

Thanks for you compliments.
Take a look here --> http://www.pienoismallit.net/galleria/malli_578/ (all-Finnish site, doesn't matter though)
The builder says he used Tamiya's XF-13 for that KV-I.
I think that looks pretty close to the color on the T-34, if only a bit darker.
Vallejo's paint chart says that matches to their bronze green. I think I have a bottle of that somewhere. If it doesn't match, I'll probably go looking for some XF-13.


I agree with you. I think it is a very close match. So you could go for XF-13. However, be careful about trusting Vallejo's paint charts. I have been disappointed before. The so called match is often very far from a match, not even a close match. So try on a piece of scrap plastic first
SGTJKJ
#041
Visit this Community
Kobenhavn, Denmark
Joined: July 20, 2006
KitMaker: 10,069 posts
Armorama: 4,677 posts
Posted: Tuesday, June 12, 2007 - 09:19 PM UTC

Quoted Text

I'm doing Trumperter's 39(H) 10.5cm. Has anyone heard of any being captured by the allies and and pressed into service? I was thinking of about possibly using Free French markings. If someone has knowledge of this I think it would be an interesting twist. I may still do it anyway.


I have seen some of these conversions captured by the Allies and stored in these captured vehicles storage. However, I think it is unlikely taht the Allies would have used them in combat against the Germans, but it is a possibility.
You could of course always go with some artistic license and finish your vehicle as you want
Jamesite
Visit this Community
United Kingdom
Joined: December 05, 2006
KitMaker: 2,208 posts
Armorama: 2,152 posts
Posted: Tuesday, June 12, 2007 - 11:46 PM UTC
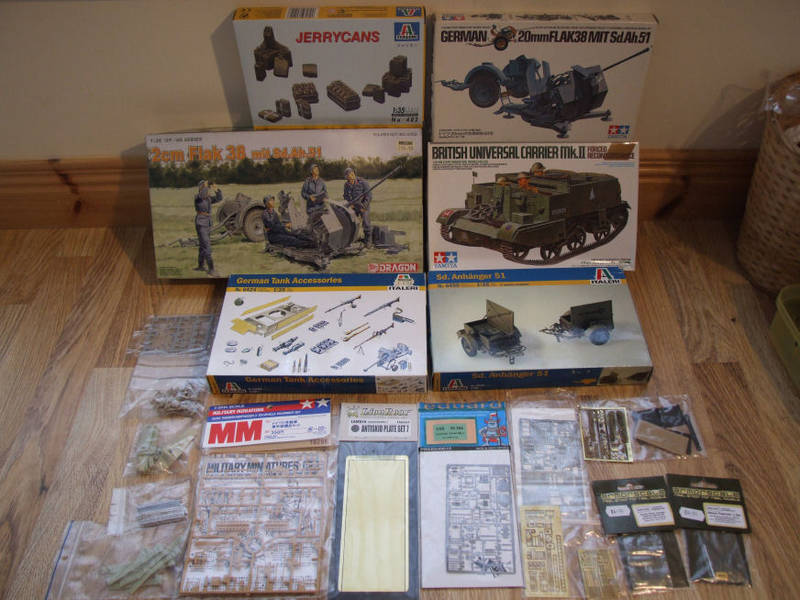
Ok i'm finally good to go, have at last aquired the kits and bits I need to get my entry built, check it out!:


Any guesses what i'm building?
If you want to know have a look HERE !

Can't wait!

James
Jamesite
Visit this Community
United Kingdom
Joined: December 05, 2006
KitMaker: 2,208 posts
Armorama: 2,152 posts
Posted: Tuesday, June 12, 2007 - 11:47 PM UTC
P.S. Mark you may recognise one of the kits in that pile!

James
RedwingNev
Visit this Community
England - East Midlands, United Kingdom
Joined: February 07, 2004
KitMaker: 911 posts
Armorama: 348 posts
Posted: Wednesday, June 13, 2007 - 12:51 AM UTC
I may be interested in joining, but I need some more info first.

On pages 18 &19 of the Concord book British Tank of WW2 (2) there are a couple of pictures of a Panther "Cuckoo" in service with the Coldstream Guards (RHQ section, 4th Bn, 6th Guards Tank Brigade).

From the not-very-clear B&W photos it appears to have been repainted Olive Drab and has a big ole white star on the turret, but other than that, I'm lacking info.

Most basically of all, does anyone know what variant of Panther it is? Is it really green, and what other markings did it carry, if any? All help gratefully received.

I'm also going to post this in the armour section to hopefully catch the eye of those who might not see it in this thread, so apologies to the mods for the double post.

mark197205
Visit this Community
England - East Midlands, United Kingdom
Joined: November 10, 2003
KitMaker: 1,593 posts
Armorama: 1,465 posts
Posted: Wednesday, June 13, 2007 - 08:52 AM UTC

Quoted Text

I'm doing Trumperter's 39(H) 10.5cm. Has anyone heard of any being captured by the allies and and pressed into service? I was thinking of about possibly using Free French markings. If someone has knowledge of this I think it would be an interesting twist. I may still do it anyway.


Hiya Dartman,
I've not come across any of those being used by the Allies but do know that the Free French did use a Tiger, a couple of Panthers and around half a dozen Panzer IV's against the Germans to help prevent breakouts from the surviving garrisons along the French coast.
mark197205
Visit this Community
England - East Midlands, United Kingdom
Joined: November 10, 2003
KitMaker: 1,593 posts
Armorama: 1,465 posts
Posted: Wednesday, June 13, 2007 - 09:00 AM UTC

Quoted Text

Ok i'm finally good to go, have at last aquired the kits and bits I need to get my entry built, check it out!:


Any guesses what i'm building?
If you want to know have a look HERE !

Can't wait!

James


*Waves hands in the air like a loon*
I know, I know!
mark197205
Visit this Community
England - East Midlands, United Kingdom
Joined: November 10, 2003
KitMaker: 1,593 posts
Armorama: 1,465 posts
Posted: Wednesday, June 13, 2007 - 09:04 AM UTC

Quoted Text

P.S. Mark you may recognise one of the kits in that pile!

James


Hehehe, I wonder which one that could be...
mark197205
Visit this Community
England - East Midlands, United Kingdom
Joined: November 10, 2003
KitMaker: 1,593 posts
Armorama: 1,465 posts
Posted: Wednesday, June 13, 2007 - 09:30 AM UTC

Quoted Text

I may be interested in joining, but I need some more info first.

On pages 18 &19 of the Concord book British Tank of WW2 (2) there are a couple of pictures of a Panther "Cuckoo" in service with the Coldstream Guards (RHQ section, 4th Bn, 6th Guards Tank Brigade).

From the not-very-clear B&W photos it appears to have been repainted Olive Drab and has a big ole white star on the turret, but other than that, I'm lacking info.

Most basically of all, does anyone know what variant of Panther it is? Is it really green, and what other markings did it carry, if any? All help gratefully received.

I'm also going to post this in the armour section to hopefully catch the eye of those who might not see it in this thread, so apologies to the mods for the double post.


Hey Neil,
Cuckoo was repainted in OD/British Deep Bronze Green and marked with white stars both sides of the turret, later it was given a winter whitewash.
As for which mark of Panther it is, its a G, someone to speak to about it and Panthers in general is H_Ackermans, the man is a walking encyclopaedia of Panther info.