

1⁄35Sherman M4A3
20
Comments
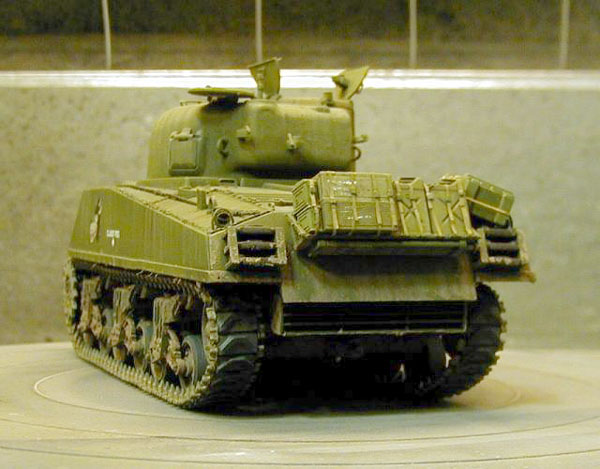
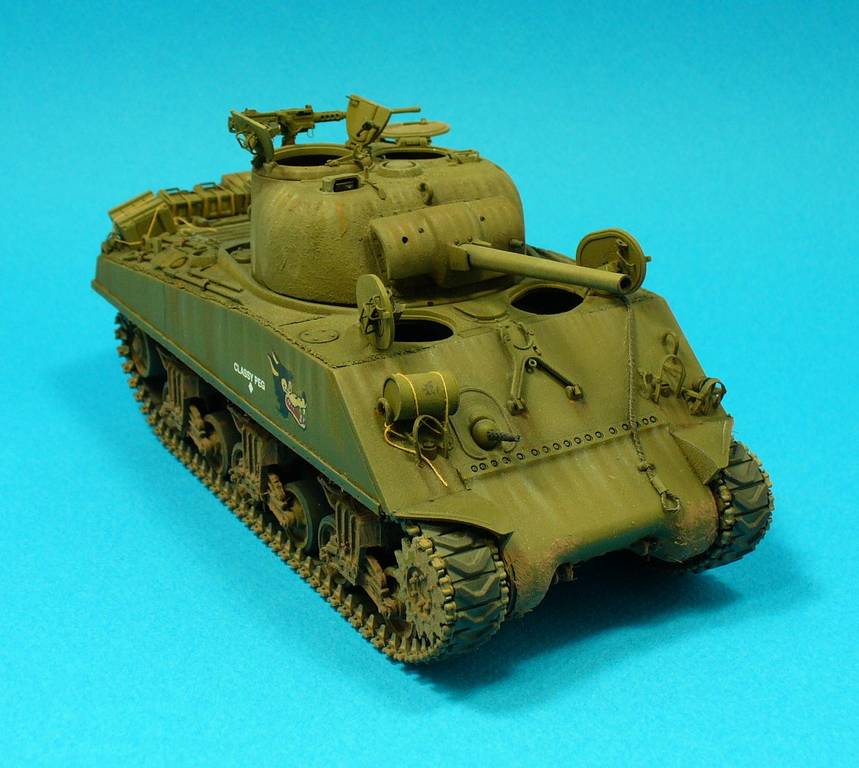
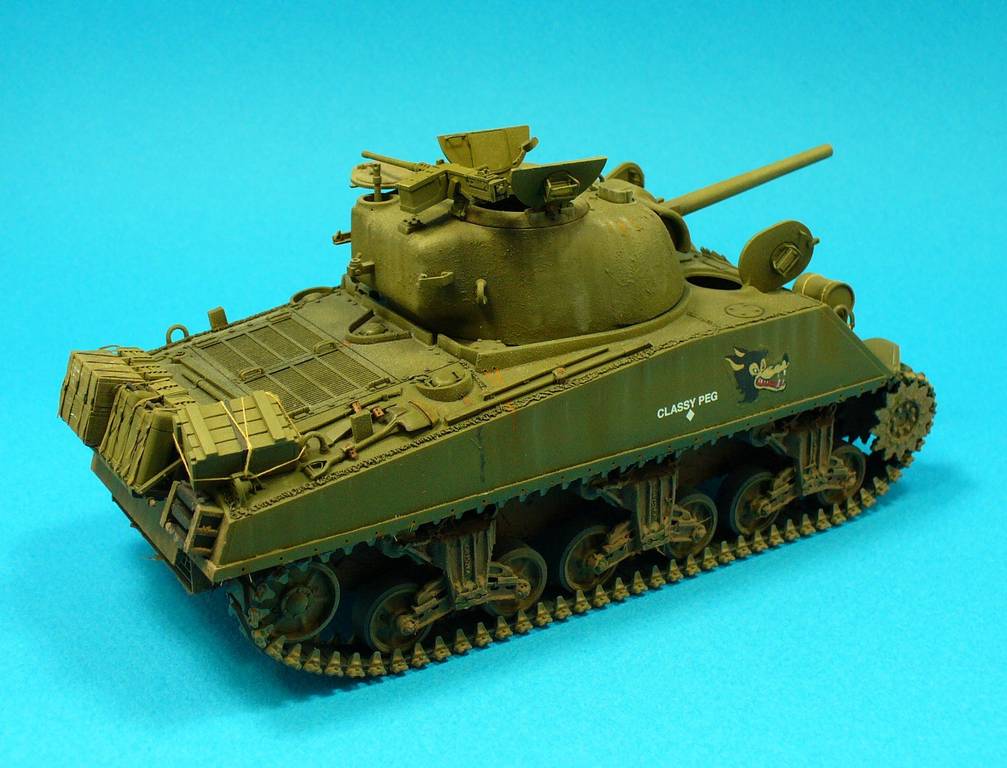
Painting and Weathering
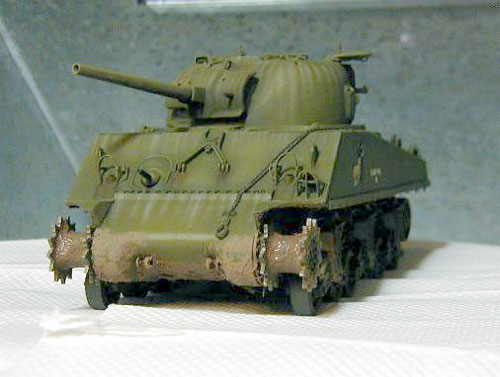
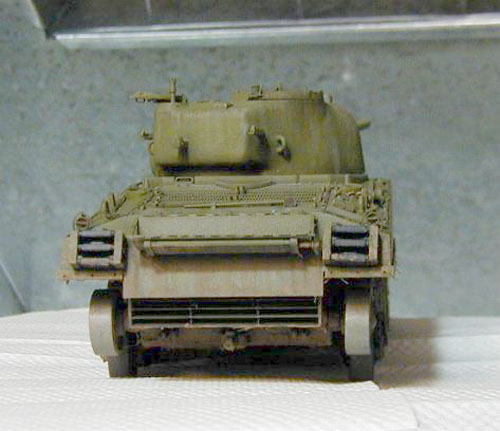
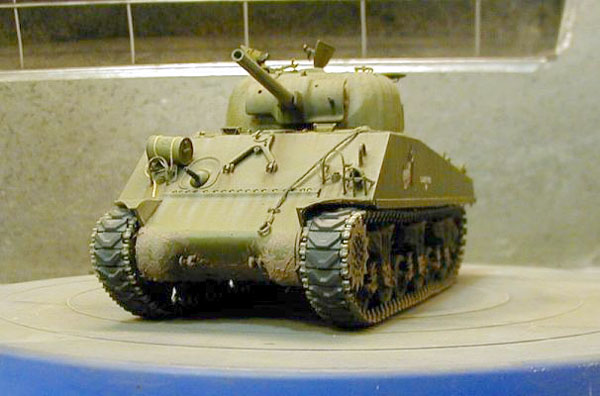
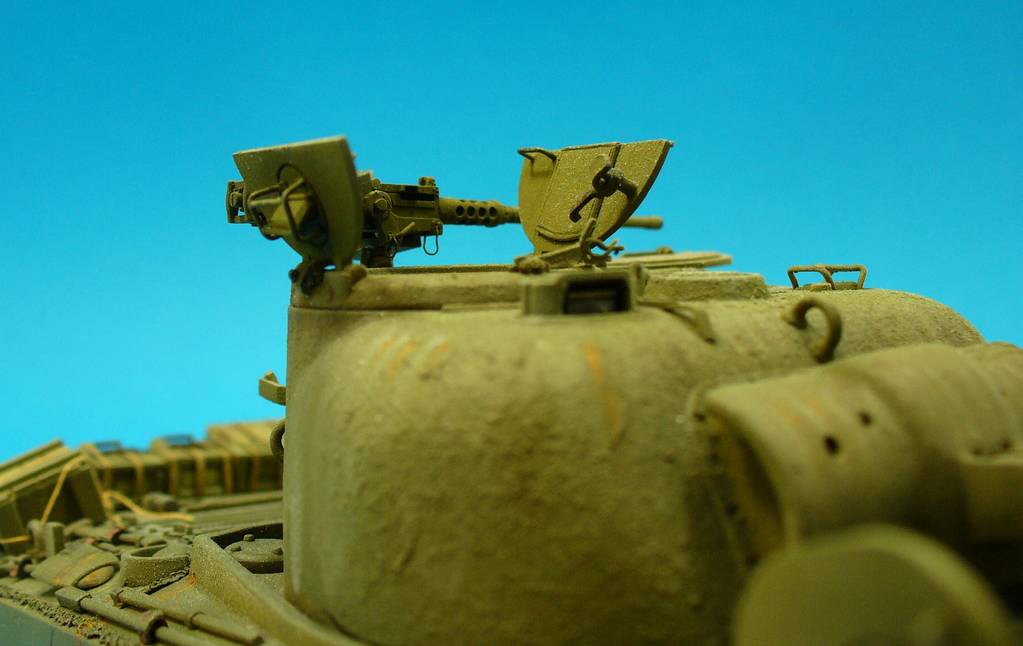
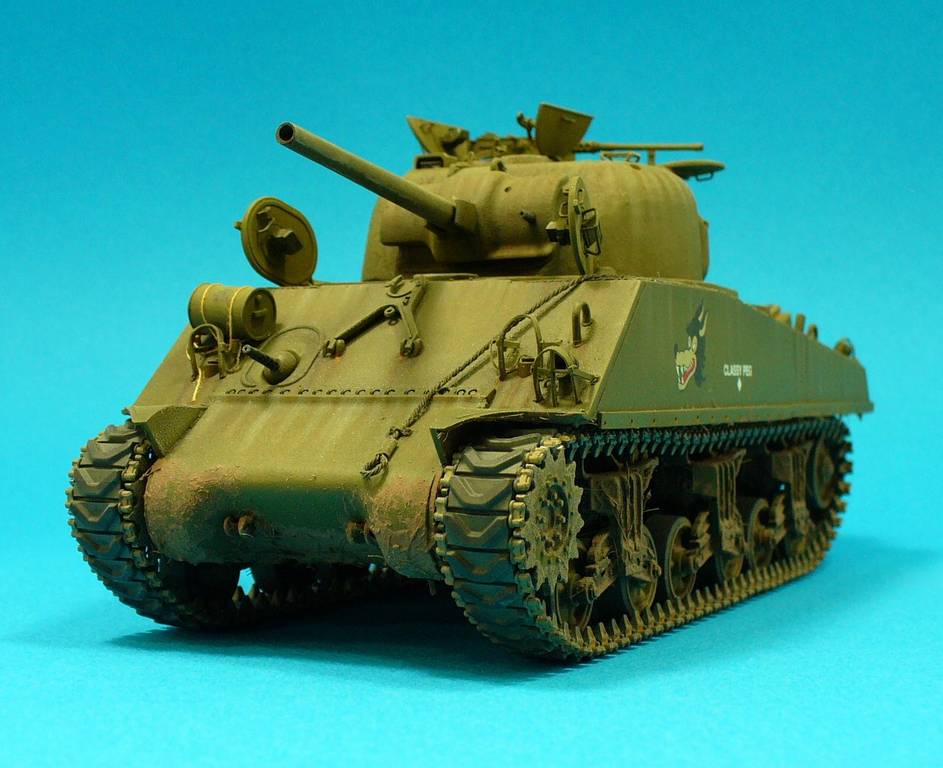
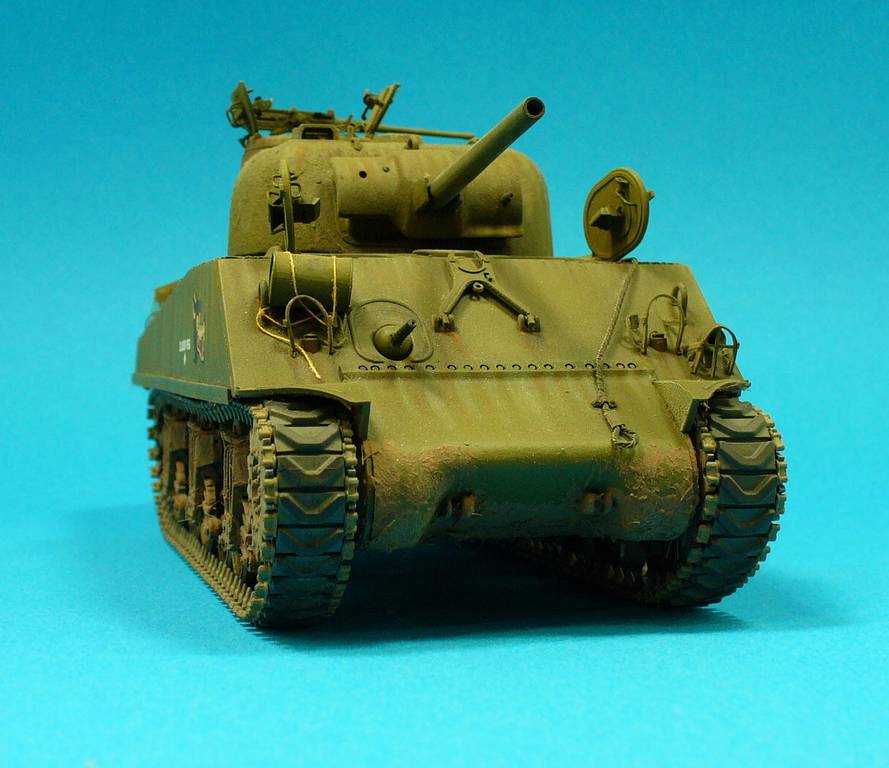
I paint weird, I know it, but it works for me. I never really pay too much attention to what paints Im using so cant really tell you what I used or added exactly. I do try to keep my paints in separate draws, enamels with enamels, acrylics with acrylics, so I dont grab the wrong type. I also write the color on the tops on a white marking dot, and put a little dab of color on the dot, and grab what looks good. I used MM OD . Its my base color. I first airbrushed a little Testors flat black along the welds, shadow areas etc. a little heavier around the exhaust deflector. I then use nothing more than light dustcoats, to bring my models up to the color density I want. I then will lighten my basic color with a little flesh, or tan, and again just use dustcoats lightening sections until it looks good to me. When this is done, I just leave it to dry. Now drying for me is a long time, I work on other kits. It may sit there for weeks, before I actually feel like working on it again, so the paint is fully cured. I then will apply a few pin washes; I use enamels and have never had a problem with it lifting the previous coats. (Must be the log drying times!!!) I then will dust on some lighter color coats. Im really not a big fan of dry brushing, and do very little of it.Decals
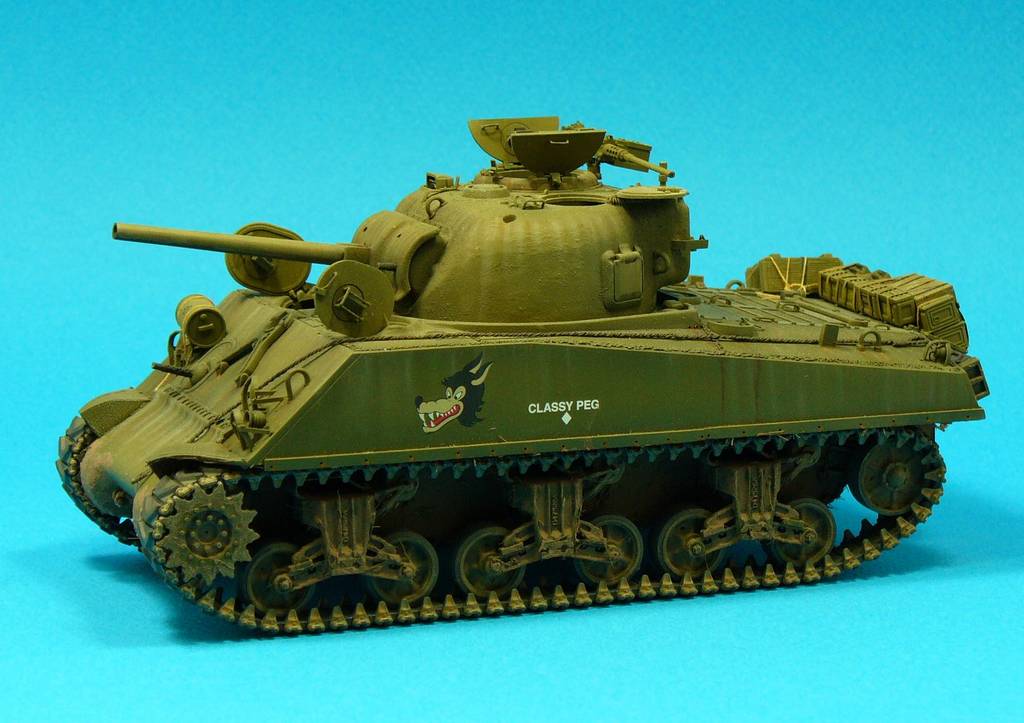
Before the real weathering begins, I added the decals. I used the kit decals for Classy Peg. They went on over a spot of Future with no problems. The kit decal is wrong, as both are suppose to be facing forward, so I needed to make one up. I tried scanning and printing on clear film, but they were so transparent they disappeared on the OD paint, so I tried on white film, this time they were bright enough, but had a ghastly white outline. I tried painting this out and it looked worse than ever. OFF it came. I then got out the enamels paints, and a fine brush and hand painted one of the printed ones on the clear film. Actually I did about a dozen, and picked the best. Then laziness set in, and instead of firing up that airbrush for a coat of clear, I grabbed a rattle can of clear Krylon, and sprayed! It came out with such force that it made the decal super thick. (My airbrushes are always set up, and this certainly is a lesson in being lazy!) I applied the dried decal the next day, and boy . It sure was thick!!! A few over coats of future over the decal, and its self-leveling properties helped hide the thick decal. I also made sure that this side received a few extra coats of flat at the end! Continuing the weathering, I then applied tiny dots of oil paints, white, red, yellow, and my favorite color Paynes Grey. When I say tiny, I mean exactly that, smaller than a pinpoint, after these were on (I do a section at a time) I proceeded to draw them downward with a flat brush. The smaller your dot, the more subdued will be the results. If they arent strong enough for your liking, you can always add more. After several sessions of doing this, I achieved the look I was after. Again the model was set aside to dry for a few days, and then a light dusting of flat. I then started to airbrush light dustings of earth colors on. Again whatever bottle I grabbed and if it was along the earth tone line, I used it. So cant really tell you exactly what colors I use. I thin these coats to about 1 part paint, 9 parts thinner, and spray at about 7 PSI, with my Iwata HP-B airbrush. Its basically a dirty color thinner going on, in extremely light coats. If you can see it when it wet, you put too much on. So dust a little on and let it dry, and it will show up better. The darker colors I used towards the bottom, the lighter ones towards the top. You want to be barely able to see them after they are dry. This blends all the previous colors together. Knowing when to stop, to suit your style is the secret. Since I use the same technique of light dusting coats when doing my groundwork trying to keep the vehicle, and groundwork somewhat similar is important. After the vehicle is mounted, I then do a little more light dustings to bring it all together. You need to visualize the finished piece, during this process, since its easy to over do, and hard to undo. Pastels, and dry pigment will come after the vehicle is mounted to the base. Im afraid to disappoint everyone, but I prefer to use my airbrush and paint to represent my weathering and therefore light dusting coats account for 98% of my weathering, and I use very little pastel or dry pigments. I preferring to have these represent -well- dry dust and dirt, applied at the very end, after the vehicle is safely mounted to it protective base, where it will not be handled. I do not over coat these. Well, there you have it. I really did nothing beyond the reach of any modeler of average skill, with a little experience with basic scratch building, a little experience with a good quality airbrush, some time, patience, and a desire to have a go at no after market. I do apologize for the quality of some of the photos. They were shot over a period of 1- a dying monitor, 2- a low pixel camera, 3- Learning to use a new camera, and 4- learning to use photoshop. I hope you enjoyed the article, hopefully someone learned something along the way, and hopefully it has inspired some readers to expand beyond the I have to buy after market to build a good model. For myself the enjoyment has always been trying to make and improve my models with my skills and talents. As I said many times throughout this article, there is not one technique that the average modeler cannot do. Give it a try, you may surprise yourself.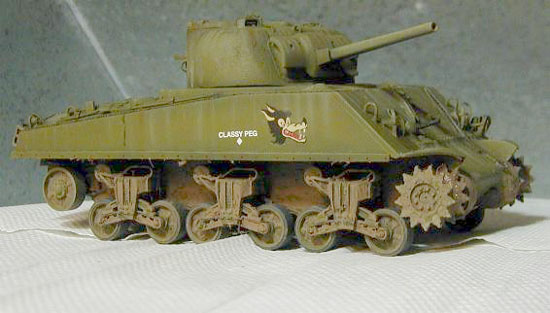


About the Author


FROM: FLORIDA, UNITED STATES
I'm rewriting this in a much more humoristic way, to help over inflate my ego, and place my self on a pedestal, because I don't have a life, and plastic models are the only thing I live for. I plead guilty as charged to excessive babble, light hearted humor, and continued encouragement to youngsters...
Comments

Great article! Interesting to read and about a very nice tank: the M4A3 Sherman! I hope to build one one of these days - after my current projects - and I read it very carefully! Very good article Dave!
Cheers and happy modelling!
Prato
JUL 16, 2006 - 07:25 PM

Gday Grumps!
Glad that this has been given the exposure it deserves
I remember following this build last year(?) and was intrigued at some of the techniques you applied... Then in reading this Feature, I discover more... The weathering technique you describe is surely worth trying out... The results look great!
Also your dab hand at that wolf on the right hullside is fantastic
Cheers for the Feature, and the quality photos...
Brad
JUL 16, 2006 - 07:52 PM

All these posts and no one has noticed that the feature's title reads "Sherman A4A3" instead of M4A3? :-) :-)
Title typo aside, the article and pics look good, Dave!
JUL 17, 2006 - 04:13 AM

Hi Dave,
For someone who constantly undermines his modelling prowess..... you might just be the most talented modeller around!!! Great build Dave!
Frank
JUL 17, 2006 - 05:50 AM

Read the article,WOW!! Just shows what can be done with time and effort, and no photoetch/ after-market. Excellent article, Thanx !!
JUL 17, 2006 - 08:02 PM

Nice one Grumpy. Im sure that will have a high read count within a very short time. Some nice little tips explained also, using the tape to transfer the design onto thinner plastic sheet, is something I´ll remember.
Who said you can´t teach an old dog new tricks?? :-) :-)
JUL 17, 2006 - 08:20 PM
Dave, I'm glad I found this. I have a 1/32nd Sherman (The old Monogram kit) I've been working on. The light guards for it were snaped in several places (like they seem to always be) and I had concerns about how to build new ones with that funky backwards curve. After seeing how well your's came out, I not worried about that curve anymore.
As an aside, does anyone know if they make armor decals for this scale? The kit's were missing....like I said..it's the old kit.
SEP 10, 2006 - 09:41 AM

love the tank build and the fact its a no aftermartket just shows all that stuff isnt realy needed i am now working on same model and keep coming back to the post just to see how its done
marvelous
spyder50
NOV 17, 2007 - 04:20 PM

Nice to here from you again Vinnie,your stuff was always helpful
Good work Dave,I like your handling of the OD
APR 10, 2012 - 04:52 AM
Copyright ©2021 by Dave O'Meara. Images and/or videos also by copyright holder unless otherwise noted. The views and opinions expressed herein are solely the views and opinions of the authors and/or contributors to this Web site and do not necessarily represent the views and/or opinions of Armorama, KitMaker Network, or Silver Star Enterrpises. All rights reserved. Originally published on: 2006-07-17 00:00:00. Unique Reads: 40262

WEB HOSTING BY


Copyright ©2021 Armorama and Kitmaker Network, a subsidiary of Silver Star Enterprises
All Rights Reserved. Please read our Conditions of Use and Privacy Policy.
All Rights Reserved. Please read our Conditions of Use and Privacy Policy.