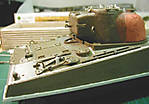
1⁄35Sherman M4A3
20
Comments
introduction
Well, first let me say that I am not an expert on the M4A3 Sherman, nor will I pretend to be. I certainly know there are many modelers out there that know ten times more about the Sherman tank than I do, and many of them have been of great assistance to me during this build. Nor do I have an extensive library of reference books on the subject. I used two books I owned and internet sites for my references. Of course Armorama.com, and it’s members were the most helpful, and as always more than happy and willing to answer many questions, and point out details I missed, and supply more material than I could ever incorporate into this model. And I’d like to start out with a big thank you for all the help, and encouragement. Hopefully I won’t say anything to offend anyone in my descriptions of the building process, or techniques used. Some of the things I did or techniques I used maybe old hat, to some, others maybe new to you, but none are extremely difficult to do, just maybe a little tedious or time consuming. Nothing I did was extra ordinary or out of the realm of the average modeler. Now that we have established that I certainly do not pretend to be an expert, lets establish that I also don’t consider myself to be an outstanding modeler, but rather just someone with a lot of experience. That can be easily read as someone whose been building models on a more serious note, since his discharge from the Navy, way back in the days of wooden ships and iron men! OK, maybe not that long, but pretty close. The basic kit used is Tamyia’s M4A3 Sherman, Kit number: 35250, it comes molded in a dark olive plastic, with glueable tracks.The Beginning
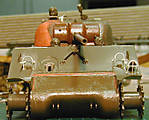
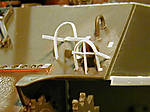
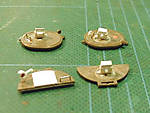
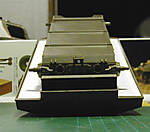
First thing I did was check for the tweaks list for the kit over at Tim Streeters’ site, US Army Models.com and downloaded it, and printed it up. I also downloaded and printed up the template for closing off the sponsons from Tom’s site. I then downloaded and printed up all the photos of the M4A3 over at Chris Hughes’ (Toadman1) site. My two reference books, both Squadron publications, “Sherman in Action”, and the “Sherman Walk Around”. Checking the many threads on Armorama.com, I came up with many other detail photos, posted by many other members, and printed these up also. Off to the workshop, OK, off to work, since this is where I do most of my building. Working the midnight shift, alone, in a boiler room allows for such past times. (I’m also writing this on the time clock. Does that make me a paid professional writer?) I first started by rubber cementing the sponson templates to a sheet of .20 plastic sheet, and cut them out. After assembling the upper and lower hull pieces, a little bit of trial and error got a fairly decent fit. It wasn’t perfect, but a little mud added later on would cover any imperfections. So far, not too difficult to do, for myself, or any average modeler, in fact, there will be nothing in this article that is beyond the skill level of the average modeler. I then filled in the large recesses on the hull and transmission covers for the headlight guards, with some small pieces of plastic strip, and CA glue. I trimmed and sanded them smooth in preparations for making the headlight guards, etc. Making these will be covered later in the article.Comments
Great article! Interesting to read and about a very nice tank: the M4A3 Sherman! I hope to build one one of these days - after my current projects - and I read it very carefully! Very good article Dave!
Cheers and happy modelling!
Prato
JUL 16, 2006 - 07:25 PM
Gday Grumps!
Glad that this has been given the exposure it deserves
I remember following this build last year(?) and was intrigued at some of the techniques you applied... Then in reading this Feature, I discover more... The weathering technique you describe is surely worth trying out... The results look great!
Also your dab hand at that wolf on the right hullside is fantastic
Cheers for the Feature, and the quality photos...
Brad
JUL 16, 2006 - 07:52 PM
All these posts and no one has noticed that the feature's title reads "Sherman A4A3" instead of M4A3? :-) :-)
Title typo aside, the article and pics look good, Dave!
JUL 17, 2006 - 04:13 AM
Hi Dave,
For someone who constantly undermines his modelling prowess..... you might just be the most talented modeller around!!! Great build Dave!
Frank
JUL 17, 2006 - 05:50 AM
Read the article,WOW!! Just shows what can be done with time and effort, and no photoetch/ after-market. Excellent article, Thanx !!
JUL 17, 2006 - 08:02 PM
Nice one Grumpy. Im sure that will have a high read count within a very short time. Some nice little tips explained also, using the tape to transfer the design onto thinner plastic sheet, is something I´ll remember.
Who said you can´t teach an old dog new tricks?? :-) :-)
JUL 17, 2006 - 08:20 PM
Dave, I'm glad I found this. I have a 1/32nd Sherman (The old Monogram kit) I've been working on. The light guards for it were snaped in several places (like they seem to always be) and I had concerns about how to build new ones with that funky backwards curve. After seeing how well your's came out, I not worried about that curve anymore.
As an aside, does anyone know if they make armor decals for this scale? The kit's were missing....like I said..it's the old kit.
SEP 10, 2006 - 09:41 AM
love the tank build and the fact its a no aftermartket just shows all that stuff isnt realy needed i am now working on same model and keep coming back to the post just to see how its done
marvelous
spyder50
NOV 17, 2007 - 04:20 PM
Nice to here from you again Vinnie,your stuff was always helpful
Good work Dave,I like your handling of the OD
APR 10, 2012 - 04:52 AM
Copyright ©2021 by Dave O'Meara. Images and/or videos also by copyright holder unless otherwise noted. The views and opinions expressed herein are solely the views and opinions of the authors and/or contributors to this Web site and do not necessarily represent the views and/or opinions of Armorama, KitMaker Network, or Silver Star Enterrpises. All rights reserved. Originally published on: 2006-07-17 00:00:00. Unique Reads: 40262


