1⁄35Sdkfz 251/17 Ausf C
7
Comments

Introduction
Throughout the course of WW2, the German armed forces recognized the need to have mobile Flak protection accompanying its motorized units. The design of the 251/17 Ausf C was aimed at addressing this by modifying the body and fighting compartment of a standard Sdkfz 251 half-track to accommodate a 2.0cm Flak 38 mount. These vehicles were unique in that they were only issued to the Hermann Goering Division of Luftwaffe troops and saw action primarily on the Eastern Front as well as North Africa at the end of the Tunisia campaign. This build focuses on the recently released 1/35 scale kit #6395 of the 251/17 Ausf C by DML with the addition of an Armorscale 2.0cm Flakrohr barrel and will be finished as a vehicle in service in Tunisia in 1943.Lower hull and suspension
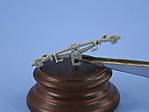
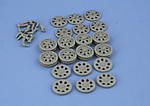
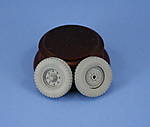
As with most of DML’s 251 series of kits, the first four steps deal with the lower hull and construction of the suspension. Based on previous build experience, I skipped around a bit in this area rather than follow the instructions directly, changing up the order of installation in regards to the suspension arms in particular. The suspension arms have a little bit of play in them due to the undersized mount pins and I waited until I had all the road wheels assembled and ready to test fit before installing them in place on the lower hull. All of the parts included are the standard suspension parts for both the front axle and wheels as well as the road wheels for the tracks with the exception of new outer road wheels and sprockets with separate rubber rims. Care was required here as some of the parts numbers are the same on the new sprues vs. the old parts, the only difference being that the new numbers are printed in blue on the instructions vs. black for the older parts. The front suspension was left semi-workable laterally due to a damaged part on the sprues, otherwise the front suspension would have been left fully workable and steerable. The front wheels as two-part assemblies required some light sanding to deal with the resulting seam and also simulate some light wear to the tire surfaces. The wheels were left off for easier painting and detailing but were dry-fit as needed at various points along the way to insure a level set along with the road wheel arms for the hull on the suspension. The suspension arms were then installed and the road wheels secured with blue tack to simulate installation and achieve proper positioning.Comments
Bill, as always a nice feature from you. Good build (love the camo) and good concrete article.
Thanks for your time and effort
JUN 18, 2007 - 09:55 PM
Great build article Bill and one i will definatly be refering to when i get around to building my halftracks, the painting and weathering turned out great also.
Ron.
JUN 19, 2007 - 03:30 AM
Copyright ©2021 by Bill Plunk. Images and/or videos also by copyright holder unless otherwise noted. The views and opinions expressed herein are solely the views and opinions of the authors and/or contributors to this Web site and do not necessarily represent the views and/or opinions of Armorama, KitMaker Network, or Silver Star Enterrpises. All rights reserved. Originally published on: 2007-06-17 00:00:00. Unique Reads: 35725


