

1⁄35Borrowed Goods
Small additions.
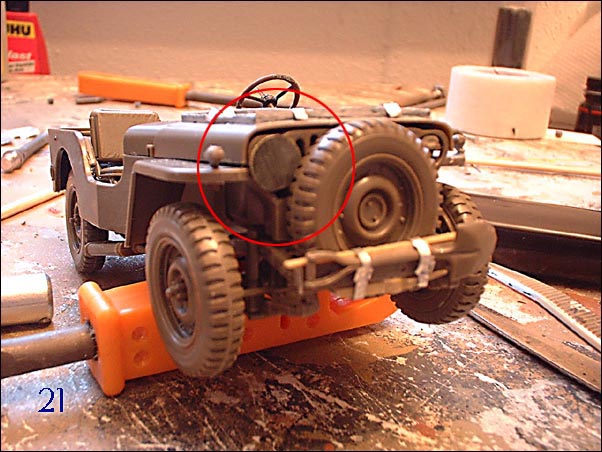
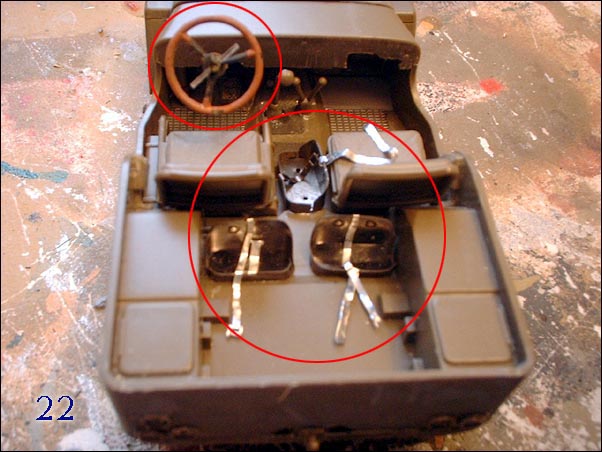
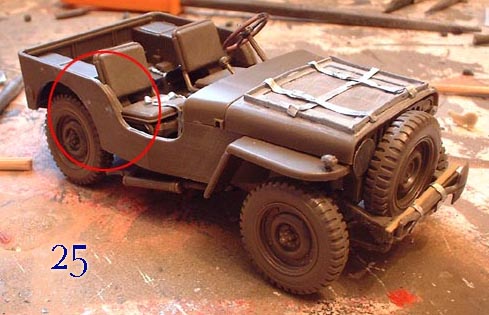
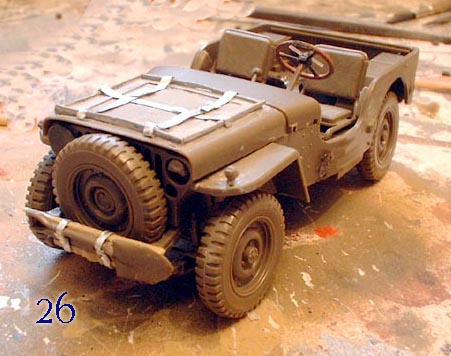
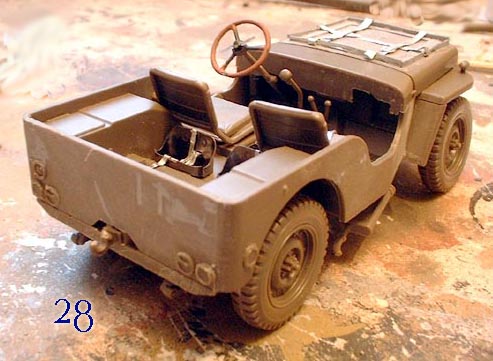
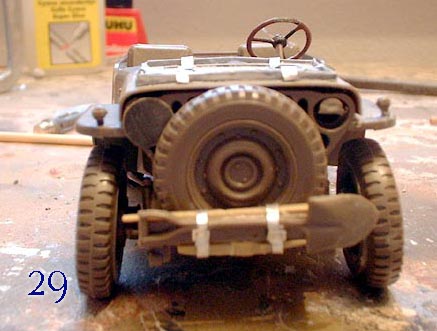
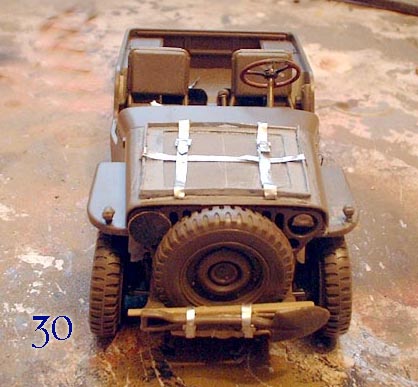
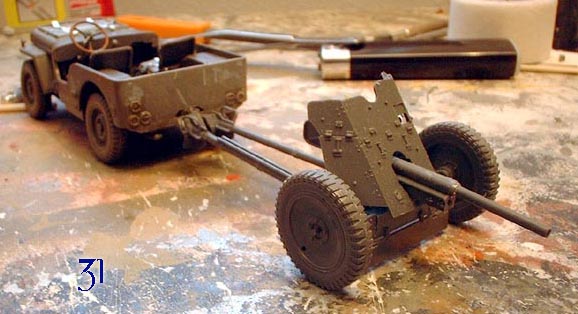
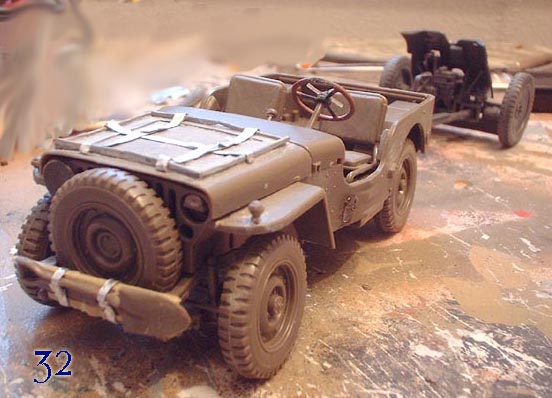
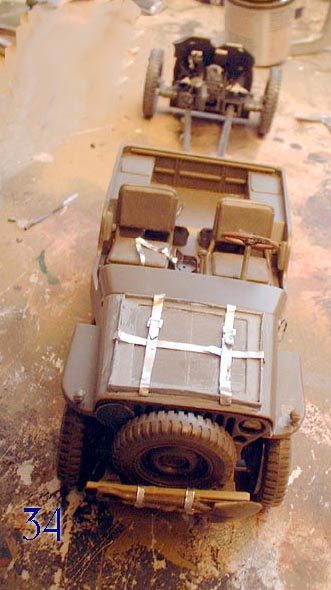
Ok we are now about half way through the construction stage and only a few things need to be done to finalise the build. Some Airborne Jeeps carried a weapon strapped on the side of the vehicle I added a normal tool clamp from the Eduard PE and put it in a little angle on the drivers side. See Image 19). This was where the rifle stock would be locked while the barrel was placed on the mudguard. Also I added the night cover for the headlight on the drivers side. I made this from a piece of sprue that I sanded flat on one side and glued it to the headlight. See Image 20. Almost all the Airborne Jeeps had a bridging plate this was to prevent weak bridges being destroyed by heavy loads. All the vehicles received this Yellow round plate (around 9 in diameter) with their classification on it usually 1 number. When a vehicle was allowed to tow a trailer there were 2 numbers on the bridging plate placed on top of each other divided with a line in the middle. I took the Bridging plate out of Italeri`s anti-tank dodge and placed it on top of the headlight on the passenger seat. See Image 21. Where a normal jeep usually only carries one jerrycan holder the Airborne Jeep usually has three. The idea behind this is very simple. Because the Airborne Jeep is dropped behind enemy lines and its always unsure when the jeep receives new fuel so they took more jerrycan with them. And as with a lot of the other additions on the Airborne Jeep there is no place for that on the outside so, the three jerry can holders move to the inside. The locations for the holders are one directly behind each seat and one in the middle of the two seats. The Eduard PE set only provided 1 Jerry can and Cliff Hutchings from Australia was so kind to send me two holders he had extra. Again the straps were made from aluminium foil because the PE set only provided straps for one holder and the PE straps were too stiff for the effect I wanted. See Image 22. In this stage I also added the quick release steering wheel. Another thing you might notice is the fact that there is also no spare wheel on the back of the jeep. No place for that in the glider. The spare wheel moves to the front bumper and the holder is left off. This means that you have to do some filling and sanding on the back of the jeep all the holes on the back need to be filled see Image 23. Same faith happens to the holes where the grabhandles on the side normally are. See Images 24 and 25. The holes for the windscreen we leave untouched as some of the Airborne Jeeps (if they stayed intact for so long) would receive windscreens by later drops. Also the Spare wheel is not attached in a holder on the back of the vehicle. In several pictures you can see the spare wheel being attached in front of the bumper. This had two reasons. 1: The jeep was easier to fit into the glider with out the spare wheel on the back. 2: Putting it in front of the grill prevented the jeep to be disabled by bullets and shrapnel. One disadvantage of having the spare wheel in front of the grill was that a lot of Airborne Jeeps were disabled due to overheating. So far the construction part of the Airborne Jeep. It was great fun to do this. And I learned a lot about this vehicle. A little overview of the completely constructed Airborne Jeep can be seen in Images 26 through 30. And with some additional gear in Images 31 through 34.


About the Author


FROM: NOORD-HOLLAND, NETHERLANDS
Started modelling when I was about 7 or 8 years old had a little break in between (school, girls partying) and eventually returned when finding this site in 2002. Main interest WW2 German army, wheeled vehicles and radio and communication troops or every other thing that manages to catch my interest...
Copyright ©2021 by Robert Blokker. Images and/or videos also by copyright holder unless otherwise noted. The views and opinions expressed herein are solely the views and opinions of the authors and/or contributors to this Web site and do not necessarily represent the views and/or opinions of Armorama, KitMaker Network, or Silver Star Enterrpises. All rights reserved. Originally published on: 2005-03-28 00:00:00. Unique Reads: 13690

WEB HOSTING BY


Copyright ©2021 Armorama and Kitmaker Network, a subsidiary of Silver Star Enterprises
All Rights Reserved. Please read our Conditions of Use and Privacy Policy.
All Rights Reserved. Please read our Conditions of Use and Privacy Policy.