

1⁄35Got'cha Covered
Road Surfaces
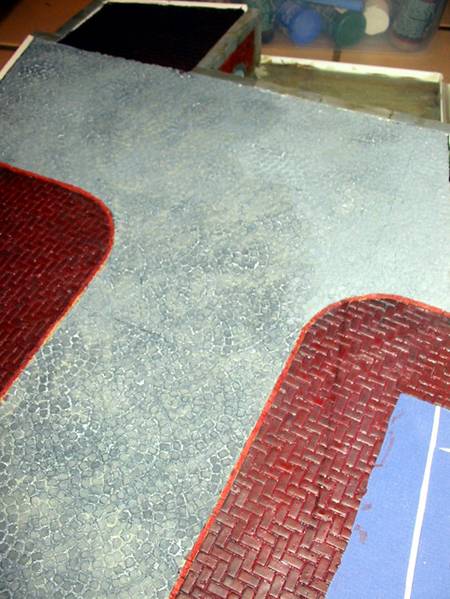
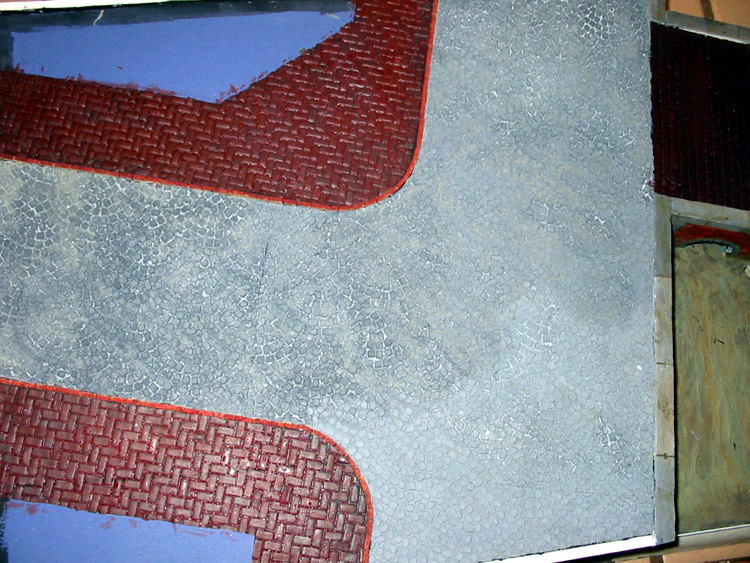
In other project I have used some Kancali products and decided to use them again. They have very nice products that are very well made and easy to use. I wanted to make a statement with the road that would be as bold as the statement of the balcony and decided to use Kancali's Fan Pattern road. You can see a review of this product here:review. To complement the road surface I planned to use other Kancali road surfaces for the bridge and side walks.
Planning again played a huge part in the project. I knew I would have seams in the road because the shape and size would require cutting the latex sheets. I 'dry fit' the road pieces in various ways to get the fewest seams that would be the easiest to conceal. The planning and dry fitting extended to the sidewalks. I laid those out in the same way, test fitting for the fewest seams. Once I had a layout I liked I transferred the shape of the sidewalk to a piece of heavy stock cardboard. This cardboard would provide about 2mm of elevation for the sidewalks. I glued these down with white glue since it was paper on paper. I had to adjust the shape of the road piece and consider the edging of my sidewalk. I studied some reference photos and decided to use brick edgers to define the sidewalks. Having such a large volume of cork on hand I decided to use cork for these. I could have used sculpy or plaster for this.
I used two-part epoxy to glue the road surfaces down. The latex reacts well with the epoxy and it creates a very long lasting bond. Along seams I used a bit of CA to tighten bonds and make some areas sit down better.
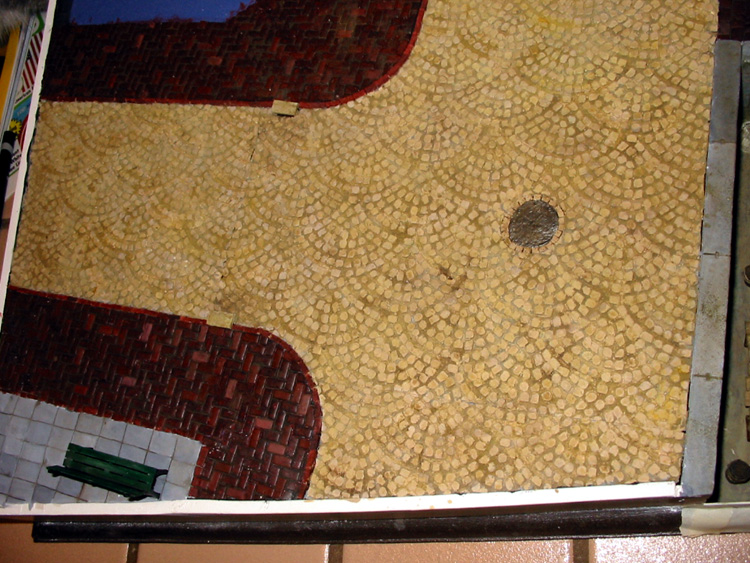
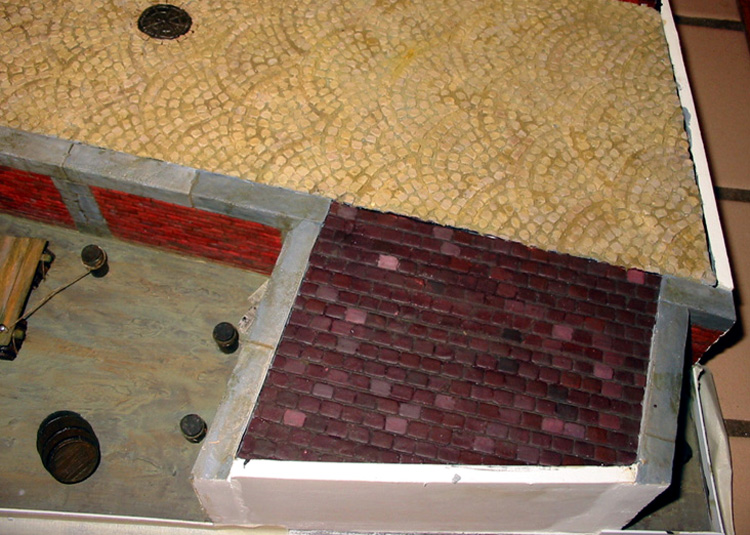
The corner-paved park is spakle spread thin and smooth. Once it was dry I used a sharp tool to etch the stone seams in. I painted it with hobby paints and washed it with oils. Once the basics were down I went on with painting and weathering. I applied hobby paints as my base paint. I mixed the bricks the same way I did the building. The fan road was a mixture of various colors from white and honey and tans. No real recipe, just mix till it looks about right. I had to try at least three times before I got the basic coat down. I researched the on Internet and asked in the Forums to get opinions and was happy to have done it. Once the street level paint was dry I washed them with oil-based washes. On the brick based surfaces I used a dark brown/black wash and a thin brush to get in the seams. On the fan pattern cobbles I used a lighter shade of wash and a brush that was a bit thicker. I did a number of washes of various shades of brown on the cobbles. I am a proponent of thin washes that are not heavy with color. I would rather do a number of lighter coats to build up to a color. Its easier to add paint than take it away.
Once the washes were dry I added pastels. I stayed with fairly uniform pastel blends across the whole base. This unifies the diorama and tones down some of the colors. I scraped the pastel crayons/sticks over a cup. Once I had a couple of colors in the cup I used a large soft brush to mix them together. Then I used the same brush to apply them to the streets.
Canal/Water
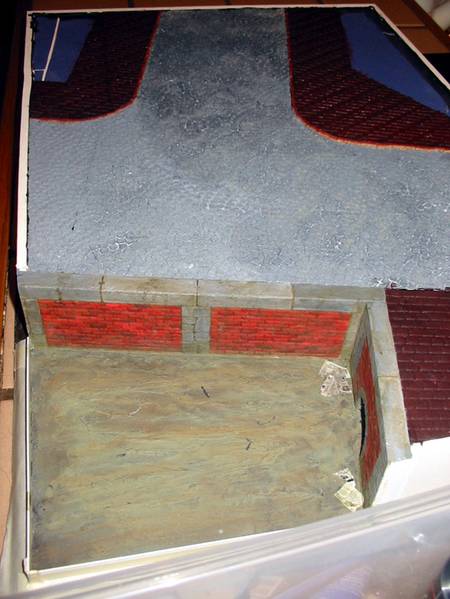
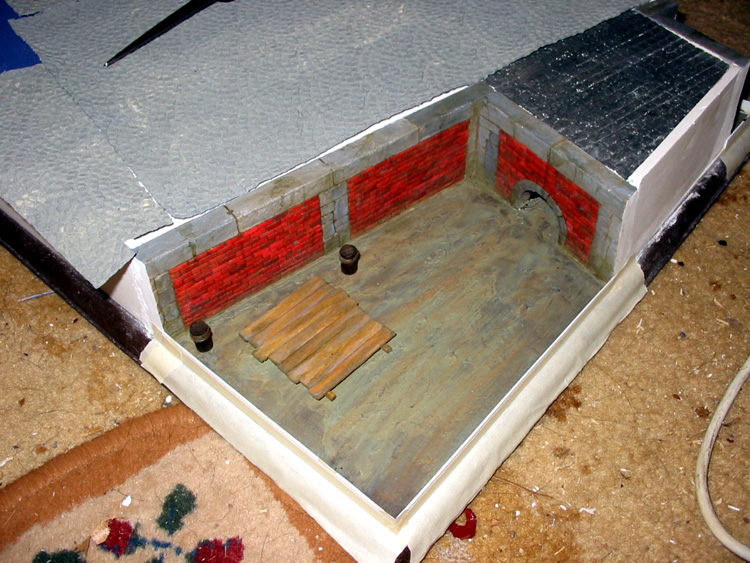
Before I could get into the water itself I had to decide what to 'fill' the canal space with. The corner is a fairly large area and could not stand-alone. My original thought was to add a small rowboat. I wasn't thrilled with the idea because it was a bit overdone and common, and I couldn't easily answer the question "Why is a rowboat at this point in the canal?" I wanted a bit of help so I went to the best resource around - Armorama.com. After talking it over I decided on some old newspapers, a raft some kids had built and used to sail their boat and lastly a few piling.
The pilings were easy, they were pieces of doweling with a bit of string wound around the top. I stained them with household stain and painted the string a light brownish color. I washed them with a muddy/green color (very difficult to see in pictures). I glued them down with epoxy to hold them strongly when water was poured. I have had white glue react with the resin and come loose.
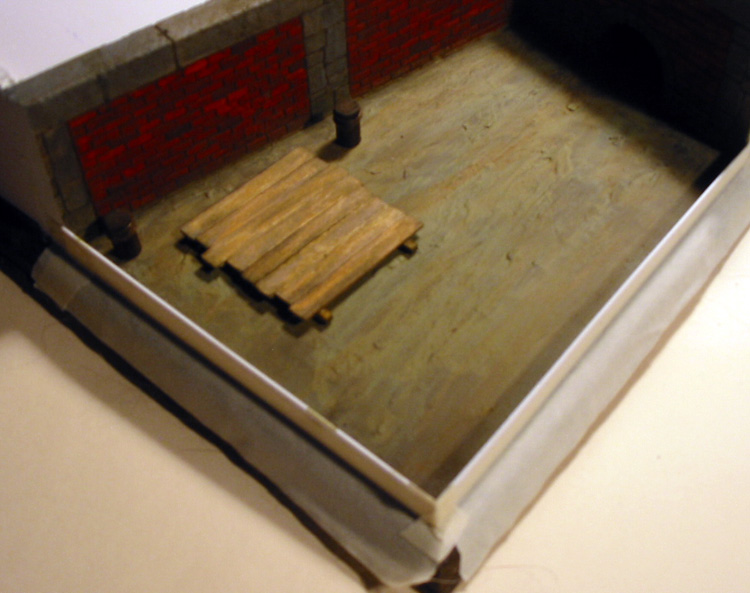
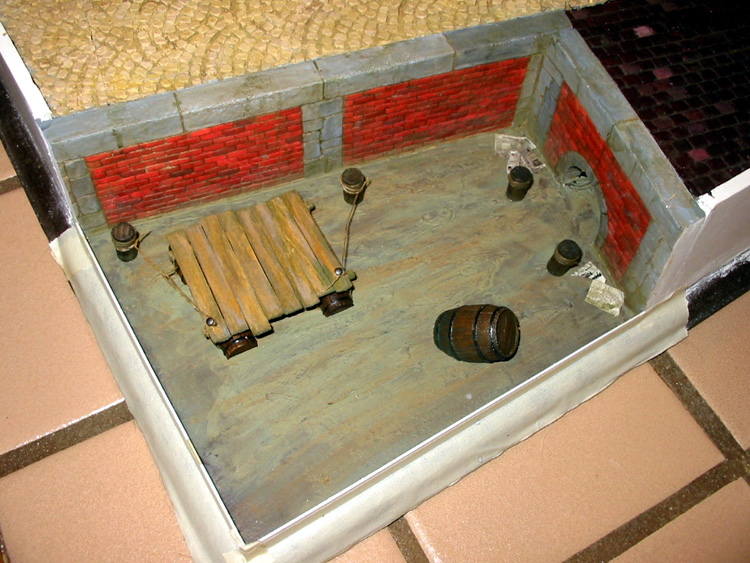
The raft was fun to make. I had an old Verlinden barrel and needed a second one. I used a two-part RTV mold and two-part resin to make my own piece (See the section later on details for more information on pouring resin parts). I cut each in half so that it would create the illusion of depth in the water. Having half a barrel makes it look like the raft has weight and is truly deep in the water. The top part of the raft is just some balsa wood scraps and my favorite coffee stir sticks. I purposefully didn't make the slats even to give it a cruder child built look. I stained it with household stain. The barrels are painted with oil paint and washed with oil washes. Thread holds the raft in place.
The sailboat is a piece of balsa wood carved to shape. I inserted a small piece of wire in as a mast. I then cut out a tea bag sail and glued it to the mast. The boom is a piece of wire glued to the sail. I did it in this order (Mast, Sail, Boom) because the joint at the mast and boom would have been very difficult to keep together without the structure of the sail. Always be creative in your build order to help you out. I painted it with hobby paints. The newspapers were small images I found on the Internet. I printed them, crinkled them, and washed them with a dark color to make them look old. I glued them with some epoxy in places I thought they would get trapped in the current.
In other project I have used some Kancali products and decided to use them again. They have very nice products that are very well made and easy to use. I wanted to make a statement with the road that would be as bold as the statement of the balcony and decided to use Kancali's Fan Pattern road. You can see a review of this product here:review. To complement the road surface I planned to use other Kancali road surfaces for the bridge and side walks.
Planning again played a huge part in the project. I knew I would have seams in the road because the shape and size would require cutting the latex sheets. I 'dry fit' the road pieces in various ways to get the fewest seams that would be the easiest to conceal. The planning and dry fitting extended to the sidewalks. I laid those out in the same way, test fitting for the fewest seams. Once I had a layout I liked I transferred the shape of the sidewalk to a piece of heavy stock cardboard. This cardboard would provide about 2mm of elevation for the sidewalks. I glued these down with white glue since it was paper on paper. I had to adjust the shape of the road piece and consider the edging of my sidewalk. I studied some reference photos and decided to use brick edgers to define the sidewalks. Having such a large volume of cork on hand I decided to use cork for these. I could have used sculpy or plaster for this.
I used two-part epoxy to glue the road surfaces down. The latex reacts well with the epoxy and it creates a very long lasting bond. Along seams I used a bit of CA to tighten bonds and make some areas sit down better.
The corner-paved park is spakle spread thin and smooth. Once it was dry I used a sharp tool to etch the stone seams in. I painted it with hobby paints and washed it with oils. Once the basics were down I went on with painting and weathering. I applied hobby paints as my base paint. I mixed the bricks the same way I did the building. The fan road was a mixture of various colors from white and honey and tans. No real recipe, just mix till it looks about right. I had to try at least three times before I got the basic coat down. I researched the on Internet and asked in the Forums to get opinions and was happy to have done it. Once the street level paint was dry I washed them with oil-based washes. On the brick based surfaces I used a dark brown/black wash and a thin brush to get in the seams. On the fan pattern cobbles I used a lighter shade of wash and a brush that was a bit thicker. I did a number of washes of various shades of brown on the cobbles. I am a proponent of thin washes that are not heavy with color. I would rather do a number of lighter coats to build up to a color. Its easier to add paint than take it away.
Once the washes were dry I added pastels. I stayed with fairly uniform pastel blends across the whole base. This unifies the diorama and tones down some of the colors. I scraped the pastel crayons/sticks over a cup. Once I had a couple of colors in the cup I used a large soft brush to mix them together. Then I used the same brush to apply them to the streets.
Canal/Water
Before I could get into the water itself I had to decide what to 'fill' the canal space with. The corner is a fairly large area and could not stand-alone. My original thought was to add a small rowboat. I wasn't thrilled with the idea because it was a bit overdone and common, and I couldn't easily answer the question "Why is a rowboat at this point in the canal?" I wanted a bit of help so I went to the best resource around - Armorama.com. After talking it over I decided on some old newspapers, a raft some kids had built and used to sail their boat and lastly a few piling.
The pilings were easy, they were pieces of doweling with a bit of string wound around the top. I stained them with household stain and painted the string a light brownish color. I washed them with a muddy/green color (very difficult to see in pictures). I glued them down with epoxy to hold them strongly when water was poured. I have had white glue react with the resin and come loose.
The raft was fun to make. I had an old Verlinden barrel and needed a second one. I used a two-part RTV mold and two-part resin to make my own piece (See the section later on details for more information on pouring resin parts). I cut each in half so that it would create the illusion of depth in the water. Having half a barrel makes it look like the raft has weight and is truly deep in the water. The top part of the raft is just some balsa wood scraps and my favorite coffee stir sticks. I purposefully didn't make the slats even to give it a cruder child built look. I stained it with household stain. The barrels are painted with oil paint and washed with oil washes. Thread holds the raft in place.
The sailboat is a piece of balsa wood carved to shape. I inserted a small piece of wire in as a mast. I then cut out a tea bag sail and glued it to the mast. The boom is a piece of wire glued to the sail. I did it in this order (Mast, Sail, Boom) because the joint at the mast and boom would have been very difficult to keep together without the structure of the sail. Always be creative in your build order to help you out. I painted it with hobby paints. The newspapers were small images I found on the Internet. I printed them, crinkled them, and washed them with a dark color to make them look old. I glued them with some epoxy in places I thought they would get trapped in the current.


About the Author


FROM: NORTH CAROLINA, UNITED STATES
I modeled when I was a teenager. College, family and work stopped me for a while. Then I picked it back up after about 12 years off. My main focus is dioramas. I like the complete artistic method of story telling. Dioramas involve so many aspects of modeling and I enjoy getting involved in the ...
Copyright ©2021 by Scott Lodder. Images and/or videos also by copyright holder unless otherwise noted. The views and opinions expressed herein are solely the views and opinions of the authors and/or contributors to this Web site and do not necessarily represent the views and/or opinions of Armorama, KitMaker Network, or Silver Star Enterrpises. All rights reserved. Originally published on: 2005-10-22 00:00:00. Unique Reads: 39489

WEB HOSTING BY


Copyright ©2021 Armorama and Kitmaker Network, a subsidiary of Silver Star Enterprises
All Rights Reserved. Please read our Conditions of Use and Privacy Policy.
All Rights Reserved. Please read our Conditions of Use and Privacy Policy.