

1⁄35Got'cha Covered
Canal
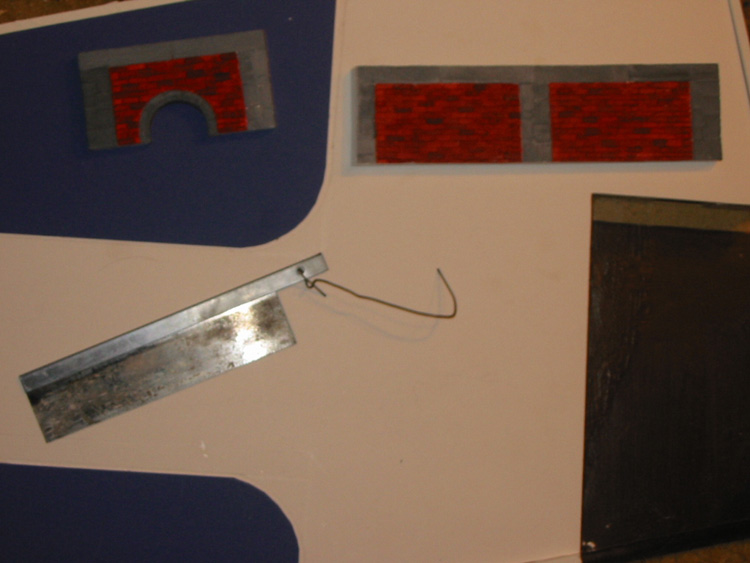
Planning again came into play. During planning I learned that the walls would have to be custom cut to fit the angles and size of the diorama. I test fit the canal walls to the styrofoam and transferred size measurements to the walls by lightly tracing the contour of the base onto the back side of the canal wall. I then used a good razor saw to cut the pieces to shape. Watch the angles of the outside edges. In order to make painting easier I planned on painting the walls before installation.
Painting was done with Folkart type paints. The basic scheme was gray stones around red bricks. The gray was mixed white and black. The red was brick red. I applied a base coat of each basic color. I then added touches of black and brown to the red to mix varying colors and I painted each brick slightly different shades. The stones received slightly varying layers of color too.
Once I was pleased with the basic colors I glued the pieces in place using two-part epoxy. I have found that weathering and washing is best done on assembled kits vs. sub-assemblies. The completeness of assembled kits allows you to evenly weather the entire thing. I used oil washes straight on the walls. I used black and burnt umber as a base weathering wash. I did an overall wash/filter covering the entire wall, and then pin washes focusing on small seams and areas of interest. I then used some forest green, yellow, burnt umber, and black oils for algae pin washes to add realism.


About the Author


FROM: NORTH CAROLINA, UNITED STATES
I modeled when I was a teenager. College, family and work stopped me for a while. Then I picked it back up after about 12 years off. My main focus is dioramas. I like the complete artistic method of story telling. Dioramas involve so many aspects of modeling and I enjoy getting involved in the ...
Copyright ©2021 by Scott Lodder. Images and/or videos also by copyright holder unless otherwise noted. The views and opinions expressed herein are solely the views and opinions of the authors and/or contributors to this Web site and do not necessarily represent the views and/or opinions of Armorama, KitMaker Network, or Silver Star Enterrpises. All rights reserved. Originally published on: 2005-10-22 00:00:00. Unique Reads: 39489

WEB HOSTING BY


Copyright ©2021 Armorama and Kitmaker Network, a subsidiary of Silver Star Enterprises
All Rights Reserved. Please read our Conditions of Use and Privacy Policy.
All Rights Reserved. Please read our Conditions of Use and Privacy Policy.