

1⁄35Got'cha Covered
Painting
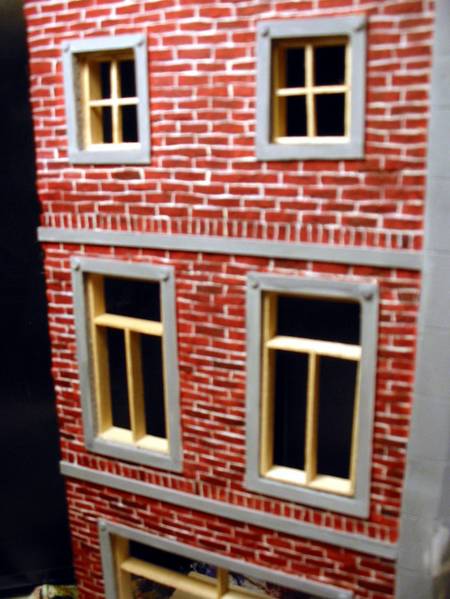
My plan called for red bricks and gray stones. I like to use hobby paints such as Apple Barrel or Folkart for this type of work. Coverage, cost, and variety are the reason I go with this type of paint. I like the variety of colors you can buy off the shelf, you can also mix and match your own custom colors. They are inexpensive at about $1 a bottle. The coverage is typically thick and solid and this type of paint offers just that.
I would need at least four colors: red, black, white, cream. The red is for the bricks, the black and white mix to make gray for the stone, the cream will be for the mortar. The black and white will be used for varying the base colors for variety.
I put a base coat of red on the bricks. Then I used the black and white to vary the color and individually painted each brick different colors of red. I like to put a nice size blob of base color down, then a drop of accent color next to it. I then gently mix a bit of the two together; I do not mix it 100%. This gives me a greater variety of color and more transition colors. My mix resembles cream in coffee in the first seconds of pouring it together.
The mortar was a nice mix of creams and browns to get the desired color. I used a fine brush and brushed it on. I had to go back and touch up some areas of red where I over painted. Paint doesn't worry me anymore, I know I can cover it or remove it or touch it up till I'm satisfied.
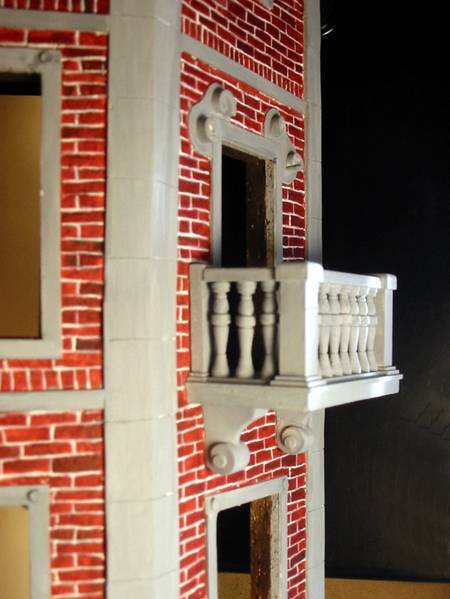
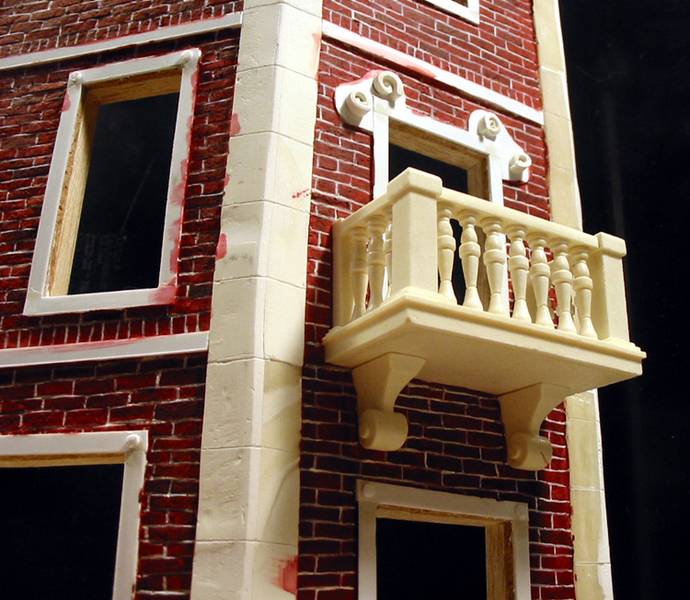
I mixed the black and white to a nice gray and painted that on all of the stone details. This included the balcony. I used a variety of brushes to meet the need. Large ones for the big areas, small thin ones to get the edges. I used medium square tipped brushes for the smaller pieces.
Windows
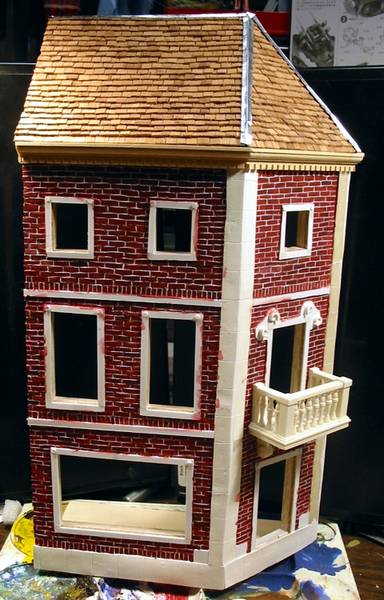
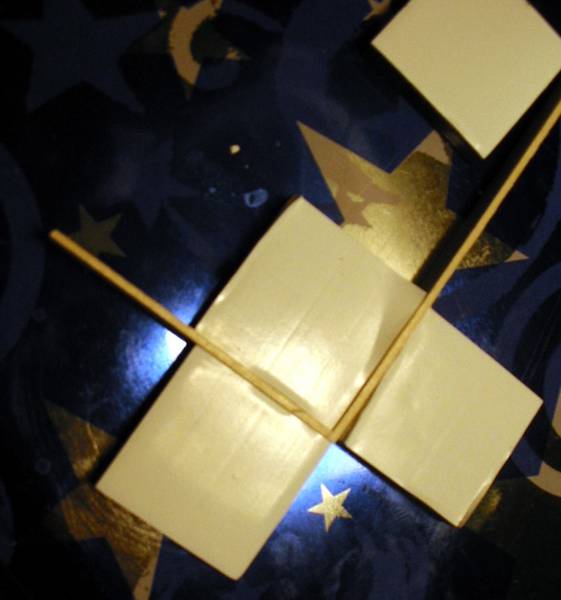
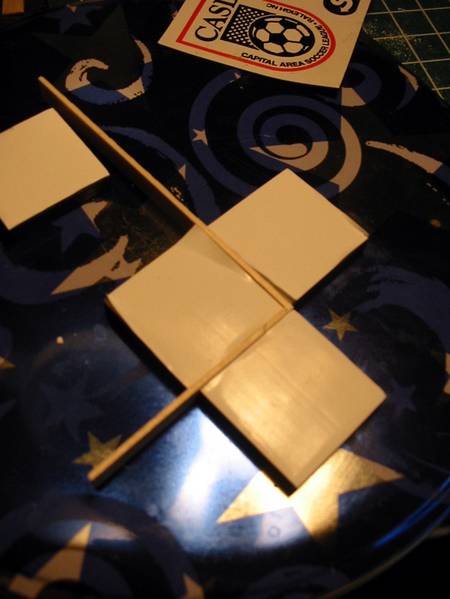
The windows were a mini project. I used my favorite material - coffee stir sticks. They are great; they are a wonderful size and have a very nice tight grain. The thickness is nice and adequate for this project. As you can see I did the interior frame before the cork. This was because the thickness of the stir sticks plus I wanted the brick to be on the outside of the frame. Accepting the width of the stick as default, I was left me with dealing with the length. My windows were going to be simple overall exterior frames with interior frames holding the 'glass' panes.
To make the exterior frames I simply measured the size of each window and cut pieces to match. When building frames of any kind you have to account for the thickness of material you use where two pieces join. Once cut, I test fit each set of pieces and made the necessary adjustments. I used white glue to hold them all together. When you are working with wood and glue you need to consider the way you will 'color' the wood. If you plan to use a stain you must be careful with the glue. Glue will not let stain absorb into the wood. The glue may appear 'clear' when you glue it, but it will not come out that way after you stain. You can work around this by staining all pieces first, then gluing.
To make the interior window frames I had devised a plan to use magnets. I have seen expensive magnetic clamps/gluing jigs in various tool magazines. The clamps help hold two pieces at right angles. I devised a homemade version of these. I found small 1"x1" magnets at my local craft store. As a base for the magnets I used the lid of a Christmas cookie tin. To start I re-measured the interior size of the windows (with exterior frames installed). I cut the interior frames, adjusting for the joints. You can see how I used the magnet clamps to hold the pieces at right angles. To ensure a right angle I had to use three magnets per corner. Two hold the outside 90 degrees, and the third holds the inside 90 degrees. You can use various sizes of magnets or stand them on end to get more joints glued at one time. Windowpanes present you with two options: 1 - one glass pane and thin frames, or 2 - regular frames and multiple glass panes. I selected the later and planned for multiple windowpanes with regular thickness frames. This makes the framing easier and presents a challenge with window fit and lots of panes. I measured for the pane frames and glued these in place.
With the window frames built I used them as measurements for the glass. I placed the frame on top of a sheet of clear styrene and marked the corners. Then I used a new blade and carefully cut the pieces out. With the above-mentioned problem with stain and glue I stained all my frames first. Then I slid the glass in place and used a very small bit of white glue to secure it.
My plan called for red bricks and gray stones. I like to use hobby paints such as Apple Barrel or Folkart for this type of work. Coverage, cost, and variety are the reason I go with this type of paint. I like the variety of colors you can buy off the shelf, you can also mix and match your own custom colors. They are inexpensive at about $1 a bottle. The coverage is typically thick and solid and this type of paint offers just that.
I would need at least four colors: red, black, white, cream. The red is for the bricks, the black and white mix to make gray for the stone, the cream will be for the mortar. The black and white will be used for varying the base colors for variety.
I put a base coat of red on the bricks. Then I used the black and white to vary the color and individually painted each brick different colors of red. I like to put a nice size blob of base color down, then a drop of accent color next to it. I then gently mix a bit of the two together; I do not mix it 100%. This gives me a greater variety of color and more transition colors. My mix resembles cream in coffee in the first seconds of pouring it together.
The mortar was a nice mix of creams and browns to get the desired color. I used a fine brush and brushed it on. I had to go back and touch up some areas of red where I over painted. Paint doesn't worry me anymore, I know I can cover it or remove it or touch it up till I'm satisfied.
I mixed the black and white to a nice gray and painted that on all of the stone details. This included the balcony. I used a variety of brushes to meet the need. Large ones for the big areas, small thin ones to get the edges. I used medium square tipped brushes for the smaller pieces.
Windows
The windows were a mini project. I used my favorite material - coffee stir sticks. They are great; they are a wonderful size and have a very nice tight grain. The thickness is nice and adequate for this project. As you can see I did the interior frame before the cork. This was because the thickness of the stir sticks plus I wanted the brick to be on the outside of the frame. Accepting the width of the stick as default, I was left me with dealing with the length. My windows were going to be simple overall exterior frames with interior frames holding the 'glass' panes.
To make the exterior frames I simply measured the size of each window and cut pieces to match. When building frames of any kind you have to account for the thickness of material you use where two pieces join. Once cut, I test fit each set of pieces and made the necessary adjustments. I used white glue to hold them all together. When you are working with wood and glue you need to consider the way you will 'color' the wood. If you plan to use a stain you must be careful with the glue. Glue will not let stain absorb into the wood. The glue may appear 'clear' when you glue it, but it will not come out that way after you stain. You can work around this by staining all pieces first, then gluing.
To make the interior window frames I had devised a plan to use magnets. I have seen expensive magnetic clamps/gluing jigs in various tool magazines. The clamps help hold two pieces at right angles. I devised a homemade version of these. I found small 1"x1" magnets at my local craft store. As a base for the magnets I used the lid of a Christmas cookie tin. To start I re-measured the interior size of the windows (with exterior frames installed). I cut the interior frames, adjusting for the joints. You can see how I used the magnet clamps to hold the pieces at right angles. To ensure a right angle I had to use three magnets per corner. Two hold the outside 90 degrees, and the third holds the inside 90 degrees. You can use various sizes of magnets or stand them on end to get more joints glued at one time. Windowpanes present you with two options: 1 - one glass pane and thin frames, or 2 - regular frames and multiple glass panes. I selected the later and planned for multiple windowpanes with regular thickness frames. This makes the framing easier and presents a challenge with window fit and lots of panes. I measured for the pane frames and glued these in place.
With the window frames built I used them as measurements for the glass. I placed the frame on top of a sheet of clear styrene and marked the corners. Then I used a new blade and carefully cut the pieces out. With the above-mentioned problem with stain and glue I stained all my frames first. Then I slid the glass in place and used a very small bit of white glue to secure it.

About the Author


FROM: NORTH CAROLINA, UNITED STATES
I modeled when I was a teenager. College, family and work stopped me for a while. Then I picked it back up after about 12 years off. My main focus is dioramas. I like the complete artistic method of story telling. Dioramas involve so many aspects of modeling and I enjoy getting involved in the ...
Copyright ©2021 by Scott Lodder. Images and/or videos also by copyright holder unless otherwise noted. The views and opinions expressed herein are solely the views and opinions of the authors and/or contributors to this Web site and do not necessarily represent the views and/or opinions of Armorama, KitMaker Network, or Silver Star Enterrpises. All rights reserved. Originally published on: 2005-10-22 00:00:00. Unique Reads: 39489

WEB HOSTING BY


Copyright ©2021 Armorama and Kitmaker Network, a subsidiary of Silver Star Enterprises
All Rights Reserved. Please read our Conditions of Use and Privacy Policy.
All Rights Reserved. Please read our Conditions of Use and Privacy Policy.