

1⁄35Got'cha Covered
Water
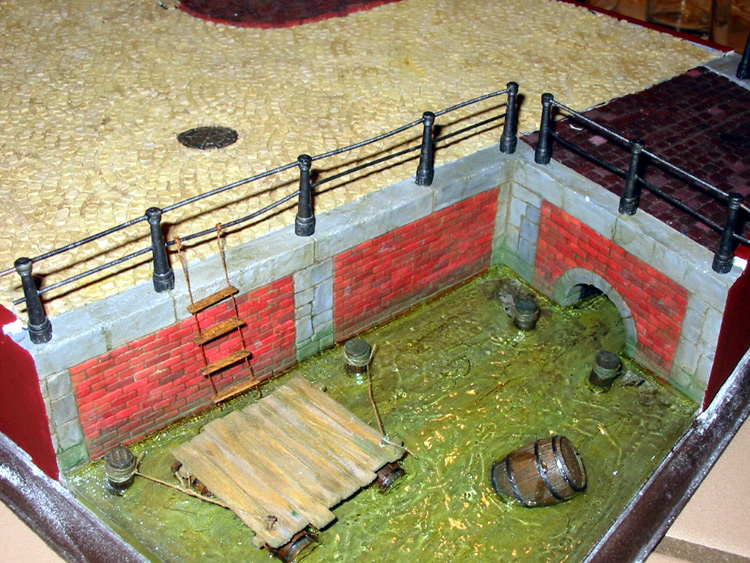
I planned on a fairly thin layer of resin water in the canal but I wanted to try to show depth. To do this I needed to use color. The 'deeper' the water the darker it should be. So I planned on a dark green base, from that I would work lighter and lighter as I pour multiple layers. I have had good success with casting resin as my water and planned to use it again. This featurepouring resin shows the basic process that I used.
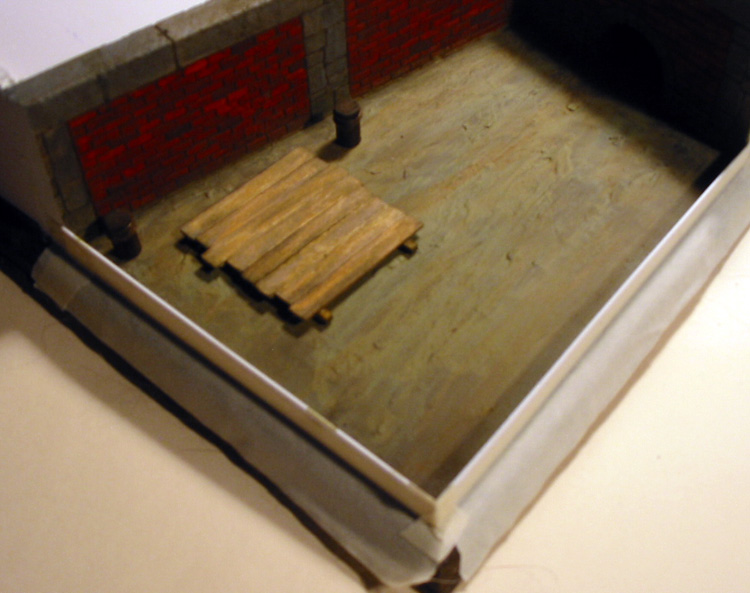
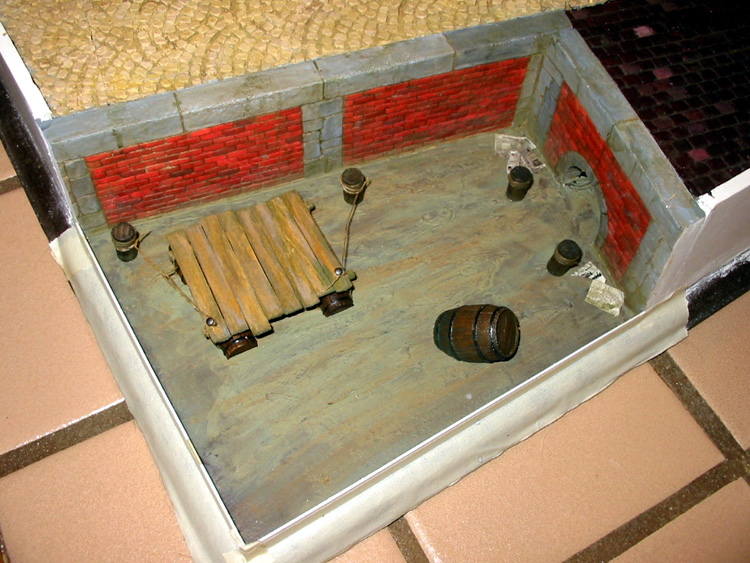
To start I added some spackle to the MDF base. I applied it like spreading butter on toast. I didn't smear a lot, just enough to give texture and visual interest. Since the water will be transparent I needed to force some movement into the water. This spackle was the trick, I smear it to represent current and water flow. When dry, I painted a base coat of Folkart brown. Then I mixed up a variety of dark greens and painted streaks along the spackle lines. With the base color in place I needed to prepare for water.
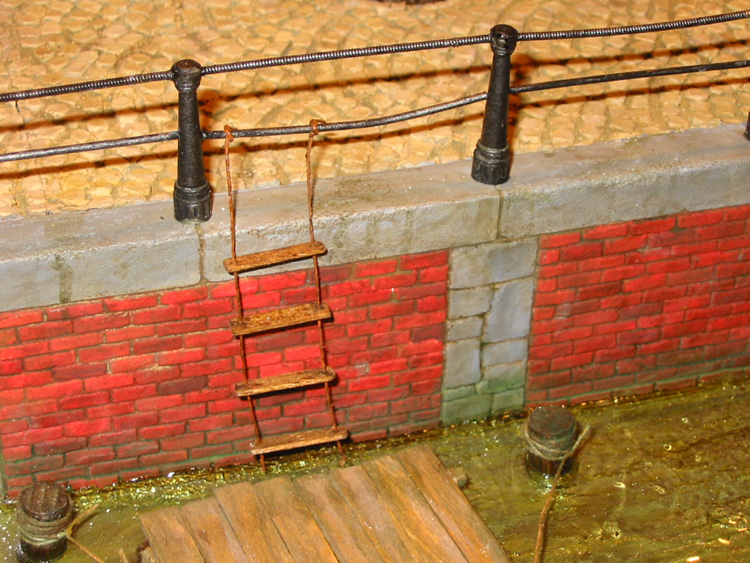
Water preparation is very important. Using a viscous product I had to make my water area 'water tight' so it does not seep out and ruin the base or seep away leading to extra pouring. I had to be sure that the bridge area was sealed. The Styrofoam itself was porous and the seal with the MDF was not perfect. In order to make this area 'water tight' I used two-part epoxy glue. I mixed it and smeared it using a coffee stirrer. I planned on having an exposed edge to the water and needed to create a temporary dam to hold the resin. I have had good success with styrene and masking tape for my dam. I cut styrene strips a bit higher than the deepest part of my canal. At the corner where the two styrene strips meet I used CA to hold the parts. At the ends where the dam met the wall I used masking tape to hold it. I had about 1/8 overlap with the base. I rubbed it quite firmly to ensure a tight seal. Along the base of the dam I used more masking tape. With the dam in place it was time to pour.
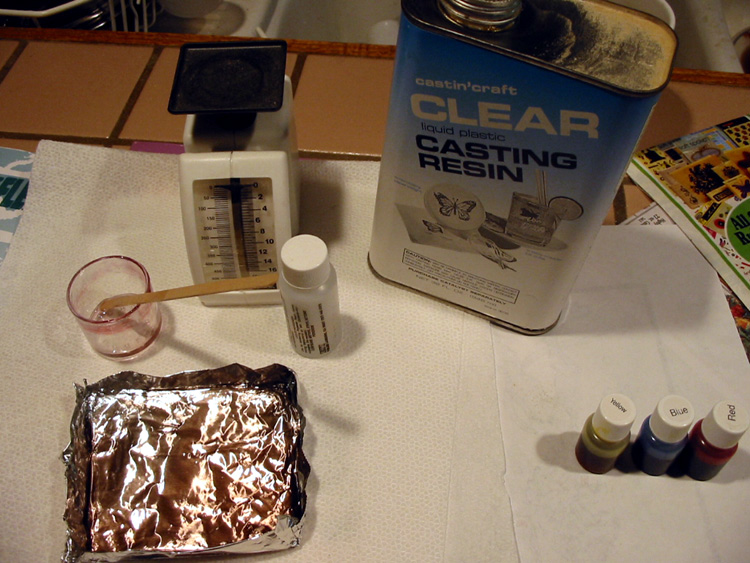
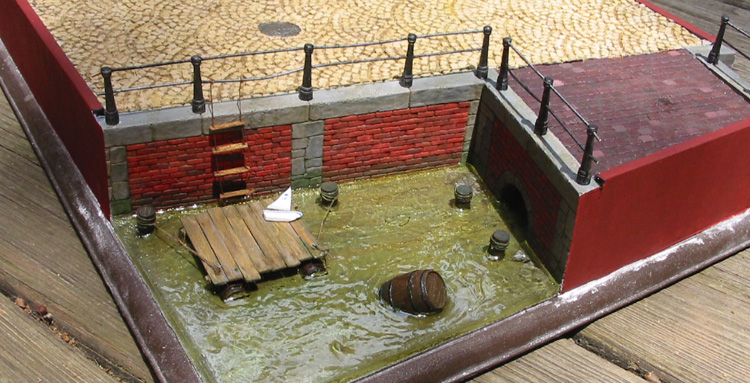
Pouring the water was fairly straightforward. As mentioned I planned to use color to gain depth, which leads to multiple layers and multiple pours. The color was achieved by using special dyes made specifically for this casting resin. This dye is found right next to the casting resin at the hobby store. I tested mixing the blue red and green colors in some water to get an idea of the proportions I would need. As stated in the dye instructions I mixed the proportions in the resin before I added the catalyst. I poured the resin in about 1mm thick layers. This can be hard to figure out sometimes. If you can do a measurement pour in a spare or 'throwaway' container do this before mixing anything. Here is one way make a temporary container out of kitchen foil. Fold the foil as close to the diorama shape as possible then pour in water to a 'layer' depth. Then pour that water out of the temporary container into the cup you will mix the resin in. Mark the depth on the outside with a marker and pour out the water. Let the cup dry. Letting the cup dry is important, if leftover water drops mix with the resin they can alter the end product with air bubbles or they can affect the hardening process. Now pour in resin up to the mark and you will have exactly the right amount of resin water. With the hidden water under the bridge and the complex shape, I was unable to do this. So I planned on pouring more than I needed and simply disposing of the excess.
Each layer was mixed with slightly less color and poured the same way.
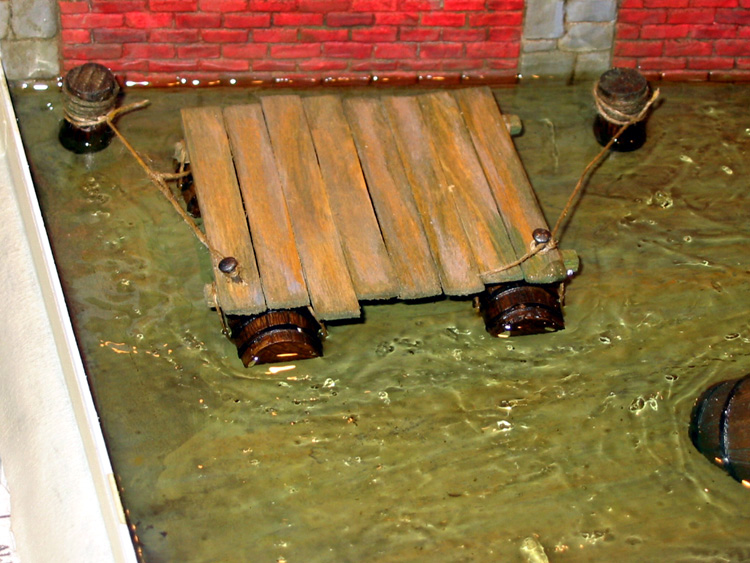
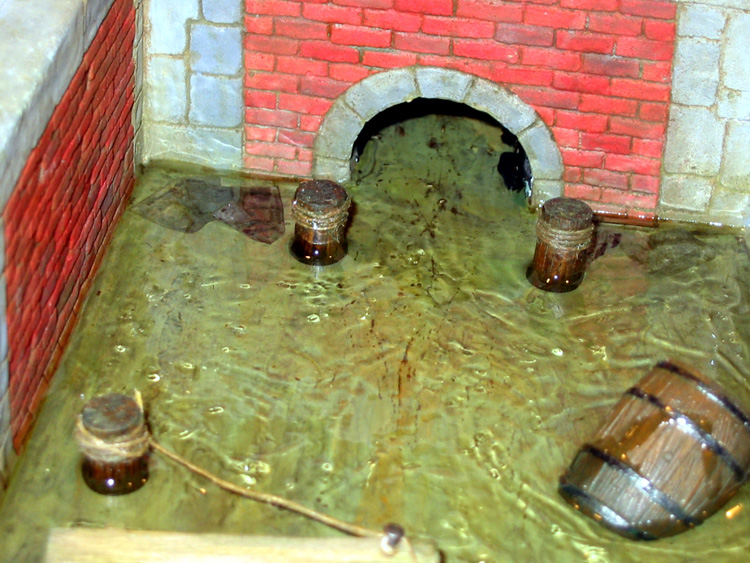
Once the last layer was poured I waited until it started to get thick. I used a stir stick and dragged it through the water to form ripples. I had to repeat this a couple of time to make sure the ripples stayed.
I planned on a fairly thin layer of resin water in the canal but I wanted to try to show depth. To do this I needed to use color. The 'deeper' the water the darker it should be. So I planned on a dark green base, from that I would work lighter and lighter as I pour multiple layers. I have had good success with casting resin as my water and planned to use it again. This feature
To start I added some spackle to the MDF base. I applied it like spreading butter on toast. I didn't smear a lot, just enough to give texture and visual interest. Since the water will be transparent I needed to force some movement into the water. This spackle was the trick, I smear it to represent current and water flow. When dry, I painted a base coat of Folkart brown. Then I mixed up a variety of dark greens and painted streaks along the spackle lines. With the base color in place I needed to prepare for water.
Water preparation is very important. Using a viscous product I had to make my water area 'water tight' so it does not seep out and ruin the base or seep away leading to extra pouring. I had to be sure that the bridge area was sealed. The Styrofoam itself was porous and the seal with the MDF was not perfect. In order to make this area 'water tight' I used two-part epoxy glue. I mixed it and smeared it using a coffee stirrer. I planned on having an exposed edge to the water and needed to create a temporary dam to hold the resin. I have had good success with styrene and masking tape for my dam. I cut styrene strips a bit higher than the deepest part of my canal. At the corner where the two styrene strips meet I used CA to hold the parts. At the ends where the dam met the wall I used masking tape to hold it. I had about 1/8 overlap with the base. I rubbed it quite firmly to ensure a tight seal. Along the base of the dam I used more masking tape. With the dam in place it was time to pour.
Pouring the water was fairly straightforward. As mentioned I planned to use color to gain depth, which leads to multiple layers and multiple pours. The color was achieved by using special dyes made specifically for this casting resin. This dye is found right next to the casting resin at the hobby store. I tested mixing the blue red and green colors in some water to get an idea of the proportions I would need. As stated in the dye instructions I mixed the proportions in the resin before I added the catalyst. I poured the resin in about 1mm thick layers. This can be hard to figure out sometimes. If you can do a measurement pour in a spare or 'throwaway' container do this before mixing anything. Here is one way make a temporary container out of kitchen foil. Fold the foil as close to the diorama shape as possible then pour in water to a 'layer' depth. Then pour that water out of the temporary container into the cup you will mix the resin in. Mark the depth on the outside with a marker and pour out the water. Let the cup dry. Letting the cup dry is important, if leftover water drops mix with the resin they can alter the end product with air bubbles or they can affect the hardening process. Now pour in resin up to the mark and you will have exactly the right amount of resin water. With the hidden water under the bridge and the complex shape, I was unable to do this. So I planned on pouring more than I needed and simply disposing of the excess.
Each layer was mixed with slightly less color and poured the same way.
Once the last layer was poured I waited until it started to get thick. I used a stir stick and dragged it through the water to form ripples. I had to repeat this a couple of time to make sure the ripples stayed.


About the Author


FROM: NORTH CAROLINA, UNITED STATES
I modeled when I was a teenager. College, family and work stopped me for a while. Then I picked it back up after about 12 years off. My main focus is dioramas. I like the complete artistic method of story telling. Dioramas involve so many aspects of modeling and I enjoy getting involved in the ...
Copyright ©2021 by Scott Lodder. Images and/or videos also by copyright holder unless otherwise noted. The views and opinions expressed herein are solely the views and opinions of the authors and/or contributors to this Web site and do not necessarily represent the views and/or opinions of Armorama, KitMaker Network, or Silver Star Enterrpises. All rights reserved. Originally published on: 2005-10-22 00:00:00. Unique Reads: 39489

WEB HOSTING BY


Copyright ©2021 Armorama and Kitmaker Network, a subsidiary of Silver Star Enterprises
All Rights Reserved. Please read our Conditions of Use and Privacy Policy.
All Rights Reserved. Please read our Conditions of Use and Privacy Policy.