Dioramas: Buildings & Ruins
Ruined buildings and city scenes.
Hosted by Darren Baker
Am Ende steht der Sieg - Berlin 1945
Mars_Volta
Visit this Community
Quebec, Canada
Joined: March 28, 2005
KitMaker: 145 posts
Armorama: 124 posts
Posted: Sunday, November 01, 2009 - 09:58 AM UTC
Hi Jan!

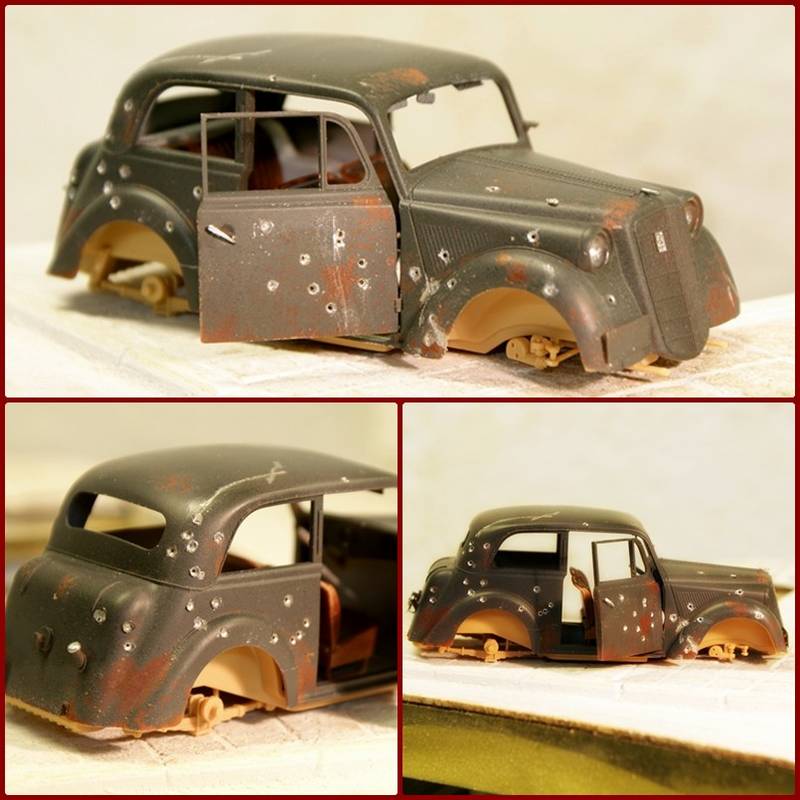
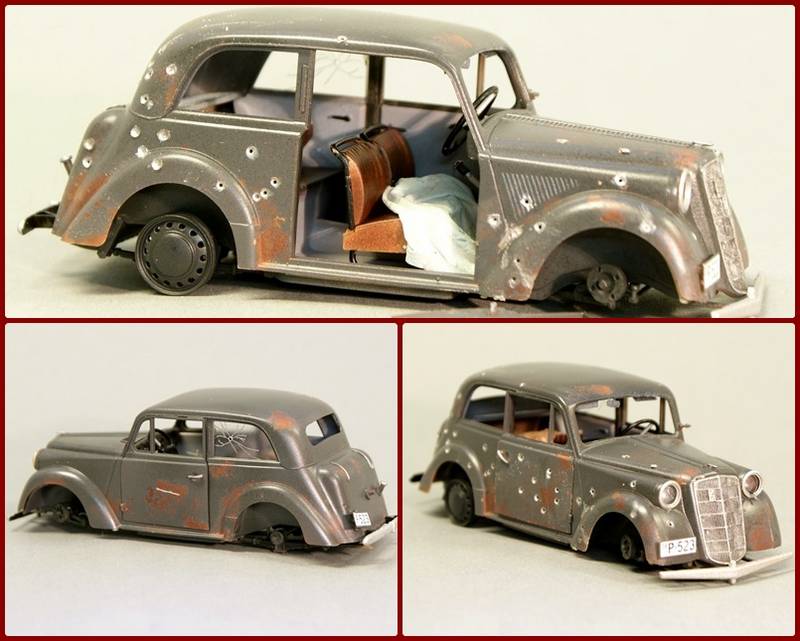
When I first saw your message I told myself ''hmm that build log is gonna be cool, interesting subject....I'll look at it for sure''
But wooooh, when I saw the first pictures i was shocked!
It looks like we're building almost the same dio!

I took a picture today to prove my point!
here it goes
and another one

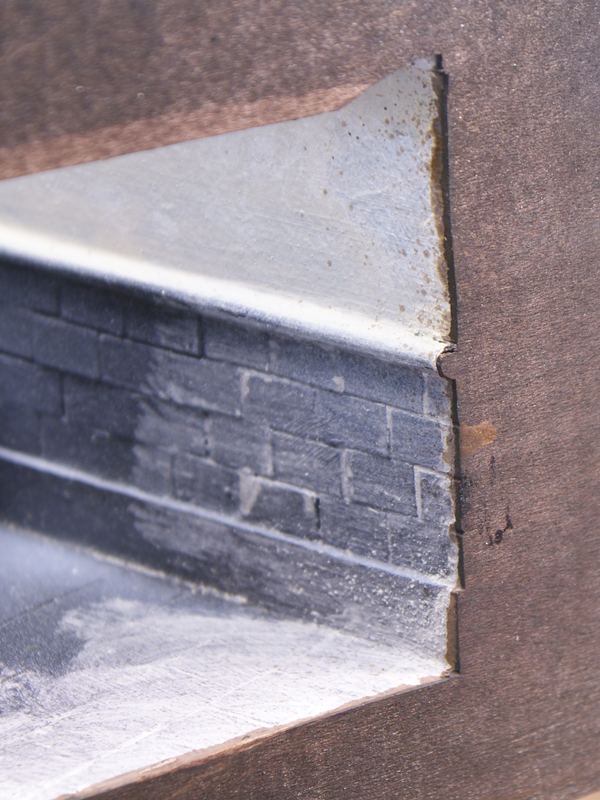
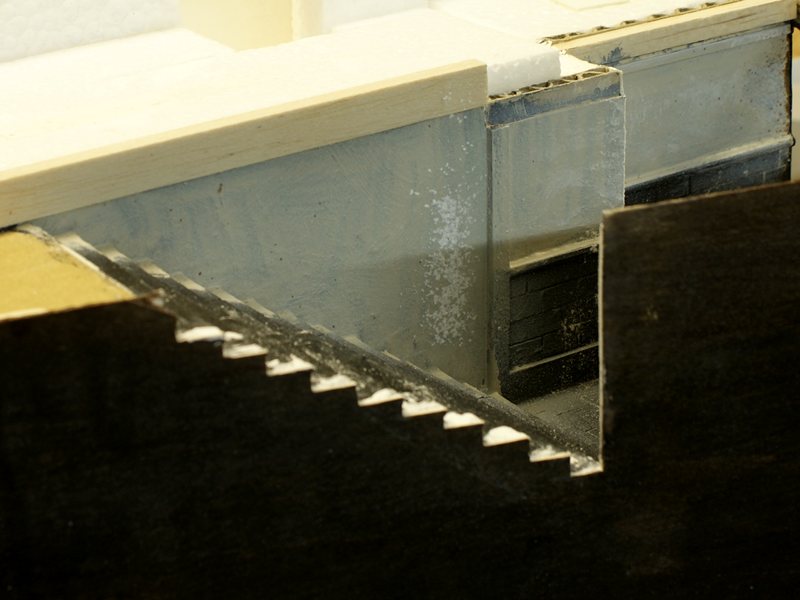
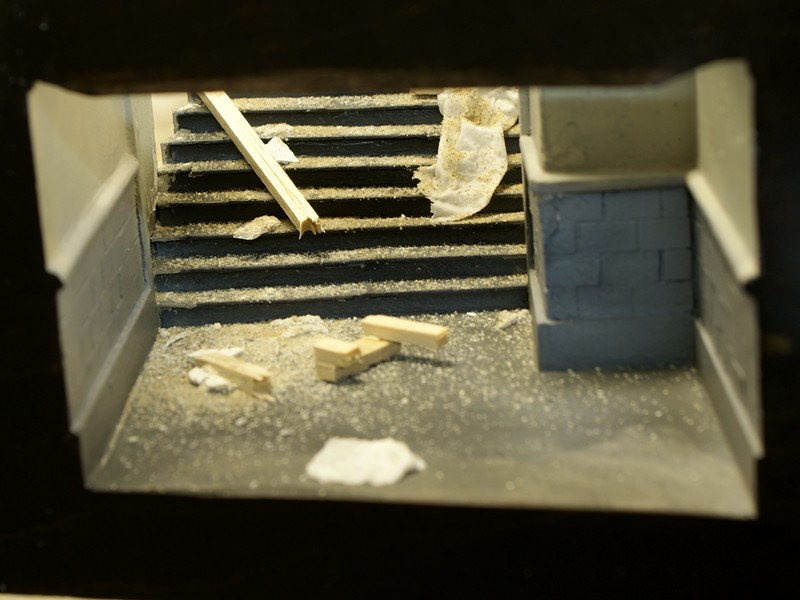
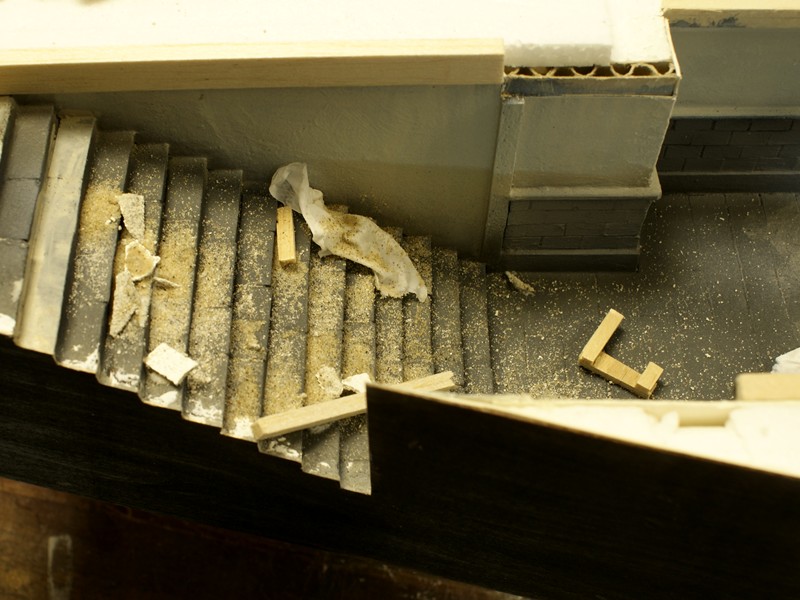
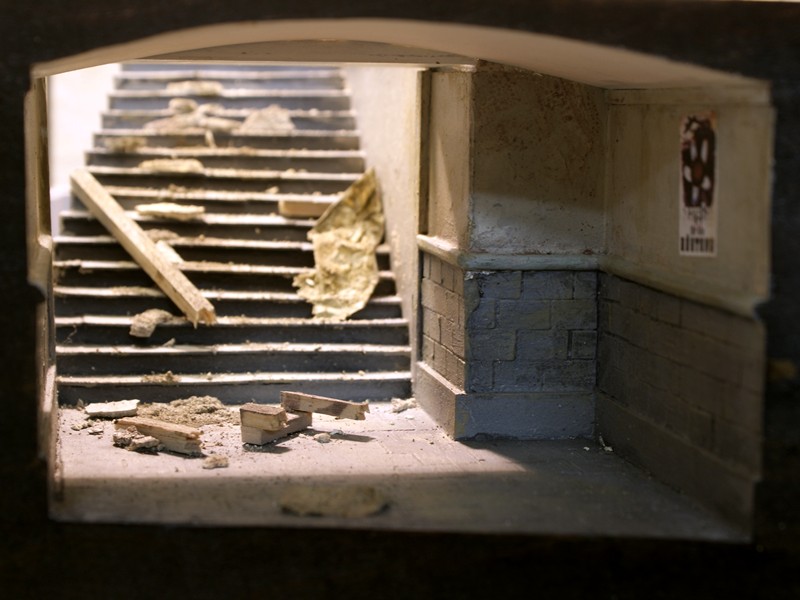
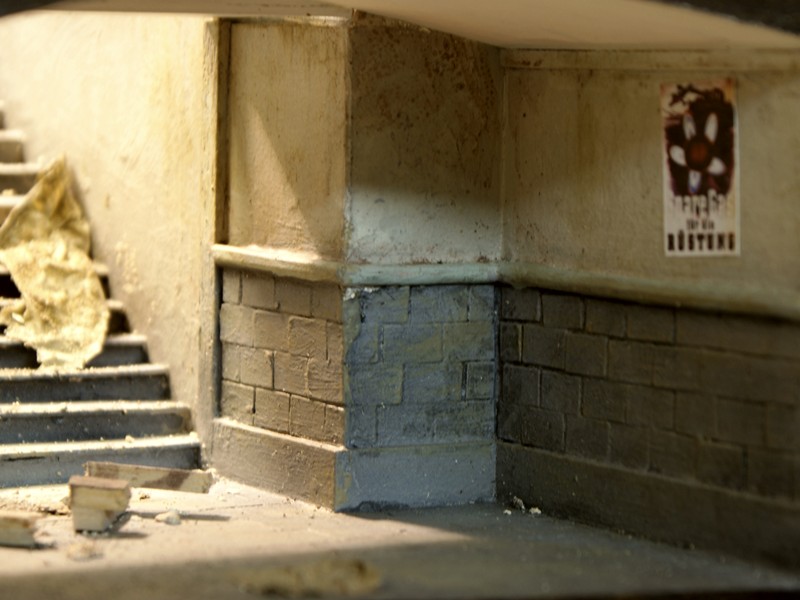
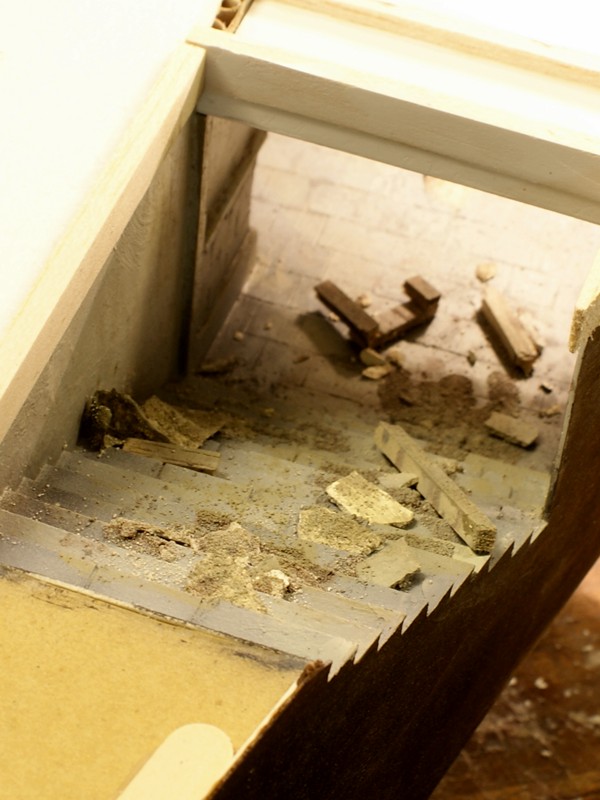
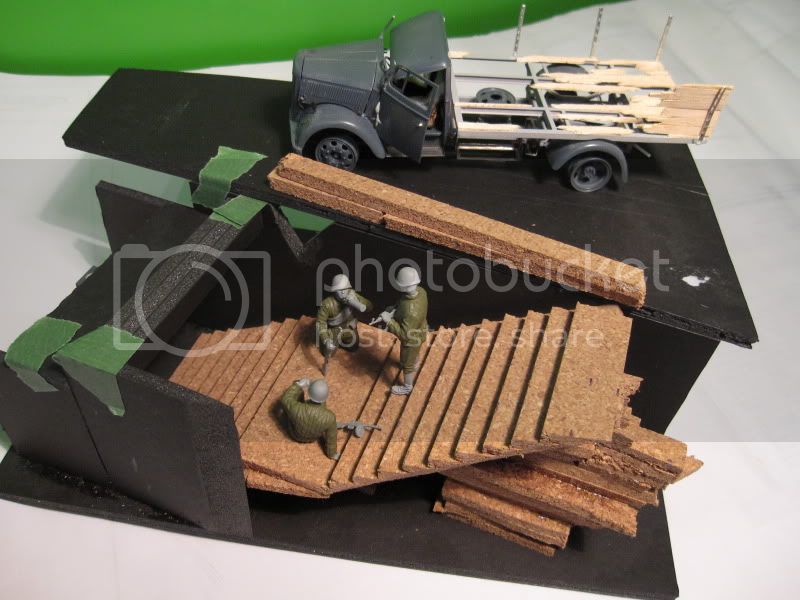
For my project i decided to show the street side instead of the building side, but we both cut in that subway staircase! I'm pretty amazed by this!

Well, I didnt consider starting a build log for my diorama cause I work waaaay too slowly and that would not be captivating enough.....but now I just can't, my project would look like a total rip off of yours Even though I began working on that thing in July! hehe.

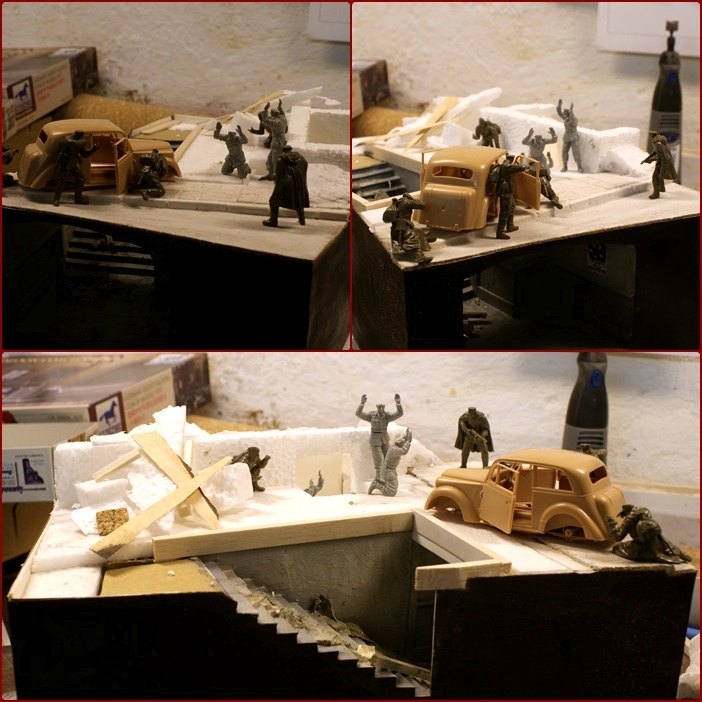
And yep, we've been inspired by the same picture of the russian scouts going down the stairs.


Keep up your nice work! I'll be looking forward at it.

Philippe

MrMox
Visit this Community
Aarhus, Denmark
Joined: July 18, 2003
KitMaker: 3,377 posts
Armorama: 1,088 posts
Posted: Sunday, November 01, 2009 - 08:16 PM UTC
Well Joris, its for sure not the best generation 2 set from dragon - but it was on sale (wonder why) and I figured that the price was fair for just the weapons and the equipment - I plan on using the one with the pistol and the one with the panzerfaust, the rest of them ends up in the spares box as the definately looks goofy and have wierd poses....

Hi Philippe - aint that something !! - by all means, get a blog going, you are off to a great start - I like your layout (naturally ) but i would love to see your progress and technique on your build!

I like the grate at the bottom of the stairs, allso that you devided the stairs into 2 sections, something that I decided against as I wanted the undergrund section bigger that yours and i was running out of space

I like your wreck too, I am considering beating a Bronco salon car up and use that.

So, feel free to do a blog, I for one would love seeing your progress!

I have begun doing the sides for the diorama - I use thin woodfinery glued on. It takes some good nerves as the moist in the glue makes the bulge when wet, but put under a bit of pressure it all straithens out. - it looks funny but it works ....

Kastanova
Visit this Community
Victoria, Australia
Joined: May 10, 2008
KitMaker: 150 posts
Armorama: 135 posts
Posted: Sunday, November 01, 2009 - 10:33 PM UTC

Quoted Text

Mathew you doing very nice job! it will be interesting to see it when it finished.
P.S:Rammstein forever!


My bad, no hijacking intended,
it is comming along nicely Jan and I'm learning new things (wood filler technique), all that weight on the diorama side... i hope theres no bowing.

PS: phillip, great minds think alike look forward to seeing a few more pics of your work.

Cheers
Mat
slodder
Visit this Community
North Carolina, United States
Joined: February 22, 2002
KitMaker: 11,718 posts
Armorama: 7,138 posts
Posted: Sunday, November 01, 2009 - 10:55 PM UTC
Nice updates, lots of details in the posts. It's coming along well.
martyncrowther
Visit this Community
England - West Midlands, United Kingdom
Joined: September 12, 2007
KitMaker: 1,548 posts
Armorama: 1,407 posts
Posted: Monday, November 02, 2009 - 03:02 AM UTC
Hi Jan great progress. It is going to be one great dio!

P.S It is my favourite subject as well.
Dangeroo
#023
Visit this Community
Zurich, Switzerland
Joined: March 13, 2009
KitMaker: 2,058 posts
Armorama: 1,656 posts
Posted: Monday, November 02, 2009 - 08:47 AM UTC
Great progress Jan, looking forward to learn more! The underground looks great!

Cheerio!
MrMox
Visit this Community
Aarhus, Denmark
Joined: July 18, 2003
KitMaker: 3,377 posts
Armorama: 1,088 posts
Posted: Wednesday, November 04, 2009 - 07:19 AM UTC
I have been down with a cold, but a little progress has happend despite a sore troath and a running nose... yikes...

I have stained the wooden frame work and partially cut it so it fits the scene. To make the wood resistant to paint and washes i will give it a solid coat of lacquer before progressing with painting.


martyncrowther
Visit this Community
England - West Midlands, United Kingdom
Joined: September 12, 2007
KitMaker: 1,548 posts
Armorama: 1,407 posts
Posted: Wednesday, November 04, 2009 - 07:27 AM UTC
Great porgress Jan, hope you feel better.
MrMox
Visit this Community
Aarhus, Denmark
Joined: July 18, 2003
KitMaker: 3,377 posts
Armorama: 1,088 posts
Posted: Tuesday, November 10, 2009 - 10:59 PM UTC
I“ll have to admit, that it has been quiet around here. My youngest had her birthday over the weekend and since then it has been different obligations each day - but i have managed to sneek away for a few minutes and stain and lacquer the base.

Next step will be painting the subwaypart and ad some rubble /litter on the floor so I can close uo the underground section.

Heres the woodwork - still going to get cut so it forms to the stairs and the roof in the subway.

Edit - removed pictures as i have uploaded the wrong ones ... darn!
slodder
Visit this Community
North Carolina, United States
Joined: February 22, 2002
KitMaker: 11,718 posts
Armorama: 7,138 posts
Posted: Wednesday, November 11, 2009 - 01:18 AM UTC
Hmm, the work is really good. I like the detail. I would offer that you make the edging a gloss finish. The matt finish keeps my eyes away from the stair 'gap'.
MrMox
Visit this Community
Aarhus, Denmark
Joined: July 18, 2003
KitMaker: 3,377 posts
Armorama: 1,088 posts
Posted: Thursday, November 12, 2009 - 07:34 AM UTC
Got the photoes sorted out now - here a single shot showing the stained and laquered frame and the cutouts so the frame follows the contours of the stairs. next step will be masking the wood and painting the underground section.

MrMox
Visit this Community
Aarhus, Denmark
Joined: July 18, 2003
KitMaker: 3,377 posts
Armorama: 1,088 posts
Posted: Saturday, November 14, 2009 - 02:43 AM UTC
I have added some debris and rubble that I would expect to find on the entrance area - thrown down form explosions and collapsing buildings.

Cheers/Jan


Mars_Volta
Visit this Community
Quebec, Canada
Joined: March 28, 2005
KitMaker: 145 posts
Armorama: 124 posts
Posted: Saturday, November 14, 2009 - 05:44 AM UTC
Good Job Jan!

You work very well, execution is first class. Especially where the frame meets the stairs, THAT is so SHARP Looks real good.
Are you done with painting the underground section?
And also maybe i would suggest to glue the fabric piece to that it follows the contour of the stairs. But maybe it's just there temporalily...

Keep it going mate, I like it a lot!

Cheers

Phil
MrMox
Visit this Community
Aarhus, Denmark
Joined: July 18, 2003
KitMaker: 3,377 posts
Armorama: 1,088 posts
Posted: Sunday, November 15, 2009 - 07:20 AM UTC
Thanks Phil,

I have been rather productive and finished the underground - still some dusting with pigments to do, but that will have to wait till I get the paving done.


MrMox
Visit this Community
Aarhus, Denmark
Joined: July 18, 2003
KitMaker: 3,377 posts
Armorama: 1,088 posts
Posted: Tuesday, November 17, 2009 - 09:11 PM UTC
I have begun working on the pavement and the road, still alot to do on the paving and building - but before that I have been toying a bit with the layout

Gundam-Mecha
Visit this Community
England - South East, United Kingdom
Joined: August 05, 2009
KitMaker: 1,019 posts
Armorama: 933 posts
Posted: Wednesday, November 18, 2009 - 01:55 AM UTC
This is coming along really nicely! I love what you're doing with the terrain!
roudeleiw
Visit this Community
Luxembourg
Joined: January 19, 2004
KitMaker: 2,406 posts
Armorama: 2,224 posts
Posted: Wednesday, November 18, 2009 - 04:18 AM UTC
Jan, IMO it would be better to break a bit more your wood pieces, the cuts (all of them) are to clean.
The still fixed together pieces do (always iMO) not look very good.

What is your poster saying? Don't you have anything more colorful perhaps?

The Layout of the vehicle and figs looks good!

Cheers
Claude


martyncrowther
Visit this Community
England - West Midlands, United Kingdom
Joined: September 12, 2007
KitMaker: 1,548 posts
Armorama: 1,407 posts
Posted: Wednesday, November 18, 2009 - 11:06 AM UTC
Hi Jan,

Really nice update!

Martyn
blockhaus
Visit this Community
Spain / Espańa
Joined: July 04, 2003
KitMaker: 693 posts
Armorama: 682 posts
Posted: Wednesday, November 18, 2009 - 08:56 PM UTC
Hi Jan!
good work ! I like the angle that you have done.
The only thing that I maybe will change his the poster.I thing that need more elaborate detail. this can reinforce the idea of "civilian" or "peaceful" set in contrast with the situation that you depics in the surface. a line framed posters as you can see in suburbans around the world.anouncing civilian goods.
mikey
Visit this Community
Idaho, United States
Joined: March 14, 2006
KitMaker: 229 posts
Armorama: 227 posts
Posted: Thursday, November 19, 2009 - 12:42 AM UTC
Jan, that is just some great work. The placement of figures really makes the scene. I can't rememeber but did you say you were going to put some figures in the entrance to the basement? Either way, it works, keep up the great work.
MrMox
Visit this Community
Aarhus, Denmark
Joined: July 18, 2003
KitMaker: 3,377 posts
Armorama: 1,088 posts
Posted: Thursday, November 19, 2009 - 01:09 AM UTC
Thanks for all the comments.

I“m not really striving for 100 % realism, more trying to create a feeling of a town in despair and falling apart, so even if the underground is somewhat darker than it propably ought to be, then its an attemt to create a feeling rather than a correct representation.

I have to agree that the poster is kin“da pale in this setting, but it was the only civilian like poster i had - its says something like "Gas sparen für der rustung" - save gas for the armamentindustri.

There will be some soldiers standing in front of it, so it will be partly hidden.

The piles of rubble on street level is only loose fitted to test the layout - thay will be replaced with something more convincing.

Some time ago I ripped out the firstfloor bathroom in our house from 1934 - my experience is that things nailed together tends to stay together, even if tossed out from first floor down into a container. I plan on the house being collapsed in the end where the subway stairs meets the street - so there will be a pile of rubble - so I will judge if more debris should have fallen down the stairs - depending on the size of the collapse.

Cheers/Jan
muddyfields
Visit this Community
Scotland, United Kingdom
Joined: February 04, 2006
KitMaker: 884 posts
Armorama: 622 posts
Posted: Thursday, November 19, 2009 - 02:03 AM UTC
Hi
Like what you have done here, & the Idea behind it. Will be waiting for the finished diorama.
MrMox
Visit this Community
Aarhus, Denmark
Joined: July 18, 2003
KitMaker: 3,377 posts
Armorama: 1,088 posts
Posted: Thursday, November 19, 2009 - 09:53 AM UTC
Being basically done with the paving, I decided to do a little work on Broncos nice little salon car. Its a quite nice kit, that at some points suffer from Broncos tendency to overcomplicate things a bit.

Thats one of the nice thing about doing dioramas, that you can change your focus to something else when you need a break from whatever you are doing.

Still alot of work to do on the car, but I will let it dry a bit before working on it again.

Cheers/Jan

MrMox
Visit this Community
Aarhus, Denmark
Joined: July 18, 2003
KitMaker: 3,377 posts
Armorama: 1,088 posts
Posted: Thursday, November 19, 2009 - 11:52 PM UTC
I have put a little ,ore work into the car, given it a coat of future so now its reasy for some washes.

Fenders will get some rust too...

SGTJKJ
#041
Visit this Community
Kobenhavn, Denmark
Joined: July 20, 2006
KitMaker: 10,069 posts
Armorama: 4,677 posts
Posted: Friday, November 20, 2009 - 02:34 AM UTC
Looks great, Jan. I think the layout of the diorama is very good.

Looking forward to see more