Hosted by Darren Baker
Am Ende steht der Sieg - Berlin 1945

martyncrowther

Joined: September 12, 2007
KitMaker: 1,548 posts
Armorama: 1,407 posts

Posted: Monday, December 07, 2009 - 05:18 AM UTC
HI Jan, great update! The diorama is coming along very nicely!
garthj

Joined: August 15, 2006
KitMaker: 282 posts
Armorama: 229 posts

Posted: Monday, December 07, 2009 - 10:35 AM UTC
Hi Jan
This is coming along very well.
It tells a great story.
Regards
Garth
This is coming along very well.
It tells a great story.
Regards
Garth
Wisham

Joined: September 05, 2007
KitMaker: 133 posts
Armorama: 119 posts

Posted: Monday, December 07, 2009 - 10:57 AM UTC
This looks very nice, I like all the different levels you have going on. Good way to keep the weight down. Keep up the great work!
MrMox

Joined: July 18, 2003
KitMaker: 3,377 posts
Armorama: 1,088 posts

Posted: Wednesday, December 09, 2009 - 12:16 AM UTC
Thanks guys !
I just noticed that I have forgot to answer Soerens question of how o make the bulletholes in the car.
First I drilled a very small hole to represent the bullet penetration. Next I took a much bigger drill (1,5 mm ) and drilled a week indention in the surface to reprecent the surrounding damage.
After painting the indentions got a metal finish, ad rust depending on how old the bulletdamage is.
Cheers/Jan
jba

Joined: November 04, 2005
KitMaker: 1,845 posts
Armorama: 777 posts

Posted: Wednesday, December 09, 2009 - 01:10 AM UTC
Your pile of rubbles look pretty good Jan -and so does the rest of your diorama, that's another masterpiece in progress no doubt about it!
Posted: Wednesday, December 09, 2009 - 04:19 AM UTC
Jan, looks great! I love the effect of the different levels and it looks very busy. Also the rubble looks great, and some great technique tips! thanks for that!
Cheerio!
Cheerio!
Justin757

Joined: August 10, 2009
KitMaker: 45 posts
Armorama: 43 posts

Posted: Wednesday, December 09, 2009 - 07:14 AM UTC
I think I need to stay away from armorama until i finish my current dio. 
Your work really makes me want work on a Berlin subject sometime. Very impressive lay out. You really capture urban combat well in this scene.

Your work really makes me want work on a Berlin subject sometime. Very impressive lay out. You really capture urban combat well in this scene.

adamant

Joined: March 25, 2009
KitMaker: 152 posts
Armorama: 119 posts

Posted: Wednesday, December 09, 2009 - 09:04 AM UTC
Simply amazing concept and composition Jan! Awesome idea, great multilevel interest grabber.
Am just wondering if the rail above the subway shouldn't be more ornate for a second world war setting? could be just me, but it looks a bit to modern, then again have never actually seen pics of such a set up in Berlin 1945, awesome work mate.
Edit: just came across this, thought you may find it handy, although you may already be using it as reference, at any rate I thought it worth posting. Keep up the great work man.
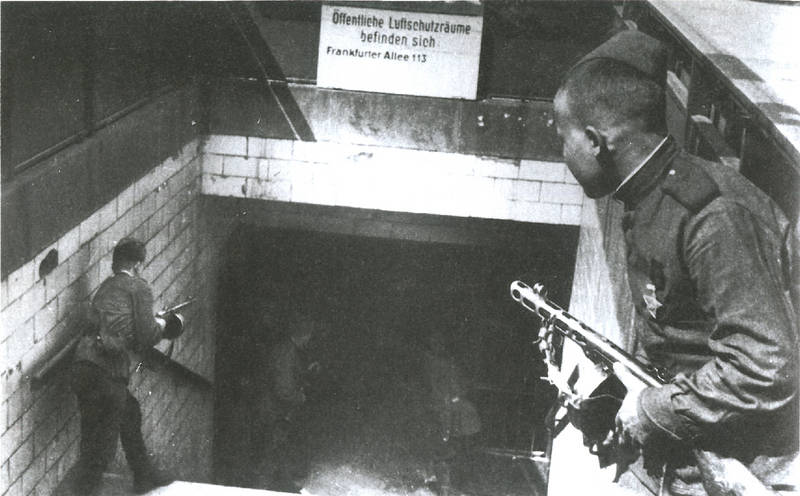
Am just wondering if the rail above the subway shouldn't be more ornate for a second world war setting? could be just me, but it looks a bit to modern, then again have never actually seen pics of such a set up in Berlin 1945, awesome work mate.

Edit: just came across this, thought you may find it handy, although you may already be using it as reference, at any rate I thought it worth posting. Keep up the great work man.

MrMox

Joined: July 18, 2003
KitMaker: 3,377 posts
Armorama: 1,088 posts

Posted: Wednesday, December 09, 2009 - 08:09 PM UTC
Thanks guys - Yes I am trying to make it more 3-dimensional, forcing the viewer to explore it from more than one direction.
James - the picture is my prime inspiration, and as you notice, then mine is somewhat strict and without much ornament. The one on the picture seems to have some siding closeing it. - my challange was that it would block the view if I closed it more up - hiding the details and action behind it, and creating a undesired shadow between fence and car.
So I went for a more simple and transparant design hoping that it would be a nice contrast to the oldstyle building.
Cheers/Jan
slodder

Joined: February 22, 2002
KitMaker: 11,718 posts
Armorama: 7,138 posts

Posted: Wednesday, December 09, 2009 - 11:06 PM UTC
You will succeed in getting people to view this from every angle.
One small nit pick. The bullet holes in the building have ridges around the rim. In a brick or plaster I would think that these would be flush or even rounded the other way (no ridge at all).
One small nit pick. The bullet holes in the building have ridges around the rim. In a brick or plaster I would think that these would be flush or even rounded the other way (no ridge at all).

guygantic

Joined: August 19, 2006
KitMaker: 7,084 posts
Armorama: 970 posts

Posted: Thursday, December 10, 2009 - 12:51 AM UTC
This is coming together so well ! What an impressive diorama, dynamic and exciting, I am almost a part of the scene, looking at it. I really don't know where to look first, so many things to see, fantastic textures of buildings and rubble, debris, yes, this one has stolen my heart as a diorama builder !

Kiyatkin

Joined: September 15, 2005
KitMaker: 291 posts
Armorama: 284 posts

Posted: Thursday, December 10, 2009 - 01:15 AM UTC
very nice work, following with interest, got me thinking about a berlin 1945 dio myself.
MrMox

Joined: July 18, 2003
KitMaker: 3,377 posts
Armorama: 1,088 posts

Posted: Wednesday, December 16, 2009 - 08:37 AM UTC
Hi guys, sorry for being AWOL  and not responding, but work has been a killer lately, and with christmas getting closer everything is just crazy
Scott, you are right - the surrounding on some of the holes needs to be sanded dow, likewise I ought to work a bit omre on the bullitdamage as the holes are rather uniform in size.
Bit of progres, painted the rubbel inside the house and the slogan outside, glued the fence on, and need to give it some additional debris and a solid coat of future before I can continue on the effects.
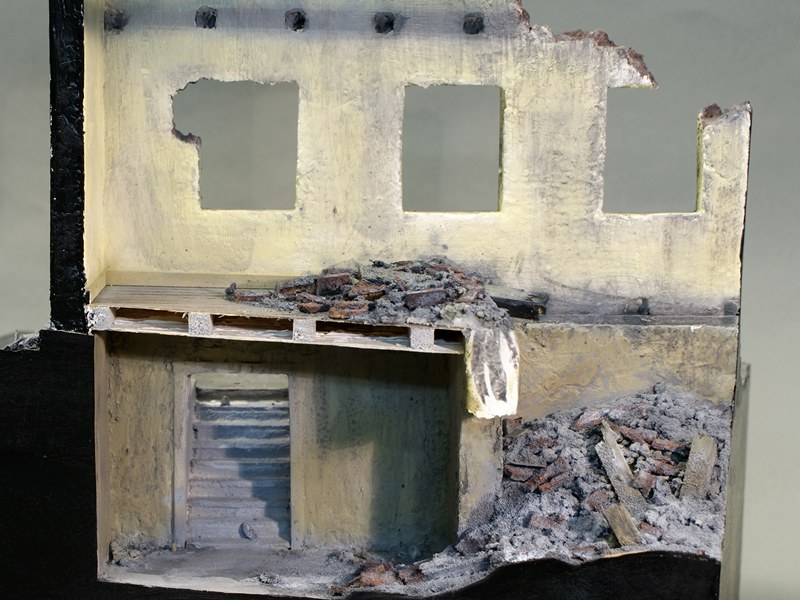
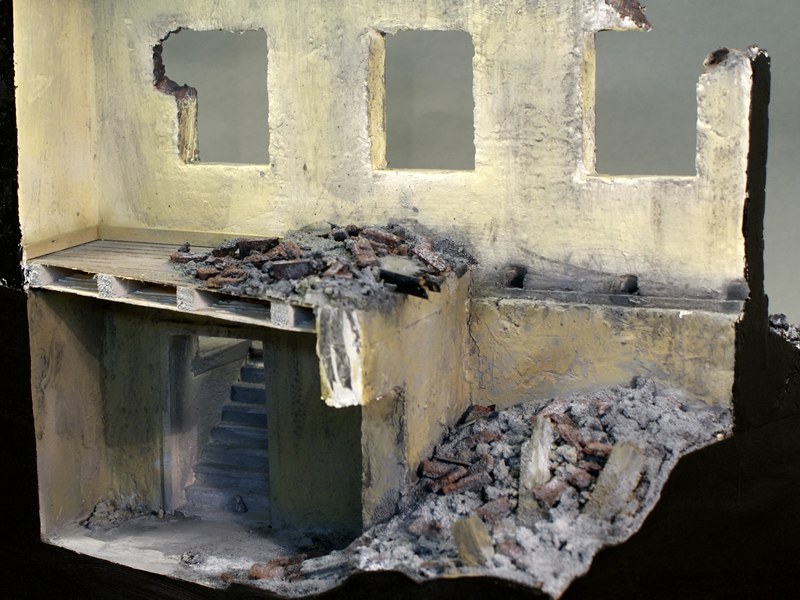
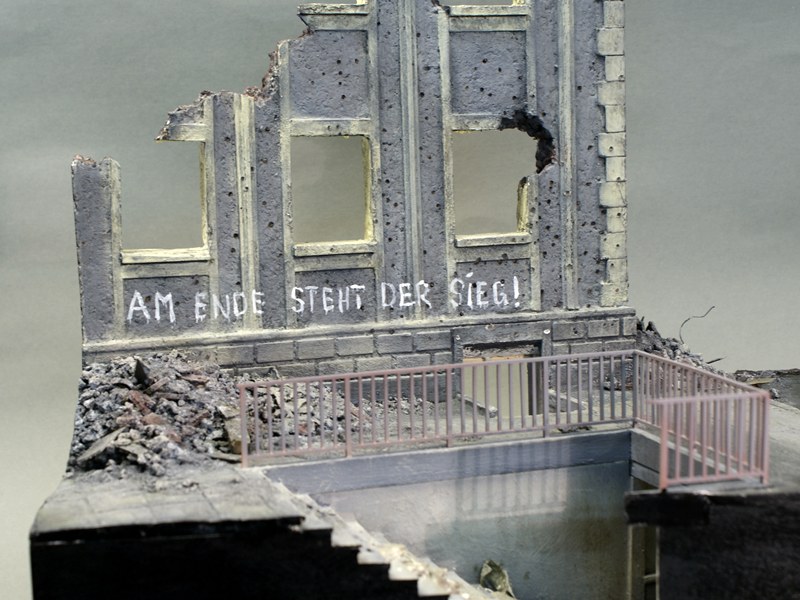
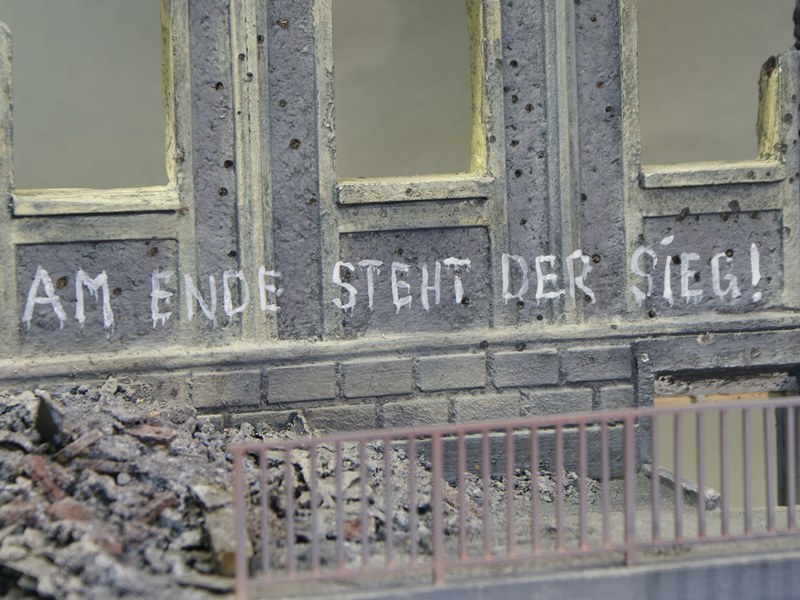
 and not responding, but work has been a killer lately, and with christmas getting closer everything is just crazy
Scott, you are right - the surrounding on some of the holes needs to be sanded dow, likewise I ought to work a bit omre on the bullitdamage as the holes are rather uniform in size.
Bit of progres, painted the rubbel inside the house and the slogan outside, glued the fence on, and need to give it some additional debris and a solid coat of future before I can continue on the effects.


milvehfan

Joined: June 26, 2007
KitMaker: 2,116 posts
Armorama: 1,080 posts

Posted: Wednesday, December 16, 2009 - 09:49 AM UTC
Nice Work, Your Dio has come a long way, I like the layout and your attention to detail.
milvehfan
milvehfan

Gorizont

Joined: November 28, 2007
KitMaker: 1,462 posts
Armorama: 1,289 posts

Posted: Wednesday, December 16, 2009 - 09:59 AM UTC
Thanks for your explanation of the bullet impacts. I“ve read it today.
I have no words for your work, which I“ve seen on the newest pictures!
(translated only as "wow" - that“s to few)
For this and other dioramas I also try to scratchbuild some parts of my "model-kits".
greetings...
Soeren
I have no words for your work, which I“ve seen on the newest pictures!
(translated only as "wow" - that“s to few)

For this and other dioramas I also try to scratchbuild some parts of my "model-kits".
greetings...
Soeren

martyncrowther

Joined: September 12, 2007
KitMaker: 1,548 posts
Armorama: 1,407 posts

Posted: Wednesday, December 16, 2009 - 12:37 PM UTC
Hi Jan, very nice dio! I lik the graffiti.
kaysersose

Joined: May 05, 2009
KitMaker: 86 posts
Armorama: 83 posts

Posted: Wednesday, December 16, 2009 - 07:27 PM UTC
wow, that is one excellent diorama! I love it.
Say, I didn't notice if you mentioned earlier, but are you going to put a scared hiding armed German in the subway hall? I think it add sooo much drama to the story here.
Looking great.
Say, I didn't notice if you mentioned earlier, but are you going to put a scared hiding armed German in the subway hall? I think it add sooo much drama to the story here.
Looking great.
MrMox

Joined: July 18, 2003
KitMaker: 3,377 posts
Armorama: 1,088 posts

Posted: Thursday, December 17, 2009 - 08:52 PM UTC
I plan on hiding a few soldiers below - I“m still not sure about including any civilians - I“m allso trying out the composition, so the number of figures are still uncertain.
Gave it a coat of future as base for some washes - used promodeler wash on the walls, still need some dullcoat and pigments
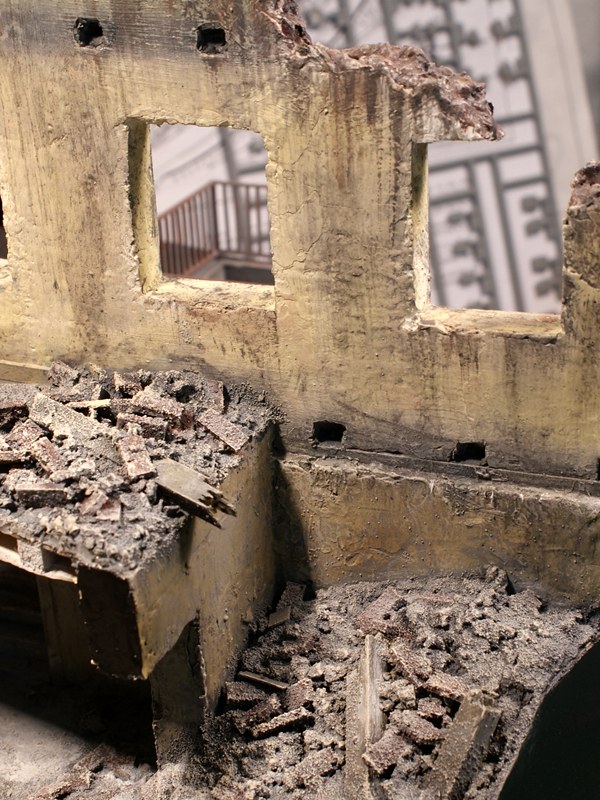
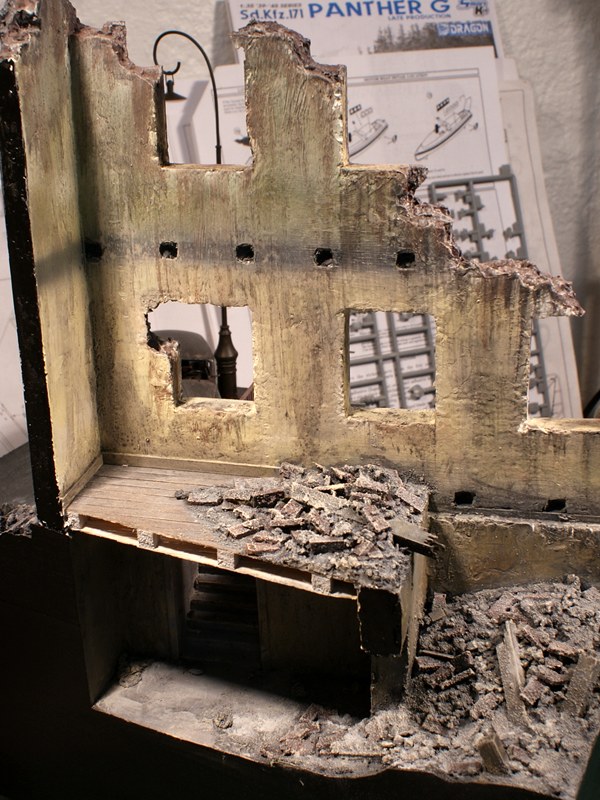
Added a small rail around the stairs to the basement:
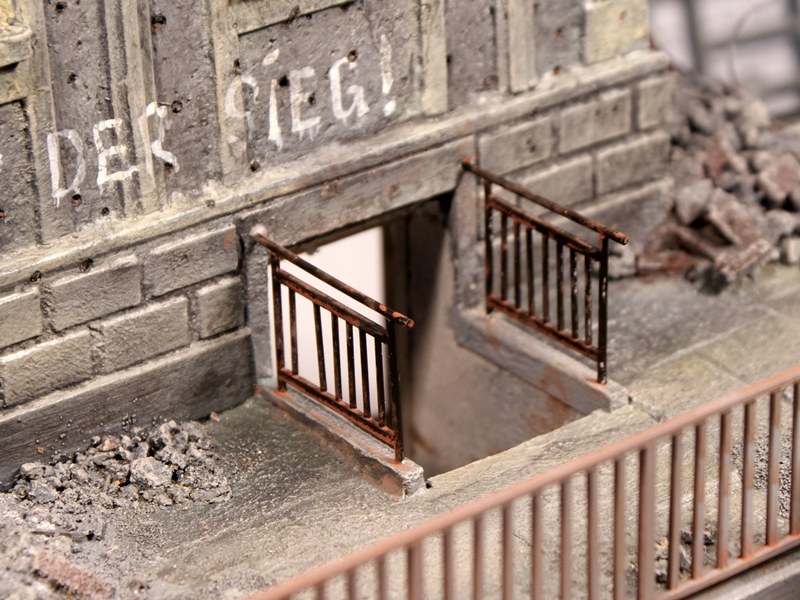
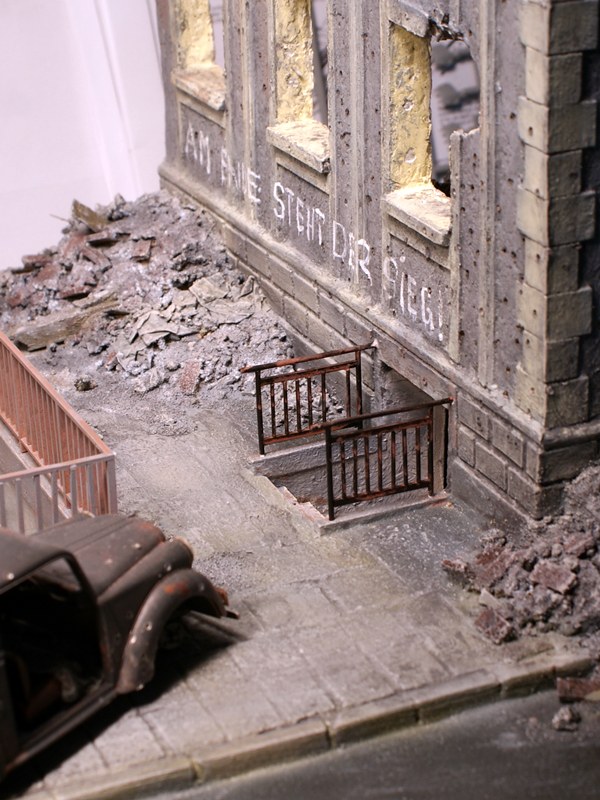
Gave it a coat of future as base for some washes - used promodeler wash on the walls, still need some dullcoat and pigments


Added a small rail around the stairs to the basement:


Posted: Thursday, December 17, 2009 - 08:59 PM UTC
Very impressive, Jan. It looks very realistic with every little detail taken into account.
Looking forward to see more
Looking forward to see more

Gundam-Mecha

Joined: August 05, 2009
KitMaker: 1,019 posts
Armorama: 933 posts

Posted: Friday, December 18, 2009 - 06:09 AM UTC
great work Jan, I really love the paint work on the building it really brings it to life!
The whole scene is very impressive and very dramatic! The graffiti is also a really nice touch.
The whole scene is very impressive and very dramatic! The graffiti is also a really nice touch.
MrMox

Joined: July 18, 2003
KitMaker: 3,377 posts
Armorama: 1,088 posts

Posted: Friday, December 18, 2009 - 08:49 PM UTC
I have been looking at the inside corner of the house, as I find it a little dull, I have decided to ad a piece of floor to spice it a little up. Still unpainted and all.
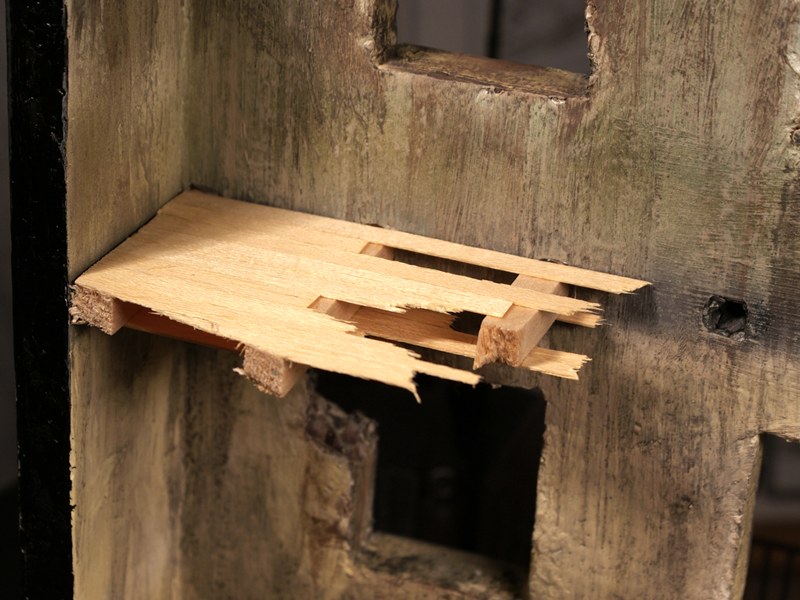
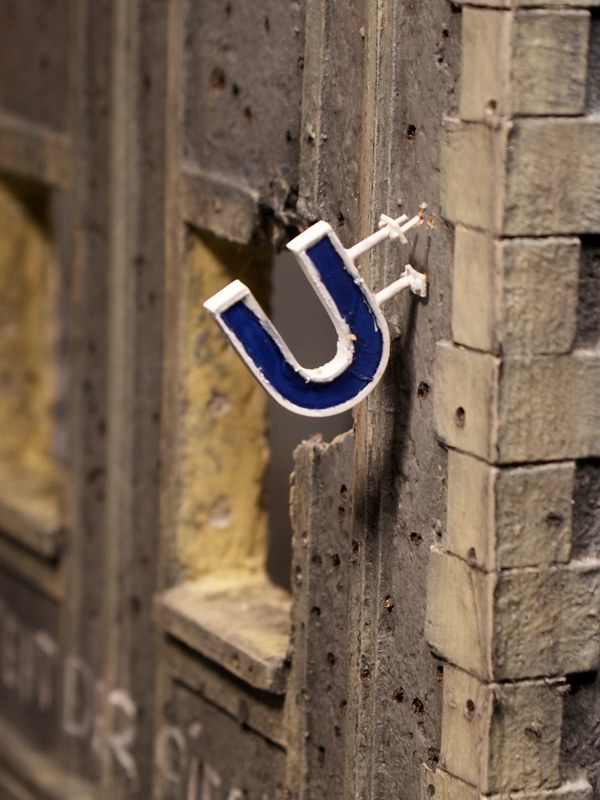
Outside I have added a "U" bahn sign - still need washes to tone it down. Its made from evergreen sheets and strips.
Cheers/Jan

Outside I have added a "U" bahn sign - still need washes to tone it down. Its made from evergreen sheets and strips.

Cheers/Jan
jba

Joined: November 04, 2005
KitMaker: 1,845 posts
Armorama: 777 posts

Posted: Friday, December 18, 2009 - 09:23 PM UTC
Nice one Jan, I really like the Blue touch, looks you're on for something definitely outstanding!


martyncrowther

Joined: September 12, 2007
KitMaker: 1,548 posts
Armorama: 1,407 posts

Posted: Saturday, December 19, 2009 - 03:18 AM UTC
Hi Jan, the Ubahn sign likes great! Nice update. 

bill1

Joined: August 14, 2005
KitMaker: 3,938 posts
Armorama: 520 posts

Posted: Saturday, December 19, 2009 - 07:42 AM UTC
Yo jan,
Great so far, nice build up from you're setting. The layout is perfect...looking forward to see the next up!
Grt Nico
Great so far, nice build up from you're setting. The layout is perfect...looking forward to see the next up!
Grt Nico

Gundam-Mecha

Joined: August 05, 2009
KitMaker: 1,019 posts
Armorama: 933 posts

Posted: Saturday, December 19, 2009 - 10:19 AM UTC
That U sign is a nice touch Jan, I like the added flooring too. I agree that it really adds a lot more to the inside of the building.
 |


