Campaigns
Where Armorama group builds can be discussed, organized, and updates posted.
Korean War Campaign
Nito74
Visit this Community
Lisboa, Portugal
Joined: March 04, 2008
KitMaker: 5,386 posts
Armorama: 4,727 posts
Posted: Saturday, April 09, 2011 - 06:43 AM UTC
My M46 Patton... I know it's the only kit available, but those single guide horns on the tracks are killing me.

The turret and hull had an olive drab coat and I'm still working on the wheels, rollers and tracks...
I hope to post some pics soon of the progress so far.

Great Campaign ! ... that M4 Easy Eight from Tasca looks great but it's too late for this one, maybe on a Sherman Campaign..
Dangeroo
#023
Visit this Community
Zurich, Switzerland
Joined: March 13, 2009
KitMaker: 2,058 posts
Armorama: 1,656 posts
Posted: Saturday, April 09, 2011 - 07:20 AM UTC
Vladimir, start pic noted.

Guy, nice how to!

John, pics, pics, pics! Well, the campaign is still 9 months to go, so I wouldn't say never on that Tasca Shermie...

List time!


As you can see, we already have 7 finishers out of 76 enlistees! Great show, gentlemen!

Cheers!
Stefan
Dangeroo
#023
Visit this Community
Zurich, Switzerland
Joined: March 13, 2009
KitMaker: 2,058 posts
Armorama: 1,656 posts
Posted: Saturday, April 09, 2011 - 08:34 AM UTC
History time! The events of April 60 years ago.

In early April 1951, UN troops dig in north of the 28th parallel on a line advantageous for defence. Another Chinese offensive is anticipated by General Mathew Ridgway and his subordinates.

11 April 1951 - McArthur is relieved, partly for his failures in late 1950 and also for insubordination. General Ridgway assumes his post of Supreme Commander Far East, while General James van Fleet takes over command of 8th Army in Korea.

22 April 1951 - The Chinese spring offensive is launched with three field armies in an attempt to recapture Seoul. The first thrust shatters the South Korean 6th Division which flees in panic.

22 April – 25 April 1951 - In the Battle of Kapyong, the 27th Commonwealth Brigade, and in particular its Australian and Canadian Battalions, hold fast for several hours, inflicting heavy casualties on the Chinese and effectively halting their offensive in that sector.

22 April – 25 April 1951 - In the Battle of the Imjin River, the British 29th Infantry Brigade, consisting of three British and one Belgian infantry battalions, holds its positions for more than 2 days against a numerically superior enemy. In the last stand of the Gloucestershire Regiment, the regiment is completely surrounded but holds up to the finest of traditions. American and British forces fail in their attempts to relieve them and they are ultimately all but shattered.

Both these battles effectively blunted the first part of the Chinese offensive and can be considered decisive. The rest of April passed in relative calm with both sides licking their wounds and waiting for the next Chinese attack.
Buckeye198
Visit this Community
Ohio, United States
Joined: May 02, 2010
KitMaker: 596 posts
Armorama: 265 posts
Posted: Saturday, April 09, 2011 - 04:55 PM UTC
Success!! (Kinda...) Here's the damage:

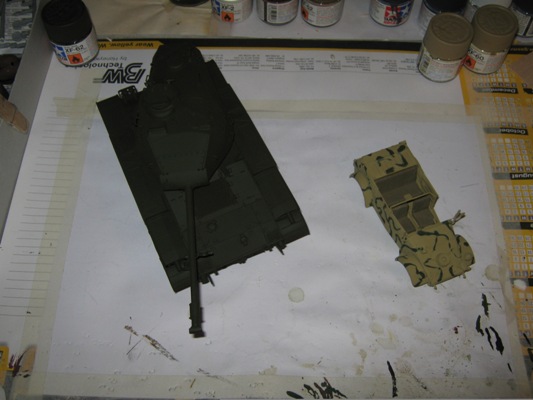
This is how I laid my model down for transport. More clothes were placed on top to keep everything stable and safe from the lid. It worked perfectly!


Academy's decal sheet was awful. The paper was too thick, the film was too thin, the decals were too large which made their placement and adjustment very awkward, the larger ones didn't fit exactly right, there was too much empty film to trim off, the glue was too weak when you wanted it to stick and too strong when you didn't. I'm sure you all know what that's like! In this shot you can see where the "S" folded over on top and stretched out lengthwise.


My pilot is still sitting right where he should be, and the parafilm mask worked wonderfully. I no longer have to fear the canopy!!


Oh nevermind...Those dots are on the inside of the canopy. No idea where they came from. It was clean when I glued it on...


Starboard is painted better, but port's decals didn't suck as much. Which way should I display this on my shelf? I guess it'll depend on which side turns out better on my MiG.


Excruciating decal mishaps aside, the kit itself was very nice. Easy construction, good detail and panel lines (unless you use the decals...I should've just painted those yellow stripes and "USAF"...), and a great subject. I'm pleased with this model mainly because it showed me that I can make a pretty convincing NMF using only good ol' enamels. Not bad...not bad a'tall...
Dangeroo
#023
Visit this Community
Zurich, Switzerland
Joined: March 13, 2009
KitMaker: 2,058 posts
Armorama: 1,656 posts
Posted: Monday, April 11, 2011 - 08:20 AM UTC
Looking good from where I stand, Robby. Maybe a subtle wash to ring out the panel lines? I would never dare to package a model between my clothes...

Cheers!
Stefan
Buckeye198
Visit this Community
Ohio, United States
Joined: May 02, 2010
KitMaker: 596 posts
Armorama: 265 posts
Posted: Monday, April 11, 2011 - 09:36 AM UTC
I have a wash solution back home in my toolbox. I'm not sure if I want to though just because I don't know if I want to accentuate the panel lines that I screwed up or the spots where the decals cover up too much. I think I'll try it out on my MiG for the Mischievous MiGs campaign. Hopefully that one will work out a little easier!
andyman
Visit this Community
New York, United States
Joined: October 11, 2002
KitMaker: 142 posts
Armorama: 134 posts
Posted: Wednesday, April 13, 2011 - 03:05 PM UTC
Thanks Guy for taking the time to post the pictures I see what you mean. I'll try that when I make my POA-CWS-H5.

Andy
VLADPANZER
Visit this Community
Lebanon
Joined: December 20, 2010
KitMaker: 568 posts
Armorama: 549 posts
Posted: Thursday, April 14, 2011 - 09:27 AM UTC
Here is my in progress shot! Built the model and gave it a coat of olive drab!

Charlie-66
#186
Visit this Community
Texas, United States
Joined: May 24, 2006
KitMaker: 771 posts
Armorama: 750 posts
Posted: Tuesday, April 19, 2011 - 06:07 PM UTC

Quoted Text

Thanks Guy for taking the time to post the pictures I see what you mean. I'll try that when I make my POA-CWS-H5.

Andy


Andy, I'm glad it helped.
Here are some more in progress shots. I have been using the casting numbers from Archer's transfers, and I love 'em. They are a must for all Shermanaholics. I also have to comment on their customer service. My order went to the wrong address (my fault). One phone call and Jen at Archer had me my package in 3 days with now fuss at all. Thanks Jen!


This shot shows the top of the turret. I used some of the Archer casting symbols, and parts from the spares box to replace the gunners periscope cover with the head assembly that appears in all the Korean war photos I've seen of these beasts. I also used a spare TC's sighting vane from a Tasca Shemie.


A front view of the turret showing more casting numbers and a front view of the gunner's head assembly. I also had to open up the hole in the gun mantlet for the coaxial MG.


The underside of the transmission cover. These casting numbers are from Archer's new set for the M4A3. too cool!

Next time I post this baby should have some paint on it!
andyman
Visit this Community
New York, United States
Joined: October 11, 2002
KitMaker: 142 posts
Armorama: 134 posts
Posted: Wednesday, April 20, 2011 - 01:14 PM UTC
It's lookin good Guy can't wait to see it painted.
Andy
GregCloseCombat
Visit this Community
California, United States
Joined: June 30, 2008
KitMaker: 2,408 posts
Armorama: 2,394 posts
Posted: Thursday, April 21, 2011 - 05:27 PM UTC
Nice builds guys, I'm trying do do my Tiger face painting now but the decals really suck. I'm going to try to paint over them and just use the decal as a guide.
Buckeye198
Visit this Community
Ohio, United States
Joined: May 02, 2010
KitMaker: 596 posts
Armorama: 265 posts
Posted: Friday, April 22, 2011 - 07:09 AM UTC
You have the right Idea, Greg. I learned from my kit for this campaign that if you ever have GIANT decals, just paint them on. The decals will guide you correctly, but just have confidence in your hand-/airbrushing skills and go for it!
ianclasper
Visit this Community
Washington, United States
Joined: September 02, 2009
KitMaker: 227 posts
Armorama: 141 posts
Posted: Tuesday, April 26, 2011 - 07:33 AM UTC


I have been battling with my M39, the conversion hull in the Legend kit is not the best, there had been a varying degree of shrinkage and distortion so the new upper hull would not fit the AFV Club lower hull as intended. So, out came the Dremel and I carved the hull extensions out of the resin part and fit them to the AFV Club upper hull molding.

I will have to scratch build several other parts that are in the conversion kit as these too have suffered from shrinkage and will not match up with other parts in the conversion.

Ian Clasper
Dangeroo
#023
Visit this Community
Zurich, Switzerland
Joined: March 13, 2009
KitMaker: 2,058 posts
Armorama: 1,656 posts
Posted: Tuesday, April 26, 2011 - 07:40 AM UTC
Vladimir, I don't think there were any Kübelwagens in Korea...

Guy, nice work on the POA, thanks for the detailed tutorial.

Ian, nice start on the M39! Looks like you've got your work cut out for ya', but I'm sure it's an interesting build. It certainly is an interesting vehicle!

Sorry if I've been absent a bit lately, new job, not as much time on the net as I would like... I check in on the mobile once in a while though.

Cheers!
Stefan
vonHengest
Visit this Community
Texas, United States
Joined: June 29, 2010
KitMaker: 5,854 posts
Armorama: 4,817 posts
Posted: Tuesday, April 26, 2011 - 07:42 AM UTC
Guy: Your photos are very helpful, and I'll be sure to take note of them and apply them to my build of the POA-CWS-H5 (not for this campaign).

Ian: How old is that conversion kit?
ianclasper
Visit this Community
Washington, United States
Joined: September 02, 2009
KitMaker: 227 posts
Armorama: 141 posts
Posted: Tuesday, April 26, 2011 - 07:47 AM UTC

Quoted Text

[
Ian: How old is that conversion kit?


I am not sure, I picked up on evilbay last year. The entire kit is cast in Yellow Resin and everything has shrunk to some degree, some parts far worse than others.
vonHengest
Visit this Community
Texas, United States
Joined: June 29, 2010
KitMaker: 5,854 posts
Armorama: 4,817 posts
Posted: Tuesday, April 26, 2011 - 08:38 AM UTC
That sounds painful, and exactly why I avoid the big V when I'm looking for resin AM.

I have an older Legends conversion for a Merkava that is yellow resin and has a warped barrel, but seems overall ok other than that. I dry-fit the turret on the Academy kit hull and didn't have any fit issues. It's not the best conversion out there, and you can tell it is an older one of their releases, and I'm wondering if that's the same deal with your conversion.

The new stuff is supposed to be very nice.
GregCloseCombat
Visit this Community
California, United States
Joined: June 30, 2008
KitMaker: 2,408 posts
Armorama: 2,394 posts
Posted: Thursday, April 28, 2011 - 03:07 PM UTC
Having some fun with the cat face. I actually placed the decals on, hated them, and here's the result of painting directly over them with a few personal touches.


More painting and Weathering to go still


MVisser
Visit this Community
Utrecht, Netherlands
Joined: December 14, 2006
KitMaker: 2,679 posts
Armorama: 313 posts
Posted: Thursday, April 28, 2011 - 05:35 PM UTC
hi all,

I've almost finished my M4A3 HVSS POA CWS 5H

photos are here
http://armorama.kitmaker.net/forums/168924&page=1

I'm not entering this campagne but I still want to share it with you.
Martin
andyman
Visit this Community
New York, United States
Joined: October 11, 2002
KitMaker: 142 posts
Armorama: 134 posts
Posted: Wednesday, May 04, 2011 - 02:12 PM UTC
I like the tiger paint job looks neat Greg. My decals on my easy 8 are so old that they fell apart when I tried to apply them.

Andy
Dangeroo
#023
Visit this Community
Zurich, Switzerland
Joined: March 13, 2009
KitMaker: 2,058 posts
Armorama: 1,656 posts
Posted: Sunday, May 08, 2011 - 08:20 AM UTC
Greg, your tiger face looks great! Looking forward to the final result!

Martin, your POA looks great, still! I really like the weathering! Hope you will keep posting progress here!


Time for some history, for once three months at a time, as there wasn't too much to tell for June and July. Events clearly calmed down by this stage of the war, but many more sons, brothers and fathers had to die before the armistice was finally signed.

In early May 1951 General Van Fleet, commander of UN forces intended to attack. By May 12 however, intelligence suggested a Communist attack within the next few days, so the offensive was cancelled. Unknown to the UN, the Communists shifted their main forces east to the sector held mostly ba ROK Divisions.

16 May 1951: Communist forces attack in the eastern half of the peninsula which is held by ROK divisions. These divisions fall back or disintegrate, leaving the US 2nd Infantry Division’s right flank wide open. The division manages to hold on to their ground and keep their flank protected long enough other US units to make a drive east and get ready for a counter offensive.

19 May 1952: Ridgway orders General Van Fleed to commence an offensife along the entire front to regain the ground lost. By the end of May, UN forces are just about where they were beofre the Chinese Spring Offensive.

June passed with UN troops diggin in on superior defensive ground. Both sides realized a victory was not possible without even more appalling losses so the gears were set in motion for armistice talks.

10 July 1951: The armistice talks finally start, after long diplomatic talks to get at the same table. The talks were first held at Kaesong, city in the western part of Korea, south of the 38th parallel but within Communist controlled territory. Due to harrassment by Communist forces the negotiations are later relocated to Panmunjon.
andyman
Visit this Community
New York, United States
Joined: October 11, 2002
KitMaker: 142 posts
Armorama: 134 posts
Posted: Tuesday, May 17, 2011 - 04:05 AM UTC
Hi all ,
Here is my M4A3E8 This is an old Dragon kit easy to build but the tracks were a real pain. The decals fell apart when I tried to place them. Hope you like it.


Andy
GregCloseCombat
Visit this Community
California, United States
Joined: June 30, 2008
KitMaker: 2,408 posts
Armorama: 2,394 posts
Posted: Tuesday, May 17, 2011 - 05:45 PM UTC
Hi Andy, decals look good from here. Nice-looking Sherman. Congrats
muttley
Visit this Community
Ontario, Canada
Joined: January 10, 2005
KitMaker: 251 posts
Armorama: 202 posts
Posted: Wednesday, May 18, 2011 - 11:02 AM UTC
Just about to start with this old LVT(A)5 from Nitto/Bluetank. A kit from the 70's that is chock-full of detailed mistakes! Now this here would be built straight from the box with very few changes/additions so let me warn you now that it is going to be UGLY

Dangeroo
#023
Visit this Community
Zurich, Switzerland
Joined: March 13, 2009
KitMaker: 2,058 posts
Armorama: 1,656 posts
Posted: Thursday, May 19, 2011 - 08:01 AM UTC
Andy. nice looking Sherman, I think I know the kit. Is it the one with the Italeri hull where you have to shave off the VVSS attachment points? I buit it a long time ago...
Rei, that looks like an interesting kit, definitely one I've never seen before. Looking forward to what you will be doing with it!

I've actually managed to get something done on my M46 in some spare time, 4 road wheels actually... Still a long ways to go for anything photogenic...

So here's to a renewed effort for this campaign!

Cheers!
Stefan