Armor/AFV: Softskins
Softskins group discussions.
Hosted by Darren Baker
LRDG
AlanL
Visit this Community
England - East Anglia, United Kingdom
Joined: August 12, 2005
KitMaker: 14,499 posts
Armorama: 11,675 posts
Posted: Friday, September 02, 2011 - 12:19 AM UTC
Hi Mark V, Ed and Lucy,

Thanks for dropping in folks and the comments.

Hi Warren,

Re:

Just one thing, it is not Pressed Iron Planking but Pierced Iron Planking

I don't see that mentioned anywhere other than the AA packaging which is for Pressed Steel Planking which as someone pointed out wasn't used on the trucks. I used the Eduard PE parts which I've referred to as sand trays which is how I've alwasy through of them.

Is the Pierced rather than Pressed an Australian thing or just a different use of the language? PSP - Pressed Steel Planking is I believe how it's referred to in the UK although I could be wrong, but that how I've alwasy though of the metal matting you see on runways and around bridges and soft beach heads.

Anyway sand trays works for me, I can't imagine anyone saying get the Pierced Iron Planking off the vehicle lads, but I had heard and used get the sand trays off lads.

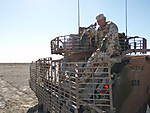
Anyway, back to the build. In the hope of getting these finished one day and to expedite things I had order up a set of the Black Dog stowage. The bulk load seems very much in keeping with how the trucks were loaded although it contains jerrycans I didn't see any Flimseys in the load. I though I'd split it between the two trucks with the bulk load going into the RT truck and the remainder of the parts used across both vehicles.

The load it'self needs a bit of clean up on the underside to get a good fit and no provision havs been made for the MG post so I drilled a hole through it to accommodate this which I'll tidy up with some milliput when done.

I hope the truck has strong suspension as the load is quite heavy .

There is a bit of spillage on the underside so this needs tidied up for a good fit.


I drilled a hole through it to accommodate the MG Post.


The bits are currently soaking in some soapy water so I might get a bit of paint on it later.

Cheers

Al
gmccabe01
Visit this Community
Cork, Ireland
Joined: August 31, 2008
KitMaker: 67 posts
Armorama: 47 posts
Posted: Friday, September 02, 2011 - 04:08 AM UTC
Beautiful build. That is one heavely loaded truck amigo.
They might have spent a bit of time digging it out of soft sand and would'ent
it be a bit hard for the gunner to fire the mg ( say attacked by an aircraft ?)
AlanL
Visit this Community
England - East Anglia, United Kingdom
Joined: August 12, 2005
KitMaker: 14,499 posts
Armorama: 11,675 posts
Posted: Friday, September 02, 2011 - 06:36 AM UTC
Hi Gerard,

Many thanks. The load looks about right for the period, they travelled well stocked up.

With aircraft they would try and bluff the way where ever possible by pretending they were Axis forces. The Germans used a tremendous amount of captured Allied transport so with the right flag and caps they could sometimes get away with it.

Once they opened fire on an aircraft they would have been in serious trouble and probably on a hiding to no-wvhere very fast so it was safer to try and bluff it out, at least that's my understanding.

The gun itself can be raised up on the inner stand if needed..

Cheers

Al
AlanL
Visit this Community
England - East Anglia, United Kingdom
Joined: August 12, 2005
KitMaker: 14,499 posts
Armorama: 11,675 posts
Posted: Friday, September 02, 2011 - 07:28 AM UTC
Hi guys,

Last of the updates for today as work looms tomorrow

I added the poles for th RT ariel. These come moulded as one so I scrapped out the plastic for better depth.


Also got some basic paint on the load, which is fun to paint. This should give me some basic colours to build on.


Cheers

Al
gmccabe01
Visit this Community
Cork, Ireland
Joined: August 31, 2008
KitMaker: 67 posts
Armorama: 47 posts
Posted: Friday, September 02, 2011 - 10:34 AM UTC
That looks just brill with the base coat on and many thanks for the
explanation, had a good day learned something new.
AlanL
Visit this Community
England - East Anglia, United Kingdom
Joined: August 12, 2005
KitMaker: 14,499 posts
Armorama: 11,675 posts
Posted: Saturday, September 03, 2011 - 05:41 AM UTC
Thanks Gerard, it's moving along, no progress to day, a working one I'm afraid!

Cheers

Al
AlanL
Visit this Community
England - East Anglia, United Kingdom
Joined: August 12, 2005
KitMaker: 14,499 posts
Armorama: 11,675 posts
Posted: Sunday, September 04, 2011 - 06:03 AM UTC
Hi folks,

A bit more work on the bulk load.

Al


AlanL
Visit this Community
England - East Anglia, United Kingdom
Joined: August 12, 2005
KitMaker: 14,499 posts
Armorama: 11,675 posts
Posted: Tuesday, September 06, 2011 - 04:17 AM UTC
Hi folks,

A bit more work on the sand trays or Pierced Steet Planking if you like. I added some straps and buckles and also started to think about stowage for the Gun Truck. I am assuming they would have kept the gun deck fairly clear so that the gun could be brought into action fairly quickly so stowage will be piled forward and held in place by some retaining straps or a net type thing.

Any thoughts there?

I also did a bit of work on the Vickers but I don't have the correct type of ammo box, or if I do I haven't found it yet so opted for a liner load. Again any thoughts there?


Al
AlanL
Visit this Community
England - East Anglia, United Kingdom
Joined: August 12, 2005
KitMaker: 14,499 posts
Armorama: 11,675 posts
Posted: Wednesday, September 07, 2011 - 06:55 AM UTC
Hi folks,

Another question. Did I read or see somewhere that the sand mats also doubled as air recognition signs being in red/white or is that just something I've imagined?

Thanks

Al
ArnoRiedel
Visit this Community
Netherlands
Joined: February 23, 2010
KitMaker: 20 posts
Armorama: 19 posts
Posted: Wednesday, September 07, 2011 - 04:44 PM UTC
You remember it right, on this site it is mentioned.
However it isn't clear in photographs.
http://lrdg.hegewisch.net/lrdgpatrol.html
AlanL
Visit this Community
England - East Anglia, United Kingdom
Joined: August 12, 2005
KitMaker: 14,499 posts
Armorama: 11,675 posts
Posted: Wednesday, September 07, 2011 - 05:08 PM UTC
Thanks Arno,

The sites has been updated since I last looked, time for a re-read.

Al
AlanL
Visit this Community
England - East Anglia, United Kingdom
Joined: August 12, 2005
KitMaker: 14,499 posts
Armorama: 11,675 posts
Posted: Thursday, September 08, 2011 - 04:01 AM UTC
Hi folks,

A bit more progress.

I added the BlackDog sand mats and LHS stowage to the gun truck and some fittings to the tail gate, plus filed off some rough edges I missed on the top of the load bed. I also added another spare wheel and fitted some PE fixings to the tail gate.


This is how things look at the moment:


I had filed off the tily ties on the side of each vehicle as you get replacement ones in the PE sets. However, , the replacemnt hooks are tiny and I doubt I'll be able to mount them successfully so I will probably have to make some from brass rod. Fitting the Eduward ones would be an exercise in frustration.

On the sand mats I've left them without the Red/White markings as that to seemed an exercise in frustration although it did spark an idea about trying to make some opened out ones and using them as a T recogition marker. Need to give that some more thought.

Cheers

Al
AlanL
Visit this Community
England - East Anglia, United Kingdom
Joined: August 12, 2005
KitMaker: 14,499 posts
Armorama: 11,675 posts
Posted: Friday, September 09, 2011 - 04:02 AM UTC
Ah silence .

Hi folks,

this is the laod I think I'll use for the gun truck. There should be a reasonable mix of hard and sofe stowage and it leaves some room around the gun. Any thoughts?


Cheers

Al
geogeezer
Visit this Community
Arizona, United States
Joined: February 17, 2011
KitMaker: 263 posts
Armorama: 258 posts
Posted: Friday, September 09, 2011 - 05:05 PM UTC
Hi Alan,
Beautiful work as always. I've seen the term sand trays used occasionally , but sand channels is more common. Bill Kennedy Shaw gives the history of them in his fine book "Long Range Desert Group'" on pp 39-40 in my copy. He also cites the following Middle East General Order 108, published 4.2.44.
108 INVENTIONS.
In accordance with para. 3, Standing Orders for War, M.E. F., it is recorded that Brig. R. A. Bagnold developed, in collaboration with other officers as stated below, the following inventions or applications of existing principles to military purposes:
(a) Sand Channels.
Devised in 1929 and subsequently adopted, with modifications, as standard desert equipment.
(b) Sand Mats.
Devised in 1929 in collaboration with Major P. A. Clayton, in the form of rope ladders with bamboo rungs, subsequently modified by the substitution of canvas for rope, and adopted as standard desert equipment.
The list goes on to include sun compasses, radiator condensers, and ration packs.
I've seen red and white patterned sand mats on an LRDG web site, but all the photos I've seen of sand mats in use appear to be plain canvas. I did make a 1/35 scale set of red and white ones for my own amusement, but I'm not happy with them..
One small quibble about the left side spare wheel mount on the Breda gun truck. I examined that photo with a 10X hand lens and it appears to me that the wheel may be secured with two strands of rope. Cheers,
Dick
jashby
Visit this Community
Queensland, Australia
Joined: July 01, 2009
KitMaker: 278 posts
Armorama: 248 posts
Posted: Friday, September 09, 2011 - 05:41 PM UTC
Beautiful workmanship on these "trucks" Allan.

Funny all the different names for some fairly mundane pieces of kit though. PSP, Pierced Steel Plank, Pressed Steel Plate, Pressed Steel Plank, throw in iron and you get PIP, but I was always told it was called Perforated Steel Plate. Doesn't really matter cause it would just be referred to as PSP. Get bogged and the call goes out "Grab the PSP".

I must admit yours looks more designed for the task where as I just thought it what the same stuff that the Yanks used on their airfields. Live and learn. This has been an excellent thread cause I have learnt a lot, not only some wonderful tips on building a model and detailing, but on some history as well.

Well done and thanks. Looking forward to more.

Cheers, John

AlanL
Visit this Community
England - East Anglia, United Kingdom
Joined: August 12, 2005
KitMaker: 14,499 posts
Armorama: 11,675 posts
Posted: Friday, September 09, 2011 - 07:08 PM UTC
Hi Dick,

Thanks for that, Sand Channels it is then. On the Sand Mats same detail for me. I haven't actually seen a picture of Red/White on the mats, they all look canvas coloured on both sides. I could add some cross ropes to the wheel too, but I just went with a copy of what was on the RT truck, I'll look for the picture. Thanks for that info - building is alwasy a learning experience.

Hi John,

Nameoculture can be a sticky point We all hear and use different things.

Glad you're both enjoying the blog, there is a lot more to these beasts than first meets the eye. Just working on trying to make the 2nd load look like it belongs there!

Thanks for the feedback.

Al
AlanL
Visit this Community
England - East Anglia, United Kingdom
Joined: August 12, 2005
KitMaker: 14,499 posts
Armorama: 11,675 posts
Posted: Friday, September 09, 2011 - 09:39 PM UTC
Hi folks,

A bit more work on the stowage. To help blend the bits together I've added some tissue tarp, pulled back and leaninng against the items.


I'm going to add a medical box in the rear LHS as it fits nicely and the gun seat can move over the top.


Some hanging waterbottles, and maybe a set of skelton webbing and a Thompson should make the inside busy looking.

On the outside I've been testing some items to add to the sides.


Did they hang anything on the tail gate? I don't recall seeing that area used much. So still lots to do yet.

I've been giving the tie down hooks some thought. The Eduward ones are tiny, but I might try and mount them on a thin piece of plastic strip first and then mouunt that and the hook to the side of the vehicle. Possibly a frustrating morning ahead !!

Cheers

Al
AlanL
Visit this Community
England - East Anglia, United Kingdom
Joined: August 12, 2005
KitMaker: 14,499 posts
Armorama: 11,675 posts
Posted: Saturday, September 10, 2011 - 02:26 AM UTC
Hi folks,

Well I though I'd have a go at fixing the tie hooks to the side of the vehicle. These are really tiny and when you cut them off the PE fret they will probably bend in on themselves, I separated the ends out with a scaple blade and finger nail. I didn't think fixing them directly to the side was an option so I put them on a small backing plate of plastic strip, roughly the size of the ribs on the side of the vehicle. I glued them on in a straight row, this was easier than I thought and when the had dried and had a second coat of CA+ I cut the plates c/w hooks off and fixed those to the side of the vehicle.


Hopefully painted in these will look OK

Stewart at SB Models had a reduction on some Wolf figuers a few weeks ago so I picked uop another Trooper a week or so ago.


.

Al
AlanL
Visit this Community
England - East Anglia, United Kingdom
Joined: August 12, 2005
KitMaker: 14,499 posts
Armorama: 11,675 posts
Posted: Saturday, September 10, 2011 - 04:14 AM UTC
This is the loads after a light dusting of Gulf War Sand.


Al
AlanL
Visit this Community
England - East Anglia, United Kingdom
Joined: August 12, 2005
KitMaker: 14,499 posts
Armorama: 11,675 posts
Posted: Sunday, September 11, 2011 - 01:31 AM UTC
Hi folks,

working on some other elements to consider. I want to add a couple of pre-war fuel/oil cans, these were around I believe in the early part of the war and would add a nice bit of colour. This lot are from the Plus Models set, I bought 4/5 years ago.


Then there is the question of external stowage, how much, how little to add. Would each vehicle have a carried a stretcher or just a designated vehicle?


Then there will be personal kit, packs, water bottles etc, plus maps, books/magazines and some rum!


The last main build element is the half cockpit window screens. These look tricky and if I can get one built reasonabley I'll be happy, two would be good and the others can be the covered kit parts.

Finally some Lewis Guns for the front of each truch and maybe a Boy AT rifle and RT fittings for the radio

Thoughts welcome.

Al
geogeezer
Visit this Community
Arizona, United States
Joined: February 17, 2011
KitMaker: 263 posts
Armorama: 258 posts
Posted: Sunday, September 11, 2011 - 04:32 PM UTC
Hi John,
Pierced steel planking seems to be NATO nomenclature. Early in WWII, U. S. forces called it Marston Matting, after the small town of Marston, North Carolina where it was first manufactured in 1941..

Cheers

Dick
geogeezer
Visit this Community
Arizona, United States
Joined: February 17, 2011
KitMaker: 263 posts
Armorama: 258 posts
Posted: Sunday, September 11, 2011 - 05:06 PM UTC
Hi Alan,
As best as I can determine, stretchers would normally have been carried on the Medical Orderly's truck, No.4 in a six-vehicle half patrol, but with breakdowns and losses due to enemy action, gear from disabled trucks was transferred to others, so a stretcher might well end up on any truck.
Since the Canadian Chevy trucks only entered LRDG service in March, 1942, I don't think the .55 Boys AT rifle is an appropriate addition. By then, there was very little enemy armor it could penetrate, and you already have a far more potent weapon in the 20 mm Breda. By late 42, a good many Vickers K and .303 Browning aircraft machine guns were available, and Lewis guns were being phased out. Some .50 Browning M2 guns appeared on the scene, possibly recovered from disabled U. S. built Honey and Grant tanks.
Your loads are magnificent, but don't forget the petrol. LRDG trucks carried prodigious amounts of it - 15 cases with 2 x 4 imp. gal. flimsies per case would be typical.
Cheers
Dick
AlanL
Visit this Community
England - East Anglia, United Kingdom
Joined: August 12, 2005
KitMaker: 14,499 posts
Armorama: 11,675 posts
Posted: Sunday, September 11, 2011 - 09:35 PM UTC
Morning Dick,

Thanks for that info, I shall look for some alternative weapons for the front.

There seems to be little decal choice other than the kit decals. I had thought of making these vehicles of the Guards Patrol G1, but the selection of figuers I have doesn't really fit with the pictuers I've seen, the Guardsmen whilst not on parade seem a bit more conventional!!! Therefore the more likely option would be T Patrol T1 of the NZ section.

My question here is how did the sequence for vehicle numbering work?

Did T1 Patrol have vehicles Numbered T1, T2, T3 and T4 or were all the T1 Patrol vehicles marked with T1?.

On the build side I've added some personal kit in the form of skelton webbing, water bottles, large and small packs and a couple of the civilian oil tins for colour. I've also added the stretcher to the Gun truck. This is one of the new Resicast items and has the correct feet for the British version.

Also I've been looking at all the pictuers I can find of the trucks on patrol and I would seem the half windows would have been covered over or had been taken off. I can easily understand this as glass would reflect in the sun light and could easily give away a position so I'll go with the kit parts here and save the half windows for something else.


Thanks again for the input folks.

Al
AlanL
Visit this Community
England - East Anglia, United Kingdom
Joined: August 12, 2005
KitMaker: 14,499 posts
Armorama: 11,675 posts
Posted: Sunday, September 11, 2011 - 10:24 PM UTC
Patrol Make up Autumn 42.

My understanding is that the NZ were part of A Sqn. They had two patrols T 1 and T 2?

Made up as follows?

Standard Half Patrol

1. Willys Jeep - OC
2. Willys Jeep _ Ptrl Sgt
3. Chevy 30 cwt RT Truck
4. Chevy 30 cwt Med Truck
5. Chevy 30cwt Fitters Truck
6. Chevy 30 cwt Breda Truck

I'm basing these vehiclkes around the Barce raid in September 1942 which comprised the New Zealanders of T1 Patrol and the British Guardsmen of G1 Patrol. Also a Small Detatchment of B Sqns HQ participated. Thgere were 47 personnel, in 12 trucks and 5 jeeps plus 2 10 ton Mack NR Trucks that provided refill fuel and came as far as Ain Dalla. The journey from Faiyum in Egypt to the objective was 1.860km each way.

Hence my question about the vehicle markings for T1 Patrols vehicles.

Thanks

Al


thomokiwi
Visit this Community
Christchurch, New Zealand
Joined: January 11, 2006
KitMaker: 438 posts
Armorama: 359 posts
Posted: Sunday, September 11, 2011 - 10:49 PM UTC
Hi

Excellent Vehicles. As far as I know the Vehicles where numbered T1 to 11 etc. The Vehicles had corresponding names to the Patrol designation - Te Anau, Te Puke Taupo etc. I haven't found a list of "T" numbers to names....I am still looking for one.

Hope that helps