Armor/AFV: Softskins
Softskins group discussions.
Hosted by Darren Baker
LRDG
AlanL
Visit this Community
England - East Anglia, United Kingdom
Joined: August 12, 2005
KitMaker: 14,499 posts
Armorama: 11,675 posts
Posted: Saturday, November 27, 2010 - 11:16 PM UTC
Hi folks,

Did a bit of work on the raised sides, like you opinion on this. I've see the two raised planks around the top,but would every Breda vehicle have been the same? Reason I ask is obvious from below as I left the metal raised plate on the front and just filled in the gap. I was wondering if this extension plate covered the full length of the front on some vehicles so just left it in place. If it's a big FUBAR I can fix it easily enough and put in a plank. I still need to fill in the interior RHS panel as I assume this would have been smooth like the LHS?

On the internal stowage box at the front of the bed I've seen it extended all the way across, again was this a standard. It's not really an issue as it will be covered by stores but just s general knowledge question.

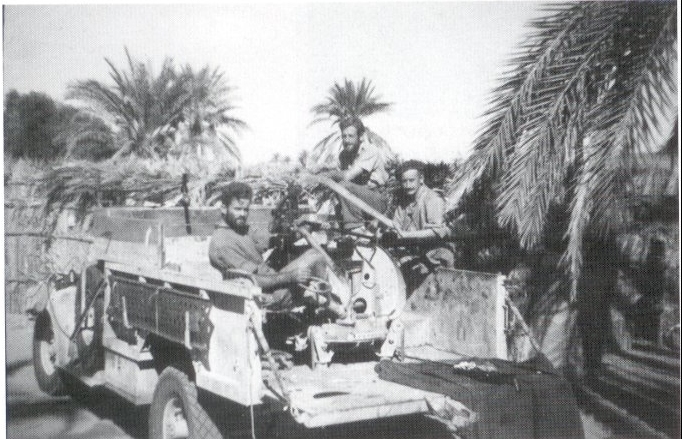
Did they have ammo ready lockers for the ammo stowage of the Breda or were the ammo cans simply stored at random?

Thoughts welcome.


Thanks

Al


AlanL
Visit this Community
England - East Anglia, United Kingdom
Joined: August 12, 2005
KitMaker: 14,499 posts
Armorama: 11,675 posts
Posted: Thursday, December 02, 2010 - 03:20 AM UTC
A bit more work on the trucs,


Al
AlanL
Visit this Community
England - East Anglia, United Kingdom
Joined: August 12, 2005
KitMaker: 14,499 posts
Armorama: 11,675 posts
Posted: Friday, December 03, 2010 - 09:58 PM UTC
Well I can see you're imprerssed

A bit of work on the Breda gun. The weapon comes in 2 versions, can't say which is correct for N Africa, possible both? It's a nice little kit. Still some more building required and then I will fix the base to the truck. Jeff seems to have cracked the correct fixing method, whether or not I can replicate that remains to be seen.


Al


AlanL
Visit this Community
England - East Anglia, United Kingdom
Joined: August 12, 2005
KitMaker: 14,499 posts
Armorama: 11,675 posts
Posted: Saturday, December 04, 2010 - 11:18 PM UTC
Hi folks,

This is the Breda build finished, you gat one ammo can, so if any one know of an AM set would you let me know.


This is a shot of both the kit radio and the Resicast No 11 set.


The Eduard PE set is an extensive one.


I always wonder with PE how much is actually necessary.

This is a pic of the can holder tray and some of the Accurate Armour cans I'll stock them with. The cans come with the handle moulded onto them and need the flash carefully clean out.


I've started to remove the fixing squares on the cab and added an open vent to one of the bonnets. Also added the light fitings and some PE to the dash board. The kit seat is nicely done.


Al
CMOT
Staff MemberEditor-in-Chief
ARMORAMA
Visit this Community
England - South West, United Kingdom
Joined: May 14, 2006
KitMaker: 10,954 posts
Armorama: 8,571 posts
Posted: Sunday, December 05, 2010 - 03:48 AM UTC
It look like the truck is going together as well as I remember. Good worlk Alan
AlanL
Visit this Community
England - East Anglia, United Kingdom
Joined: August 12, 2005
KitMaker: 14,499 posts
Armorama: 11,675 posts
Posted: Monday, December 06, 2010 - 04:36 AM UTC
Hi Darren,

Thanks, it's nice to know I'm not just posting to myself!!

Al
Grumpyoldman
Staff MemberConsigliere
KITMAKER NETWORK
Visit this Community
Florida, United States
Joined: October 17, 2003
KitMaker: 15,338 posts
Armorama: 7,297 posts
Posted: Monday, December 06, 2010 - 05:17 AM UTC
Been quietly watching.
Looking good so far Al.
AlanL
Visit this Community
England - East Anglia, United Kingdom
Joined: August 12, 2005
KitMaker: 14,499 posts
Armorama: 11,675 posts
Posted: Saturday, December 11, 2010 - 03:43 AM UTC
Hi dave,

MAny thanks, almost too cold to model here these last few days

OK folks a bit more work.

The Eduard PE set is an extensive one. It provided shelving for the forward stowage bins and a new door that slips over a locking eye. So if you want to open the bins up and stock them up that's an option


It lso providees a new hatch for the radio compartment:


replacement can holders


A bit of unsdercoating and fixed the base of the 20mm


Finished fixing the pedals, gear, break and bonnet but no pics, it's a bit dark here now.

Al


AlanL
Visit this Community
England - East Anglia, United Kingdom
Joined: August 12, 2005
KitMaker: 14,499 posts
Armorama: 11,675 posts
Posted: Sunday, December 12, 2010 - 06:06 AM UTC
Greetings folks,

well fun time! This version of the Chevy came into servcie in Mar 42. I had originally thought of doing a Caunter scheme but the scheme came into being at the end of 1940 and was cancelled by GO 1272 dtd 5th December 1941.
The GO (General Order) called for a basic colour of Light Stone 61 only with area commanders being allowed to add a single disruptive of their choice. Howveer, Australian orders of the period allowed for the use of Portnald Stone 64 as an alternative colour and so you had two basic colours depending upon availaility to use as a base colour.

I had ordered soem WEM Light Stone 61 whioch I've used before on my M3 Grant and a couple of the carriers but when the order arrived those particular colours were on back order.

I set about experimenting with some paint, a light version close to but not exactle the same as Portland stone and then I came across some Vallejo Green Orche I had that looks pretty mcuh like Light Stone to me so after some playing around that's what I've decided to go with.

I have Mike Starmers Caunter Book and in it are some colour tabs representing the various colours used, very handy. There is a small exampel beside the colour of Vallejo Green orche which seems close enough to me.


The WEM Portland Stone you can see on the wheels as I wanted to see what it looked like but it's a bight bright for me, although it would look good in the Caunter scheme.


I've added the pedals and bonnet as mentioned above:


and painted the floors in wood so that they can be scuffed and exposed a bit under the Light Stone.


Having settled on a base colour things should proceed at a better pace. I've yet to decide on whather I'll add a disrupter colour but I have been reading about an interesting raid that I could use as a setting, but more on that later.

Al
AlanL
Visit this Community
England - East Anglia, United Kingdom
Joined: August 12, 2005
KitMaker: 14,499 posts
Armorama: 11,675 posts
Posted: Wednesday, December 15, 2010 - 05:54 AM UTC
Hi folks,

Work progresses on the trucks, no pics until the weekend through as the light is so poor by the time I get home.

Picked up a copy of Osprey's LRDG Patrolman by Tim Moreman last week. Interesting read. There is a bit about the raid on Barce in September 42 that fits the time line of the vehicles. Twelve trucks and five jeeps were involved with folks from the New Zealanders T1 Patrol and Guardsmen from G1 Patrol, so a nice mix.

The raid was from Faiyum in Egypt to Barce in the Gebel Akhdar some 1,859 klm. Produced some great ideas for finishing the kits.

Al
AlanL
Visit this Community
England - East Anglia, United Kingdom
Joined: August 12, 2005
KitMaker: 14,499 posts
Armorama: 11,675 posts
Posted: Friday, December 17, 2010 - 05:51 AM UTC
Hi folks,

Bit more progress. On the gun truck I've added some bolts around the wood, and the shovel, which I've just transfered to the other side : Added an MG mount to the front of the cab and some banding to both it and the condenser. Put the light main light in and the side lights on.

On the radio truck same detail but I'm scract building another MG fitting and have added a sun compass. The side bins have been fixed on so just need painted and some 2 Gal cans added.

The kit provides 2 x 4 gal cans which I think are probably way to big but I'll use them as fillers in the bottom stowage of the vehicle so that won't matter.


Al
AlanL
Visit this Community
England - East Anglia, United Kingdom
Joined: August 12, 2005
KitMaker: 14,499 posts
Armorama: 11,675 posts
Posted: Thursday, December 23, 2010 - 11:41 PM UTC
Hi Guys,

Still plodding away, not much doen this week, condensers and a little PE added. Drooped in some stores to get an idea of how much will be needed to stock the trucks. I like the look of the Black Dog stowage, so might go that route for one of the vehciles, or just finsih the basic vehicle and see what resicast come along with.

Got some of the Accurate Armour 4gal cans for a variety of projects.


Al
ArnoRiedel
Visit this Community
Netherlands
Joined: February 23, 2010
KitMaker: 20 posts
Armorama: 19 posts
Posted: Friday, December 24, 2010 - 01:48 AM UTC
I love them.
biffa
Visit this Community
Tennessee, United States
Joined: September 07, 2005
KitMaker: 881 posts
Armorama: 826 posts
Posted: Friday, December 24, 2010 - 10:32 AM UTC
great subjects Al i have one of these with the resin wheels replacements and was waiting till i picked up some PE but still couldnt find it does this kit really need it or could it be done OOB either way yours look great and those figs rock very well painted.
Plasticbattle
#003
Visit this Community
Donegal, Ireland
Joined: May 14, 2002
KitMaker: 9,763 posts
Armorama: 7,444 posts
Posted: Friday, December 24, 2010 - 12:10 PM UTC
Hi Alan. You´re making great headway with these trucks and figures. Love the NWM figures .... seen them in the flesh recently and I was very impressed. Great collection of accessories as well. Build them up with some sculpted bedrolls and tarps to get a nice snug load, that looks realistic.
AlanL
Visit this Community
England - East Anglia, United Kingdom
Joined: August 12, 2005
KitMaker: 14,499 posts
Armorama: 11,675 posts
Posted: Friday, December 24, 2010 - 08:41 PM UTC
Hi Arno, Frank and Ron,

Merry Chrstmas guys, thanks for dropping in.

Ron,

The Eduward PE is extensive, some of it will add some nice additional detail missing on the kit, but I'll not use it all as some I think just creats unnecessary work.

Frank,

Yes, this was just a trial to get an idea of how much stowage it might take to fill one up. I am tempted by the Black Dog set and yes, lots of tarps and rolls would be required.

One thing I'm wondering about is the seat on the 20mm. I wonder if the LRDG removed this for a wider swing of the gun ie 190%?

AL

ArnoRiedel
Visit this Community
Netherlands
Joined: February 23, 2010
KitMaker: 20 posts
Armorama: 19 posts
Posted: Saturday, December 25, 2010 - 04:05 AM UTC

Here's de seat present Picture taken from www.lrdg.de
AlanL
Visit this Community
England - East Anglia, United Kingdom
Joined: August 12, 2005
KitMaker: 14,499 posts
Armorama: 11,675 posts
Posted: Saturday, December 25, 2010 - 09:17 PM UTC
Thanks Arno, forgotten about that one.

Al
AlanL
Visit this Community
England - East Anglia, United Kingdom
Joined: August 12, 2005
KitMaker: 14,499 posts
Armorama: 11,675 posts
Posted: Sunday, January 09, 2011 - 04:04 AM UTC
Hi folks,

Well a bit more work, mot much very idle over Christmas!

Fittted a few of the cans, started work on some stowage and the front bumper. You get replecement parts for the bumper in the PE, but I thought I'd hollow out the centre of the bars intead. Stil a lot to do, on this one, but at least i got started again today.


You get replacement fittings for the rifles, but these are very footery and are probably only needed if you want to show an empty holder. the back of the cab is also very thick so I've thinned that down. I'll add one or possibly two empty holders.


Al
AlanL
Visit this Community
England - East Anglia, United Kingdom
Joined: August 12, 2005
KitMaker: 14,499 posts
Armorama: 11,675 posts
Posted: Friday, January 14, 2011 - 11:48 PM UTC
Hi Guys,

Well I though I would get lots on on the vehicles over Christmas but in fact I got little done until this week.

I've added in the seat, thinned down the backing plate, drillled out the plastic supports on the mud guards and thinned down the bumper plate plus drilled out the holes in them. I've fixed the cargo bed to both trucks, almost finished the POW cans for the side and added to front chassis ends for the bumbers. Lack of any decent light these last few weeks just put me off making the effort.

There were PE replacements for the front bumbers but I wanted to see if I could fix up the original part which has worked out reasonably OK.

I've started work on the No 11 set and just have some plumbing to add.

Here is how things stand at the moment.


panzerserra
Visit this Community
Goias, Brazil
Joined: March 29, 2002
KitMaker: 730 posts
Armorama: 688 posts
Posted: Wednesday, February 09, 2011 - 08:08 PM UTC
Beautiful girls, Alan...

Following this topic with attention !!!

regards
F3066
Visit this Community
Victoria, Australia
Joined: November 20, 2004
KitMaker: 71 posts
Armorama: 55 posts
Posted: Wednesday, February 09, 2011 - 10:40 PM UTC
a tip for you if i may when i built my trucks, links below,to save on stowage that can be expensive i used a false bottom to give the impression that the trucks are loaded to the hilt and it also cuts down the weight issue on those axles as well,but they are certainly coming along watching with interest
http://www.network54.com/Forum/110741/thread/1153561167/F30+LRDG+Fitters+truck

http://www.track-link.net/gallery/3948

http://www.track-link.net/gallery/3945

AlanL
Visit this Community
England - East Anglia, United Kingdom
Joined: August 12, 2005
KitMaker: 14,499 posts
Armorama: 11,675 posts
Posted: Thursday, February 10, 2011 - 03:35 AM UTC
Hi J,

I've done that myself in the past, it is a cost effective way to bulk up the stowage.

I've seen both kits over on ML link before very tasty.

I have to confess I haven't done much to either of these past 6/8 weeks - went into a bit of a lull.

Cheers

Al
F3066
Visit this Community
Victoria, Australia
Joined: November 20, 2004
KitMaker: 71 posts
Armorama: 55 posts
Posted: Friday, February 11, 2011 - 04:38 PM UTC

This is the figure i used to answer your question


http://www.toytrainheaven.com/.sc/ms/dd/Military--Verlinden/9156795/Verlinden%20SS%20TANK%20OFFICER%20SEATED%2054mm%20%20%20%2C%20LIST%20PRICE%20%2414.01
AlanL
Visit this Community
England - East Anglia, United Kingdom
Joined: August 12, 2005
KitMaker: 14,499 posts
Armorama: 11,675 posts
Posted: Saturday, February 19, 2011 - 03:53 AM UTC
Hi folks,

Well after weeks of inactivity on these two I got a bit done today. Finished adding most of the fittings to the cab and started to add some fender stowage. I wasn't sure whether to use the Edward PE parts or kit parts so though I'd start with the PE and if it didn't work I could always fall back on the kit parts.

Wireless truck


The fender stowage looks to normally be Sand Mats, I though about how I might makes these for weeks and gave up, so just added some kit.

Gun truck


Not so much done here, just the PE bases and cab supports.

Both


Al