

Adam, this is some awesome stuff! Keep up the great work and I look foward to seeing it complete!
And I like your honesty. So you like competing, nothing wrong with that!
Jim
Dioramas
Do you love dioramas & vignettes? We sure do.
Do you love dioramas & vignettes? We sure do.
Hosted by Darren Baker, Mario Matijasic
That Aussie's in Iraq Diorama, 2006

jvazquez

Joined: September 26, 2006
KitMaker: 857 posts
Armorama: 811 posts
Posted: Thursday, January 27, 2011 - 06:30 AM UTC
jointhepit

Joined: May 14, 2006
KitMaker: 3,829 posts
Armorama: 881 posts
Posted: Thursday, January 27, 2011 - 12:21 PM UTC
amazing piece!! 

Adamskii

Joined: November 06, 2010
KitMaker: 537 posts
Armorama: 474 posts

Posted: Friday, January 28, 2011 - 01:40 AM UTC
Wow it took a whole day to dry. The foam trapped the moisture from the plaster under the skin and I had to leave it in the sun for a while. The MDF wood board underneath warped slightl so I had to screw it down to another piece. Thats ok because usually II laminate 4 pieces together to prevent warping over time.
A couple of lessons before we proceed. Dont use the river gravel - when sanding, the tiny rocks come loose and rub between the sand paper and the surface leaving horrible big scars (and a challenge to fix). Also, I suggest using the green wet flower foam not the grey dry foam - the grey stuff is very strong and doesnt "dent" like the green did. Thats a good thing because I get heavy handed but still I did like the Chipped effect from the trial.
So another problem today was I exceeded my photobucket allowance in bandwidth of all things for the month = 10 gigabytes so I had to sort that out and ultimately finally sort out how to post pictures on here from the kitmaker website photo cache. Thats sorted now.
I did loose some pictures in the process, and unfortunately I cant recover them. So we have to skip ahead a little bit.
Here we have the "dried" road. I have test fitted some sidewalk sections. I mostly spent the day working out how to incorporate the "driveway" elements of the kerbing while sustaining a street view. I took the advice of sanding the road, and also rounding the indentations.
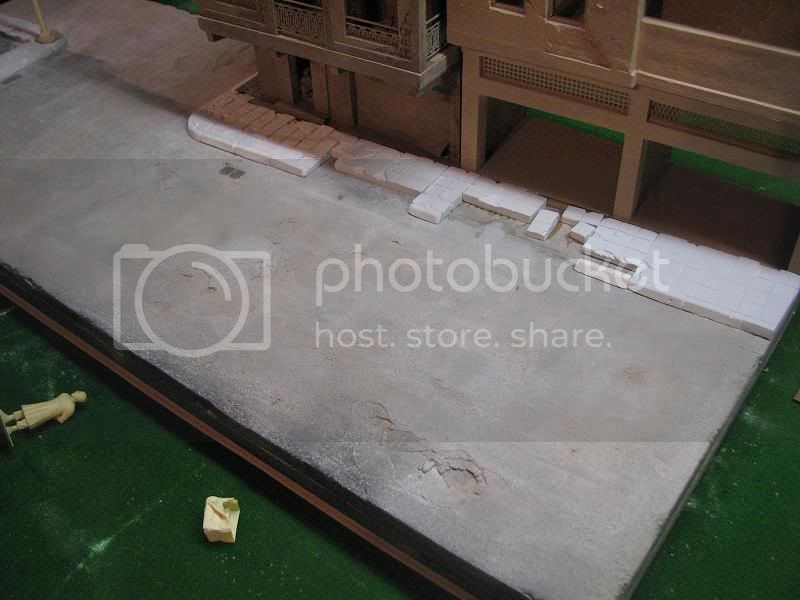
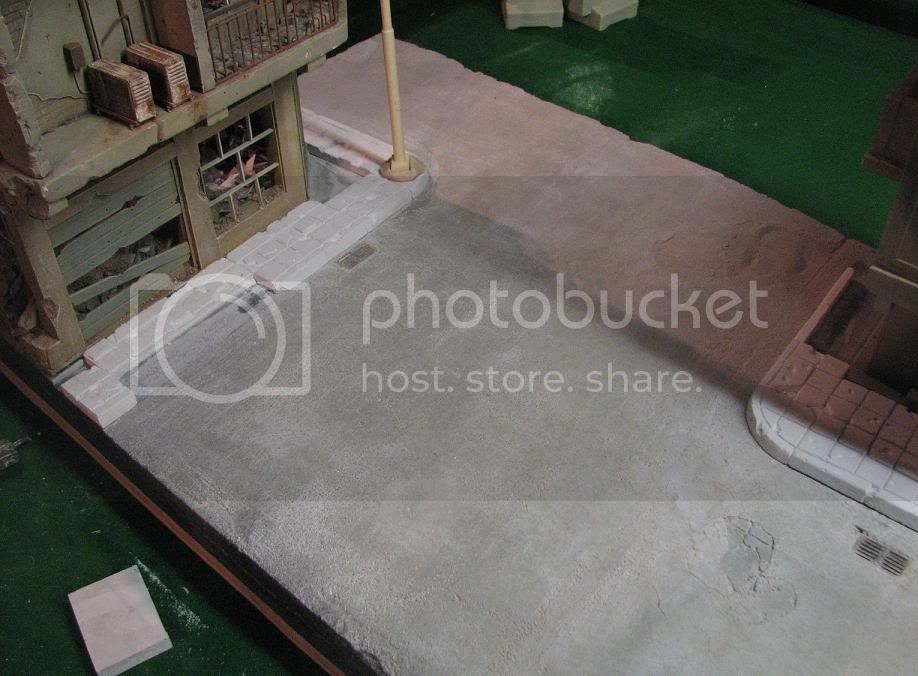
The road has been sanded with 320 grit sandpaper on a sanding block.
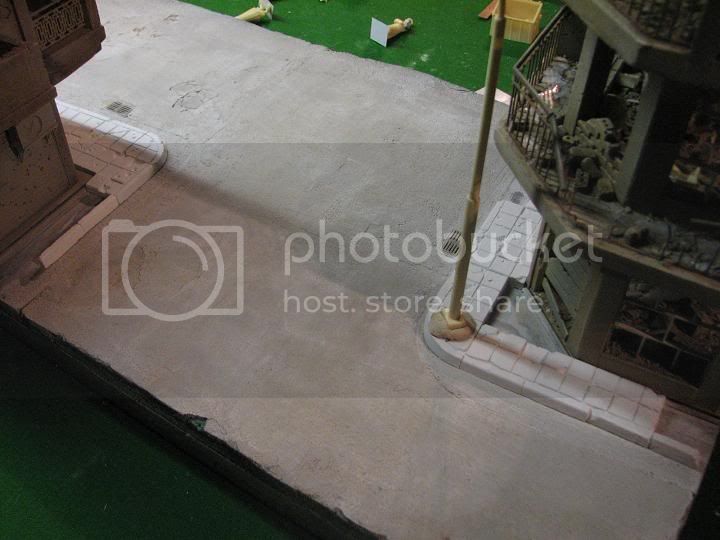
This view helps show some texture of the road. Also I cracked the surface with a small hammer today, (these are the lost pictures), however the technique is the same from the trial blog on bitumen roads.
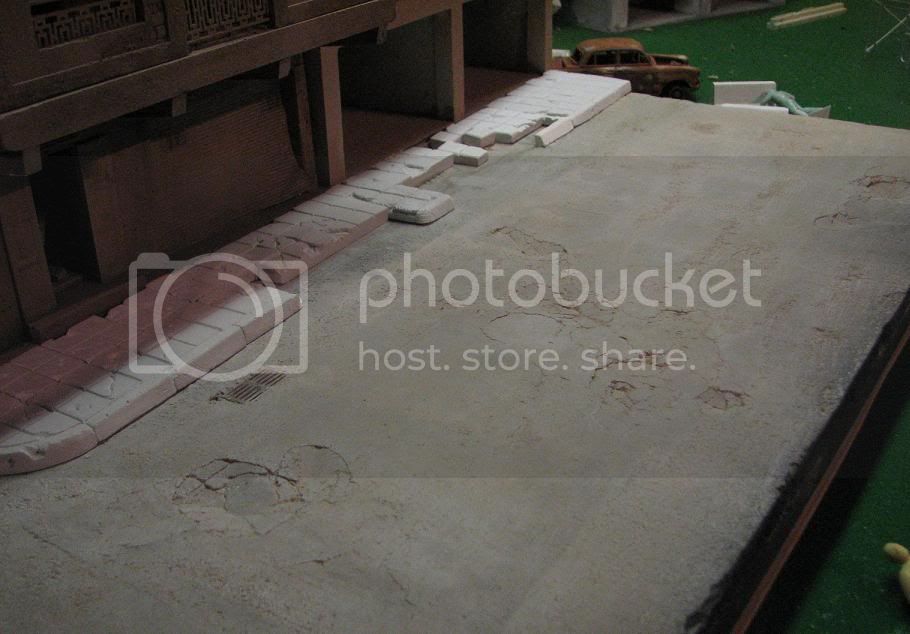
A plan view of the road to show texture and other elements

If you think you could be looking at a real piece of road then I am satisfied.
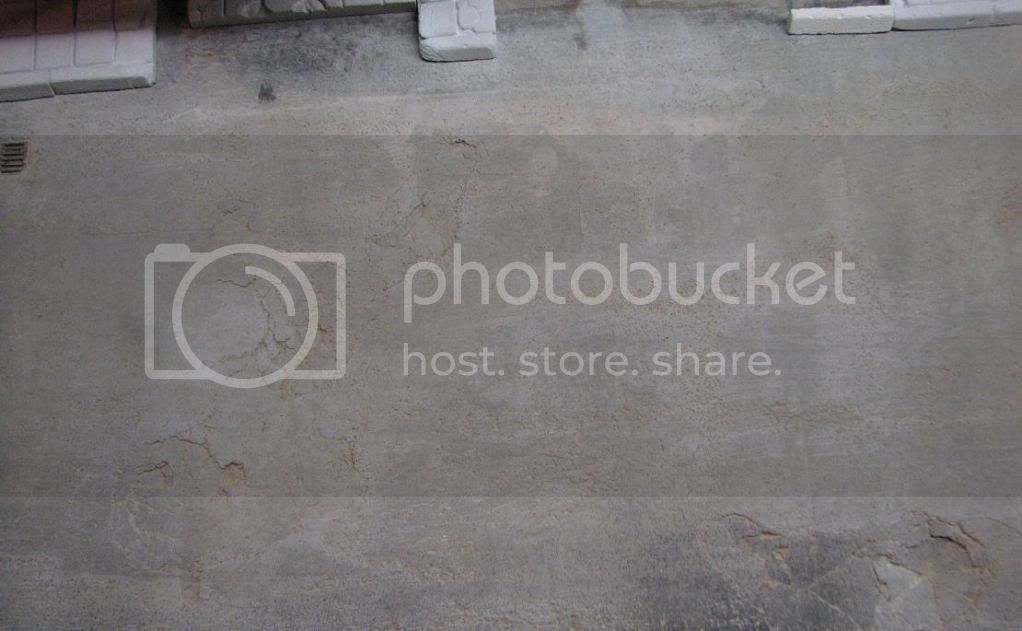
Of course the road has not been painted, weathered, dusted, washed etc etc..
Adam
A couple of lessons before we proceed. Dont use the river gravel - when sanding, the tiny rocks come loose and rub between the sand paper and the surface leaving horrible big scars (and a challenge to fix). Also, I suggest using the green wet flower foam not the grey dry foam - the grey stuff is very strong and doesnt "dent" like the green did. Thats a good thing because I get heavy handed but still I did like the Chipped effect from the trial.
So another problem today was I exceeded my photobucket allowance in bandwidth of all things for the month = 10 gigabytes so I had to sort that out and ultimately finally sort out how to post pictures on here from the kitmaker website photo cache. Thats sorted now.
I did loose some pictures in the process, and unfortunately I cant recover them. So we have to skip ahead a little bit.
Here we have the "dried" road. I have test fitted some sidewalk sections. I mostly spent the day working out how to incorporate the "driveway" elements of the kerbing while sustaining a street view. I took the advice of sanding the road, and also rounding the indentations.
The road has been sanded with 320 grit sandpaper on a sanding block.
This view helps show some texture of the road. Also I cracked the surface with a small hammer today, (these are the lost pictures), however the technique is the same from the trial blog on bitumen roads.
A plan view of the road to show texture and other elements
If you think you could be looking at a real piece of road then I am satisfied.
Of course the road has not been painted, weathered, dusted, washed etc etc..
Adam

majjanelson
Joined: December 14, 2006
KitMaker: 1,355 posts
Armorama: 979 posts
Posted: Friday, January 28, 2011 - 02:36 AM UTC
Adam,
EXCELLENT! (in the sound of Bill & Ted's Excellent Adventure)
Have you tried a thinner foam under your road surface for a more "alligator" effect on the asphalt?
Asphalt sometimes cracks in a pattern similiar to alligator hide over a larger area. I'll have to get you an image if you aren't following...
Adamskii
Joined: November 06, 2010
KitMaker: 537 posts
Armorama: 474 posts
Posted: Saturday, January 29, 2011 - 02:47 AM UTC
a small dilemma
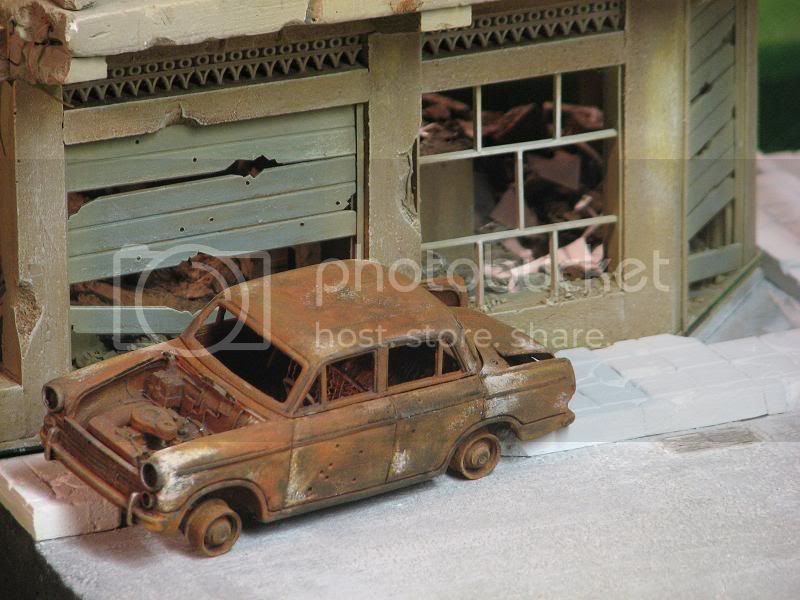
I dont know why I do this to myself. I have already stated the MIG destroyed car would not be part of this dio for good reasons. Ones based on reality and proper situational awareness of how things are in Iraq. That being scrap metal is valuable - destroyed/ abandoned vehicles are therefore prized for the metal and rarely last long. So to see one hanging around is not necesarilly consistant with that view. The generalisation is they dont really belong in a long term landscape.
However, from an "artistic" point of view, Or one that might appeal to 99% of the viewers who didnt know about the scrap metal deal, the car would be very appropriate.
So do I go with reality (all that work on accurising the vehicles supports this theme), or test the waters with something tht might look more appealing or intersting in the setting of a diorama?
Heres the idea (suggested by a visitor) Place the MIG car at the top end of the street in front of the destroyed corner store. pile rubbish and some debris around it. This would replace the ad hoc street market.
Heres some pics of the car posed in the suggested position.
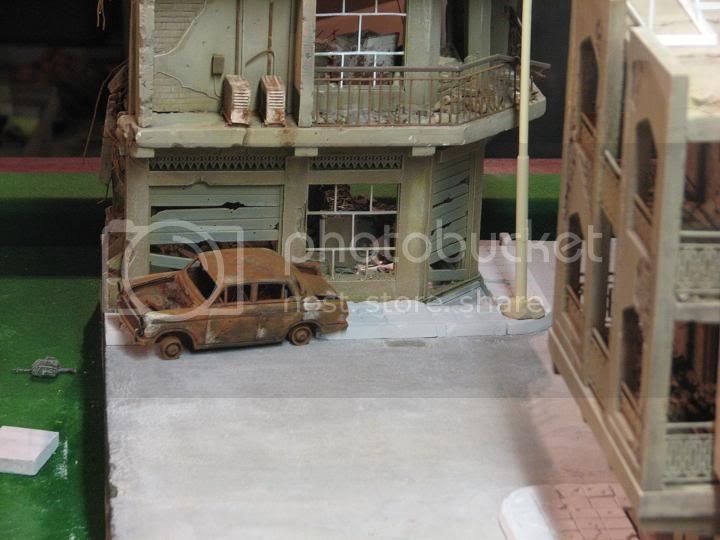
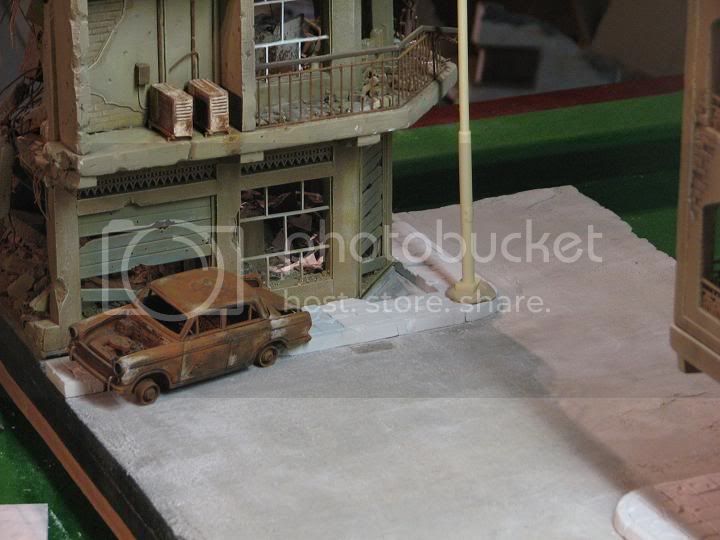
Thoughts / comments anyone while I toy with this alternative.
Adamskii the masochist
I dont know why I do this to myself. I have already stated the MIG destroyed car would not be part of this dio for good reasons. Ones based on reality and proper situational awareness of how things are in Iraq. That being scrap metal is valuable - destroyed/ abandoned vehicles are therefore prized for the metal and rarely last long. So to see one hanging around is not necesarilly consistant with that view. The generalisation is they dont really belong in a long term landscape.
However, from an "artistic" point of view, Or one that might appeal to 99% of the viewers who didnt know about the scrap metal deal, the car would be very appropriate.
So do I go with reality (all that work on accurising the vehicles supports this theme), or test the waters with something tht might look more appealing or intersting in the setting of a diorama?
Heres the idea (suggested by a visitor) Place the MIG car at the top end of the street in front of the destroyed corner store. pile rubbish and some debris around it. This would replace the ad hoc street market.
Heres some pics of the car posed in the suggested position.
Thoughts / comments anyone while I toy with this alternative.
Adamskii the masochist

lestweforget
Joined: November 08, 2002
KitMaker: 2,832 posts
Armorama: 1,500 posts

Posted: Saturday, January 29, 2011 - 03:18 AM UTC
Adam. Your idea, or friends idea, sounds possible, but i also really like the adhoc street market and think it would be a shame to remove it.
So how about, you kitbash some Iraqi's with some hacksaws and whatnot, dismantling the burnt out car, doing exactly as you describe, salvaging it for metal.
You can keep it, and also portray the background details on wrecks as you described.
Food for thought.
So how about, you kitbash some Iraqi's with some hacksaws and whatnot, dismantling the burnt out car, doing exactly as you describe, salvaging it for metal.
You can keep it, and also portray the background details on wrecks as you described.
Food for thought.

Adamskii
Joined: November 06, 2010
KitMaker: 537 posts
Armorama: 474 posts
Posted: Saturday, January 29, 2011 - 03:36 AM UTC
Quoted Text
Adam. Your idea, or friends idea, sounds possible, but i also really like the adhoc street market and think it would be a shame to remove it.
So how about, you kitbash some Iraqi's with some hacksaws and whatnot, dismantling the burnt out car, doing exactly as you describe, salvaging it for metal.
You can keep it, and also portray the background details on wrecks as you described.
Food for thought.
I agree on a shame to loose it. The kitbashing of figs to make em wreckers is interesting- but it assumes the vehicle is only recently abandoned or whatever. So more of a burnt out shell than a rusted old wreck. I kick myself for not working out to put it in the garage and paint around it / rubble around it. .
If the postie would deliver all my packages I might have the figs and street market stuff needed to make a mock up for comparison shots.......
easier to decide with a side by side view perhaps. I naturally lean to the market. But its a shame to waste a good car. the market would occupy the same area.
Adaaaam
lestweforget
Joined: November 08, 2002
KitMaker: 2,832 posts
Armorama: 1,500 posts
Posted: Saturday, January 29, 2011 - 04:02 AM UTC
Right then, i didnt realise the market was to go in that spot. Ditch the car mate, the market adds so much more life and detail to the overall diorama than a rust bucket.

catman31
Joined: September 12, 2005
KitMaker: 166 posts
Armorama: 142 posts
Posted: Saturday, January 29, 2011 - 06:09 AM UTC
Hi Adam
Following this diorama with interest as I am in the process of building an Iraq street scene too. I am using an apartment ruin from Diorama Plus (really nice) and I was thinking of adding some furniture. Excuse me if I sound naive, but would a modern washing machine, like you see in VP's "Home Goods," be out of place :
http://cgi.ebay.com/Verlinden-1-35-Home-Goods-Modern-1950s-Set-2299-/200280486079?pt=LH_DefaultDomain_0&hash=item2ea1a5b0bf
It's hard to find interior shots of furniture and living/everyday "things" in pics.
I like Blast Models' modern set and Royal Models' modern house accessories, too. They have a nice air conditioning unit in that set but I can't figure out where to place it? On the roof? Next to the base of the building? Any ideas?
Thanks and keep going! Awesome scene.
-Felix
Adamskii
Joined: November 06, 2010
KitMaker: 537 posts
Armorama: 474 posts
Posted: Saturday, January 29, 2011 - 12:11 PM UTC
Quoted Text
Hi Adam
Following this diorama with interest as I am in the process of building an Iraq street scene too. I am using an apartment ruin from Diorama Plus (really nice) and I was thinking of adding some furniture. Excuse me if I sound naive, but would a modern washing machine, like you see in VP's "Home Goods," be out of place :
http://cgi.ebay.com/Verlinden-1-35-Home-Goods-Modern-1950s-Set-2299-/200280486079?pt=LH_DefaultDomain_0&hash=item2ea1a5b0bf
It's hard to find interior shots of furniture and living/everyday "things" in pics.
I like Blast Models' modern set and Royal Models' modern house accessories, too. They have a nice air conditioning unit in that set but I can't figure out where to place it? On the roof? Next to the base of the building? Any ideas?
Thanks and keep going! Awesome scene.
-Felix
Hi Felix, yes it is very appropriate. I have used the Verlinden set so foar, but am thinking of buying the two fridge set from plus model (i think). I have several photos of the whitegoods just sitting in the middle of the sidewalk in both new and used and abandoned condition. I have seen video footage on youtube from a ahumvee driving down a baghdad street and every 3rd or 4th shop has them in front of the buildngs. The Verlinden set is cost effective and has some usefule street accesories such as the rubbish bin,, the TV is also handy, Middle east may seem like its in themiddle ages but believe me they have all the mod cons of western society (except power 24 hours a day) .
The royal models Modern accesories set is very usefull ( got for the satellite dish and air conditioners) - the water tank alone is great but the one that I see by chance mostly in pictures is the water tank in the MIG modern street update set. The Air conditioner is a split system or converter type, and I think ismissing the bit seen inside the building unfortunately. It should be mounted on the ground against a wall with twopipes that would run up the wall and then into it, on the other side should be the blower unit. It can be mounted on the side of the wall using a bracket (supplied in kit) or on the roof- as long as the two pipes leasing from it run into the building.
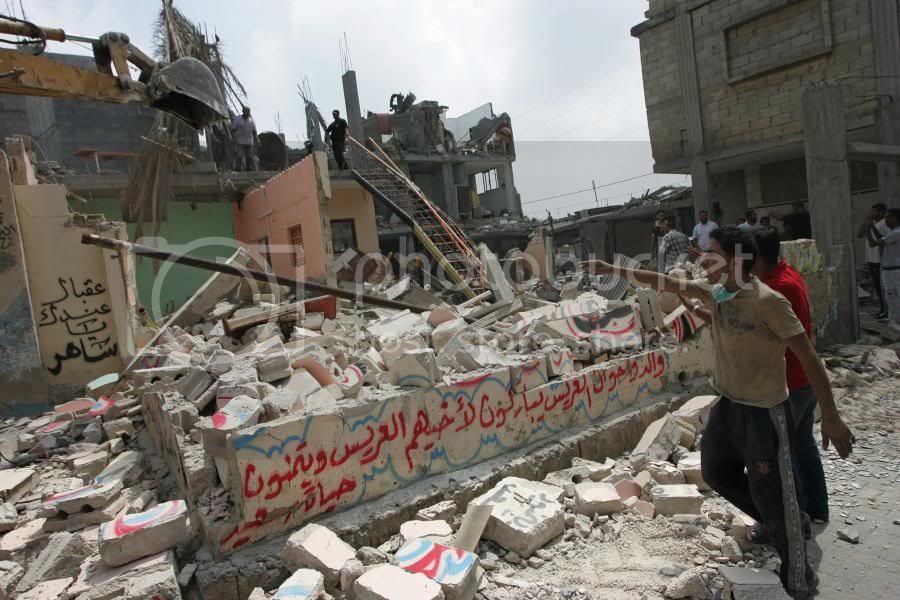
As fo rthe interior everyday living type furniture - the best photos unfortunately are of recently destroyed houses and people picking through the mess.
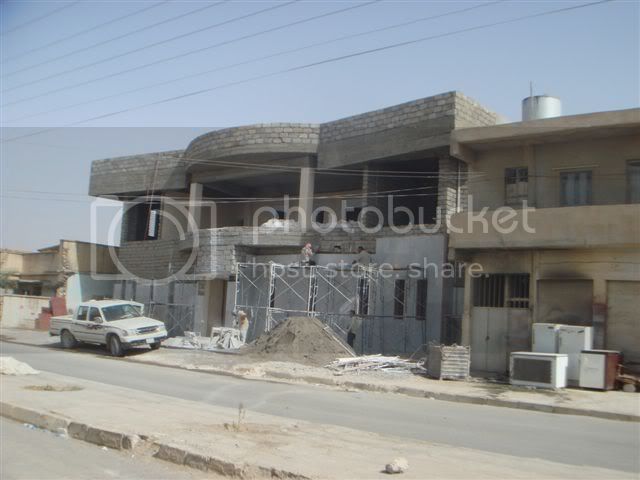
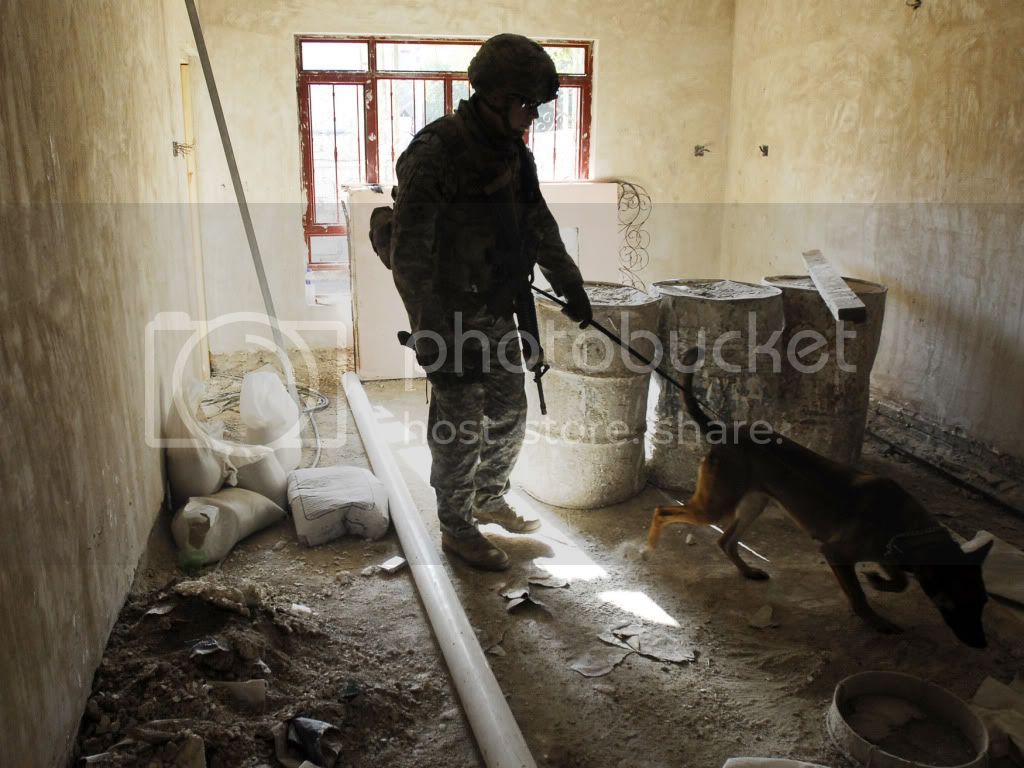
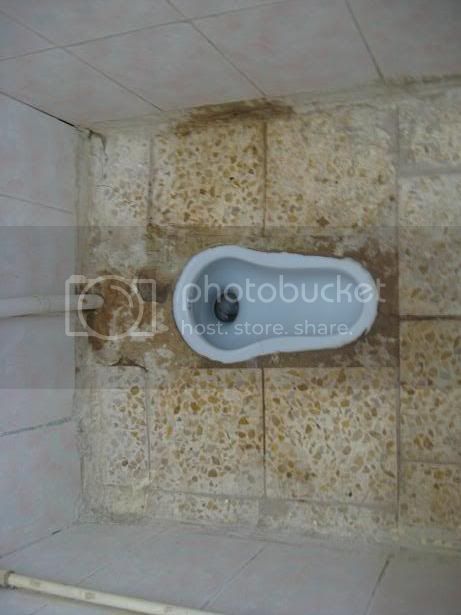
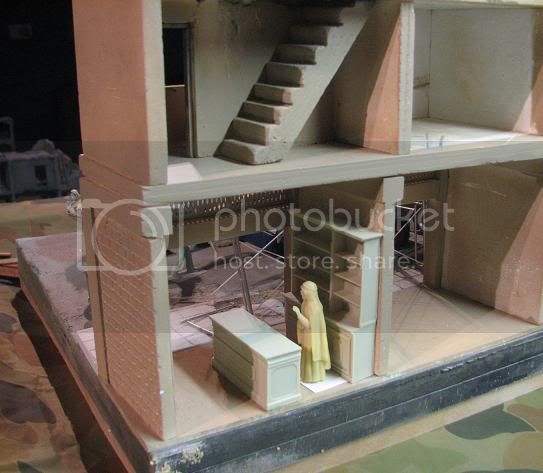
Heres some pictures for reference. Once again if anyone believe sthey should be credited let me know the reference, Felix spend some time googling pictures using terms like "baghdad slum, Iraq rooftop, sadr street, destroyed Iraq building, Falujah market" be creative in how to describe natural or normal buildings and you should get tonnes of examples. Be carefull in that some of the results can also be disturbing (pictures of wounded children etc.) Some of the best photos come from independant bloggers and Journalists.
rooftop airconditioner
wall mounted air conditioner
Balconny mounted (?) air conditioners
fridges lying in the street
more street side whitegoods
An interior - middle eastern culture has different ideas about interior colours etc as a standard - I'm sure of it!
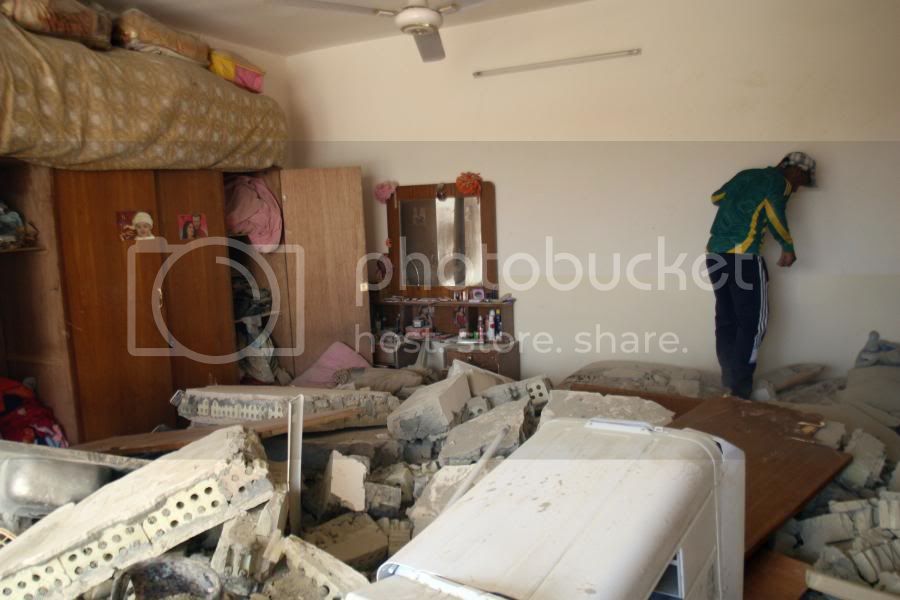
room undergoing renovations Iraq style?
A Baghdad toilet? someone confirm this - i would do a bathroom like a western one (many aftermarket sets to choose from), but this throws me...
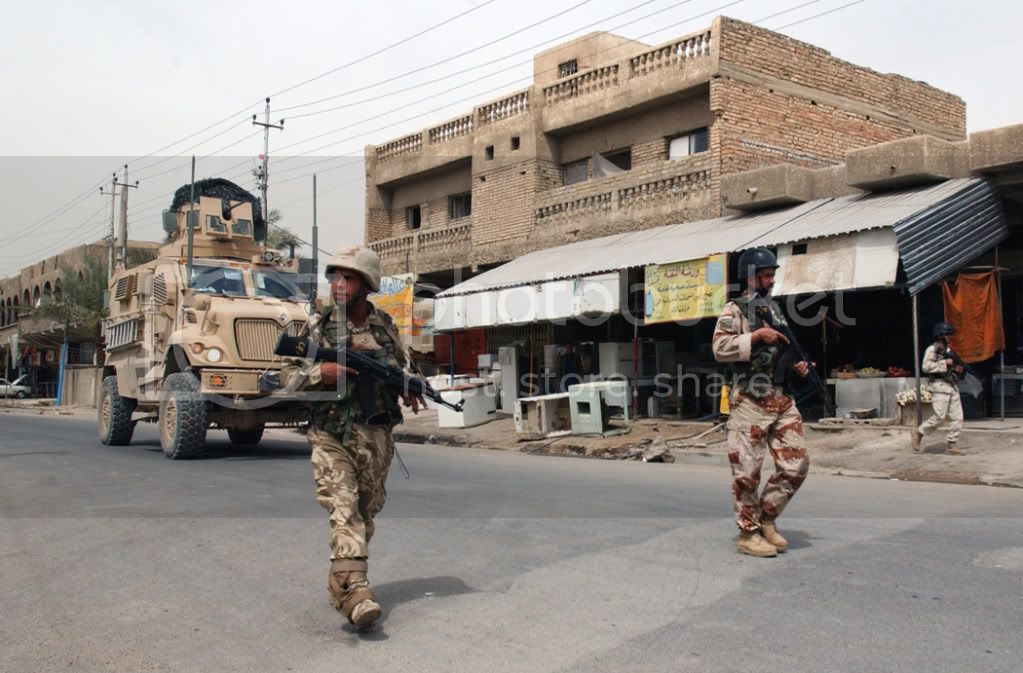
interior wall colours also good pic for scaling wall thickness (same as US helmet)
The interior shots are hardest to get - I have to cross this bridge too, but havnt fully devoted time to looking into it yet.
good luck with your diorama!
Adamskii
catman31
Joined: September 12, 2005
KitMaker: 166 posts
Armorama: 142 posts
Posted: Saturday, January 29, 2011 - 02:27 PM UTC
Thanks so much for the photos and information! This helps a lot and it is inspiring. I mounted the air conditioning unit from the Royal set above the main entrance of the Diorama Plus kit. There are no doors in the kit so I may use the one from the Verlinden Iraq wall set (it has plaster walls and resin doors/gates). I still don't know if the larger air conditioning unit (the one that looks like a big block on four legs) is appropriate for the building. Maybe for a Bosnia or European diorama? Or like in your photos, maybe in the street for the next looter to "take." That could be cool with the microwave and sweeper from the Blast set?
Those green and pink interior colors are pretty cool - could be a show stopper. Thank you again for the references. I appreciate the help. One thing; I wasn't quite sure of what you meant from the MIG street set-I couldn't find what you were talking about.
I'll keep watching your progress. Looks amazing!
Adamskii
Joined: November 06, 2010
KitMaker: 537 posts
Armorama: 474 posts
Posted: Saturday, January 29, 2011 - 03:35 PM UTC
Hi again,
that bock block on 4 legs is not an air conditioner - it is a water tank - the little pump that goes underneath it is there to pump the water in from an interior float valve while thewater pressure created by gravity from it being on the roof allows pressure in the building.
the MIG modern street accesories set looks like this
http://www.modellbau-universe.de/uploadfiles/original/mp_72091.jpg
the two big bulged domes look like water tanks to me as I seen things like on the roofs middle eastern style. Its called MIG modern city accesories and is set number 35001. I dont have it , yet. That dio plus kit is real nice too and would greatly benefit from your modification.
As for the air conditioners being used in Bosnia etc - I dont see why not - they usually are reverse cycle and look exactly like ones I see around my local city on the side of the world!. I would declare them universal as long as its era appropriate (last 20 years say) and the building had or has power to it (not some hillbilly shack or goat herder in the Urals)
Adam
catman31
Joined: September 12, 2005
KitMaker: 166 posts
Armorama: 142 posts
Posted: Saturday, January 29, 2011 - 04:34 PM UTC
Got it! Thanks again; I swear I read somewhere those bulge looking things in the MIG kit are recycle bins, but your description makes more sense.
Thanks for the information!
Thanks for the information!
Adamskii
Joined: November 06, 2010
KitMaker: 537 posts
Armorama: 474 posts
Posted: Saturday, January 29, 2011 - 05:13 PM UTC
They could be recycle bins - they look mostly like septic tanks to me. but i have seen some pics of things that look very much like that on the roofs of some buildings in the middle east - I might be wrong. I am certain someone will correct me if so.
Adam
Adam

Lagumiles
Joined: December 30, 2003
KitMaker: 156 posts
Armorama: 135 posts
KitMaker: 156 posts
Armorama: 135 posts
Posted: Saturday, January 29, 2011 - 11:56 PM UTC
Quoted Text
They could be recycle bins - they look mostly like septic tanks to me. but i have seen some pics of things that look very much like that on the roofs of some buildings in the middle east - I might be wrong. I am certain someone will correct me if so.
Adam
You are right, we also have in Italy very similar bins to recicle plastic and cans.
Moreno

Lagumiles
Joined: December 30, 2003
KitMaker: 156 posts
Armorama: 135 posts
KitMaker: 156 posts
Armorama: 135 posts
Posted: Sunday, January 30, 2011 - 01:54 AM UTC
Quoted Text
Quoted TextThey could be recycle bins - they look mostly like septic tanks to me. but i have seen some pics of things that look very much like that on the roofs of some buildings in the middle east - I might be wrong. I am certain someone will correct me if so.
Adam
You are right, we also have in Italy very similar bins to recicle plastic and cans.
Moreno
I forgot to say that , this is an oustanding work . And I have a question:
Are the balcon fences in building B scratchbulit or are they coming from some aftermarket set?
Thanks Moreno

meaty_hellhound

Joined: July 23, 2010
KitMaker: 786 posts
Armorama: 753 posts

Posted: Sunday, January 30, 2011 - 04:21 AM UTC
Quoted Text
the MIG modern street accesories set looks like this
http://www.modellbau-universe.de/uploadfiles/original/mp_72091.jpg
the two big bulged domes look like water tanks to me as I seen things like on the roofs middle eastern style. Its called MIG modern city accesories and is set number 35001. I dont have it , yet. That dio plus kit is real nice too and would greatly benefit from your modification.
yes, they are recycling bins usually used for glass, tins, etc. one could be for coloured glass and the other for clear glass as those are often separated. the hook on the top is for the recycling truck to pick the bin up to empty. they should have some sort of decal on the front showing at least a pictogram of what it's for if not more stencils for warnings and who owns the bins. unfortunately this great set does not come with any decals.
if you want to convert this to a rooftop water tank you'd want to remove the top hook, fill in the side hole and perhaps scratchbuild a stand for it as roof water tanks never sit directly on the roof surface for moisture reasons. cheers, bd.

Adamskii
Joined: November 06, 2010
KitMaker: 537 posts
Armorama: 474 posts
Posted: Monday, January 31, 2011 - 10:14 PM UTC
Quoted Text
And I have a question:
Are the balcon fences in building B scratchbulit or are they coming from some aftermarket set?
Thanks Moreno
the fences are from ebay - they are plastic and really not pleasant in their design configuration, the stone wall joiners are toy like and certainly not model standard ( I threw mine in the bin). The fence elements however match a balcony picture I have thereforfe quite useful.
the fence is available here - http://cgi.ebay.com.au/FENCE-WALL-decorative-iron-stone-G-O-1-35-scale-/220635277616?pt=AU_Toys_Hobbies_Model_Kits&hash=item335ee32930 be sue to correctly specify the one you want.
the picture showing the design I chose is this one -
 - it pays to study the small details on buildings sometimes!
The balcony I created -
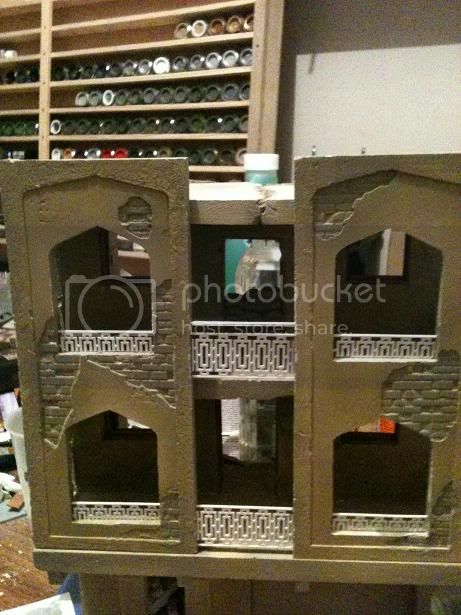
the other fence on the corner building (A) is from the Miniart bridge kit. Bless them. hese guys are making seriously nice details that a scratchbuilder can find more uses for than intended!
Hope that helps, and sorry for late reply!
Adam
Lagumiles
Joined: December 30, 2003
KitMaker: 156 posts
Armorama: 135 posts
KitMaker: 156 posts
Armorama: 135 posts
Posted: Tuesday, February 01, 2011 - 01:35 AM UTC
Thanks Adam the link will be very useful to me. Yes the Miniart set was already recognized, true they have made very interesting things.
Ciao Moreno
P.s. They ship worldwide exept Italy
Ciao Moreno
P.s. They ship worldwide exept Italy

bill1
Joined: August 14, 2005
KitMaker: 3,938 posts
Armorama: 520 posts

Posted: Tuesday, February 01, 2011 - 02:57 AM UTC
Yo Adam,
Great atmosfhere you are creating here...mutch detail. Nice trick how you did the street sections...the texture is just great.
Keep up!
Nice real life photo's to...
Greetz Nico
Great atmosfhere you are creating here...mutch detail. Nice trick how you did the street sections...the texture is just great.
Keep up!
Nice real life photo's to...
Greetz Nico

Adamskii
Joined: November 06, 2010
KitMaker: 537 posts
Armorama: 474 posts
Posted: Wednesday, February 02, 2011 - 12:43 AM UTC
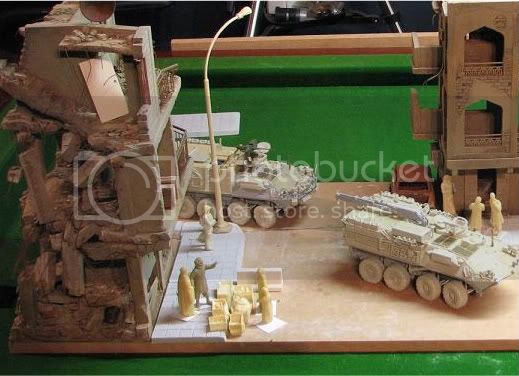
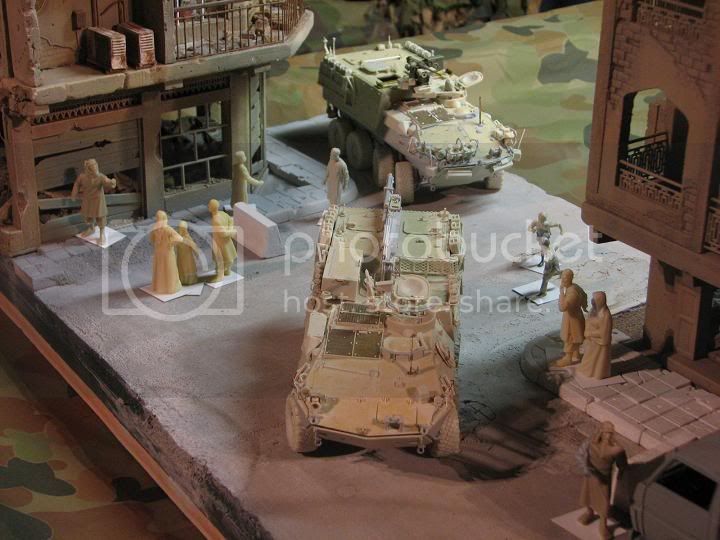
Just a quick few progress pics -
got the last of the figues and have begun modifying them to suit their purpose on the dio.
civiallian figure count - 17.
Sticking with the market theme, there would be a couple of street market stalls and I am using one of the carports in buiding C as a store front.
Anyways heres the pics. Note the Sidewalks are in placeand some street work on developing the kerbing.
enjoy,
Adam
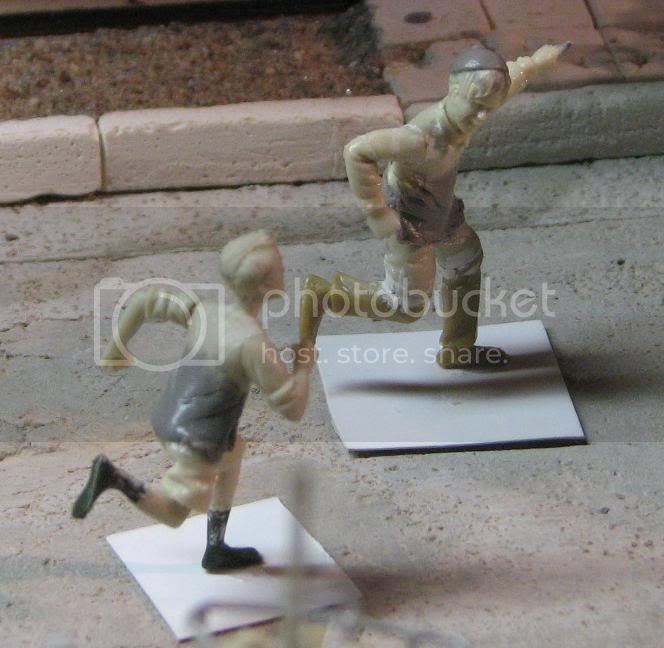
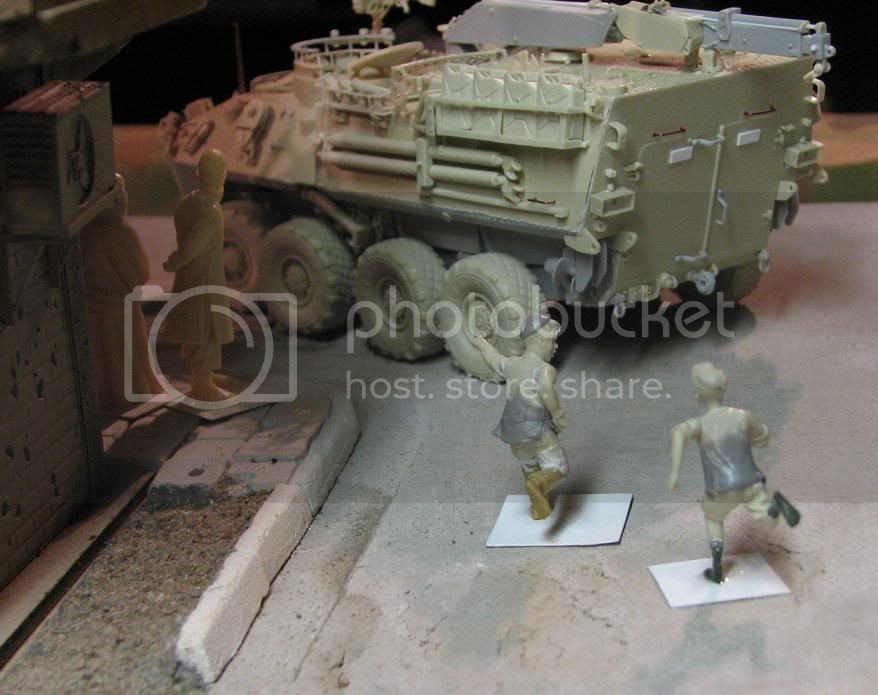
The two running boys are actually euopean running children circa WW2, I had to cut off their legs and replace with bare feet, sand off the school uniform deails, and make their tops more middle east like (tunics). One I gave a hat to. The legs are borrowed from the masterbox set with the middle east kid, and the green feet are from the vietnamese woman in the Academy m113 set, much sanding/smoothing and detailing to go but I think they will pass!
couple of kerb sidewalk test/ developement pics.
got the last of the figues and have begun modifying them to suit their purpose on the dio.
civiallian figure count - 17.
Sticking with the market theme, there would be a couple of street market stalls and I am using one of the carports in buiding C as a store front.
Anyways heres the pics. Note the Sidewalks are in placeand some street work on developing the kerbing.
enjoy,
Adam
The two running boys are actually euopean running children circa WW2, I had to cut off their legs and replace with bare feet, sand off the school uniform deails, and make their tops more middle east like (tunics). One I gave a hat to. The legs are borrowed from the masterbox set with the middle east kid, and the green feet are from the vietnamese woman in the Academy m113 set, much sanding/smoothing and detailing to go but I think they will pass!
couple of kerb sidewalk test/ developement pics.
catman31
Joined: September 12, 2005
KitMaker: 166 posts
Armorama: 142 posts
Posted: Wednesday, February 02, 2011 - 07:40 AM UTC
One other question (by the way, the progress is fantastic) What about drain pipes? I was going to use the set from Hudson & Allen or the plastic one from MiniArt. The H&A is white metal and easy to bend for damage effects. Thinking these are more for WWII homes/buildings, but the water has to go somewhere, right? I've looked for reference photos, but can't really locate drain pipes.
Thanks again,
Felix
Thanks again,
Felix
Adamskii
Joined: November 06, 2010
KitMaker: 537 posts
Armorama: 474 posts
Posted: Wednesday, February 02, 2011 - 11:03 PM UTC
Quoted Text
One other question (by the way, the progress is fantastic) What about drain pipes? I was going to use the set from Hudson & Allen or the plastic one from MiniArt. The H&A is white metal and easy to bend for damage effects. Thinking these are more for WWII homes/buildings, but the water has to go somewhere, right? I've looked for reference photos, but can't really locate drain pipes.
Thanks again,
Felix
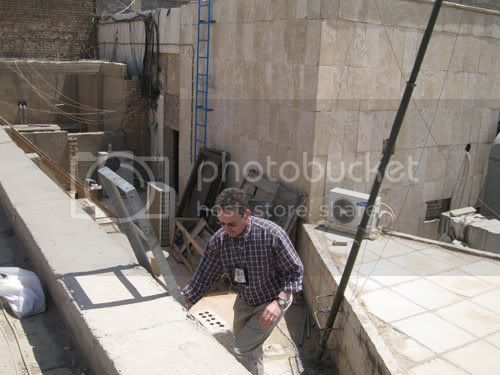
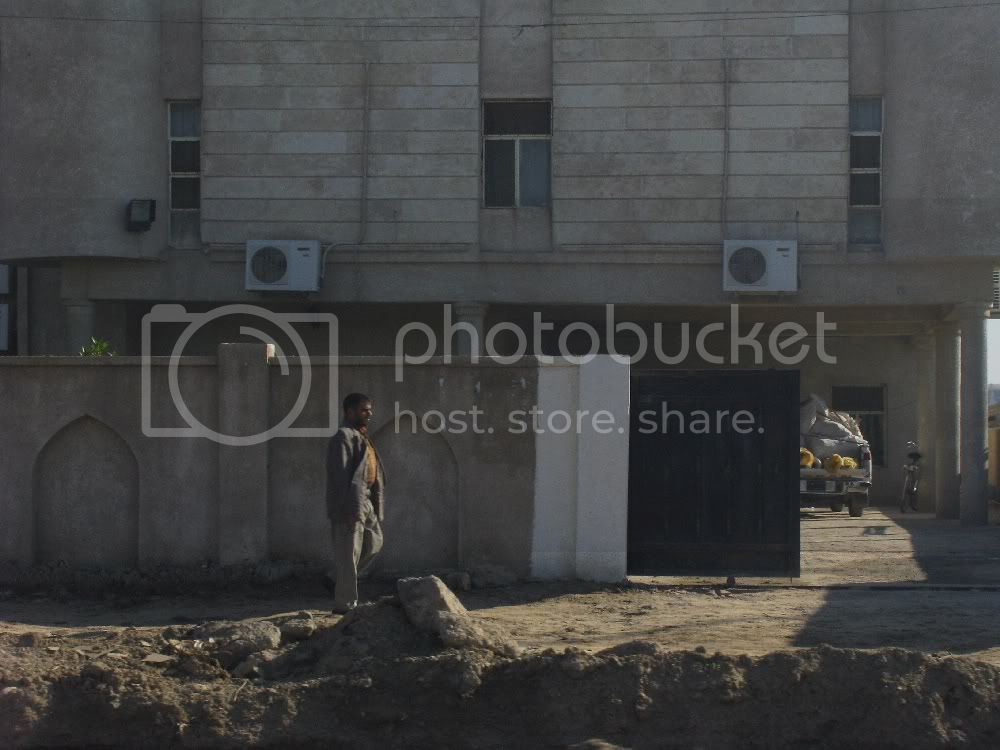
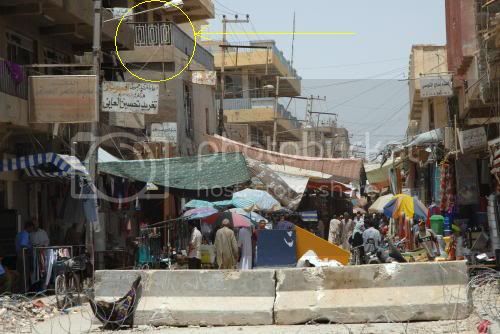
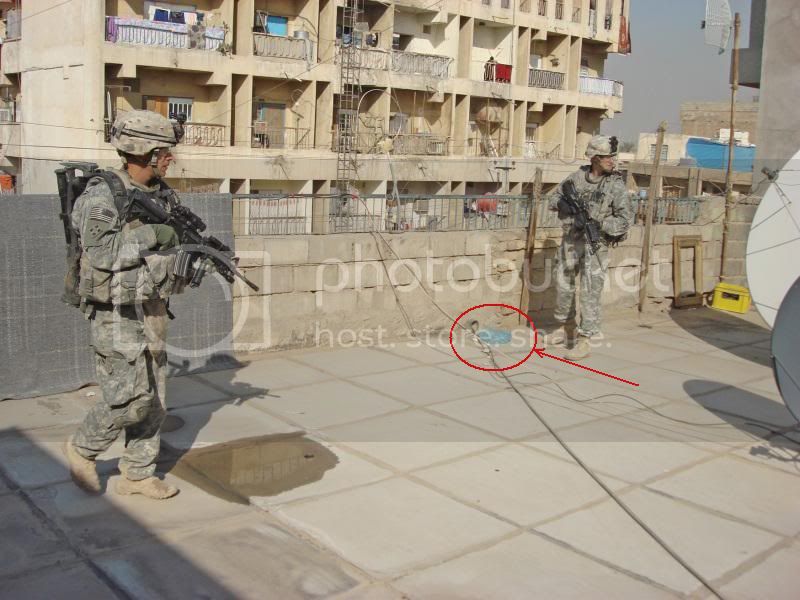
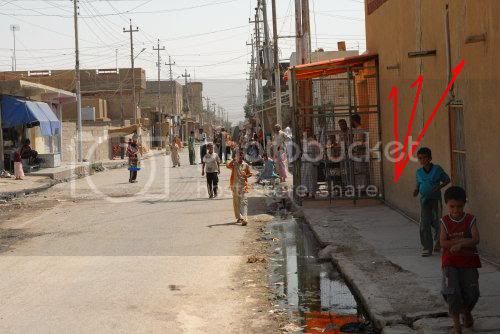
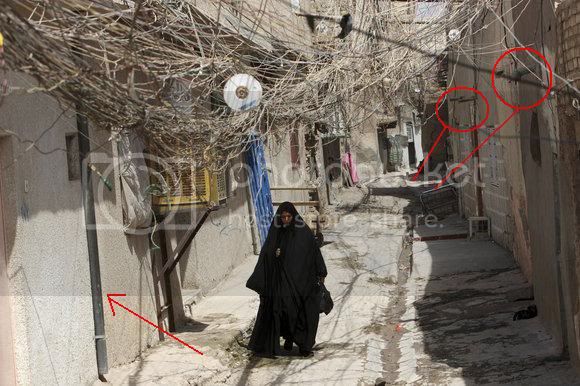
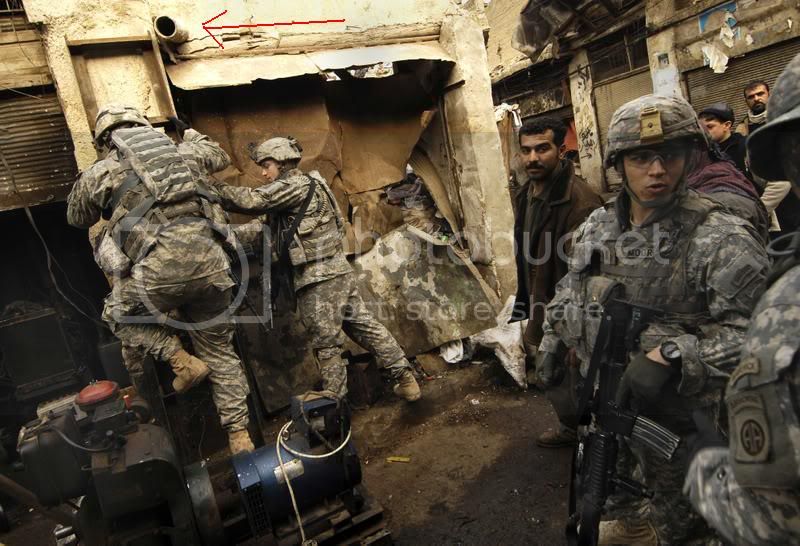
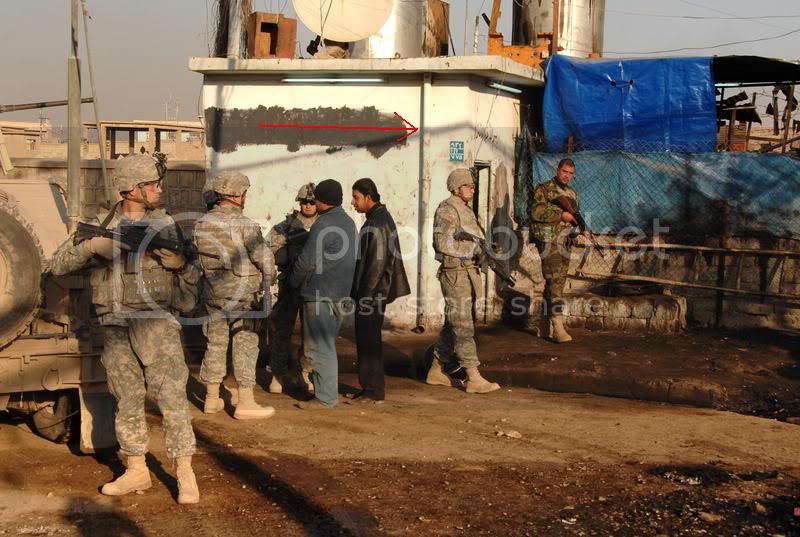
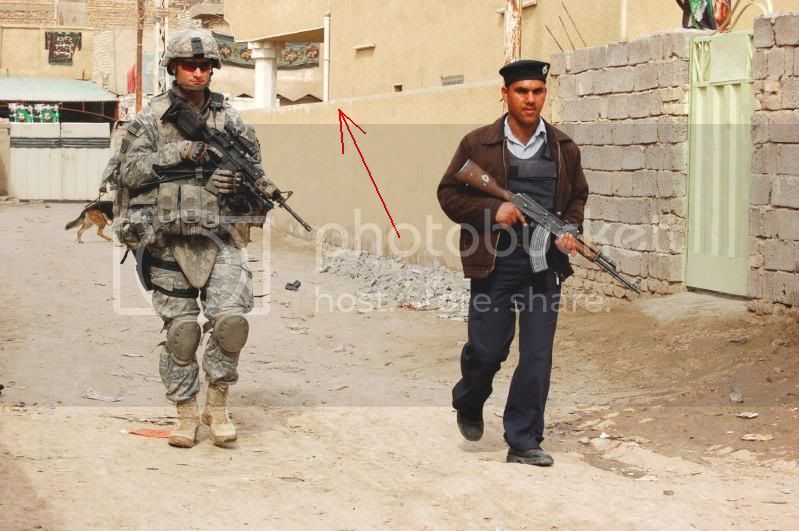
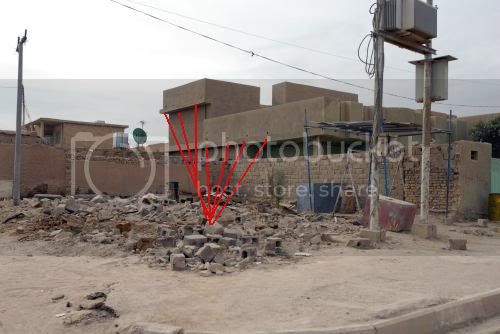
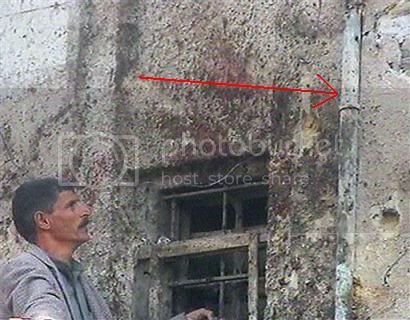
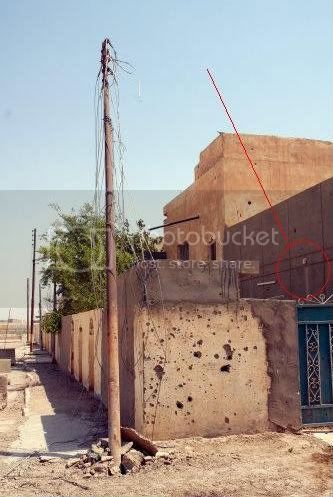
Drains and downpipes are curiously hidden amongst the buildings architecture. I am not certain of how the standard configuration is on residential buildings, but there is some evidence. The flat rooftops are often accesible and have a small wall around them - making a water catchment that must have run off or a swimming pool would form on the roof everytime it rains! look closely and you will see holes and pipes sticking out the walls. the water doesnt really go down a pipe as much as collects in the street to run off. They dont have gutters because they have flat roofs not inclined ones.
More very modern business and hospitality buidings in business areas may have somethig more common with western architecture, as the stormwater system is more developed (underground). But as with modern buildings this is internal and hidden amongst the buildings design. There is some evidence but mostly it looks very crude.
here are some pics I have of the pipes, spouts, holes a dthings associated!
catman31
Joined: September 12, 2005
KitMaker: 166 posts
Armorama: 142 posts
Posted: Thursday, February 03, 2011 - 01:28 AM UTC
Awesome! Thank you so much for these reference shots. I think I am in good shape - maybe just a re-paint and weather a bit. Seems like everything there is sort of "independent" contractor and no real building code? Just a hunch.
Thanks again.
Thanks again.

Petition2God
Joined: February 06, 2002
KitMaker: 1,526 posts
Armorama: 1,294 posts
Posted: Friday, February 04, 2011 - 02:52 AM UTC
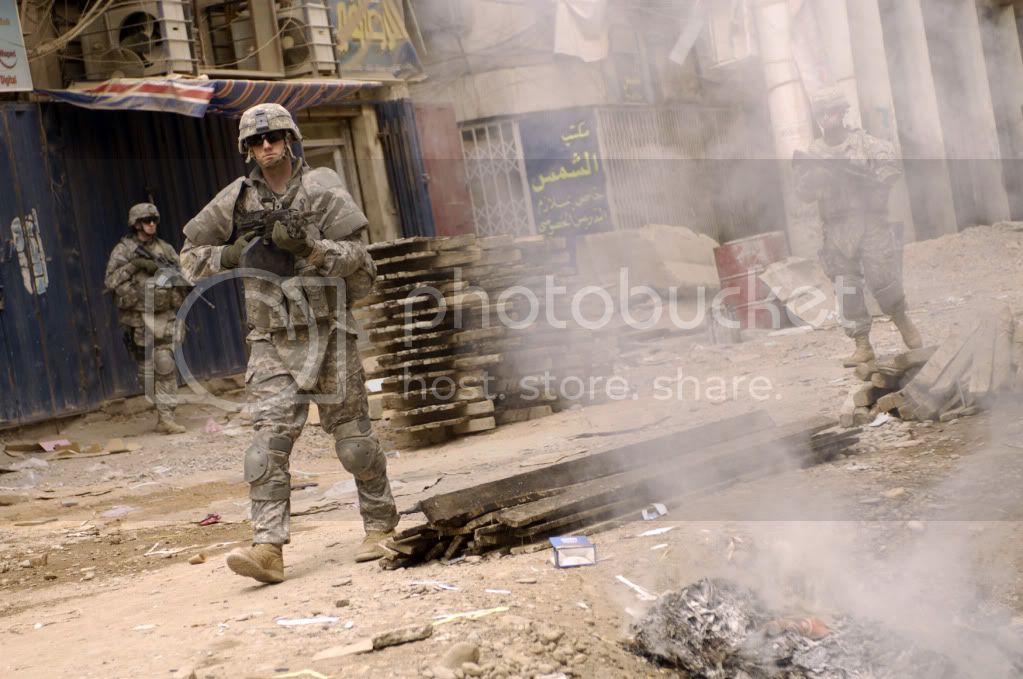
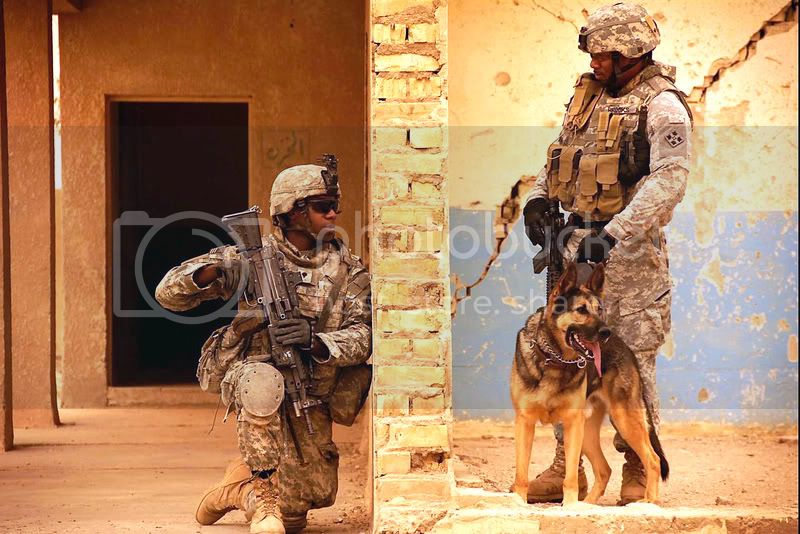
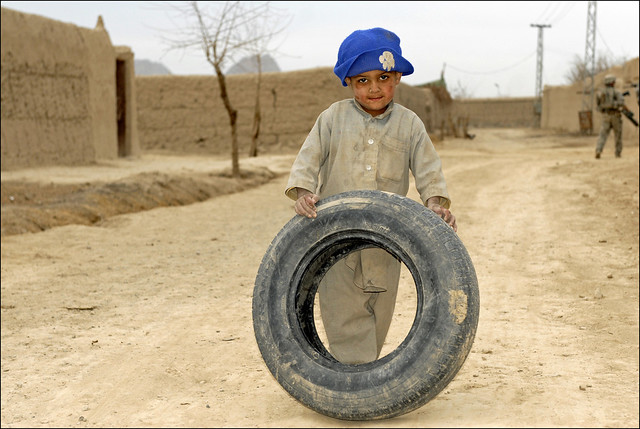
Very nice work and extensive research. Those children figures remind of this photo: photo source from the US Army's flickr page posted for discussion purposes only
 |

WEB HOSTING BY


Copyright ©2021 Armorama and Kitmaker Network, a subsidiary of Silver Star Enterprises
All Rights Reserved. Please read our Conditions of Use and Privacy Policy.
All Rights Reserved. Please read our Conditions of Use and Privacy Policy.