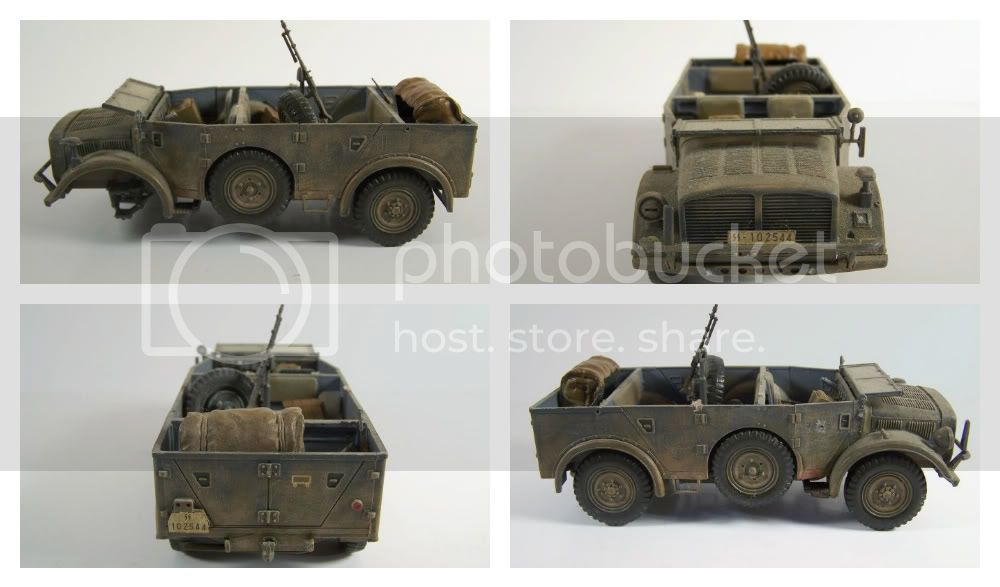
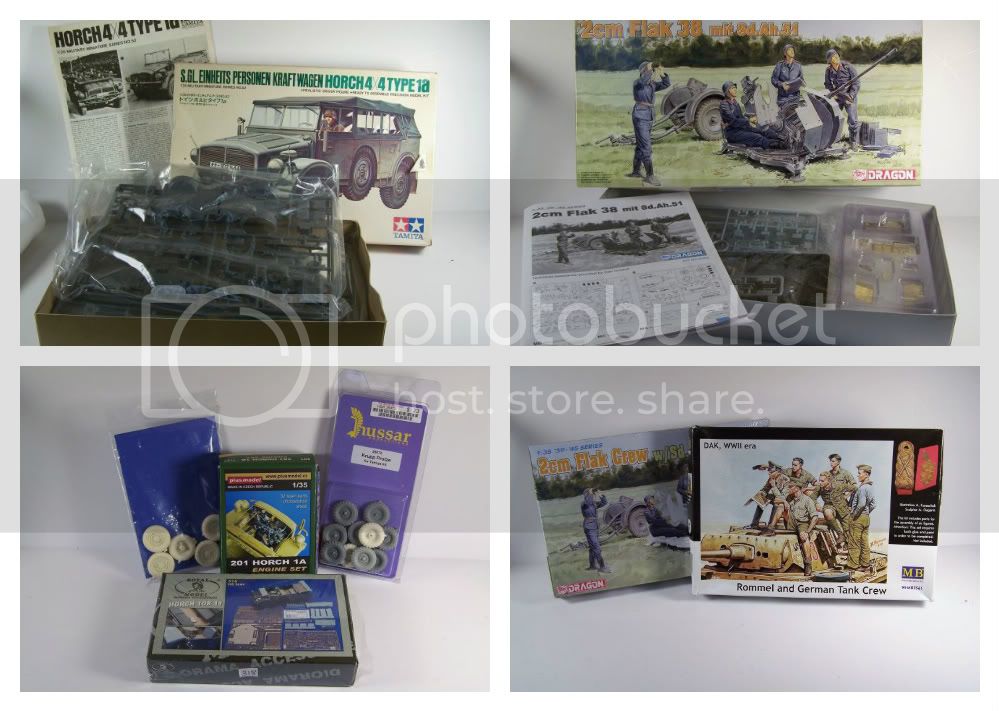
IT BEGINSSS!!!
Ever since I got a copy of "Afrikakorps: Rommel's Tropical Army In Original Color by Bernd Peitz", I have been fixated on a series of photos taken on the road overlooking Sallum bay.
This is what I want to depict with my build...
I placed some orders, dug up the Horch I built when I was 14 (a long, long, long time ago)
Then notes, notes, and more notes...
Now pieces I need have finally been arriving, with the Horch coming in yesterday.
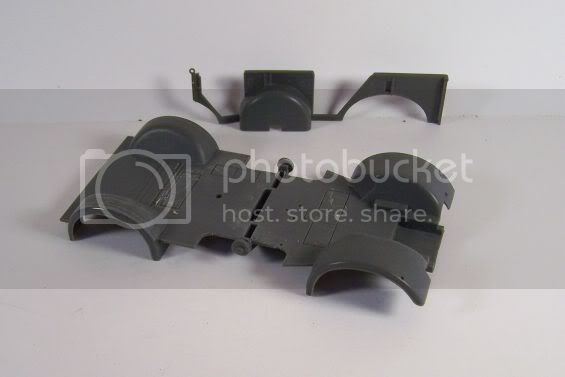
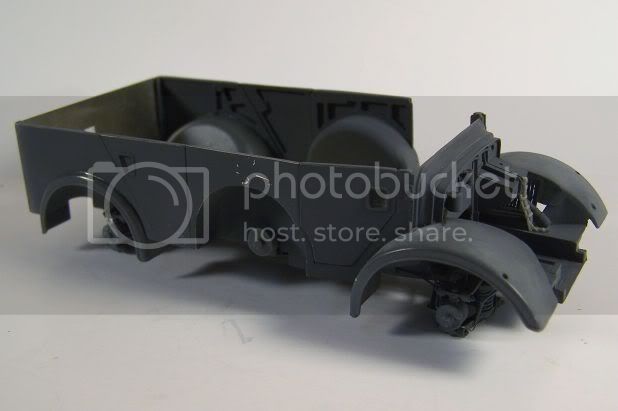
So wasting no time I started removing kit detail from the Horch
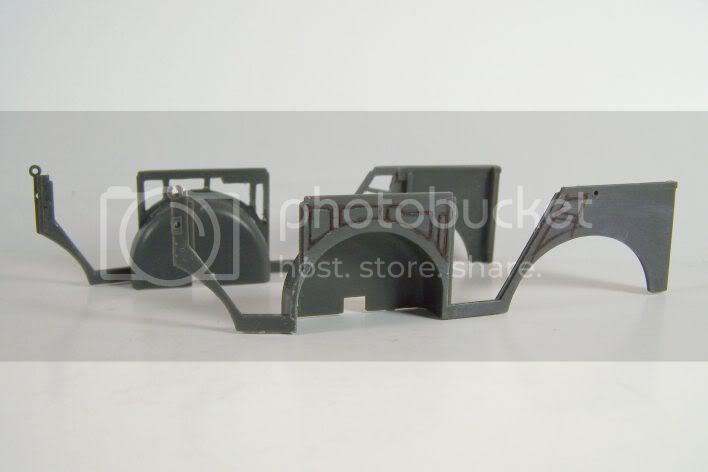
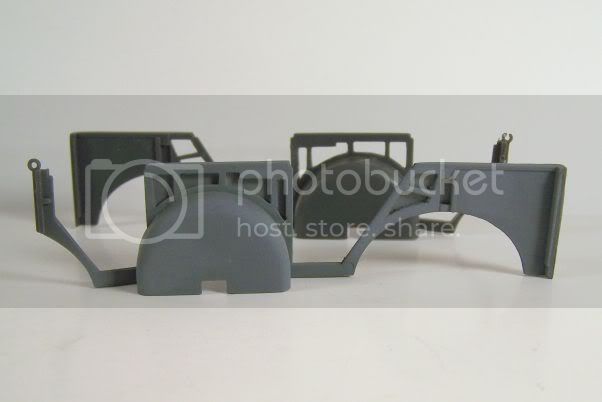
Then I reworked the side walls shaping up the interior supports...
Metal foil was glued to the outside...
and now it time for some Christmas Cheering!
Merry Christmas!
Constructive Feedback
For in-progress or completed build photos. Give and get contructive feedback!
Hosted by Darren Baker, Dave O'Meara
Horch 1a With Flak 38
Babcat
Michigan, United States
Joined: March 21, 2006
KitMaker: 269 posts
Armorama: 259 posts
Joined: March 21, 2006
KitMaker: 269 posts
Armorama: 259 posts
Posted: Sunday, December 25, 2011 - 10:01 AM UTC
retiredyank
Arkansas, United States
Joined: June 29, 2009
KitMaker: 11,610 posts
Armorama: 7,843 posts
Joined: June 29, 2009
KitMaker: 11,610 posts
Armorama: 7,843 posts
Posted: Sunday, December 25, 2011 - 10:13 AM UTC
This promises to be an interesting build. I've subscribed.
17741907
Istanbul, Turkey / Türkçe
Joined: December 05, 2007
KitMaker: 953 posts
Armorama: 705 posts
Joined: December 05, 2007
KitMaker: 953 posts
Armorama: 705 posts
Posted: Sunday, December 25, 2011 - 11:21 AM UTC
Good luck Jonathan...I'll follow...
Babcat
Michigan, United States
Joined: March 21, 2006
KitMaker: 269 posts
Armorama: 259 posts
Joined: March 21, 2006
KitMaker: 269 posts
Armorama: 259 posts
Posted: Sunday, December 25, 2011 - 12:18 PM UTC
Well thanks for following along fellas! I hope this one lives up expectations. I've been looking at what's been done, what period photo's there are, and anything I related that I can find. Right now I'm leaning toward a wooden deck for the gun platform. It seems that steel diamond plate is the norm. But without any photo's I'm using this logic, if new resources are in short supply in the desert war the first place to get a gun deck would be from wrecks. The easiest to adapt (I think) would be truck beds... wood... so that is what I'm thinking right now. The other detail that I'm missing, unit markings. The only thing I see in the photos is license plates, and a small circle with a 5 in it on the left fender. I'm sure there will be more as the build progresses. If you have any thoughts or information let me know.
Thanks
Thanks
panzerbob01
Louisiana, United States
Joined: March 06, 2010
KitMaker: 3,128 posts
Armorama: 2,959 posts
Joined: March 06, 2010
KitMaker: 3,128 posts
Armorama: 2,959 posts
Posted: Sunday, December 25, 2011 - 07:16 PM UTC
Jonathan:
COOL!
I am a FAN of Horch trucks and flak conversions, and I will be following your build!
The DAK Horch flak-truck idea only festered in my mind (and that venerable Tamiya kit, and along with it, the first Tamiya Flak 38 kit, on my back closet shelf) for about 35 years (packed away 1973, pulled out to smell the glue in 2010)!
After seeing a few builds, I decided to finally do it - below is a pic of my truck completed June 2011... Sounds like your thoughts could have been mine oh, about a year back! How funny! Being an old-school guy and rather cheap, I did quit a bit of scratch work around the truck: tool mounts, lamp mounts, hull steps and details, lots of stuff in the driver's space, a whole windscreen assembly, a real wood gun-deck, some of the removable "celluloid" windows, and a new rolled rag-top. The gun is also the old Tamiya kit with an RB metal barrel, a scratched shell-basket, and various details around the gun and mount.
I found it to be one heck of a lot of fun! The old kit is really a gem, and there's lots of stuff one can do to make the girl sing. AFTER I completed my version, I found out more about the details one can add to that suspension, and I found I had missed correcting the rear doors and the driver's floor area actually needs more work than I gave it... (see some pics of museum specimens, etc.). There are plenty of things I missed.
Painting was with Floquil engine black (hull primer) and Weathered Black (rubber), followed by partial coat with lightened MM panzer grey (dunkelgrau = schwarzgrau) followed by a lightened Tamiya desert sand. I did some actual chipping and scraping to expose bits of the "dunkelgrau", weathered with some van dyke brown oil and some pin washes, and dusted it up with various pastel chalks. My decals had REALLY yellowed, so I stenciled the markings. It's been to a few shows and folks have apparently liked it. I may eventually post it as a feature or something here.
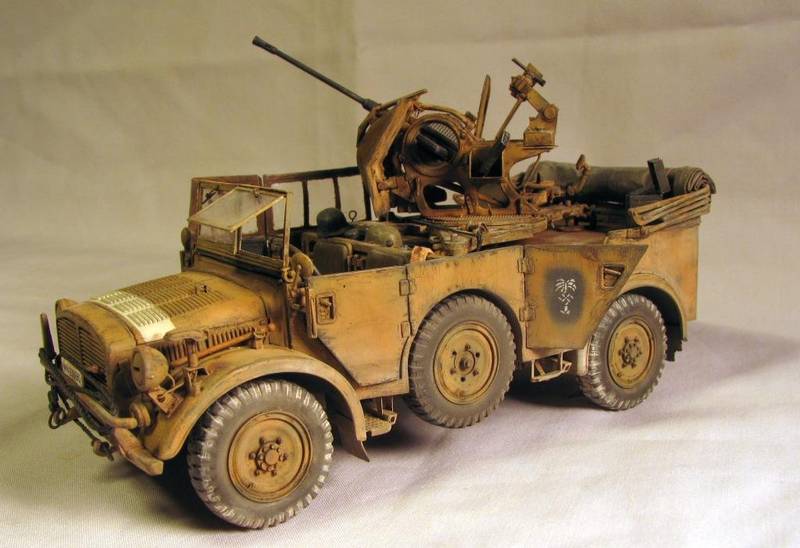
Aim HIGH! I look forward with great anticipation to what you do!
Cheers!
Bob
Babcat
Michigan, United States
Joined: March 21, 2006
KitMaker: 269 posts
Armorama: 259 posts
Joined: March 21, 2006
KitMaker: 269 posts
Armorama: 259 posts
Posted: Monday, December 26, 2011 - 12:49 PM UTC
Bob, nice looking build, I would definately do a post with that. I'll tell ya what, upgrading those old Tamiya kits can be really rewarding. I just finished scratch updates on the old GPA . This one though, I went with a bunch of aftermarket stuff since I want to have this one done for AMPS. The only existing example that I have come across is one at Lešany military museum, Czech Republic. It's the later version Horch (type 40 I think) and there are only a couple of pictures that I can find and none of the deck itself. It does look like the gun is mounted a little farther back too. So I'll keep searching and making my own plan.
Today was a day of plastic carving.
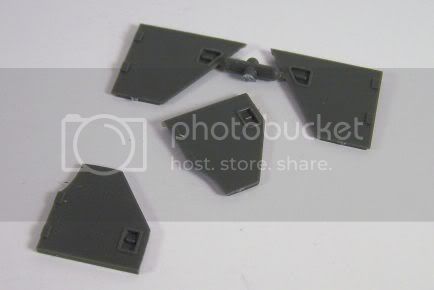
I have all four doors skinned with a couple of photo etch pieces added
I pressed the door skin before carving out the framework...
That has all been set aside for now until I can figure out the best assembly sequence.
As always any questions, comments, or information is appreciated!
Thanks
Jonathan
Babcat
Michigan, United States
Joined: March 21, 2006
KitMaker: 269 posts
Armorama: 259 posts
Joined: March 21, 2006
KitMaker: 269 posts
Armorama: 259 posts
Posted: Wednesday, December 28, 2011 - 02:27 AM UTC
I am wondering if anyone has used the Royal Model Horch 1a detail set (or if you know of a build review). I'm feeling a little fuzzy on the fit of some of the interior firewall and fender components. Hopefully I will have some more photos this evening or tomorrow.
Thanks
Jonathan
Thanks
Jonathan
skyhawk
Florida, United States
Joined: June 03, 2003
KitMaker: 1,095 posts
Armorama: 743 posts
Joined: June 03, 2003
KitMaker: 1,095 posts
Armorama: 743 posts
Posted: Wednesday, December 28, 2011 - 03:55 AM UTC
wow, this is going to be great. So far, you are hitting on two of my favorite subjets, jeeps and self propelled flak!
following...with the right-click-->save ready!
Andy
following...with the right-click-->save ready!
Andy
Babcat
Michigan, United States
Joined: March 21, 2006
KitMaker: 269 posts
Armorama: 259 posts
Joined: March 21, 2006
KitMaker: 269 posts
Armorama: 259 posts
Posted: Wednesday, December 28, 2011 - 02:12 PM UTC
OK, so here we go again. I still haven't been able to find any better information on how exactly to assemble the photoetch firewall so I will run you through my best guesses so far.
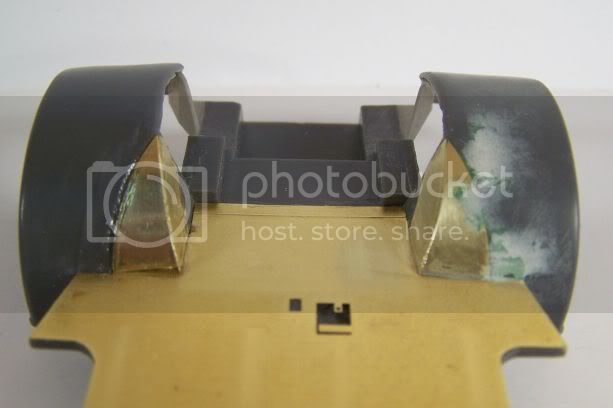
Before that though I started removing plastic for the Plus Model engine upgrade.
And installed the resin "wedge" for stability. The center portion that is still missing will be fit with a piece of heavy foil that will have vents embossed on it.
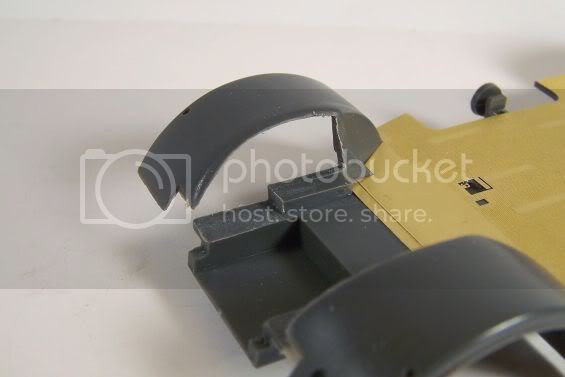
Then I moved on to some of that photo etch that I've been scratching my head over. These first pieces of fender well seem to be fairly straight forward after a second look. I still need to fill and sand the seams but here they are.
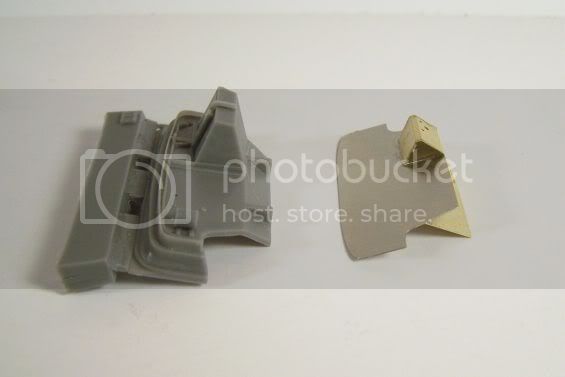
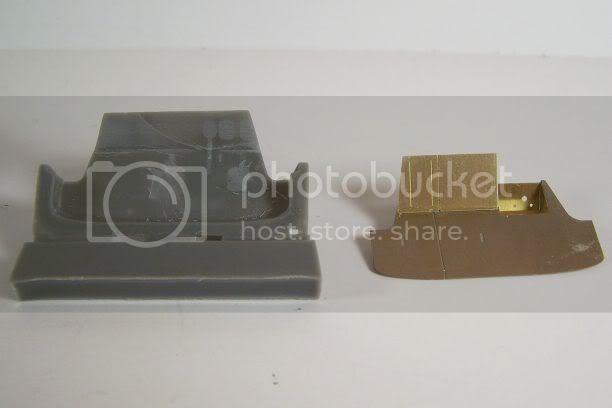
Now for the firewall pieces, much more debate on what to do. There is the Plus Model resin piece, and the Royal Model photo etch piece.
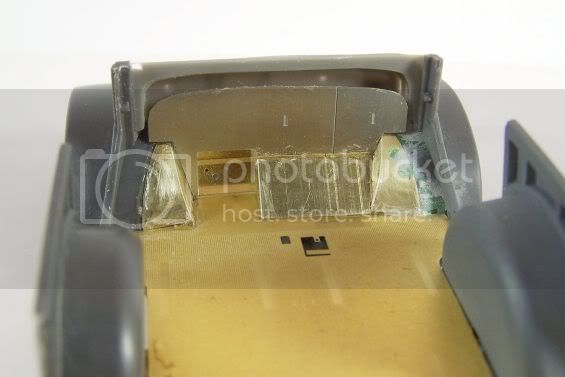
I may have messed up a bit in the trimming on both parts. My first impression was that they would nest right into each other, so that is how I trimmed them. Well that was not the case. Instead they set more on top of one antother. Any way too much trimming, so there will probably have to be some fixing.
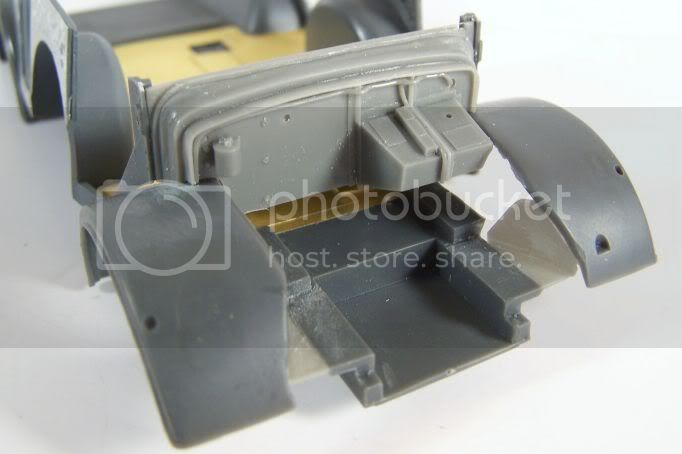
I had attached the sides to see where the resin firewall would sit on the fenders, then added the rear doors to add stability to the assembly.
The thing is it looks like I need to do some work on the undercarriage before I mount the sides with the firewall attached. So, for now, I'll set that assembly aside and move on to the underside. Maybe it will make more sense when I come back to it!
Soooooo, that's it for now... Pshew!
Babcat
Michigan, United States
Joined: March 21, 2006
KitMaker: 269 posts
Armorama: 259 posts
Joined: March 21, 2006
KitMaker: 269 posts
Armorama: 259 posts
Posted: Thursday, December 29, 2011 - 12:46 AM UTC
After looking it all over, I think that whole photo-etch firewall is coming out. A little heat should do the trick. Then a scratch mod to the resin wall and we should be in. It looks to me that both pieces were compromised to fit the kit for their own respective focus, but neither is a very accurate reflection of the the true vehicle. With the etch part there is no way to even come close to lining up the steering shaft with the gear box. And with the resin part there is no appropriate opening for the pedals in the cab. Now I'm not into counting rivits, but some things should at least look right. So there goes the quick and easy, it's scratching time again. I can't remember the last model that I just built. I think I'm going to have to do one of the OOB campaigns to make it happen!
Rambling over...
Rambling over...
panzerbob01
Louisiana, United States
Joined: March 06, 2010
KitMaker: 3,128 posts
Armorama: 2,959 posts
Joined: March 06, 2010
KitMaker: 3,128 posts
Armorama: 2,959 posts
Posted: Thursday, December 29, 2011 - 01:24 PM UTC
Quote[So there goes the quick and easy, it's scratching time again. I can't remember the last model that I just built. I think I'm going to have to do one of the OOB campaigns to make it happen!] quote
My sentiments exactly! A guy's just gotta learn to leave things be and sometimes go with the flow!
All this happened to me, too, when I opened up my Horch project. I first eyeballed the kit with the notion of maybe correcting or enhancing a few "obvious" things - maybe add on mud-flaps, re-work the door handles, etc. And then I realized that I actually had no idea what or how a gun deck might have been built, let alone what-all much of its interior actually looked like... so I opened Pandora's Box (the Web) and fell in. Pretty soon I had a "must fix" list filling a whole page. I saw all sorts of great and not-so-great builds posted, found oodles of pics of the real trucks, etc. The list of stuff I could conceivably do got longer.
Eventually, I decided to just leave some stuff "as is" - add details where doable, have fun, wax creative, and get happy. The real problems come when you start feeling like you need to get it all "right" - when A) finding WHAT is actually "right" when and where gets so complicated you lose the fun of it, and B) you realize that no matter HOW "right" you tried to be (and likely got near) in so doing (A), there's always someone to tell you NOT! Specially so the latter if you are going to show it... I don't suppose you know any judges out there who are actual bona-fide experts on your particular version of this truck...
Here's to hoping that you are still in the FUN phase... even if there are a couple a bumps in the road!
PS: Here's one of those awful detail paradoxes you have stumbled into... Your doors. VERY COOL job - I REALLY like your treatment! But many of the few inside-door pics I can find show double-skinned doors (flat in and out, with sunken-in pockets with latch handle on outside, latch handle out on an access-plate inside, and sheet-metal cubby or box spot-welded to the inner skin, and a handle/grip) - not what appears to be a single-skin - on - box frame style such as you have modeled! I'm in no way saying "You are WRONG" - just telling what I've seen. So, I kept the kit flats and added the inside boxes and grip-handles and door-latch handle and re-worked the outside latch pocket. *This detail point goes back to this being both one of those "Einheits" "standardized type" vehicles for production by multiple contractors and something designed (sheet-metal wise, at least) to be simplest and cheapest to produce - with least amounts of materials and work-hours. Photos of surviving examples surely support the "done cheapest possible" part!
Bob
Babcat
Michigan, United States
Joined: March 21, 2006
KitMaker: 269 posts
Armorama: 259 posts
Joined: March 21, 2006
KitMaker: 269 posts
Armorama: 259 posts
Posted: Friday, December 30, 2011 - 12:49 AM UTC
Bob,
I think that is the trick, you need to keep your sights inside the fun zone. When they get out of there they tend to end up back on the shelf (for a while anyway). As far as this one goes, it is still all kinds of fun. I think my problem was expecting the purchased parts to work like my scratch built parts, but they don't always do that!
As far as the doors go, I have been using the WWP Horch in Detail book and this is pretty much what the doors look like on the three vehilces that they are using
That's just my take on it, so I was going with a thin skin (although I'm starting to think a thin plastic would have been a better choice... oh well...
I still need to add the handles and release latches, but I think they are pretty close to the book. Of course basing anything on three post war restorations is a roll of dice! Thanks for looking so close, it keeps me on my toes!
Any way I pulled the etched firewall out and did a little planning on the resin one, but I still have some issues to work through. So I moved on to the undercarriage. I know that it won't be highly visible so I'm keeping my focus outside and below the frame rails... for now. This is back in scratch building land too so I am digging that.
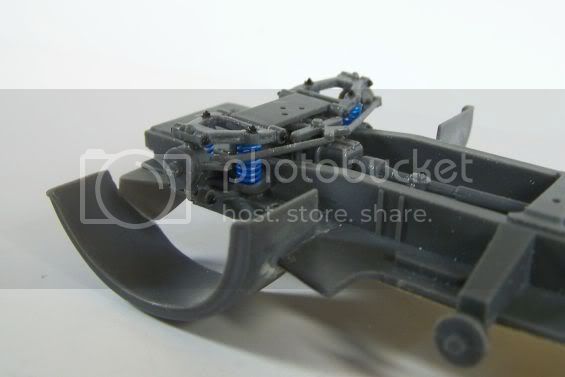
So far I've done a little grinding on the "A" arms and opened up some space between the frame rails, added some nuts and made some coil springs.
That's all on the front right now. I did do some other odds and ends, but forgot to get pictures
As usual... more to come...
Babcat
Michigan, United States
Joined: March 21, 2006
KitMaker: 269 posts
Armorama: 259 posts
Joined: March 21, 2006
KitMaker: 269 posts
Armorama: 259 posts
Posted: Tuesday, January 03, 2012 - 01:20 AM UTC
What did I accomplish over the holiday weekend? Much celebration and a little bit of building progress.
I finished off the details on the undercarriage keeping it fairly simple and outside the frame rails.
On the top side I went ahead and added the fender vents and some steering components.
I also installed three of the doors into the body.
I finished off the weekend with some work on the engine kit… yeah… I’ll have to get some pictures of that next time…
That’s the update!
Babcat
Michigan, United States
Joined: March 21, 2006
KitMaker: 269 posts
Armorama: 259 posts
Joined: March 21, 2006
KitMaker: 269 posts
Armorama: 259 posts
Posted: Wednesday, January 04, 2012 - 12:31 AM UTC
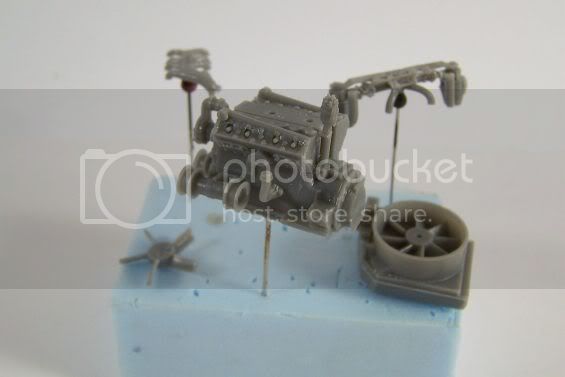
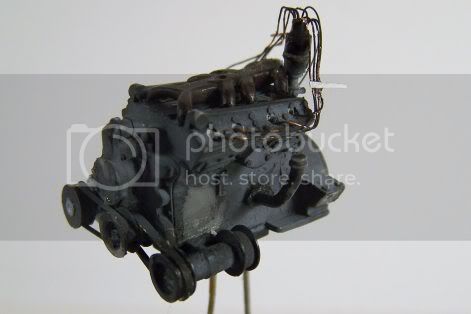
Here is the Plus Model engine. I will keep the intake and exhaust manifolds seperate for inital painting anyway.
The intake was a bit of a struggle to assemble, but it's together. I may have to adjust the pully assembly on the driver side to fit under the radiator housing. The radiator housing itself will still need some scratch work because the front was designed to be concealed behind the grill, hence no detail at all.
panzerbob01
Louisiana, United States
Joined: March 06, 2010
KitMaker: 3,128 posts
Armorama: 2,959 posts
Joined: March 06, 2010
KitMaker: 3,128 posts
Armorama: 2,959 posts
Posted: Thursday, January 05, 2012 - 02:35 AM UTC
Jon;
Now that I've seen the pics of the doors as you are following, "Alles klar!" Thanks for posting these.
The double - and single - skin doors are almost identical from outside - outer latch handle sits in a sunken cubby (spot-welded to the outer skin) on both. The grab handle attached to the inside of the skin with 2 or 4 "carriage" bolts - which show on the single-skin outside. As it attached to the inner skin on the double-skin door, no bolts visible outside. The actual latch mechanism and set-up is the same. You get to see it / model it in the single-skin version. Any "map bin" or other box of course attached to whatever inner skin surface was available. BOMK, these sheet-metal boxes were spot-welded onto the door skin.
Both door styles were made - who knows? Maybe a "mix" could have happened on a vehicle with a replaced door. Had I known more about this "versioning" when I built mine... I may have done this! I DID model mine with the front-right door being a "replacement" taken from another, but as revealed by a different paint-job.
Looks like you have done some suspension work... just did an SdKfz 223 (based on this Horch chassis and suspension, but with motor to the rear) - posted some pics over on the "Command campaign thread", but sadly did not complete on time! - I detailed some of the lube and brake lines... These are well-shown in "Toadman's" -222 walk-around pics and some similar. It looks really cool and is pretty easily seen on the car. (I did NOT bother on my gun-truck - maybe next time!)
I'd post a pic of this here, but the server is busy... again. (hmmmm. many times it has been "busy".... sounds like it could be under-served! LoL!)
Your progress looks GREAT! Like those inner-fender vents!
Bob
Babcat
Michigan, United States
Joined: March 21, 2006
KitMaker: 269 posts
Armorama: 259 posts
Joined: March 21, 2006
KitMaker: 269 posts
Armorama: 259 posts
Posted: Thursday, January 05, 2012 - 04:46 AM UTC
Bob,
I jumped over to the Command thread and took a look at the suspension work. I like it! The kit in general is leaps and bounds above the old Tamiya. I was almost going to cut the frame away from the body on mine, but I reeled myself in and decided against it.
The doors are just the tip of the iceberg when it comes to references and modeling. When you find good material (at least what appears good) you never really know if it is representative of period vehicles or not. I know that the main ones I'm using are restorations so that leads to even more questions. Roll the dice and plod along!
It looks like I will be a while on the engine, I just did a couple of modifications to it last night, and I'm sure there are more to come. Since it will be right out there in the open holding back on detail is not as easy as my fuzzy suspension work. But it is still fun, so I'm still on the right track!
Thanks for looking
Jonathan
panzerbob01
Louisiana, United States
Joined: March 06, 2010
KitMaker: 3,128 posts
Armorama: 2,959 posts
Joined: March 06, 2010
KitMaker: 3,128 posts
Armorama: 2,959 posts
Posted: Friday, January 06, 2012 - 04:06 AM UTC
Jon:
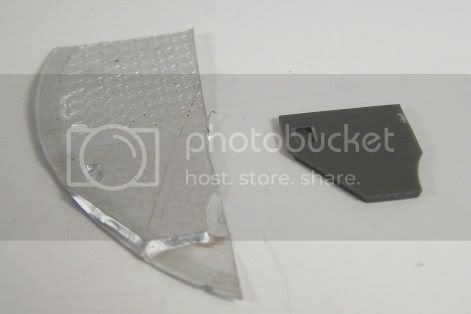
I went back to see WHICH stage and pic I had posted on the "Command" viz the suspension things... actually not so informative! Things went well beyond that - those were early in my game! Just "FYI"; Apparently, the Horch chassis, while versatile and "able", was one of those true maintenance nightmares! ALL of those pivot-points had grease fittings and most of these actually were attached by a net of small hoses and tubes to junction-fittings, etc. A real "grease-monkey's jungle"!
Cheers!
Bob
Babcat
Michigan, United States
Joined: March 21, 2006
KitMaker: 269 posts
Armorama: 259 posts
Joined: March 21, 2006
KitMaker: 269 posts
Armorama: 259 posts
Posted: Saturday, January 14, 2012 - 10:18 AM UTC
It hasn't been the most productive week but I have been working on some of the scratch detail. I talked to some of the car builders at our model club and they gave me some great ideas for the engine detail that I want for this project.
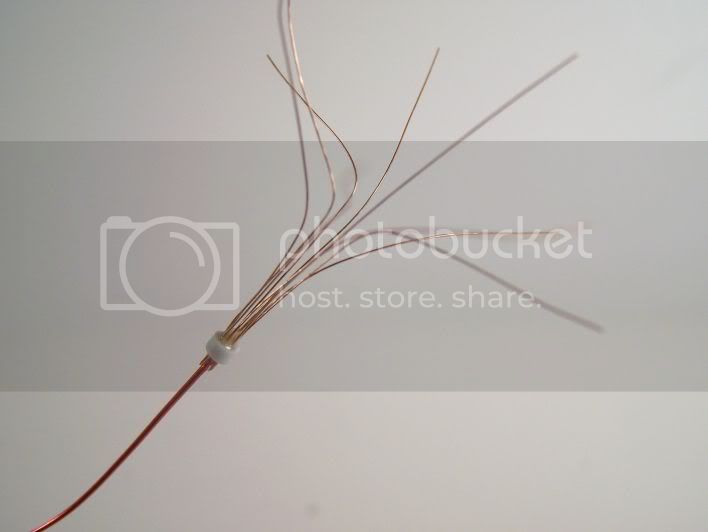
First off the distributer.
I reemed out some tube to fit the nine wires...
Super glued them to a central wire...
Then added a drop of resin to cap it off. And there you have a distributer cap with wires. They had suggested drilling all the way through the block to thread the wires in, but my bit isn't long enough so I'll be cutting the spark plug wires and trying to feed them into the holes. That's for later though.
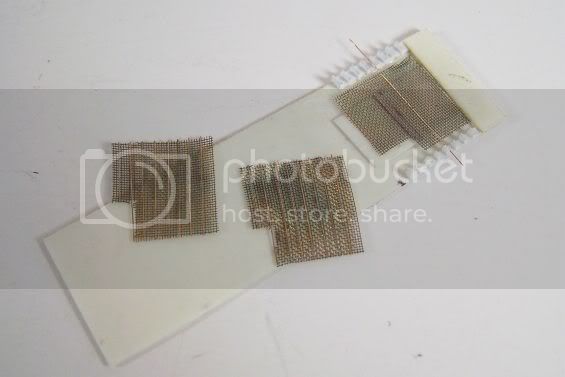
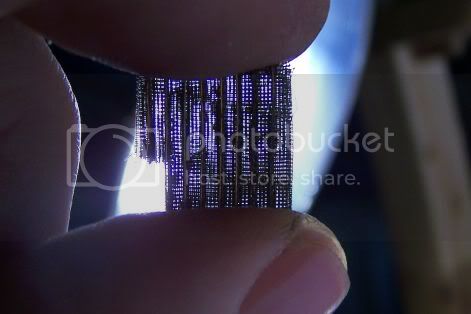
The next idea they gave me was for building the radiator. After talking it over we decided that layering some fine screen should give me the transluscent effect I'm looking for.
So first I copied the radiator assembly (just in case)
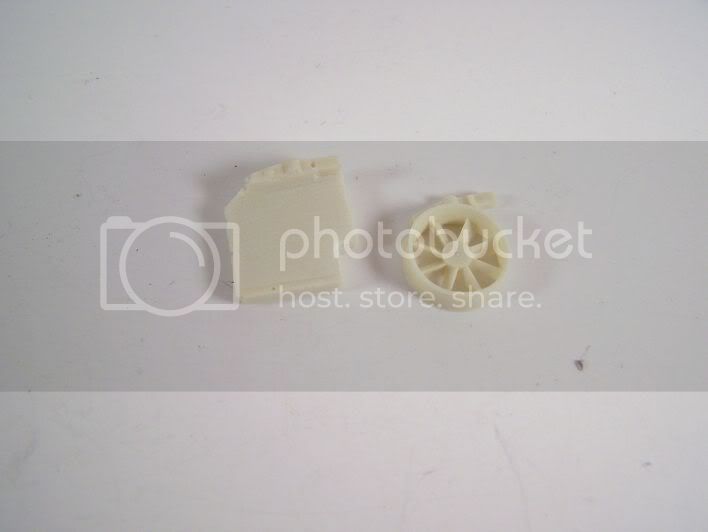
Then I seperated the cowl and fan from the radiator.
I cut out 5 pieces of screen using a masking tape pattern.
Then I built a jig to add the water channels.
and that is were I am right now. The test stacks look pretty good and I can't wait to test out all five together. So back to the bench to finish them up and maybe there will be a good update at the end of the weekend!
Posted: Saturday, January 14, 2012 - 10:02 PM UTC
Great attention to detail Jonathon. Have not seen the Horch to taken to this extreme before. Looking forward to more.
retiredyank
Arkansas, United States
Joined: June 29, 2009
KitMaker: 11,610 posts
Armorama: 7,843 posts
Joined: June 29, 2009
KitMaker: 11,610 posts
Armorama: 7,843 posts
Posted: Sunday, January 15, 2012 - 04:10 AM UTC
Wow! That makes me want to superdetail my next engine. Perhaps on my Pz.IV build.
Babcat
Michigan, United States
Joined: March 21, 2006
KitMaker: 269 posts
Armorama: 259 posts
Joined: March 21, 2006
KitMaker: 269 posts
Armorama: 259 posts
Posted: Sunday, January 15, 2012 - 05:01 AM UTC
Frank, Matt, thanks for the encouragement. I hope I can do this build justice. It's one thing to have all these good ideas and quite another to pull them off!
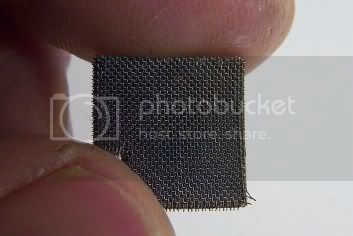
I got five panels done for the first run at the radiator and I like the look.
It may be a little too transparent though.
But after looking it over, and over, and over again. I decided to try one without the wire for the water channels, there is just something about them...
This one eded up 7 panels and a little too opaque. I cut out another set and was trying to figure out how to space 5 panels for the thikness I want. I think I'm on the right track, but I'm going to set this aside for a while and get back to engine. If I get that done I can finish the firewall, and then mount the body, and then build a platform... pshew
So back at the engine...
I got that distributer cap mounted.
And the wires run.
I still need to rust the exhaust manifold a bit and then I can add the intake manifold. I'm also trying to come up with front differential to fill the void next to the engine. I'll keep at it and see if I can't get one more update in this weekend.
Thanks again!
retiredyank
Arkansas, United States
Joined: June 29, 2009
KitMaker: 11,610 posts
Armorama: 7,843 posts
Joined: June 29, 2009
KitMaker: 11,610 posts
Armorama: 7,843 posts
Posted: Sunday, January 15, 2012 - 05:43 AM UTC
That engine looks awesome!
Babcat
Michigan, United States
Joined: March 21, 2006
KitMaker: 269 posts
Armorama: 259 posts
Joined: March 21, 2006
KitMaker: 269 posts
Armorama: 259 posts
Posted: Sunday, January 15, 2012 - 01:11 PM UTC
Thanks Matt, engine work is certainly something different for me, but I think it will be worth it for this project.
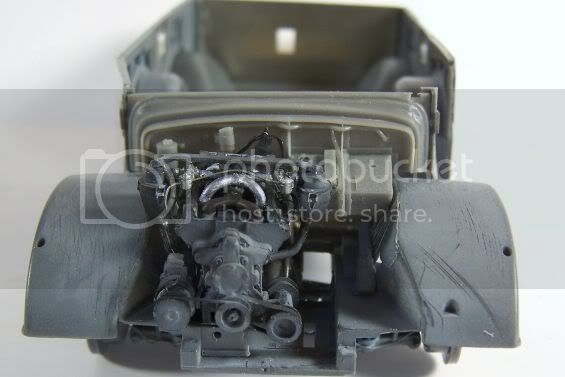
I let that sit for a while and went back to the engine compartment. I used the dremel to clear away some more of the kit plastic and added a part from the junk box to fill the void.
Then I went back to the engine and added the intake, sounds simple right? Well it took quite a bit of adjusting to get that thing on there and centered, but I think I finally got it. I added a fuel line between the carbs too.
And of course another test fit, I did have to lower the distributer to get it below the top of the cowel.
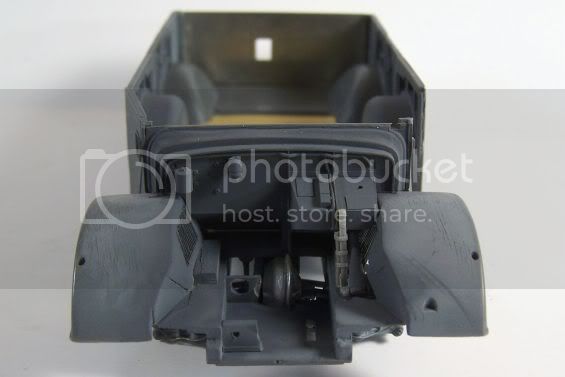
After that (and much thinking) I decided to finish up the firewall and attach the body.
I sure hope this was the right time to do it!
Babcat
Michigan, United States
Joined: March 21, 2006
KitMaker: 269 posts
Armorama: 259 posts
Joined: March 21, 2006
KitMaker: 269 posts
Armorama: 259 posts
Posted: Tuesday, January 17, 2012 - 01:02 PM UTC
Here is what we have for today.
I scratched up a rear wall.
It is set a little forward of the kit piece and at an angle.
It fits the Royal model rear deck cover and appears to match my references.
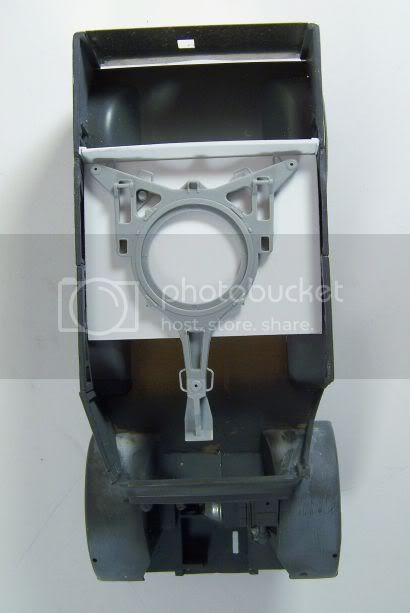
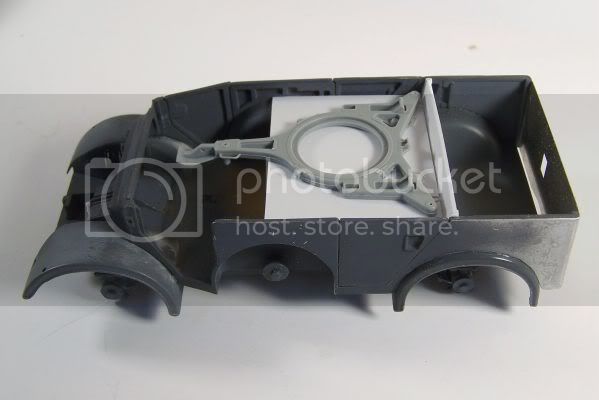
Now this is why that is all important, it takes up quite a bit of room back there (seemingly justified), and that means a smaller gun deck.
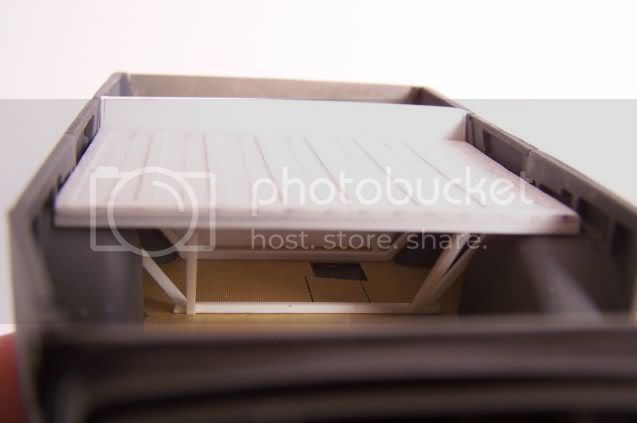
I went ahead and scratch built a truck type wooden bed complete with metal strips.
And support framework.
The supports were modeled after the ones on my Opel Blitz kit.
And here it is with the flack base in place.
I think it works, but I am up your thoughts on this one. I do plan on building a brace for the one leg hanging over.
I scratched up a rear wall.
It is set a little forward of the kit piece and at an angle.
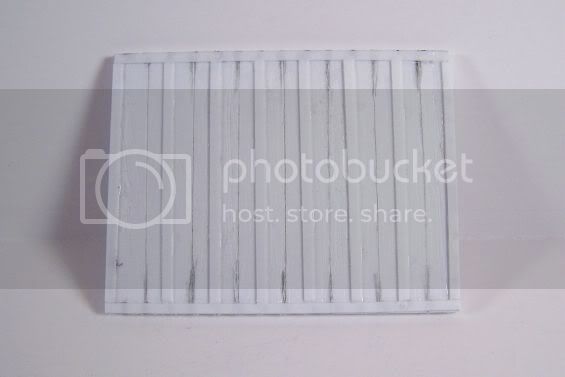
It fits the Royal model rear deck cover and appears to match my references.
Now this is why that is all important, it takes up quite a bit of room back there (seemingly justified), and that means a smaller gun deck.
I went ahead and scratch built a truck type wooden bed complete with metal strips.
And support framework.
The supports were modeled after the ones on my Opel Blitz kit.
And here it is with the flack base in place.
I think it works, but I am up your thoughts on this one. I do plan on building a brace for the one leg hanging over.
retiredyank
Arkansas, United States
Joined: June 29, 2009
KitMaker: 11,610 posts
Armorama: 7,843 posts
Joined: June 29, 2009
KitMaker: 11,610 posts
Armorama: 7,843 posts
Posted: Tuesday, January 17, 2012 - 01:47 PM UTC
The base is off-center. Would it be possible to turn it around, so that the leg needing the brace will line up with the rear of the vehicle?