I will play follow the leader too, be great to learn!!
Mike
Hosted by Darren Baker
First Diorama Step by Step
Tanksami
Victoria, Australia
Joined: August 06, 2011
KitMaker: 1,314 posts
Armorama: 1,217 posts
Joined: August 06, 2011
KitMaker: 1,314 posts
Armorama: 1,217 posts
Posted: Tuesday, March 13, 2012 - 02:30 PM UTC
asmodeuss
Quebec, Canada
Joined: November 19, 2011
KitMaker: 1,389 posts
Armorama: 1,388 posts
Joined: November 19, 2011
KitMaker: 1,389 posts
Armorama: 1,388 posts
Posted: Wednesday, March 14, 2012 - 12:50 AM UTC
SWEET! I'm suscribing right away,
Thanks
Philippe.
Thanks
Philippe.
didgeboy
Washington, United States
Joined: September 21, 2010
KitMaker: 1,846 posts
Armorama: 1,509 posts
Joined: September 21, 2010
KitMaker: 1,846 posts
Armorama: 1,509 posts
Posted: Wednesday, March 14, 2012 - 02:33 PM UTC
Hobby Lobby was out of boards today but the other crappy crafts store had some and even two big one on sale! Now I just needs to get some celluclay and some sealer and I' m off to the races. cheers for this thread
keenan
Indiana, United States
Joined: October 16, 2002
KitMaker: 5,272 posts
Armorama: 2,844 posts
Joined: October 16, 2002
KitMaker: 5,272 posts
Armorama: 2,844 posts
Posted: Thursday, March 15, 2012 - 01:37 PM UTC
Thanks everyone. Dry brushing and beginning of the vegetation this weekend. Hoops on the TV in the basement and diorama building. What could possibly be any better?
panzerconor
Massachusetts, United States
Joined: February 08, 2012
KitMaker: 1,271 posts
Armorama: 1,253 posts
Joined: February 08, 2012
KitMaker: 1,271 posts
Armorama: 1,253 posts
Posted: Thursday, March 15, 2012 - 01:42 PM UTC
You sir will have an amazing weekend.
BBD468
Texas, United States
Joined: March 08, 2010
KitMaker: 2,465 posts
Armorama: 2,383 posts
Joined: March 08, 2010
KitMaker: 2,465 posts
Armorama: 2,383 posts
Posted: Thursday, March 15, 2012 - 03:35 PM UTC
Quoted Text
Thanks everyone. Dry brushing and beginning of the vegetation this weekend. Hoops on the TV in the basement and diorama building. What could possibly be any better?
Hmmm, maybe Kate Beckinsale bringing you your Favorite cold beverage? and often!
Gary
asmodeuss
Quebec, Canada
Joined: November 19, 2011
KitMaker: 1,389 posts
Armorama: 1,388 posts
Joined: November 19, 2011
KitMaker: 1,389 posts
Armorama: 1,388 posts
Posted: Friday, March 16, 2012 - 12:34 AM UTC
I'm with Gary on this one!
Phil
Phil
keenan
Indiana, United States
Joined: October 16, 2002
KitMaker: 5,272 posts
Armorama: 2,844 posts
Joined: October 16, 2002
KitMaker: 5,272 posts
Armorama: 2,844 posts
Posted: Sunday, March 18, 2012 - 03:32 AM UTC
Well played Gary.
keenan
Indiana, United States
Joined: October 16, 2002
KitMaker: 5,272 posts
Armorama: 2,844 posts
Joined: October 16, 2002
KitMaker: 5,272 posts
Armorama: 2,844 posts
Posted: Sunday, March 18, 2012 - 10:28 AM UTC
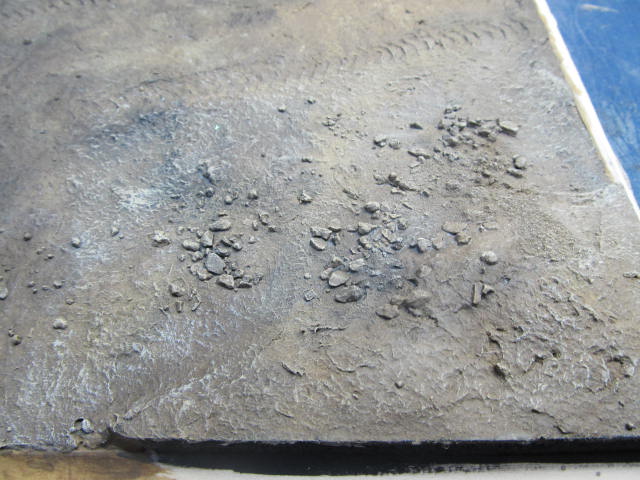
Dry brushing is essentially exactly what it says it is, dry brushing. The whole point is to highlight the high points on your ground work in much the same fashion that the wash darkened the recesses.
When dry brushing you need wide flat brushes. I have several I have been using for a long time. Soft bristles are great pretty much any wide flat brush will do:
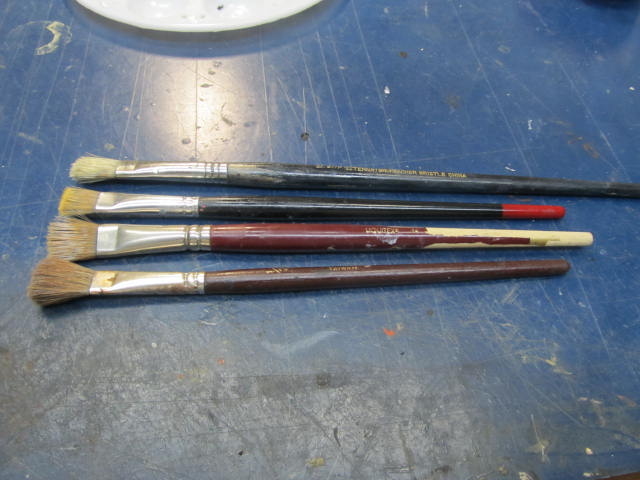
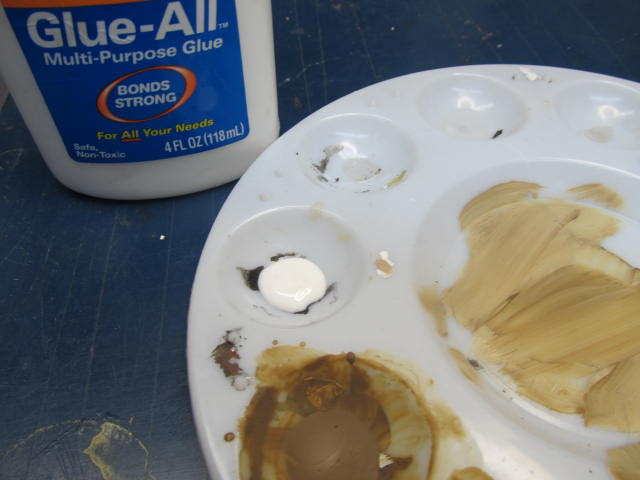
Next I am using the same paint tray I used for the base coat and the wash. I am also using the same "Fawn" color paint I used for the base coat and some cheap white craft paint.
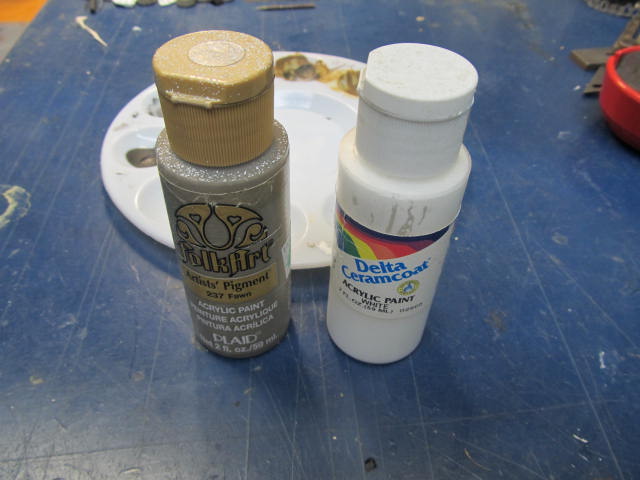
Put about equal portions of both colors in two wells on your paint pan:
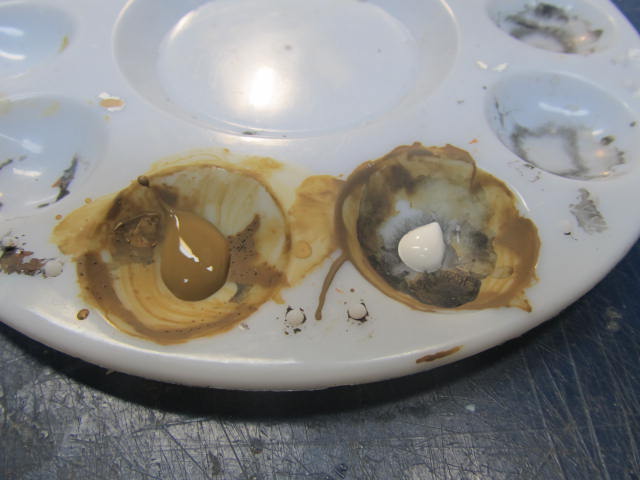
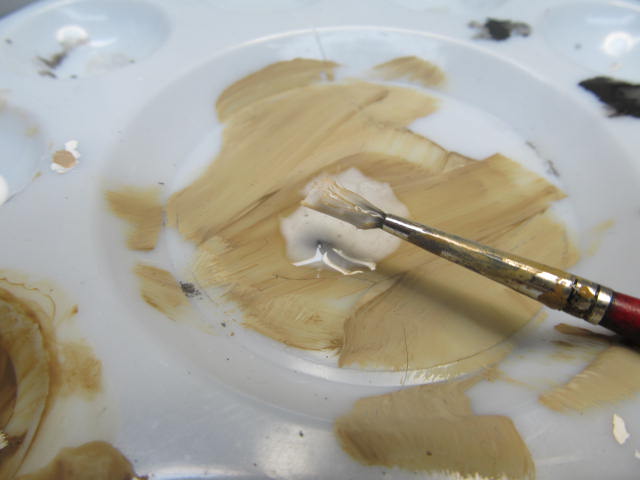
Take your wide flat brush and put some of your "Fawn" colored paint or whatever color you used for your base coat and add some of the white on top of it.
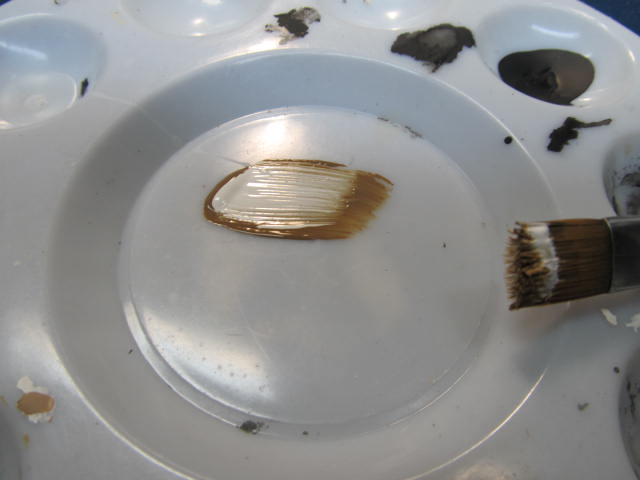
Blend and pull the two colors together. Like this:
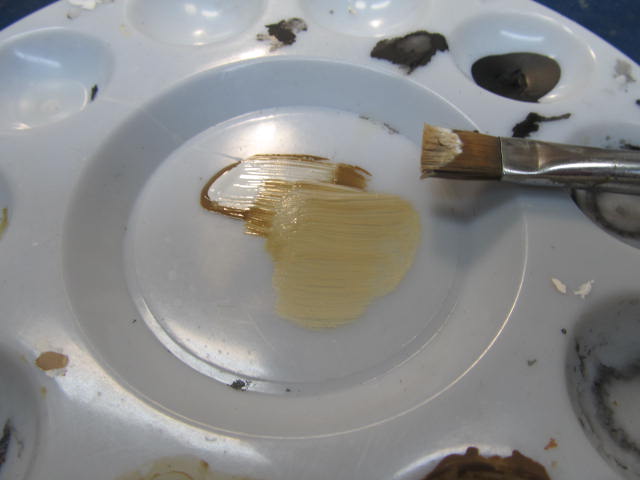
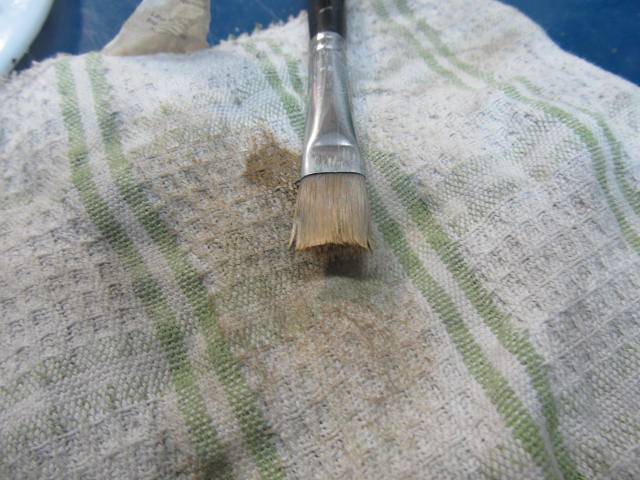
Now you want to wipe almost all of the paint off the brush on a rag, towel or the back of your hand. Using a rag here because I got tired of explaining the dunklegelb paint on the back of my hand at work:
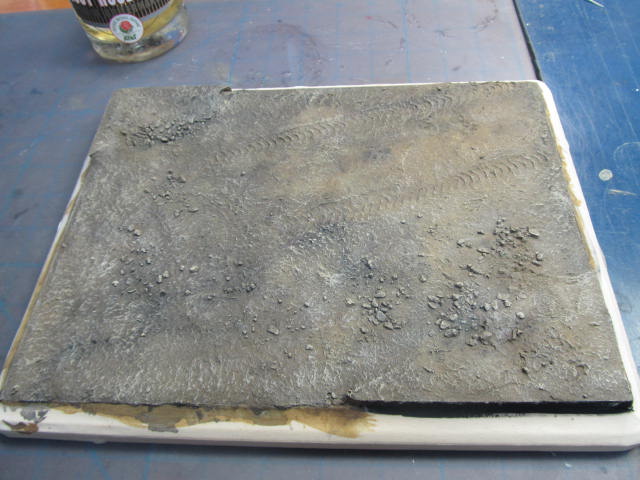
Next you want to kiss the high spots on the base with your dry brush that has almost no paint on it at all. Use really light strokes and just touch the tops of the details. I did not take any in progress photos of the actual dry brushing technique and those would be really handy. I will get some posted. In any case it should look some like this when you are done:
keenan
Indiana, United States
Joined: October 16, 2002
KitMaker: 5,272 posts
Armorama: 2,844 posts
Joined: October 16, 2002
KitMaker: 5,272 posts
Armorama: 2,844 posts
Posted: Sunday, March 18, 2012 - 11:28 AM UTC
And like this:
You want to be really careful when you are dry brushing anything from ground work to a Jeep to a figure. It is awful easy to go too far and make your ground work look like it just snowed or your Jeep look like it just ran through a flour factory. Less is more when it comes to dry brushing. When you are doing washes you can always add some more to deepen the recesses. When you are are dry brushing it is awful hard to fix mistakes.
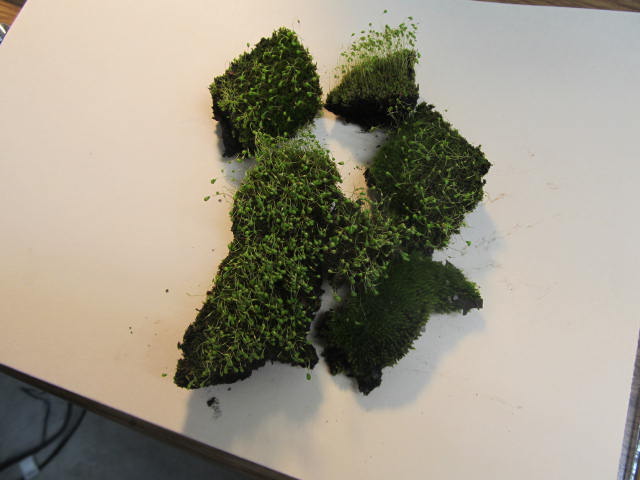
Plant teaser:
Thanks for following along everyone. And for everyone that thinks it cannot be this easy, it really is. Trust me...
Questions or concerns please ask. That is what this forum is all about.
AgentG
Nevada, United States
Joined: December 21, 2008
KitMaker: 1,109 posts
Armorama: 1,095 posts
Joined: December 21, 2008
KitMaker: 1,109 posts
Armorama: 1,095 posts
Posted: Sunday, March 18, 2012 - 11:52 AM UTC
I am loving this!
Do me one favor though, take that chain and tie it up to the side of the tank or remove it altogether. The crew wouldn't let it hang like that as it could foul the track. A nit pick I know, but one based on experience.
G
Do me one favor though, take that chain and tie it up to the side of the tank or remove it altogether. The crew wouldn't let it hang like that as it could foul the track. A nit pick I know, but one based on experience.
G
panzerconor
Massachusetts, United States
Joined: February 08, 2012
KitMaker: 1,271 posts
Armorama: 1,253 posts
Joined: February 08, 2012
KitMaker: 1,271 posts
Armorama: 1,253 posts
Posted: Sunday, March 18, 2012 - 12:35 PM UTC
Question: One week from today, there's an AFV show in Chicopee MA. I thought it was in two weeks. I've got only one week to finish up a panzer IV and get a diorama base started and finished. Is it possible to do all that in a week AND make it look good?
-Conor
-Conor
BBD468
Texas, United States
Joined: March 08, 2010
KitMaker: 2,465 posts
Armorama: 2,383 posts
Joined: March 08, 2010
KitMaker: 2,465 posts
Armorama: 2,383 posts
Posted: Sunday, March 18, 2012 - 12:50 PM UTC
Hi Shaun,
This is awsome! you make it look so easy and it is. Thanks for showing us the way.
Gary
This is awsome! you make it look so easy and it is. Thanks for showing us the way.
Gary
keenan
Indiana, United States
Joined: October 16, 2002
KitMaker: 5,272 posts
Armorama: 2,844 posts
Joined: October 16, 2002
KitMaker: 5,272 posts
Armorama: 2,844 posts
Posted: Sunday, March 18, 2012 - 01:01 PM UTC
Conor, Probably not. We are only now getting to the fun part. This isn't about contests, this about having fun, right?
@ Wayne: Noted. Fixed. Thanks.
keenan
Indiana, United States
Joined: October 16, 2002
KitMaker: 5,272 posts
Armorama: 2,844 posts
Joined: October 16, 2002
KitMaker: 5,272 posts
Armorama: 2,844 posts
Posted: Sunday, March 18, 2012 - 01:19 PM UTC
@ Gary: Don't tell anyone... It is pretty easy.
BBD468
Texas, United States
Joined: March 08, 2010
KitMaker: 2,465 posts
Armorama: 2,383 posts
Joined: March 08, 2010
KitMaker: 2,465 posts
Armorama: 2,383 posts
Posted: Sunday, March 18, 2012 - 02:47 PM UTC
Tell what? My lips are sealed!
Gary
Gary
didgeboy
Washington, United States
Joined: September 21, 2010
KitMaker: 1,846 posts
Armorama: 1,509 posts
Joined: September 21, 2010
KitMaker: 1,846 posts
Armorama: 1,509 posts
Posted: Tuesday, March 20, 2012 - 08:52 AM UTC
Shaun;
quick question, how many layers of clear coat do you usually put on your boards? Just want to make sure that I am sealing them sufficiently. Cheers.
keenan
Indiana, United States
Joined: October 16, 2002
KitMaker: 5,272 posts
Armorama: 2,844 posts
Joined: October 16, 2002
KitMaker: 5,272 posts
Armorama: 2,844 posts
Posted: Wednesday, March 21, 2012 - 12:33 PM UTC
Damon, most of the time just one heavy rattle can coat all the way around. I usually drive a wood screw into the middle of the bottom of base so I have something to hang onto. Then just spray away.
Good Q,
Thanks for asking.
Shaun
Good Q,
Thanks for asking.
Shaun
keenan
Indiana, United States
Joined: October 16, 2002
KitMaker: 5,272 posts
Armorama: 2,844 posts
Joined: October 16, 2002
KitMaker: 5,272 posts
Armorama: 2,844 posts
Posted: Wednesday, March 21, 2012 - 12:47 PM UTC
Since it has been in the mid 80s in Central Indiana this week when it should be in the mid 40s I thought I would take a minute to talk about diorama material gathering.
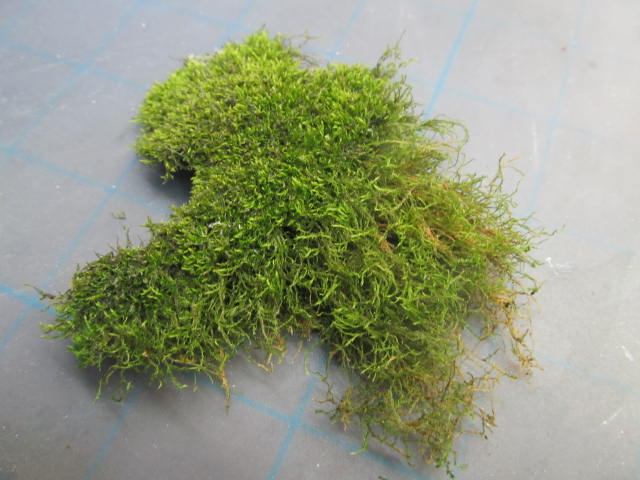
Moss:
This stuff grows all around my house:
I use an awful lot of it. It is free. I just lift it off the rocks and store it in a "cool dry place" until I need it. The amazing thing is it actually stays that color.
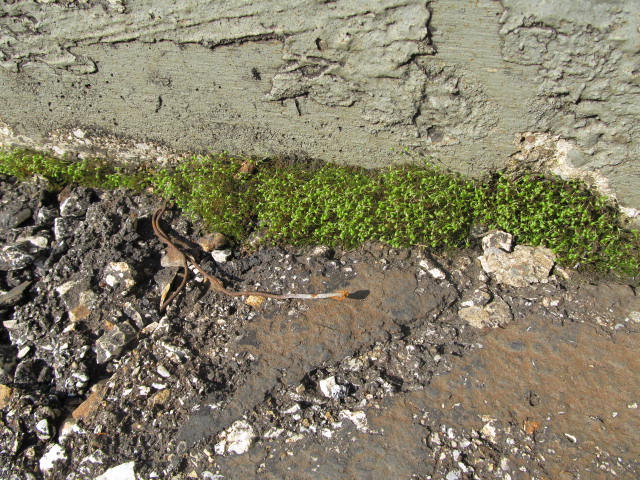
This kind grows in the nooks and crannies were I work. Looks like some spring flowers:
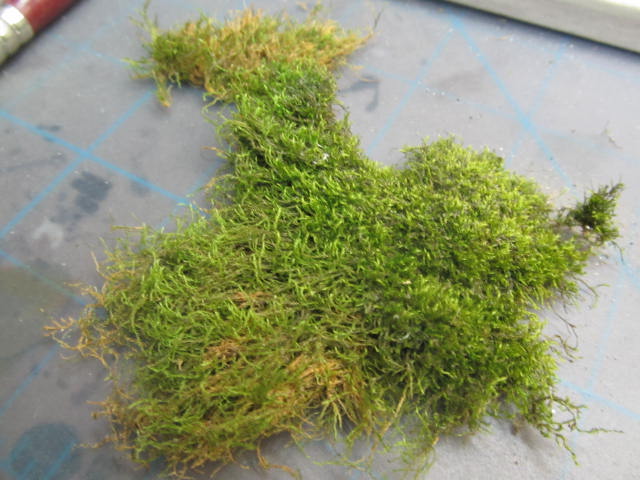
Pull it up and store it for a while and it makes great ground cover from everything from the central Pacific to Normandy..
Next update Saturday at the latest.
Cheers,
Shaun
rodrigo_sartori
Sao Paulo, Brazil
Joined: January 16, 2007
KitMaker: 160 posts
Armorama: 159 posts
Joined: January 16, 2007
KitMaker: 160 posts
Armorama: 159 posts
Posted: Friday, March 23, 2012 - 03:56 AM UTC
portuguêsinglêsespanhol
this is your first diorama?
You have a very good technique. I like to see work on step by step. We can learn more and share / learn different techniques.
This technique of moss I also do. I harvest these trees and moss around old buildings / abandoned then put them directly into a box with a lid so that no any external light. Ready!
After a while all of them are dehydrated and green as if they had been collected today.
congratulations!
good luck!
BBD468
Texas, United States
Joined: March 08, 2010
KitMaker: 2,465 posts
Armorama: 2,383 posts
Joined: March 08, 2010
KitMaker: 2,465 posts
Armorama: 2,383 posts
Posted: Friday, March 23, 2012 - 04:23 AM UTC
Hi Shaun,
Shaun, Im on an extremly tight budget and this info your bringing is brilliant. Im loving this! i feel like i might be able to pull off a good dio without haveing to shell out alot of cash. the celluclay was cheap and i got plent of cat litter. Cant wait for the next installment man. Thanks!
Gary
Shaun, Im on an extremly tight budget and this info your bringing is brilliant. Im loving this! i feel like i might be able to pull off a good dio without haveing to shell out alot of cash. the celluclay was cheap and i got plent of cat litter. Cant wait for the next installment man. Thanks!
Gary
ophelia53
Missouri, United States
Joined: March 10, 2010
KitMaker: 254 posts
Armorama: 226 posts
Joined: March 10, 2010
KitMaker: 254 posts
Armorama: 226 posts
Posted: Friday, March 23, 2012 - 05:44 AM UTC
Hi Shaun,
Gotta say...for your first dio, it came out AMAZING! Love that you are recounting all your mistakes and going through each step, like a good book. Following this as I am going to start up working on my first dio again tonight! Very excited. Will you be going over how you did your figures, too?
Thanks for sharing.
Brandi
Sparky13
United States
Joined: March 19, 2012
KitMaker: 2 posts
Armorama: 1 posts
Joined: March 19, 2012
KitMaker: 2 posts
Armorama: 1 posts
Posted: Friday, March 23, 2012 - 09:01 AM UTC
This is awesome. Ive just got into modeling after a 35 year hiatus. My how things have changed. On my first build now since then and cannot wait to get to the diorama. Won a 2nd place ribbon in 5th grade at state fair for my last diorama. Your step by step will get me back on track. Greatly appreciated.
keenan
Indiana, United States
Joined: October 16, 2002
KitMaker: 5,272 posts
Armorama: 2,844 posts
Joined: October 16, 2002
KitMaker: 5,272 posts
Armorama: 2,844 posts
Posted: Sunday, March 25, 2012 - 09:17 AM UTC
Thanks for the replies. No, this isn't my first diorama. Far from it. It is a SBS for everyone who wants to try give dioramas a try.
keenan
Indiana, United States
Joined: October 16, 2002
KitMaker: 5,272 posts
Armorama: 2,844 posts
Joined: October 16, 2002
KitMaker: 5,272 posts
Armorama: 2,844 posts
Posted: Sunday, March 25, 2012 - 09:49 AM UTC
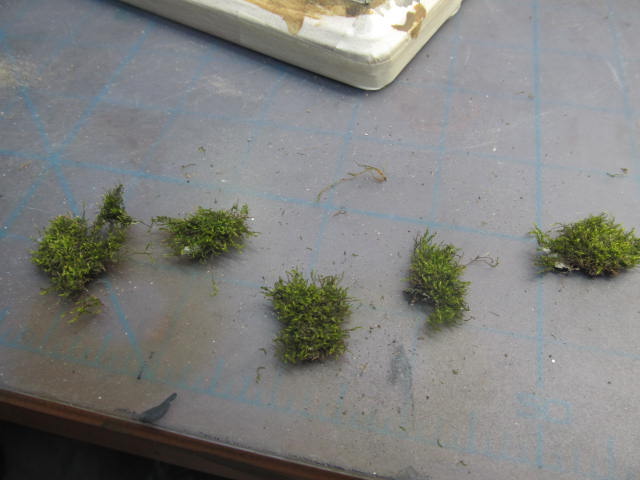
Let's add some green stuff to the ground work. I am starting out with chuck of dried moss I picked from my front yard last summer. You can buy dried moss at florist shops too.
I am using the the same paint pan I have been using. This time I am putting some PVA glue in the well so I can thin it with water.
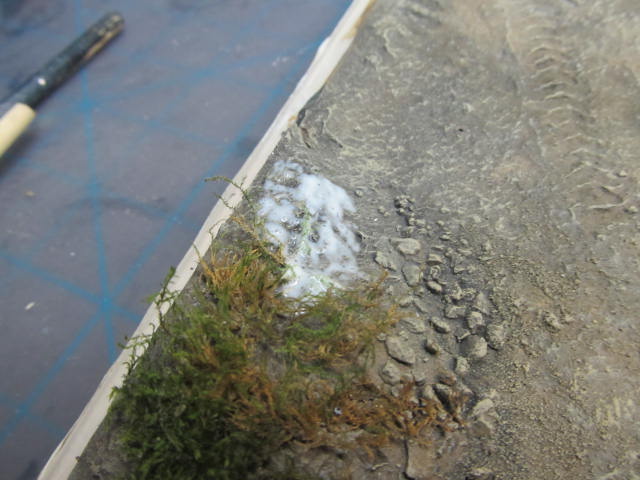
Thin your white glue with water and load up a cheap brush.
Add a good sized spot of the thinned glue where you want your foliage.
and stick it on there.
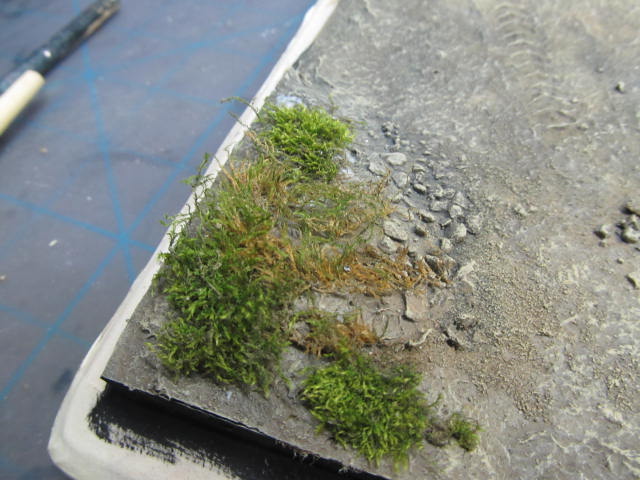
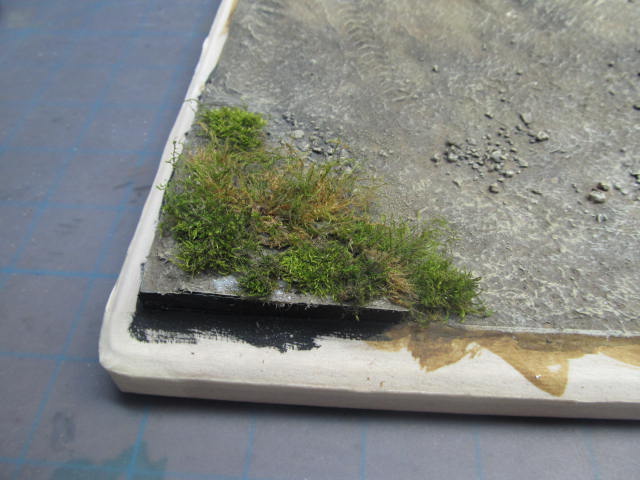
As you go you should pick off some little chunks of the dried moss and fill in gaps. Try to make everything look as random as possible. Look at some woods by your house. Nothing is in a straight line...
Left front corner done.
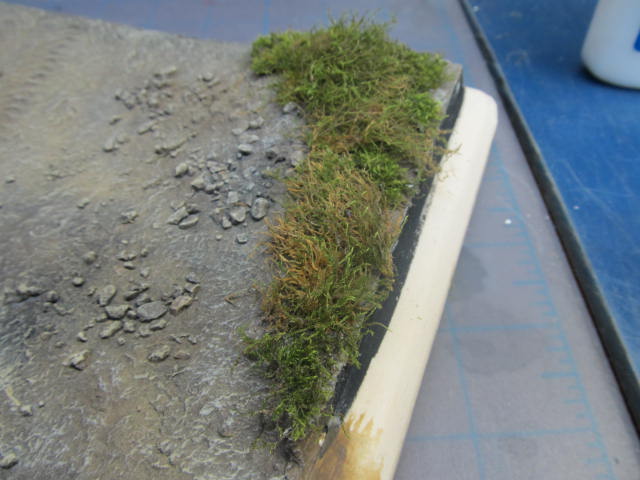
Used the exact same technique on the right rear corner of the base.
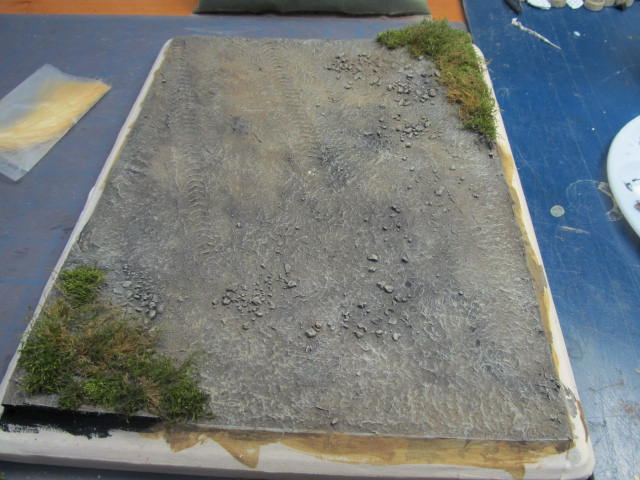
All mossy looking base...
I actually added some more clumps of moss on various places after I put the camera away.
Next up turf and a spring sapling. Stay tuned glamorous guys and groovy gals...