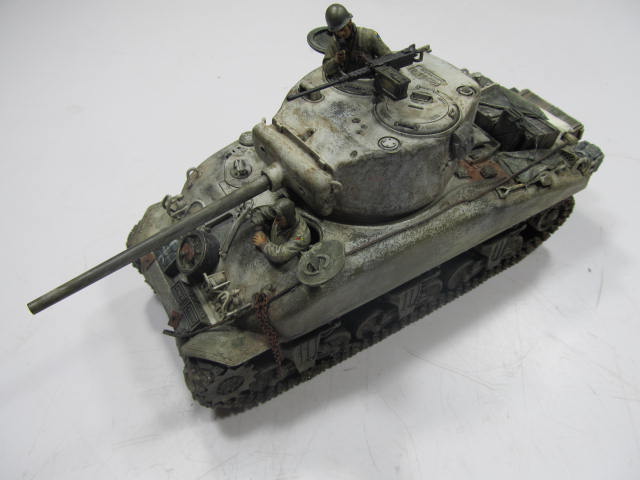
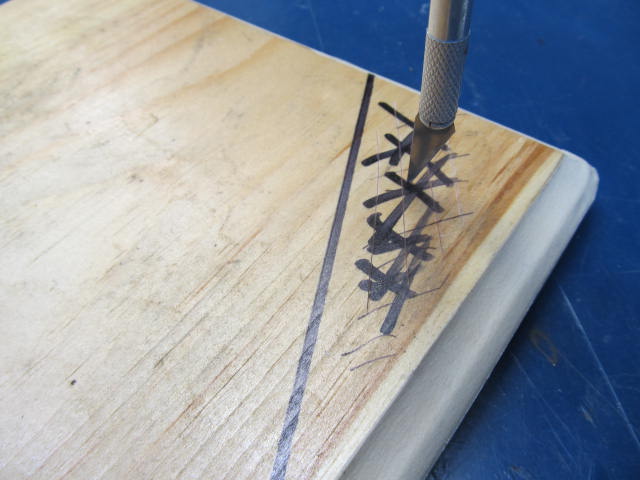
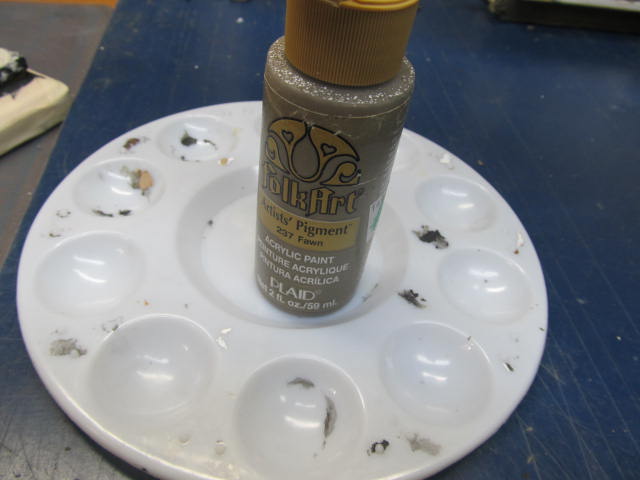
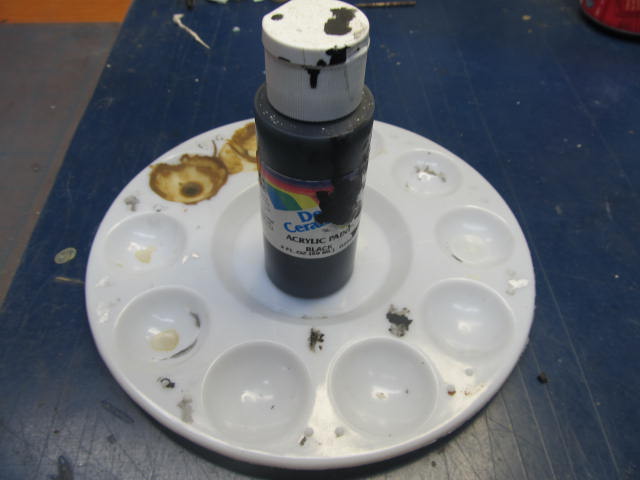
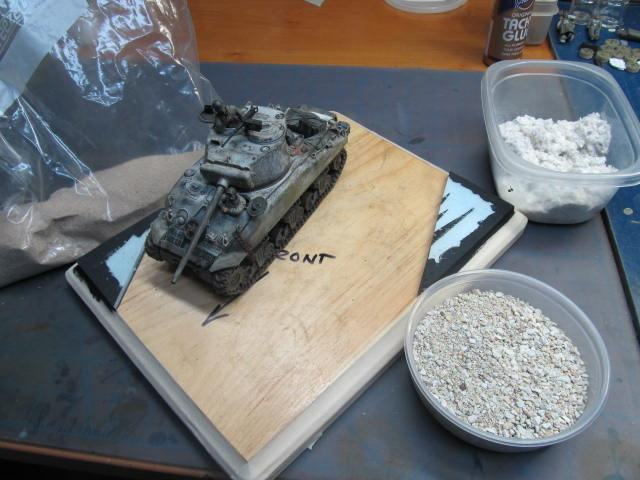
Dioramas: Beginners
A good place to look if you are just starting out.
Hosted by Darren Baker
First Diorama Step by Step
keenan
Visit this Community
Indiana, United States
Joined: October 16, 2002
KitMaker: 5,272 posts
Armorama: 2,844 posts
Posted: Monday, February 20, 2012 - 11:41 AM UTC
I lined out the new light table and camera. Here are pictures of the Sherman I am going to use. Dragon Sherman with two Dragon crew members:


Dragon Sherman built pretty much OOB with stowage from the parts drawers. Winter white wash done with the now famous "hair spray" method, my first attempt. Dry transfers from Archer. Weathered the running gear with a whole lot of mud made out of, well, real mud.

Pictures of the figures to follow before the week is out and some overall compsition photos by the weekend.

Thanks for following,
Shaun
keenan
Visit this Community
Indiana, United States
Joined: October 16, 2002
KitMaker: 5,272 posts
Armorama: 2,844 posts
Posted: Monday, February 20, 2012 - 11:50 AM UTC
Another piece of advise, since this whole topic is about helping out. Take pictures of your models and look at them later. In the first picture in my last post the driver needs a strap for his goggles. That is the type of the thing you will notice looking at pictures of your models that you won't notice otherwise.
Off to the basement to make a goggle strap...
Shaun
keenan
Visit this Community
Indiana, United States
Joined: October 16, 2002
KitMaker: 5,272 posts
Armorama: 2,844 posts
Posted: Monday, February 20, 2012 - 12:00 PM UTC
@ Eugene: We are going to get into some serious Celluclay action directly. Stick around so to speak. I love that stuff.
Shaun
keenan
Visit this Community
Indiana, United States
Joined: October 16, 2002
KitMaker: 5,272 posts
Armorama: 2,844 posts
Posted: Monday, February 20, 2012 - 01:11 PM UTC
More Base Basics:

Had some extra time so I jumped ahead a bit. Or behind, depending on how you look at it. You aren't building cabinets here so you don't need to stain your base or at like a carpenter for your first diorama. If you are planning to take your diorama to a contest every little bit helps.
One thing you need to do if you are going to follow along is mask the sides of the base so when we put all the ground work on it and your diorama is done you can pull the masking top off and your base will have nice crisp lines.

Masked base:


Shaun
keenan
Visit this Community
Indiana, United States
Joined: October 16, 2002
KitMaker: 5,272 posts
Armorama: 2,844 posts
Posted: Saturday, February 25, 2012 - 07:46 AM UTC
Okay. So here are the figures and the basic composition photos. The story I am trying to tell here is the crew of the Sherman and the infantry are both lost. The tank commander is on the radio and so are the infantry NCOs. Everyone is checking their maps. Not a lot of action but for your first diorama most of the time a good story is much easier than a lot of action.


We are going to do some serious ground work this weekend for anyone following along. I apologize if I don't update daily like some bloggers do but I work an awful of hours.

If anyone has any questions or feedback to offer don't hesitate.

I am going to mark out where we need filler on the base tomorrow.

Cheers,
Shaun
keenan
Visit this Community
Indiana, United States
Joined: October 16, 2002
KitMaker: 5,272 posts
Armorama: 2,844 posts
Posted: Saturday, February 25, 2012 - 07:55 AM UTC
And yes, I just noticed that all the infantry guys need straps on their goggles too.
keenan
Visit this Community
Indiana, United States
Joined: October 16, 2002
KitMaker: 5,272 posts
Armorama: 2,844 posts
Posted: Monday, February 27, 2012 - 12:41 PM UTC
Changed locations to get to the real work on the base.
First, I put the Shermy and the figures away and marked the front of the base so I would a reference when I went to the bench.


Next I am adding some elevation in a couple of corners of the base just to break things up. You don't need to add much. I use Dow foam board. You should be able to get remnants from friends or buy one sheet that will last you forever. I am using .25 inch thick stuff here.


So I have the base marked and I just need to cut two triangles of the foam that match the dimensions marked out on the base and glue them down. Use a square and an sharp knife to cut the foam. The outside edges of the foam are going to be a part of the base you cannot hide so you want everything to be as neat as possible.


I use craft glue or PVA to glue the foam sections down. Since we sealed the base in an earlier step to keep it from warping when we add the ground you need to score the base before you glue down the foam sections. The foam sections won't stick if you don't.


Last step for today. Paint the outside edges of the foam with what ever kind of craft squeeze bottle paint you want to use. I use the 79 cent stuff from the fabric store. DO NOT USE OIL BASED PAINT TO PAINT DOW FOAM BOARD. Trust me. It will melt.


Last photo to give you folks the general idea. Pay no attention to the Achilles. That is for another blog.


I hope this is helping you guys out. This blog is helping me remember all the mistakes I made so it is helping me out too.

Feedback is always welcome. If you have questions don't hesitate to ask.

Celluclay slamming coming up next. Much fun.
Thanks for following along.

Removed by original poster on 03/03/12 - 23:28:41 (GMT).
keenan
Visit this Community
Indiana, United States
Joined: October 16, 2002
KitMaker: 5,272 posts
Armorama: 2,844 posts
Posted: Saturday, March 03, 2012 - 11:35 AM UTC
Basic Groundwork
Okay, we have the base masked and we are ready to do some basic ground work. At this point you are going to need at a minimum whatever vehicle you are going to use and whatever you are going to use for your groundwork. I am using the Sherman, Celluclay, and oil dry. Oil dry is pretty much the same as "kitty Litter" but I think that is copywritten and way more expensive. Sand in a plastic bag will be handy later:


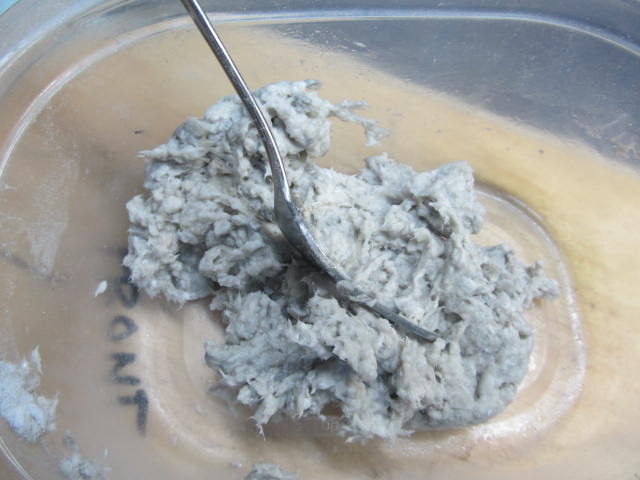
Add some water to the disposable plastic bowl with the Celluclay. It is hard to explain how much water you want to add but it should be about the consistency of heavy dough. Stir it up with a fork. You can always add more water if it is too wet but there is no taking water out.


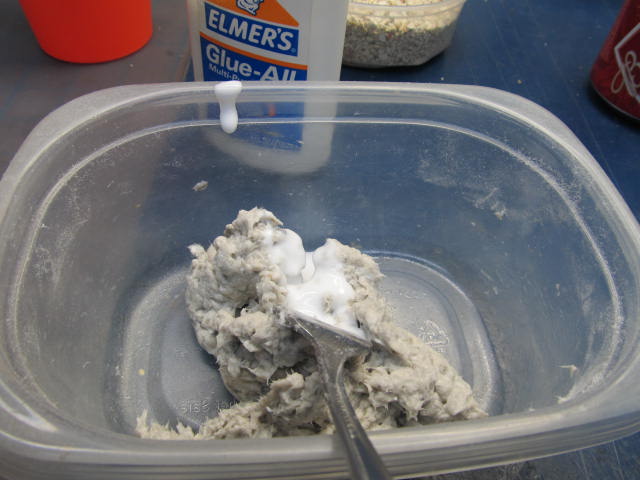
I always add a good size spoon full of Elmer's (PVA) glue to help the Celluclay stick to the base.


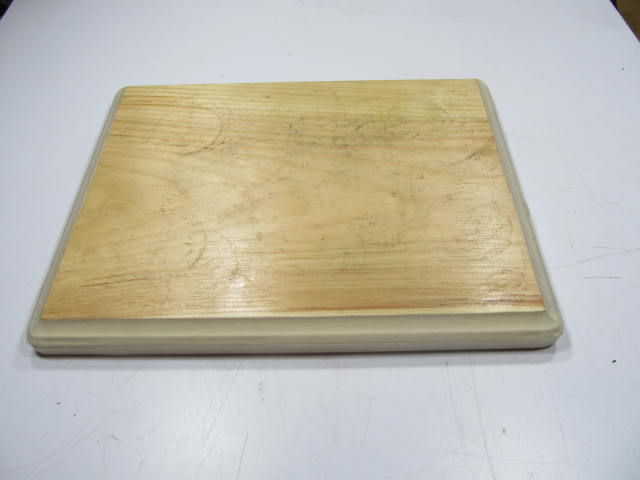
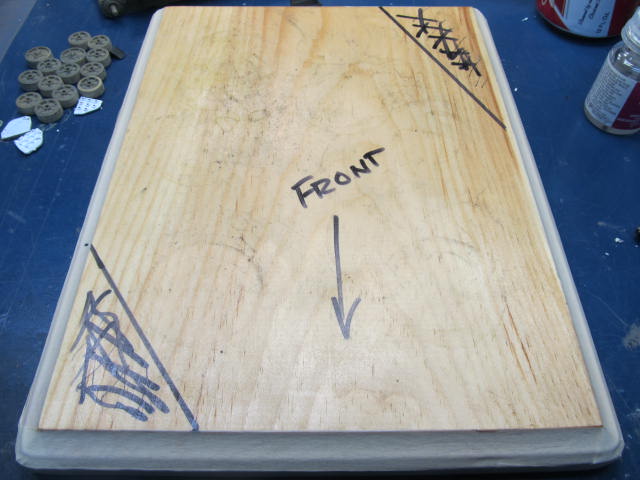
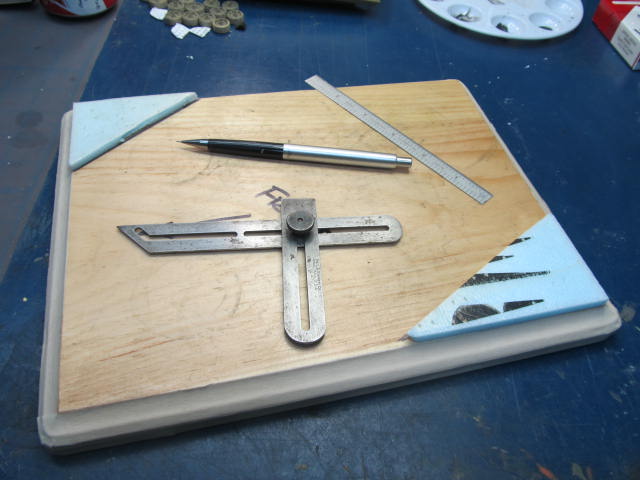
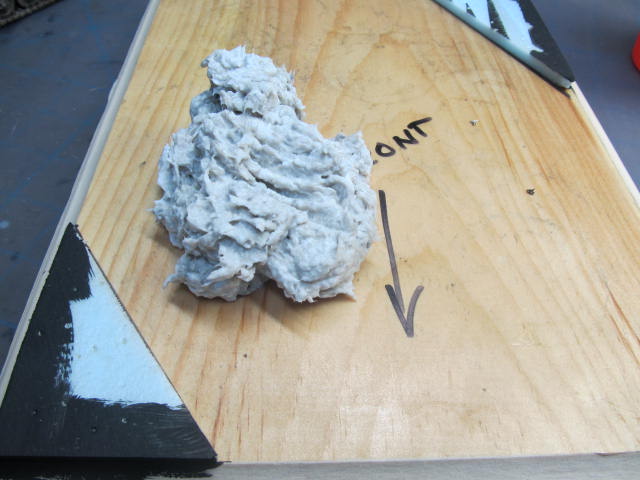
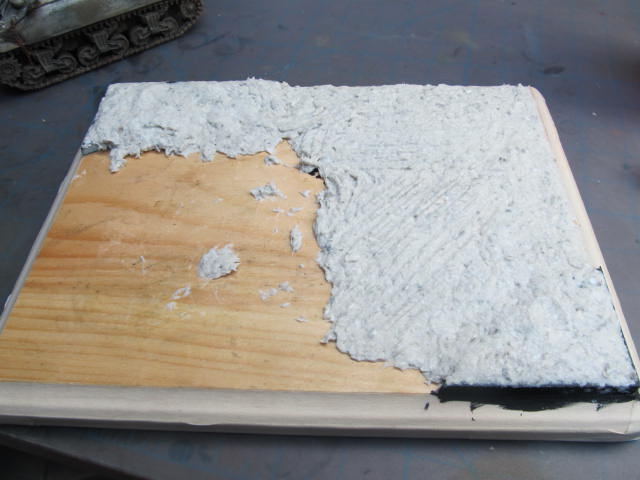
Dump the Celluclay on the base. Notice that I still have the front of the base marked.


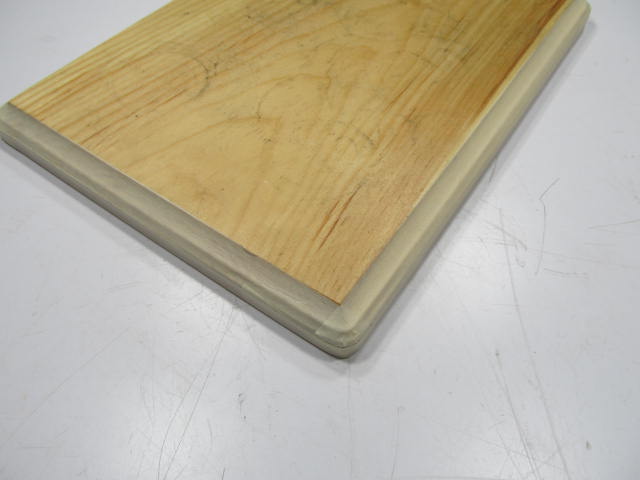
Now comes the fun part. First, add some Celluclay to both ends of the base where we put the elevation. Then start spreading the Celluclay with the fork.


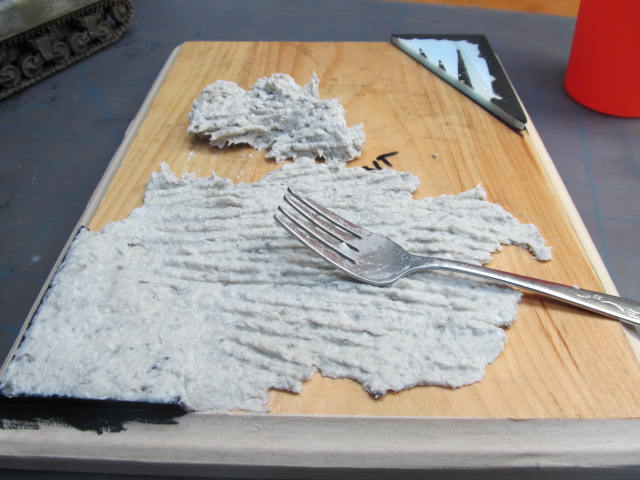
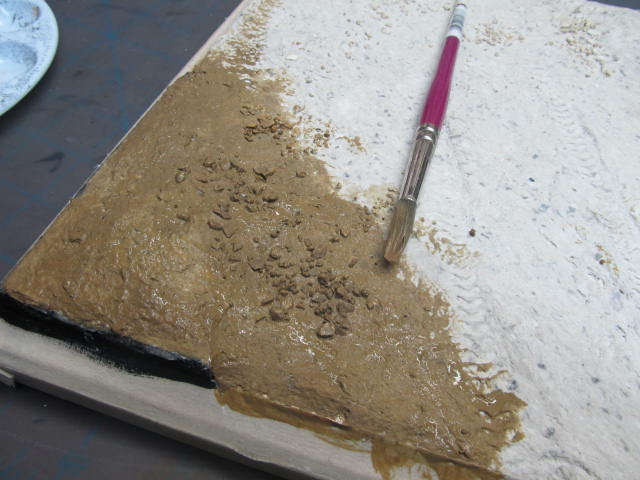
It ought to start looking something like this:


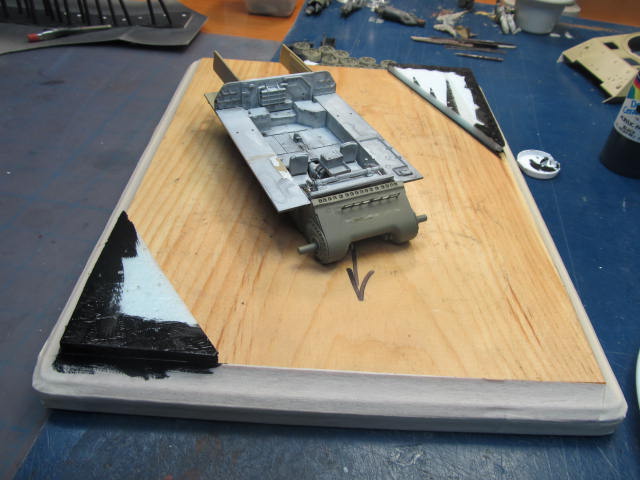
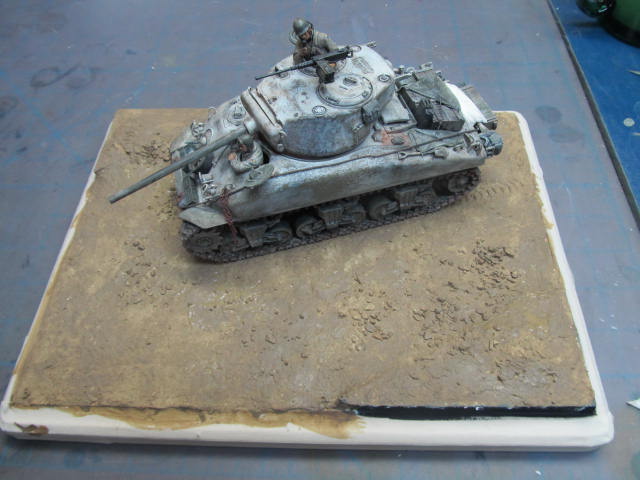
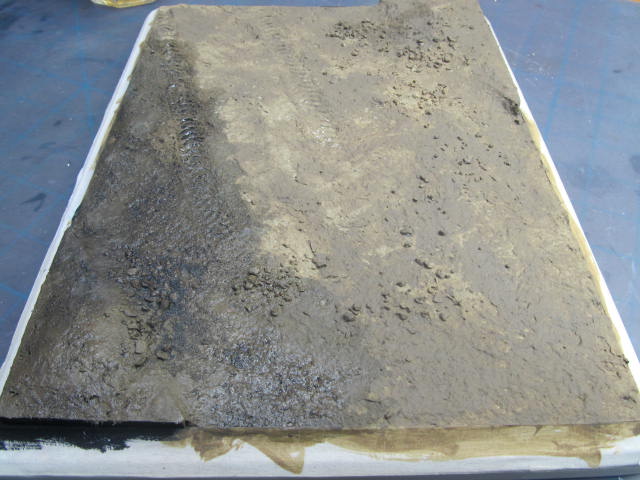
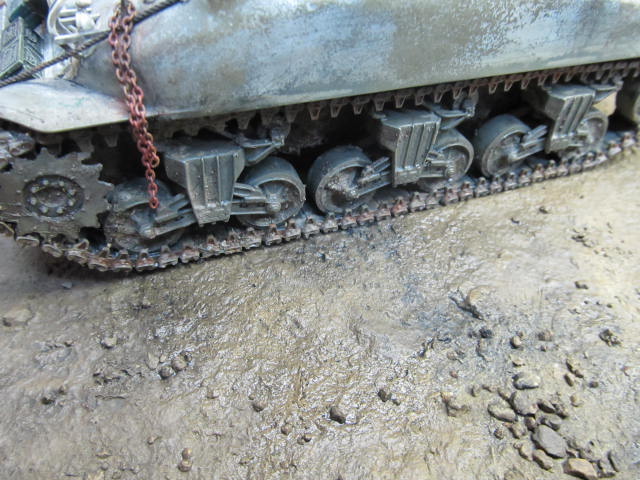
Now it is time to make tracks. Tanks don't float, they sink. So need to make tracks, that is track marks. Push your vehicle into the wet ground work to make track marks. If you are using a wheeled vehicle, roll it. In any case you want marks in the ground work where your vehicle has been.


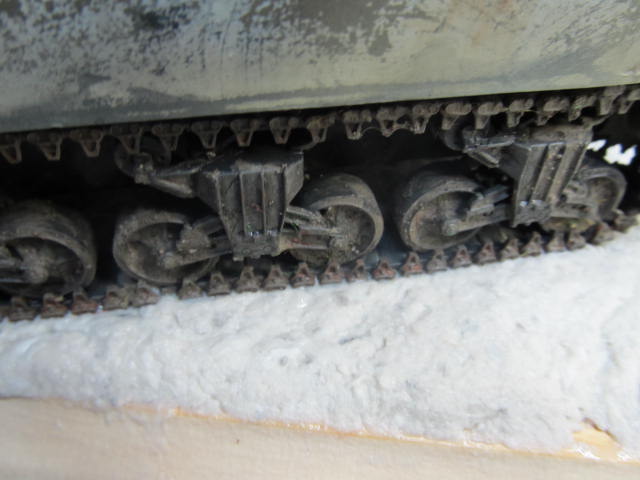
After you have pushed your track marks into the ground work DO NOT LEAVE THE MODEL ON THE WET GROUNDWORK. You will not be able to get off of there without ripping the treads off the tank or lifting the groundwork off the base. Trust me.

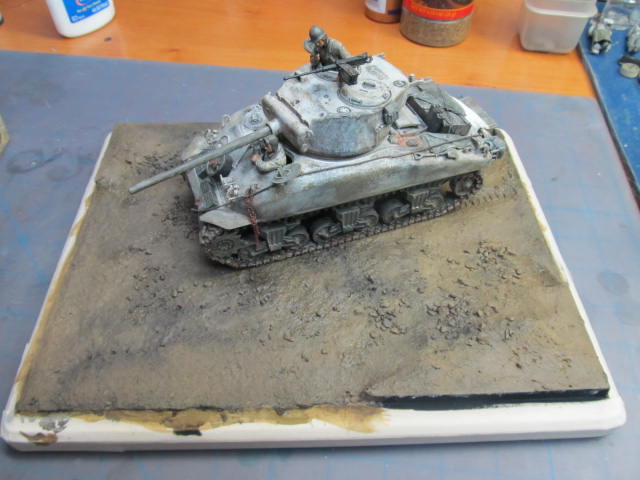
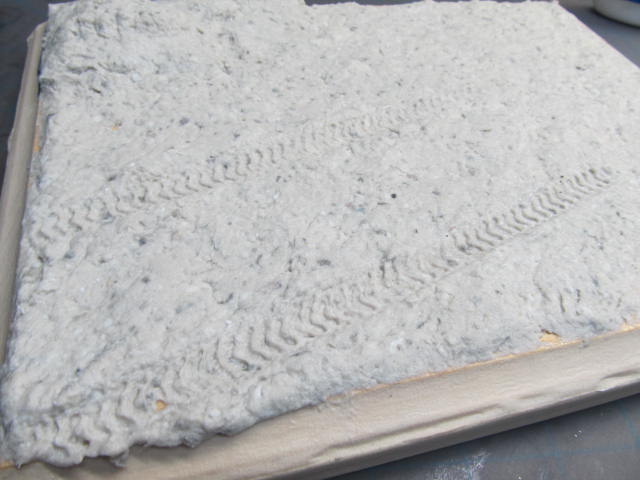
So you should end up with something like this:


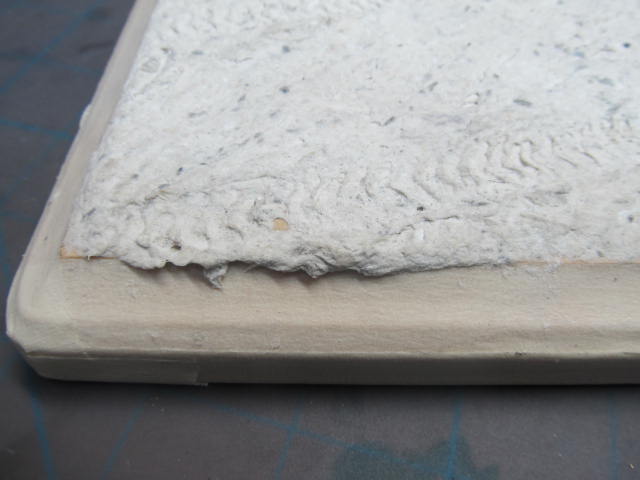
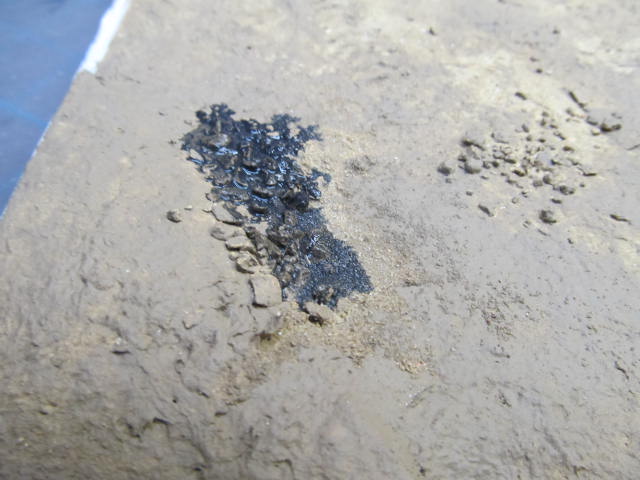
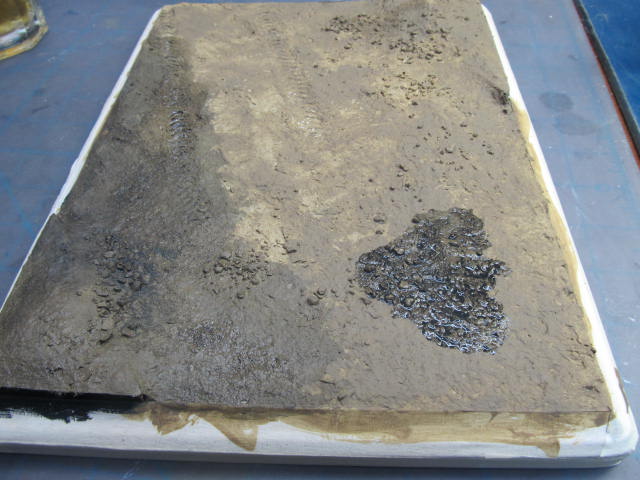
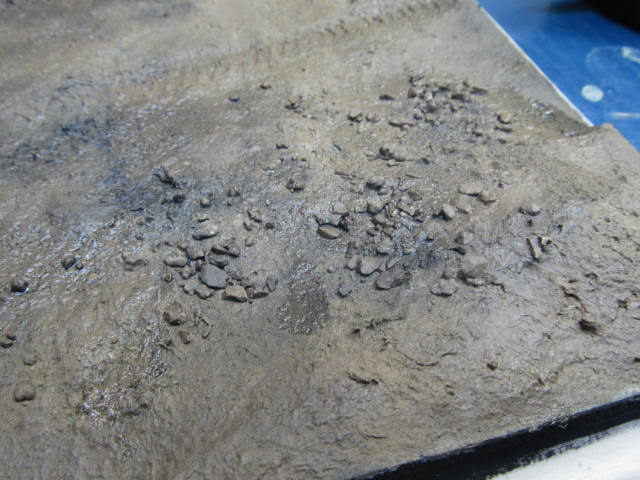
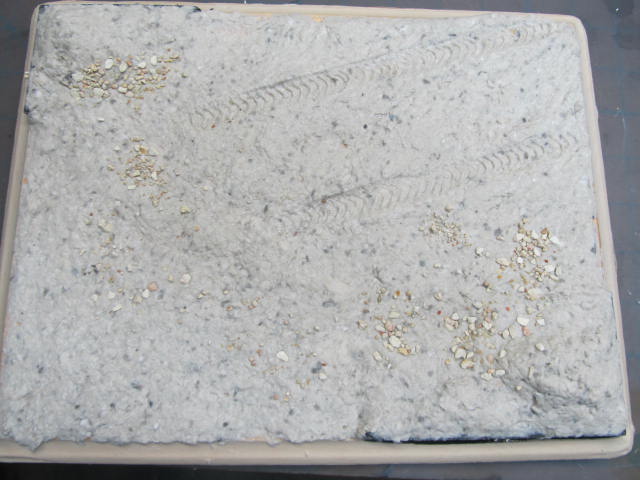
Last step until the Celluclay sets up is throwing around some of the oil dry. I try to put it where rocks would normally be, towards the bottom of high points where water might wash them...


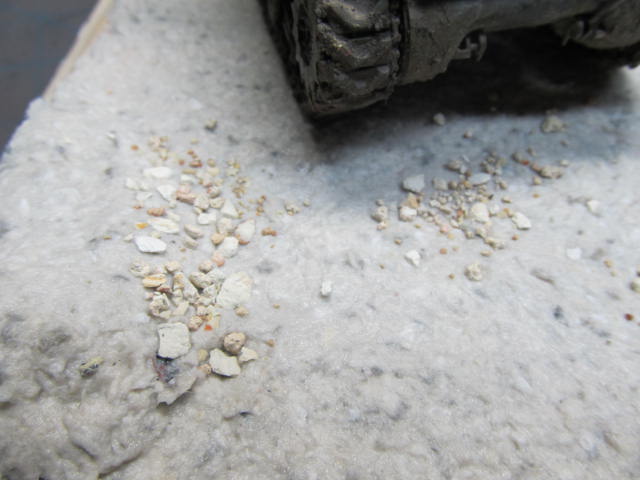
Picture of the base where I am leaving it until the next step:


As always, if anyone has questions or comments please let me know. Next, painting ground work with no air brush required...

Shaun.


keenan
Visit this Community
Indiana, United States
Joined: October 16, 2002
KitMaker: 5,272 posts
Armorama: 2,844 posts
Posted: Tuesday, March 06, 2012 - 11:43 AM UTC
For those of you following along, my father in law passed away Sunday night. Obviously I will be erstwhile engaged. Update some time this week end.
Peace.
Shaun
exer
Visit this Community
Dublin, Ireland
Joined: November 27, 2004
KitMaker: 6,048 posts
Armorama: 4,619 posts
Posted: Tuesday, March 06, 2012 - 12:03 PM UTC
Sorry to hear about your father Shaun. Take your time.
Thundergrunt
Visit this Community
California, United States
Joined: November 01, 2009
KitMaker: 657 posts
Armorama: 481 posts
Posted: Tuesday, March 06, 2012 - 04:24 PM UTC
Shaun

Sorry for the loss of your father. We will be here when you feel ready to return. My wife and I send our best to you and your family.

Eugene
c5flies
Visit this Community
California, United States
Joined: October 21, 2007
KitMaker: 3,684 posts
Armorama: 2,938 posts
Posted: Tuesday, March 06, 2012 - 04:54 PM UTC
Shaun, very sorry to hear that my friend. We'll be thinking of you and your family.
BBD468
Visit this Community
Texas, United States
Joined: March 08, 2010
KitMaker: 2,465 posts
Armorama: 2,383 posts
Posted: Tuesday, March 06, 2012 - 04:55 PM UTC
Hi Shaun,

My condolences to you and your family in this troubling time.

Gary
ahandykindaguy
Visit this Community
Alberta, Canada
Joined: August 20, 2008
KitMaker: 1,295 posts
Armorama: 1,191 posts
Posted: Wednesday, March 07, 2012 - 03:03 AM UTC
Shaun, my condolences to you & your family. My wife & I have gone through this tough time too and will be praying for grace and peace and understanding and strength for you during the coming days.

Dave.
steph2102
Visit this Community
Isere, France
Joined: April 23, 2011
KitMaker: 735 posts
Armorama: 606 posts
Posted: Wednesday, March 07, 2012 - 03:37 AM UTC
Shaun, My condolences to you and your family .steph
dioman13
Visit this Community
Indiana, United States
Joined: August 19, 2007
KitMaker: 2,184 posts
Armorama: 1,468 posts
Posted: Wednesday, March 07, 2012 - 01:35 PM UTC
Shaun, My families condolences to you and your family, we will keep him in our prayers. Times as such have reflections as we remember those who have crossed over and the happy memories we hold so dear. Just remember when you feel down and miss him, the good times and fatherly advise, the hug or arm over your shoulder, and the sacrifices made and love given freely just because he loved you as his son. The void you feel will always be there, but you can fill it with some of the best things he gave you, love and memories. Take your time, we can wait; life comes first.
keenan
Visit this Community
Indiana, United States
Joined: October 16, 2002
KitMaker: 5,272 posts
Armorama: 2,844 posts
Posted: Sunday, March 11, 2012 - 07:38 AM UTC
Thanks everyone for the kind words and heartfelt condolences. I have known some of you folks for ten years and you are honestly the nicest people I have never met.
Thanks again.
Love, Shaun
keenan
Visit this Community
Indiana, United States
Joined: October 16, 2002
KitMaker: 5,272 posts
Armorama: 2,844 posts
Posted: Sunday, March 11, 2012 - 09:18 AM UTC
Okay, when last I left you we had the Celluclay on the base. We need to trim off some of the Celluclay that is hanging too far over the masked edge of the base like this before we start painting:

If you don't when you have your base finished and remove the tape you will pull up a huge chunk of your groundwork.

I use cheap craft paint to paint the base. Using "Folk Art" brand "Fawn" for this one. Looks like dirt to me and it cost 87 cents.


Get out a big cheap brush and a glass of water.


Go to town. The Celluclay will absorb a bunch of water. Thin the paint as you go. Just mop it on there. The variations in the paint consistency helps here because dirt doesn't look the same.


Cheap craft paint mopped onto the base. You can see the variations in the base coat. Right now it looks a lot more like Tunisia than Germany but we will fix that.


Stay tuned...


keenan
Visit this Community
Indiana, United States
Joined: October 16, 2002
KitMaker: 5,272 posts
Armorama: 2,844 posts
Posted: Sunday, March 11, 2012 - 09:27 AM UTC
Adding up the cost so far (without the Sherman and the figs):
$2.99 for the base. About $6.00 for a decade supply of Cellclay, a buck for the craft paint and am calling the "oil dry" free because everyone knows someone who owns a cat...
keenan
Visit this Community
Indiana, United States
Joined: October 16, 2002
KitMaker: 5,272 posts
Armorama: 2,844 posts
Posted: Tuesday, March 13, 2012 - 12:45 PM UTC
Okay, I build armor and figures too. Pre-shading and filters are all the rage now. Me, I am slopping on a good old school wash on top of the base we painted. I have the same silly less than a dollar craft paint and a paint tray:


Take some of the thinned paint and mop it on to the base. It really doesn't matter where.


Clean your brush, add some water and just start spreading the spot of paint around the base. There is no real way to explain any of this but you will know when it looks right.
I took the spot of paint in the previous picture and covered about 70% of the base with it. Then it looked like this:


Lay on another spot of paint and spread it around. Try to lay more thinned black paint around the rocks and in the track marks we pressed into the Celluclay earlier.

Second spot of wash on the base before I started spreading it around:


keenan
Visit this Community
Indiana, United States
Joined: October 16, 2002
KitMaker: 5,272 posts
Armorama: 2,844 posts
Posted: Tuesday, March 13, 2012 - 12:56 PM UTC
Okay, overhead shot of the base after the wash.


Detail shot of the wash laid on the "rocks."


Things looking a lot more like a sloppy German spring of 1945 than Tunisia.


Overview.


Again, questions always welcome. And remember first timers we have less than $10 in this so far.

I need to let this dry for a day or three and then I am going to dry brush the base and get ready for planting...

Thanks for following along.
Shaun
panzerconor
Visit this Community
Massachusetts, United States
Joined: February 08, 2012
KitMaker: 1,271 posts
Armorama: 1,253 posts
Posted: Tuesday, March 13, 2012 - 01:22 PM UTC
This is practically a Godsend. We've got three cats here(didn't plan on three) so cat litter is easily accessible. You make all this look far too easy, Shaun.

-Conor
BBD468
Visit this Community
Texas, United States
Joined: March 08, 2010
KitMaker: 2,465 posts
Armorama: 2,383 posts
Posted: Tuesday, March 13, 2012 - 01:46 PM UTC
Hi Shaun,

Thanks for doing this man. youve sold me on it. i bought some celluclay today, and i have a cat. im good to go! i like your straight forward, simple way of doing it, and get terrific results. thanks!

Gary
c5flies
Visit this Community
California, United States
Joined: October 21, 2007
KitMaker: 3,684 posts
Armorama: 2,938 posts
Posted: Tuesday, March 13, 2012 - 01:57 PM UTC
Thanks Shaun... you make it sound (and look) like even I could do this. Off to get some celluclay