Dioramas
Do you love dioramas & vignettes? We sure do.
Do you love dioramas & vignettes? We sure do.
Hosted by Darren Baker, Mario Matijasic
Near Cheux June27'44
cestus72

Joined: February 06, 2011
KitMaker: 230 posts
Armorama: 227 posts

Posted: Tuesday, May 22, 2012 - 09:16 AM UTC
Tutto bello, bravissimo, un applauso 

jrutman

Joined: April 10, 2011
KitMaker: 7,941 posts
Armorama: 7,934 posts

Posted: Wednesday, May 23, 2012 - 02:41 AM UTC
Quoted Text
Tutto bello, bravissimo, un applauso
Grazi mille amico mia,
J
jrutman

Joined: April 10, 2011
KitMaker: 7,941 posts
Armorama: 7,934 posts

Posted: Wednesday, May 23, 2012 - 06:38 AM UTC
One more done,coming and going


jrutman

Joined: April 10, 2011
KitMaker: 7,941 posts
Armorama: 7,934 posts

Posted: Friday, June 01, 2012 - 01:17 AM UTC
Latest POW to recieve paint.

And my first ever infantryman from the UK. Those of you from Blighty please be kind! He is from Glasgow HL.


And my first ever infantryman from the UK. Those of you from Blighty please be kind! He is from Glasgow HL.

Posted: Friday, June 01, 2012 - 03:29 AM UTC
Hey Jerry- nice work on these two! The painting really is first class and the effect you've got on the Tommy's rifle is real nice- what did you use for that? The uniform shade is also, in my opinion, spot on.
jrutman

Joined: April 10, 2011
KitMaker: 7,941 posts
Armorama: 7,934 posts

Posted: Friday, June 01, 2012 - 05:18 AM UTC
Quoted Text
Hey Jerry- nice work on these two! The painting really is first class and the effect you've got on the Tommy's rifle is real nice- what did you use for that? The uniform shade is also, in my opinion, spot on.
Thanks for the kind words Karl.
The weapon was first painted dark grey with acrylic. The wood part was painted using oil,in this case burnt sienna. Then the low points were accented with black oil. When dry,I rubbed the metal high parts with a lead pencil point.
J
Posted: Friday, June 01, 2012 - 10:43 PM UTC
That sounds roughly similar to what I do with wooden weapons. You should also check out Vallejo Old Wood and their Transparent Wood Grain color- the old wood acts as a nice base, then the wood grain, kind of like an ink, goes on top and creates a nice grain effect- the good thing about it is it dries a lot quicker than oils, although I always find using oil paint for wood is a must in any scale larger than 1/35.
jrutman

Joined: April 10, 2011
KitMaker: 7,941 posts
Armorama: 7,934 posts

Posted: Saturday, June 02, 2012 - 03:17 AM UTC
Karl,
Thanks for the tip on the V paints. In fact,I just invested in a good bit of that paint for the first time and am very impressed.
Getting back into painting for the first time in about 10 or so years I had found that most of my old Polly S paints were dried up. I like to use rubbing alcohol as a thinner as it dries very quickly.
I still cling to my oil paints for skin tones and wood though.I still like the sheen. I am told that Citadel is good for metallic colors?
J
Posted: Saturday, June 02, 2012 - 03:27 AM UTC
Quoted Text
Karl,
Thanks for the tip on the V paints. In fact,I just invested in a good bit of that paint for the first time and am very impressed.
Getting back into painting for the first time in about 10 or so years I had found that most of my old Polly S paints were dried up. I like to use rubbing alcohol as a thinner as it dries very quickly.
I still cling to my oil paints for skin tones and wood though.I still like the sheen. I am told that Citadel is good for metallic colors?
J
Yeah, citadel's metallic colors are surprisingly good. I used them a good few years ago and then just last year bought a few pots to see if they were still good and they are. I heard they just changed their range a bit, supposed to be even better now.
I would also recommend Mr. Metal Color. You can also buff Mr. Metal Color when its dry so if you need something with a sheen then these are good to have.
jrutman

Joined: April 10, 2011
KitMaker: 7,941 posts
Armorama: 7,934 posts

Posted: Monday, June 04, 2012 - 03:13 AM UTC
Thanks Karl,
I will check out Citadel but now I must find a vendor!
J
I will check out Citadel but now I must find a vendor!
J
cestus72

Joined: February 06, 2011
KitMaker: 230 posts
Armorama: 227 posts

Posted: Monday, June 04, 2012 - 08:48 PM UTC
Beautiful , good skin tone and camouflage uniform, for the camouflage uniform what color you use for the brown base and greens?
Thanks

Thanks

Kinggeorges

Joined: August 31, 2005
KitMaker: 1,380 posts
Armorama: 845 posts

Posted: Monday, June 04, 2012 - 10:31 PM UTC
Hi Jerry,
Excellent figures you've made !
!
They have a lot of character. One can feel the fear of this new pow life in the look of those germans.
Very well done.
Best,
Julien
Excellent figures you've made
 !
!They have a lot of character. One can feel the fear of this new pow life in the look of those germans.
Very well done.
Best,
Julien
jrutman

Joined: April 10, 2011
KitMaker: 7,941 posts
Armorama: 7,934 posts

Posted: Tuesday, June 05, 2012 - 02:31 AM UTC
Quoted Text
Beautiful , good skin tone and camouflage uniform, for the camouflage uniform what color you use for the brown base and greens?
Thanks

Thanks!
For the base color I mixed the paint,as every uniform I see has a different tone to it. The dark green is from Polly s and the light green is Aircraft interior green from Pollyscale.
J
jrutman

Joined: April 10, 2011
KitMaker: 7,941 posts
Armorama: 7,934 posts

Posted: Tuesday, June 05, 2012 - 02:34 AM UTC
Quoted Text
Hi Jerry,
Excellent figures you've made!
They have a lot of character. One can feel the fear of this new pow life in the look of those germans.
Very well done.
Best,
Julien
Thanks Julien,
I still use the Hornet heads as I have not worked up the courage to try to make my own heads! I am starting to make some progress on the bodies though.
J
jrutman

Joined: April 10, 2011
KitMaker: 7,941 posts
Armorama: 7,934 posts

Posted: Wednesday, June 20, 2012 - 07:02 AM UTC
Life and buiness have not let me get to this very much but here is a small update.
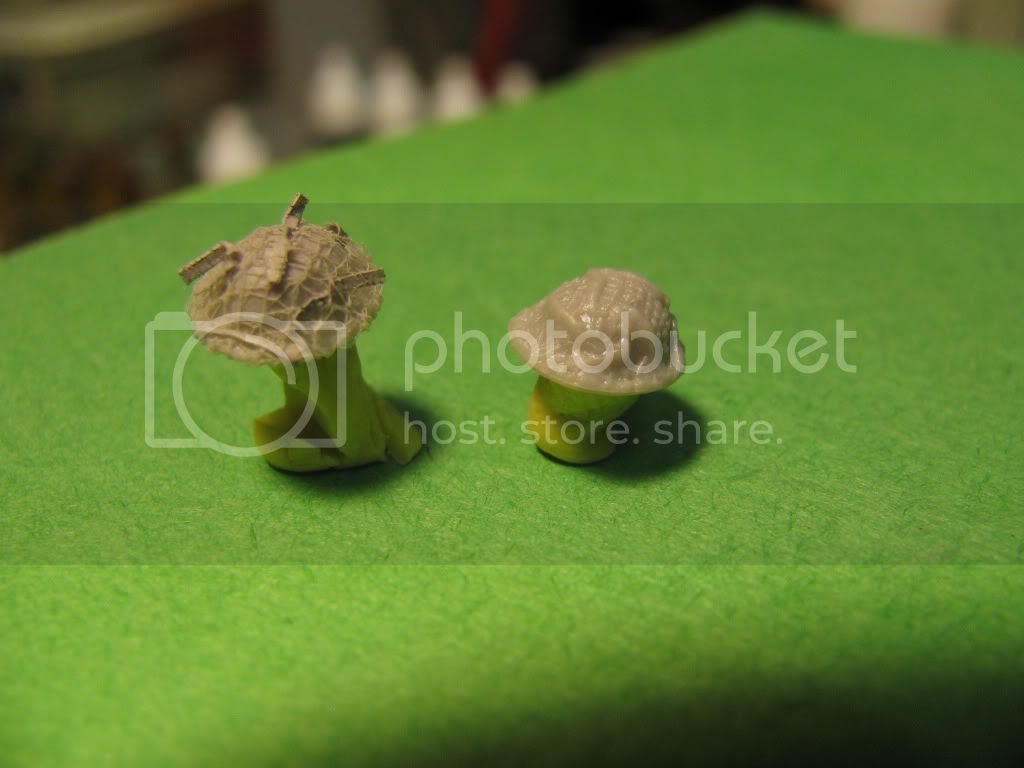
Got the next wee Scot ready to paint after a lot of mods. Also decided on messin with the helmet. On the right is the kit version and the left I put 2 layers of bridal tulle on then tin foil strips for the chin strap and burlap cammo pieces. I think it's a little better than the kit piece. Thoughts?


Got the next wee Scot ready to paint after a lot of mods. Also decided on messin with the helmet. On the right is the kit version and the left I put 2 layers of bridal tulle on then tin foil strips for the chin strap and burlap cammo pieces. I think it's a little better than the kit piece. Thoughts?


Posted: Thursday, June 21, 2012 - 12:00 AM UTC
The scratch made helmet cover is way better than the kit piece, it actually looks very realistic, awesome!
jrutman

Joined: April 10, 2011
KitMaker: 7,941 posts
Armorama: 7,934 posts

Posted: Thursday, June 21, 2012 - 02:41 AM UTC
Quoted Text
The scratch made helmet cover is way better than the kit piece, it actually looks very realistic, awesome!
Thanks for the kind words Karl. I wasn't sure if I had pulled it off. I am not too familiar with British Kit. I know the pattern of the netting is very small on the real thing but I couldn't find netting with a small enough pattern. Of course,the way things go,I will find some after the project is complete!
J
jrutman

Joined: April 10, 2011
KitMaker: 7,941 posts
Armorama: 7,934 posts

Posted: Thursday, June 21, 2012 - 05:35 AM UTC
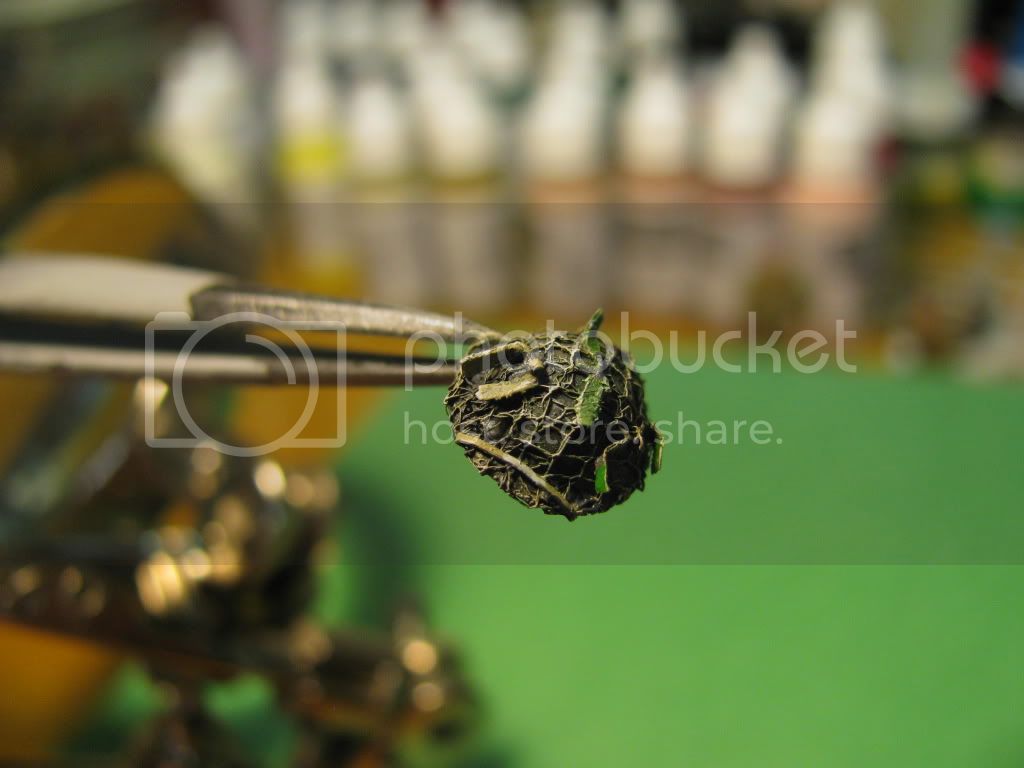
Put a little paint on the helmet cover.


exer

Joined: November 27, 2004
KitMaker: 6,048 posts
Armorama: 4,619 posts

Posted: Thursday, June 21, 2012 - 06:43 AM UTC
Quoted Text
I am not too familiar with British Kit. I know the pattern of the netting is very small on the real thing but I couldn't find netting with a small enough pattern. Of course,the way things go,I will find some after the project is complete!
J
Helmet netting varied in size soI think you're good to go with what you've done- It looks great Jerry
jrutman

Joined: April 10, 2011
KitMaker: 7,941 posts
Armorama: 7,934 posts

Posted: Friday, June 22, 2012 - 01:32 AM UTC
Quoted Text
Quoted TextI am not too familiar with British Kit. I know the pattern of the netting is very small on the real thing but I couldn't find netting with a small enough pattern. Of course,the way things go,I will find some after the project is complete!
J
Helmet netting varied in size soI think you're good to go with what you've done- It looks great Jerry
Thanks Pat! I was hoping that this was the case.
J
jrutman

Joined: April 10, 2011
KitMaker: 7,941 posts
Armorama: 7,934 posts

Posted: Tuesday, July 03, 2012 - 03:54 AM UTC
Latest wee Scotsman painted up. I switched to Vallejo paint and have not regretted it!
J

J


exer

Joined: November 27, 2004
KitMaker: 6,048 posts
Armorama: 4,619 posts

Posted: Tuesday, July 03, 2012 - 04:37 AM UTC
Excellent, he looks great Jerry
jrutman

Joined: April 10, 2011
KitMaker: 7,941 posts
Armorama: 7,934 posts

Posted: Tuesday, July 03, 2012 - 11:02 AM UTC
Thanks Pat,for the always kind comments,
J
J
rodrigo_sartori

Joined: January 16, 2007
KitMaker: 160 posts
Armorama: 159 posts

Posted: Tuesday, July 03, 2012 - 02:02 PM UTC
Jerry,
Do You carved most of the figures?
Is to be congratulated loved the idea of using cotton for the hair and also how the tulle used to involve the helmet. I also do the same, because the original detailing of the kit seems bad.
His progress is perfect. I will definitely continue to follow this work.
Hugs,
Rodrigo Sartori
Posted: Wednesday, July 04, 2012 - 12:13 AM UTC
Nice job on the Scotsman Jerry- the uniform and webbing really look spot-on.
 |


