Constructive Feedback
For in-progress or completed build photos. Give and get contructive feedback!
For in-progress or completed build photos. Give and get contructive feedback!
Hosted by Darren Baker, Dave O'Meara
Bronco M24 Chaffee Light Tank
tankglasgow

Joined: October 04, 2010
KitMaker: 275 posts
Armorama: 260 posts

Posted: Wednesday, February 20, 2013 - 10:03 AM UTC
keeping up with this one, goggles and eyepatches it's all in the eyes!

jimbrae

Joined: April 23, 2003
KitMaker: 12,927 posts
Armorama: 9,486 posts

Posted: Wednesday, February 20, 2013 - 09:39 PM UTC
First of all, thanks for sharing this with us. I'm more or less at the same point with mine and some of the pointers are very useful. 
Regarding figures, there's a couple o nice U.S. figures in the Alpine range which are well worth checking out.

Regarding figures, there's a couple o nice U.S. figures in the Alpine range which are well worth checking out.
Joel_W

Joined: December 04, 2010
KitMaker: 11,666 posts
Armorama: 1,143 posts

Posted: Thursday, February 21, 2013 - 01:15 AM UTC
Jesse, thanks for the links. I just checked them out, and they should really help me get through my 1st few figures.
Joel
Joel
Joel_W

Joined: December 04, 2010
KitMaker: 11,666 posts
Armorama: 1,143 posts

Posted: Thursday, February 21, 2013 - 01:24 AM UTC
Ray & Jim, thanks for sharing my build. So far it's been a great adventure, one that I'm really enjoying.
Jim, glad to hear that you've made it as far as I have. There haven't been any issues that weren't easily solved. I've completed the suspension and am currently working on the top of the hull. One thing I didn't want nor need was a working suspension. Jesse & Russ have already mentioned how flimsy it is, especially once you put on the wheels. So I decided to glue each arm and axle assembly to help with this issue. It took some effort to get everything plumb and square, then I glued one suspension arm on each side at a time and worked my way backwards. Once dry, the hull seats level, and is rock solid. Once I paint the Base color O.D. on the lower hull, and paint up the wheels and tires, I'll carefully glue the wheels on. Hopefully, everything will still be rock solid, as I'm sure that the tracks will add some stress to them. And speaking of tracks, for a change I'm actually looking forward to building them. I've done two sets of AFV Club T16 tracks, and really struggled, as I never came up with a working jig.
As for the top of the hull, there are a front and back section, the turret section, then 7 smaller sections. The turret section and the next 3 directly behind it has required a great deal of dry fitting, and tweaking, but once done, the parts line up perfectly.
Joel
pseudorealityx

Joined: January 31, 2010
KitMaker: 2,191 posts
Armorama: 1,814 posts

Posted: Thursday, February 21, 2013 - 01:57 AM UTC
Quoted Text
As for the top of the hull, there are a front and back section, the turret section, then 7 smaller sections. The turret section and the next 3 directly behind it has required a great deal of dry fitting, and tweaking, but once done, the parts line up perfectly.
Joel
The rest will also require a LOT of dryfitting and sanding to make sure everything is square and fits.
Remember to drill out the overly thick exhaust pipes in the rear grill corners as well. Exhaust pipe is very thin walled.
Joel_W

Joined: December 04, 2010
KitMaker: 11,666 posts
Armorama: 1,143 posts

Posted: Friday, February 22, 2013 - 02:57 AM UTC
Jesse, thanks for the heads up on the exhausts.
I'm still looking for pictures of any M24 with side skirts, and have found only one other then pictures of models. Seems that the skirts either weren't used very often, taken off, or damaged and just removed. At this point I'm going to go with a non-skirted version of company D, 36th Tank Battalion, 8th Armored Division 3/45 as depicted in the instructions.
Joel
pseudorealityx

Joined: January 31, 2010
KitMaker: 2,191 posts
Armorama: 1,814 posts

Posted: Friday, February 22, 2013 - 04:20 AM UTC
Sounds good.... the sideskirts certainly aren't the most common. But here's some M24's with side skirts:
http://www.fas.org/man/dod-101/sys/land/m24-chaffee2.jpg
http://upload.wikimedia.org/wikipedia/commons/9/94/M24_May_1945.jpg
http://images1.wikia.nocookie.net/__cb20111025004133/world-war-2/images/5/5a/M24_Chaffee_1.jpg
http://mailer.fsu.edu/~akirk/tanks/UnitedStates/lighttanks/uslt-T24.jpg
And here's a shot with just the angle supports:
http://wwiivehicles.com/usa/tanks-light/m24-light-tank-chaffee/m24-light-tank-chaffee-13.png
Joel_W

Joined: December 04, 2010
KitMaker: 11,666 posts
Armorama: 1,143 posts

Posted: Monday, February 25, 2013 - 12:13 PM UTC
Jesse, there is a storage pin that in the kit I made up of rolled PE. Yet every picture I've seen has a folding type shelf like this.

Joel
Joel
pseudorealityx

Joined: January 31, 2010
KitMaker: 2,191 posts
Armorama: 1,814 posts

Posted: Monday, February 25, 2013 - 12:35 PM UTC
Quoted Text
Jesse, there is a storage pin that in the kit I made up of rolled PE. Yet every picture I've seen has a folding type shelf like this.
Joel
The mesh basket is the 'early' version. You can see it in the first 2 pictures I linked in my previous post.
Joel_W

Joined: December 04, 2010
KitMaker: 11,666 posts
Armorama: 1,143 posts

Posted: Monday, February 25, 2013 - 12:54 PM UTC
Thanks Jesse for the heads up.
Joel
Joel
Joel_W

Joined: December 04, 2010
KitMaker: 11,666 posts
Armorama: 1,143 posts

Posted: Tuesday, February 26, 2013 - 01:31 AM UTC
Well, I screwed up trying to build that PE stowage basket. Work like that is very hard for me as I only see out of one eye due to retina disease, and have no depth of field. But enough with the excuses; I just screwed up plain & simple. That's why I brought up the idea of using the late version folding shelf. If I stretched my modeling license some, why wouldn't a M24 in for a major over haul, and with a battered up bin, get replaced with the upgrade if that's what they had on hand? So, I've been scratching one out to see what it looks like.
Joel
Joel
Posted: Tuesday, February 26, 2013 - 02:39 AM UTC
Joel, following with interest. I have two of these in the stash (early and Korean version) and hopefully I can avoid some pitfalls by watching your blog.
Cheers!
Stefan
Cheers!
Stefan
pseudorealityx

Joined: January 31, 2010
KitMaker: 2,191 posts
Armorama: 1,814 posts

Posted: Tuesday, February 26, 2013 - 02:43 AM UTC
Quoted Text
Well, I screwed up trying to build that PE stowage basket. Work like that is very hard for me as I only see out of one eye due to retina disease, and have no depth of field. But enough with the excuses; I just screwed up plain & simple. That's why I brought up the idea of using the late version folding shelf. If I stretched my modeling license some, why wouldn't a M24 in for a major over haul, and with a battered up bin, get replaced with the upgrade if that's what they had on hand? So, I've been scratching one out to see what it looks like.
Joel
I think it would be easy enough to say that the driver backed into a wall or a tree and it got ripped off.

The very first Chaffees didn't get into the ETO until December of 1944, so I doubt there would have been much 'major overhaul' going on.
Did you put the big bolted plates on the back? If so, that would indicate a bit later production Chaffee. Unfortunately, this kit only includes the early nose, so it's not technically accurate, but no biggie.

jimbrae

Joined: April 23, 2003
KitMaker: 12,927 posts
Armorama: 9,486 posts

Posted: Wednesday, February 27, 2013 - 10:15 PM UTC
Here are some unusual Chaffee pics - Spanish Army in Morocco in the 1950s:
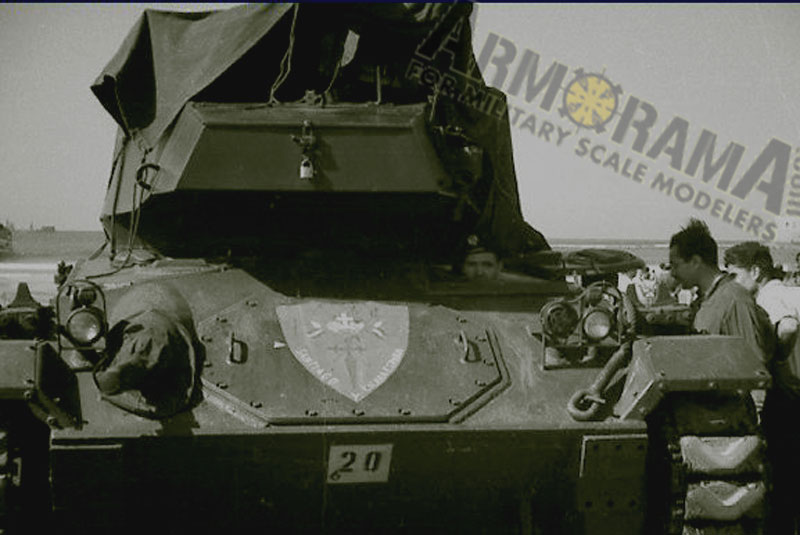
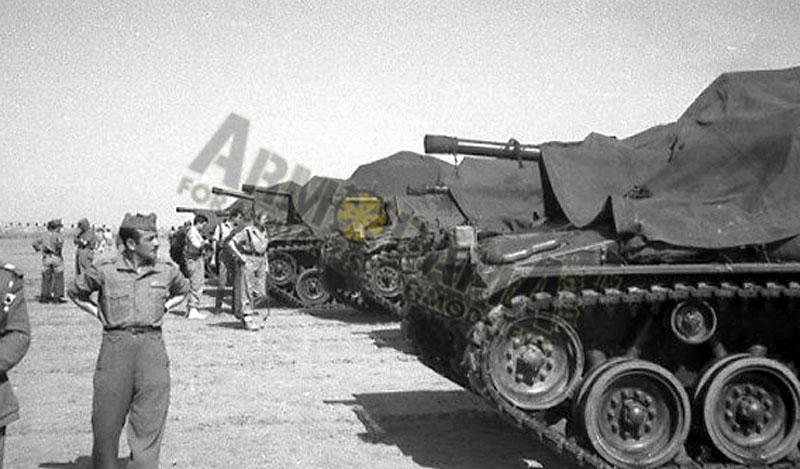
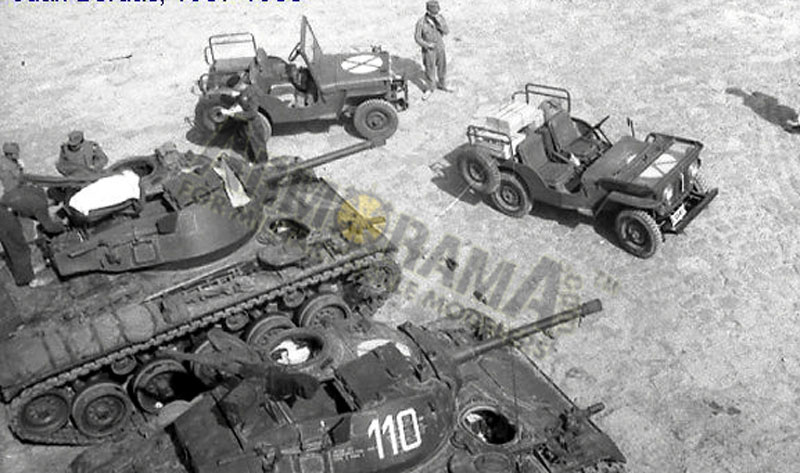
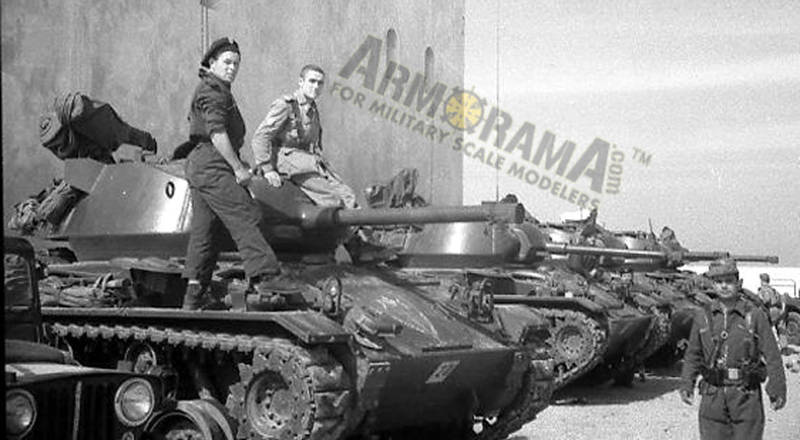
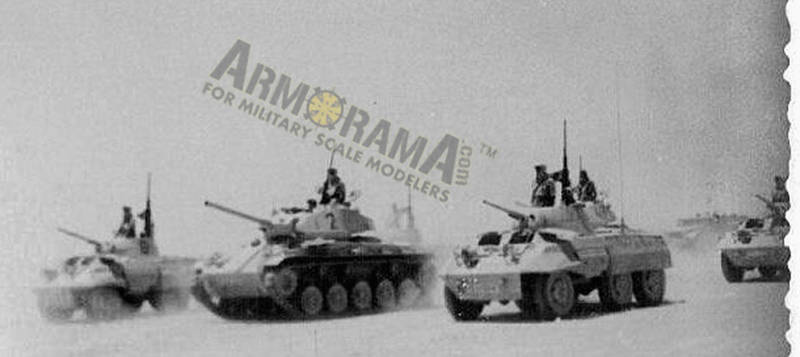

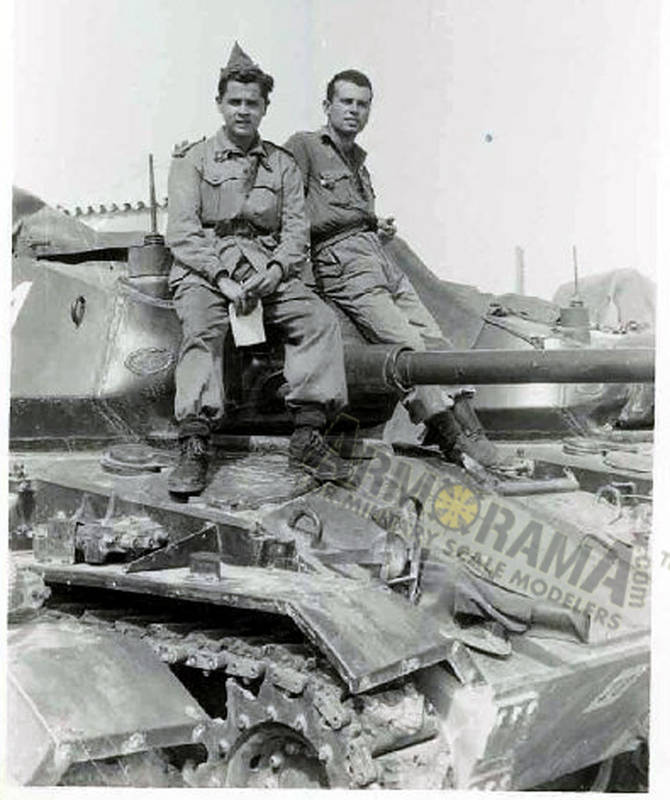


Joel_W

Joined: December 04, 2010
KitMaker: 11,666 posts
Armorama: 1,143 posts

Posted: Friday, March 01, 2013 - 06:22 AM UTC
Jim, thanks for the pictures. One thing for sure, no side skirts.
Joel
Joel
Joel_W

Joined: December 04, 2010
KitMaker: 11,666 posts
Armorama: 1,143 posts

Posted: Sunday, March 03, 2013 - 10:58 AM UTC
Well, after screwing up the rear basket, as I posted, I decided to use a little modeling license, and did a upgrade to the late version rear stowage shelf. Here's the completed lower hull, and the stowage shelf.
Joel


Joel
pseudorealityx

Joined: January 31, 2010
KitMaker: 2,191 posts
Armorama: 1,814 posts

Posted: Sunday, March 03, 2013 - 11:39 AM UTC
Joel,
What happened to the windshield? Why is it in the middle of the hull?
What happened to the windshield? Why is it in the middle of the hull?
Joel_W

Joined: December 04, 2010
KitMaker: 11,666 posts
Armorama: 1,143 posts

Posted: Sunday, March 03, 2013 - 11:55 AM UTC
Jesse, I tacked it in the wrong position, and just forgot to move it to it's right place when I found my error. Doing it now. Thanks for catching that one.
Joel
Joel
Joel_W

Joined: December 04, 2010
KitMaker: 11,666 posts
Armorama: 1,143 posts

Posted: Monday, March 04, 2013 - 03:45 AM UTC
Jesse, Windshield assembly moved to proper location. I need to pay more attention to what I'm doing, and stop modeling when I'm so tired.
Joel
Joel
Removed by original poster on 05/14/19 - 01:25:13 (GMT).
pseudorealityx

Joined: January 31, 2010
KitMaker: 2,191 posts
Armorama: 1,814 posts

Posted: Monday, March 04, 2013 - 01:28 PM UTC
Quoted Text
What you should of done is -
1. Remove the pictures, (quickly)
2. Move the windshield to its proper location, (quickly)
3. Take some new pictures, (quickly)
4. Post the new pictures, (quickly)
Then, the killer blow,
5. Post with this - "Jesse mate, what's up, are you nuts, its in the right place, get some new eyes dude."
Then just pray that Jesse didn't save any pictures, or know how to retrieve old web pages, lol

You almost tried to do that with your entire T-55 build, but you forgot the "quickly" part.


Joel_W

Joined: December 04, 2010
KitMaker: 11,666 posts
Armorama: 1,143 posts

Posted: Monday, March 04, 2013 - 02:04 PM UTC
Never thought of that. Spent a few hours of my day off fixing my screw ups. At least I didn't make it a shelf Queen. Jesse has saved my butt on few builds. Armor sure is a lot harder then aircraft was all those years ago.
Joel
Joel
Removed by original poster on 05/14/19 - 01:25:30 (GMT).
Joel_W

Joined: December 04, 2010
KitMaker: 11,666 posts
Armorama: 1,143 posts

Posted: Tuesday, March 05, 2013 - 02:19 AM UTC
Steve's work is incredible. Love the diorama. Quick glance and you think you're looking at the real deal.
BTW, this is by far the hardest and most detailed build to date since I came back to the hobby nearly 3 years ago. Poor eyesight sure doesn't help.
Joel
BTW, this is by far the hardest and most detailed build to date since I came back to the hobby nearly 3 years ago. Poor eyesight sure doesn't help.
Joel
pseudorealityx

Joined: January 31, 2010
KitMaker: 2,191 posts
Armorama: 1,814 posts

Posted: Tuesday, March 05, 2013 - 04:45 AM UTC
Quoted Text
Steve's work is incredible. Love the diorama. Quick glance and you think you're looking at the real deal.
BTW, this is by far the hardest and most detailed build to date since I came back to the hobby nearly 3 years ago. Poor eyesight sure doesn't help.
Joel
This and the Grant are the craziest builds I've done so far. The funny part is, the Bronco kit was mostly out of the box, while the Grant is anything but.
 |


