

Campaigns: Active Campaigns
Campaigns that are either in planning or underway should be grouped here.
Campaigns that are either in planning or underway should be grouped here.
Hosted by Richard S.
Japanese Military Campaign

iowabrit

Joined: November 06, 2007
KitMaker: 585 posts
Armorama: 557 posts

Posted: Saturday, July 04, 2015 - 07:34 PM UTC
Try Hobby Link Japan. www.hlj.com
andromeda673
Joined: July 30, 2013
KitMaker: 584 posts
Armorama: 525 posts
Posted: Sunday, July 05, 2015 - 01:31 AM UTC
Alright boys, when I started the idea of this campaign I figured I would join in with a type 90 and mine roller, I got to thinking about how I've always wanted a 1/32 F-4 in my collection, then it hit me, build a F-4 E/J with Japanese Air Force markings, I got to researching and have started my build! This one will be displayed with doors closed and gears up, and on a stand.
Here's where I'm at as of today, I do have to order my decals and a few other items, but overall I'm pretty excited about this build. I don't plan on going ape crazy with aftermarket either.
So here's the donor kit


I need to touch up some of the yellow for the ejection handles, but for free hand, and an opti-visor, I'll take it.


Thats all for now!

Bluestab
Joined: December 03, 2009
KitMaker: 2,160 posts
Armorama: 1,906 posts
Posted: Sunday, July 05, 2015 - 03:27 AM UTC
Does the start pictures have to be time stamped? I took some without the date. A lot of campaigns aren't requiring it any more. I have only done a little work to the kit since then so I can retake them if need be.
andromeda673
Joined: July 30, 2013
KitMaker: 584 posts
Armorama: 525 posts
Posted: Sunday, July 05, 2015 - 05:00 AM UTC
Naw, your good, I believe you! Get after your build and have some fun!
bwiber
Joined: August 03, 2008
KitMaker: 436 posts
Armorama: 320 posts
Posted: Sunday, July 05, 2015 - 07:01 AM UTC
@ G.Houle... Now that is a great way to combine the interests you have going into one project. At 1/32nd scale that should be one massive bird.... will be enjoying this one.
Oh, I sent you an IM....
Bob
Oh, I sent you an IM....
Bob
Bluestab
Joined: December 03, 2009
KitMaker: 2,160 posts
Armorama: 1,906 posts
Posted: Sunday, July 05, 2015 - 10:50 AM UTC
Quoted Text
Naw, your good, I believe you! Get after your build and have some fun!
Thanks. I could have taken new ones with a cellphone or my reader for a date. I did some work on it since then and it would look like I was farther ahead of the build with the new pictures.
Nice choice. When I was building aircraft, I was a big fan of the Phantoms. I built a few but never the 1/32 kit.
andromeda673
Joined: July 30, 2013
KitMaker: 584 posts
Armorama: 525 posts
Posted: Sunday, July 05, 2015 - 10:47 PM UTC
I just ordered up my CAM decals today from the guys over at Sprue bros, I can't wait to get the sheet and get to cracking, it's coming along slowly as most aircraft do. I figured this would be a home run and the best possible build for this particular campaign.
iowabrit
Joined: November 06, 2007
KitMaker: 585 posts
Armorama: 557 posts
Posted: Sunday, July 12, 2015 - 05:41 AM UTC
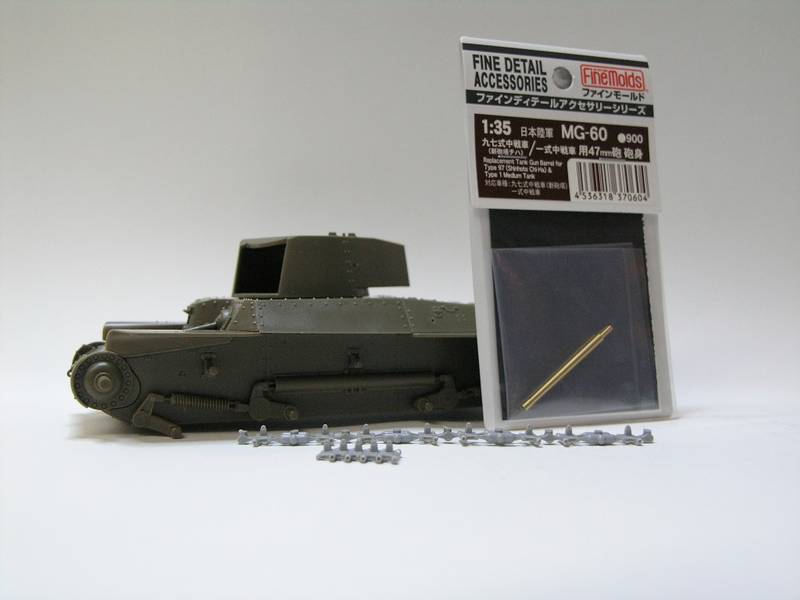
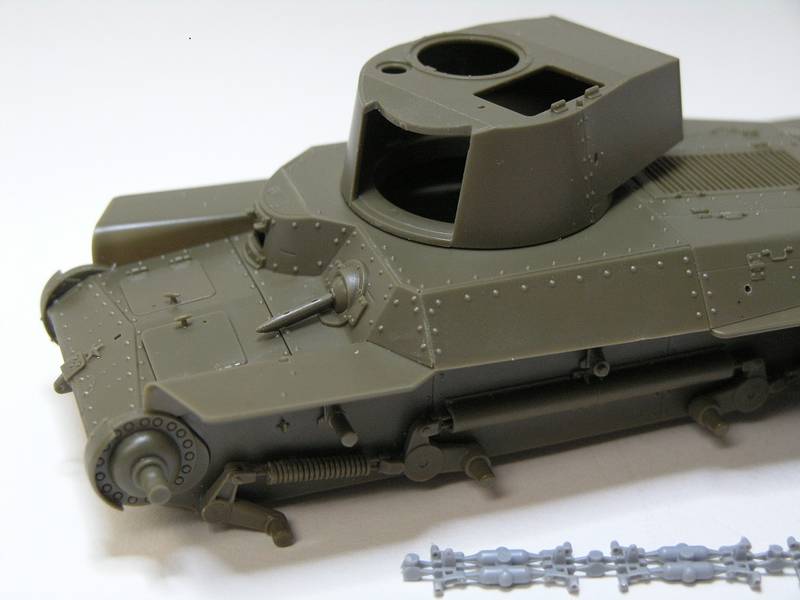
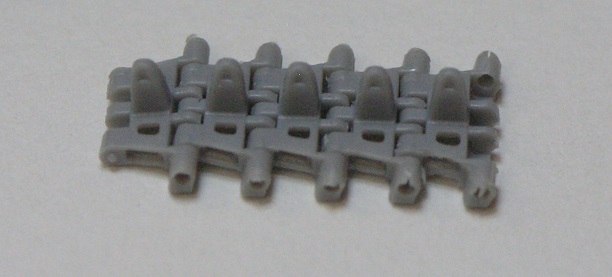
Well, we had our club 'buildathon' yesterday, 12 guys in a room all building kits, B.S.ing and generally having fun. Plus lots of food and drink. I managed to get a good start on the kit without too many problems despite the distractions. You really have to study the instructions FM use the same sprues for different versions and I ended up using two wrong compression springs but the only difference was the length of the attachment so I was able to rectify that. Pretty good fit all round. The Vision tracks have quite a bit of flash on them and don't stay together very well, I will probably have to cement them when it gets too the fitting stage.
bwiber
Joined: August 03, 2008
KitMaker: 436 posts
Armorama: 320 posts
Posted: Sunday, July 12, 2015 - 07:22 AM UTC
@Steve.... Nice build so far. Should really look good when you get some color on it.... To bad about the tracks, but that is how it goes sometimes.
~~~~~~~~~~~~~~~~~~
As for my build.... let me start by saying that I don't like to paint. Unfortunately, this little monster is a lot like building a WWI aircraft... you are painting at each step.
I figured that when I had done the step on the passenger side that was it.... wrong! Here is the drivers side...

The larger step is the working platform for using the crane.
Have I mentioned that I don't like to paint? Well, I have been swinging the paint brushes....

The suspension units, the tracks and that little black rectangle in the back left is the dashboard. Black dials on black panel....

The control T-bar... and yes, it really is chrome with red balls on the ends of the handle...
Finally, more paint.... did I meanti.... Oh, I did? Ok...

The bottom of the dump bed, the pin marks will be covered when I glue the hinges on.

Finally, the dump bed. Tamiya acrylic brushed on and then weathered with Vallejo.
More paint to come.... and really, there aren't that many more bits to go on!
Later,
Bob
~~~~~~~~~~~~~~~~~~
As for my build.... let me start by saying that I don't like to paint. Unfortunately, this little monster is a lot like building a WWI aircraft... you are painting at each step.
I figured that when I had done the step on the passenger side that was it.... wrong! Here is the drivers side...
The larger step is the working platform for using the crane.
Have I mentioned that I don't like to paint? Well, I have been swinging the paint brushes....
The suspension units, the tracks and that little black rectangle in the back left is the dashboard. Black dials on black panel....
The control T-bar... and yes, it really is chrome with red balls on the ends of the handle...
Finally, more paint.... did I meanti.... Oh, I did? Ok...
The bottom of the dump bed, the pin marks will be covered when I glue the hinges on.
Finally, the dump bed. Tamiya acrylic brushed on and then weathered with Vallejo.
More paint to come.... and really, there aren't that many more bits to go on!
Later,
Bob

Namabiiru

#399
Joined: March 05, 2014
KitMaker: 2,888 posts
Armorama: 1,920 posts

Posted: Monday, July 13, 2015 - 03:39 AM UTC
Your weathering of the dumb bed is absolutely spot-on! Can't wait to see it all together. It's going to be impressive!

ComradeMP

#0
Joined: July 31, 2011
KitMaker: 472 posts
Armorama: 453 posts
Posted: Tuesday, July 14, 2015 - 10:04 PM UTC
Finished the suspension. Usually paint and add the road wheels and tracks before I finish off the build.

Some of the upper hull done. The 75mm gun/gun mount is done.
Have some minor filling in to do on the breech end since I'm going to have the hatches open. Also need to paint the interior and gun breech end before I mate the top and lower halves.


Some of the upper hull done. The 75mm gun/gun mount is done.

Have some minor filling in to do on the breech end since I'm going to have the hatches open. Also need to paint the interior and gun breech end before I mate the top and lower halves.

Namabiiru
#399
Joined: March 05, 2014
KitMaker: 2,888 posts
Armorama: 1,920 posts
Posted: Wednesday, July 15, 2015 - 03:49 AM UTC
Quoted Text
Your weathering of the dumb bed is absolutely spot-on! Can't wait to see it all together. It's going to be impressive!
Oops!
 I just noticed: That was supposed to say DUMP bed, not DUMB bed!
Sorry, Bob! By no means intended to be a reflection on your modeling skills!

bwiber
Joined: August 03, 2008
KitMaker: 436 posts
Armorama: 320 posts
Posted: Wednesday, July 15, 2015 - 04:00 AM UTC
Quoted Text
Quoted TextYour weathering of the dumb bed is absolutely spot-on! Can't wait to see it all together. It's going to be impressive!
Oops!
Sorry, Bob! By no means intended to be a reflection on your modeling skills!
Mark,
Don't worry about it. Saw that a while ago and figured it was a typo... of course, that was after I LMAO...
Besides, there are moments that I think DUMB would be the more appropriate term. 
Amazing just how much paint you have to sling at these small ones... and of course, I ended up doing it all by brush.
Later,
Bob
andromeda673
Joined: July 30, 2013
KitMaker: 584 posts
Armorama: 525 posts
Posted: Thursday, July 16, 2015 - 08:40 AM UTC
well after getting some more time at the bench, I got some more work done, and now have the cockpit completed, installed, and the front nose is for the most part now "done". I had to fill some gaps with styrene, I have never had to do this before on a build, I'm glad I learned on the fly, because the gaps were pretty knarly, and there was no way I was not going to address them.


Here are the "gaps" front the front landing gear assembly


Thanks for looking!


Here are the "gaps" front the front landing gear assembly


Thanks for looking!
andromeda673
Joined: July 30, 2013
KitMaker: 584 posts
Armorama: 525 posts
Posted: Saturday, July 18, 2015 - 11:56 PM UTC
Well I made some more progress here over the course of this weekend, and have been spending a good amount of time finally at the old bench!
I ran into some serious gaps here and filled in the seams with sheet styrene, this is the first build I have ever filled gaps, it's very time consuming, but worth it once you get the gaps filled and sanded.


I got the fuselage assembled, and the rear tail fins attached


My only complaint about this kit are how bad the directions/instructions are, it's pitiful. Revell gives you all the parts to make an E model, but no instructions and or directions on what E model parts to use and where.
Regardless, slow and steady is winning the race with this kit, it's actually not a bad kit for it's age, and has been going together as expected.
Some guys have been saying that this is a horrible kit, and shouldn't even't be attempted. As long as it looks like E/J KAI model when done, then I'll be one happy guy!
Namabiiru
#399
Joined: March 05, 2014
KitMaker: 2,888 posts
Armorama: 1,920 posts
Posted: Sunday, July 19, 2015 - 03:41 AM UTC
Looks Phabulous!
andromeda673
Joined: July 30, 2013
KitMaker: 584 posts
Armorama: 525 posts
Posted: Sunday, July 19, 2015 - 07:28 PM UTC
Quoted Text
Looks Phabulous!
thank you!
andromeda673
Joined: July 30, 2013
KitMaker: 584 posts
Armorama: 525 posts
Posted: Tuesday, July 21, 2015 - 07:42 AM UTC
well made some more progress here tonight, it's coming together, slowly but surely seems to be the pace on this one.


Thanks for looking!


Thanks for looking!
Bluestab
Joined: December 03, 2009
KitMaker: 2,160 posts
Armorama: 1,906 posts
Posted: Tuesday, July 21, 2015 - 08:52 AM UTC
starting with my Trumpeter JGSDF Type 82 Command Vehicle. I picked up all three of this family of vehicle during one of Squadron's Black Friday sales. I've built the NBC and Recon vehicles.
Starter picture 1....box.

And the contents.

I went ahead and shot a coat of black on the tires. I added the backside of the hubs. I left the outside off for now until I decide on color schemes. It'll be easier to paint them separate and add then to the tire.

A couple of shots of the suspension. Cleanup can be a bear. The coils are tricky even with a flat file. I left the PE fender pieces, step rungs, and tow hooks for now...they are easily breakable. I used the metal axles to help line up and hold the suspension pieces in place.


With the suspension done I made the decision to not add the driver's compartment. From building the NBC variant, you really cannot see much of the interior. Since I plan on building it buttoned up, I decided to bag up the interior pieces. I built the NBC version with the armored flaps up and even added a driver and co-driver. You cannot see all the work that went on inside.

Rear panel. Assembeled and mounted. I left off the PE jerrycan straps and jerrycans for the timebeing.

And that's it for now.
Starter picture 1....box.
And the contents.
I went ahead and shot a coat of black on the tires. I added the backside of the hubs. I left the outside off for now until I decide on color schemes. It'll be easier to paint them separate and add then to the tire.
A couple of shots of the suspension. Cleanup can be a bear. The coils are tricky even with a flat file. I left the PE fender pieces, step rungs, and tow hooks for now...they are easily breakable. I used the metal axles to help line up and hold the suspension pieces in place.
With the suspension done I made the decision to not add the driver's compartment. From building the NBC variant, you really cannot see much of the interior. Since I plan on building it buttoned up, I decided to bag up the interior pieces. I built the NBC version with the armored flaps up and even added a driver and co-driver. You cannot see all the work that went on inside.
Rear panel. Assembeled and mounted. I left off the PE jerrycan straps and jerrycans for the timebeing.
And that's it for now.
SGTJKJ
#041

Joined: July 20, 2006
KitMaker: 10,069 posts
Armorama: 4,677 posts

Posted: Tuesday, July 21, 2015 - 05:07 PM UTC
Nice progress, Houle. That is really a big beast and will be an impressive build when finished!
Alex, nice start. I am planning to build the recon version of this, but I might change my mind a million times before I actually start building
Alex, nice start. I am planning to build the recon version of this, but I might change my mind a million times before I actually start building

andromeda673
Joined: July 30, 2013
KitMaker: 584 posts
Armorama: 525 posts
Posted: Tuesday, July 21, 2015 - 06:31 PM UTC
Thank you, I'm pretty happy with the progress so far, I'm alot farther along then I thought I was going to be. I'm dreading taping the canopy and going through that three ring circus, but oh crap cookie, what are you going to do.
andromeda673
Joined: July 30, 2013
KitMaker: 584 posts
Armorama: 525 posts
Posted: Wednesday, July 22, 2015 - 06:26 AM UTC
Made some more progress tonight, and got a few more bits and pieces installed, as well as filled and sanded seams and gaps.


Thanks for looking!


Thanks for looking!
Bluestab
Joined: December 03, 2009
KitMaker: 2,160 posts
Armorama: 1,906 posts
Posted: Wednesday, July 22, 2015 - 09:13 AM UTC
Jesper, I think the recon version is the nicer of the three kits. It's a nice little build and has a nice look to it. Be careful with the canon barrel...it's delicate.

Lakota
#123
Joined: November 17, 2008
KitMaker: 1,202 posts
Armorama: 635 posts
Posted: Saturday, July 25, 2015 - 12:38 AM UTC
Howdy Y'all 
@ G. Houle-I'm enjoying watching your build, keep up the posts!
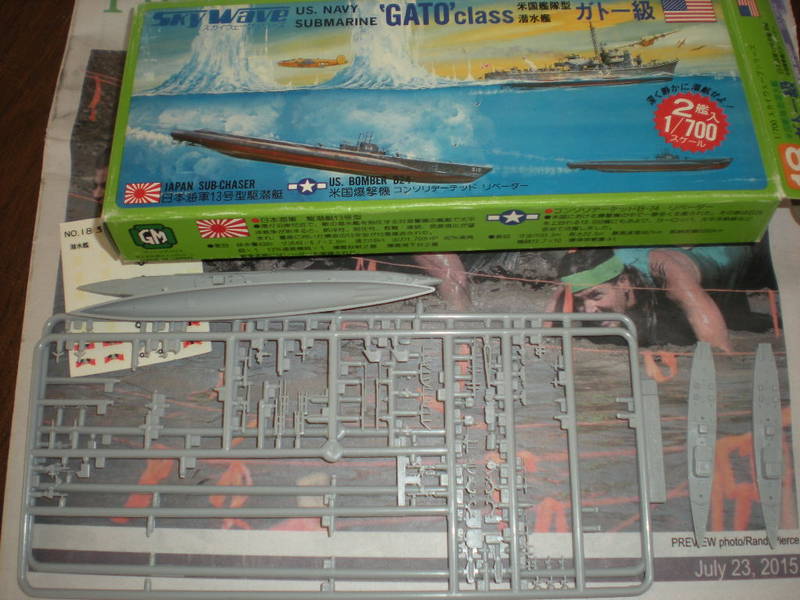
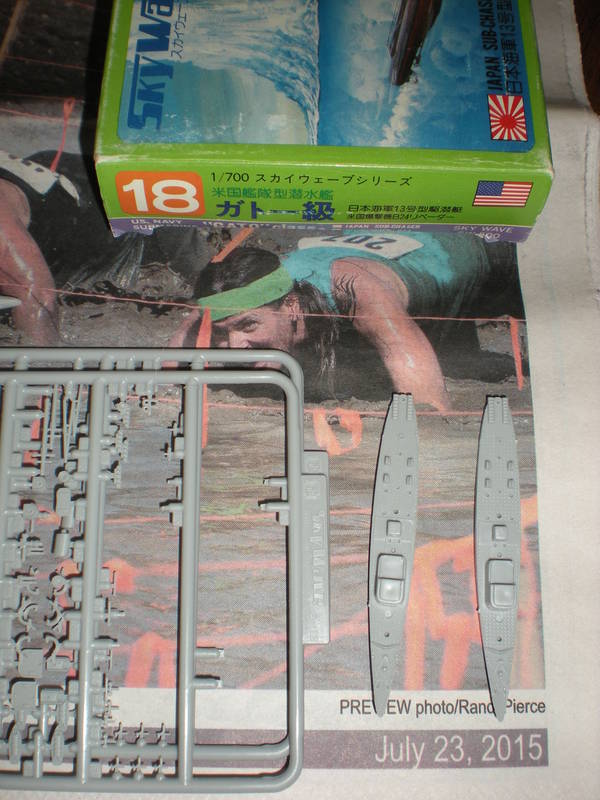
I've decided on my build-an old Skywave kit of an IJN Subchaser. It's very small,1/700, and I might put it in a diorama if I can finish my IJN Ise from the Battleship campaign. I'm going to build the Ise for the Unfinished Business 2015 campaign. I'm getting campaign overload but enjoying it.
Take care,
Don "Lakota"
@ G. Houle-I'm enjoying watching your build, keep up the posts!
I've decided on my build-an old Skywave kit of an IJN Subchaser. It's very small,1/700, and I might put it in a diorama if I can finish my IJN Ise from the Battleship campaign. I'm going to build the Ise for the Unfinished Business 2015 campaign. I'm getting campaign overload but enjoying it.
Take care,
Don "Lakota"
andromeda673
Joined: July 30, 2013
KitMaker: 584 posts
Armorama: 525 posts
Posted: Wednesday, July 29, 2015 - 06:27 AM UTC
well made some more progress tonight and finally buttoned up all of the assembly. I did all the preshading and tomorrow I might get the grey down, we will have to see though.


 |

WEB HOSTING BY


Copyright ©2021 Armorama and Kitmaker Network, a subsidiary of Silver Star Enterprises
All Rights Reserved. Please read our Conditions of Use and Privacy Policy.
All Rights Reserved. Please read our Conditions of Use and Privacy Policy.