Armor/AFV: Axis - WWII
Armor and ground forces of the Axis forces during World War II.
Hosted by Darren Baker
Dragon Panzer IV E 3 in 1
Thudius
Visit this Community
Uusimaa, Finland
Joined: October 22, 2012
KitMaker: 1,194 posts
Armorama: 1,077 posts
Posted: Monday, October 14, 2013 - 09:00 AM UTC
Finally got around to the mg ammo bins and a little fine tuning on the ammo bags. Added a couple of details to the main gun and got everything primed and managed a few coats of paint. I'm using Game Color Elfic Flesh, looks pretty good as a base colour, I wanted to see if Game Color is actually a little more durable than Model Color. Brush painting is an exercise for the patient. 10 minutes to do 2 light coats, 2-3 more for the ivory, then the grey-green and details.


Kimmo
Thudius
Visit this Community
Uusimaa, Finland
Joined: October 22, 2012
KitMaker: 1,194 posts
Armorama: 1,077 posts
Posted: Tuesday, October 15, 2013 - 01:16 AM UTC
A few more coats on today. I also started blocking in the grey-green, I used Lifecolor RAL 7009 and Panzergrau shade for the black. The Lifecolors brush nice enough, but the coverage is nowhere near as good as Vallejo, I'm thinking they will make excellent washes. I picked up 3 sets (16 bottles) to try out on ebay for about 20 euros shipped, a steal in my books.


A couple more painting sessions should do it. The beauty of acrylics is the quick drying time. By the time I've painted everything, the starting point is already dry and ready for another coat. If you've never used acrylics, I can't recommend them enough for brush painting, particularly Vallejos. There's a bit of a learning curve with thinning and brush technique, but they are fairly quick to get the hang of.

Kimmo
Byrden
Visit this Community
Wien, Austria
Joined: July 12, 2005
KitMaker: 2,233 posts
Armorama: 2,221 posts
Posted: Tuesday, October 15, 2013 - 01:38 AM UTC
The right-hand side of the breech, with the rotating handle and other controls, must be unpainted.

David
Thudius
Visit this Community
Uusimaa, Finland
Joined: October 22, 2012
KitMaker: 1,194 posts
Armorama: 1,077 posts
Posted: Tuesday, October 15, 2013 - 03:39 AM UTC

Quoted Text

The right-hand side of the breech, with the rotating handle and other controls, must be unpainted.

David


Yep, just got some overspray

Kimmo
Thudius
Visit this Community
Uusimaa, Finland
Joined: October 22, 2012
KitMaker: 1,194 posts
Armorama: 1,077 posts
Posted: Wednesday, October 16, 2013 - 03:56 AM UTC
I was doing a dry fit to see what could be seen and not seen, turns out there's a good sight line down the right side into the driver's area. I have a Verlinden interior set and used it to get some basic dimensions and started to scratch a transmission unit and the radios. These should fill up the void nicely. May need to do a seat for the driver too.


Quick and dirty as they say. Leaving the parts to set overnight. As you can see, I left the pieces long so they can be trimmed to fit, much less hassle this way. I should get a good session in tomorrow, so hopefully I'll have these and the rest of the interior painted.

Kimmo
Thudius
Visit this Community
Uusimaa, Finland
Joined: October 22, 2012
KitMaker: 1,194 posts
Armorama: 1,077 posts
Posted: Thursday, October 17, 2013 - 05:45 AM UTC
Not as much done today as hoped, pizza making eats into bench time. I did manage to get the transmission, radio and seat done and painted. I also got the canvas painted on the ammo bins, a bit of semi-dry brushing and blending gave it an interesting look. May need to tone it down with a lighter shade. Tomorrow will be a turret detail painting session. I found out that if you let the Lifecolors dry a little, they cover and brush much better. Straight from the bottle, they're much too thin.


Kimmo
Thudius
Visit this Community
Uusimaa, Finland
Joined: October 22, 2012
KitMaker: 1,194 posts
Armorama: 1,077 posts
Posted: Friday, October 18, 2013 - 07:06 AM UTC
Another good session today, got some detail painting done and started on getting the driver's visor sorted. For some reason, there isn't one in the kit. I took a piece of clear sprue and shaped and polished it, then added some thin strip to the visor housing. There's a wee lip, so I figured what the heck.


The turret and hull are almost ready for weathering. Picked out the wires, junction boxes etc and got the steel portions of the gun breech painted. Since I had some paint still handy, I decided to start the chipping/wear on the foot rest and the gun guard. I'll add some more to the heavy wear areas in the turret after I get some touch ups and washes down. I'm going to try out water based oils. I got a starters set as a gift and have been waiting for a chance to play with them. Ordinarily I'd use Vallejo's umber/sepia washes and pigment washes, this should give me a little more flexibility with colour choice and another drybrush option.

Kimmo
Plasticbattle
#003
Visit this Community
Donegal, Ireland
Joined: May 14, 2002
KitMaker: 9,763 posts
Armorama: 7,444 posts
Posted: Friday, October 18, 2013 - 11:43 AM UTC
Great job on the interior Kimmo. Looks great so far.
Thudius
Visit this Community
Uusimaa, Finland
Joined: October 22, 2012
KitMaker: 1,194 posts
Armorama: 1,077 posts
Posted: Friday, October 18, 2013 - 11:51 AM UTC
Thanks! The going is a little slow at times, but it sure is fun.

Kimmo
retiredyank
Visit this Community
Arkansas, United States
Joined: June 29, 2009
KitMaker: 11,610 posts
Armorama: 7,843 posts
Posted: Friday, October 18, 2013 - 12:14 PM UTC
Wow! You have done some spectacular work, here! Wish I had caught this one from the beginning. I have some trouble, with Sketchup. I know my way around AutoCad and E-Machine Shop. I may have missed an earlier post, but do you intend to have Shapeways print your design?
Thudius
Visit this Community
Uusimaa, Finland
Joined: October 22, 2012
KitMaker: 1,194 posts
Armorama: 1,077 posts
Posted: Friday, October 18, 2013 - 12:28 PM UTC

Quoted Text

Wow! You have done some spectacular work, here! Wish I had caught this one from the beginning. I have some trouble, with Sketchup. I know my way around AutoCad and E-Machine Shop. I may have missed an earlier post, but do you intend to have Shapeways print your design?


Thanks for the kind words. I'll have to look into this whole Shapeways process and cost of course. I just started playing around with Sketchup myself so there's still a bit of learning to be done and I've only got the free version, so I don't know what impact that will have if any. I do have a pdf with all the dimension call-outs if anyone wants to have a go at scratching their own basic hull interior. I may add more bits and pieces as I get more familiar with the software. I started off doing the designs for future projects (easier than note taking) I've got 2 more IVs in the stash and will probably get more at some point.

Kimmo
AFVFan
Visit this Community
North Carolina, United States
Joined: May 17, 2012
KitMaker: 1,980 posts
Armorama: 1,571 posts
Posted: Friday, October 18, 2013 - 03:40 PM UTC
Really nice work so far, Kimmo.
Thudius
Visit this Community
Uusimaa, Finland
Joined: October 22, 2012
KitMaker: 1,194 posts
Armorama: 1,077 posts
Posted: Friday, October 18, 2013 - 10:45 PM UTC
Thanks Bob!
Rocco_1955
Visit this Community
New York, United States
Joined: September 22, 2013
KitMaker: 19 posts
Armorama: 16 posts
Posted: Monday, October 21, 2013 - 01:56 AM UTC
Kimmo, Fantastic work! I know I'll never be able to scratch build like that, but it has been fun to watch so far. What kind of reference are you using for the interior?
Thudius
Visit this Community
Uusimaa, Finland
Joined: October 22, 2012
KitMaker: 1,194 posts
Armorama: 1,077 posts
Posted: Monday, October 21, 2013 - 02:35 AM UTC

Quoted Text

Kimmo, Fantastic work! I know I'll never be able to scratch build like that, but it has been fun to watch so far. What kind of reference are you using for the interior?


Thanks! Most of the scratch stuff is fairly basic work with sheet styrene, strip and stretched sprue, so with a bit of practice and a few hundred mistakes along the way, anyone can do it. It really is fairly easy with some patience and practice. As for refs, I've got Jonathan Forty's Pz IV A-J, great pics, text and captions can be a wee bit off though. Spielberger's latest edition, Achtung Panzer and stuff from the net. The kit is a good start in helping get relative placement sorted out. I haven't tried to do 100% accurate, just close enough and busy enough. Once she's closed up, I'm not sure what will be seen and not be seen. That's sort of what this project was all about, to know what's needed next time around.

Kimmo
Thudius
Visit this Community
Uusimaa, Finland
Joined: October 22, 2012
KitMaker: 1,194 posts
Armorama: 1,077 posts
Posted: Monday, October 21, 2013 - 01:13 PM UTC
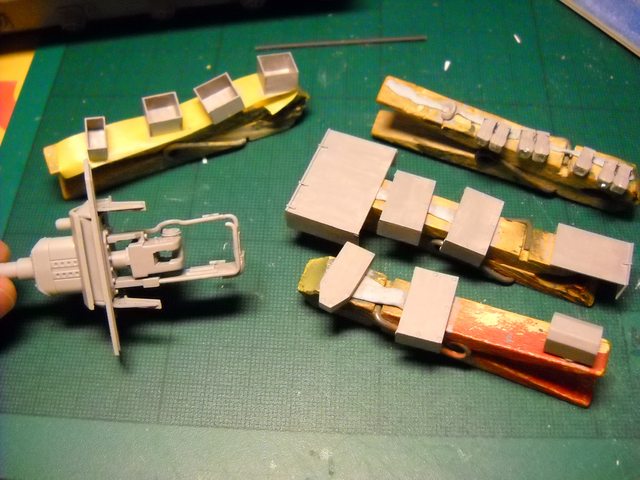
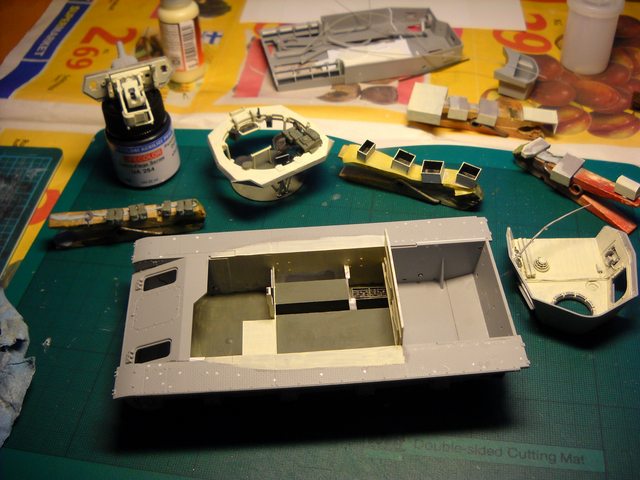
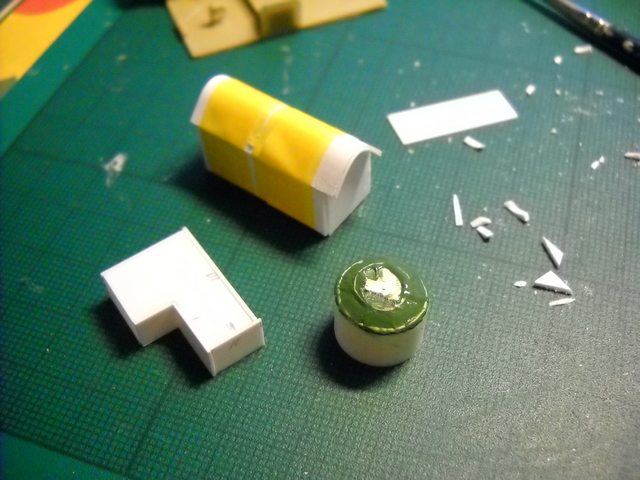
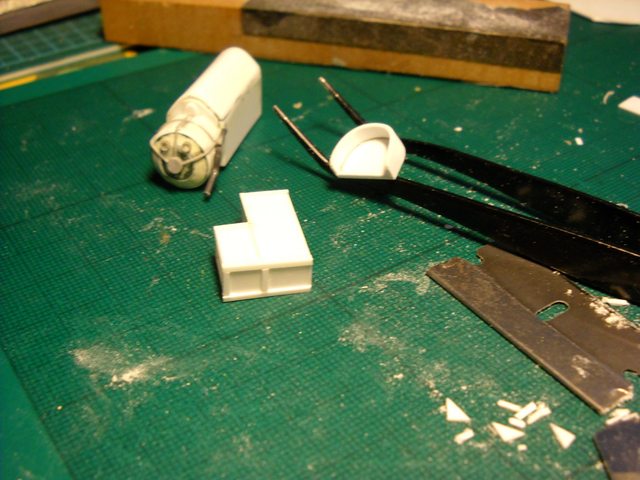
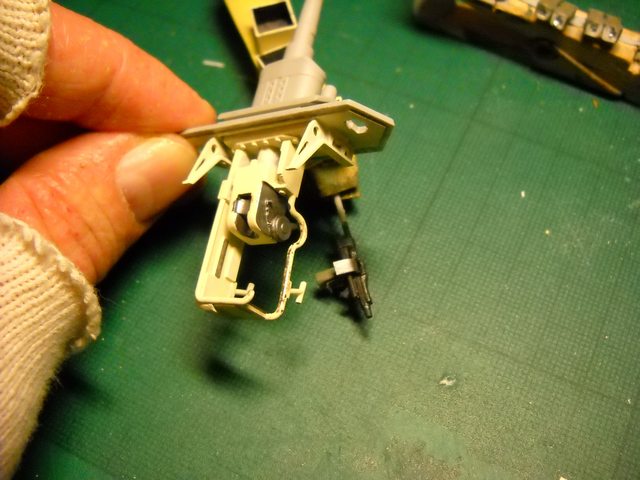
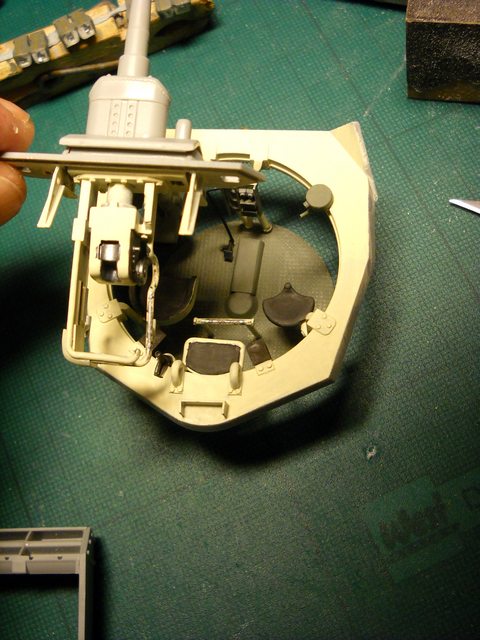
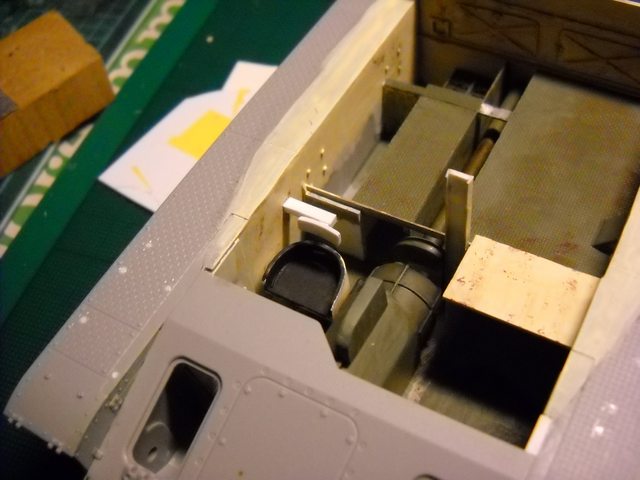
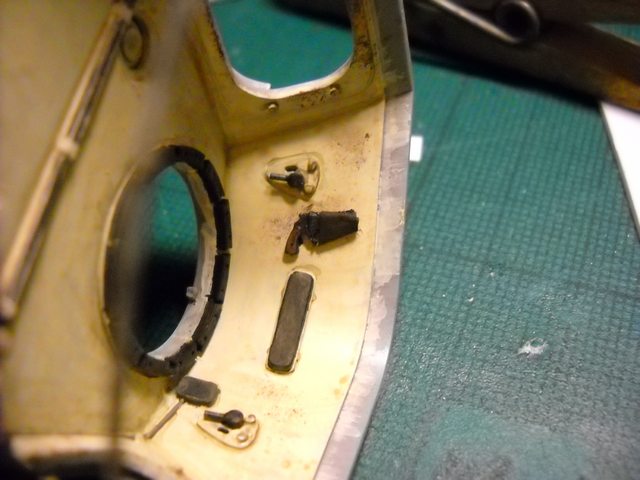
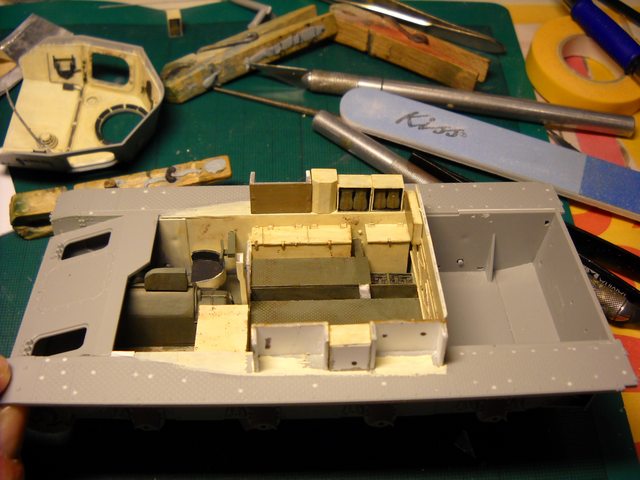
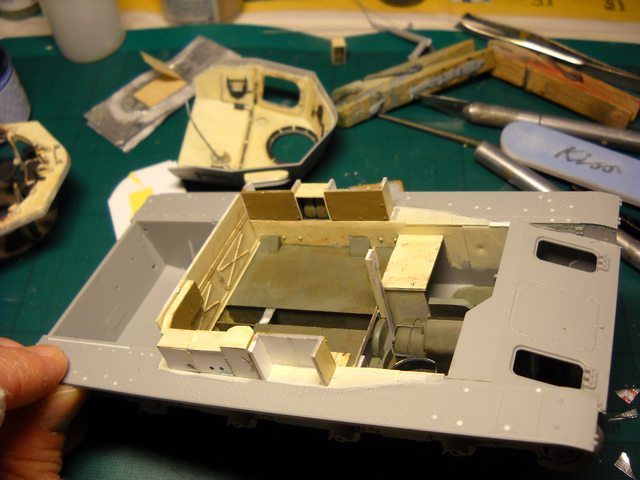
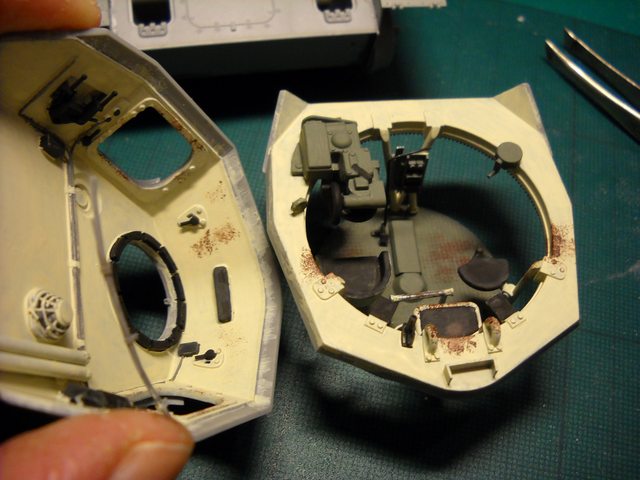
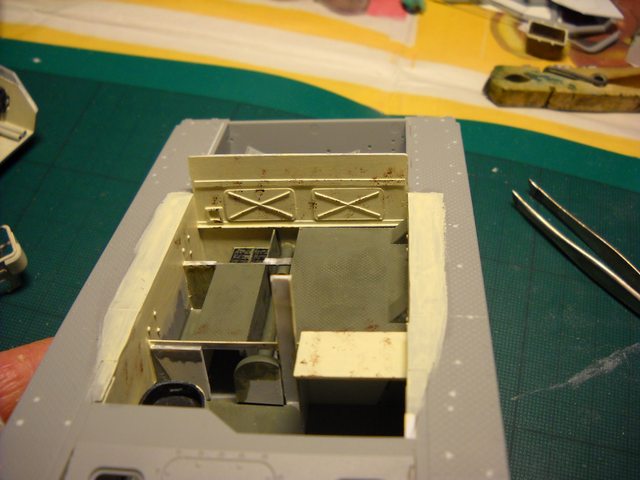
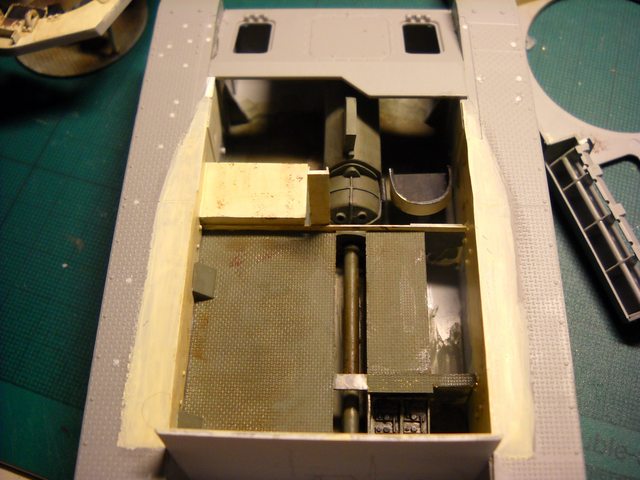
Got a lot of detail work and weathering done today. I was looking forward to using the water based oils only to discover they were regular oils. Silly relatives. Lifecolor to the rescue. As I suspected, they do make excellent washes. But first things first; I started the heavy wear areas with a sponge application of dark reddish brown, then followed up with some brownish gunmetal. Turned out quite nice if I say so myself, maybe a little too rusty looking for a desert, but it will get toned down with some pigments. Next up was a wash of thinned umber wash from Vallejo to tone down the ivory, then a beige/grey pin wash. Added the drivers glass, bow mg and vision blocks. The transmission unit was weathered and glued in place as was the shell basket. Also added the missing floor plate and glued the mg ammo bags in their bins. A few lighter coats on some of the grey green surfaces to break up the monotony and so on and so forth and such. Rinse, repeat. As mentioned, a filter with pigments still needs to be applied, the bins glued in place and I can close the hull.


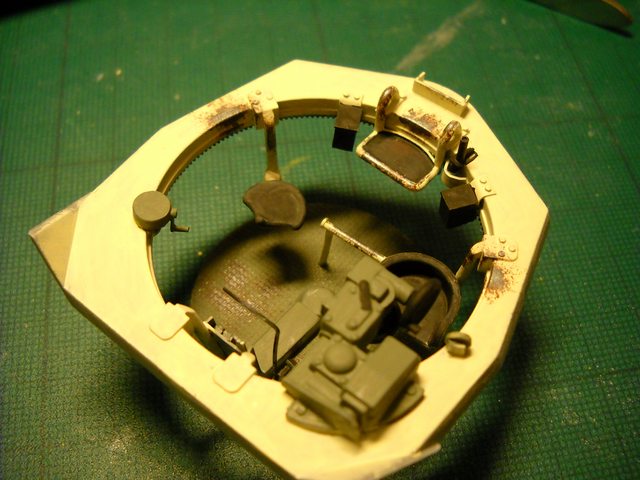
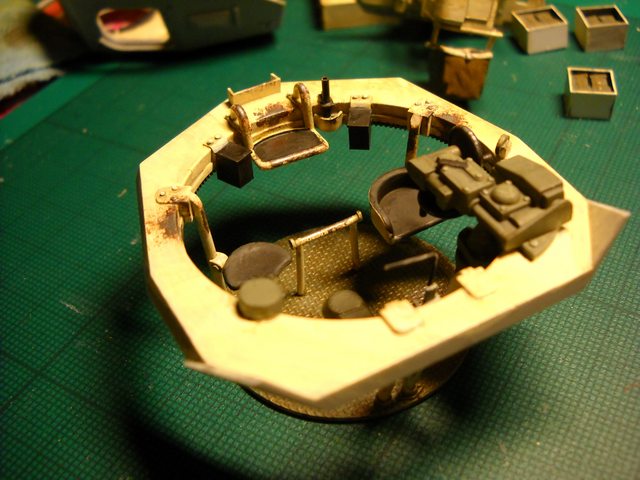
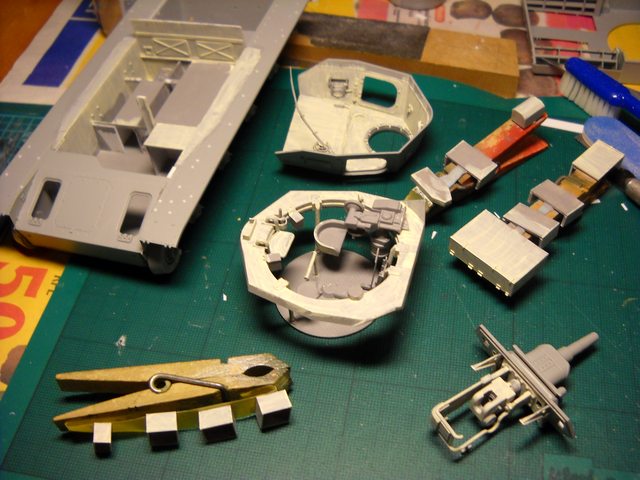
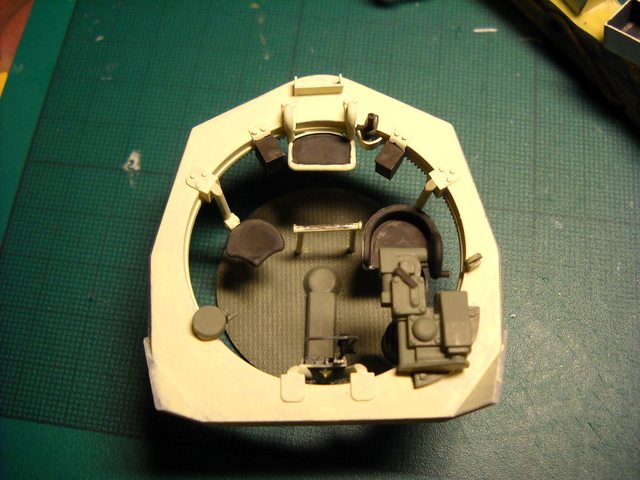
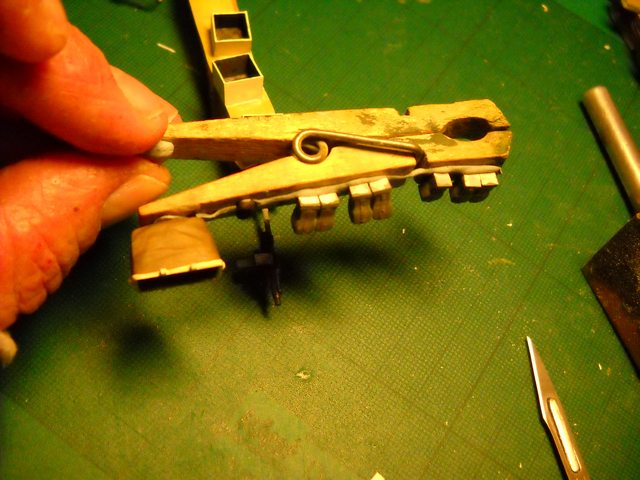
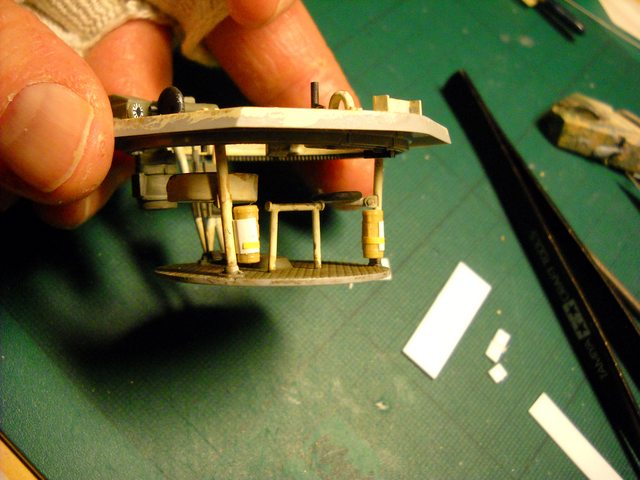
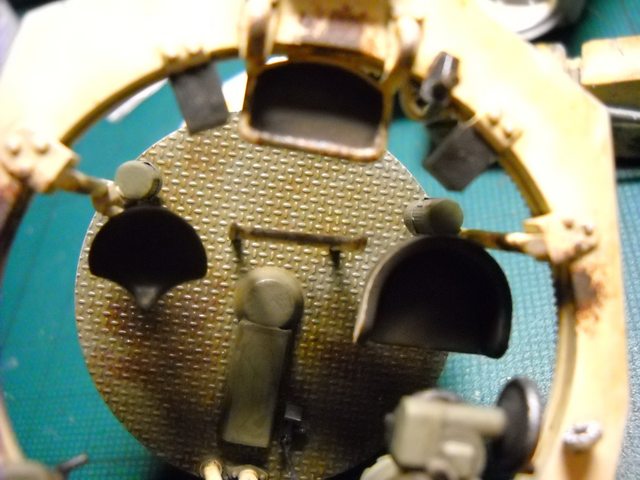
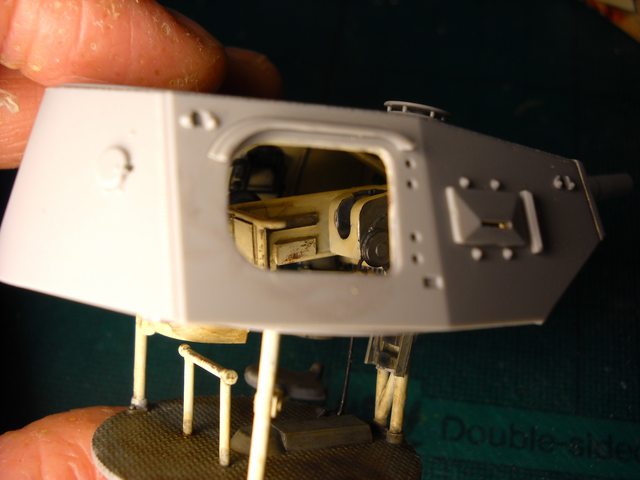
I put the turret together, no glue, just to see what's going on. Unsurprisingly, not a whole lot can really be seen, not to mention being tricky to get decent pictures.


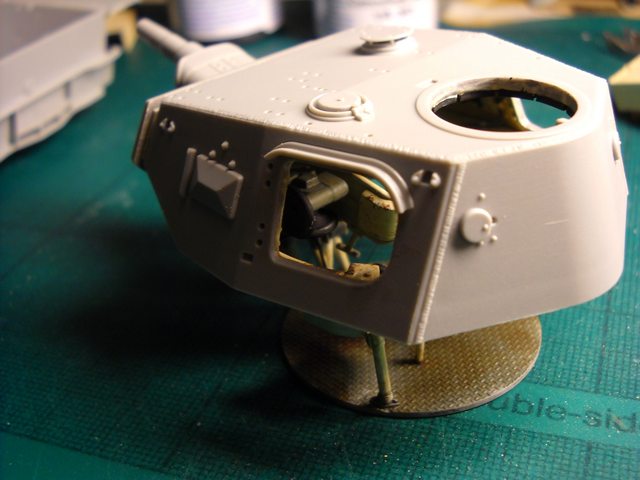
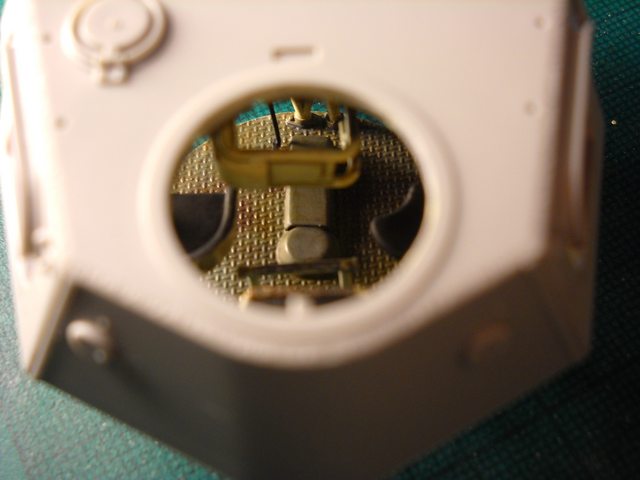
Still need a few details in the turret, and then that can be closed up too.

For those interested, I did some preliminary stuff with Shapeways to get a feel for cost and so on. Let's just say that some more work and head scratching is needed. I was surprised how reasonable costs are, but if I did do a proper set, I don't think it would be cheaper than what's available in resin. The floor is looking to be in the $18-20 US range (not including shipping) depending on a few variables and how little the mark up would be. To be honest, I don't think it will be worth doing unless I can figure out how to seriously reduce the cost which is determined by the volume of the design. Minimum thicknesses need to be taken into account and the thicker the walls, the more material, the higher the cost. I'll play with it some more and see what can be done. That's it for today.

Kimmo

retiredyank
Visit this Community
Arkansas, United States
Joined: June 29, 2009
KitMaker: 11,610 posts
Armorama: 7,843 posts
Posted: Monday, October 21, 2013 - 03:09 PM UTC
You must have the patience of a saint. I believe that vehicles in the desert would be nearly as rusty as those in a temperate climate. Heat will cause metal to rust. This is why one of the first things to rust are exhaust systems. Also, you could consider 50 gallon burn barrels. They are covered in rust.
AFVFan
Visit this Community
North Carolina, United States
Joined: May 17, 2012
KitMaker: 1,980 posts
Armorama: 1,571 posts
Posted: Monday, October 21, 2013 - 11:18 PM UTC

Quoted Text

You must have the patience of a saint. I believe that vehicles in the desert would be nearly as rusty as those in a temperate climate. Heat will cause metal to rust. This is why one of the first things to rust are exhaust systems. Also, you could consider 50 gallon burn barrels. They are covered in rust.


It's actually a combination of heat and moisture. While the desert has the heat, there's a much lower humidity level than say, central Europe.
AFVFan
Visit this Community
North Carolina, United States
Joined: May 17, 2012
KitMaker: 1,980 posts
Armorama: 1,571 posts
Posted: Monday, October 21, 2013 - 11:43 PM UTC
Kimmo - are the large sink marks on the insides of the driver's and R/O positions going to be out of sight? It's hard to see the angles in the pictures.

On a different note, while your build is photo intensive, it takes forever to load, and continually bogs down on my system. Are you resizing the pictures? If so, to what size (pixel-wise)? Personally, I go between 600 and 800 pixels (on the long side). I'd really like to keep following your progress, but it just took me 25 minutes to scroll the page and add two comments.
SDavies
Visit this Community
England - South East, United Kingdom
Joined: January 09, 2010
KitMaker: 979 posts
Armorama: 959 posts
Posted: Monday, October 21, 2013 - 11:45 PM UTC
Very nice progress

I have problems looking at the images too, often they do not load properly ?
Thudius
Visit this Community
Uusimaa, Finland
Joined: October 22, 2012
KitMaker: 1,194 posts
Armorama: 1,077 posts
Posted: Tuesday, October 22, 2013 - 12:25 AM UTC
Thanks for the comments gents. I didn't realize the pics were causing problems. I haven't re-sized them as nobody has mentioned having any problems with them before, with this blog or any other of my posts. I'll do the next batch at 50% and see how that works. I do notice that any page that has a lot of pics can be a pain to load sometimes, not speaking specifically with mine, although it does take a while to load when it's getting near the end of the page.

Kimmo

PS I just went back and edited the photos, this turned out to be rather simple. Most image hosting sites should give you an option to re-size the linked image (in this case imgur) with a little link sorcery: image123xxx.jpg is ginormous, so we add an "l" (lower case L) before the file extension image123xxxl.jpg. Viola. Re-sized. You can also use "m" or "s".
AFVFan
Visit this Community
North Carolina, United States
Joined: May 17, 2012
KitMaker: 1,980 posts
Armorama: 1,571 posts
Posted: Tuesday, October 22, 2013 - 07:24 AM UTC
Glad you got the photo problem sorted out. This loads much, much faster now.
Thudius
Visit this Community
Uusimaa, Finland
Joined: October 22, 2012
KitMaker: 1,194 posts
Armorama: 1,077 posts
Posted: Tuesday, October 22, 2013 - 09:08 AM UTC
Good to hear it's loading better now, on to the latest.

I decided to add the radioman's seat back to fill up space, cobbled a flare pistol holder out of foil and a flare gun from a Dragon set and added a couple of gas masks to the turret supports. Glued all the ammo bins in place and noticed a small oopsie. Somewhere my measurements have clearly gone wrong because the single bin won't fit in the left side sponson and the right side fit is a bit tighter than it should be. Oh well, next time I'll have to be more careful. As soon as the bins set, I'll seal up the hull and get cracking on the exterior. I'm pushing to get everything done and base coated within the next week or so to start on an OOTB build for Armorama, so stay tuned for that too.


A peek at the commander's binocular case and guard for the gunner's sight.


And I forgot to reply regarding the ejector marks in the forward hull, they won't show, or at least not in any obvious way. Not much light will get into the front compartment once closed up. I am pleasantly surprised with how much more durable the Game Color is compared to Model Color, so a head's up to give Game Color a shot as a base coat. And one more observation, Model Color German Fieldgrey is pretty close to Lifecolor's RAL 7009.

Kimmo
Thudius
Visit this Community
Uusimaa, Finland
Joined: October 22, 2012
KitMaker: 1,194 posts
Armorama: 1,077 posts
Posted: Thursday, October 24, 2013 - 10:17 AM UTC
Last update for a bit, something came in the mail that I wasn't expecting until next week.


The hull is now closed up. Had some issues at the back with fit and had to add a strip of 10 thou to close the gap. Some minor gaps at the front too, but those will be hidden with the extra armour. I might get some stuff done while I work on the other project, I figure 2 weeks or so if all goes well until I can get back to this full time.

Kimmo
retiredyank
Visit this Community
Arkansas, United States
Joined: June 29, 2009
KitMaker: 11,610 posts
Armorama: 7,843 posts
Posted: Thursday, October 24, 2013 - 10:38 AM UTC
Closing the hull is a major step. All of Dragon's panzers have fit issues with the upper and lower hull. This build has been very inspiring. I just have to clear out a few shelf queens, before I can start my build.