Armor/AFV: Axis - WWII
Armor and ground forces of the Axis forces during World War II.
Hosted by Darren Baker
Dragon Panzer IV E 3 in 1
Thudius
Visit this Community
Uusimaa, Finland
Joined: October 22, 2012
KitMaker: 1,194 posts
Armorama: 1,077 posts
Posted: Thursday, October 24, 2013 - 11:27 AM UTC

Quoted Text

Closing the hull is a major step. All of Dragon's panzers have fit issues with the upper and lower hull. This build has been very inspiring. I just have to clear out a few shelf queens, before I can start my build.


Glad someone is enjoying it. This is just my second Dragon and things do seem to be hit and miss sometimes. I probably threw things out of whack slightly with the interior, but luckily nothing major. I forgot to mention I did need to remove the box in the upper right rear sponson (it may only be on E and lower marks) as it was interfering with the mg ammo bin and a minor trim of the forward ammo bin. All in all, a pretty good result.

Kimmo
Thudius
Visit this Community
Uusimaa, Finland
Joined: October 22, 2012
KitMaker: 1,194 posts
Armorama: 1,077 posts
Posted: Monday, November 04, 2013 - 08:24 AM UTC
Looks like another couple of weeks until I can get back on track. I've got my hands full trying to overcome precision engineering. That was sarcasm, in case you were wondering.

Kimmo
retiredyank
Visit this Community
Arkansas, United States
Joined: June 29, 2009
KitMaker: 11,610 posts
Armorama: 7,843 posts
Posted: Tuesday, November 05, 2013 - 12:01 AM UTC
Build your professor a tank, using your amazing scratch building skills.
Thudius
Visit this Community
Uusimaa, Finland
Joined: October 22, 2012
KitMaker: 1,194 posts
Armorama: 1,077 posts
Posted: Tuesday, November 05, 2013 - 04:20 AM UTC

Quoted Text

Build your professor a tank, using your amazing scratch building skills.


I just might. Let's say that my current build is rather old school in many ways. Can't wait to get it done with.

Kimmo
retiredyank
Visit this Community
Arkansas, United States
Joined: June 29, 2009
KitMaker: 11,610 posts
Armorama: 7,843 posts
Posted: Tuesday, November 05, 2013 - 04:42 AM UTC
"Old school" seems to work, for you. Have you considered making your own photo-etch or working with a CAD program to have resin pieces printed for you?
Thudius
Visit this Community
Uusimaa, Finland
Joined: October 22, 2012
KitMaker: 1,194 posts
Armorama: 1,077 posts
Posted: Tuesday, November 05, 2013 - 05:46 AM UTC

Quoted Text

"Old school" seems to work, for you. Have you considered making your own photo-etch or working with a CAD program to have resin pieces printed for you?


Several times. I don't have a place to do any of the etching, and I did do some resin casting way back when. I'll still do small parts when necessary using epoxy putty and latex or something similar that doesn't smell. I've only got half the dining room table to use for a few hours at a time so no stinky chemicals and stuff, and no leaving parts out to dry overnight either. 3D software and printing is interesting, and something that I will look at more closely in the future. I grew up with Fine Scale and the like and learned to do a lot of neat little things; basically all scratch building is a bunch of little things added to other little things. I find it more satisfying to make your own than buy something off the shelf wherever possible. Cheaper too. Hopefully this build will inspire people to try their hand at making stuff themselves. It's really quite incredible what you can actually make with a little practice and patience without any specialist tools.

Kimmo
Thudius
Visit this Community
Uusimaa, Finland
Joined: October 22, 2012
KitMaker: 1,194 posts
Armorama: 1,077 posts
Posted: Thursday, November 14, 2013 - 02:06 PM UTC
Still got my hands full with the other project, as I said the last time, hopefully next week.

Kimmo
HipKitty
Visit this Community
Pennsylvania, United States
Joined: February 14, 2011
KitMaker: 390 posts
Armorama: 387 posts
Posted: Friday, November 15, 2013 - 03:51 PM UTC
Nice work!
Thudius
Visit this Community
Uusimaa, Finland
Joined: October 22, 2012
KitMaker: 1,194 posts
Armorama: 1,077 posts
Posted: Saturday, November 16, 2013 - 12:15 AM UTC
Thank you.
Thudius
Visit this Community
Uusimaa, Finland
Joined: October 22, 2012
KitMaker: 1,194 posts
Armorama: 1,077 posts
Posted: Saturday, November 23, 2013 - 09:07 AM UTC
Soon. Very soon...I need to get back to something relaxing and easy like scratch building a turret interior.

Kimmo
Thudius
Visit this Community
Uusimaa, Finland
Joined: October 22, 2012
KitMaker: 1,194 posts
Armorama: 1,077 posts
Posted: Sunday, November 24, 2013 - 08:13 AM UTC
And we're back. Feels nice to get back to doing something for myself. Right, on to the update. Just some minor bits and pieces today, fixed up the bullet splash guards with some angled Plastruct, added the applique side armour and the bolts that were shaved off the fenders way back when. Still need to go back and add weld seams to the splash guards. Rather than try to shave off all of the guards, I just cut and shaved off a bit from the ends of the longer pieces and sanded as needed, the short one was dead simple. Glued a few more bits here and there. I ended up having to re-glue the front superstructure/hull join, it hadn't set properly. Fortunately it was a simple matter of slicing a bond or two, gluing and clamping. Having been away from it for almost a month, I didn't realise how far along I am. I'll have to start thinking about paint soon.


Hopefully some more tomorrow.

Kimmo
Thudius
Visit this Community
Uusimaa, Finland
Joined: October 22, 2012
KitMaker: 1,194 posts
Armorama: 1,077 posts
Posted: Monday, November 25, 2013 - 07:39 AM UTC
Got the welds done and added some details to the rear hull. Only 2 pics, the welds don't show up that great, need a coat of paint first. I also got a coat of paint on the intakes, better to do that now, and added the shutters and wing nuts. I got somewhat carried away plugging holes in the fenders when I started, turns out I should have left a few open. Oops.


That's it for now, next update sometime this week.

Kimmo
Thudius
Visit this Community
Uusimaa, Finland
Joined: October 22, 2012
KitMaker: 1,194 posts
Armorama: 1,077 posts
Posted: Wednesday, November 27, 2013 - 06:09 AM UTC
A quick session today, slapped some paint on those hard to reach places and did some work with the running gear and suspension.


I replaced the return rollers with ones from another Dragon kit, not sure which one, got them off ebay with a bunch of other spares. You can see the size difference. Curiosly, the drawings in the Spielberger book show the larger ones being correct in size and the newer ones being a touch undersized. I haven't dug around to see what the actual diameter of the real life items were.


And a few shots of the weld beads with paint


More tomorrow.

Kimmo
Thudius
Visit this Community
Uusimaa, Finland
Joined: October 22, 2012
KitMaker: 1,194 posts
Armorama: 1,077 posts
Posted: Thursday, November 28, 2013 - 07:20 AM UTC
Some more progress on the rear hull. I'm jazzing up the exhaust to make it look more like what it should, the exhausts leading into the muffler are fairly obvious on earlier models. So out comes the rod, gentle heat and a light bend. The kit's muffler needs the the supports shaved off for a more realistic look, I left one sort of there to help with aligning things. The muffler will get some strips of styrene or left over pe to clamp it in place later. I shaved a couple of slices of sprue for the mounting flanges and sanded them down, they need to set completely before I drill out holes for the pipes. Got started on the rear flaps too. Some serious thinning down is going to be needed on the sides. I may just end up making them from brass sheet or from a set I have lying around. We'll see.


That's it for now

Kimmo


Thudius
Visit this Community
Uusimaa, Finland
Joined: October 22, 2012
KitMaker: 1,194 posts
Armorama: 1,077 posts
Posted: Friday, November 29, 2013 - 04:32 AM UTC
More fiddly work. Thinned the fenders a bit, stretched sprue was used to fill the slight gaps, better than putty. Progress on the muffler, pipes added and the body dinged up a bit. Used some stretched sprue to create the weld bead around the outlet.Speaking of stretched sprue (sure gets used a lot) I added some missing tread plate detail. The Fender supports are supposed to go onto a bare spot, but the bare spot isn't really in the right place on the left side. The whole upper hull/fender sit is slightly out of whack on this kit. Nothing major, just annoying. Started on a new jack block, the one in the kit is ok, but just looks way overscale with the grain. I'd have to scribe something on the sides and so on, so I figured I'll just do up one. I have an etch set that includes a nice bracket and straps.


Maybe some more tomorrow depending on how beery the night gets DJing tonight.

Kimmo


Thudius
Visit this Community
Uusimaa, Finland
Joined: October 22, 2012
KitMaker: 1,194 posts
Armorama: 1,077 posts
Posted: Saturday, November 30, 2013 - 05:41 AM UTC
Winter beer is yummy and dangerous. Got a short session in today, added some more bits to the rear and noticed my sprues are getting nice and empty. Did some work on the nose armour. It sits a wee bit high so I shaved it down a little and added new braces and of course, weld beads. I thinned the side braces down as well and added welds too.


That's it for the weekend. Time to catch up on sleep and hockey.

KImmo
Thudius
Visit this Community
Uusimaa, Finland
Joined: October 22, 2012
KitMaker: 1,194 posts
Armorama: 1,077 posts
Posted: Wednesday, December 04, 2013 - 02:14 AM UTC
Not much bench time this week, which sucks. Can't have everything I guess. Been doing some clean up on joins and filling gaps and starting to get going on the fiddly bits. First off, thinned down the rear mud flaps some more and gently bent them out of shape. The plastic is actually quite pliable. Got the spare wheel rims glued together, even though you won't need glue, the fit is that tight. You may need to do a little sanding, make sure you press the halves completely together! Also watch out for alignment if you choose to leave the hubs off to show the gear rings (a nice detail BTW) as there are no alignment stops. You'll have to eyeball it.

Also take care when removing the rims from the sprues, a side cutter won't really work here so use a razor blade to slice them off the sprues. Trim/sand the nubs down on the sides first, shave off excess material on the inner faces and then scrape the outer faces as needed. The flange is quite thin and will distort or get sliced off easily if you aren't careful.


I was doing some dry fitting of the rubber sections to the wheel rims. This will not be fun. Dragon provides the two separately to theoretically make painting easier. For the spares, this works quite well, the rings just slip on and should be able to take a coat of paint. The rest will need a good shaving down to get them to slide over the rims without paint! More on that when I get around to it.

I am getting seriously close to putting some paint on this thing. I need to sort out a few minor details, then etch for the tool clamps. I also need to decide whether to attach them before or after the base coat is on. Decisions, decisions.

Kimmo
Thudius
Visit this Community
Uusimaa, Finland
Joined: October 22, 2012
KitMaker: 1,194 posts
Armorama: 1,077 posts
Posted: Monday, December 09, 2013 - 11:06 AM UTC
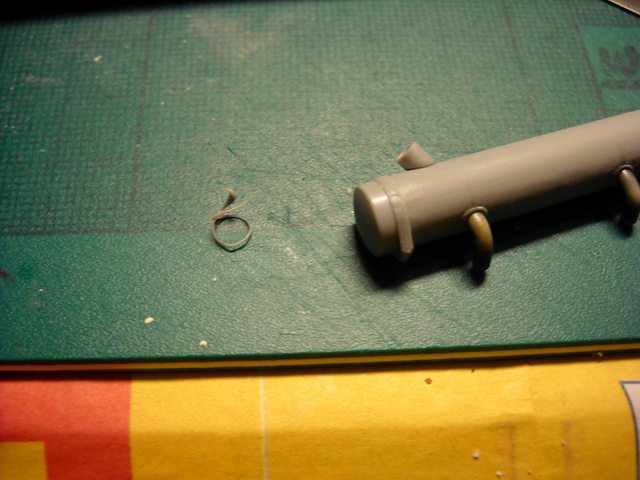
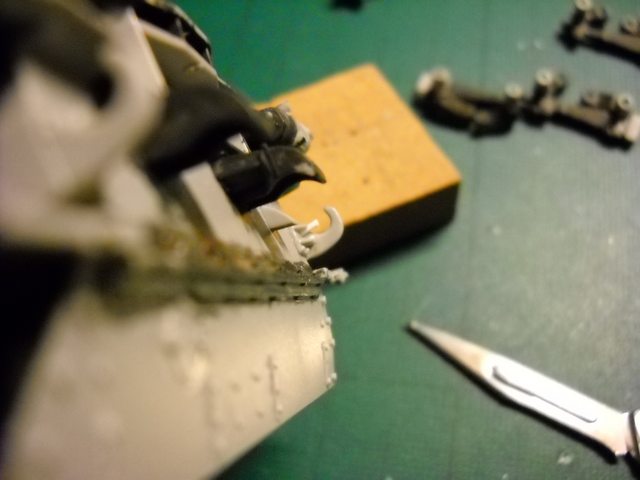
Got on with the suspension today. It feels like one of those cooking shows. Here's some swing arms I had made earlier...

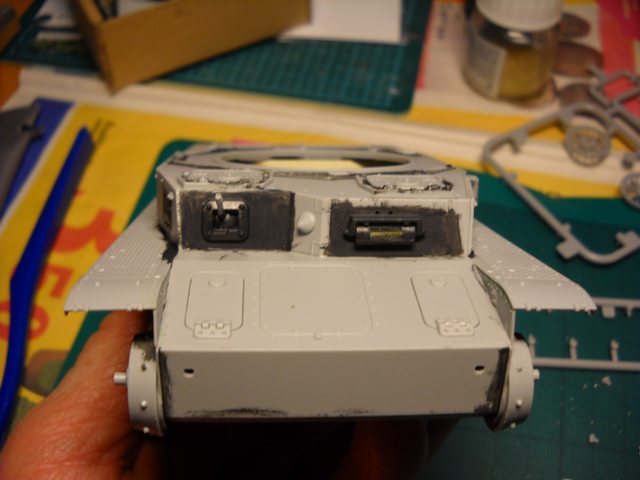
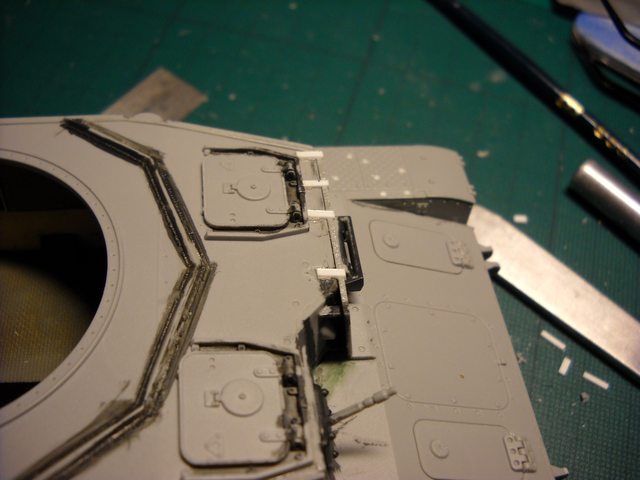
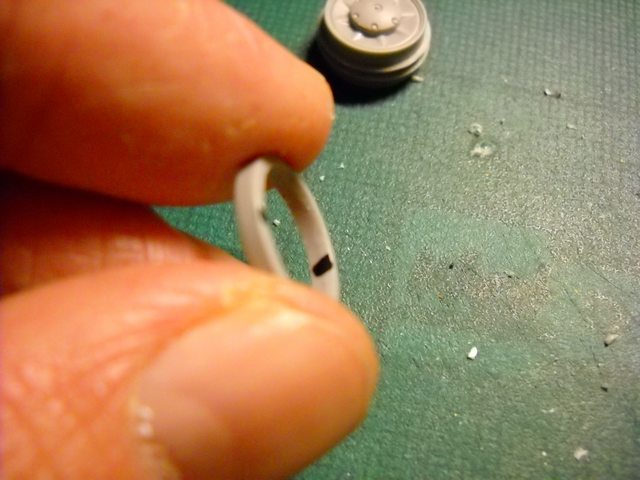
The suspension in the kit is designed to articulate. When I started building, I hadn't the foggiest idea whether this would be going on a base or not, still don't, so I decided to leave the working bits functional. I pre-painted the hard to reach areas once again, layed the hull on its side and was prepared for some foul language and a well fed floor. Neither happened. A pre Christmas miracle! A small dab of glue on the top of the thingy, I love technical terms, and all is good.


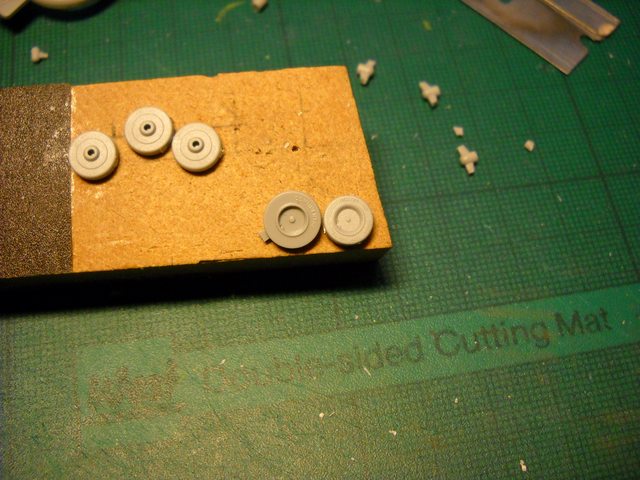
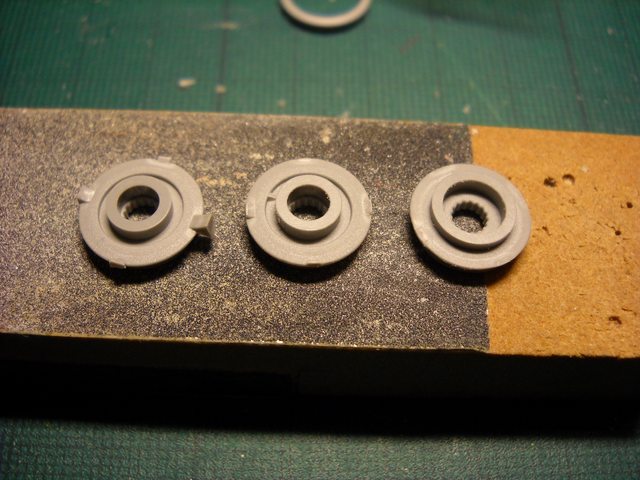
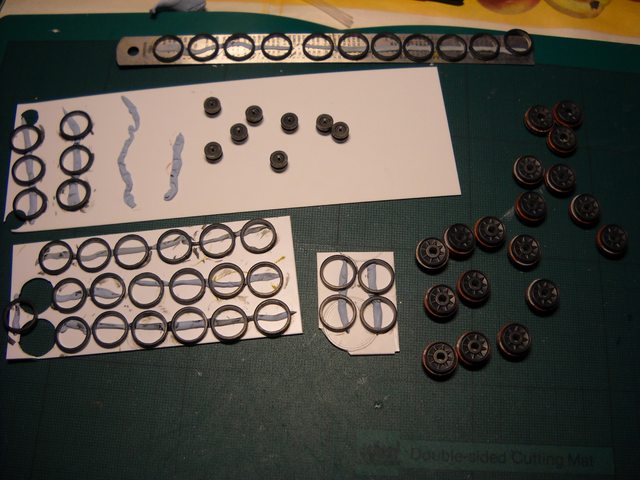
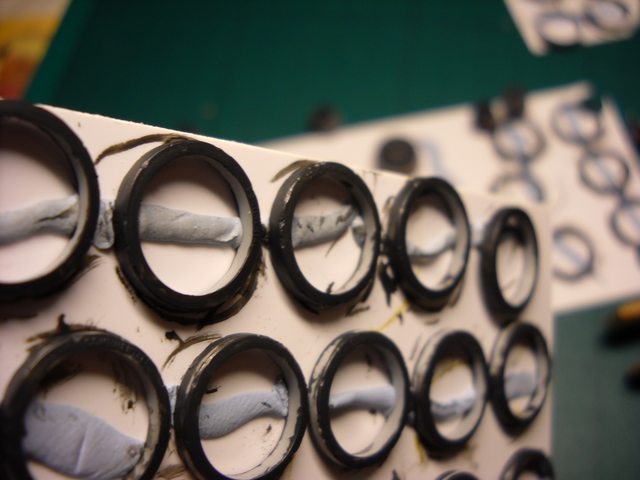
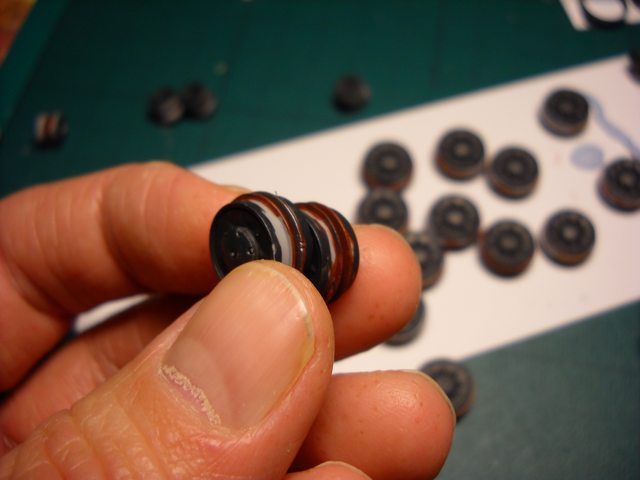
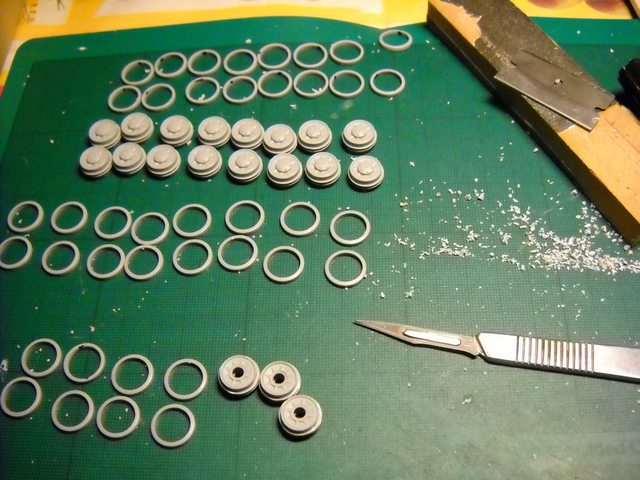
Next up, cleaning the tires. As I mentioned earlier, the fit is tight. Very tight. The weird thing is, the tight fit is only a problem on the outer faces of the road wheels. The inner faces are fine as are the spares. I ended up gently shaving the inner rear edge a few times to give it a bit of a bevel. The fit is much better now, I may need a quick pass with a file. Fortunately I only had to do 16 of them, next step will be to give them some wear and tear. Slapped primer in between the wheels and called it a day.


Some of you may be scratching your heads, primer? There is evidence to suggest the inner faces of the wheel pairs were left in primer. There's a fairly well known colour (or colourized) photo of a Pz III coming out of a river in panzer grey. You can quite clearly see the red in between the wheels. Before you say but but but, let me explain my reasoning.

Road wheel pairs appear to have been painted after they were sandwiched together, ie, only the outer faces were painted. This was gleaned from some videos up on youtube, for both Pz IIIs and IVs. It makes perfect sense actually.

The "colour" photo might be colourized. Yes, it might. But why would the artist bother to paint something red on an otherwise grey tank?

So, until someone shows me different, this is how I'll be doing my road wheels for IIIs and IVs.

That's it for now

Kimmo

Thudius
Visit this Community
Uusimaa, Finland
Joined: October 22, 2012
KitMaker: 1,194 posts
Armorama: 1,077 posts
Posted: Tuesday, December 10, 2013 - 01:45 AM UTC
Minor update today. I went and distressed the rubber on the return rollers and road wheels. My take on wear and tear is that subtlety is the key. Bear in mind a 1 mm gash or chip would be 3.5 cm in real life (that's not quite 1.5" for our metrically challenged brethren) which is very noticeable and probably would necessitate a swap out for a new unit. Therefore, bigger chips etc should be kept to a minimum. Ice cream scoop divots are right out. What I go for is a lot of very minor, barely perceptible nicks, dents and the like. This really breaks up the clean lines of the wheel so it doesn't look like a plastic part pulled from a mold. I attack the edges with a scalpel, holding the blade up against my thumb, and change the angle of the blade and the pressure applied while rotating the wheel to get a randomness to the process. Once I've done a circuit, I go back and make a few of the dings more noticeable or to ad a few more as needed. I also scratch the edges with my fingernail to smooth out any burrs. Do this for both the outside and inside edges. The inside edge gets a lighter treatment. The track will wear down that edge too, just not nearly as much. I added a few nicks to the contact surfaces, these wouldn't be very common, so go easy with them.

Before this, I take a sanding stick to the wheels to remove the seam, again with random pressure and sanding angles, using 2-3 different grits to rough up the surface a bit better. Sometimes the mold lines on wheels are not completely worn down, particularly on newer ones so I leave a bit of seam here and there. For the spare wheels, I just went over the seams very lightly. As this kit has separate rubber sections, I just plopped them on a spare wheel hub and went to town. 2 hours and cramped fingers later, it was time to pack up my mess for the day.

I took a couple of pics, but my macro skills (more accurately lighting I think) need some work. You can barely make out anything, but I assure you, they are beat up. When they get painted and weathered, you'll see what I mean. I also made sure to keep the spares, newer rubber (4 pieces taped together) and the rest separate so I don't have to fish around for matching sets. I plan on having 1 or 2 newish sets of wheels for a little variety.


I should get another good session in tomorrow. Maybe some paint would be a good idea.

Kimmo
Thudius
Visit this Community
Uusimaa, Finland
Joined: October 22, 2012
KitMaker: 1,194 posts
Armorama: 1,077 posts
Posted: Wednesday, December 11, 2013 - 01:52 AM UTC
I didn't get the time I was hoping for today so just a bit of paint on the wheels. More tomorrow hopefully. You should be able to make out some of the chipping in these pics. These are the inner faces so nothing major. The last pic should be clickable to get a better view


During my previous session, I also fixed the gaps between the tow hooks and support plates (both sides) with some shims. I just forgot to upload the pic.


That's it for now.

Kimmo
chumpo
Visit this Community
United States
Joined: August 30, 2010
KitMaker: 749 posts
Armorama: 521 posts
Posted: Wednesday, December 11, 2013 - 08:32 AM UTC
The problem I got when assembling the wheels was that the thickness of the paint if any of it got onto the tire and rims would interfered with placing the rubber tires on the rims , sometimes it was enough to crack the tires . So I found a drill bit the same size as the inside diameter of the tires and just airbrushed the tire color and left the inside relatively paint free . For the rims I drilled a hole the same diameter as the tires on a piece of plastic same thickness as the rim and airbrushed the camo coat and left the rim paint free of color ,seems a lot to go through but it worked .
Thudius
Visit this Community
Uusimaa, Finland
Joined: October 22, 2012
KitMaker: 1,194 posts
Armorama: 1,077 posts
Posted: Wednesday, December 11, 2013 - 09:09 AM UTC

Quoted Text

The problem I got when assembling the wheels was that the thickness of the paint if any of it got onto the tire and rims would interfered with placing the rubber tires on the rims , sometimes it was enough to crack the tires . So I found a drill bit the same size as the inside diameter of the tires and just airbrushed the tire color and left the inside relatively paint free . For the rims I drilled a hole the same diameter as the tires on a piece of plastic same thickness as the rim and airbrushed the camo coat and left the rim paint free of color ,seems a lot to go through but it worked .


Yeah, I'd go with a masking system if I had an airbrush, but alas. And as mentioned, it's only the fit to the front faces of the road wheels that is extremely tight. If these were later models, the rubber would be thicker and easier to paint once glued on, as it is, there's just a hair of a lip that needs paint and isn't really worth the potential headache. If I had to do this again, I'd probably make a tapered dowel and stick some sand paper on it.

Kimmo
chumpo
Visit this Community
United States
Joined: August 30, 2010
KitMaker: 749 posts
Armorama: 521 posts
Posted: Wednesday, December 11, 2013 - 09:21 AM UTC
It's kind of hard to imagine not having an airbrush , specially for me my hands shake and holding the brush is the hardest thing to do , let alone paint a straight line . You got a banged up job here , lots details . I just closed all the hatches , could not add all those details inside .
Thudius
Visit this Community
Uusimaa, Finland
Joined: October 22, 2012
KitMaker: 1,194 posts
Armorama: 1,077 posts
Posted: Wednesday, December 11, 2013 - 10:06 AM UTC

Quoted Text

It's kind of hard to imagine not having an airbrush , specially for me my hands shake and holding the brush is the hardest thing to do , let alone paint a straight line . You got a banged up job here , lots details . I just closed all the hatches , could not add all those details inside .


No dedicated space, so no airbrush. Some day, hopefully. Not to pry or anything, but have you tried to brace your hands when painting? My hands are still good, but the eyes are starting to go for close up work. Without the optivisor thingy and extra lighting, there's no way I'd be able to pull off half this stuff.

Kimmo
Thudius
Visit this Community
Uusimaa, Finland
Joined: October 22, 2012
KitMaker: 1,194 posts
Armorama: 1,077 posts
Posted: Thursday, December 12, 2013 - 05:54 AM UTC
More paint. Toned down the inner faces of the road wheels and gave them some wear. You can see the chipping and wear a little better on these pics. Gave the leaf springs a rusty wash as well, more weathering to come. Talk about time consuming, 3+ hours and not really all that much to show for it. At least I got it out of the way.


That's probably it for this week.

Kimmo