Campaigns
Where Armorama group builds can be discussed, organized, and updates posted.
KV campaign pt.2
Nokturnal
Visit this Community
England - East Anglia, United Kingdom
Joined: January 11, 2013
KitMaker: 65 posts
Armorama: 64 posts
Posted: Wednesday, July 16, 2014 - 07:11 PM UTC
Paul - Would gladly not quit on ya! Huge fan of the KV series so this campaign is top of my priority list.
Yes I think 2 more weeks should be enough, it all depends on when the pins arrive..I've not used Russian post before so I can't say if the 2 weeks (from 11th) was optimistic or not.
I checked the tracking # and apparently it took 5 days from being dispatched to being processed and released from customs.

Worst case scenario I will throw on the vinyl tracks and take some pics of that .
Vista85
Visit this Community
Bergamo, Italy
Joined: January 03, 2014
KitMaker: 118 posts
Armorama: 112 posts
Posted: Thursday, July 17, 2014 - 08:18 AM UTC
Hi guys
i finished my KV-1 Ekrenami
This was my first attempt with 1/48 scale model and heavy dust effects
Tamiya is a very nice kit, without complications and with a enough detail level
Thanks everybody to participation at my posts in this campaign, see you again for another contest!


Nito74
Visit this Community
Lisboa, Portugal
Joined: March 04, 2008
KitMaker: 5,386 posts
Armorama: 4,727 posts
Posted: Friday, July 18, 2014 - 02:18 PM UTC
As requested, extension granted: August 15th, 2014

1721Lancers
Visit this Community
England - East Anglia, United Kingdom
Joined: March 21, 2012
KitMaker: 1,673 posts
Armorama: 1,640 posts
Posted: Friday, July 18, 2014 - 06:06 PM UTC
Cheers John, that should suffice so that we get a few more in the gallery

Dario, I'm afraid your pics have turned into those horrible little squares dude.
Have another go


Happy weekend all


Paul
Vista85
Visit this Community
Bergamo, Italy
Joined: January 03, 2014
KitMaker: 118 posts
Armorama: 112 posts
Posted: Friday, July 18, 2014 - 09:32 PM UTC
Sorry again!!


1721Lancers
Visit this Community
England - East Anglia, United Kingdom
Joined: March 21, 2012
KitMaker: 1,673 posts
Armorama: 1,640 posts
Posted: Saturday, July 19, 2014 - 02:43 AM UTC

Quoted Text

Sorry again!!


Dario thats better, and the build also looks good .

Thanks Also for playing along with and hope to see on another
of my campaigns later


Paul
ComradeMP
#0
Visit this Community
United States
Joined: July 31, 2011
KitMaker: 472 posts
Armorama: 453 posts
Posted: Saturday, July 19, 2014 - 01:23 PM UTC
I know I could have finished by the finish date, but hey I'll take that breathing room. My KV-1E just needs its tracks and paint, the other 5 are at 90% completed. Man getting the suspension and road wheels together on 5 tanks felt like an eternity. Oh, I should mention that I managed to scrounge up my old KV-2, so that's part of my build. I also have my German KV-1, but I need to go back and change a few things, so I don't know about that one.
IronOwl
Visit this Community
Georgia, United States
Joined: January 07, 2013
KitMaker: 572 posts
Armorama: 302 posts
Posted: Tuesday, July 22, 2014 - 08:24 AM UTC
well I have been challenged by the wife to finish the unstarted KV-1 tank in the time left on this build didn't get a chance to start because of fire school and work but I have some time so here goes my start pic is on the 2nd or 3rd page of the build site. due to the limited time I have I will be building straight oob on this one

Sascha(Ironowl)
nng-nng
Visit this Community
Bayern, Germany
Joined: October 22, 2013
KitMaker: 380 posts
Armorama: 376 posts
Posted: Tuesday, July 22, 2014 - 09:52 AM UTC
Thanks for the positive feedback guys... that got me the motivation to finish at least the tank, although I´ve changed the layout a bit:


The groundwork might ceep me busy for some time, but not now... simply couldn´t pass the oportunity to visit Bovington, so I´m on holidy in a few hours
But I think that´s enough to get me a ribbon, if not I´ll remove my entry in the gallery...

Nice work so far chaps, Thanks Paul for hosting this small and neat campaign
1721Lancers
Visit this Community
England - East Anglia, United Kingdom
Joined: March 21, 2012
KitMaker: 1,673 posts
Armorama: 1,640 posts
Posted: Wednesday, July 23, 2014 - 03:41 AM UTC
ComradeMP it's ok dude , just get one completed and all will be good

Sascha just go for it mate , and remember I like lots of pics about the build .

Fabian no panic mate , if you say the tank is done then that qualifies . If you wish to add a little more then do so, it still qualifies .
Have a great time in Bovington, it is a fantastic place to visit . After that try and go to Lulworth Cove, it's a really nice little village on the coast just down the road from Bovvie. If you're travelling with your wife/girlfriend she will admire you forever if you do go there. And take your
swimming shorts with you too, it's great for swim in the warm
cove waters .

Oh yes, you must also try the local drink of Cider or Scrumpy, but don't sit in the sun to drink it !

Cheers


Paul

IronOwl
Visit this Community
Georgia, United States
Joined: January 07, 2013
KitMaker: 572 posts
Armorama: 302 posts
Posted: Friday, July 25, 2014 - 09:08 AM UTC
well I am making very good headway with this kit lower hull is nearly finished and road wheels almost complete heres an update pic


Ironowl
IronOwl
Visit this Community
Georgia, United States
Joined: January 07, 2013
KitMaker: 572 posts
Armorama: 302 posts
Posted: Friday, July 25, 2014 - 09:11 AM UTC
Heres a 2nd pic so far the fit is amazing very little to clean up and no flash and nothings warped


am gonna stop for a little bit and grab some dinner should have another update in several hours or so

Sascha(Ironowl)
1721Lancers
Visit this Community
England - East Anglia, United Kingdom
Joined: March 21, 2012
KitMaker: 1,673 posts
Armorama: 1,640 posts
Posted: Saturday, July 26, 2014 - 03:59 AM UTC
Nice work Sascha , if you keep up this pace there will be no need for an extension


Paul
IronOwl
Visit this Community
Georgia, United States
Joined: January 07, 2013
KitMaker: 572 posts
Armorama: 302 posts
Posted: Saturday, July 26, 2014 - 08:30 AM UTC
Heres where I stopped last night turret was just fitted not glued


Sascha(Ironowl)
IronOwl
Visit this Community
Georgia, United States
Joined: January 07, 2013
KitMaker: 572 posts
Armorama: 302 posts
Posted: Saturday, July 26, 2014 - 08:33 AM UTC
heres where I am at today


Sascha(Ironowl)
IronOwl
Visit this Community
Georgia, United States
Joined: January 07, 2013
KitMaker: 572 posts
Armorama: 302 posts
Posted: Saturday, July 26, 2014 - 08:34 AM UTC
IronOwl
Visit this Community
Georgia, United States
Joined: January 07, 2013
KitMaker: 572 posts
Armorama: 302 posts
Posted: Saturday, July 26, 2014 - 08:37 AM UTC


I have a lot of troubles with Crew figures that's why I usually build the kits with there hatches closed however I am going to try this one out

Sascha(ironowl
gconterio
Visit this Community
Florida, United States
Joined: June 24, 2010
KitMaker: 66 posts
Armorama: 23 posts
Posted: Thursday, July 31, 2014 - 05:07 PM UTC
Well I have finished. Sort of. One of the two I planned on completing is being "called done." The KV-1S, which I want done in a winter whitewash finish will have to wait. After experimenting, I have not come up with a satisfactory method I feel confident in, so it will have to be finished later. I don't want to rush through it just to get it done.
Picture to follow tomorrow, I'm too tired tonight!
gconterio
Visit this Community
Florida, United States
Joined: June 24, 2010
KitMaker: 66 posts
Armorama: 23 posts
Posted: Friday, August 01, 2014 - 05:51 AM UTC
On to the pictures!
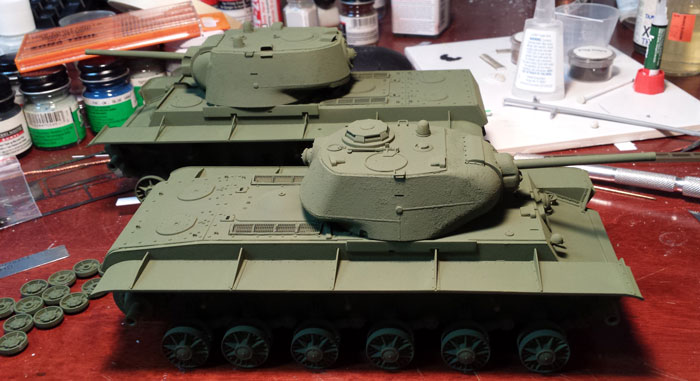
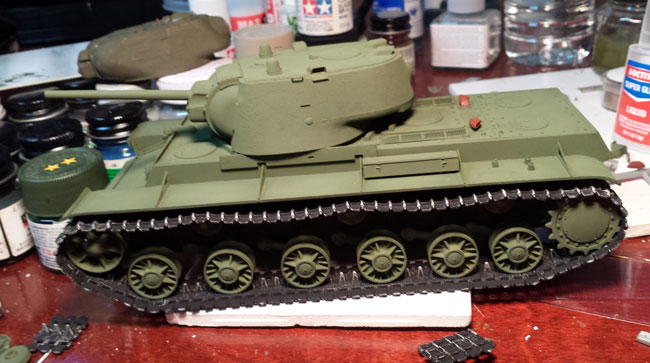
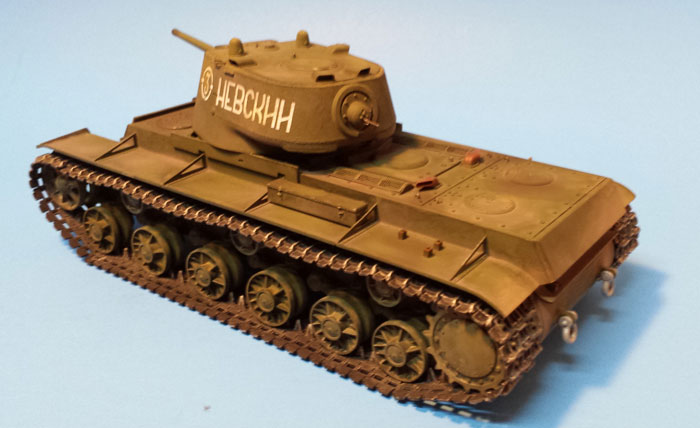
First, a bit of final progress documentation. I finally got both KVs into the paint shop, and shot them with a custom mixture based on Tamiya XF-58, with some white, yellow, and a touch of blue added to get something like 4B0.


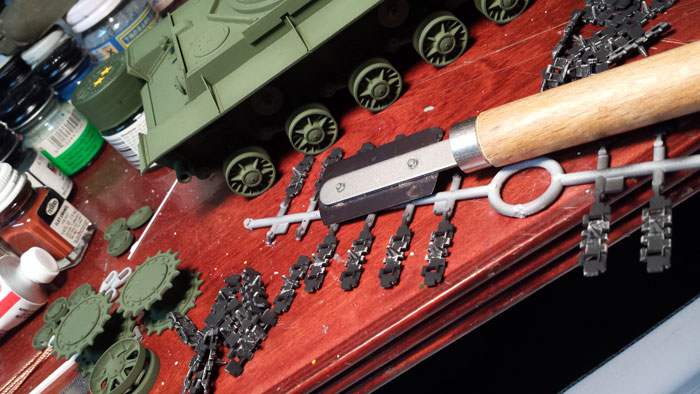
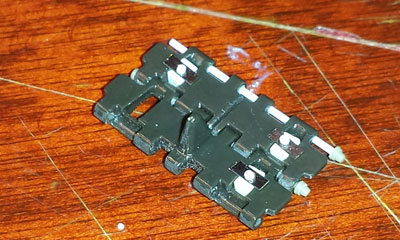
Next, it was on to the tracks. I rather like Trumpeter's link & length tracks for the KVs. They save on a lot of tedium, and don't look at all bad when done, especially the molded-in sag.


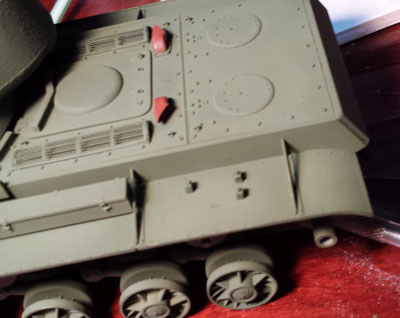
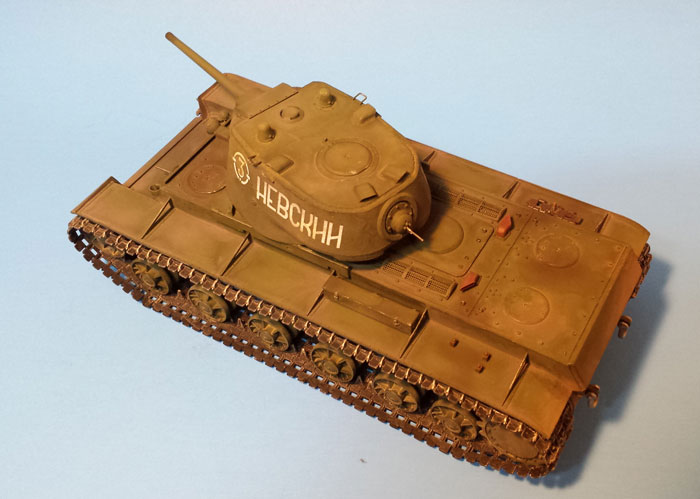
I decided to add track retainer hubs on one fender, and replaced the kit-provided spare tracks with more detailed ones made from extra single links:


One side finished! I paint the tracks separately before assembling, starting with flat black, then dry brushing with steel. Once they are on, I dirty them up with several washes, along with the rest of the undercarriage, which really ties everything together.


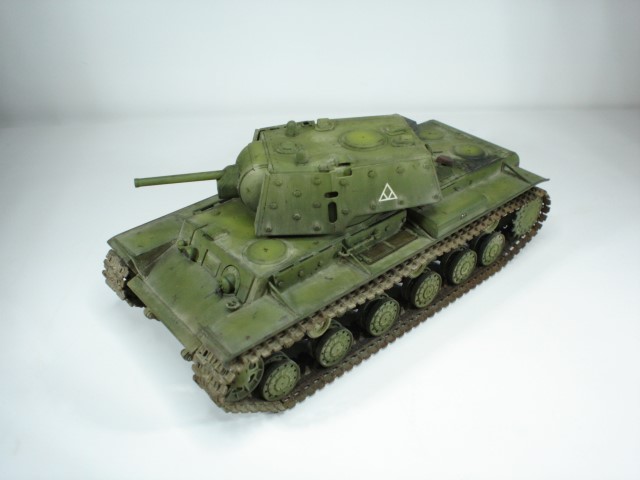
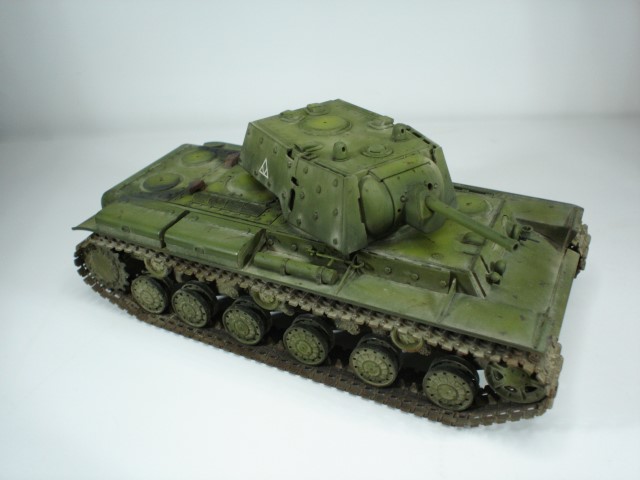
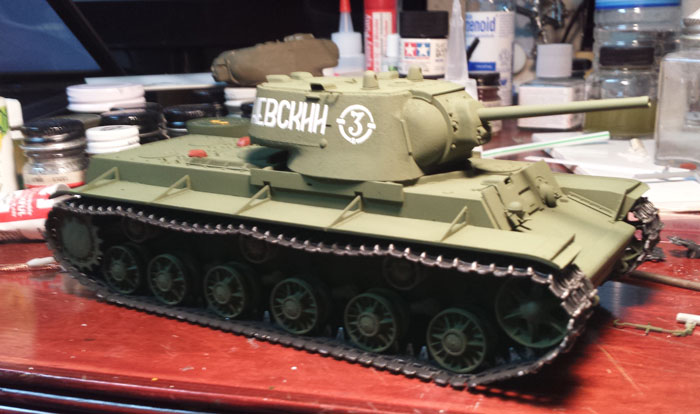
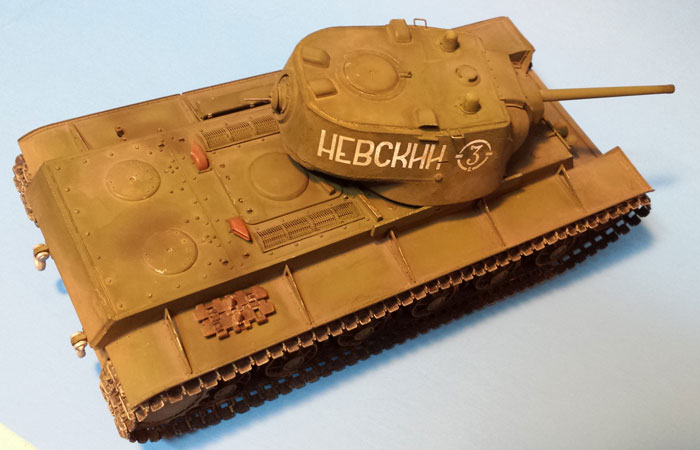
Finally time for some markings. After pouring-over all my references, I finally decided on this set from an old MB Models dry transfer set I have had for probably 20+ years. They still work quite well, as you can see! I am not positive they are accurate for this particular vehicle, and in fact I could not find an actual picture in my ever-growing collection. It is based instead on artwork in one of Steve Zaloga's old KV books. Since I also cannot definitively tell the markings are not wrong for this vehicle, I went with it!


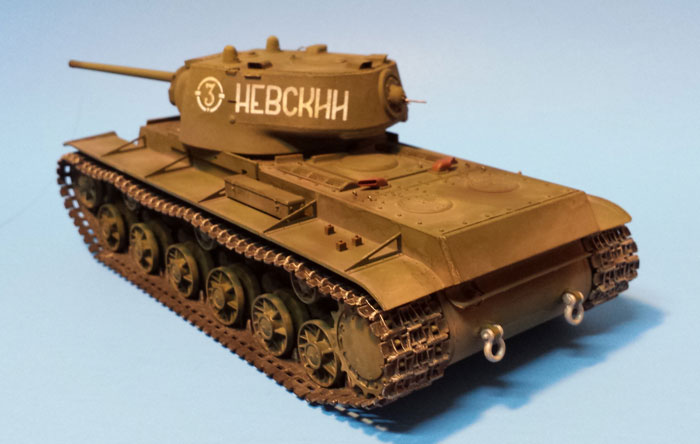
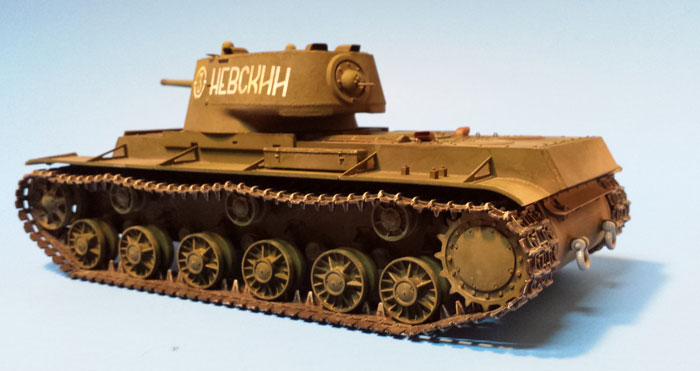
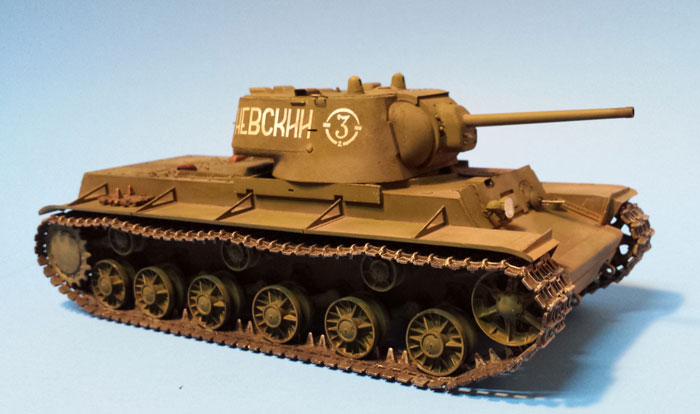
With the markings done, it was time for the weathering. I like my tanks to look a certain way, used, but not thoroughly beat-up and slathered in mud & muck, so I go for a stained, weathered, dusty look. I also ALWAYS do them buttoned-up. I started with spraying a lightened version of my 4B0 mix strategically on the upper-surfaces so simulate sun bleaching. Then, it received sever different color washes to darken, lighten or distress various parts of the vehicle. Once dry, it got the pastel powder treatment to finish things off. Oh, forgot to mention adding paint chipping and wear with a silver pencil, and a bit of strategic rust here & there. All of which gives us the finished product


As I mentioned above, I have been stymied by my inability to come up with a technique for the winter whitewash I intend for the KV-1s. I have never done a whitewash finish before, and have always been a bit intimidated about trying. Once I am confident in a method I have tried, I will tackle it. Here it is presently:


So at least I finished one of the two I started with!
IronOwl
Visit this Community
Georgia, United States
Joined: January 07, 2013
KitMaker: 572 posts
Armorama: 302 posts
Posted: Friday, August 01, 2014 - 05:13 PM UTC
I am calling this one finished

IronOwl
Visit this Community
Georgia, United States
Joined: January 07, 2013
KitMaker: 572 posts
Armorama: 302 posts
Posted: Friday, August 01, 2014 - 05:16 PM UTC


sorry if pics are kinda blah camera is old and has its moments.

I have had fun doing this build and hope to do another KV-1 Build soon.

Sascha(Ironowl)
IronOwl
Visit this Community
Georgia, United States
Joined: January 07, 2013
KitMaker: 572 posts
Armorama: 302 posts
Posted: Friday, August 01, 2014 - 10:08 PM UTC
I destroyed the crewman that came with the kit so at some point down the road I forsee having some extra Red army tank crewmen will fix one up and add to the tank.

Sascha(Ironowl)
EHAM0624
Visit this Community
Noord-Holland, Netherlands
Joined: January 27, 2014
KitMaker: 200 posts
Armorama: 95 posts
Posted: Wednesday, August 06, 2014 - 10:06 AM UTC
Really can we have a KV-1 pt.3 campaign please! (next year or so), I have too much things to do with no time,..Anyway I have KV in the stash with lots of metal updates that I would have used if I had some time. However I still wanted to participate so thought of doing a old Tamiya KV-1C without all extras but then my eye fell on something simple and easy (a weekend build maybe) the tiny Zvezda 1/100 KV-1 mod 1940. Verifying campaign rules it seemed a possibility however this was 3 weeks ago and with the deadline being the 31 of July I had no way of getting the little 2,99 Euro kit,...but the 2 week extension (thanks) gave me still the possibility to participate. This weekend I managed to go to a nearby hobby shop, so here go's


And after not more then 30 seconds we have a KV-1,..Surly the fastest built I ever did (and no glue needed!)


And now it's almost ready but those pictures need to wait till i finish the base, thanks
EHAM0624
Visit this Community
Noord-Holland, Netherlands
Joined: January 27, 2014
KitMaker: 200 posts
Armorama: 95 posts
Posted: Saturday, August 09, 2014 - 06:52 AM UTC
Small tank, small upgrade but worth the effort


Paint


and base


Base finished


That's it, lots of fun! Such a tiny thing

Paints used Vallejo/Tamiya/Live color Acrylics, water, Vallejo pigments, AK Washes, future and some artistic oil paints. For the base some of the mentioned paints, a plastic cap, toilet paper, baking soda, water, wood glue and two stick of the Calamintha nepeta,..
1721Lancers
Visit this Community
England - East Anglia, United Kingdom
Joined: March 21, 2012
KitMaker: 1,673 posts
Armorama: 1,640 posts
Posted: Sunday, August 10, 2014 - 12:36 AM UTC
Greg: a very nice build there indeed . The only way I know to tackle white wash is with the hairspray method and plenty of washes afterwards. Well thanks for playing along with us and I hope to see the twin completed sometime

Sascha: that is also a nice build you have shown us dude
You really should try you hand at weathering, this really adds a whole new dimension to your builds. You have told me that you are not acquainted to this so here's a tip:
1. Take a piece of plastic card and add some leftover kit parts to it, anything in any order will do. Best to one half
and leave the other half free
2. Do a paint job anything from single colour to three tone camo.
3. On this you can then practice to your hearts content and you won't mess up a kit in the process. Start with the flat half first and then move on to the raised detail side later.
4. Make sure you take notes of what you do or photograph each step, that way you don't forget what you did so fast.

Jan: that is also an awesome little build .
Fast and clean, I like the ground work too . How did you make the snow?
As for part 3, well why don't you take up the reins for that in a few months or so?


Paul