Armor/AFV: Allied - WWII
Armor and ground forces of the Allied forces during World War II.
Hosted by Darren Baker
IBG Marmon-Herrington Mk II Middle East Type
Thudius
Visit this Community
Uusimaa, Finland
Joined: October 22, 2012
KitMaker: 1,194 posts
Armorama: 1,077 posts
Posted: Tuesday, May 20, 2014 - 02:12 AM UTC

Quoted Text

Black Dog will issue accessories set the following news.
Malvin
vt-models.cz


I was wondering where all the accessory sets were. Most period photos show all kinds of tarps, rolls and stuff.

Kimmo
russamotto
Visit this Community
Utah, United States
Joined: December 14, 2007
KitMaker: 3,389 posts
Armorama: 2,054 posts
Posted: Tuesday, May 20, 2014 - 11:07 AM UTC
Kimmo, I really like how the radio has turned out. Thanks again for the tips.

There is a lot of room for accessories for these kits. Stowage of course, but also the various improvised gun mounts used by both Commonwealth and Axis forces.
Thudius
Visit this Community
Uusimaa, Finland
Joined: October 22, 2012
KitMaker: 1,194 posts
Armorama: 1,077 posts
Posted: Tuesday, May 20, 2014 - 11:06 PM UTC
Thanks Russ. Passing on tips is what the interwebs was created for. One thing I should mention about the pe tip. I use Vallejo primer which helps secure pe. If you don't use this for painting, you might want to add a drop of super glue on pieces that look like they might come loose. The beauty of using liquid cement is you get a lot more time to position and I'd say I have a success rate of 90% or better with stuff staying on first go before primer. If at all possible or if a really good bond is needed, I glue 5 thou to the pe piece, trim and then glue with liquid cement. In either case, if you apply a generous amount of glue, you can create tiny weld beads when you press the piece in.

Kimmo
AlanL
Visit this Community
England - East Anglia, United Kingdom
Joined: August 12, 2005
KitMaker: 14,499 posts
Armorama: 11,675 posts
Posted: Tuesday, May 20, 2014 - 11:48 PM UTC
Excellent progress.

Al
iowabrit
Visit this Community
Iowa, United States
Joined: November 06, 2007
KitMaker: 585 posts
Armorama: 557 posts
Posted: Wednesday, May 21, 2014 - 12:28 AM UTC
Gel superglue also works well and gives you time to position a piece. Speaking of stowage, here's my resin Mk III Breda. Most of the interior was scratchbuilt.

Thudius
Visit this Community
Uusimaa, Finland
Joined: October 22, 2012
KitMaker: 1,194 posts
Armorama: 1,077 posts
Posted: Wednesday, May 21, 2014 - 01:03 AM UTC
Thanks Al, nice build Steve. I've used slow gel types before, the one I'm using now has about 5-6 seconds working time. The only thing I don't like about super glues is trying to get precise amounts where needed. As I mentioned, it's easier to use the liquid cement, then add super glue if necessary with a piece of sprue or wire and then, sealing with Vallejo primer makes sure it isn't going anywhere. Future also works well as a sealant. I generally avoid super glue unless absolutely necessary.

Kimmo
Thudius
Visit this Community
Uusimaa, Finland
Joined: October 22, 2012
KitMaker: 1,194 posts
Armorama: 1,077 posts
Posted: Wednesday, May 21, 2014 - 01:25 AM UTC
Now to the actual update of the day. I started reworking the seat cushions, as they are, they look kind of silly with some serious troughs to represent sag. I'm still not sure whether the seats are canvas or padded leather. The refs indicate canvas, but that may not be correct. I'm assuming the seats are padded leather because the head padding and presumably the rear seat cushion are. The front seat backs might be simple canvas slips judging from what can be seen of the seat frame in the reference pictures. Anyways, I filled in the troughs with some putty and have started smoothing them out. More putty will be needed.


After a lot of dry fitting and hemming and hawing, I decided to glue the left side and firewall to to the lower hull. I figured I'll need the left wall in place to add the glove compartment and dash. I had knocked off the U bracket when dry fitting the hull pieces and radio, you can see the marks the glue left so it will be easy enough to put back in place. I needed to bend the wires in tighter to get a better fit, bear that in mind if you wire up your set. Dry fit before gluing anything. I had mentioned the rear corner being a potential headache, here you can see what I mean. I left it unglued for the time being.


Then on to today's fun. The hull sides lack frames. Curiously, the rear wall and roof have them, the two least likely to be seen plates. I decided on 10 x 40 thou strip and added a double strip everywhere a join was as per the refs and a single around the perimeter. Mind you, the refs are for a Mk I and III, but I think the principle held. A vertical strip was added lining up with the front of the wheel well. I need to think about the door opening, a vertical strip still needs to go just forward, but I'm not sure if there should be stiffeners surrounding the door or not. I'm leaning towards yes. More consulting of the refs.


I decided to add the frames because they will be seen through the openings, and this is something that most modelers should be able to do. My method is to tack at one end, then trim in place and run glue into the seam. I think I only trimmed 3-4 pieces to size first. Let the glue dry before you trim any possible excess, less mess to clean up that way.

The postman dropped off a notice that something from Poland is waiting for me at the post office. I wonder what that might be? More tomorrow.

Kimmo
iowabrit
Visit this Community
Iowa, United States
Joined: November 06, 2007
KitMaker: 585 posts
Armorama: 557 posts
Posted: Wednesday, May 21, 2014 - 02:05 AM UTC
Good call on the inside framing, I would probably not have thought of that. This may end up being my next build.....
Thudius
Visit this Community
Uusimaa, Finland
Joined: October 22, 2012
KitMaker: 1,194 posts
Armorama: 1,077 posts
Posted: Wednesday, May 21, 2014 - 03:27 AM UTC

Quoted Text

Good call on the inside framing, I would probably not have thought of that. This may end up being my next build.....


I'm much too curious for my own good sometimes.

Kimmo
thebear
Visit this Community
Quebec, Canada
Joined: November 15, 2002
KitMaker: 3,960 posts
Armorama: 3,579 posts
Posted: Wednesday, May 21, 2014 - 06:34 AM UTC
Very nice work so far Kimmo... didn't you say OOB when you started ? I know it is just too tempting to resist at times .. Keep up the good work.

Rick
Thudius
Visit this Community
Uusimaa, Finland
Joined: October 22, 2012
KitMaker: 1,194 posts
Armorama: 1,077 posts
Posted: Wednesday, May 21, 2014 - 06:44 AM UTC

Quoted Text

Very nice work so far Kimmo... didn't you say OOB when you started ? I know it is just too tempting to resist at times .. Keep up the good work.

Rick


Thanks Rick. I think I said mostly OOB. Maybe. Good thing nothing's written down for all to see and verify.

Kimmo
iowabrit
Visit this Community
Iowa, United States
Joined: November 06, 2007
KitMaker: 585 posts
Armorama: 557 posts
Posted: Wednesday, May 21, 2014 - 07:06 AM UTC
The one thing I can't quite figure out even with the MH book, is, exactly how the commanders folding turret seat worked
Thudius
Visit this Community
Uusimaa, Finland
Joined: October 22, 2012
KitMaker: 1,194 posts
Armorama: 1,077 posts
Posted: Wednesday, May 21, 2014 - 07:47 AM UTC

Quoted Text

The one thing I can't quite figure out even with the MH book, is, exactly how the commanders folding turret seat worked


Here's a good shot

http://s554.photobucket.com/user/Tegner/media/Marmon%20Herrington%20Mk1/DSC05324_zps48f064b5.jpg.html?sort=3&o=11

Looks like it just folds up and drops down to use.

Kimmo
Thudius
Visit this Community
Uusimaa, Finland
Joined: October 22, 2012
KitMaker: 1,194 posts
Armorama: 1,077 posts
Posted: Thursday, May 22, 2014 - 04:23 AM UTC
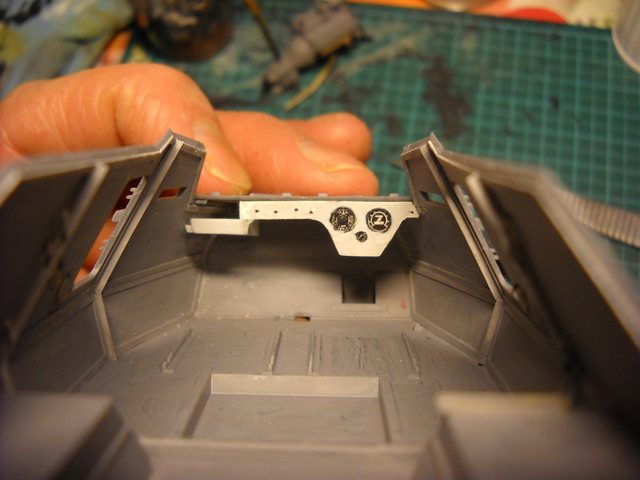
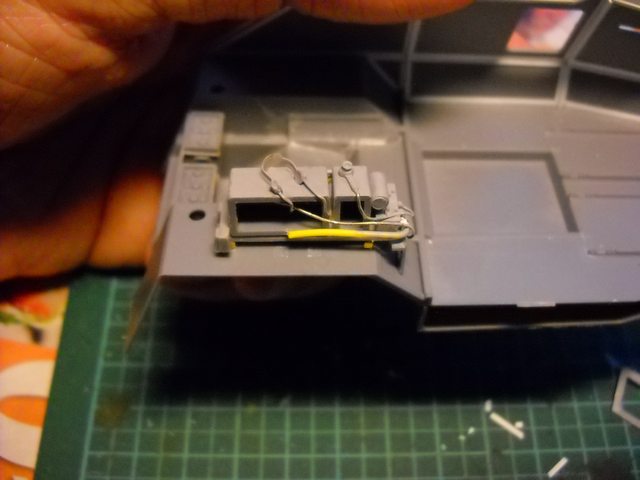
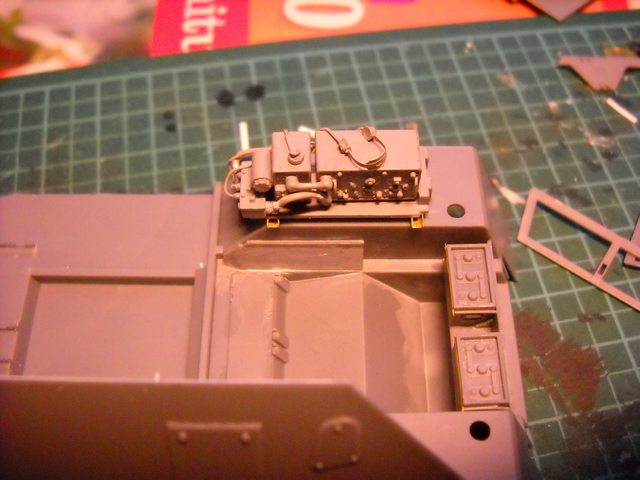
Got a little more done today, most of the time went to dry fitting again. I glued the radio shelf support leg and set aside to dry. The instructions again are a bit vague on placement (the support butts up against a small tab on the side of the shelf), but the gist is that the support should be square to the shelf, and then you glue it where everything sits properly. I'll paint everything up first, then attach.


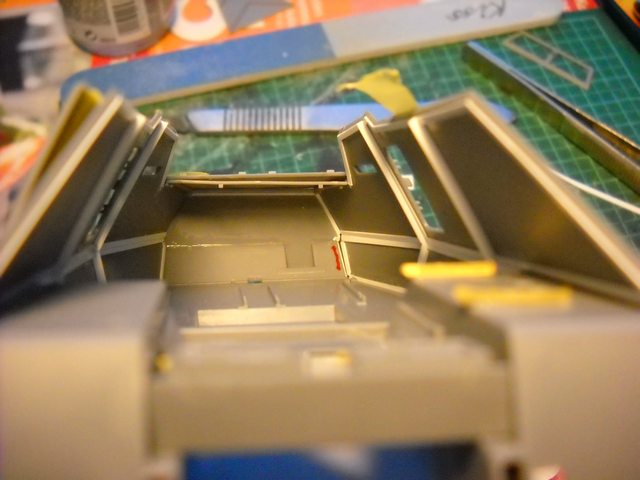
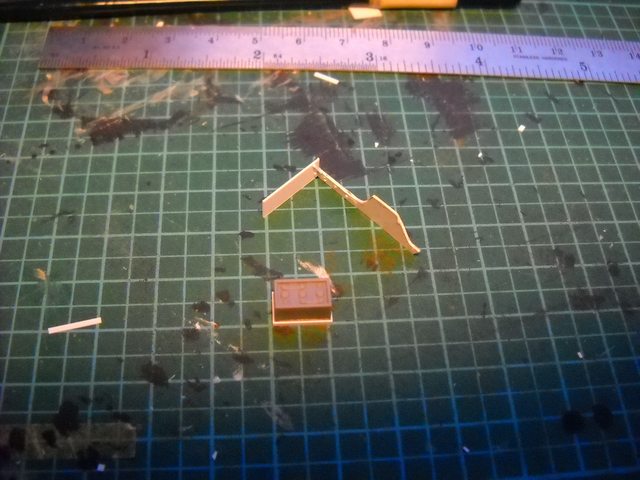
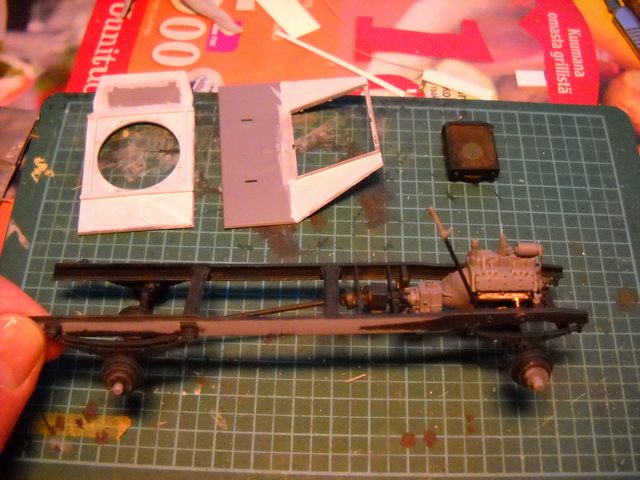
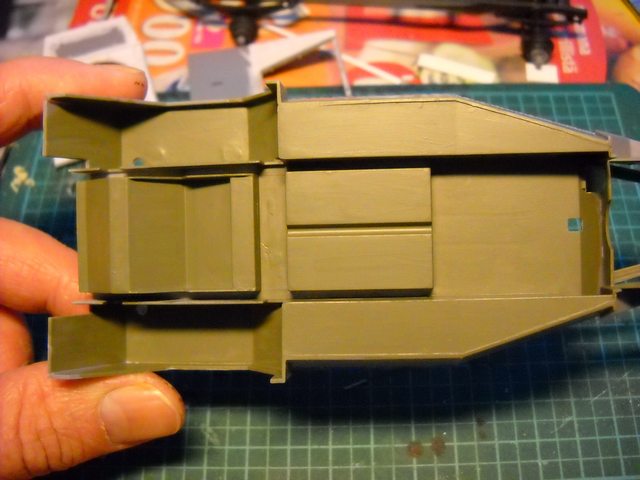
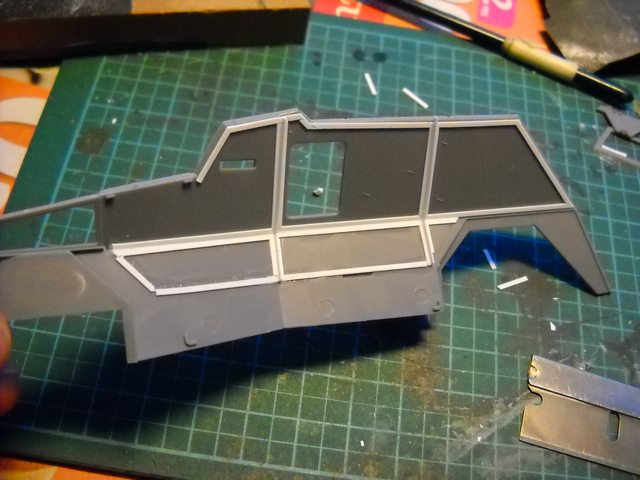
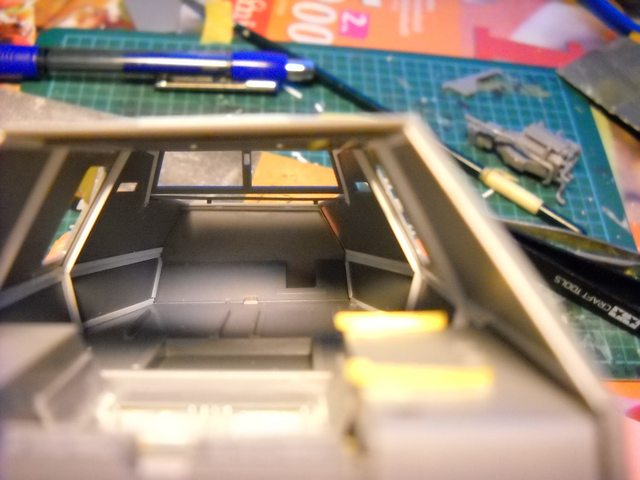
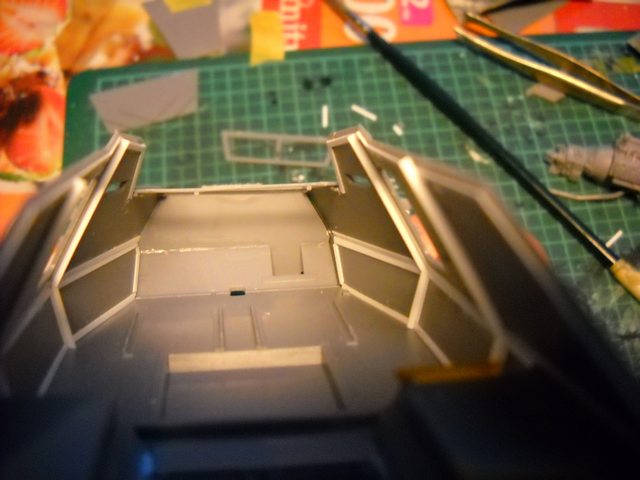
Continued with the framing on the right side. It went fairly quickly. The bottom strip was the only tricky one. You need to make sure it sits flush with the floor.


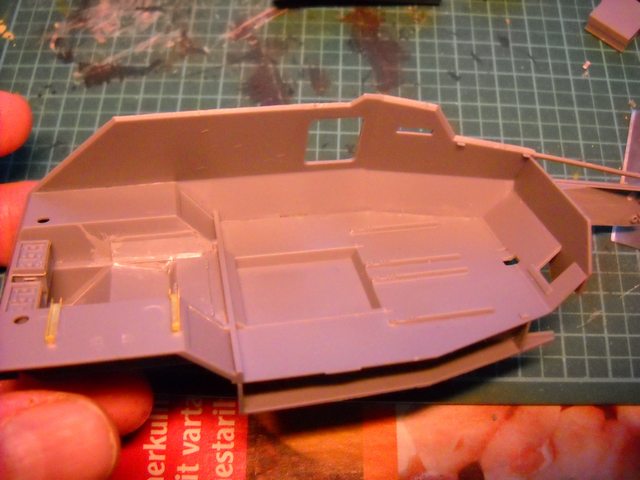
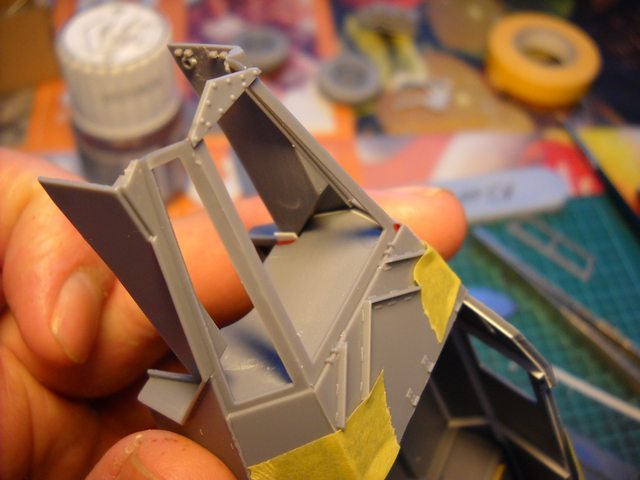
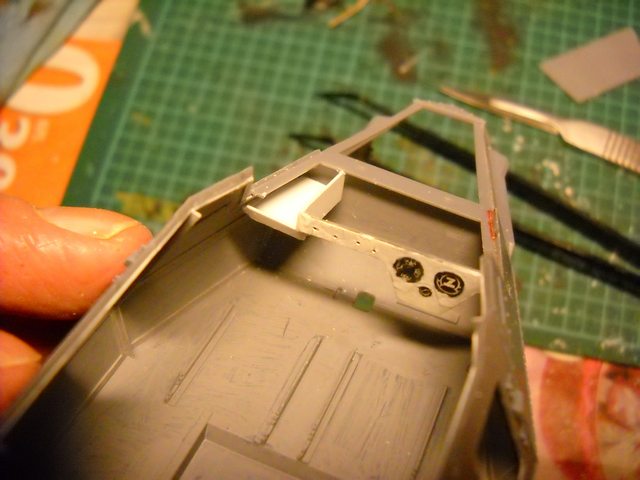
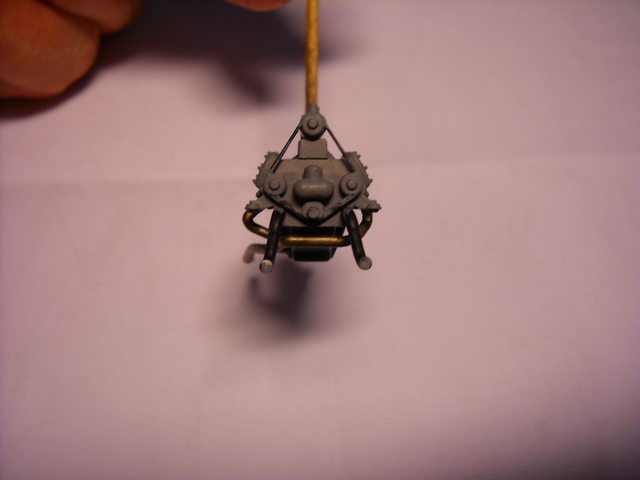
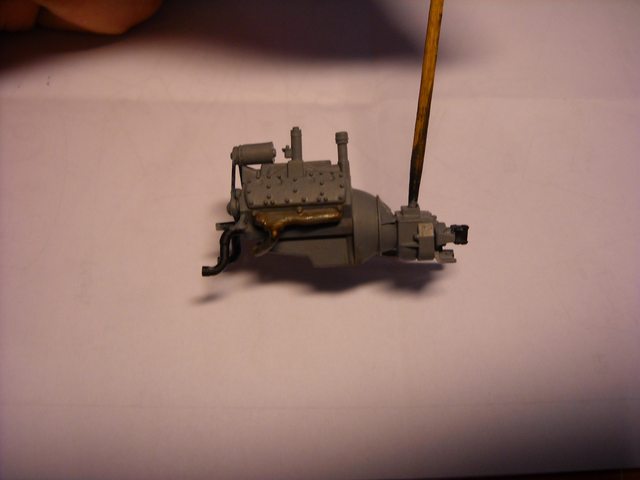
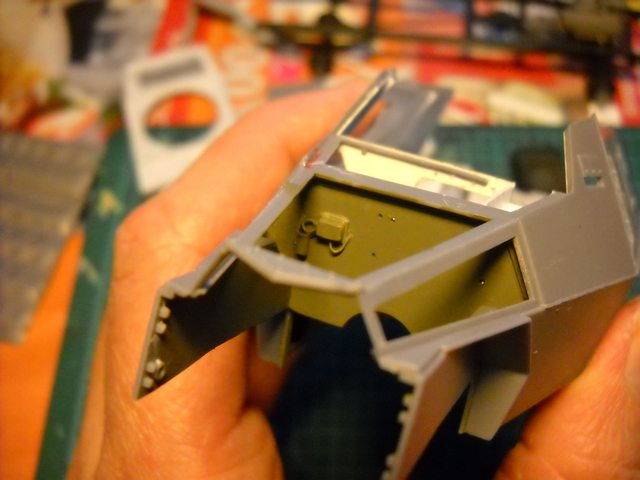
I glued the hood support frame in place, it needed a 20 thou shim to the fire wall top, and started dry fitting things.


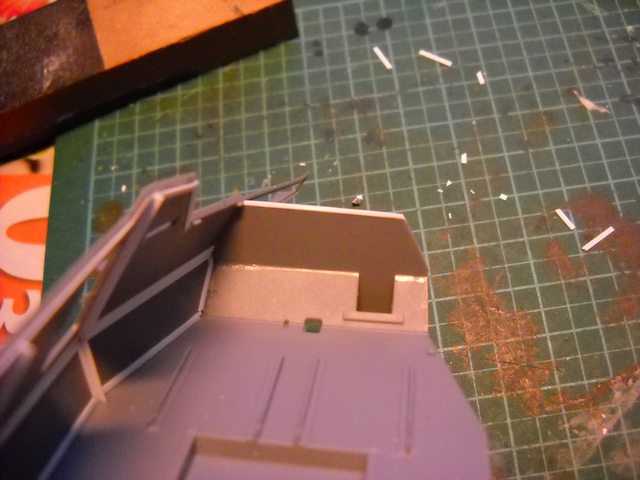
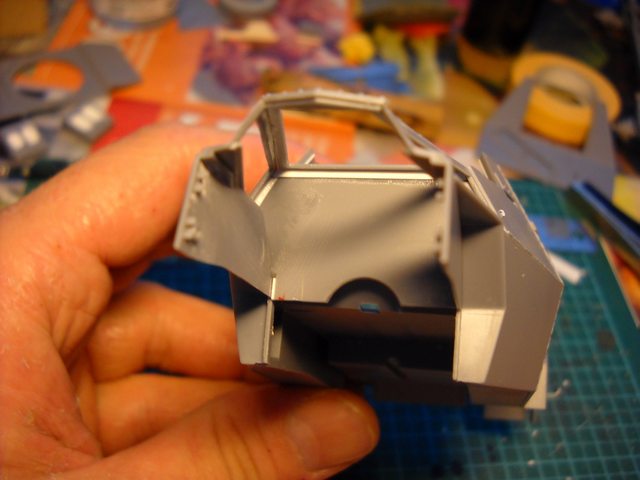
Hmm.....fiddle fiddle. There is a wee problem with the right side of the hull/firewall/hood frame alignment and leaves a noticeable gap. This won't be a problem if you don't have an open rear or left door 
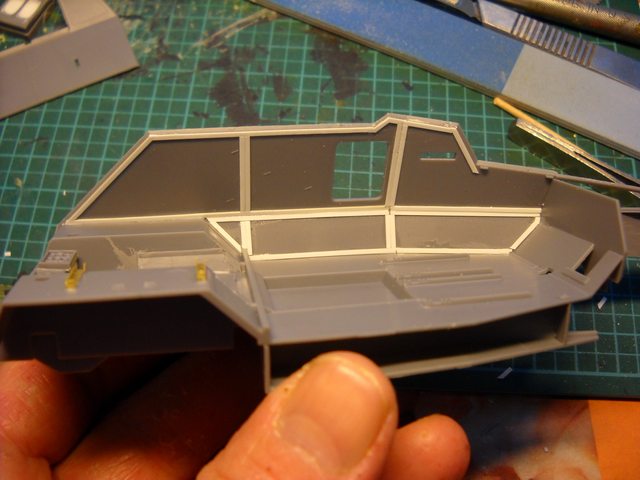
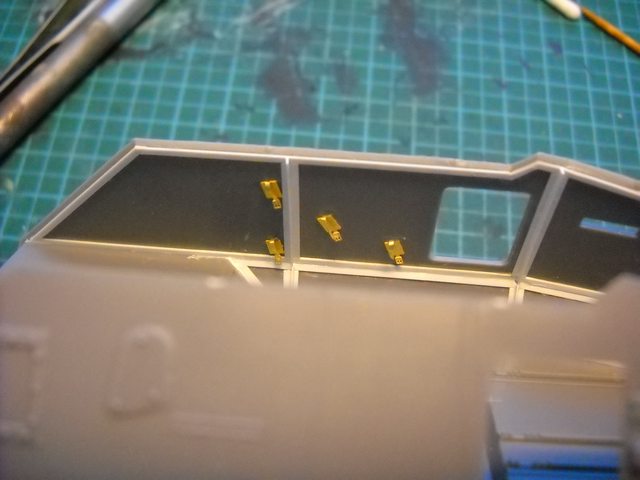
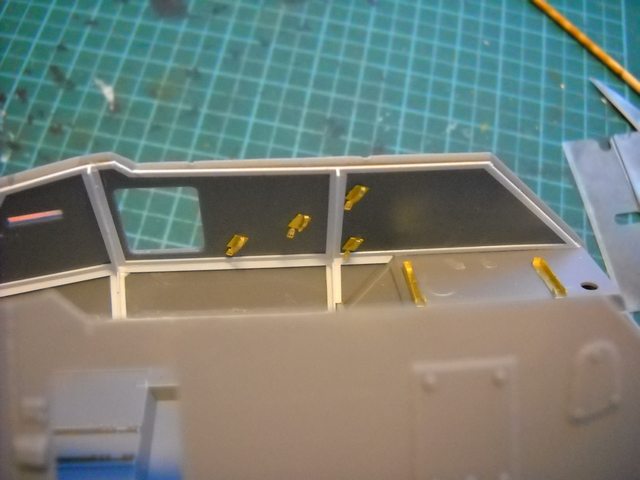
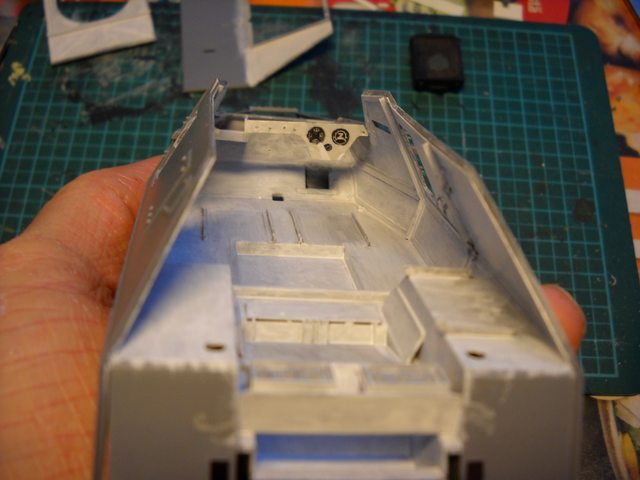
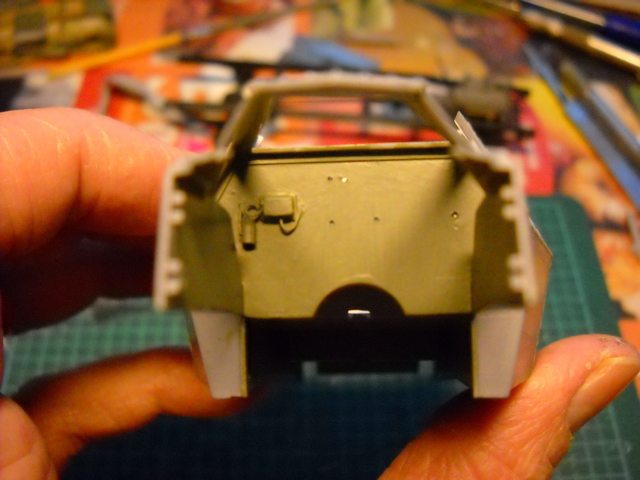
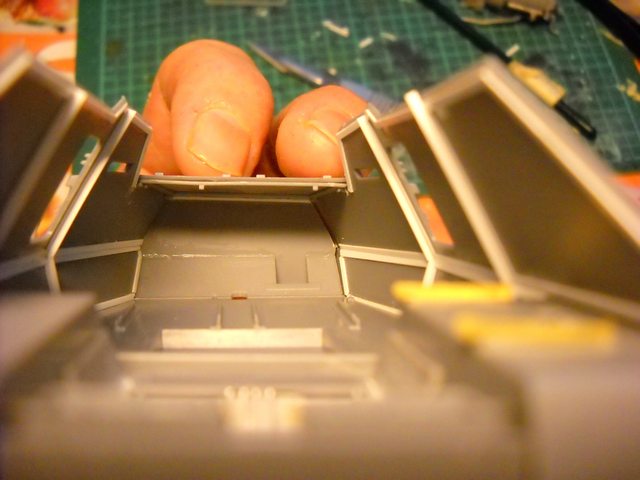
I dry fit the roof and windshield frame and the good news is that all the rest of the stuff seems to align well enough to each other after some prodding, stretching, shaving and sanding.


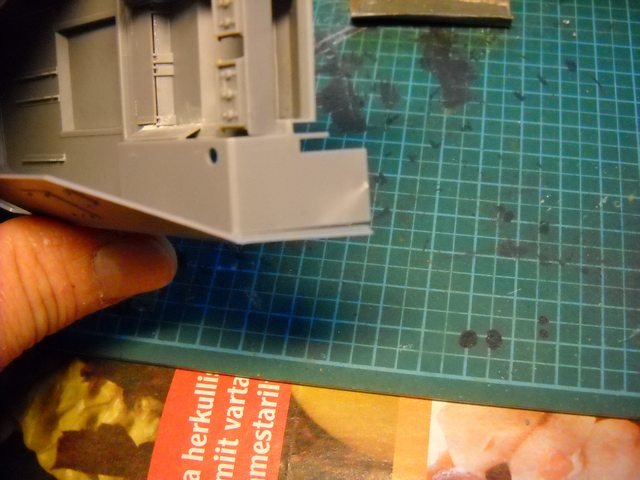
You can see that if you squeeze the firewall join shut, the hood will sit proud. Bending back the upper corner of the hull side helped a bit, but not enough to make sanding an attractive option. The hood has bullet splashes that makes this a no go. The hood and windshield frame fit when all else is cajoled into place (except the fire wall of course), so the best option here is to cut the hood frame at the dashboard, this will give you more play for the right side frame. A shim strip will need to be glued to the right side of the firewall in any event. Dry fit until you're satisfied that everything will sit as best as it can before you start sanding and gluing strips. If you glue the sides to the floor first, this problem may not be as noticeable. Then again, it might create another set of problems. Ever the optimist, that's me.

In a case of unexpected bonuses, the roof fits easier with the added frame strips. You will need to trim the roof cross braces to clear the frames. If you don't add frames, a little sanding will probably be needed as well.

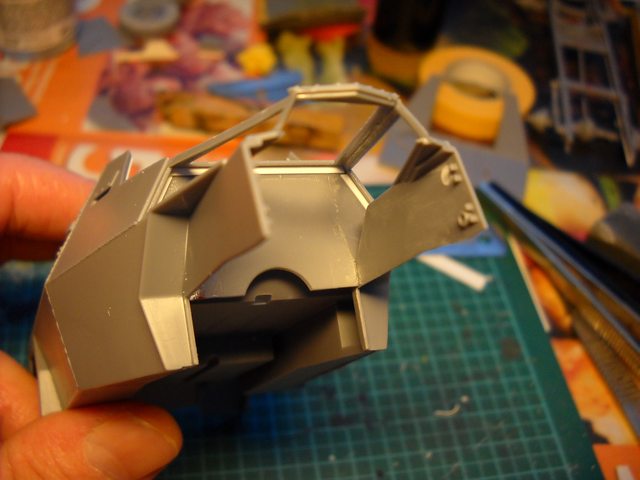
So, to sum up: dry fit absolutely everything. All these beveled parts means something will be out of whack somewhere. Tape the pieces together, figure out what is out of line, and fix one issue at a time. When you do get around to gluing, glue one area at a time, let the glue set and carry on to the next section. You will invite disaster and much putty if you try to rush the hull joins.

I'll try to tackle the firewall and dashboard tomorrow.

Kimmo


iowabrit
Visit this Community
Iowa, United States
Joined: November 06, 2007
KitMaker: 585 posts
Armorama: 557 posts
Posted: Thursday, May 22, 2014 - 05:28 AM UTC
Thanks for the pic link, exactly what I needed
Thudius
Visit this Community
Uusimaa, Finland
Joined: October 22, 2012
KitMaker: 1,194 posts
Armorama: 1,077 posts
Posted: Friday, May 23, 2014 - 02:15 AM UTC
Another short update. Spent a couple of hours trimming, shimming and finally gluing the right hull side in place. I'm fairly certain I can get the rest of the interior done this way as well as the engine compartment. Speaking of which, I added some framing to the firewall, this hid the tiny gap on the right side nicely. I removed a frame from the interior firewall side, it needs to be a little more forward because of the shift from shimming, no biggie. In test fitting, I realized the U channel for the radio set can be left off completely, it will not be seen. Still some putty to go and a coat of primer on tap for tomorrow.


Started on the glove box and added some framing to the battery box. The glove compartment looks to run to the firewall, a tad deep if you ask me, but a logical choice.


Some random musings I had overnight concerning the hull fit and assembly. I was thinking that it should be possible to assemble the hull completely first, then attach it to the floor pan. There aren't any tricky alignment or attachment issues on the floor, and this way you should ensure that you get a good solid and true sit and you will be able to address any gaps easily. The interior pieces can be added through the roof and rear openings if you choose not to glue them to the floor pan first. Something to consider if you haven't already started gluing.

Speaking of musings, I've been going over the references and made some observations regarding the windshield frame of the Mk I. It looks to sit recessed and then the glass portion brings it flush. The final cover then sits proud. If anybody can confirm this for the Mk II, I'd appreciate a holler.

And I also realized the quickest way to spot a Mk I from a II are the front doors. The Mk I has them begin at the hood line, the Mk II has an armoured slot in that front panel and the doors further back. If you can only see the front half of the vehicle, if there's a vertical strip near the hood line, it's a Mk I.

Now I need to decide on whether to add some stowage racks to the interior or not. I decided the doors don't need any other framing. Speaking of stowage, does anybody know where crew weapons were stored? There are straps on the hulls that look like they might be for rifles, although I think racks or clips of some sort would be more common and practical? Anyways, enough pondering for now, more soon.


Kimmo


Almost forgot, I received some lovely photo etch from Part that Staff Jim was kind enough to arrange. For a look at what's in the sets, see my in-box review here:
http://armorama.com/review/10209


Thudius
Visit this Community
Uusimaa, Finland
Joined: October 22, 2012
KitMaker: 1,194 posts
Armorama: 1,077 posts
Posted: Saturday, May 24, 2014 - 02:16 AM UTC
Putty and primer. The perfect way to kill an afternoon waiting for the hockey game to start. I added a few more framing pieces and the straps in the hull. The etch that comes with the kit is quite soft and looks very similar to what you get in Bronco and Hobby Boss kits. Probably the same sub contractor. Be very careful with it.


I primed the chassis with AK black. I've been meaning to use this for some time now but was always put off by the tests I had done previously. The primer seems to separate after vigorous shaking and needs constant stirring and the first layer doesn't look very black at all. Well, I'm nothing if not persistent. So, shake shake shake, pour. Yep. Separates. Thin washed out gray. Hmm...wait a minute, it gets blacker as add layers and it dries. Maybe this will work after all. Sure enough, in the end you get a good black with a bit of tooth, a trait common to AK primers. I did need to keep stirring it though. The gray and dark yellow primer I have don't need stirring, so I don't know what's going on with the black, but in the end it works well enough and looks to settle nicely without obscuring detail.


Primed the seats and the backs of the wheels. You can almost make out the indentations on the seat.


Since I was wondering about crew weapons yesterday, here's what you get in the kit for a rifle with an Enfield from Italeri for comparison. I have no idea what rifle that is supposed to be. It looks nice though.


And the Bren and Boys.


I think I'll paint the radio on Monday, I need to finish a figure as well, so kill a couple of birds in one session.

Kimmo
Thudius
Visit this Community
Uusimaa, Finland
Joined: October 22, 2012
KitMaker: 1,194 posts
Armorama: 1,077 posts
Posted: Tuesday, May 27, 2014 - 12:48 AM UTC
Nothing much to report. Yesterday I was just too tired to do anything and today I managed to get the radio painting started, no pics yet. I should get some more bench time tomorrow. I may not get anymore time until Monday so I need to get cracking.

Kimmo
AlanL
Visit this Community
England - East Anglia, United Kingdom
Joined: August 12, 2005
KitMaker: 14,499 posts
Armorama: 11,675 posts
Posted: Tuesday, May 27, 2014 - 04:14 AM UTC
Coming along well Kimmo.

Al
Nahuel19431
Visit this Community
Chubut, Argentina
Joined: August 15, 2010
KitMaker: 593 posts
Armorama: 548 posts
Posted: Tuesday, May 27, 2014 - 04:45 AM UTC
Nice work

Omar
Thudius
Visit this Community
Uusimaa, Finland
Joined: October 22, 2012
KitMaker: 1,194 posts
Armorama: 1,077 posts
Posted: Tuesday, May 27, 2014 - 06:03 AM UTC
Thanks Al and Omar. Things should start to pick up pace now that the suspension and the interior is mostly done.

Kimmo
Thudius
Visit this Community
Uusimaa, Finland
Joined: October 22, 2012
KitMaker: 1,194 posts
Armorama: 1,077 posts
Posted: Wednesday, May 28, 2014 - 06:41 AM UTC
Finally manged to get the dashboard wedged in place. Still a couple of touch ups needed. The cross brace snapped at some point during my test fitting as I figured it would. This actually made fitting easier.


I came to the conclusion that in order to proceed, I will have to get the engine compartment done. It will be tricky to do anything after the chassis is attached because the engine will need to be mounted first. So I spent way too much time trying to figure out how I'm going to do the ignition harness. I'm still debating. I marked where holes and boxes will go on the firewall and started painting the engine.

The engine and transmission are Ford grey, which appears to be a roughly 40% grey with a touch of red to give it some warmth. I primed everything black and then Model Color Cold Grey (which look decidedly warm to me) and natural steel for the manifolds and exhausts. I tried something new: smoke. This is sort of a wash/paint. It has an oily/smokey feel and gave the metal a freshly singed look. Very interesting but a wee bit too new for what I want so I'll start again with a darker shade of metal. To dull it down, I slapped on some rust and umber wash, then removed with a dampened cotton bud. Better but still too new and chrome looking. I want used, but not rusted out.


A happy accident, as Bob Ross would say. Anyways, next update probably won't be until next week. My work bench will be occupied by people dining on it through the weekend.

Kimmo
Thudius
Visit this Community
Uusimaa, Finland
Joined: October 22, 2012
KitMaker: 1,194 posts
Armorama: 1,077 posts
Posted: Monday, June 02, 2014 - 12:39 AM UTC
Got a decent session in today. Added some wiring and boxes to the firewall and drilled the holes for the remaining wires and the actuating rod for the grill covers. Speaking of grill, I glued the Part grill on. Looks really nice. the kit supplied radiator is quite nice as well, but the pe is a lot more defined. Gave the radiator a base coat too. The engine compartment and undersides got a coat of olive drab/grey primer and the interior light grey and a couple of coats of white. If you need an exercise in patience, brush paint a white interior. I also sanded and shaved a little bit of the chassis frame to help it slip in and out of place easier, the fit is quite tight without paint.


Continuing with dry fitting, the steering column is a bit of a tricky do. The instructions are once again sort of vague on placement, but there is only one place it can go. You can wiggle it through the opening if you slip it place first. Don't glue it until you have everything adjusted. The instructions would have you thread the column through the firewall opening and into the chassis. Good luck with that. I need to sand the bottom of the dash to get the column to sit better. You may need to trim the opening a little bit as well. I need to add the pedal mounts at some point too. Be extremely careful removing it from the sprue, one of the mounts snapped but I got it glued back in place.


Not a bad day's work. Still plenty of stuff to do, adding the wiring will feel like doing up a ship in a bottle I'm sure. Hopefully more tomorrow.

Kimmo
SdAufKla
Visit this Community
South Carolina, United States
Joined: May 07, 2010
KitMaker: 2,238 posts
Armorama: 2,158 posts
Posted: Monday, June 02, 2014 - 02:01 AM UTC
Coming along very nicely, Kimmo. Your extra work on the interior, especially, is paying off dividends.

I think I may have to add one of these M-H armored cars to my "to build" list. Lots of great detail and potential with the interior and engine.
Thudius
Visit this Community
Uusimaa, Finland
Joined: October 22, 2012
KitMaker: 1,194 posts
Armorama: 1,077 posts
Posted: Monday, June 02, 2014 - 02:25 AM UTC

Quoted Text

Coming along very nicely, Kimmo. Your extra work on the interior, especially, is paying off dividends.

I think I may have to add one of these M-H armored cars to my "to build" list. Lots of great detail and potential with the interior and engine.


Thanks Mike. It sure is a nice little kit, fiddling aside.

Kimmo