Dioramas: Buildings & Ruins
Ruined buildings and city scenes.
Hosted by Darren Baker
Rough road, on the road again...
parrot
Visit this Community
Ontario, Canada
Joined: March 01, 2002
KitMaker: 1,607 posts
Armorama: 1,581 posts
Posted: Thursday, August 28, 2014 - 01:16 AM UTC
Simply amazing work.

Tom
Stickframe
#362
Visit this Community
California, United States
Joined: December 01, 2013
KitMaker: 1,661 posts
Armorama: 1,202 posts
Posted: Sunday, August 31, 2014 - 10:38 AM UTC
Hi fellow model builders,

thanks for the positive words - certainly serves as moral support as this moves along!

This beast keeps getting bigger and bigger!

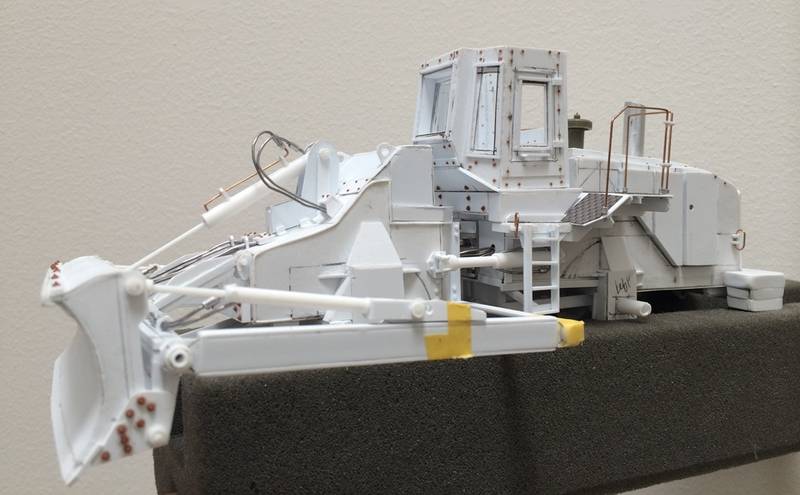
So far, more or less, so good. I've had a few headaches, but nothing that far out of the ordinary - the biggest challenge has to do with the nature of the front blade, relative to the frame.

As you'll see, the blade is attached both at the central frame, and from outriggers on each side. The outriggers though, project past the front wheels, which at this point, aren't done yet and won't be for a while. So, in effect, the blade was built in place, and it hung from the central frame - then, the outriggers temporarily placed. They slide on and off at the front and back pivot points...if that makes sense...? In any event, it was easier to write the description than to do the work!!!

Ok - here we go:


No, it's not a transformer, it's a sheepsfoot roller missing its "feet"!


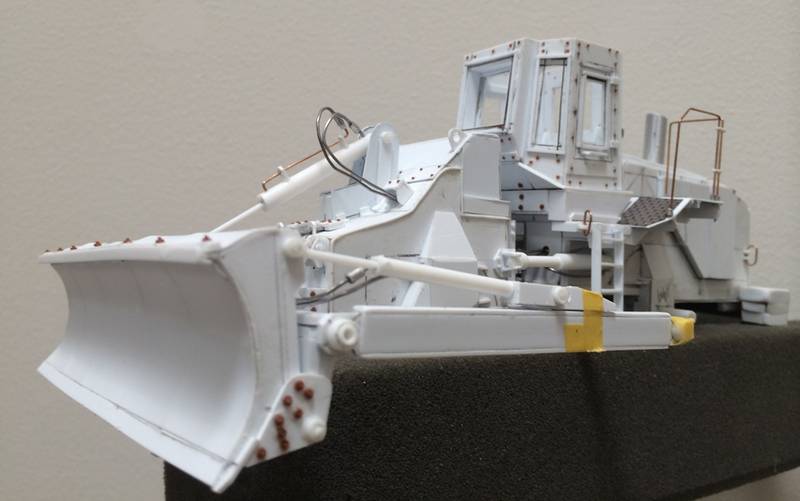
The blade was a bit of a head scratcher - the back side is thicker styrene, then I cut curves into a series of ribs along one side of the thicker styrene, to set the pattern for the curve. Next, a sheet of thin styrene was glued down matching the curve -


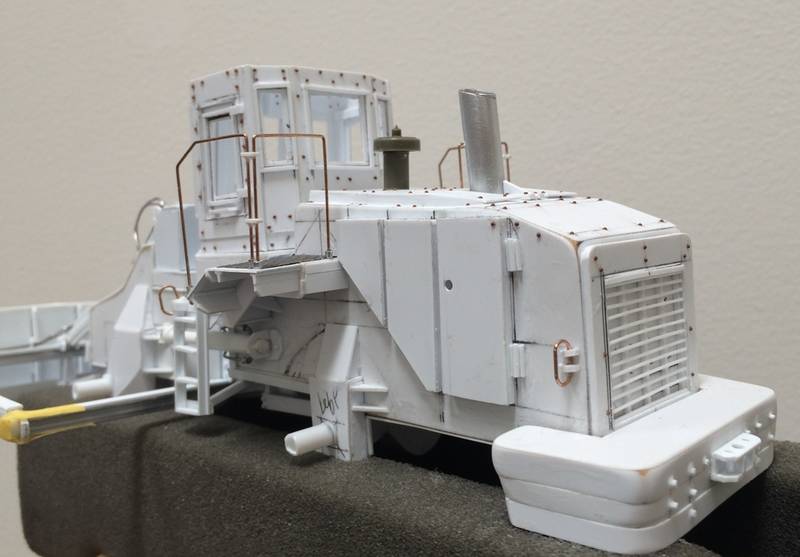
You can see, while a clunky beast, there's actually quite a bit going on here - from the radiator grill to various grabs, and all sort of odd bits and pieces - the good news is they are generally symmetric - so, what goes on one side goes on the other - which, in a way, has forced me to pay attention to both sides, and I think has helped in keeping it square and more or less true - yes, there are a few misalignments, but nothing drastic -


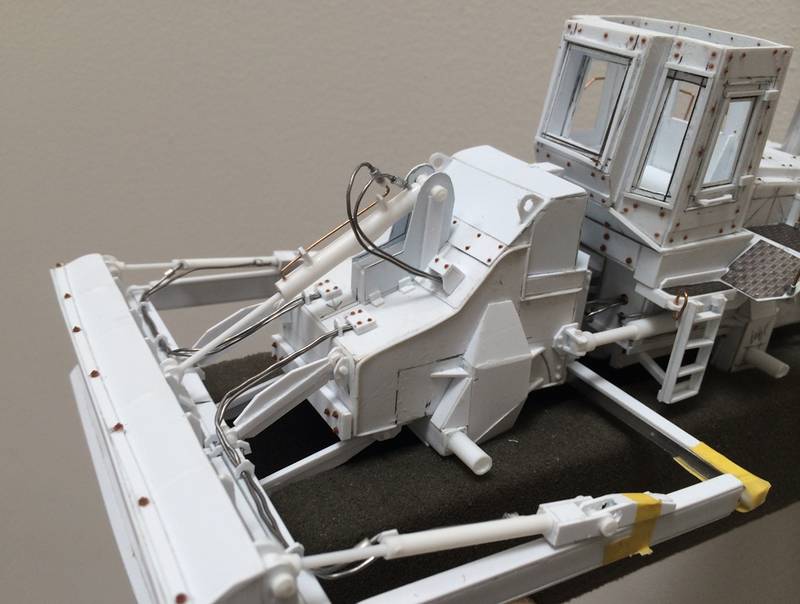
The picture above illustrates the point I made above pretty well - lots of odd pieces times 2!...and you can see what I meant by "hanging" the blade from the frame. The side arms slide on and off so I can still attempt to get the wheels on - Yes - I've tested this out, and aside from some perilous bending of glued in place hydraulics, it seems to work fine. Remind me of that when it's all painted up and I need to install the wheels!!!

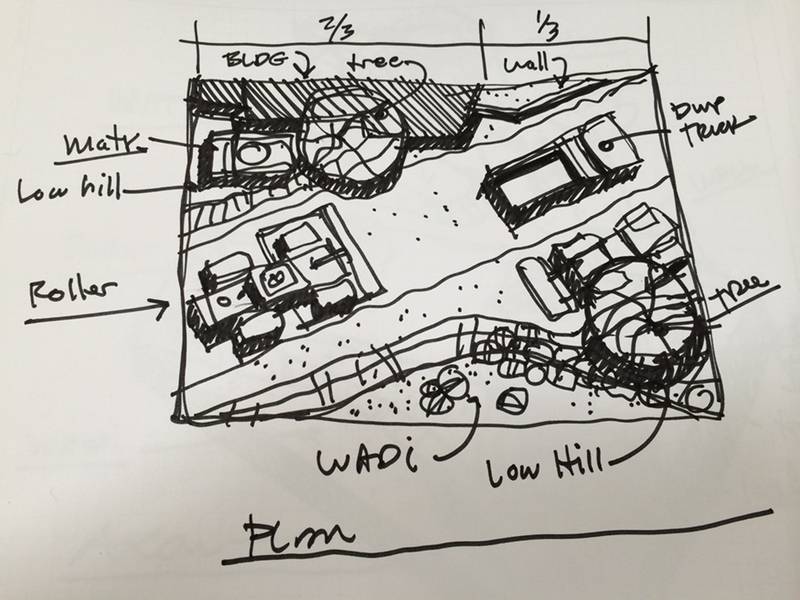
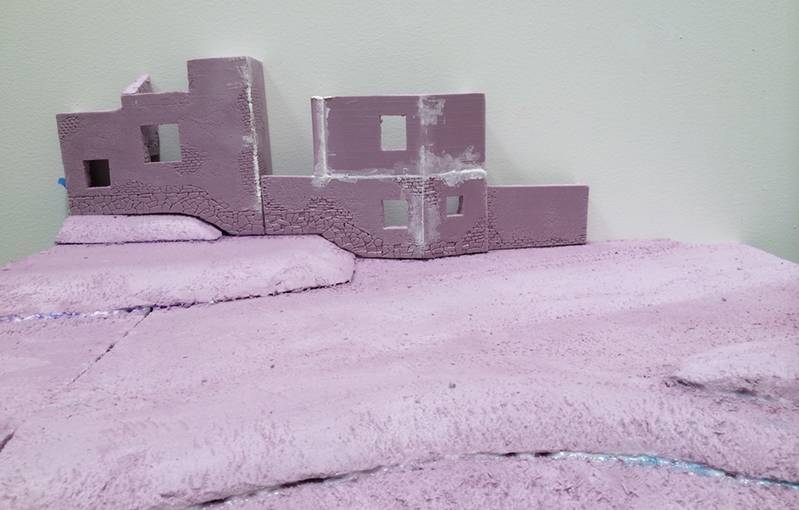
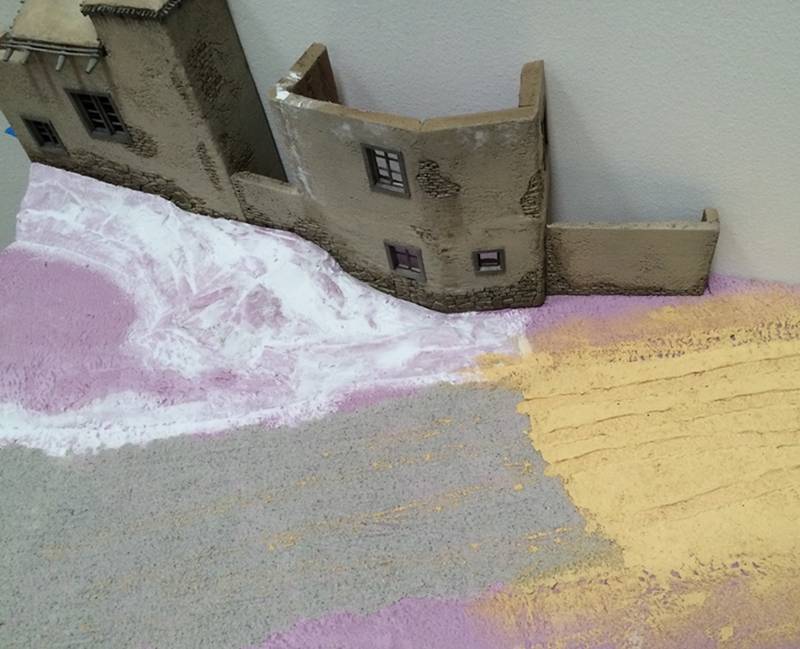
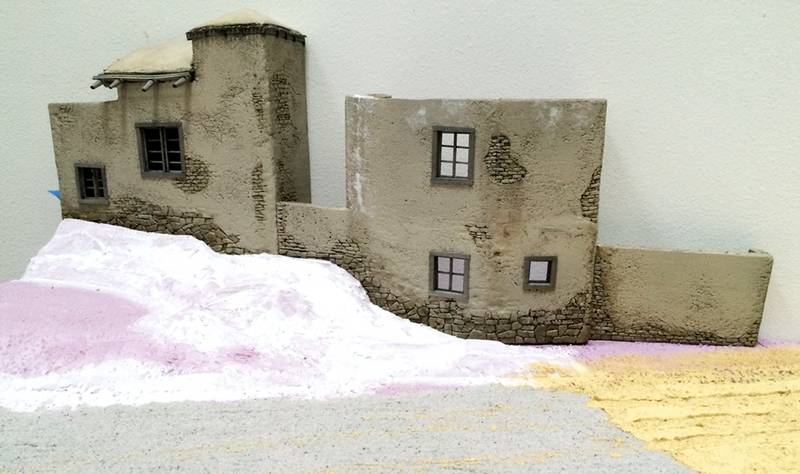
As for the dio - I'm doing a redesign. While I was pretty close in guestimating the tractor footprint(s), I was off the mark in terms of estimating their "presence" -these things are big! and each tractor has a lot going on visually - so, they each need "room" just to sit and not look crowded -

Next, our Armorama associate Brian, whose been nice enough to give me some insight on what really goes on in the world of road building in Afghanistan, and I've concluded this layout won't get an HMMWV for sentry, and will get an MATV - which, as some of you have seen, I like to build anyway, but, that adds one more big truck -

Also, my great idea of a fleet service truck - turns out to be a bit off too....in reality, that role is served by either MRAP wreckers (which I think I'll build for another project! - they just look cool) or HEMMTs - both of which are also huge...so, no service truck, but I will give a go at converting the armored M1083 in to a dump truck -

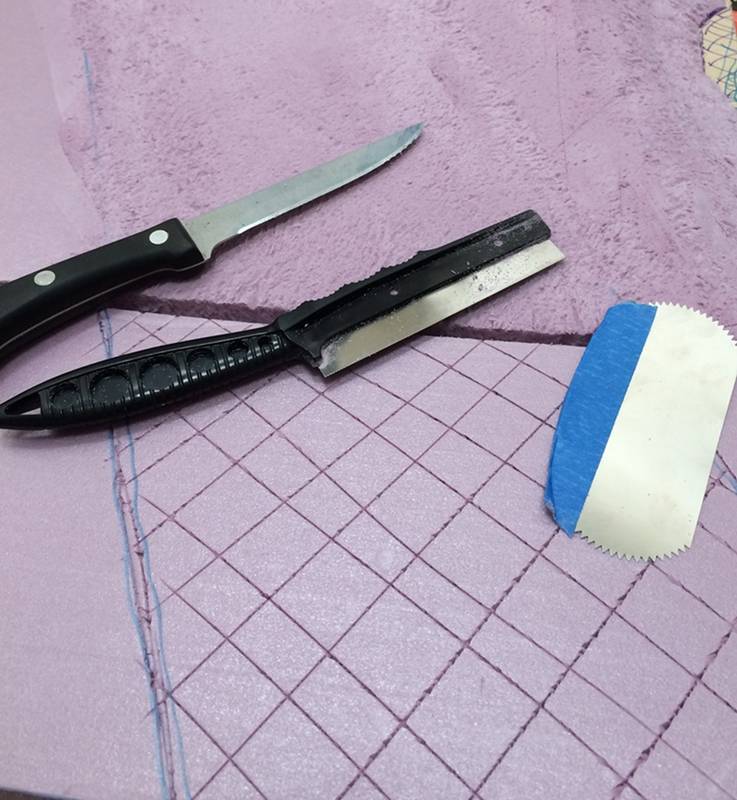
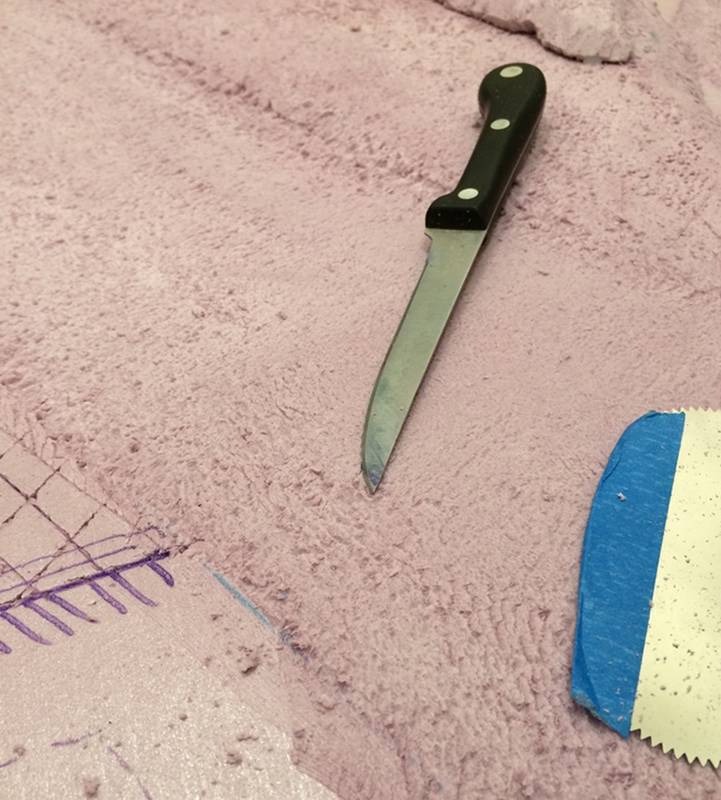
In regard to the sheepsfoot roller "feet", apparently officially called "cushions", our very own Matt has decided to tackle the challenge - he's made up an autocad version of the cushions and will get them 3d printed, then make resin pieces for installation! how's that for cool! he just volunteered and emailed me a jpeg of his idea! right on! I like this approach much better than the alternative making up hundreds of little styrene nuggets to look right - thanks Matt!

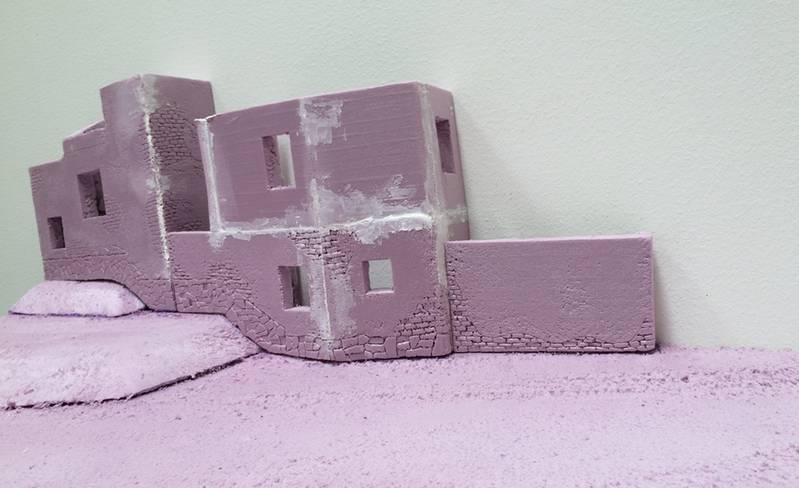
Sheesh - this is almost becoming a group build!, in addition, I've been in touch with a certain European model builder, who I'll call "Romain", who has been offering some great thoughts on the layout and what I'm actually showing in the dio - keeping it real that is, and not my vague interpretation of what the "place" may (uhh, err, or may not)look like!

So - thanks guys!

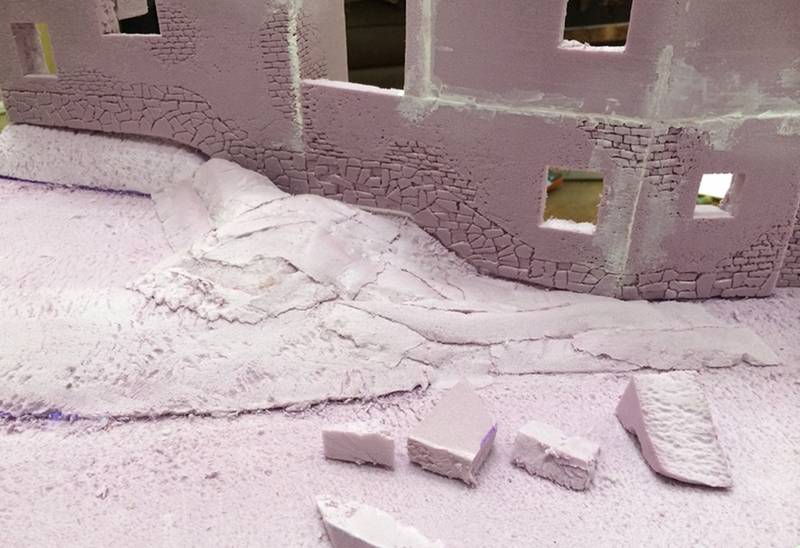
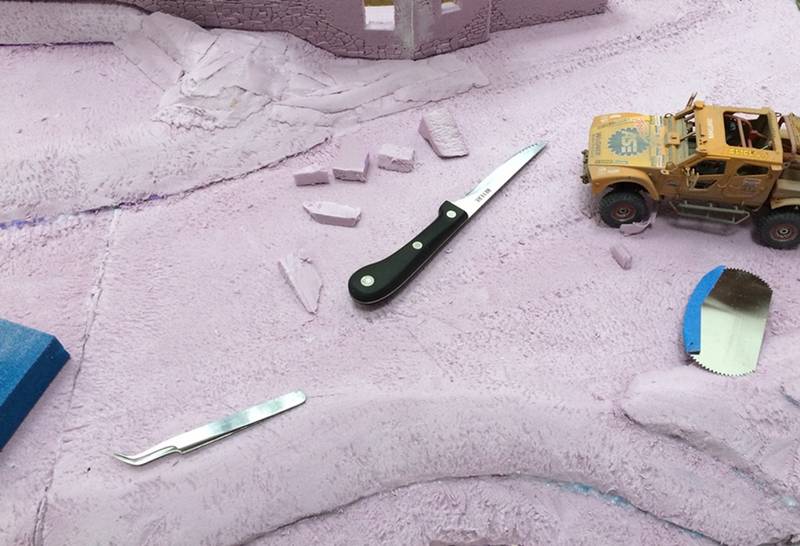
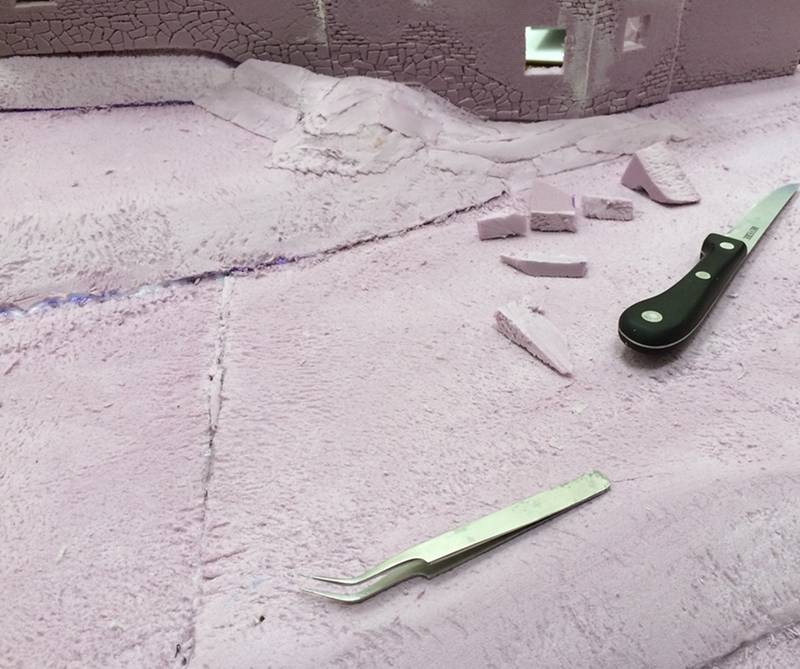
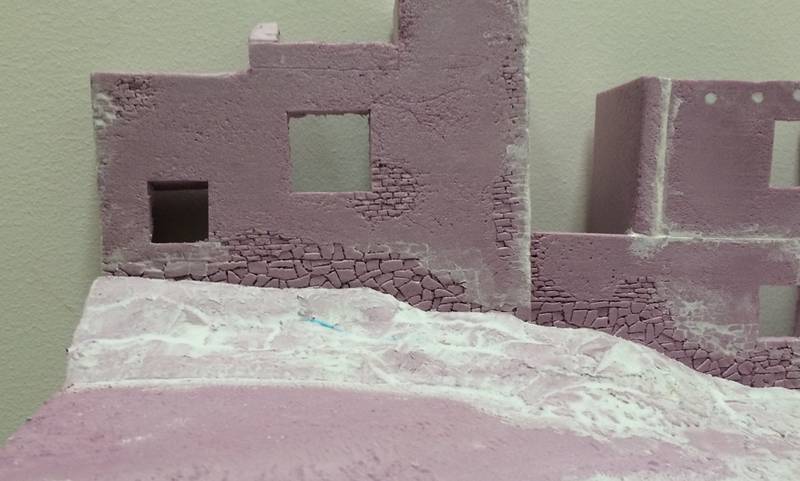
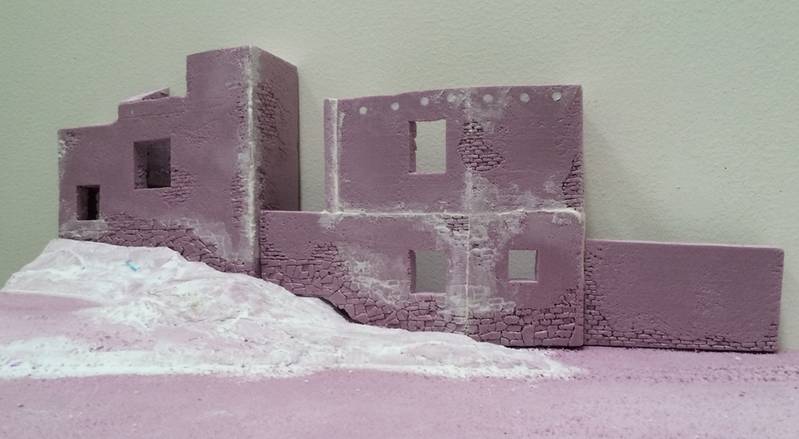
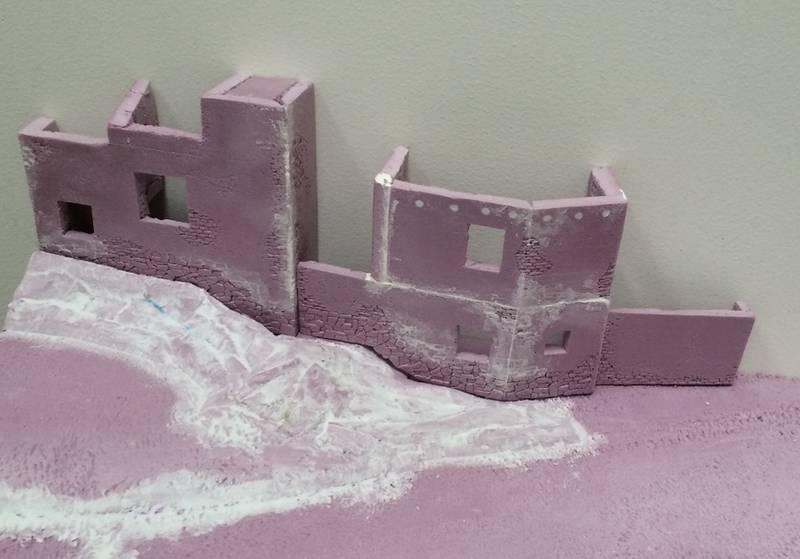
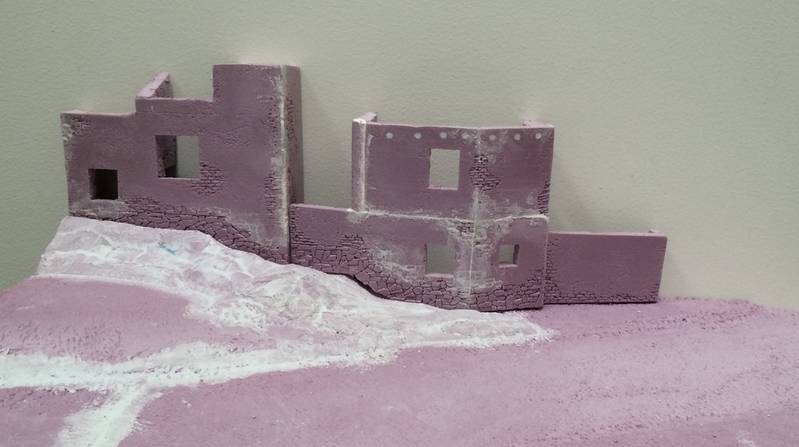
As for the next steps, I'll finish this roller up, but there will be some down time while the "cushions" are addressed. In the meantime, I might get going on the base - I even with the vehicle changes, I still want some topo, and buildings - I'm not as sure about the wadi - I might just be out of room for it all -

thanks for checking it out!
cheers
Nick
165thspc
#521
Visit this Community
Kentucky, United States
Joined: April 13, 2011
KitMaker: 9,465 posts
Armorama: 8,695 posts
Posted: Sunday, August 31, 2014 - 10:42 AM UTC
Killer! Really amazing work! Kudos
justsendit
Visit this Community
Colorado, United States
Joined: February 24, 2014
KitMaker: 3,033 posts
Armorama: 2,492 posts
Posted: Sunday, August 31, 2014 - 10:57 AM UTC
Yes, yes, here we go! Spectacular!!! This will be awesome when painted but I love the progress pics/notes — what a build! Thanks for sharing.

—mike
1stjaeger
Visit this Community
Wien, Austria
Joined: May 20, 2011
KitMaker: 1,744 posts
Armorama: 1,727 posts
Posted: Sunday, August 31, 2014 - 01:53 PM UTC

Quoted Text

Yes, yes, here we go! Spectacular!!! This will be awesome when painted but I love the progress pics/notes — what a build! Thanks for sharing.

—mike


I can only concur!! Wow!!! Spectacular indeed!!

Cheers

Romain

jrutman
Visit this Community
Pennsylvania, United States
Joined: April 10, 2011
KitMaker: 7,941 posts
Armorama: 7,934 posts
Posted: Sunday, August 31, 2014 - 03:24 PM UTC
I've said it before and I'll say it again,EIII Carumba!!
yeahwiggie
Visit this Community
Dalarnas, Sweden
Joined: March 24, 2006
KitMaker: 2,093 posts
Armorama: 1,359 posts
Posted: Sunday, August 31, 2014 - 06:27 PM UTC
This is some seriously amazing work!
Stickframe
#362
Visit this Community
California, United States
Joined: December 01, 2013
KitMaker: 1,661 posts
Armorama: 1,202 posts
Posted: Saturday, September 06, 2014 - 09:48 AM UTC
Hi guys - thanks for the positive words

Progress on the roller has essentially stopped - just need to wait for the "cushions" for the wheels. In the mean time, I've finished a few details, adding lights, air conditioner, bits and pieces, window frames, and cut out all the glass from clear styrene.

So, while the roller waits, I've started work on the base. The actual base is thin plywood with a bass wood frame. The "ground" is layers of 1" thick rigid pink foam insulation board. I plan to post some update pics tomorrow - from this, I'm learning a few things:

1) the pink foam can be manipulated into some pretty decent landform

2) it makes a huge mess while carving/cutting/scraping!!!! I'll have pink dust and nuggets floating around for years!

So - hope everyone is having a nice weekend! Hope to post an update tomorrow.

Cheers
Nick
Stickframe
#362
Visit this Community
California, United States
Joined: December 01, 2013
KitMaker: 1,661 posts
Armorama: 1,202 posts
Posted: Sunday, September 07, 2014 - 11:35 AM UTC
Hi fellow model builders -

Some updates on the dio - I'm making pretty good progress on the base - first though, as I mentioned, ,I needed a redesign - it just looked too crowded as I initially drew it up, so, a new concept:


Each of the original elements are here, just reorganized. The order is now, from the front to back, only a portion of a waterway, really more of a creek than a wadi in the foreground - I just didn't have enough room to make a reasonable typical wide and shallow wadi - next, the road being worked on, and finally some village buildings in the back.

I decided to try something new - while I really like the end result of hydrocal and plaster, I hate using it - the mess that is - so, I've opted for another sort of mess - the cuttings and shavings of pink rigid foam insulation - so far so good. I'm gluing it together with a glue gun (el cheapo at that!) with great results:


After I built a thin plywood base, I glued down my first 1" thick sheet of foam - then, adding layers - each is 1" thick. Getting it shaped has been interesting too - you'll see a cheap kitchen knife, razor saw and clay sculpting thing...in brief, you do a few heavy cuts, some mid-range shaping, and final shaping - the razor saw (being scraped over the surface) leaves a nice texture:


be forewarned, this process makes a huge mess - pink dust and nuggets everywhere!


I'm also using the foam for the buildings - I cut the sheets in half, to get about 1/2" thick wall panels - and assemble with the glue gun - the results are pretty good -clearly, there's a long way to go - but, so far so good.


It took about a day and a half to get this far - which, is fine, and no plaster mess!


To add more interest to the ground plane, I'm adding pieces here and there to extend the land form - the gaps will be filled with spackle. You can also see the building has a way to go - the upper floor, on the left side needs textures/mud brick showing through here and there. The wall planes took some time to consider - I opted with a stone base, then plaster coated mud brick -


This is an almost-overview - the colorful MATV is just there for scale -


The final pic is just of the use of scraps to fill gaps -the pink + glue gun seems to be a pretty good approach.

I'm hoping to not need to add a "land" layer above this (plaster or paper mache) and instead, will finish with fills, add some cast hydrocal boulders and paint - then, prime (really more of a base color) paint, add many "final" layers of dirt, sand, small rocks etc to make it complete -

thanks for checking it out

NIck
retiredyank
Visit this Community
Arkansas, United States
Joined: June 29, 2009
KitMaker: 11,610 posts
Armorama: 7,843 posts
Posted: Sunday, September 07, 2014 - 12:31 PM UTC
Loving this.
jrutman
Visit this Community
Pennsylvania, United States
Joined: April 10, 2011
KitMaker: 7,941 posts
Armorama: 7,934 posts
Posted: Sunday, September 07, 2014 - 12:46 PM UTC
Nice start to the groundwork. Looks like I may have to try that stuff sometime. I once made a pretty good cobblestone street by using a piece of styrofoam with the correct sized"peebles in the surface. I then hit the surface with a hairdryer and it made some nice effects.
Interesting blog as usual.
J
justsendit
Visit this Community
Colorado, United States
Joined: February 24, 2014
KitMaker: 3,033 posts
Armorama: 2,492 posts
Posted: Sunday, September 07, 2014 - 01:40 PM UTC
Nice!

—mike
fhvn4d
#159
Visit this Community
Massachusetts, United States
Joined: April 07, 2008
KitMaker: 803 posts
Armorama: 564 posts
Posted: Monday, September 08, 2014 - 12:49 AM UTC
Its just incredible Nick!!!! I cant even start to talk about the cool factor in everything you are doing here!! I am preparing some more dump truck uploads as we speak and Ill have them up here for all in about ten minutes!
fhvn4d
#159
Visit this Community
Massachusetts, United States
Joined: April 07, 2008
KitMaker: 803 posts
Armorama: 564 posts
Posted: Monday, September 08, 2014 - 12:59 AM UTC
This is what an up armored 10 ton dump truck looks like!


This is the Passengers side BII box and spare tire


This is the drivers side access ladder and back side of the BII Box (doors on both sides)


Cab


looking down the drivers side of the dump body. The steps you see on this side are on the rear on the opposite side


Hope that helps a little bit. I have a few more close in detail pictures of the dump body but not gonna bother posting them here. PM me if you would like them !
matt
Staff MemberCampaigns Administrator
Visit this Community
New York, United States
Joined: February 28, 2002
KitMaker: 5,957 posts
Armorama: 2,956 posts
Posted: Monday, September 08, 2014 - 01:13 AM UTC
I got work from Shapeways that the pads are shipping in the next day or two.
Stickframe
#362
Visit this Community
California, United States
Joined: December 01, 2013
KitMaker: 1,661 posts
Armorama: 1,202 posts
Posted: Monday, September 08, 2014 - 07:27 AM UTC
Hi Matt, Jerry and Mike - thanks for sticking with the build - it's getting there.

Brian - yes, the images would be great - any help I can get - I'm not sure of the order of builds tho - that dump truck will take a fair amount of scratch work - I might do the MATV first - while no picnic to build, at least there's a kit....so, maybe the dump truck last. The scratch marathon of the roller is enough for me for a while.

Thanks Matt - no worries - I've got plenty to keep me busy -

So, after yesterday's post, I settled in for Sunday of football and model building. I'm still working on the pink foam - its getting there.

Have a look:


and there you have it - I've been fooling around with the look of the wall elements, mud brick, stone, mud plaster - and smoothing out the landform - the white material is lightweight spackle - it works very well so far. For the ground plane it's been useful to fill gaps and round edges - on the wall....to cover mistakes!

ok - thanks for having a look

Nick
jrutman
Visit this Community
Pennsylvania, United States
Joined: April 10, 2011
KitMaker: 7,941 posts
Armorama: 7,934 posts
Posted: Tuesday, September 09, 2014 - 01:22 AM UTC
You have a real eye for getting the disparate textures of the masonry accomplished. Very effective.
J
matt
Staff MemberCampaigns Administrator
Visit this Community
New York, United States
Joined: February 28, 2002
KitMaker: 5,957 posts
Armorama: 2,956 posts
Posted: Tuesday, September 09, 2014 - 01:55 AM UTC
Here's what the "pads" look like:


I believe the final Qty Nick & I came up with a 240 of them.
1stjaeger
Visit this Community
Wien, Austria
Joined: May 20, 2011
KitMaker: 1,744 posts
Armorama: 1,727 posts
Posted: Tuesday, September 09, 2014 - 02:20 AM UTC


Oooh!! That dump truck looks interesting!!!!!

Come on Nick, you can spare half an hour, can't you!

Honestly, you have the talent to scratch most of it in an acceptable time frame!!

Go Nick!!!

Cheers

Romain

PolishBrigade12
Visit this Community
Washington, United States
Joined: January 31, 2009
KitMaker: 380 posts
Armorama: 366 posts
Posted: Tuesday, September 09, 2014 - 08:53 PM UTC
Not sure how I missed the start of this build, but I'm glad I found it. Awesome work Nick. Those scratch builds are incredible, every one of them! ground work looks great so far. Standing by for more.

Cheers, Ski.
matt
Staff MemberCampaigns Administrator
Visit this Community
New York, United States
Joined: February 28, 2002
KitMaker: 5,957 posts
Armorama: 2,956 posts
Posted: Wednesday, September 10, 2014 - 10:01 PM UTC
I got the pads from shapeways last night.....


I'll be able to demold this evening, and start casting.
Danny_506
Visit this Community
Antwerpen, Belgium
Joined: October 07, 2007
KitMaker: 254 posts
Armorama: 26 posts
Posted: Thursday, September 11, 2014 - 01:03 AM UTC
Nike work,love it
1stjaeger
Visit this Community
Wien, Austria
Joined: May 20, 2011
KitMaker: 1,744 posts
Armorama: 1,727 posts
Posted: Thursday, September 11, 2014 - 01:45 AM UTC

Quoted Text

I got the pads from shapeways last night.....


I'll be able to demold this evening, and start casting.


COOL!!!!!!!!!!!

Can't wait to see them cast and attached to the rollers!!!

Such a fascinating project..!!!

Thanks for making my day guys!!!!

Cheers

Romain


Stickframe
#362
Visit this Community
California, United States
Joined: December 01, 2013
KitMaker: 1,661 posts
Armorama: 1,202 posts
Posted: Thursday, September 11, 2014 - 09:27 AM UTC
Hello - pleased to say I'm making progress on the base and buildings -

Jerry, Romain, Ski, and Danny -thanks for checking in! its appreciated on this end -

Matt - glad to see this is getting close - that said, I'm not all that anxious to cut, file and glue all 240 of those!!! - but, if all goes to plan, it should look cool when its done!

OK - while not building vehicles, I've been working on the base and the buildings - the paint is mostly on, and I'm starting the weathering. Unfortunately, some "on the way to work pictures" - have a look:


There you have it - not bad. This is 3 or four layers of various acrylics - started with a Vallejo primer, then Vallejo0 cam grey followed by AK dust - and a few others for the stonework. It has a way to go still - the wood is bass wood with an alcohol and ink wash.

Next, as I was watching the paint dry...I paid more attention to the base - also, as part of my ongoing effort to win the prize for the ugliest work in process!!! - this is coming close to an all time best:


As there is intended to be a lot visually happening on the ground, and I've decided no plaster or hyrocal - I'm trying other choices the grey is "coarse pumice gel" - the roller will be parked there (roller tracks?) - the yellow is Vallejo desert sand paste, home of the dump truck (tire tracks) -

Each material has a different texture, so I'm hoping this will influence the appearance of each, even as the colors will be fairly close, but different - I guess we'll find out -

OK - thanks for taking a look!

cheers
NIck

justsendit
Visit this Community
Colorado, United States
Joined: February 24, 2014
KitMaker: 3,033 posts
Armorama: 2,492 posts
Posted: Thursday, September 11, 2014 - 09:36 AM UTC
Nice! The exposed stones and surface washes are looking really good!

—mike