

Thanks Keith and Bob.
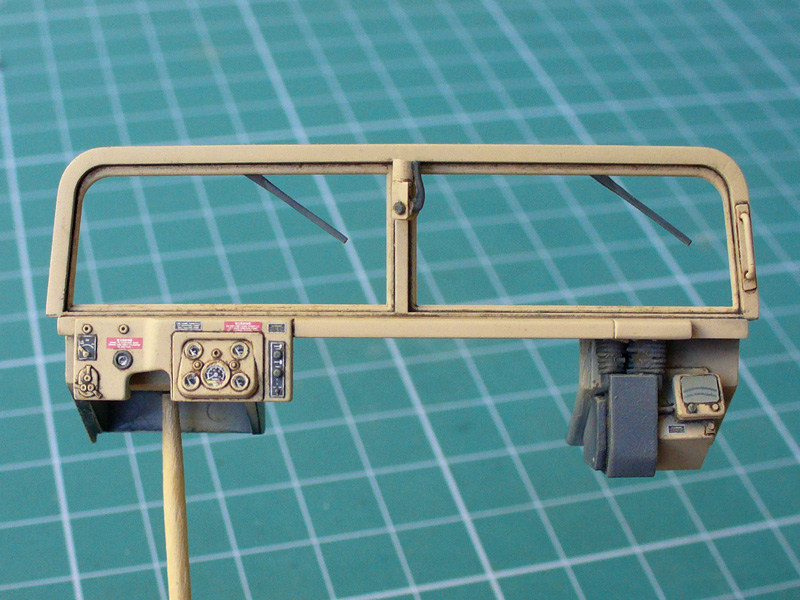
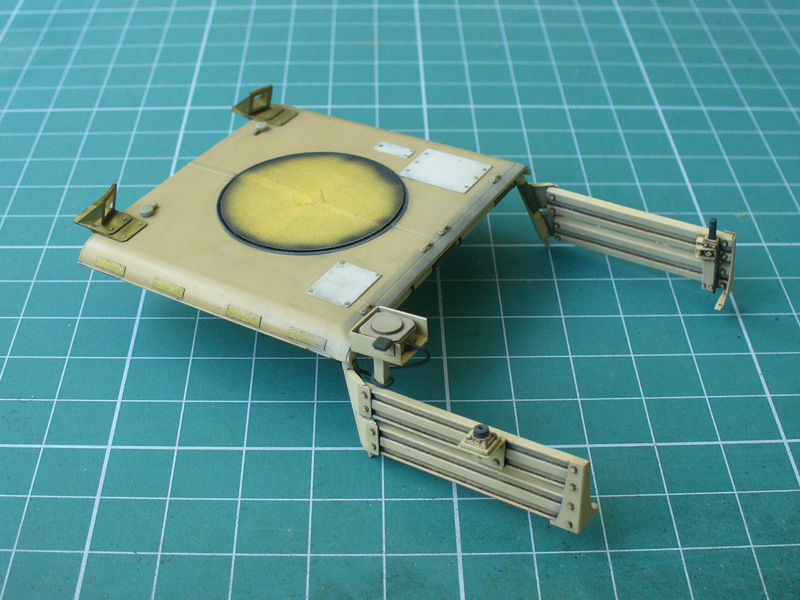
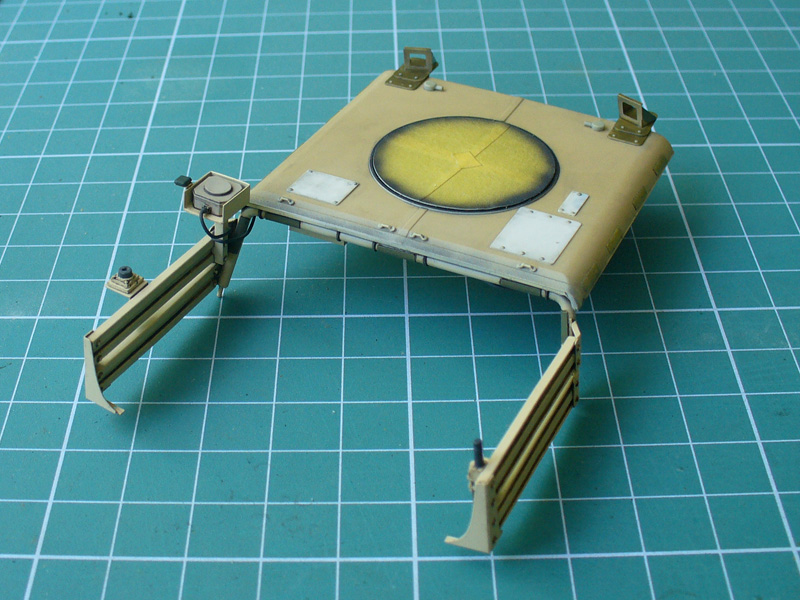
The 4 long thin pieces on the edge of the roof is Tamiya masking tape. I've put some on the rollbar as well and plan to put it on several other places on the model... Some GMVs are full of rubberized thick tape all around.
Mario
Hosted by Darren Baker
Special Forces GMV Afghanistan

Maki


Joined: February 13, 2002
KitMaker: 5,579 posts
Armorama: 2,988 posts
Posted: Sunday, September 20, 2015 - 05:37 PM UTC


11Bravo_C2

Joined: May 12, 2015
KitMaker: 475 posts
Armorama: 394 posts
Posted: Monday, September 21, 2015 - 09:36 AM UTC
Quoted Text
Thanks Keith and Bob.
Some GMVs are full of rubberized thick tape all around.
Mario
Rubberized tape or could it possibly be 2" velcro?
Maki
Joined: February 13, 2002
KitMaker: 5,579 posts
Armorama: 2,988 posts
Posted: Monday, September 21, 2015 - 12:12 PM UTC
Quoted Text
Rubberized tape or could it possibly be 2" velcro?
Hm, I'm not sure. I've seen long strips of tape which is added to the vehicle places with most wear and tear. These shorter strips possibly have other function. Perhaps someone could shed some light on these... 18Bravo, you there?
Mario
Epi
Joined: December 22, 2001
KitMaker: 3,586 posts
Armorama: 2,556 posts

Posted: Monday, September 21, 2015 - 05:22 PM UTC
Mario, I would go with VELCRO, but lets wait and see what the real expert, 18Bravo(Rob) says since he actually was around these vehicles.

Maki
Joined: February 13, 2002
KitMaker: 5,579 posts
Armorama: 2,988 posts
Posted: Sunday, November 29, 2015 - 03:56 PM UTC
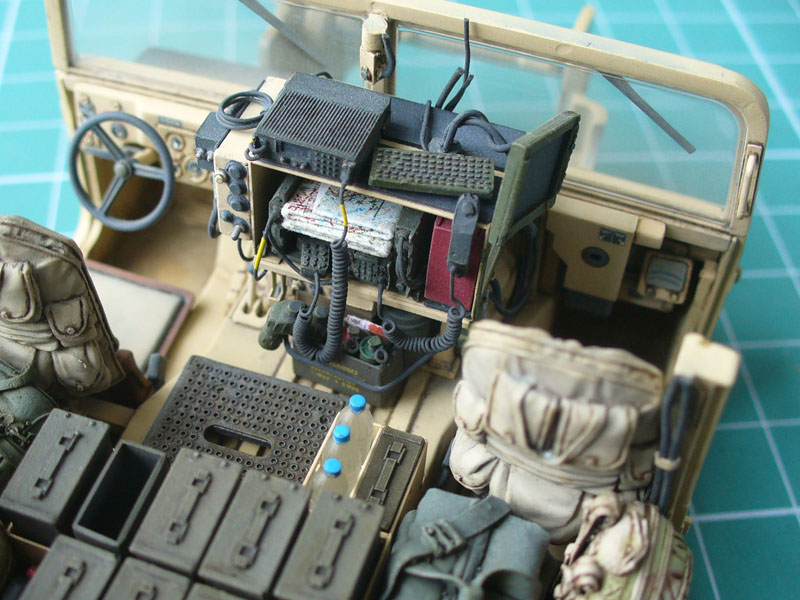
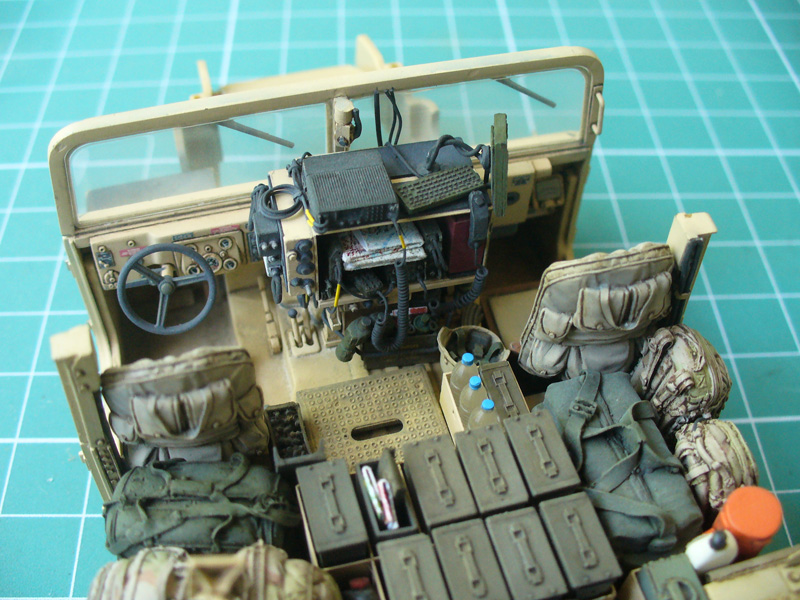
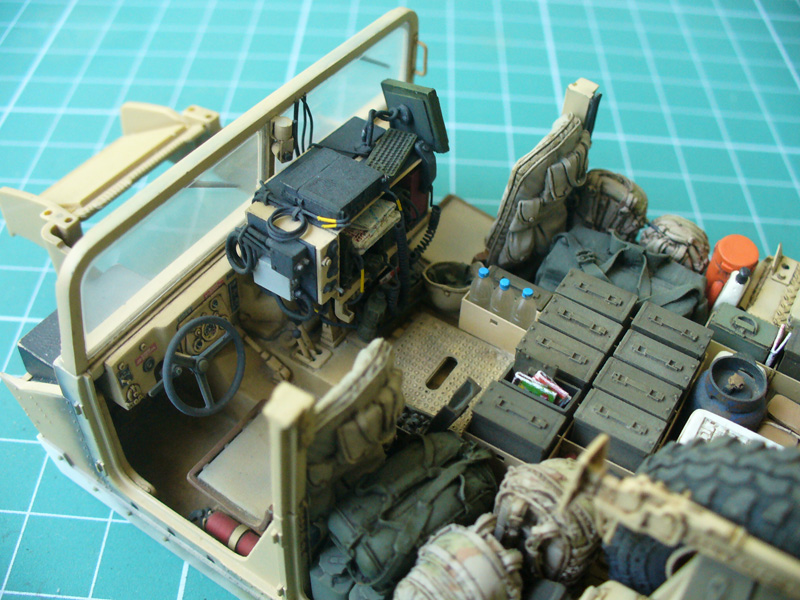
Some progress. The dashboard with fabulous Archer Transfers... Woody was kind to replace my old set with new transfers which worked like a charm:
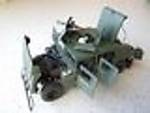
Then I started wiring the comms setup. First this:
And then the radio box:
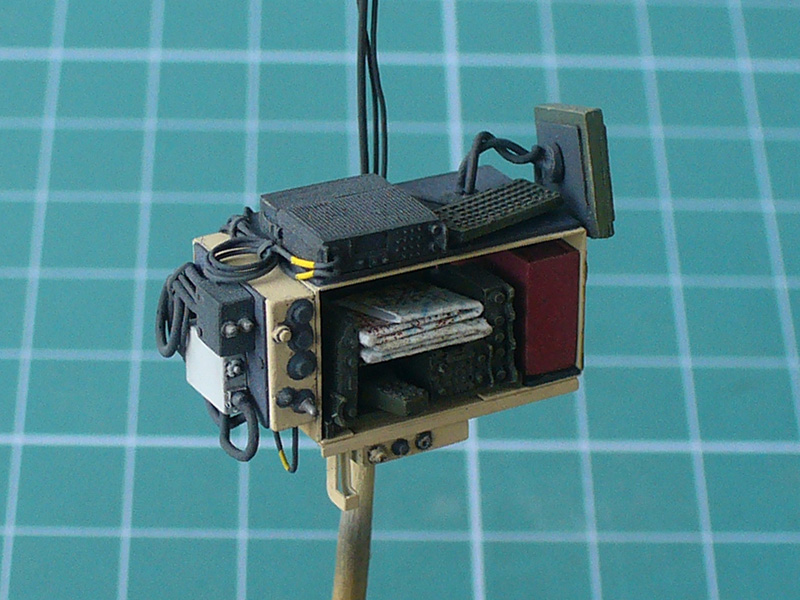
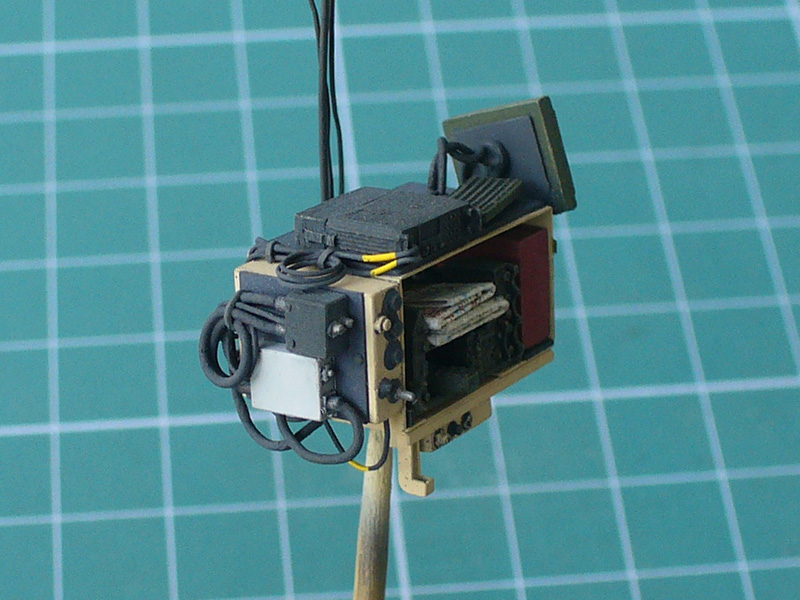
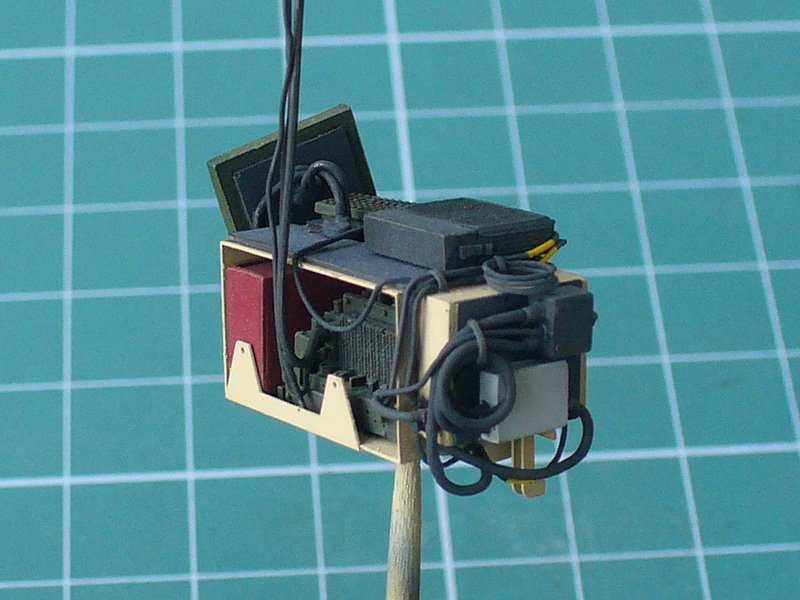
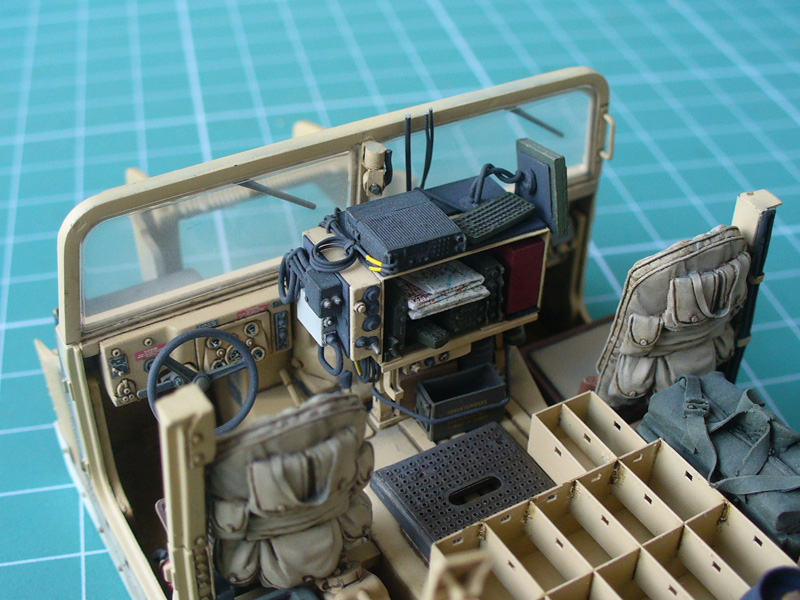
Installed. I still have to do the wires on the front of the box.
So far so good. Comments welcome.
Mario
Then I started wiring the comms setup. First this:
And then the radio box:
Installed. I still have to do the wires on the front of the box.
So far so good. Comments welcome.
Mario

Foxtrot1

Joined: March 03, 2011
KitMaker: 234 posts
Armorama: 200 posts
Posted: Sunday, November 29, 2015 - 05:10 PM UTC
So nice to see some updates! The comms setup looks amazing.
Watching this one closely Mario.
Watching this one closely Mario.

Graywolf

Joined: December 01, 2001
KitMaker: 6,405 posts
Armorama: 1,850 posts
Posted: Sunday, November 29, 2015 - 05:36 PM UTC
Great progress again Brother.


young_sven

Joined: May 14, 2010
KitMaker: 749 posts
Armorama: 743 posts
Posted: Sunday, November 29, 2015 - 06:16 PM UTC
Fantastic and beautiful work as always, Mario. Always a pleasure to follow your progress.

Lawyer1
Joined: July 22, 2015
KitMaker: 72 posts
Armorama: 67 posts
Posted: Sunday, November 29, 2015 - 06:24 PM UTC
Simply stunning!!!

Trisaw
Joined: December 24, 2002
KitMaker: 4,105 posts
Armorama: 2,492 posts
Posted: Monday, November 30, 2015 - 12:03 AM UTC
That looks marvelous, Mario! I really like the different shades of colors you used for all the gear and equipment.

BobSolo

Joined: August 30, 2014
KitMaker: 331 posts
Armorama: 112 posts
Posted: Monday, November 30, 2015 - 08:13 PM UTC
Wherever i look theres more awesome details to see, this build is so cool 
Maki
Joined: February 13, 2002
KitMaker: 5,579 posts
Armorama: 2,988 posts
Posted: Tuesday, December 01, 2015 - 12:58 PM UTC
Thanks guys, I'm glad you like it. I don't have much time for modeling at the moment, but hopefully there will be some updates soon.
Mario
Mario
kubisz

Joined: February 18, 2007
KitMaker: 978 posts
Armorama: 977 posts
Posted: Tuesday, December 01, 2015 - 02:30 PM UTC
Mario, give us more! Great work, expecially I like wash which made beautiful shadows 
Maki
Joined: February 13, 2002
KitMaker: 5,579 posts
Armorama: 2,988 posts
Posted: Thursday, March 24, 2016 - 05:46 PM UTC
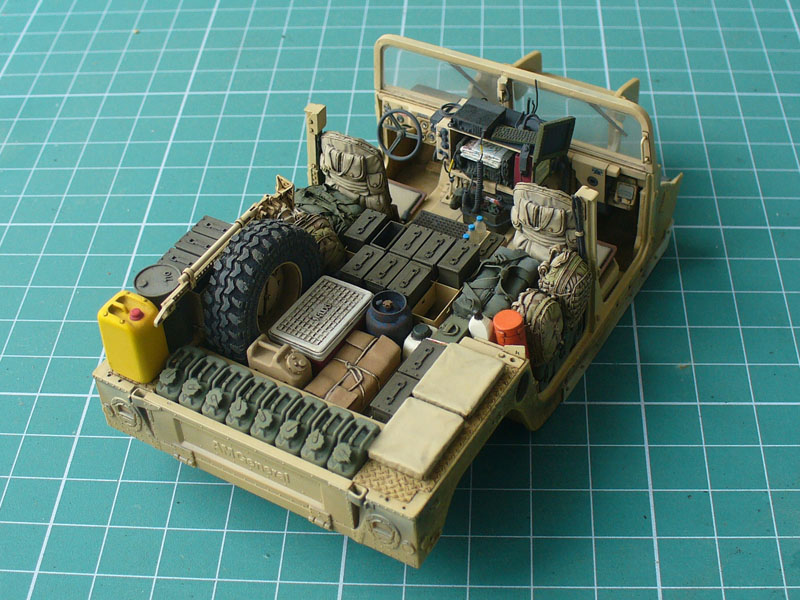
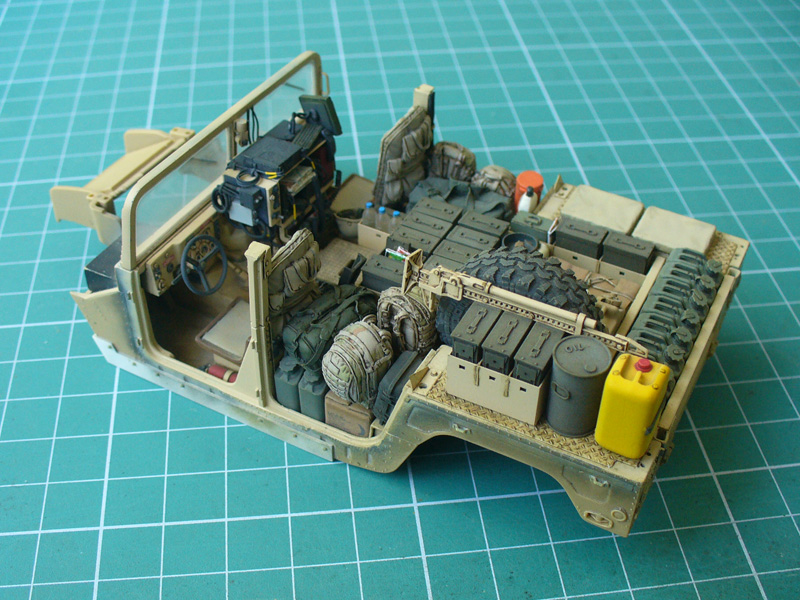
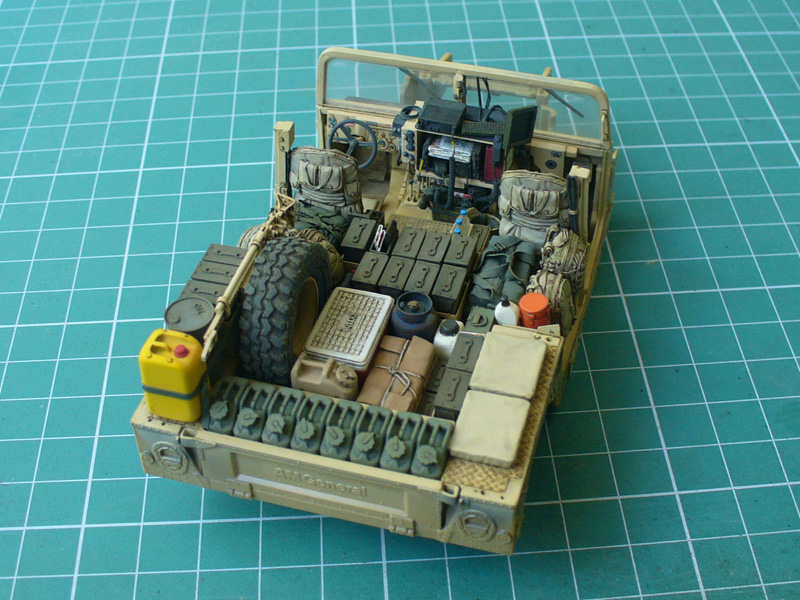
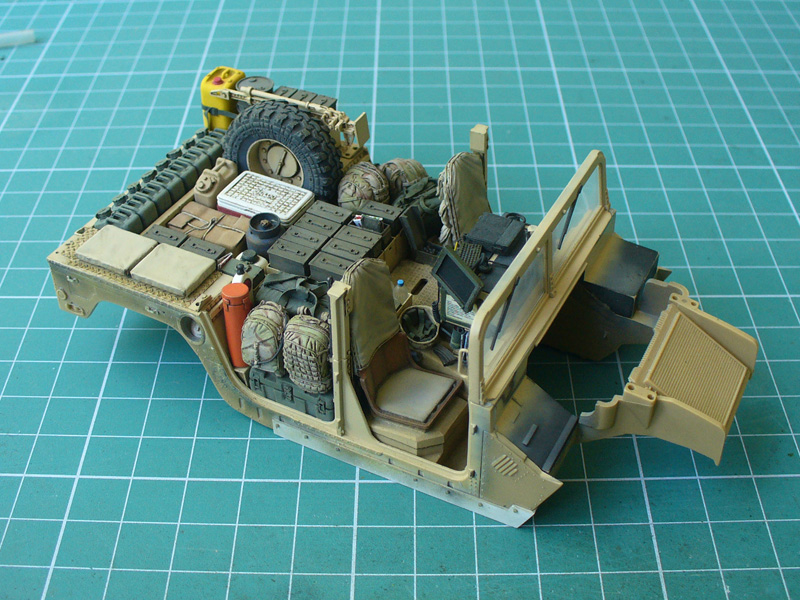
After a long break, here it is again...
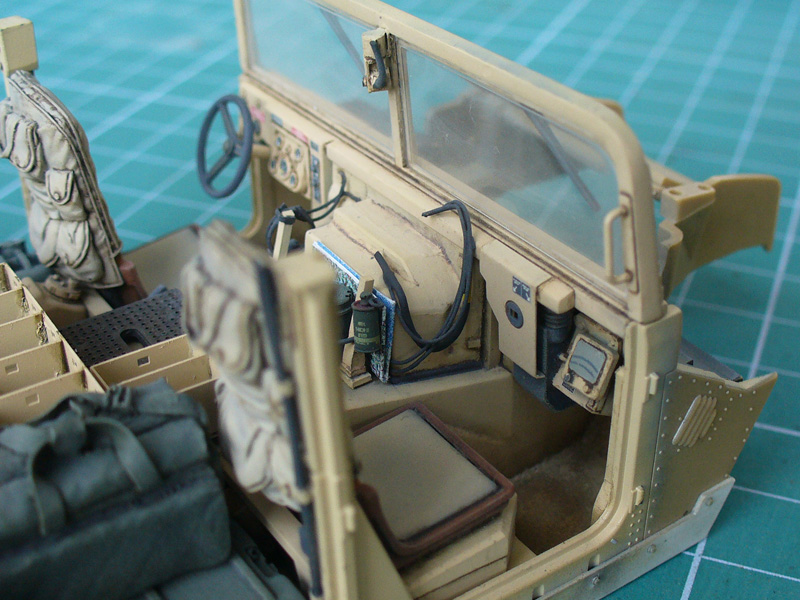
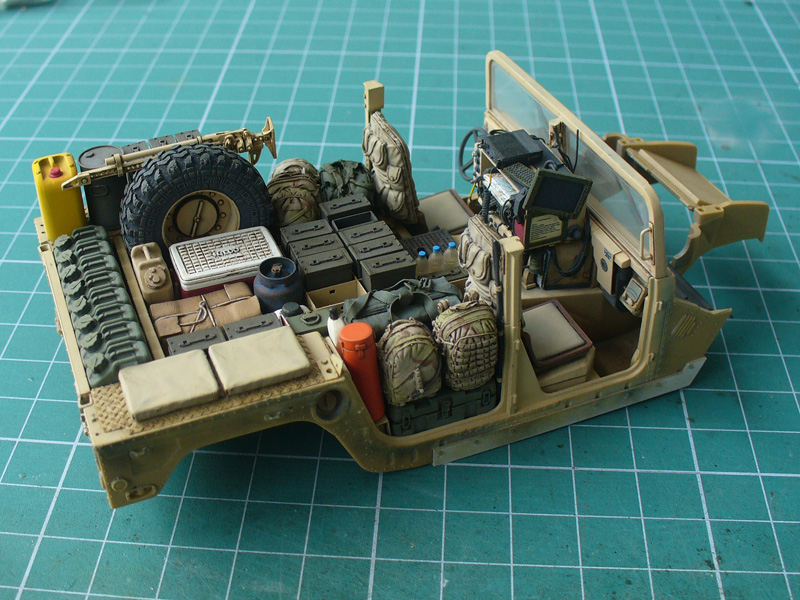
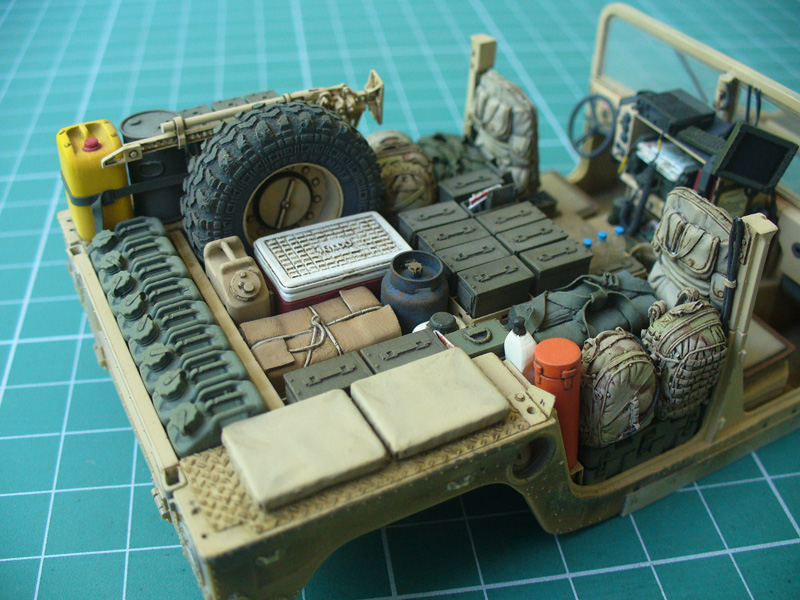
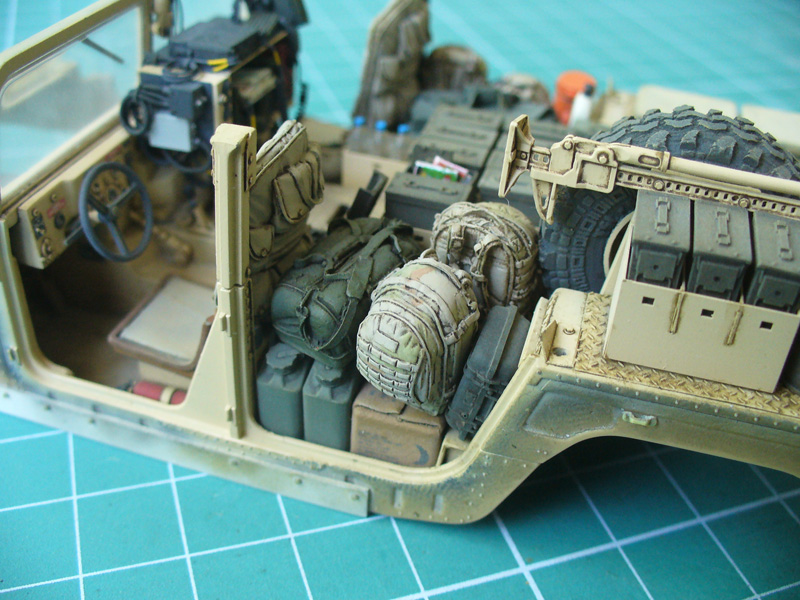
A lot of stowage was painted and added. Here are some backpacks:

and some details in the front box:
Here's how it looks now. Most of the internal stowage is finished, just some bits to add and weather the interior:
Cheers,
Mario
A lot of stowage was painted and added. Here are some backpacks:
and some details in the front box:
Here's how it looks now. Most of the internal stowage is finished, just some bits to add and weather the interior:
Cheers,
Mario
panorama

Joined: January 18, 2013
KitMaker: 254 posts
Armorama: 253 posts
Posted: Thursday, March 24, 2016 - 07:54 PM UTC
I have not followed your built for a while and I am impressed by the way it already looks! this thing is really coming alive.
Looking forward for more.
Cheers and happy modelling
Looking forward for more.
Cheers and happy modelling
kubisz
Joined: February 18, 2007
KitMaker: 978 posts
Armorama: 977 posts
Posted: Thursday, March 24, 2016 - 08:41 PM UTC
It's always a very big pleasure to watch every update in this thread. Great work on all stowage, many details to look closer at! But remember, that the crew of Dumvees was three (always? usually? I'm not sure), and there is no space for the third man.
Maki
Joined: February 13, 2002
KitMaker: 5,579 posts
Armorama: 2,988 posts
Posted: Thursday, March 24, 2016 - 09:20 PM UTC
Quoted Text
It's always a very big pleasure to watch every update in this thread. Great work on all stowage, many details to look closer at! But remember, that the crew of Dumvees was three (always? usually? I'm not sure), and there is no space for the third man.
As far as I understand, the third man is usually in the turret ring. I've also seen the third (or is it fourth?) on the right bench of cargo bay, manning the MG... hence those seat cushins.
Mario
Stickframe

#362
Joined: December 01, 2013
KitMaker: 1,661 posts
Armorama: 1,202 posts

Posted: Friday, March 25, 2016 - 05:13 AM UTC
Hi Mario - nice to see you posting again! I really admire the "clean" work you are doing - it's really excellent! Regarding staffing of the GMV, in recent project I worked on, I think it was said that each truck was intended to include three soldiers, with enough gear to last ten days on the road.
While reading more about one example which occurred in northern Iraq in 2003, the trucks were said to have an almost unparalleled abundance of all sorts of supplies. With that said, it seems reasonable to imagine that the location of the gear might vary based on the event you are illustrating - maybe driver, coms, and third on the bed mounted weapon or in the ring? I imagine if the group were traveling any great distance, the gear shown in the back seat could be relocated - at this point, I suppose it's your call where soldier 3 winds up being placed - and the others too for that matter - looking forward to your next post.
Cheers
Nick
Maki
Joined: February 13, 2002
KitMaker: 5,579 posts
Armorama: 2,988 posts
Posted: Friday, March 25, 2016 - 11:47 AM UTC
Thanks for your comments Nick.
Three soldiers, 10 days.... no wonder these trucks were packed full with supplies. I planned some figures for this build, but standing around the truck.
Mario
Three soldiers, 10 days.... no wonder these trucks were packed full with supplies. I planned some figures for this build, but standing around the truck.
Mario
Maki
Joined: February 13, 2002
KitMaker: 5,579 posts
Armorama: 2,988 posts
Posted: Friday, June 03, 2016 - 01:52 AM UTC
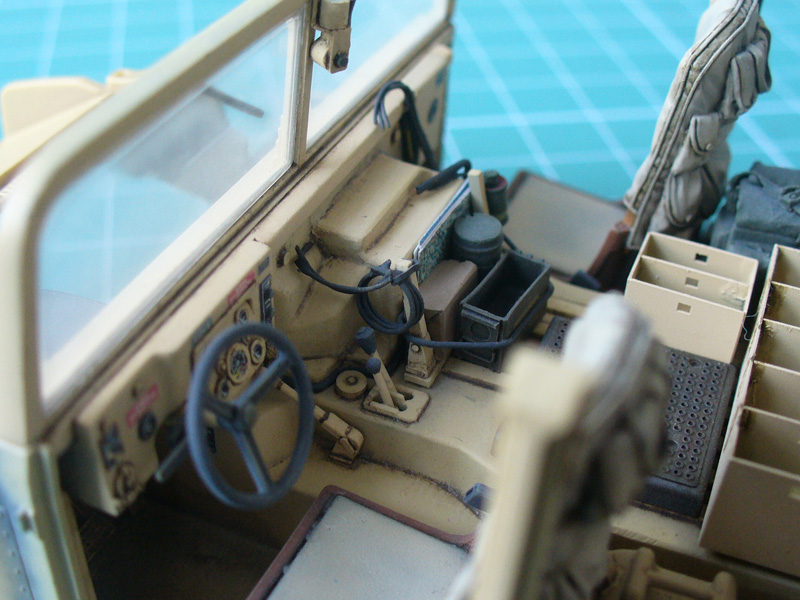
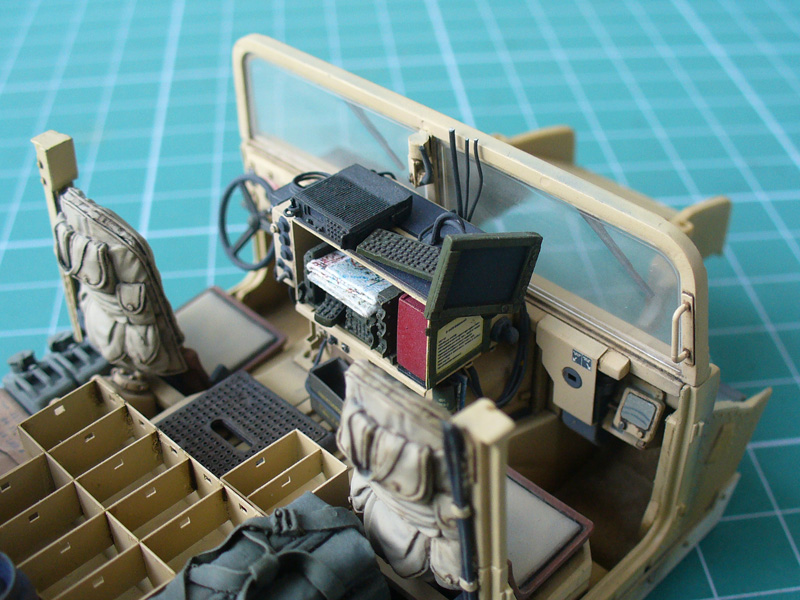
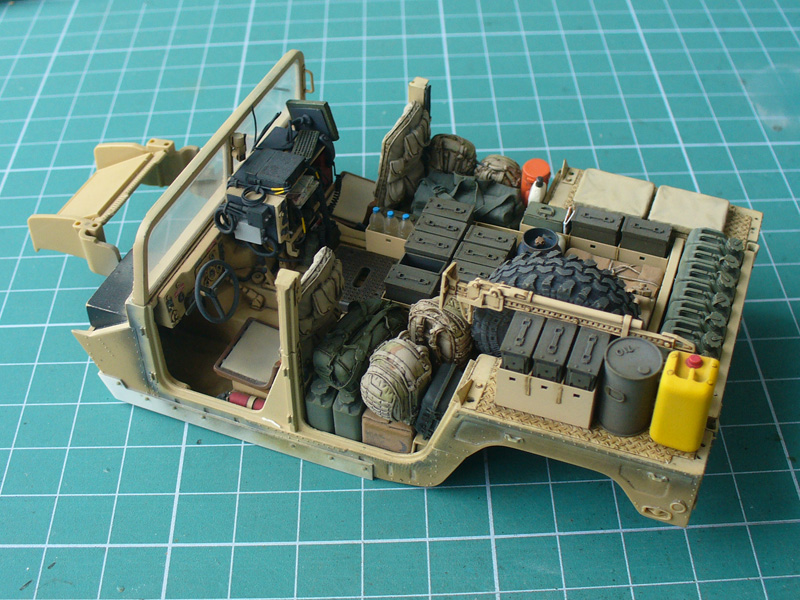
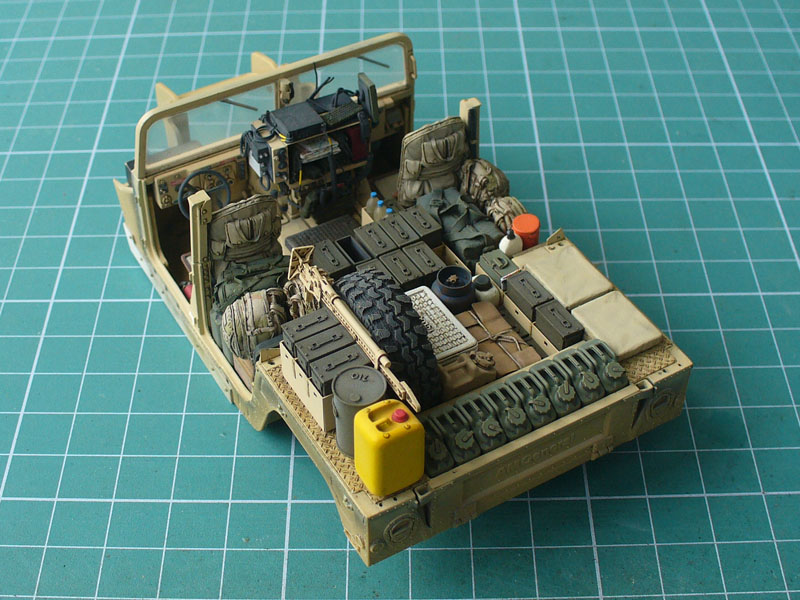
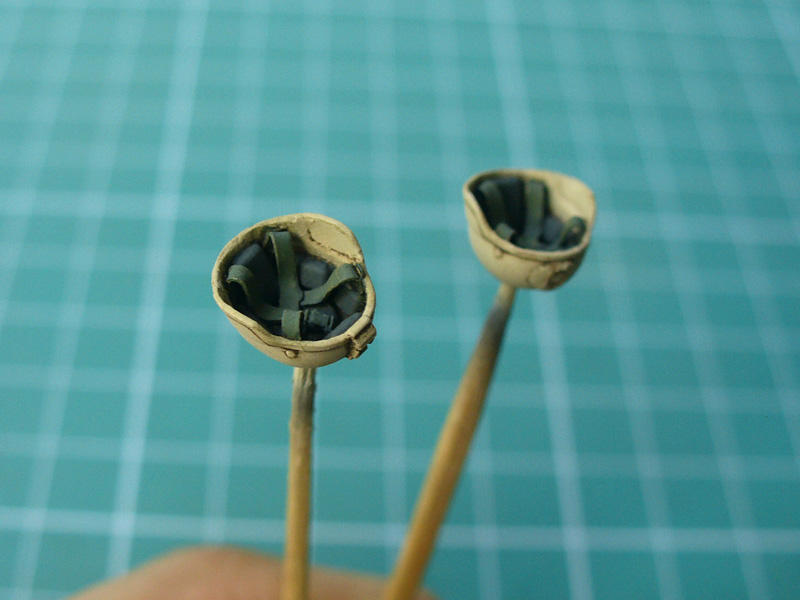
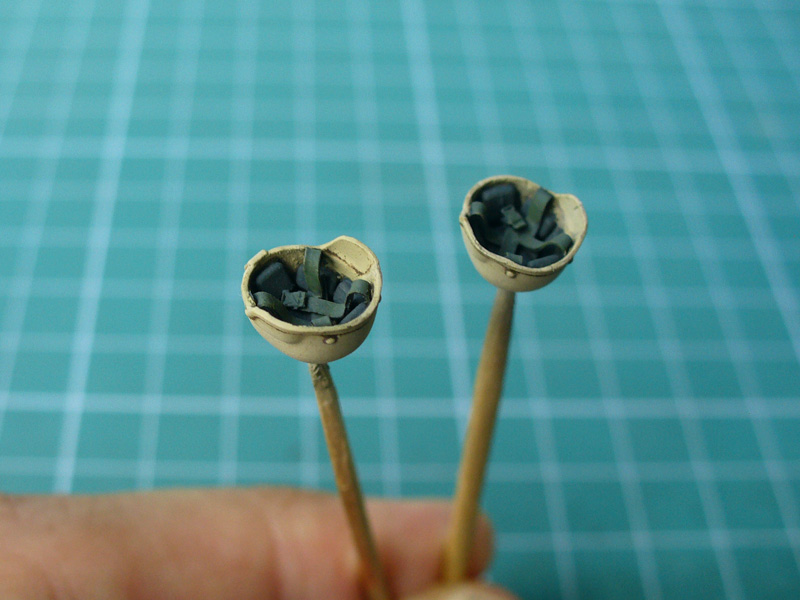
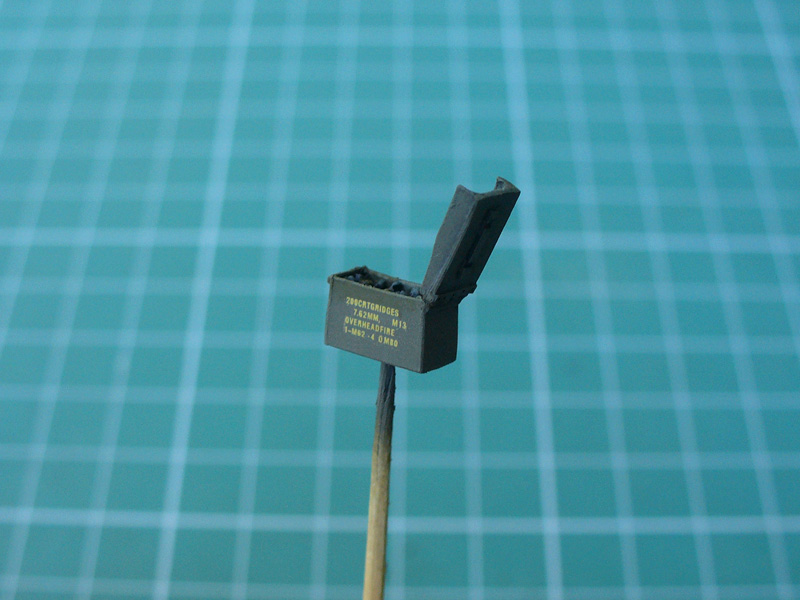
OK, I think I can call the interior done. I don't even want to say how much time details like this took:
Installed the goodies, weathered and dusted the interior. It looks like this:
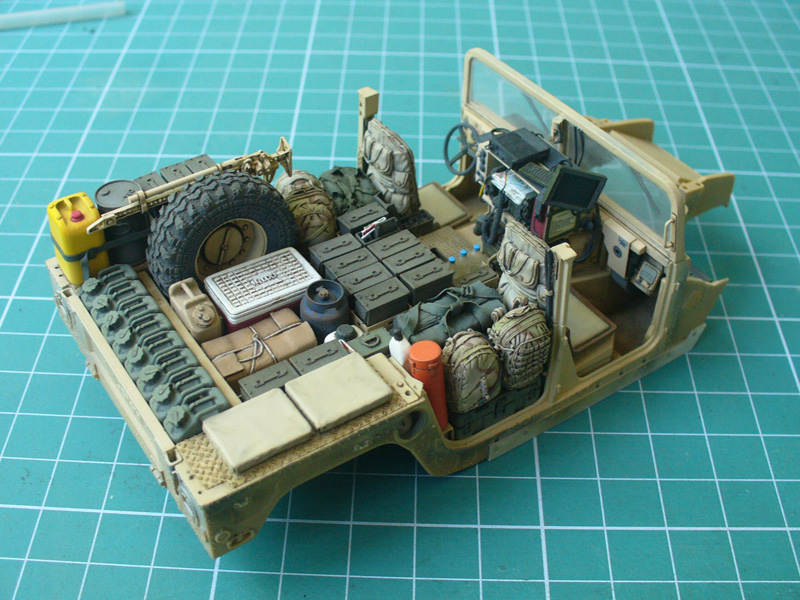
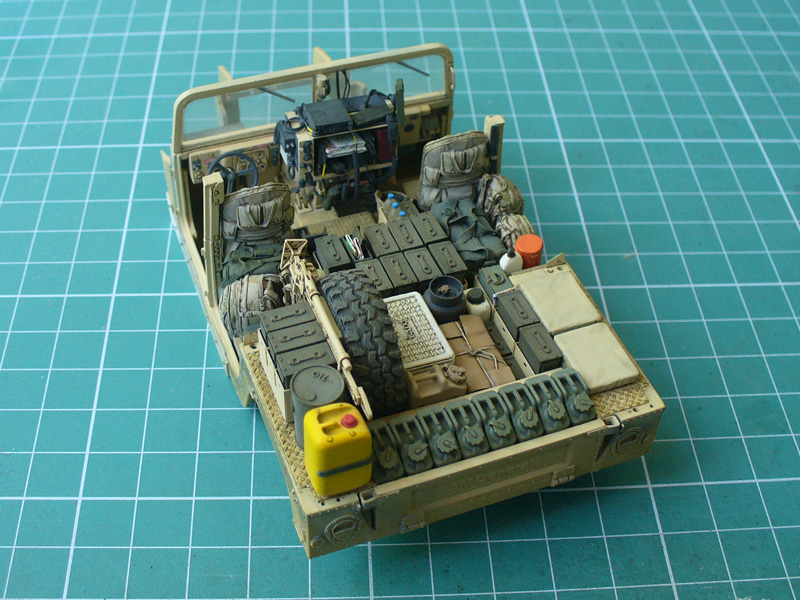
And some details:
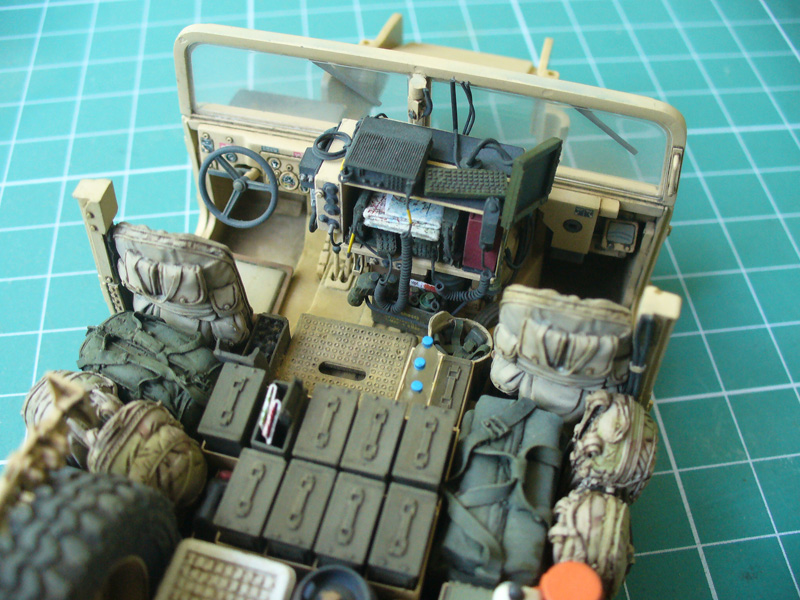
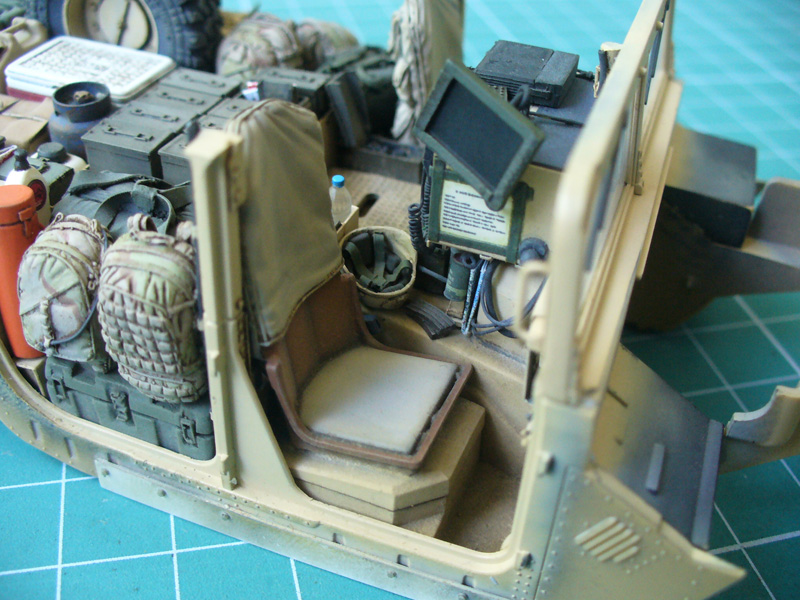
The aft part of the roof is also finished, so I'll be able to close the interior soon.
Cheers,
Mario
Installed the goodies, weathered and dusted the interior. It looks like this:
And some details:
The aft part of the roof is also finished, so I'll be able to close the interior soon.
Cheers,
Mario
WXerock
#450
Joined: July 19, 2015
KitMaker: 672 posts
Armorama: 668 posts

Posted: Friday, June 03, 2016 - 03:04 AM UTC
Wow... just wow Mario! It just keeps getting better.
Regards,
Eric
Regards,
Eric
Thirian24
Joined: September 30, 2015
KitMaker: 2,493 posts
Armorama: 2,344 posts
Posted: Friday, June 03, 2016 - 08:29 AM UTC
This is amazing work.

gcdavidson

Joined: August 05, 2003
KitMaker: 1,698 posts
Armorama: 1,563 posts
Posted: Friday, June 03, 2016 - 08:40 AM UTC
Mario, you've developed this crisp & neat painting style that I really really admire. This one turned out great, just awesome work man.
terminators

Joined: February 20, 2012
KitMaker: 1,932 posts
Armorama: 1,907 posts
Posted: Friday, June 03, 2016 - 01:16 PM UTC
Nice details and nice paint work !
goofmuilwijk

Joined: April 19, 2013
KitMaker: 179 posts
Armorama: 117 posts
Posted: Friday, June 03, 2016 - 06:41 PM UTC
Great looking!! Really inspiring!
 |

WEB HOSTING BY


Copyright ©2021 Armorama and Kitmaker Network, a subsidiary of Silver Star Enterprises
All Rights Reserved. Please read our Conditions of Use and Privacy Policy.
All Rights Reserved. Please read our Conditions of Use and Privacy Policy.