Mario, looking at your work on the computer shows just how talented you are. Even at extreme levels of magnification I can't see any building flaws or blobs of glue. The finish is so smooth. This is fantastic work sir!
Regards,
Eric
Hosted by Darren Baker
Special Forces GMV Afghanistan
Posted: Monday, May 01, 2017 - 02:57 AM UTC

galactica

Joined: April 11, 2008
KitMaker: 146 posts
Armorama: 126 posts

Posted: Monday, May 01, 2017 - 03:26 AM UTC
Mario,
wonderful build, from the construction and from the paint point of view.
I have one question: I have seen in the last pictures that you use wooden sticks as a support for painting parts.
How do you attach the parts to the sticks ?
wonderful build, from the construction and from the paint point of view.
I have one question: I have seen in the last pictures that you use wooden sticks as a support for painting parts.
How do you attach the parts to the sticks ?
Maki


Joined: February 13, 2002
KitMaker: 5,579 posts
Armorama: 2,988 posts

Posted: Monday, May 01, 2017 - 11:04 AM UTC
Thanks guys, I'm glad you like the build so far.
Ettore, the toothpicks are attached using a tiny amount of super glue. Usually to the points which would not be visible after the piece is fixed to the model.
Mario
Ettore, the toothpicks are attached using a tiny amount of super glue. Usually to the points which would not be visible after the piece is fixed to the model.
Mario
Maki


Joined: February 13, 2002
KitMaker: 5,579 posts
Armorama: 2,988 posts

Posted: Saturday, May 06, 2017 - 02:40 PM UTC
Here it is, turret finished:
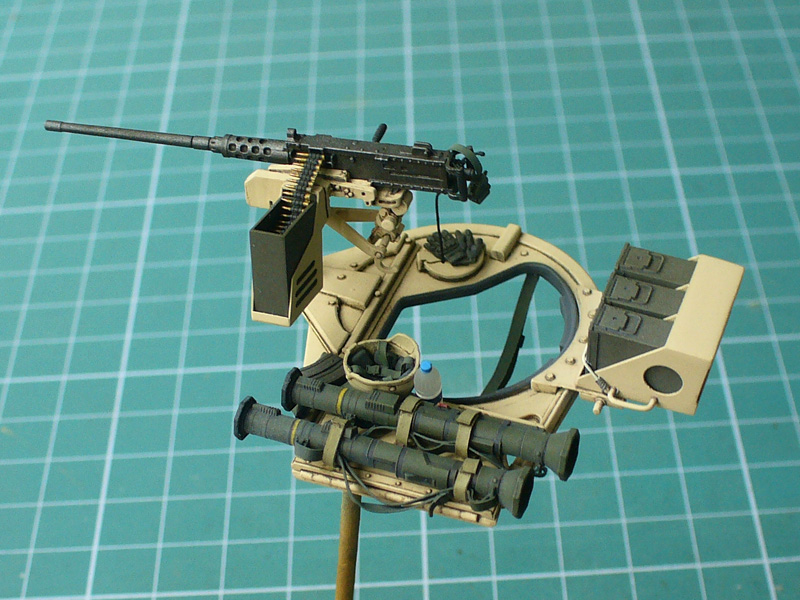
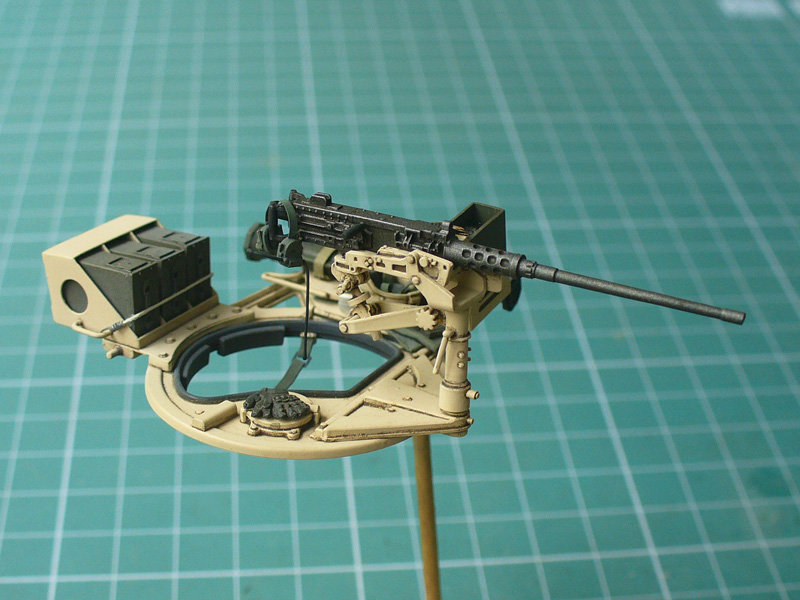
I did the bungee cord to secure ammo boxes, gunner's sling and added some more details on the turret.
Baby steps, but its getting there...
Mario


I did the bungee cord to secure ammo boxes, gunner's sling and added some more details on the turret.
Baby steps, but its getting there...
Mario
DutyFirst1917

Joined: February 03, 2016
KitMaker: 93 posts
Armorama: 86 posts

Posted: Sunday, May 07, 2017 - 05:51 AM UTC
Fantastic work wow!!!!!
Neo

Joined: January 20, 2005
KitMaker: 916 posts
Armorama: 758 posts

Posted: Sunday, May 07, 2017 - 05:58 AM UTC
Did you make the hook ends on the bungee cord ?
Or is that something manufactured ?
By the way - Build looking really good...
Or is that something manufactured ?
By the way - Build looking really good...
Maki


Joined: February 13, 2002
KitMaker: 5,579 posts
Armorama: 2,988 posts

Posted: Sunday, May 07, 2017 - 11:00 AM UTC
The hook ends were done using thin wire. The whole thing was an exercise in patience, but I think the end result was worth it.
Mario
Mario

Graywolf


Joined: December 01, 2001
KitMaker: 6,405 posts
Armorama: 1,850 posts

Posted: Sunday, May 07, 2017 - 01:12 PM UTC
Turret looks great Brother. 

roygdarwin

Joined: February 25, 2017
KitMaker: 69 posts
Armorama: 49 posts
Posted: Thursday, May 11, 2017 - 03:46 AM UTC
 your build is great ,love all the detail you are doing .


Maki


Joined: February 13, 2002
KitMaker: 5,579 posts
Armorama: 2,988 posts

Posted: Thursday, May 11, 2017 - 12:43 PM UTC
Thanks guys, I appreciate the comments.
Mario
Mario
young_sven

Joined: May 14, 2010
KitMaker: 749 posts
Armorama: 743 posts

Posted: Sunday, May 21, 2017 - 12:42 AM UTC
This build goes from strenght to strength, Mario. Superb detailing and impeccable painting. Stunning all around!
You are a master.
You are a master.
niart17

Joined: October 29, 2008
KitMaker: 76 posts
Armorama: 19 posts

Posted: Thursday, June 15, 2017 - 10:30 PM UTC
Wow, this build is amazing! I'm a new guy around here and am starting to attempt a 1/24 conversion of MENG's Hummer into something very similar to this. I don't think I'll be able to get half this detailed even at the larger scale. I definitely am bookmarking this build to use as reference. I can't wait to see more.
Bill
Bill
11Bravo_C2

Joined: May 12, 2015
KitMaker: 475 posts
Armorama: 394 posts

Posted: Monday, August 07, 2017 - 02:47 AM UTC
Mario,
Have you finished this project and have final images of it? If you have posted completion pics, I must've missed it.
Have you finished this project and have final images of it? If you have posted completion pics, I must've missed it.
Maki


Joined: February 13, 2002
KitMaker: 5,579 posts
Armorama: 2,988 posts

Posted: Monday, August 07, 2017 - 09:55 PM UTC
Not finished, but working on it.
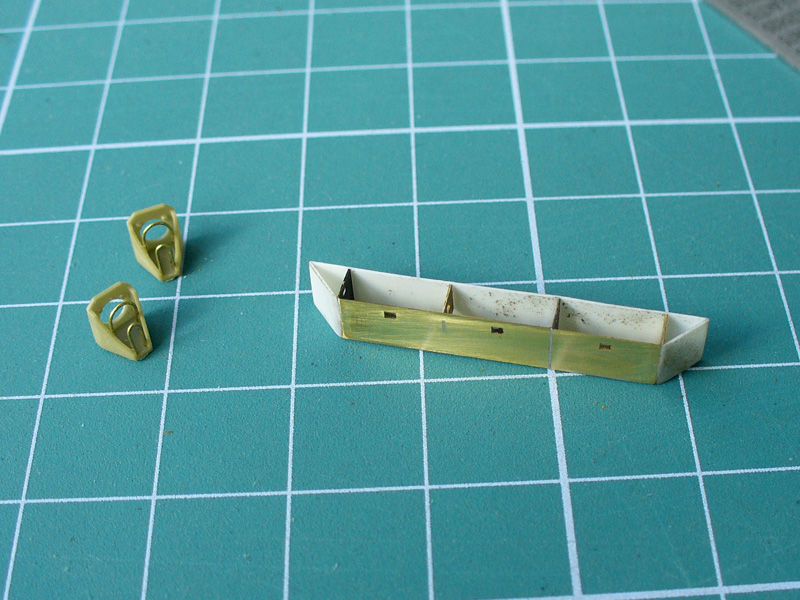
I used some custom PE (thanks to Jolly!) and brass wire to enhance the appearance of the details:
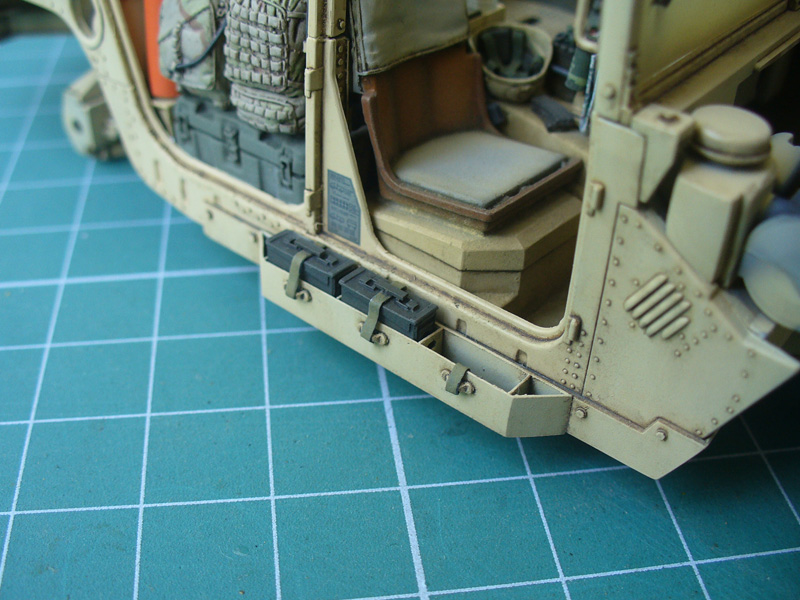
Here's how the ammo cradle looks installed:
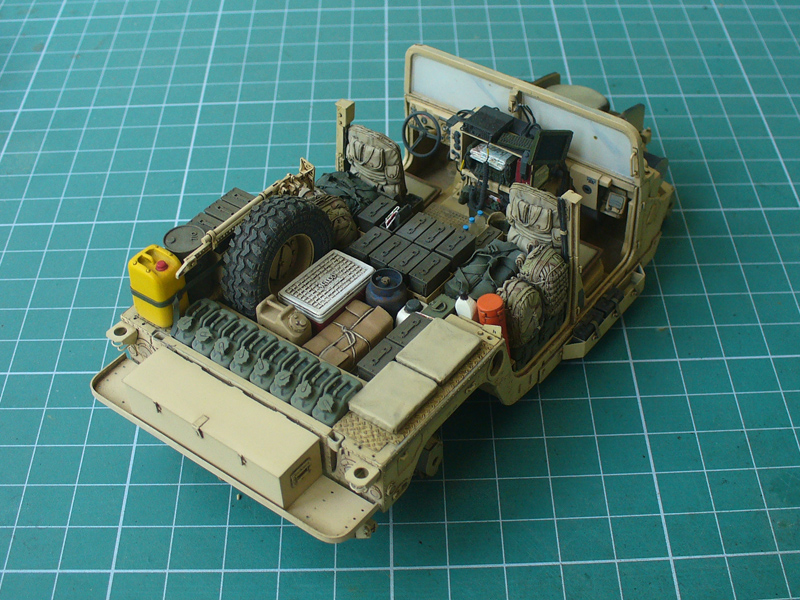
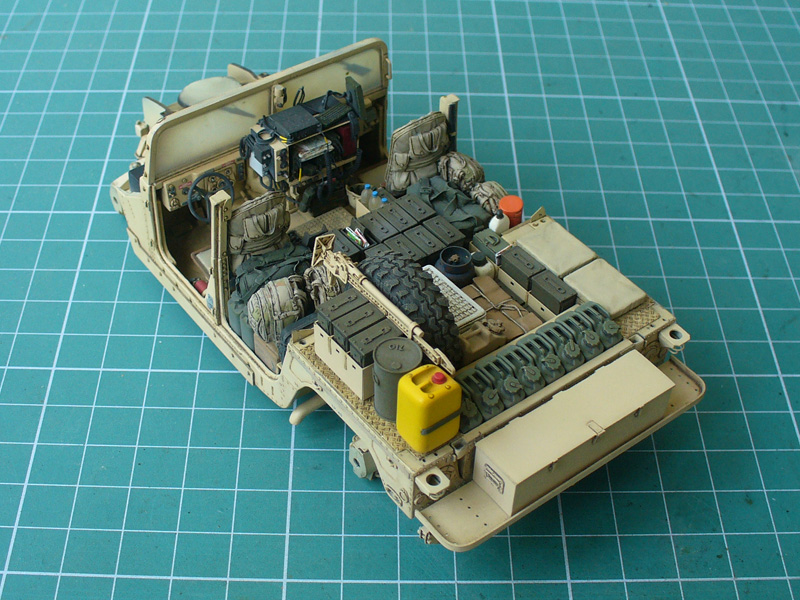
And here are some overall images of the current status. The vehicle body received the paint and wash, added some decals as well. I fixed the suspension and the rear shelf with large utility box:
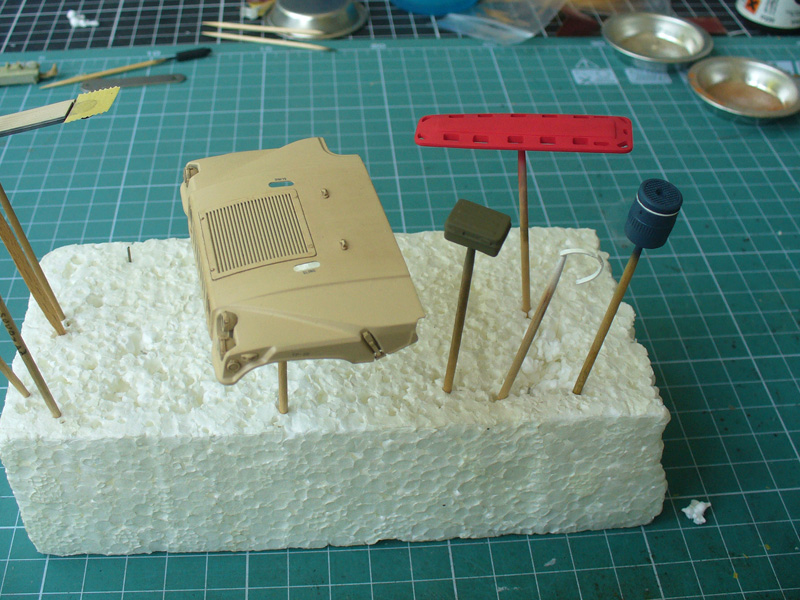
The hood and some stowage items are in the works... the red spine board would be an overkill, so I decided to go with khaki green variant instead:
I'm installing the roof now, hope it would fit well.
Mario
I used some custom PE (thanks to Jolly!) and brass wire to enhance the appearance of the details:

Here's how the ammo cradle looks installed:

And here are some overall images of the current status. The vehicle body received the paint and wash, added some decals as well. I fixed the suspension and the rear shelf with large utility box:


The hood and some stowage items are in the works... the red spine board would be an overkill, so I decided to go with khaki green variant instead:

I'm installing the roof now, hope it would fit well.
Mario

jwest21

Joined: October 16, 2006
KitMaker: 3,374 posts
Armorama: 3,126 posts

Posted: Monday, August 07, 2017 - 10:03 PM UTC
This is a beautiful build

11Bravo_C2

Joined: May 12, 2015
KitMaker: 475 posts
Armorama: 394 posts

Posted: Monday, August 07, 2017 - 10:05 PM UTC
Awesome. I have this kit in my stash, and planning a GMV also, but I doubt it would look as good as this one 


Graywolf


Joined: December 01, 2001
KitMaker: 6,405 posts
Armorama: 1,850 posts

Posted: Monday, August 07, 2017 - 10:16 PM UTC
Great progress again Brother. Good decision to replace red board to green.keep safe
Engin
Engin
Trisaw

Joined: December 24, 2002
KitMaker: 4,105 posts
Armorama: 2,492 posts

Posted: Tuesday, August 08, 2017 - 01:43 AM UTC
Really smooth paint job, and the abundance of gear just shows the wealth and realism of U.S. Special Forces on long range patrols. Great job, Mario! 

Maki


Joined: February 13, 2002
KitMaker: 5,579 posts
Armorama: 2,988 posts

Posted: Saturday, August 26, 2017 - 03:54 PM UTC
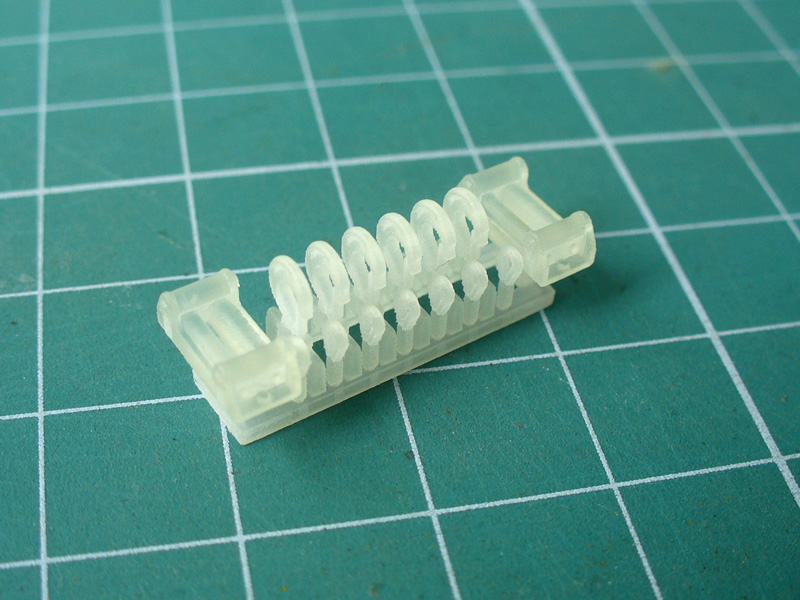
I decided to bite the bullet and order some 3D printed goodies for this build. Clevis hook is Peter Samofalov's design. The printing lines do not show on the first glance, but after a coat of primer the surface needed some prep:
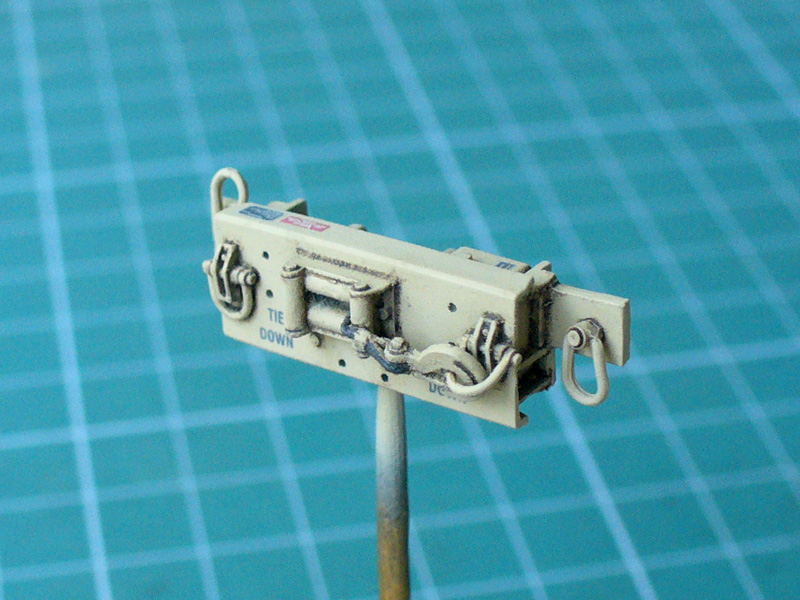
Here is the hook assembly installed. It makes quite a difference and I'm glad I took the time to play around with this:
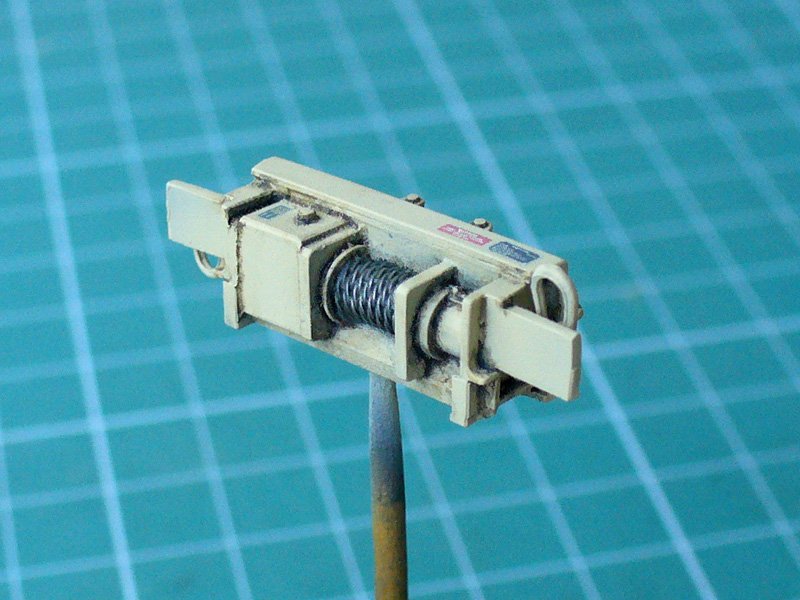
I installed the roof and the hood, added the winch. Here's how the model looks now:
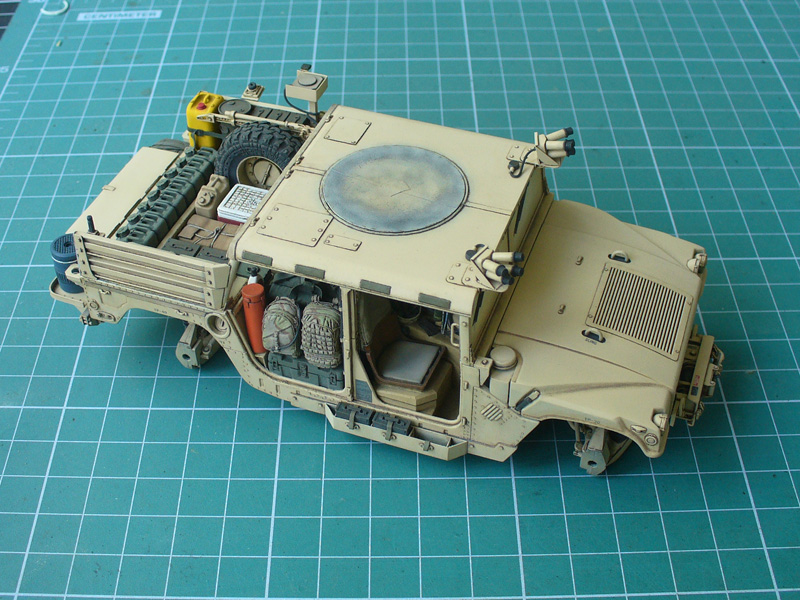
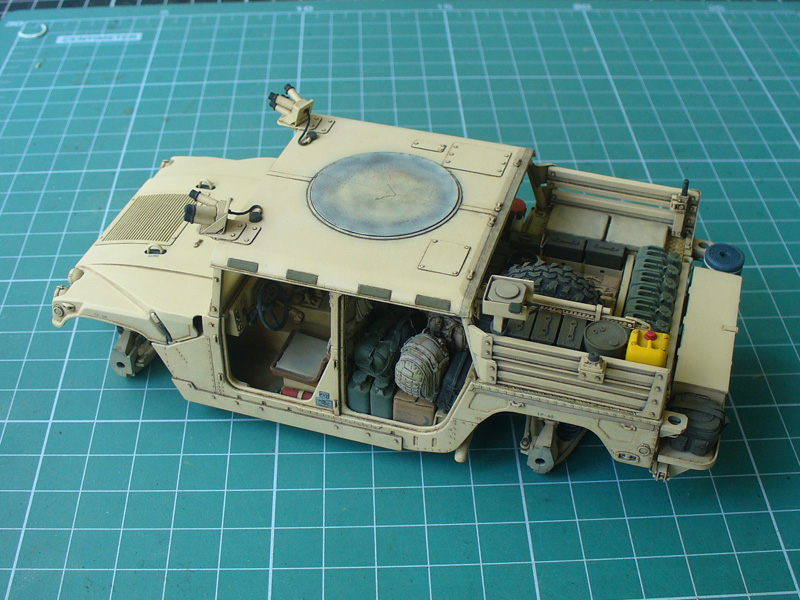
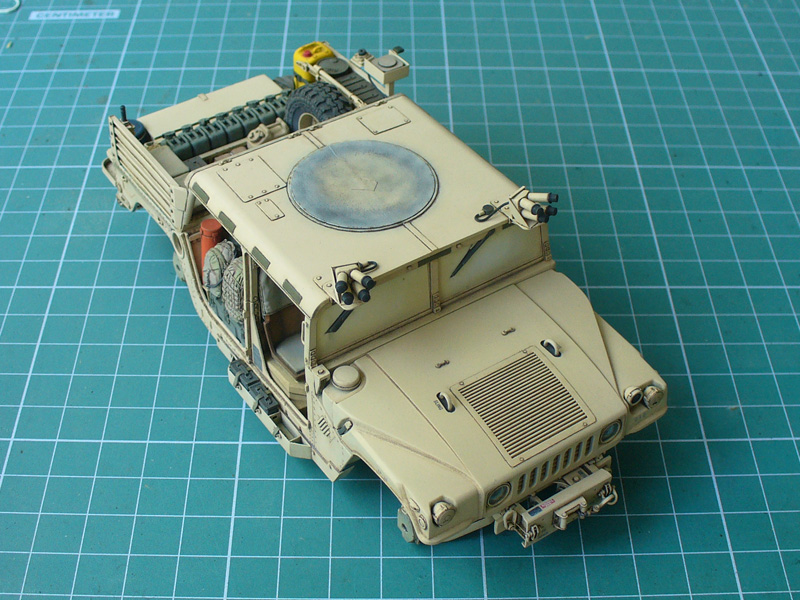
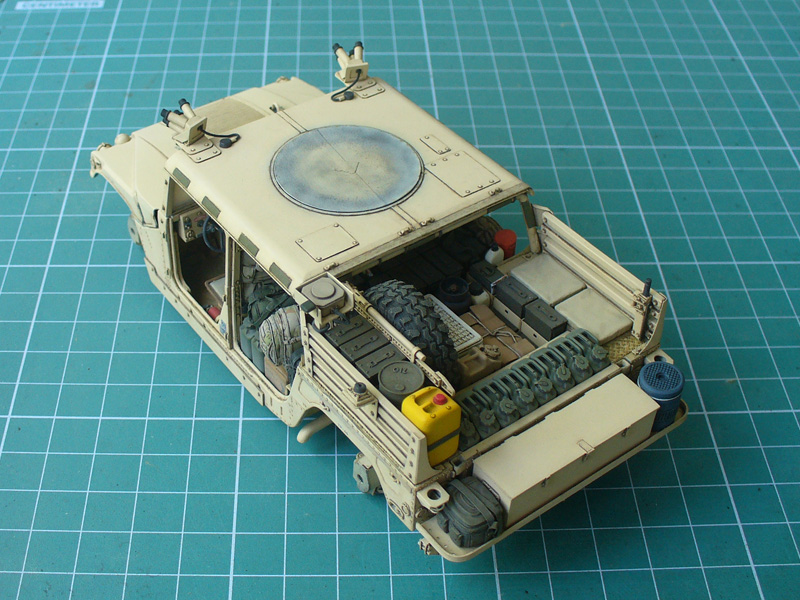
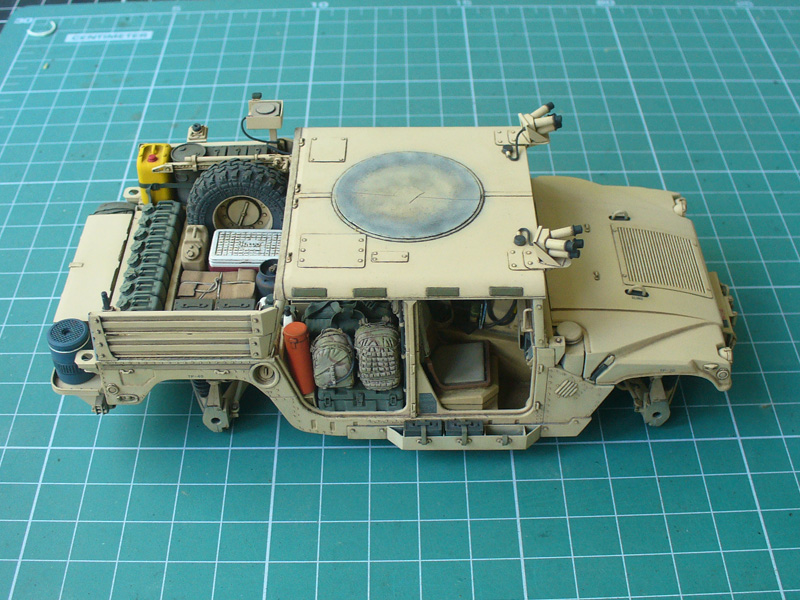
Now that the majority of the stuff is in its place, I think there were smarter ways to do all this that could have saved me some time and nerves... but I'm glad the end is finally near.
Mario

Here is the hook assembly installed. It makes quite a difference and I'm glad I took the time to play around with this:


I installed the roof and the hood, added the winch. Here's how the model looks now:


Now that the majority of the stuff is in its place, I think there were smarter ways to do all this that could have saved me some time and nerves... but I'm glad the end is finally near.
Mario
BUTA46

Joined: May 05, 2015
KitMaker: 117 posts
Armorama: 113 posts

Posted: Saturday, August 26, 2017 - 04:13 PM UTC
Mario, you catch the tone of the colors so well. Correct colors are obviously essential, but the tone and the depth of color, well, yours seems perfect from here.

11Bravo_C2

Joined: May 12, 2015
KitMaker: 475 posts
Armorama: 394 posts

Posted: Saturday, September 09, 2017 - 12:26 AM UTC
Mario,
The desert tan looks spot on. Looks "faded" just right.
What paint mix did you use?
The desert tan looks spot on. Looks "faded" just right.
What paint mix did you use?
Maki


Joined: February 13, 2002
KitMaker: 5,579 posts
Armorama: 2,988 posts

Posted: Saturday, September 09, 2017 - 09:33 PM UTC
This is a custom color mix by my friend. It looks really good to my eye as well.
Mario
Mario

TotemWolf

Joined: February 11, 2013
KitMaker: 294 posts
Armorama: 196 posts

Posted: Sunday, September 10, 2017 - 01:40 AM UTC
I'm not big on modern pieces but I can't help but love this build. It looks exactly like one of the vehicles I've climbing in and out of many times. There's nothing I could pick out that needs more detail.
Keep up the great work!
Keep up the great work!
bat-213

Joined: December 30, 2011
KitMaker: 902 posts
Armorama: 788 posts

Posted: Sunday, September 10, 2017 - 04:17 AM UTC
 wow your build is great ,is threr more to add or is that for now ? any way it is very cool .


Maki


Joined: February 13, 2002
KitMaker: 5,579 posts
Armorama: 2,988 posts

Posted: Sunday, September 10, 2017 - 12:36 PM UTC
Thanks guys. There's not much more to add, some additional stowage, slings, antennas, as well as two M240s.
Mario
Mario
 |


