Hosted by Darren Baker
Special Forces GMV Afghanistan
young_sven

Joined: May 14, 2010
KitMaker: 749 posts
Armorama: 743 posts

Posted: Wednesday, April 01, 2015 - 08:56 AM UTC
This is such a sweet build, Mario, really love the detailing! Keep up the superb work! :-)
Maki


Joined: February 13, 2002
KitMaker: 5,579 posts
Armorama: 2,988 posts

Posted: Wednesday, April 01, 2015 - 12:00 PM UTC
Thanks for the encouragement guys. Unfortunatelly my modeling time is very limited at the moment so the pace of progress is slow at best. Hope to give you some updates soon.
Mario
Mario
Maki


Joined: February 13, 2002
KitMaker: 5,579 posts
Armorama: 2,988 posts

Posted: Wednesday, April 08, 2015 - 09:10 PM UTC
OK, just to show you what I'm up to.
Although I'm pretty heavy handed when it comes to using an airbrush, I wanted to try some postshading in order to give more depth to the model. Here's my take on postshading Humvee rear cargo bay:
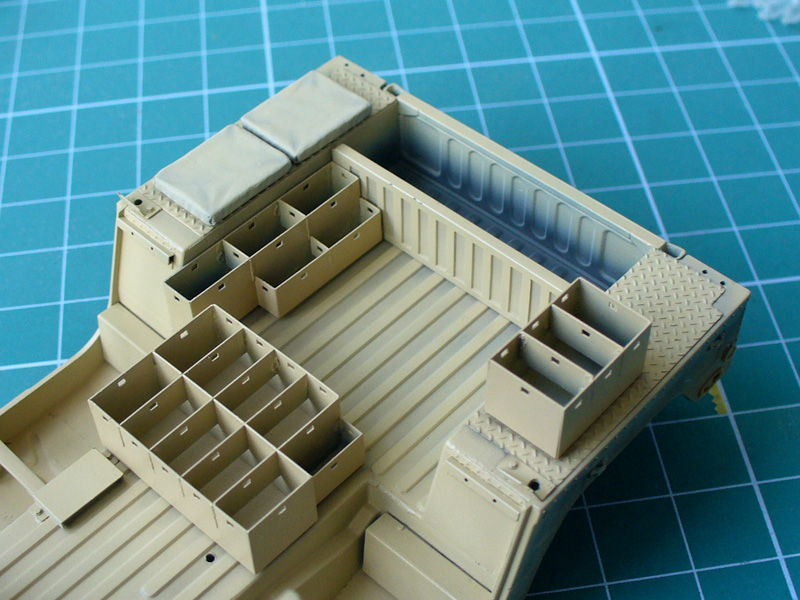
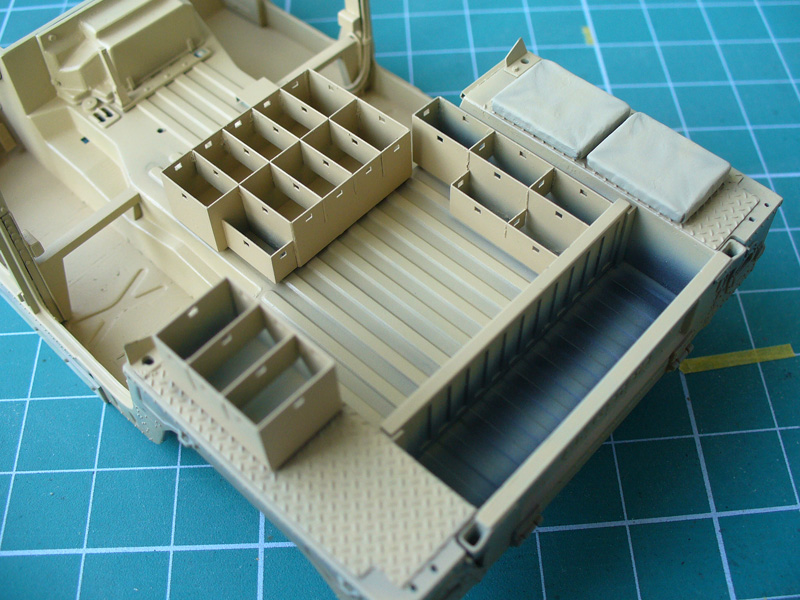
I know it is not much, but it is a big step for me. I realized I can do this and although postshading takes a lot of time for me, I think I will continue with it.
Mario
EDIT: Obviously I'm not talking about that dark space between the two rear vertical cargo doors. This is where jerry cans will go and I didn't even bother to paint that space in base color.
Although I'm pretty heavy handed when it comes to using an airbrush, I wanted to try some postshading in order to give more depth to the model. Here's my take on postshading Humvee rear cargo bay:


I know it is not much, but it is a big step for me. I realized I can do this and although postshading takes a lot of time for me, I think I will continue with it.
Mario
EDIT: Obviously I'm not talking about that dark space between the two rear vertical cargo doors. This is where jerry cans will go and I didn't even bother to paint that space in base color.
Maki


Joined: February 13, 2002
KitMaker: 5,579 posts
Armorama: 2,988 posts

Posted: Saturday, April 25, 2015 - 03:49 PM UTC
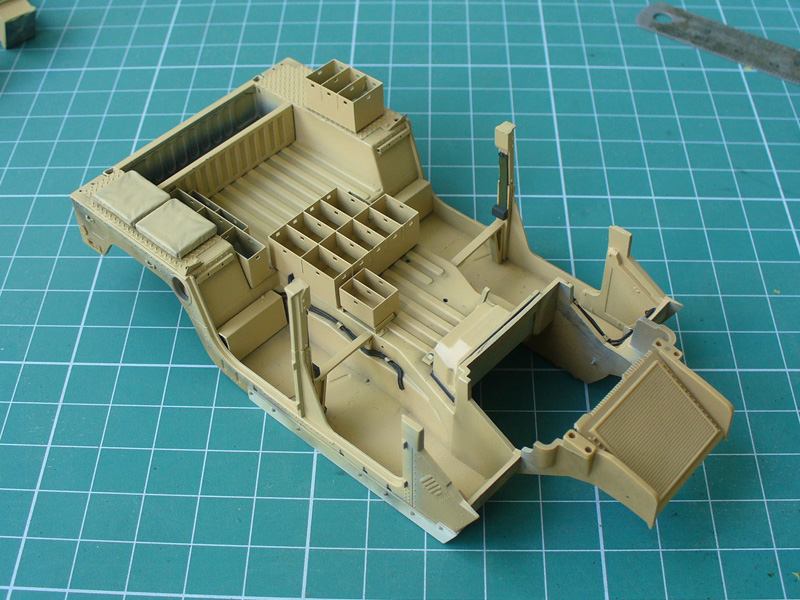
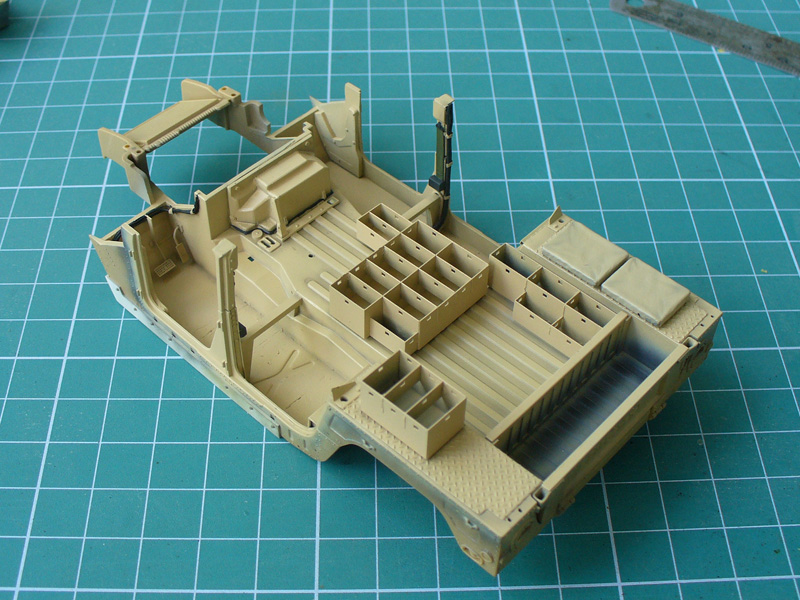
The postshading is finished. What do you think? I can still make changes if you guys think something could be improved. Also, the details were painted and a part of seatbelt assembly finished.
Gloss coat is on, now the pinwashes.
Cheers,
Mario
Gloss coat is on, now the pinwashes.


Cheers,
Mario

jeffmeckley

Joined: April 20, 2015
KitMaker: 7 posts
Armorama: 2 posts

Posted: Sunday, May 17, 2015 - 07:27 PM UTC
This stuff makes my mouth water (all things modern)! Awesome work Maki, looking forward to completion.
Cheers
JM
Cheers

JM
Maki


Joined: February 13, 2002
KitMaker: 5,579 posts
Armorama: 2,988 posts

Posted: Friday, May 22, 2015 - 01:40 PM UTC
Thanks Jeff, I'm happy to see you are following this build.
An update... washes and matt coat applied. Some stowage added. I'm contemplating about all the stowage I'd like to add here... I like the look of heavy ladden vehicles, so I'll probably go crazy with all the different packs, ammo boxes, extinguishers, heavy duty cases, coolers, etc.
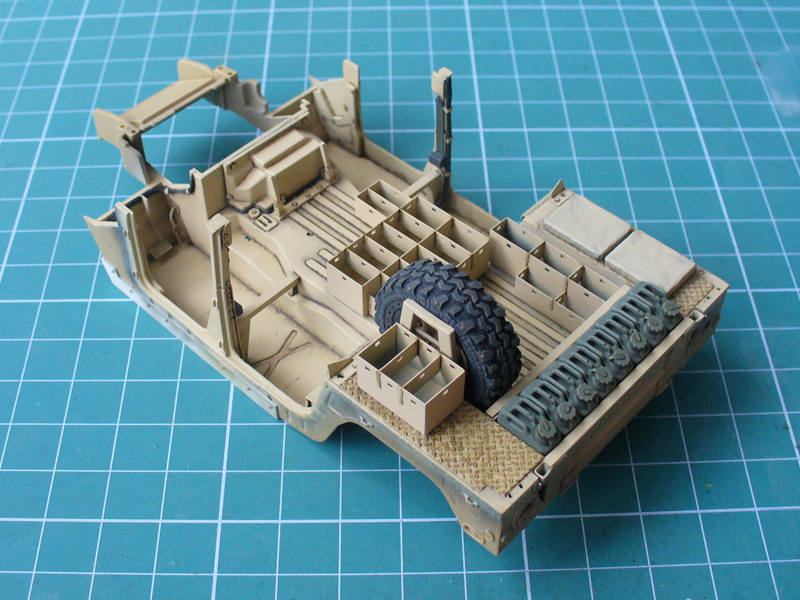
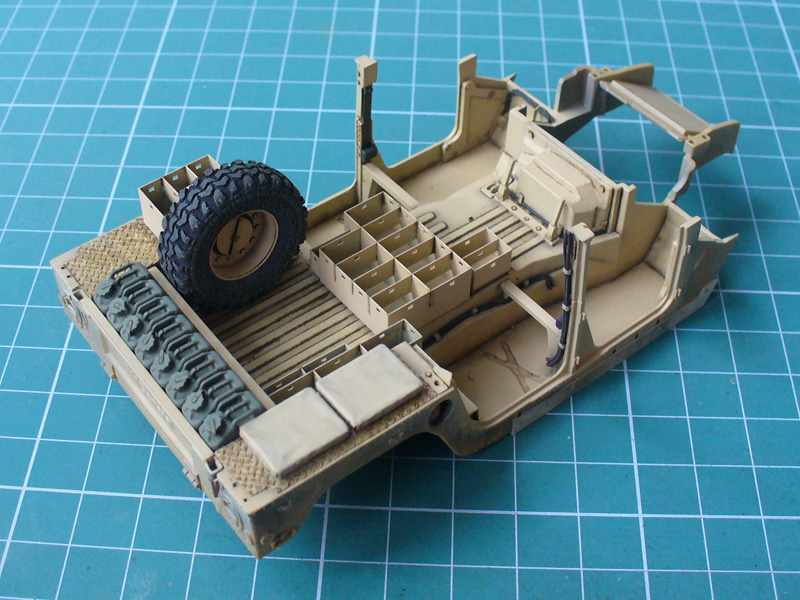
Mario
An update... washes and matt coat applied. Some stowage added. I'm contemplating about all the stowage I'd like to add here... I like the look of heavy ladden vehicles, so I'll probably go crazy with all the different packs, ammo boxes, extinguishers, heavy duty cases, coolers, etc.


Mario

BobSolo

Joined: August 30, 2014
KitMaker: 331 posts
Armorama: 112 posts

Posted: Saturday, May 30, 2015 - 01:51 AM UTC
Awesome work so far, it could be a real GMV being built on a massive matt 

Maki


Joined: February 13, 2002
KitMaker: 5,579 posts
Armorama: 2,988 posts

Posted: Saturday, May 30, 2015 - 03:08 PM UTC
Thanks Bob! 
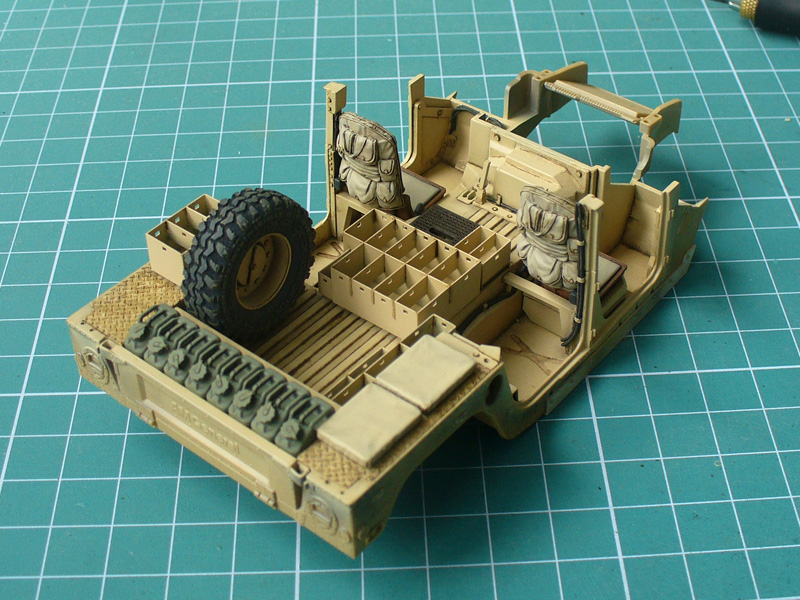
Some progress. Seats are installed as well as seat belt buckles... seat belts are in progress. I also installed the gunner's platform.
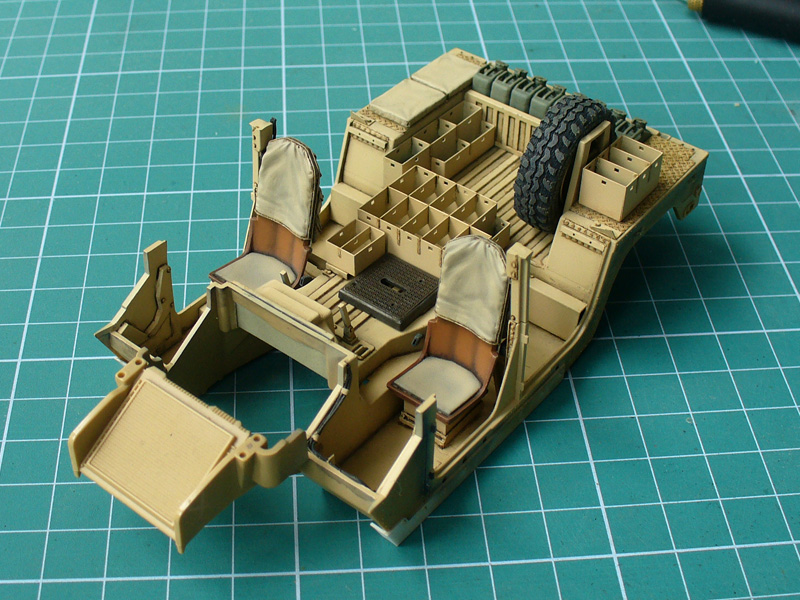
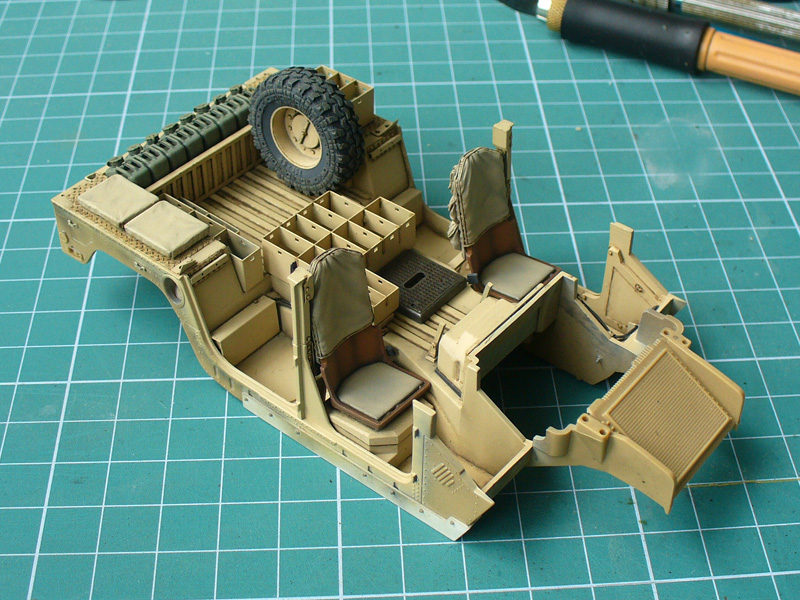
Mario

Some progress. Seats are installed as well as seat belt buckles... seat belts are in progress. I also installed the gunner's platform.


Mario
young_sven

Joined: May 14, 2010
KitMaker: 749 posts
Armorama: 743 posts

Posted: Saturday, May 30, 2015 - 03:25 PM UTC
Fantastic Mario!
I especially love the painting of those seats. Excellent work all the way.
Cheers,
Sven
I especially love the painting of those seats. Excellent work all the way.
Cheers,
Sven
Lazzarus78

Joined: January 27, 2013
KitMaker: 75 posts
Armorama: 75 posts
Posted: Saturday, May 30, 2015 - 04:23 PM UTC
Looks awesome, always really cool work you present here. Like your stuff. Hope some day i get to this Level, Allways inspiring, thanks for showing. Go on like that.
Cheers Christoph
Cheers Christoph

BobSolo

Joined: August 30, 2014
KitMaker: 331 posts
Armorama: 112 posts

Posted: Saturday, May 30, 2015 - 11:35 PM UTC
Yes really inspiring! 

MakiWawa

Joined: December 17, 2014
KitMaker: 448 posts
Armorama: 448 posts

Posted: Monday, June 01, 2015 - 04:16 PM UTC
Quoted Text
Fantastic Mario!
I especially love the painting of those seats.
Me too...

gcdavidson

Joined: August 05, 2003
KitMaker: 1,698 posts
Armorama: 1,563 posts

Posted: Wednesday, June 03, 2015 - 06:41 AM UTC
Great stuff Mario! Its taking a while, but its worth it!
35th-scale

Joined: November 21, 2007
KitMaker: 3,212 posts
Armorama: 2,807 posts

Posted: Friday, June 05, 2015 - 03:27 AM UTC
Those seats could easily be mistaken for the real thing....
iamhope

Joined: November 05, 2014
KitMaker: 4 posts
Armorama: 4 posts
Posted: Tuesday, June 16, 2015 - 07:46 PM UTC
Awesome job! Which paint exactly did you used to make the seat? and which colors for the highlights?
Thank you and props!
Thank you and props!
Maki


Joined: February 13, 2002
KitMaker: 5,579 posts
Armorama: 2,988 posts

Posted: Wednesday, June 17, 2015 - 12:03 PM UTC
I mixed some paints for the seats till I found a tone that I thought was good. I use Gunze paints and I know I mixed some red browns and yellows for the seat shell, and some hemp sand colors for the cushions. Sorry for not remembering the exact recipe.
Mario
Mario
Maki


Joined: February 13, 2002
KitMaker: 5,579 posts
Armorama: 2,988 posts

Posted: Monday, July 27, 2015 - 03:01 PM UTC
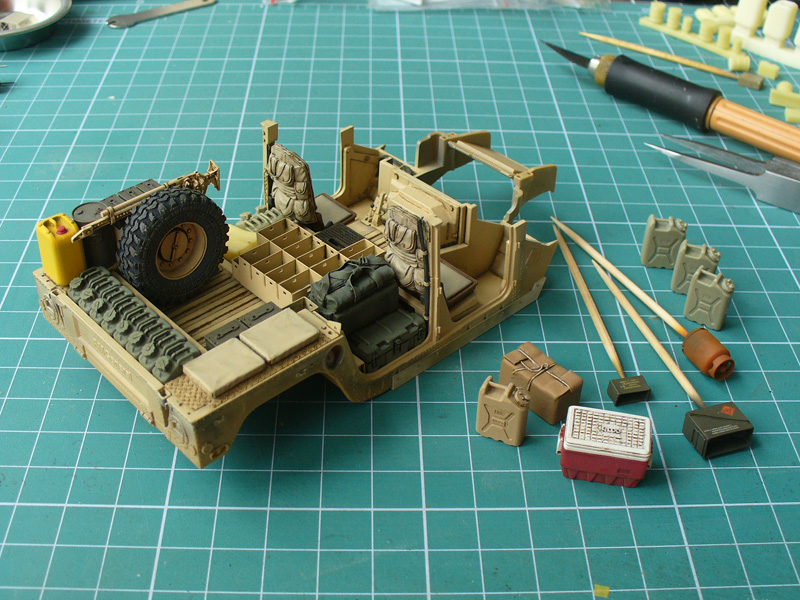
Some stowage added, more on the way...
Mario

Mario
Foxtrot1

Joined: March 03, 2011
KitMaker: 234 posts
Armorama: 200 posts

Posted: Tuesday, July 28, 2015 - 12:59 PM UTC
Coming along nicely. I am watching this build with great anticipation.
Posted: Thursday, July 30, 2015 - 11:53 AM UTC
Nice. Mario, look forward to more
Posted: Thursday, July 30, 2015 - 01:00 PM UTC
This is fantastic work. This is what the hobby is all about. You are one of the true artists here at Armorama. There are several guys here who produce truly great models and you are up there with them. I am following this closely and I don't even build modern stuff. Looking forward to seeing the finished product.
Jeff
Jeff

Maki


Joined: February 13, 2002
KitMaker: 5,579 posts
Armorama: 2,988 posts

Posted: Thursday, July 30, 2015 - 01:42 PM UTC
Thanks guys, I appreciate your comments. Here are some more photos:
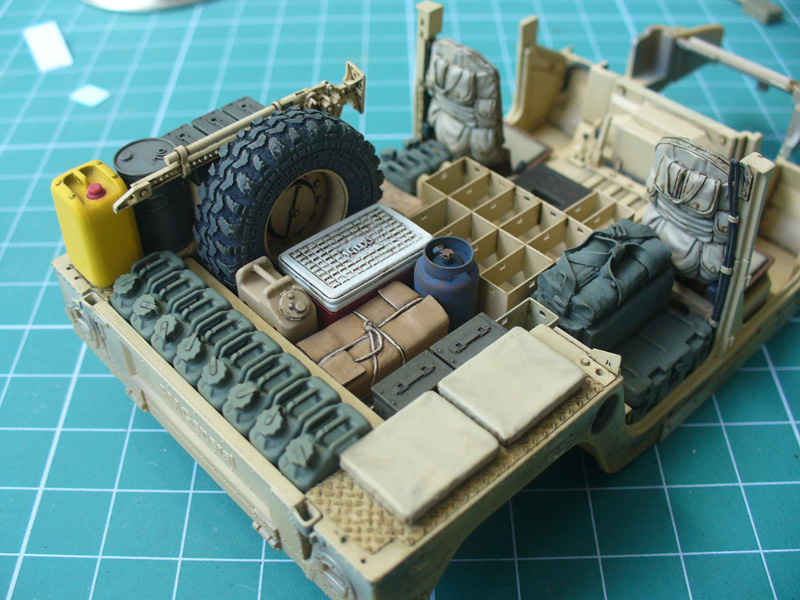
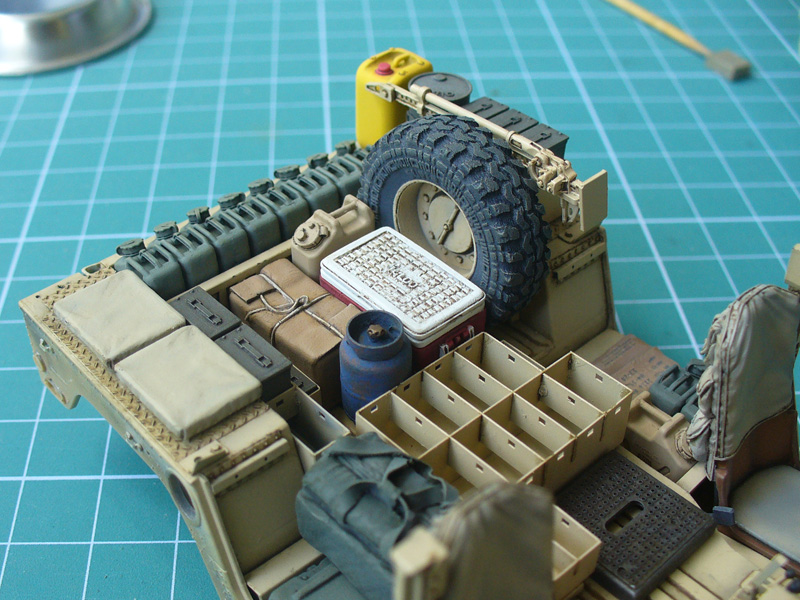
I tried AK chipping fluid on the gas bottle. Not quite what I expected what it would be like, but I think it looks ok for my first try.
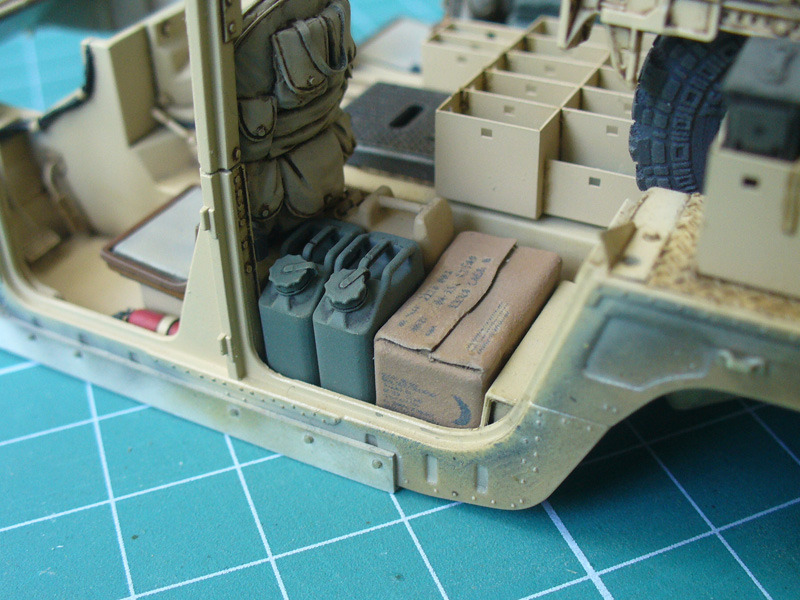
The MRE box is a resin item from Pro Art set with the decals I printed myself. Some decal silvering is visible under the magnification.
Mario


I tried AK chipping fluid on the gas bottle. Not quite what I expected what it would be like, but I think it looks ok for my first try.

The MRE box is a resin item from Pro Art set with the decals I printed myself. Some decal silvering is visible under the magnification.
Mario
samofptr

Joined: April 27, 2015
KitMaker: 130 posts
Armorama: 130 posts

Posted: Saturday, August 01, 2015 - 12:12 AM UTC
Mario, it looks like a photos of the object on a scale of 1/1. Great project! 


airborne1

Joined: April 15, 2006
KitMaker: 915 posts
Armorama: 797 posts

Posted: Saturday, August 01, 2015 - 06:23 AM UTC
Nice work Mario ,
The interior is coming together and it looks good .
Michael
The interior is coming together and it looks good .
Michael

BobSolo

Joined: August 30, 2014
KitMaker: 331 posts
Armorama: 112 posts

Posted: Wednesday, August 05, 2015 - 06:18 PM UTC
Awesome modeling! 

mvaiano

Joined: January 24, 2012
KitMaker: 1,054 posts
Armorama: 1,050 posts

Posted: Wednesday, August 05, 2015 - 06:24 PM UTC
Fantastic Mario!
Cheers!
Marco
Cheers!
Marco
 |


