I had a little time this morning, so out came the MrSurfacer and I blended the different parts of the mantlet. I will more than likely smooth this up considerably, seems like the M51 and M50 mantlets are both very nice castings...
Anyway, the pic:
I also need to see if I can scare up some more of those lovely Dragon DS T80 (I think- the metal chevron double pin) tracks for this one. I think they would be most appropriate.
Hosted by Richard S.
What if V :: The return of the weird
rfbaer
Texas, United States
Joined: June 12, 2007
KitMaker: 1,866 posts
Armorama: 1,696 posts
Joined: June 12, 2007
KitMaker: 1,866 posts
Armorama: 1,696 posts
Posted: Monday, May 04, 2015 - 08:06 PM UTC
Cantstopbuyingkits
European Union
Joined: January 28, 2015
KitMaker: 2,099 posts
Armorama: 1,920 posts
Joined: January 28, 2015
KitMaker: 2,099 posts
Armorama: 1,920 posts
Posted: Tuesday, May 05, 2015 - 01:39 AM UTC
Work you've done here looks very nice so far Rfbaer. what colour scheme are you thinking of? IRL shades or something made up?
rfbaer
Texas, United States
Joined: June 12, 2007
KitMaker: 1,866 posts
Armorama: 1,696 posts
Joined: June 12, 2007
KitMaker: 1,866 posts
Armorama: 1,696 posts
Posted: Tuesday, May 05, 2015 - 03:47 AM UTC
Thanks, Timothy.
I'll be going with something that I think looks a lot like a mid-'70's IDF sand gray, Krylon "khaki" camo paint.
Posted: Tuesday, May 05, 2015 - 10:14 AM UTC
Nice start, Russell.
Looking forward to see more
Posted: Tuesday, May 05, 2015 - 11:19 AM UTC
Cantstopbuyingkits
European Union
Joined: January 28, 2015
KitMaker: 2,099 posts
Armorama: 1,920 posts
Joined: January 28, 2015
KitMaker: 2,099 posts
Armorama: 1,920 posts
Posted: Tuesday, May 05, 2015 - 05:27 PM UTC
Was it an oil wash? I do believe any unvarnished oil paint can be removed from the model surface with a strong enough application of thinner.
rfbaer
Texas, United States
Joined: June 12, 2007
KitMaker: 1,866 posts
Armorama: 1,696 posts
Joined: June 12, 2007
KitMaker: 1,866 posts
Armorama: 1,696 posts
Posted: Tuesday, May 05, 2015 - 09:51 PM UTC
Jesper, it's certainly interesting, good luck with your paint.
More on my M26:
Hull is together, running gear on and tracks from an old build test-fitted. I would really prefer to use some steel-chevron (T80E1?) tracks on this one, and have one set that I have ear-marked for the next M26, so if I can scare up another set, I'll be happy. I thought I had a set of Friul T81, no go, so it'll probably be the HB tracks, which are actually pretty good.
I've also started adding stuff to the turret, and moved two of the smoke launchers, but still not happy with them. And I need to start thinking about now much I want to change the engine deck area to make it look like there's a Cummins in there. For sure a big exhaust, but maybe more.
Pics so far:
I'm very happy with how the mantlet came out, thinking now on whether or not to mount a 50-cal on it....
Posted: Tuesday, May 05, 2015 - 10:36 PM UTC
Quoted Text
Was it an oil wash? I do believe any unvarnished oil paint can be removed from the model surface with a strong enough application of thinner.
Thanks for the tip. It was a vallejo water based wash, so no chance to remove it. However, I think it will work better if I apply weathering directly on top of it. The main problem is that it is shiny and has too large streaks in it. Should be possible, but thanks for the tip.
vettejack
Florida, United States
Joined: November 23, 2012
KitMaker: 1,277 posts
Armorama: 1,254 posts
Joined: November 23, 2012
KitMaker: 1,277 posts
Armorama: 1,254 posts
Posted: Tuesday, May 05, 2015 - 10:42 PM UTC
Man-o-man, if I just had the time to get into another campaign...I'd try something along the lines of the two 'prototypes' below...
The latter one looks like it would take at least 3 KV chassis, 3 KV turrets, 2 BT 5 like turrets, at least 3 sets of Friul's...and on it goes...lol...and I would move the aft turret up some as to provide the obvious room for the large a$$ engine size needed to have to move this beast!!
LeftyDan
Illinois, United States
Joined: November 03, 2013
KitMaker: 77 posts
Armorama: 76 posts
Joined: November 03, 2013
KitMaker: 77 posts
Armorama: 76 posts
Posted: Thursday, May 07, 2015 - 08:34 PM UTC
Quoted Text
Yeah as my Churchill tank hunter never got off the drawing board last time despite me getting all the bits together to build the damn thing!!
Paul
Paul, I was thinking about this as well, something like this at least. If I were to ever build mine it would be a Churchill/Ferdinand with a late war 20lb gun. It would become a difficult however cause of the rear engine and drive wheels.
Food for thought.
I picture something like a M551 body with the turret of a striker MGS or an M163 topper. Making a small fire support Vehicle. Too many ideas and not enough time!
Posted: Thursday, May 07, 2015 - 08:53 PM UTC
John, that KV land battleship looks like it would break in half the first time it tried the drive over a sharp ridge. It would have to have a flexible joint somewhere in the middle.
vettejack
Florida, United States
Joined: November 23, 2012
KitMaker: 1,277 posts
Armorama: 1,254 posts
Joined: November 23, 2012
KitMaker: 1,277 posts
Armorama: 1,254 posts
Posted: Thursday, May 07, 2015 - 08:59 PM UTC
Quoted Text
John, that KV land battleship looks like it would break in half the first time it tried the drive over a sharp ridge. It would have to have a flexible joint somewhere in the middle.
Naw...'Ivan' would only weld on more rolled steel first to stiffen' the beast up, and secondly, with an unintended 'false positive', it would stop anything the allies could shoot at it!
35th-scale
Kildare, Ireland
Joined: November 21, 2007
KitMaker: 3,212 posts
Armorama: 2,807 posts
Joined: November 21, 2007
KitMaker: 3,212 posts
Armorama: 2,807 posts
Posted: Friday, May 08, 2015 - 03:32 AM UTC
Some awesome buikds and ideas here already!
And so, at last, my build begins...
First, the Fennek: an absolutely beautiful kit! Stunning in the level of detail and so far the fit is immaculate. Only on page 2 of the instructions so far but really, really, really loving this kit.
With all the detail painting it might be a different story
And then the weapon station....wow! Goes together like a dream, but there was one nightmare moment. One critical part was missing and was going to take Live Resin a few weeks to recast as they are out of stock of this kit. However, a friend bought the other LR RWS as part of the same order and on checking his parts he had what was needed for mine in his set, but not used on it, so Iwas sorted and could continue. Some wiring, using stretched sprue, and the ammo feed chutes just to be added before painting.
Posted: Sunday, May 10, 2015 - 12:19 AM UTC
Looks like an awesome kit, Sean. Looking forward to see more.
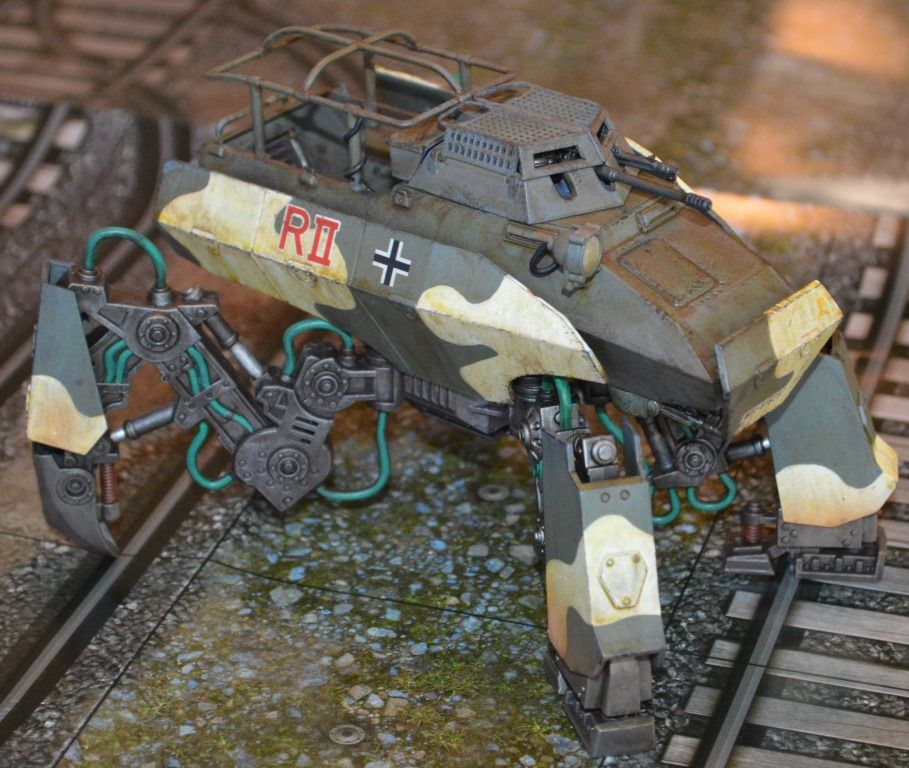
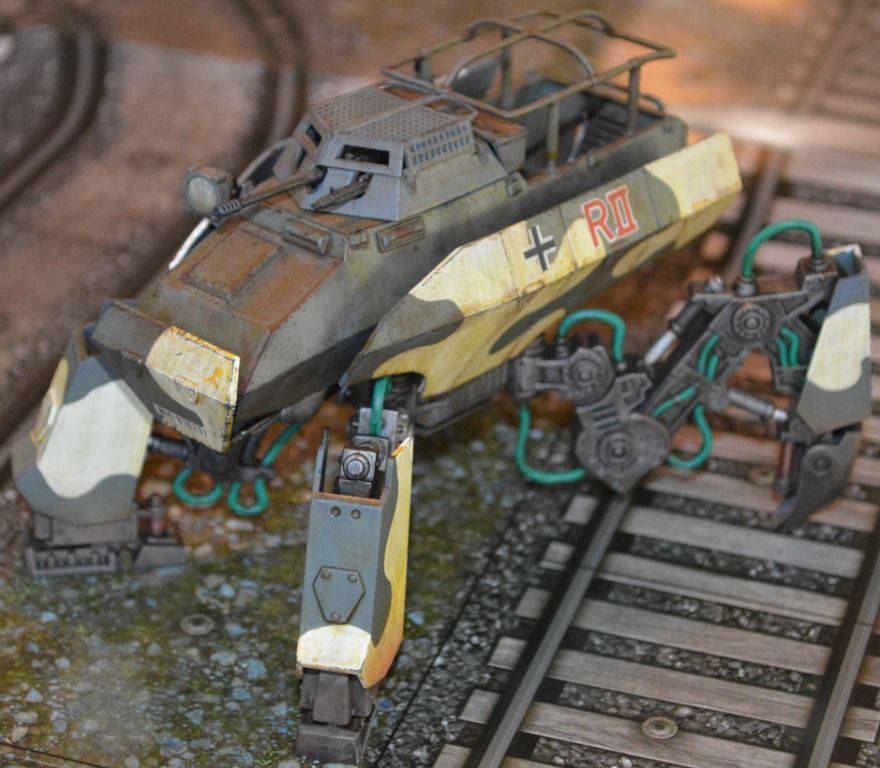
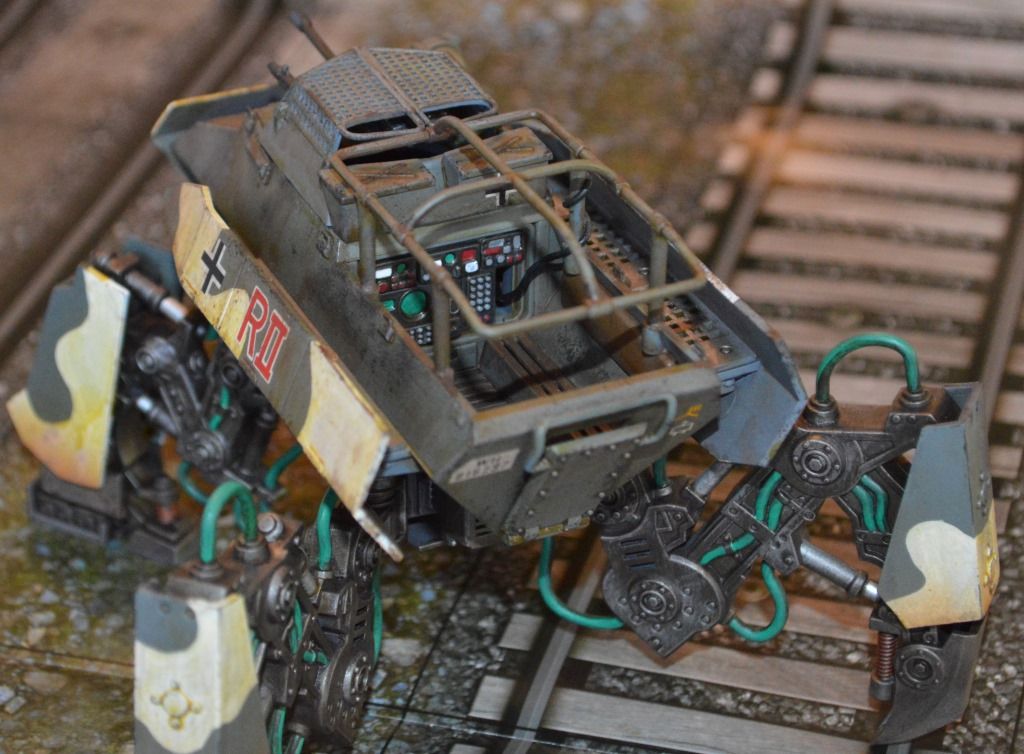
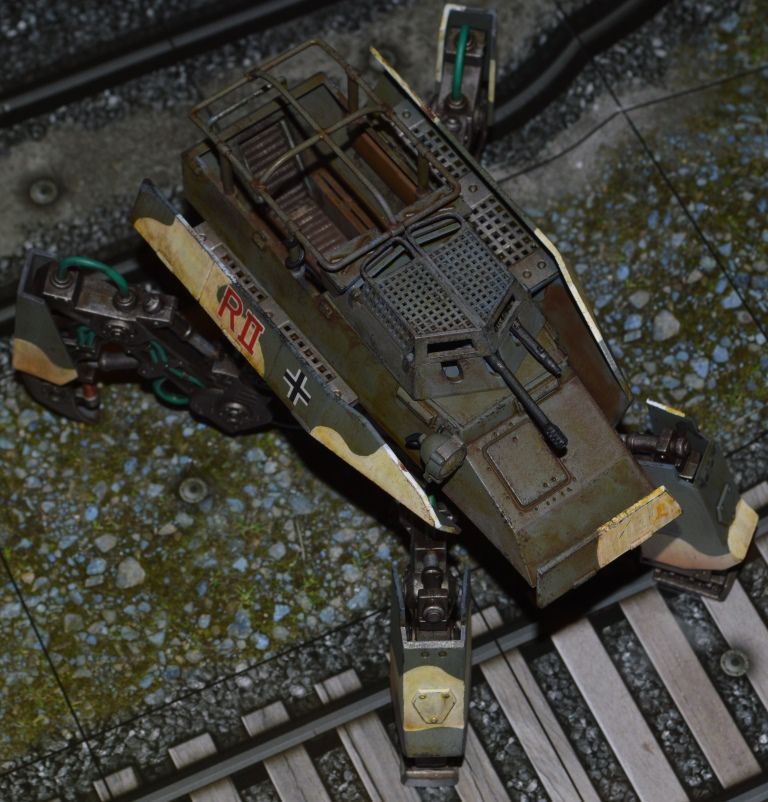
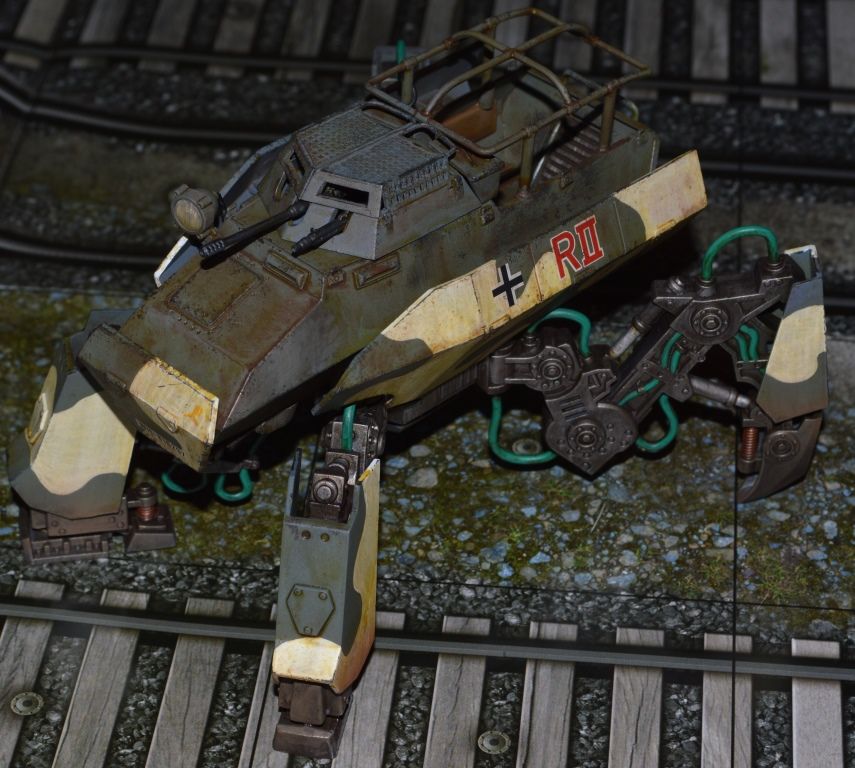
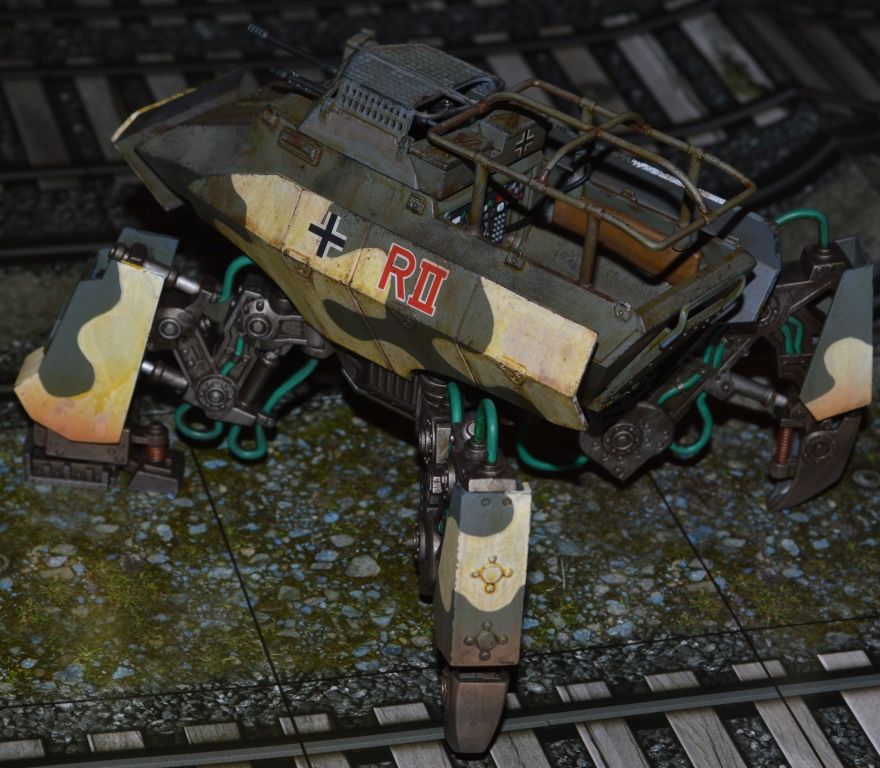
I have finished my build for this campign. The 1/48 Dust Tactics Prinz Luther. A nice lile kit. I applied too much weatering to the white camo, but overall I am satisfied.
wo set of pitures as the flash really makes a difference in the look of the model.
Comments welcome
I have finished my build for this campign. The 1/48 Dust Tactics Prinz Luther. A nice lile kit. I applied too much weatering to the white camo, but overall I am satisfied.
wo set of pitures as the flash really makes a difference in the look of the model.
Comments welcome
17741907
Istanbul, Turkey / Türkçe
Joined: December 05, 2007
KitMaker: 953 posts
Armorama: 705 posts
Joined: December 05, 2007
KitMaker: 953 posts
Armorama: 705 posts
Posted: Sunday, May 10, 2015 - 02:52 AM UTC
Really awesome...Well done my friend...
http://www.facebook.com/povHG
http://battletankpower.blogspot.com/
http://www.facebook.com/povHG
http://battletankpower.blogspot.com/
Posted: Sunday, May 10, 2015 - 11:10 AM UTC
Thanks, Hakan. Appreciate the comment.
gcdavidson
Ontario, Canada
Joined: August 05, 2003
KitMaker: 1,698 posts
Armorama: 1,563 posts
Joined: August 05, 2003
KitMaker: 1,698 posts
Armorama: 1,563 posts
Posted: Tuesday, May 12, 2015 - 04:26 AM UTC
A fictional stable mate for the Javelin Air Defence SEV...
gcdavidson
Ontario, Canada
Joined: August 05, 2003
KitMaker: 1,698 posts
Armorama: 1,563 posts
Joined: August 05, 2003
KitMaker: 1,698 posts
Armorama: 1,563 posts
Posted: Tuesday, May 12, 2015 - 04:29 AM UTC
Shoot! I just realized the Flak II campaign hasn't started yet! Oh well, I will paint the Javelin SEV in a fictional scheme and add it to this thread
Posted: Tuesday, May 12, 2015 - 02:17 PM UTC
Looks great, Graeme. Nice details and something out of the ordinary.
What do you have in mind for camouflage?
rfbaer
Texas, United States
Joined: June 12, 2007
KitMaker: 1,866 posts
Armorama: 1,696 posts
Joined: June 12, 2007
KitMaker: 1,866 posts
Armorama: 1,696 posts
Posted: Tuesday, May 12, 2015 - 09:51 PM UTC
Well done, Jesper. That's still a good result, whether you like it or not.
Graeme, as always, very nice!
I did some re-arranging of the items on the turret sides on my M26, and added a couple of ventilators to the turret roof. I like it better now.....
My thought was that to make it truly look like a plausible "what-if" I should make the turret look as much like the M51 as possible.
dweeb203
Jakarta Raya, Indonesia
Joined: May 06, 2014
KitMaker: 59 posts
Armorama: 58 posts
Joined: May 06, 2014
KitMaker: 59 posts
Armorama: 58 posts
Posted: Wednesday, May 13, 2015 - 08:18 AM UTC
Okay, about to start the build. Will add some kind of mine protection to the hull. When i was about to start, i realized i'm out of my styrene plates i guess it will take plave later
Posted: Wednesday, May 13, 2015 - 10:57 AM UTC
Thanks for the comment, Russell.
Nice progress on your build. Truly unique looking, but realistic at the same time. Looking forward to see more.
rfbaer
Texas, United States
Joined: June 12, 2007
KitMaker: 1,866 posts
Armorama: 1,696 posts
Joined: June 12, 2007
KitMaker: 1,866 posts
Armorama: 1,696 posts
Posted: Wednesday, May 13, 2015 - 08:41 PM UTC
That's my goal, Jesper: keep it plausible. Is it a contradiction in terms to say that I like my "what-ifs" to be realistic? Hope not....
Anyway, some work on the engine deck, exhaust and rear happened last night.
As a preface, I now have pieces from all plastic M50/51 kits on this model. I need to get some HobbyBoss M26 parts in there somehow....Okee dokee then.
The intake covers are Tamiya M51, cut and turned front-to-back to clear the underside of the turret bustle. Small splash shields are Dragon. The exhaust cover is from the Mp Models M50, and the actual "pipe" is Academy, from their M51. I blanked off the M26 exhaust opening, added a weld bead from Vallejo putty, and filled all the holes in the rear plate. Then the rear bin from the Academy M51 was built up and added, with the gun travel lock from the Tamiya M51 attached. The crutch itself is just laying there for pics, comes off for adding stowage/painting.
A searchlight mount from one of the tan plastic kits was added to the mantlet, and I'm deciding whose searchlight to use: I have Dragon, Academy and Verlinden parts. It is noice to have a big parts stash, one of the reasons I like to grab old kits at shows and such.
I do believe my major construction "hurdles" are behind me. I can't say this has been difficult at all, it's actually been (so far) one of the easiest builds in recent memory.
dweeb203
Jakarta Raya, Indonesia
Joined: May 06, 2014
KitMaker: 59 posts
Armorama: 58 posts
Joined: May 06, 2014
KitMaker: 59 posts
Armorama: 58 posts
Posted: Wednesday, May 13, 2015 - 10:28 PM UTC
Progress so far
Got a bit of a problem with the 'cage', but it's fine right now. Won't start the CROWS,since i got the idea to replace it with the one from live resin. A friend of mine told me 'that kit could kill a person', and he's not completely mistaken, about a quarter of it was true
rfbaer
Texas, United States
Joined: June 12, 2007
KitMaker: 1,866 posts
Armorama: 1,696 posts
Joined: June 12, 2007
KitMaker: 1,866 posts
Armorama: 1,696 posts
Posted: Wednesday, May 13, 2015 - 10:49 PM UTC
Interested in seeing that....