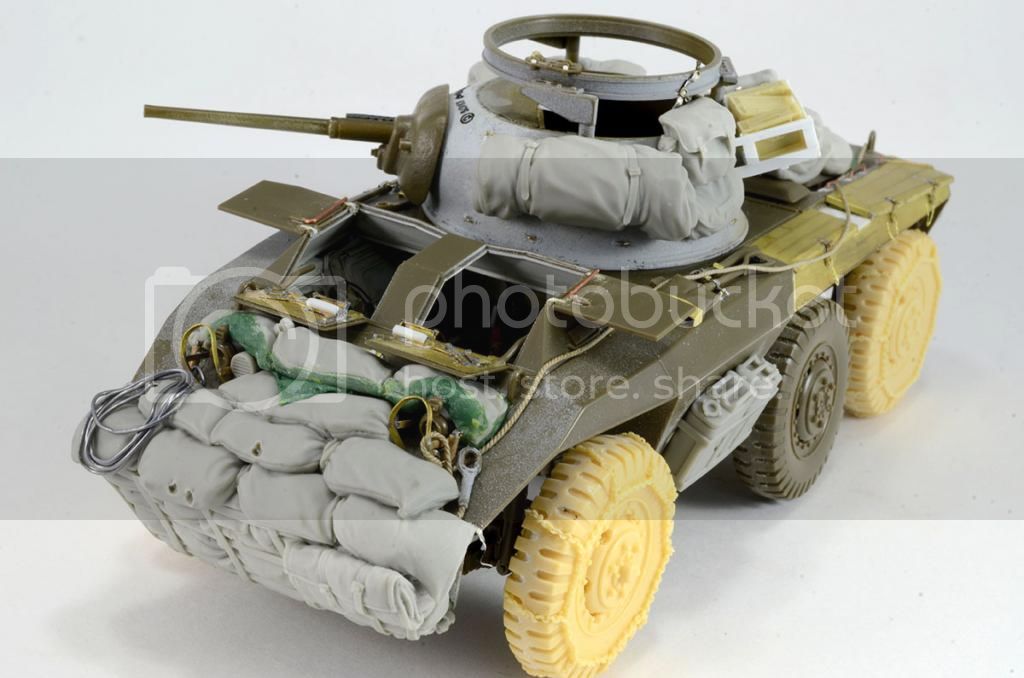
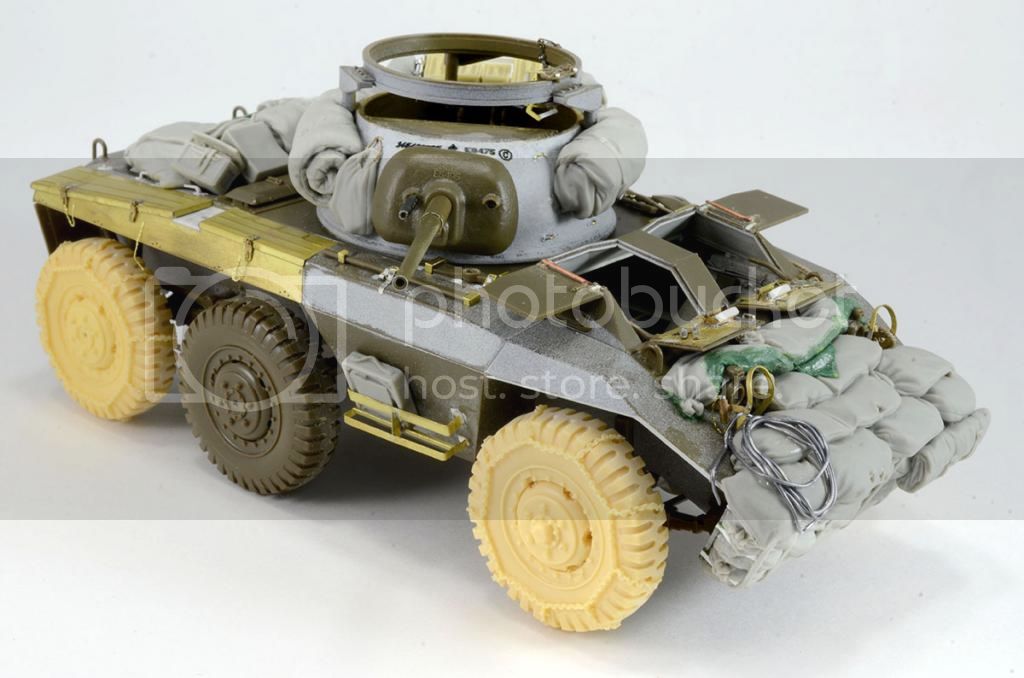
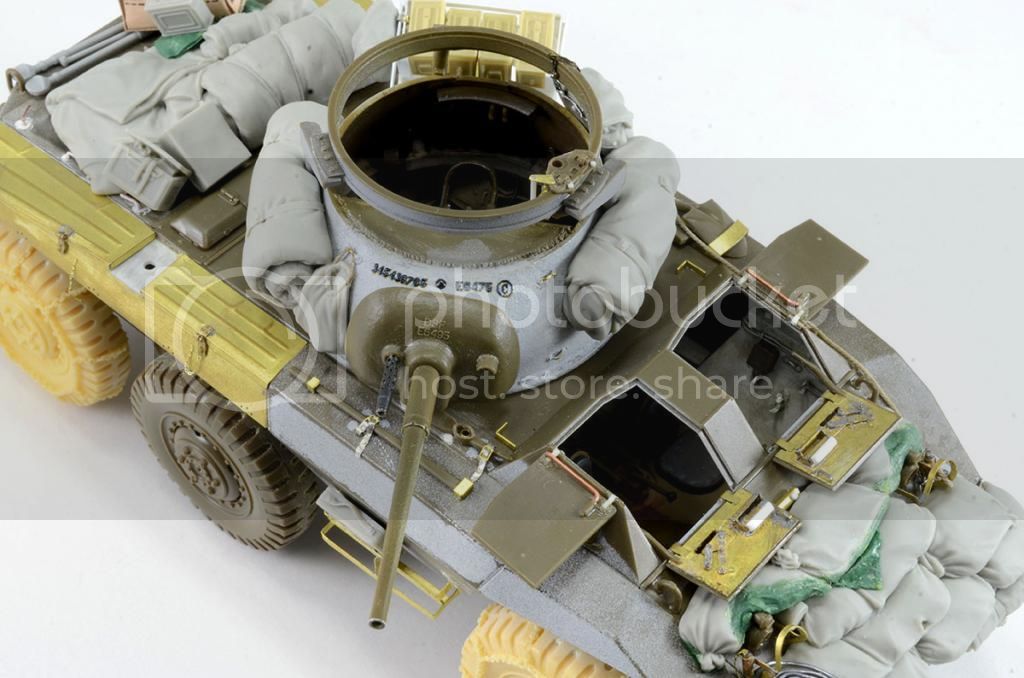
M8 Greyhound & BoB Vignette
United Kingdom
Joined: February 25, 2007
KitMaker: 3,033 posts
Armorama: 2,953 posts
Posted: Sunday, January 04, 2015 - 12:03 AM UTC
Quoted Text
Quoted Text
Plus I believe there is a hatch of some sort on the turret rear which the rack if fitted would interfere with.
Alan: it's an open topped turret -- why would there be a hatch there?
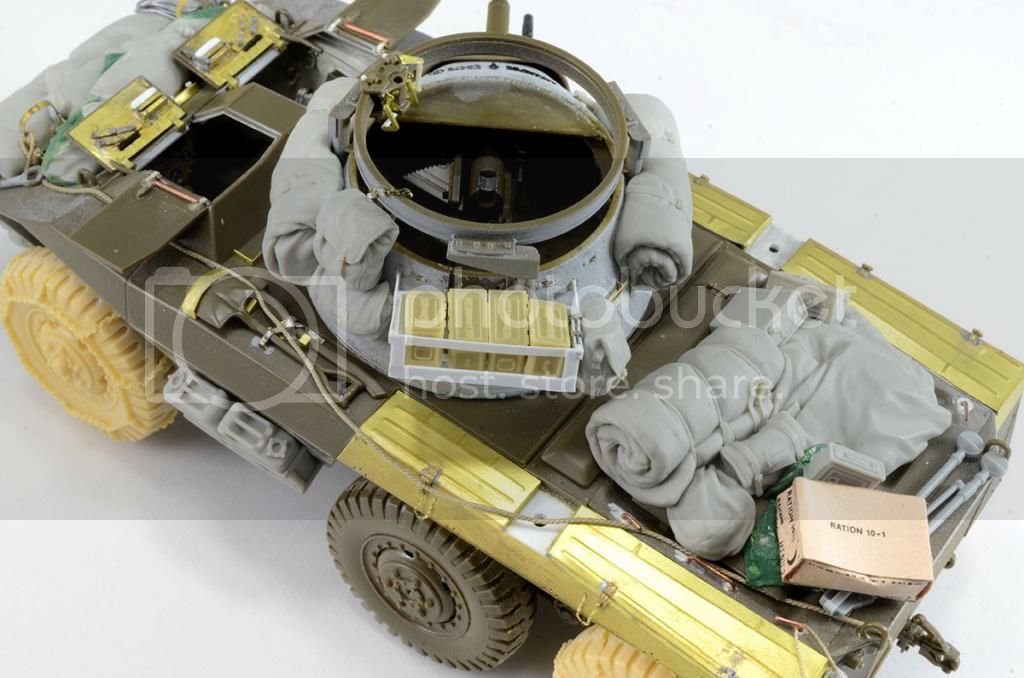
Check on the last picture Jeff has posted. Looking behind his lovely scratch built rack to the turret you'll see a hatch/plate. Don't know what it was for. Maybe when they had to take the main gun out for replacement it unbolted and slid out the back of the turret as there wasn't enough room due to its length to extract it out the top. Just guessing as to why, in my opinion, looking at the real life photo it appears that the rack is side mounted on the turret.
Alan
Virginia, United States
Joined: December 06, 2014
KitMaker: 96 posts
Armorama: 96 posts
Posted: Sunday, January 04, 2015 - 03:39 AM UTC
Thanks everyone for the encouragement and kind words. As this is my first blog on Armorama, I'm impressed with the level of professionalism and support that this community provides. Great stuff!
Alan, et al, as for that hatch, you are correct, there's one there. And now that you mention it, I think that ammo rack is mounted on the side! Good eye! But, I've got a number of other photos that show welded on storage bins on the rear of the turret, covering up that pesky hatch. So, I think I'll leave it as is.

Funny thing about that hatch, the ready rack sits right on the other side, so not sure it was utilized often, and perhaps your hypothesis about gun replacement use is correct.
Anyway, back to the workbench.... almost done with all the construction and readying this bad boy for primer. Will take some pics tonight pre-primer.

Virginia, United States
Joined: December 06, 2014
KitMaker: 96 posts
Armorama: 96 posts
Posted: Sunday, January 04, 2015 - 03:43 AM UTC
Hey Mike, I'll try and pull some pics together of my soldering process. In the meantime, I know Mike Roof has provided some detail on his approach to soldering in his latest blog:
https://armorama.kitmaker.net/forums/221479Mr. Roof's builds are pure magic.

Virginia, United States
Joined: December 06, 2014
KitMaker: 96 posts
Armorama: 96 posts
Posted: Sunday, January 04, 2015 - 07:41 AM UTC
Massachusetts, United States
Joined: August 15, 2004
KitMaker: 252 posts
Armorama: 146 posts
Posted: Sunday, January 04, 2015 - 07:54 AM UTC
Looks fantastic. I can't wait to see it with paint on it. For the tow cable -- did you use string or wire?
Virginia, United States
Joined: December 06, 2014
KitMaker: 96 posts
Armorama: 96 posts
Posted: Sunday, January 04, 2015 - 07:58 AM UTC
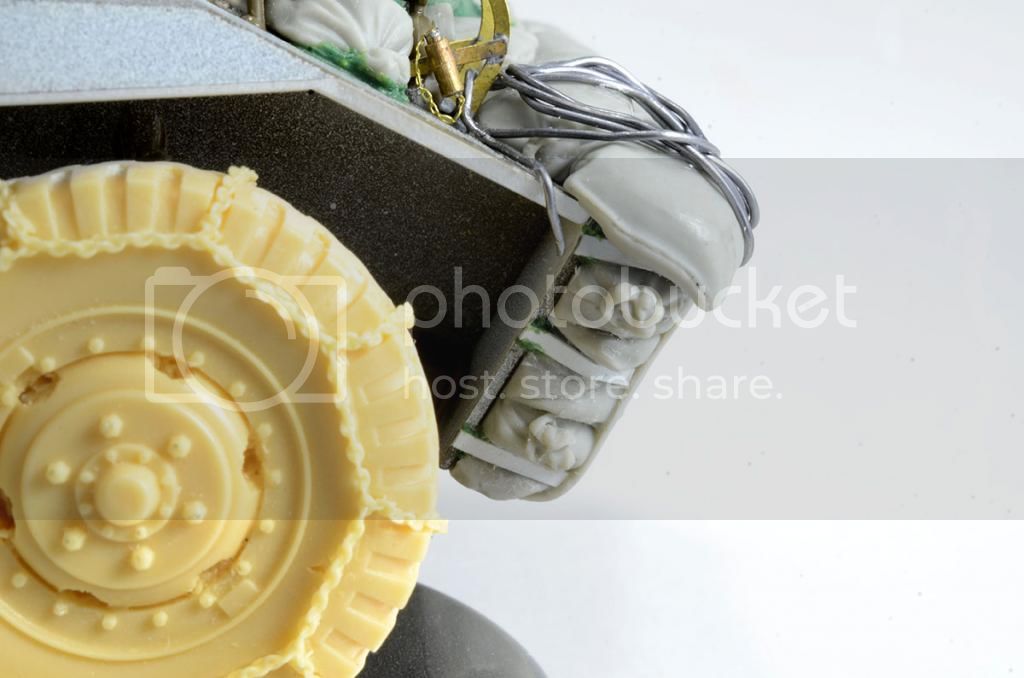
I gotta say, the Legend upgrade set is pretty friggin' sweet! With most resin sets, it required a fair share of cleanup. I was really drawn to this set by the sandbag armor. Now, I must admit, I've only been able to find one reference photo of an M8 w/ this field mod, but heck, it looks so bad a$$, I could not resist.
The fit was pretty good, but I still had to get creative with the greenstuff and some Evergreen strip. Here, I had to remake the strapping on the side so that it made positive contact with the hull. I also added some fine weld beads with greenstuff for added effect.
Virginia, United States
Joined: December 06, 2014
KitMaker: 96 posts
Armorama: 96 posts
Posted: Sunday, January 04, 2015 - 08:08 AM UTC
Hi Brian, Thanks for looking! For the tow cable, I used ship modelers scale rope, made by Syren:
http://www.syrenshipmodelcompany.com/This stuff is amazing! I use it for standard rope as well of course. But I like it for the tow cable instead of wire versions since it has a more natural "weight" to it. I used diluted carpenters glue and gradually applied the glue as I positioned the cable.
Virginia, United States
Joined: December 06, 2014
KitMaker: 96 posts
Armorama: 96 posts
Posted: Sunday, January 04, 2015 - 08:20 AM UTC
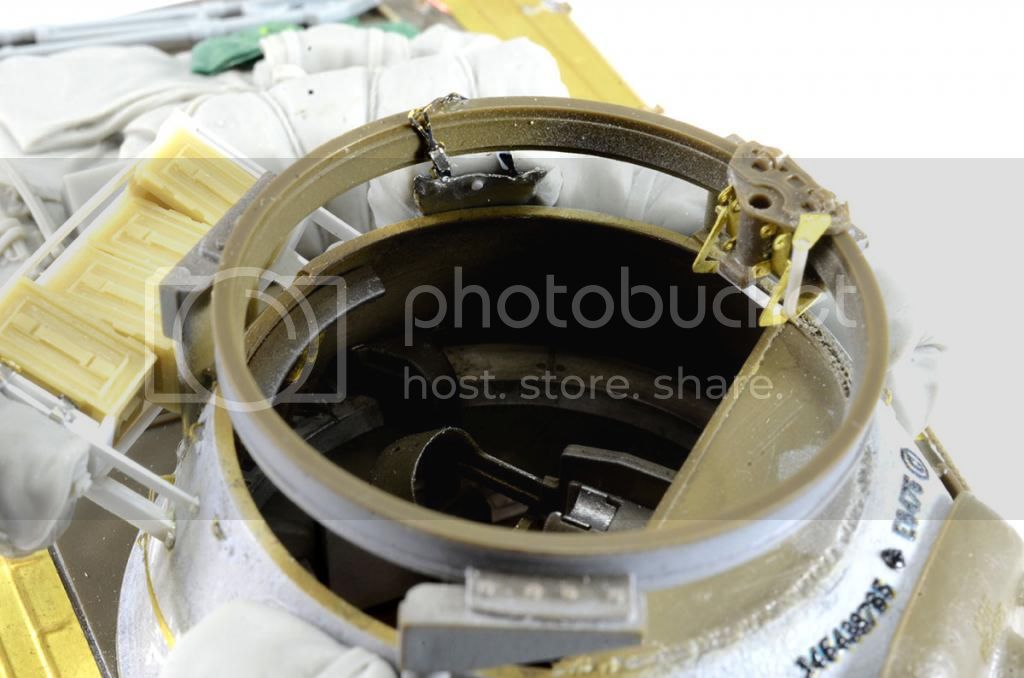
This shot shows the machine gun cradle detail (Aber) and the backside of the musette bag where I added the pocket and snap. I love little details like this, and since you rarely see the backside of the bag, figured I'd take the chance to include it. I used lead foil from a wine bottle (yes, some vineyards still use real lead) for the pocket. For the edges, I burnished the foil until it flattened out and blended with the resin bag. I used a punch and die (I like this one:
http://umm-usa.com/onlinestore/product_info.php?cPath=21_28&products_id=3660) to make the snap/button.
Massachusetts, United States
Joined: August 15, 2004
KitMaker: 252 posts
Armorama: 146 posts
Posted: Sunday, January 04, 2015 - 08:35 PM UTC
Thanks for the link Jeff. Do you know what size you use for 1/35? It looks like .63mm or .89mm might work.
Virginia, United States
Joined: December 06, 2014
KitMaker: 96 posts
Armorama: 96 posts
Posted: Monday, January 05, 2015 - 12:59 AM UTC
[quote]
Quoted Text
Do you know what size you use for 1/35? It looks like .63mm or .89mm might work.
I'll take a look when I'm back at the bench tonight. Cheers.
Madrid, Spain / España
Joined: July 08, 2006
KitMaker: 146 posts
Armorama: 128 posts
Posted: Monday, January 05, 2015 - 01:21 AM UTC
Quoted Text
Quoted Text
Quoted Text
Plus I believe there is a hatch of some sort on the turret rear which the rack if fitted would interfere with.
Alan: it's an open topped turret -- why would there be a hatch there?
Check on the last picture Jeff has posted. Looking behind his lovely scratch built rack to the turret you'll see a hatch/plate. Don't know what it was for. Maybe when they had to take the main gun out for replacement it unbolted and slid out the back of the turret as there wasn't enough room due to its length to extract it out the top. Just guessing as to why, in my opinion, looking at the real life photo it appears that the rack is side mounted on the turret.
Alan
The hatch is for replacing the gun
Virginia, United States
Joined: December 06, 2014
KitMaker: 96 posts
Armorama: 96 posts
Posted: Monday, January 05, 2015 - 10:36 AM UTC
Thanks Javier! So, my crew better not need an expedient gun swap, otherwise the'll be yank in' their fancy ammo rack off!

Virginia, United States
Joined: December 06, 2014
KitMaker: 96 posts
Armorama: 96 posts
Posted: Monday, January 05, 2015 - 10:37 AM UTC
Got the primer on tonight...pics tomorrow. Then some OD. Cheers.
Heves, Hungary
Joined: January 04, 2015
KitMaker: 3 posts
Armorama: 3 posts
Posted: Monday, January 05, 2015 - 05:30 PM UTC
Waiting for the pics. What kind of OD will You use?
Regards,
Antal Bujdoso
www.runisandthings.blogspot.hu
England - North East, United Kingdom
Joined: March 14, 2014
KitMaker: 242 posts
Armorama: 161 posts
Posted: Monday, January 05, 2015 - 05:47 PM UTC
On the workbench:
FAR TO MUCH!!!
Virginia, United States
Joined: December 06, 2014
KitMaker: 96 posts
Armorama: 96 posts
Posted: Monday, January 05, 2015 - 07:42 PM UTC
Quoted Text
Waiting for the pics. What kind of OD will You use?
I'll be using Tamiya OD, lightened a bit in varying degrees for a little "modulation." On top of that, I'll be doing a winter whitewash, using the hairspray technique. First time using this technique that's "all the rage."

We'll see how it goes!
Thanks for looking!
California, United States
Joined: November 28, 2007
KitMaker: 817 posts
Armorama: 75 posts
Posted: Monday, January 05, 2015 - 09:17 PM UTC
Really fun stuff- This thing looks great without the fenders. Cheers!
[url]http://chukw.blogspot.com/[/url]
Virginia, United States
Joined: December 06, 2014
KitMaker: 96 posts
Armorama: 96 posts
Posted: Tuesday, January 06, 2015 - 12:56 AM UTC
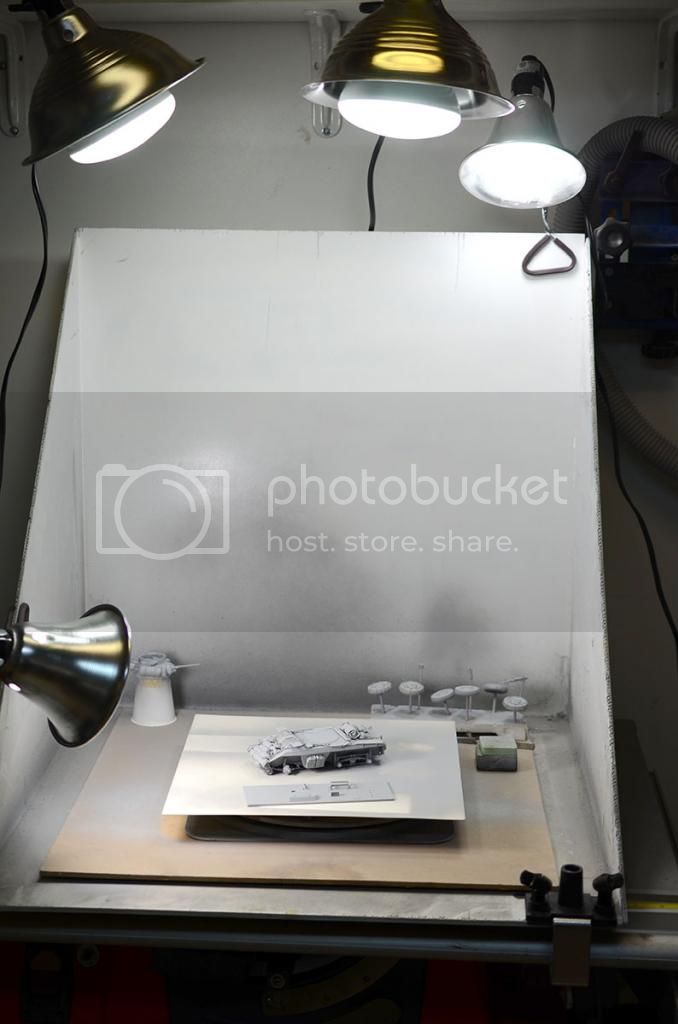
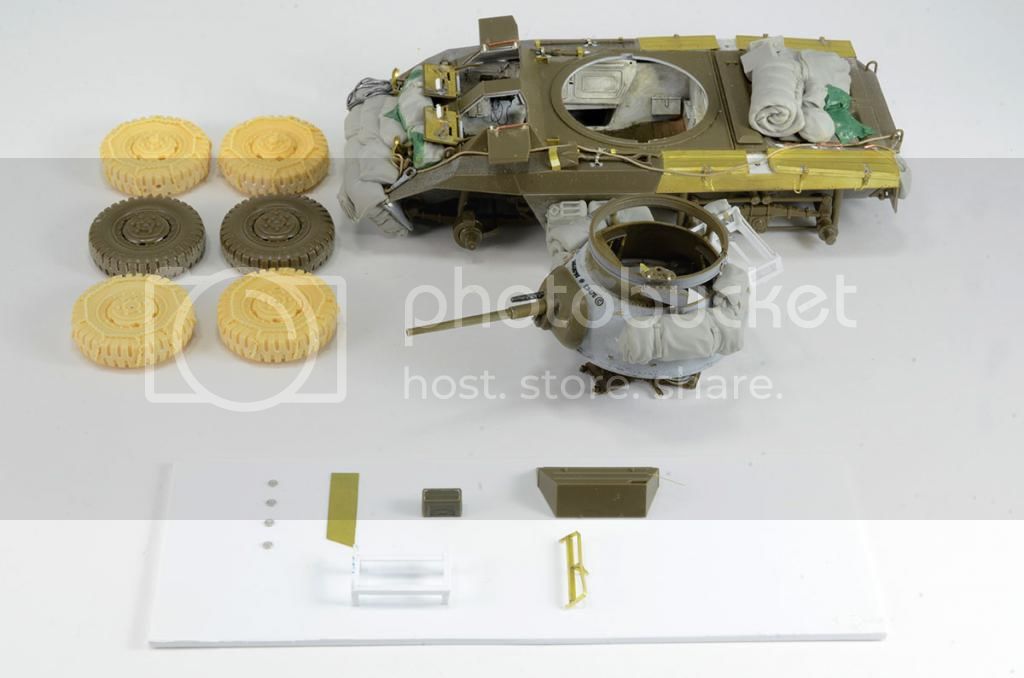
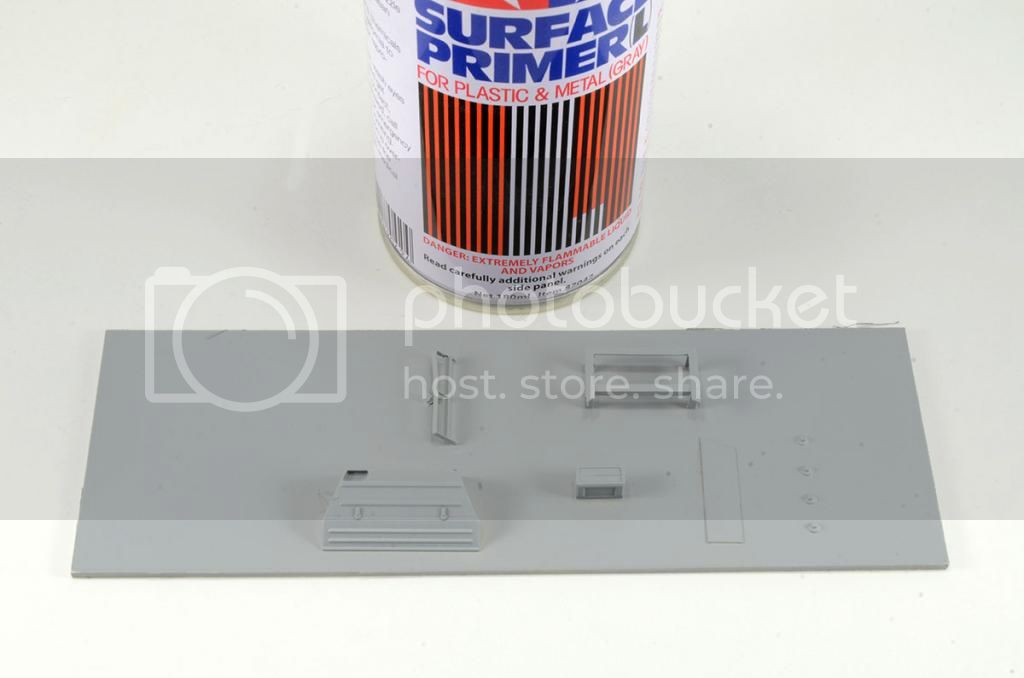
Was able to get this primed last night. Here's the final pre-primer shot. Note the odd piece of styrene with various blobs and bits. That ugly bugger would be my test piece as I make my way through the HS technique. Figure I'll paint it exactly the way I paint the actual model to ensure consistency in my testing/experimentation.
Virginia, United States
Joined: December 06, 2014
KitMaker: 96 posts
Armorama: 96 posts
Posted: Tuesday, January 06, 2015 - 12:58 AM UTC
And after the primer applied. Looks so clean and nice. A blank canvas for the onslaught of painting and weathering!!!
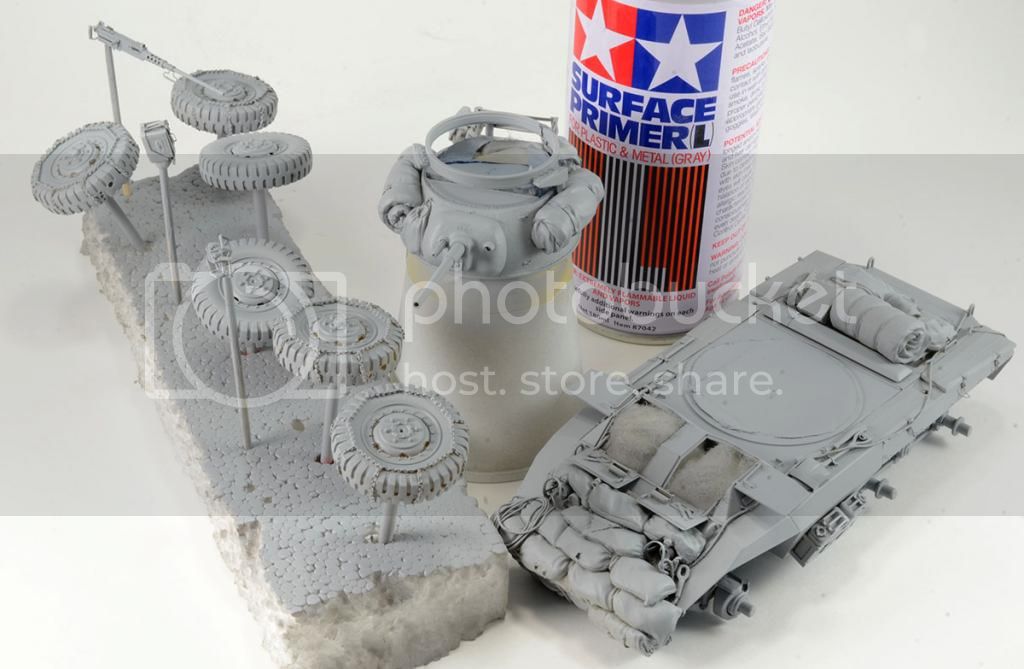
And the frankenstein test piece.

OD color modulation will happen tonight....I think!
Virginia, United States
Joined: December 06, 2014
KitMaker: 96 posts
Armorama: 96 posts
Posted: Tuesday, January 06, 2015 - 07:08 AM UTC
Virginia, United States
Joined: December 06, 2014
KitMaker: 96 posts
Armorama: 96 posts
Posted: Tuesday, January 06, 2015 - 10:44 AM UTC
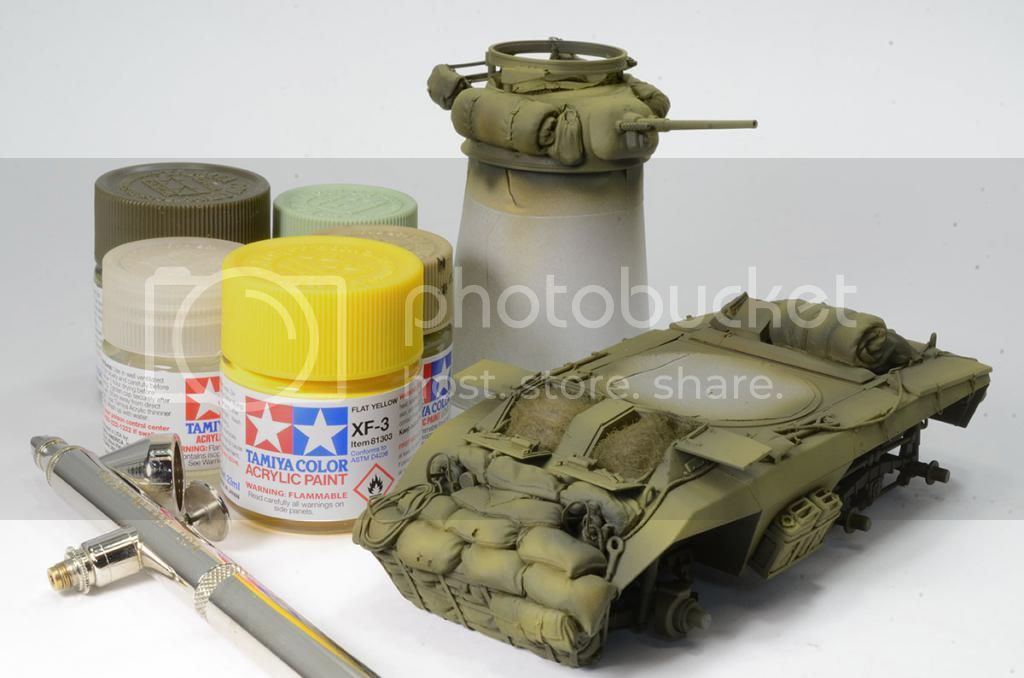
Evening/Morning gents! Was able to tackle the base coats tonight. Here's how it turned out.
Pre-shade using Tamiya OD and Black.
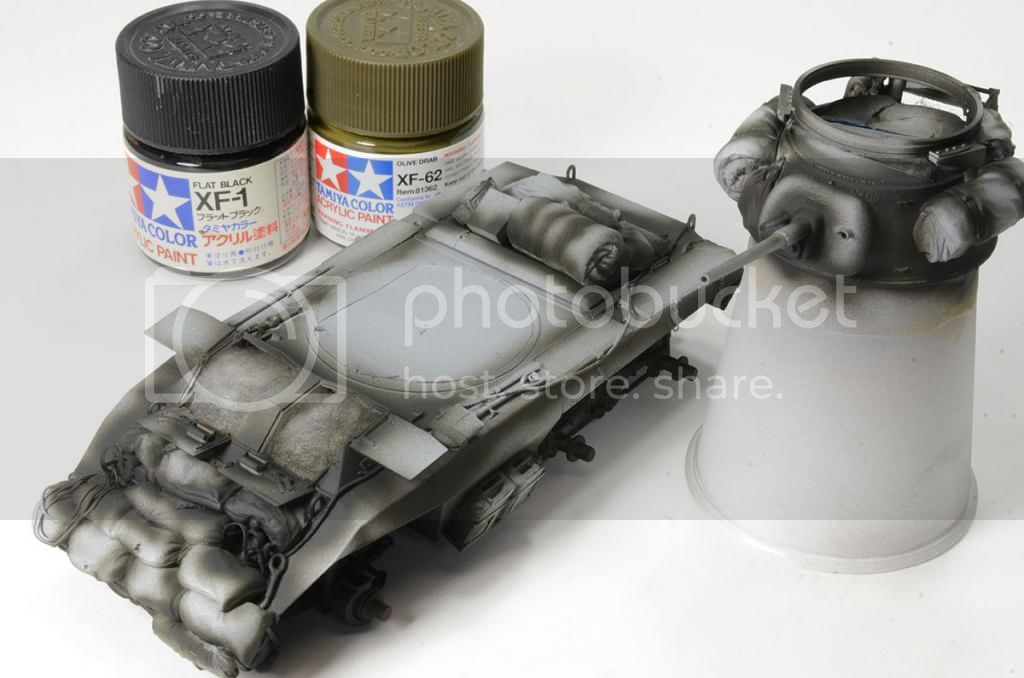
OD Base: Tamiya OD and a little Dark Yellow, and a little X-22 clear.
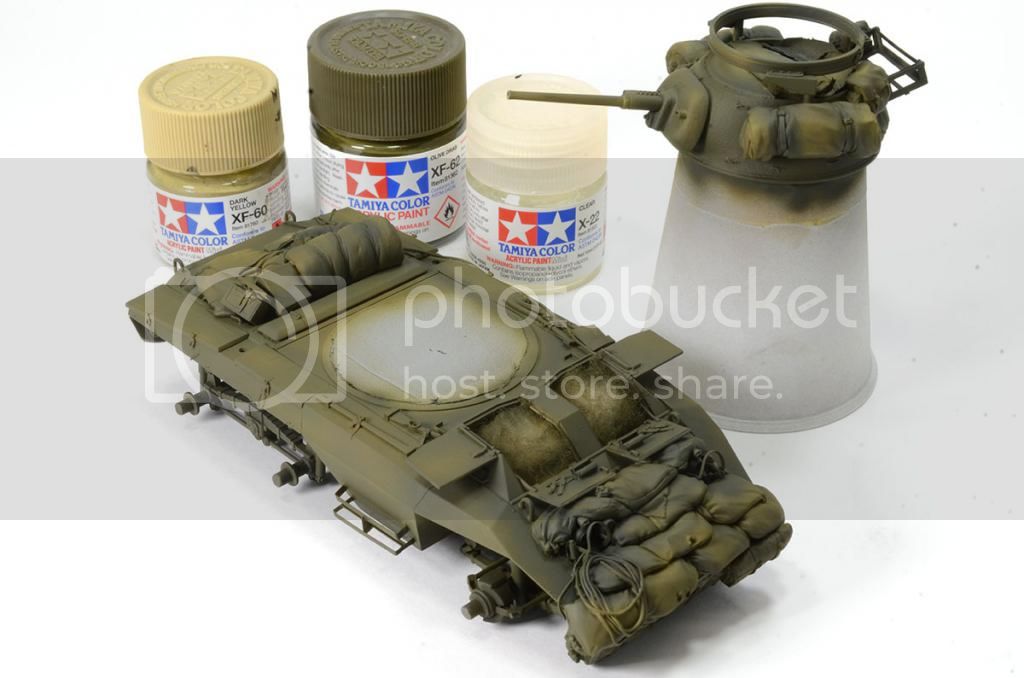
OD Highlight #1: OD, Dark Yellow, & Sky:
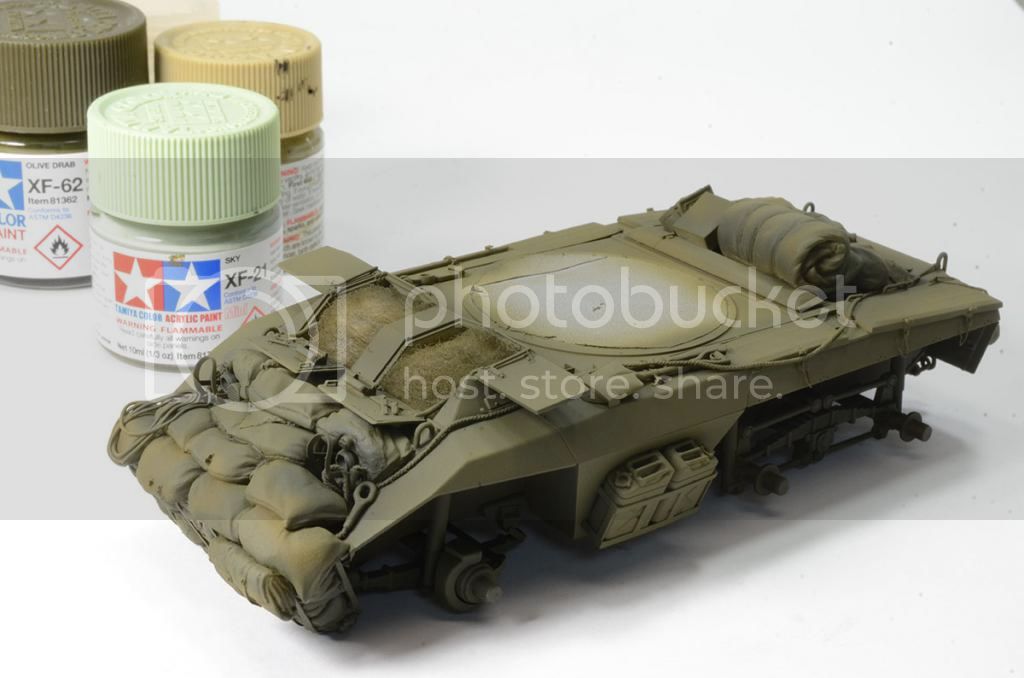
OD Highlight #2: OD, Dark Yellow, Sky, and a bit of Yellow to add some chromatic richness. Also threw in my trusty Badger 103 into the pic.
And here are all the completed base coated parts, including my test piece.
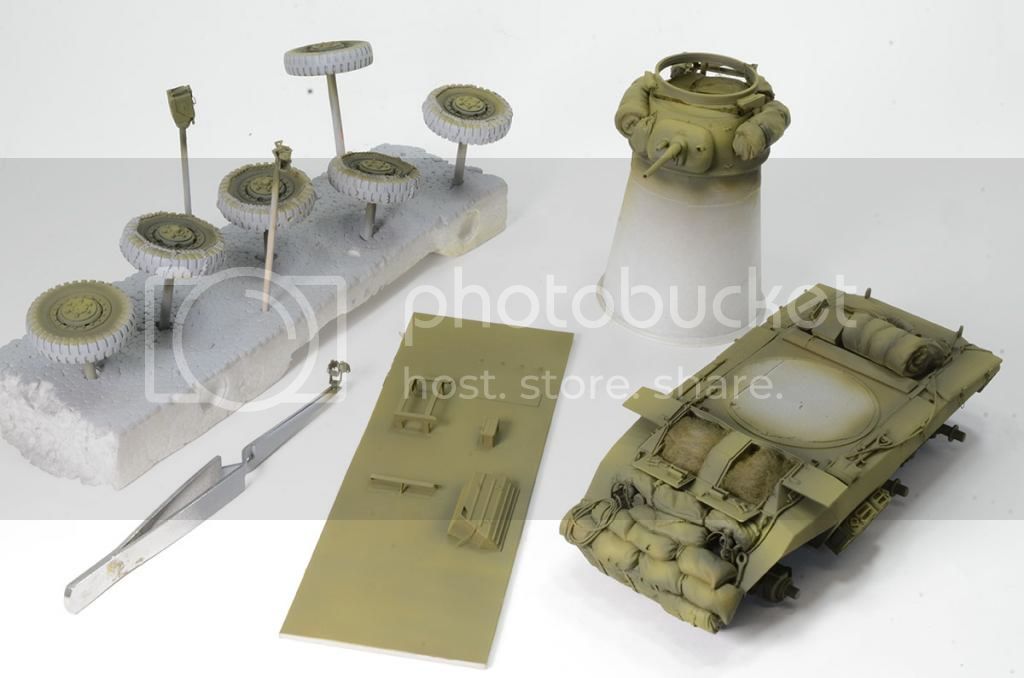
Late night tonight, so need to get some sleep. Next up is the hairspray & winter white. Stay tuned....


Virginia, United States
Joined: December 06, 2014
KitMaker: 96 posts
Armorama: 96 posts
Posted: Wednesday, January 07, 2015 - 10:31 AM UTC
Alright, was able to do some tests on the HS technique tonight. As a reminder this is my first go at this technique. I've read about it for years (Wilder, Rinaldi, Lawler, Mig, et al), and was always intrigued by it, especially for whitewash effects. So here goes my first attempt....
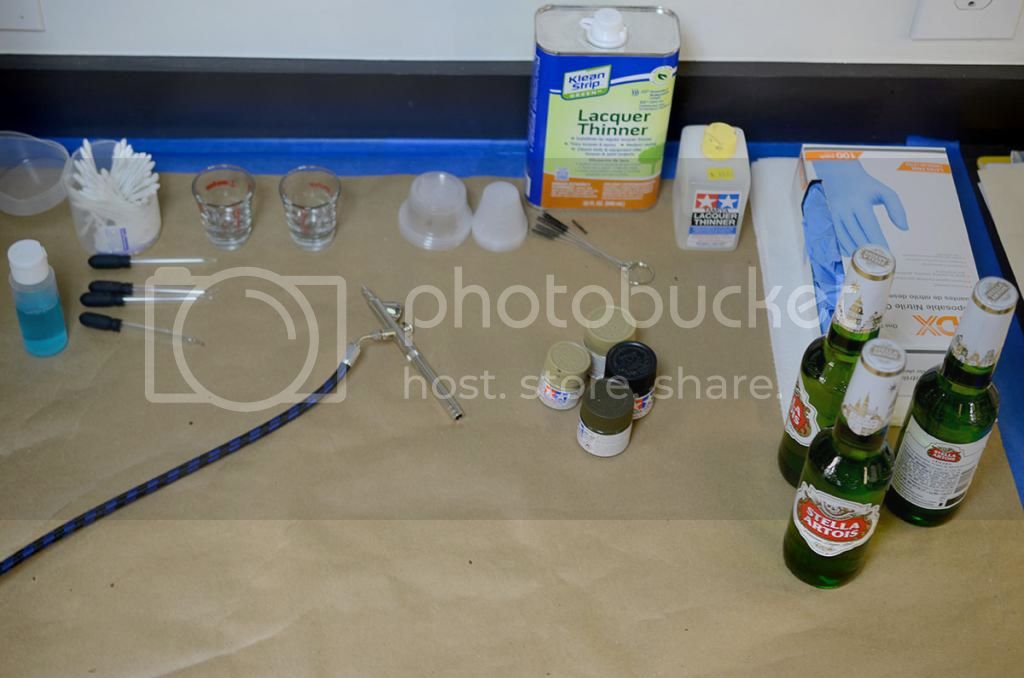
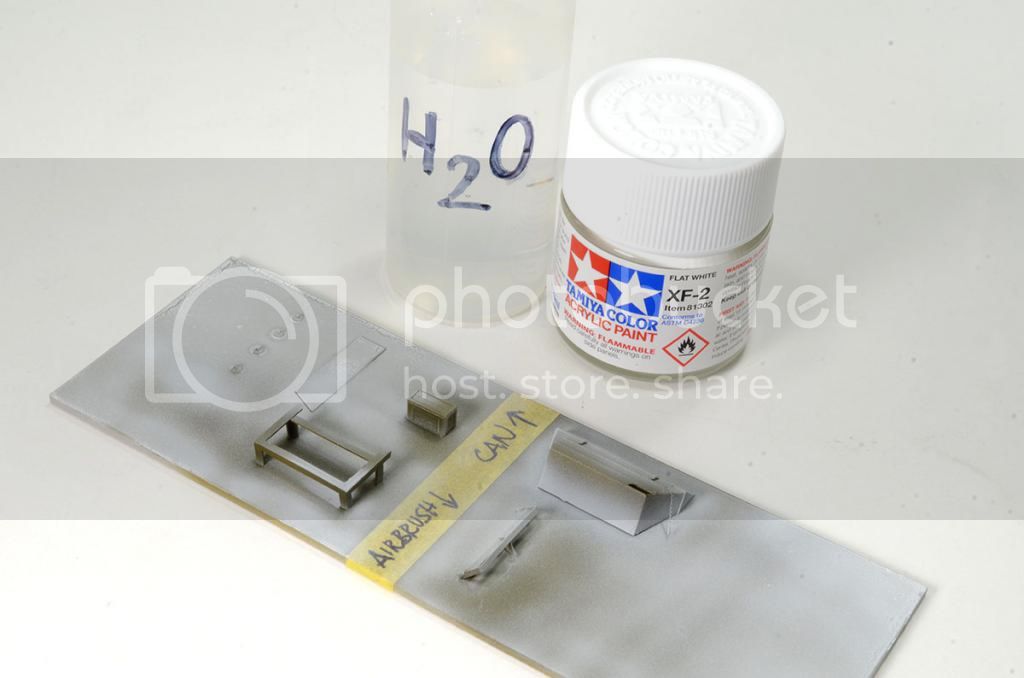
Using my test piece, I divided it into two halves. One half I would spray the HS directly from the can (just like Mr. RInaldi does). The other half, I would decant (I just like saying that word

) and spray from my AB. Not sure if this would produce any noticeable difference, but I read about both approaches, so figured I'd include this in my experiment.

Virginia, United States
Joined: December 06, 2014
KitMaker: 96 posts
Armorama: 96 posts
Posted: Wednesday, January 07, 2015 - 10:40 AM UTC
Next, I applied the white. Using Tamiya White, thinned with water, I applied it in a random, mottled pattern. I purposely tried to get some areas with full/heavy coverage and others with weak/little coverage. On my actual M8, my goal is to replicate a very used/worn/faded whitewash. So for the test, I did not want to leave "any stone on turned" as they say.
Virginia, United States
Joined: December 06, 2014
KitMaker: 96 posts
Armorama: 96 posts
Posted: Wednesday, January 07, 2015 - 11:09 AM UTC
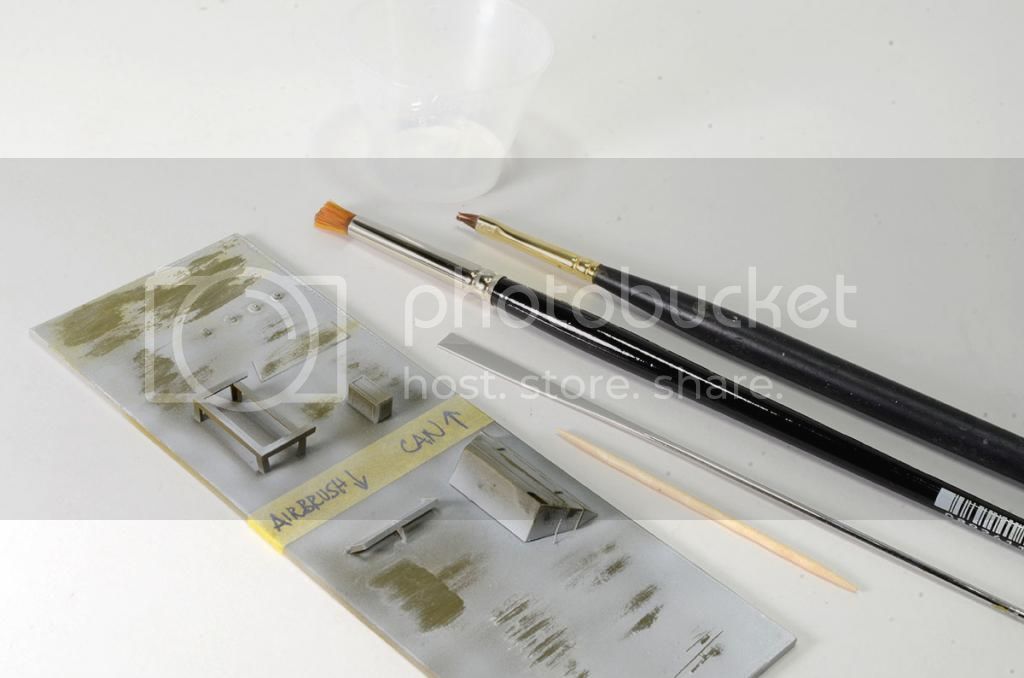
And the chipping test. I pulled a couple of brushes to start scrubbing at the white top coat: softer flat brush and a stiffer round brush. I also set aside a toothpick and a metal Tamiya stir stick to do more "scratching" type distress. And of course some warm water to to agitate the HS layer.
First impressions: I applied medium pressure with the soft brush dipped in the warm water, and the white started coming off immediately!! For some reason, I thought it would take a little more elbow grease to start the chipping/faded process. So, I switched to a much more gentle, soft touch with the soft brush. I also used a relatively dry brush--dipped in the water then wiped on a towel. This approach seemed to be far more "in scale" with the chipping and wearing away at the white layer.
With the more aggressive approach, I also noticed a slight discoloration in the white layer, almost as if the OD base coat was be degraded and tainting the white. Could also be yellowing from the HS. It seemed to be lessened on the areas that I used a more gentle touch.
As for the 2 HS application processes, no real noticeable difference. So, why clean the AB another couple of times when you can just shoot it straight from the can?
Probably won't get back to the bench for a couple days, so cheers.


Noord-Holland, Netherlands
Joined: January 28, 2007
KitMaker: 1,945 posts
Armorama: 282 posts
Posted: Wednesday, January 07, 2015 - 01:58 PM UTC
Hi Jeff,
Thanks for sharing your test with the hairspray. Good to know that spraying directly from the can also gives good results, as I am reluctant to put the stuff in my airbrush.
I am looking forward to see the white wash on your M8. It looks really nice thus far, although the sky green is maybe a little bit too green in my (humble) opinion, but it will probably darken a bit with the weathering.

Jelger
On the workbench:
- Tamiya P-47D 1/48
- Eduard Mig21 1/144


