tatbaqui
 News Writer
#040
Metro Manila, Philippines
Joined: May 06, 2007
KitMaker: 2,713 posts
Armorama: 2,451 posts
Posted: Friday, January 22, 2016 - 10:07 AM UTC
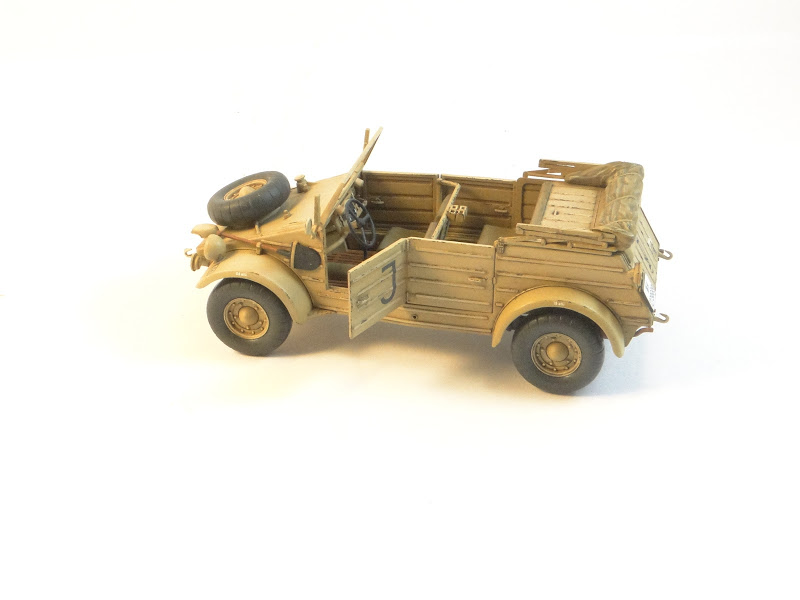
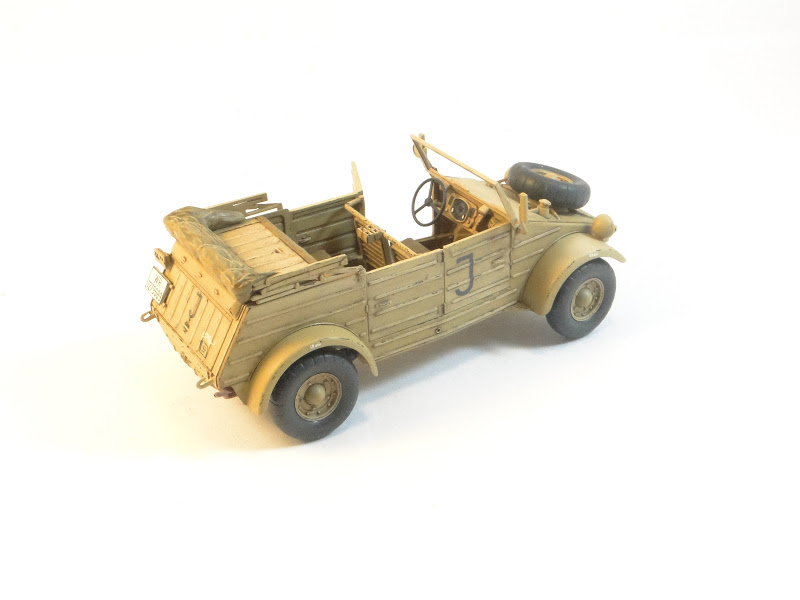
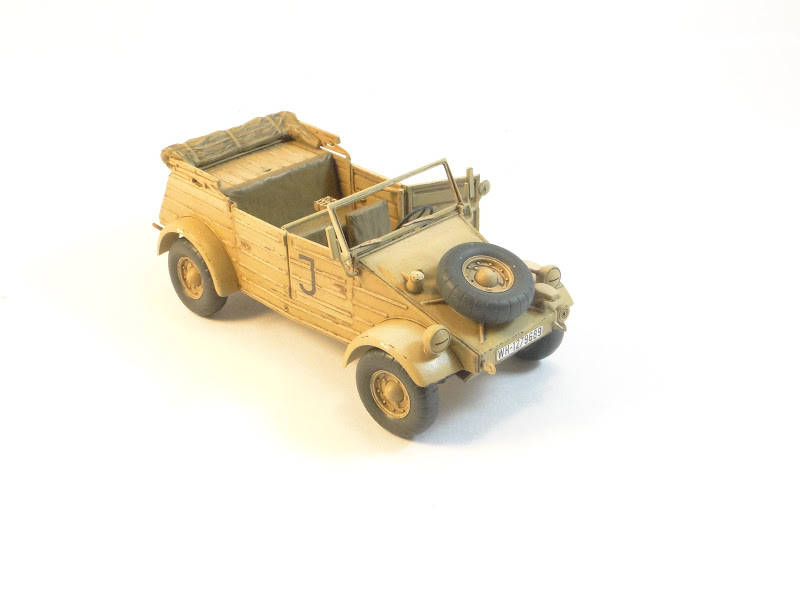
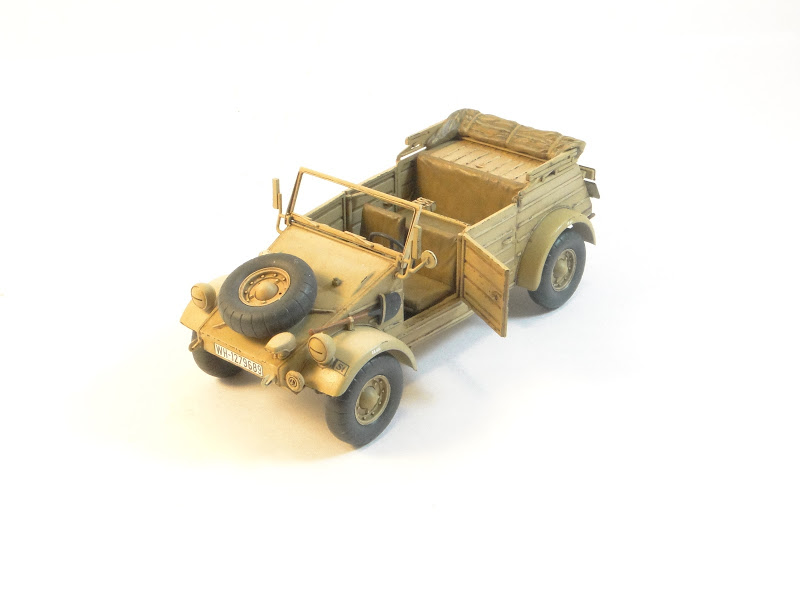
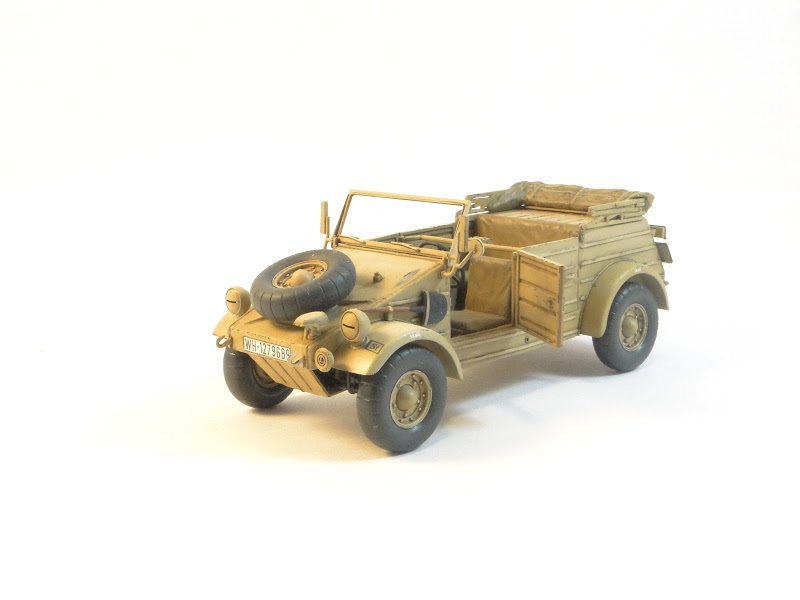
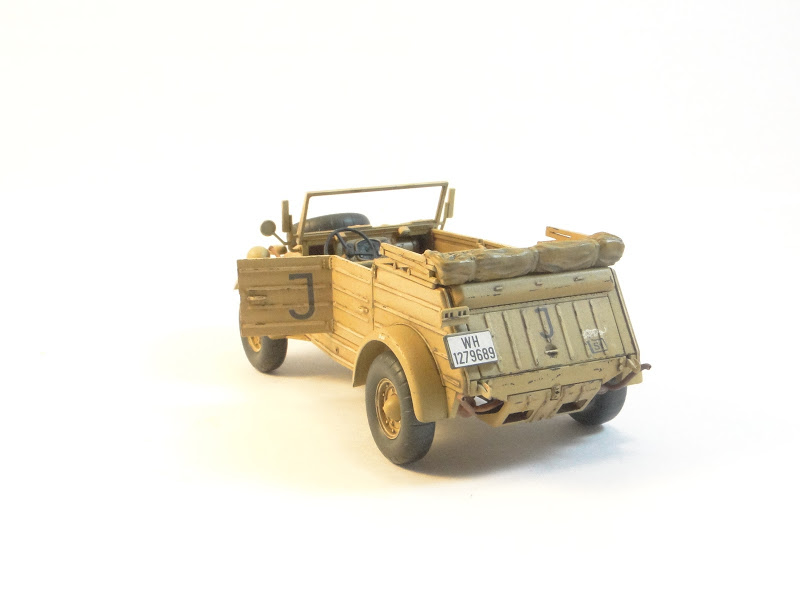
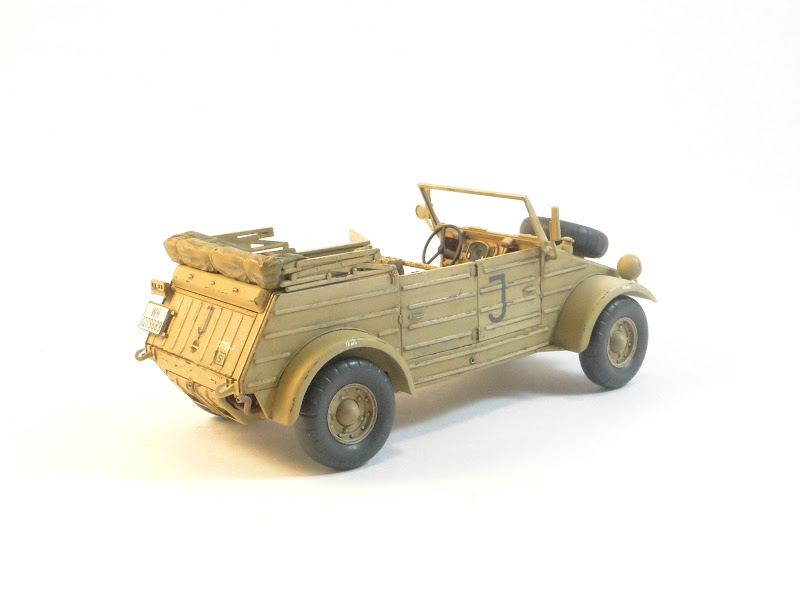
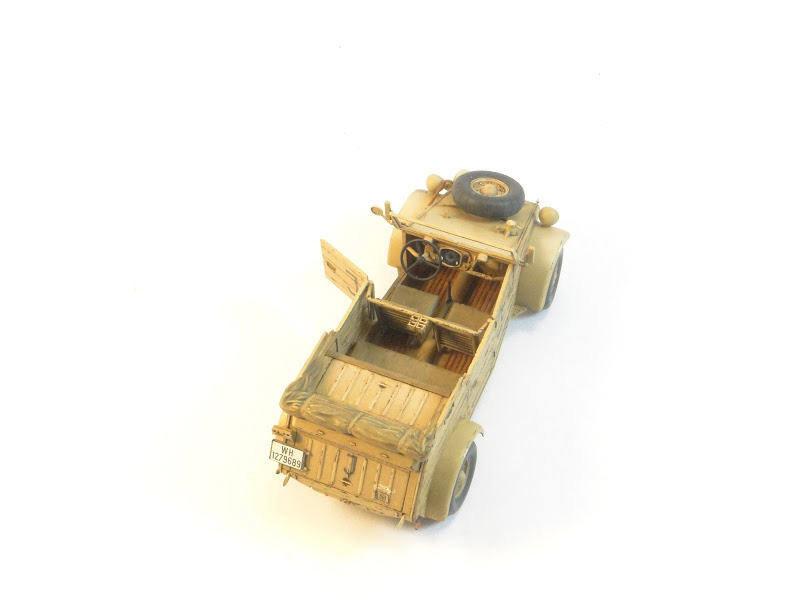
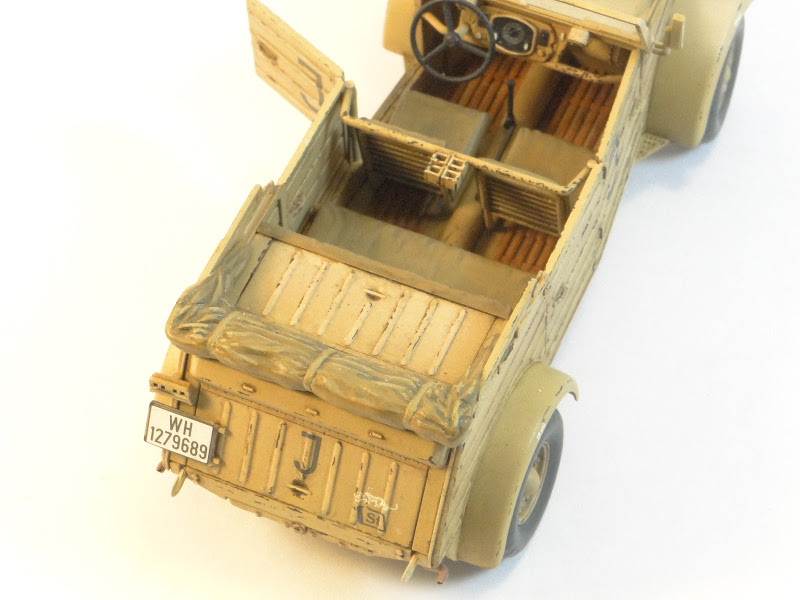
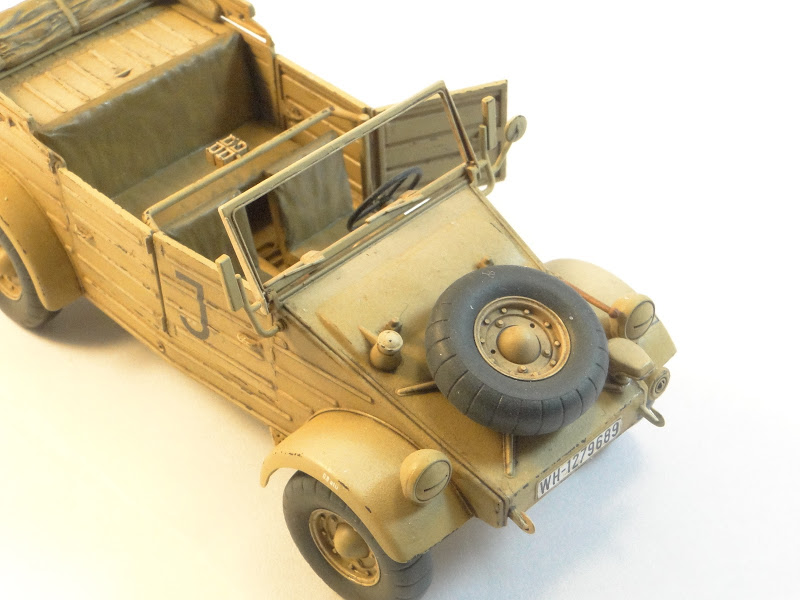
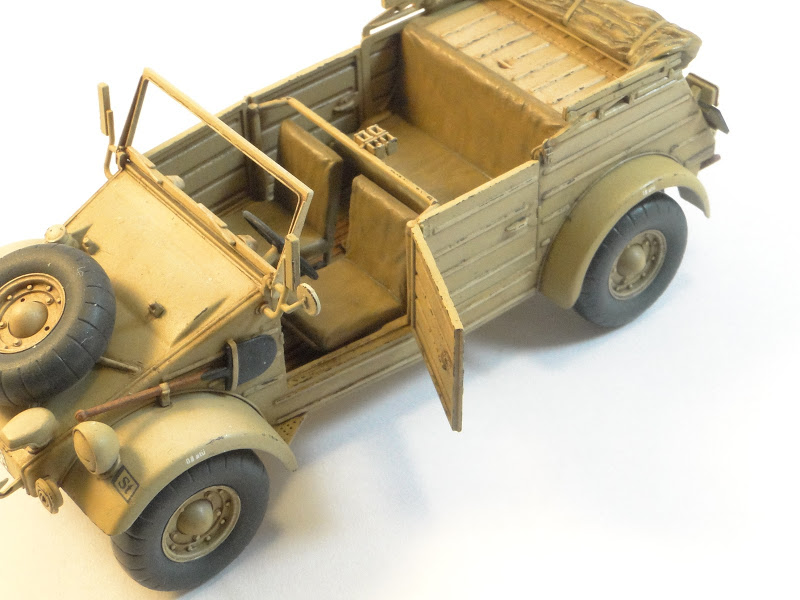
Working on some basic interior painting on the Kubelwagen before I close it up:

I like the clean build you have there Larry!
Cheers.
Tat
#073
Pennsylvania, United States
Joined: October 05, 2002
KitMaker: 2,659 posts
Armorama: 1,512 posts
Posted: Saturday, January 23, 2016 - 08:28 PM UTC
Hello again and welcome to my update on my BRC40...
There was some pin damage on the main chassis part, but it will be mostly unseen when the build is complete, and there is a lot of flash on this kit.. I still have some to trim here and there.. every part seems to have a small bit and the main chassis part had a lot..
anyways here is some pics of the chassis.. lots of small parts and some were difficult to line up but so far so good.


here is a photo that shows the flash on this kit..

Delbert
Just Your Everyday Average Model Builder
Removed by original poster on 01/24/16 - 17:58:07 (GMT).
Noord-Brabant, Netherlands
Joined: February 13, 2011
KitMaker: 322 posts
Armorama: 300 posts
Posted: Saturday, January 23, 2016 - 11:40 PM UTC
AussieReg
Associate Editor #007
Victoria, Australia
Joined: June 09, 2009
KitMaker: 8,156 posts
Armorama: 194 posts
Posted: Sunday, January 24, 2016 - 08:21 AM UTC
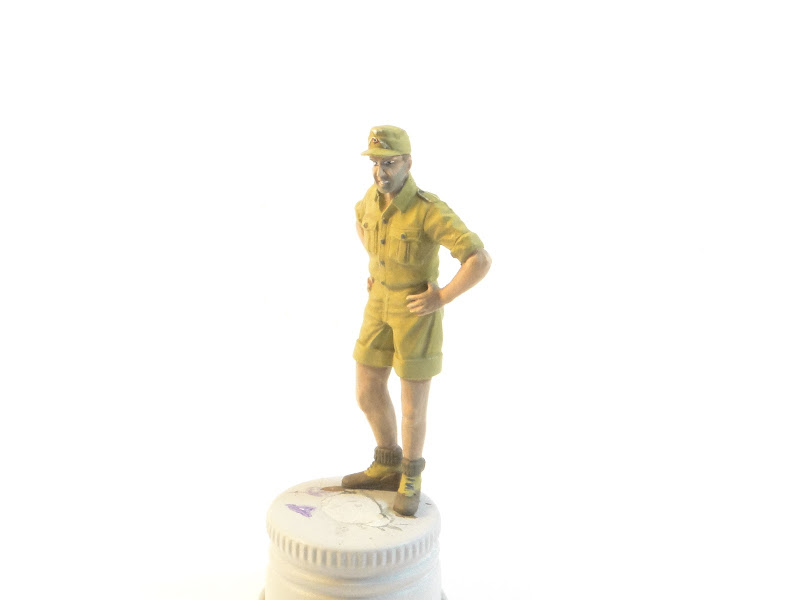
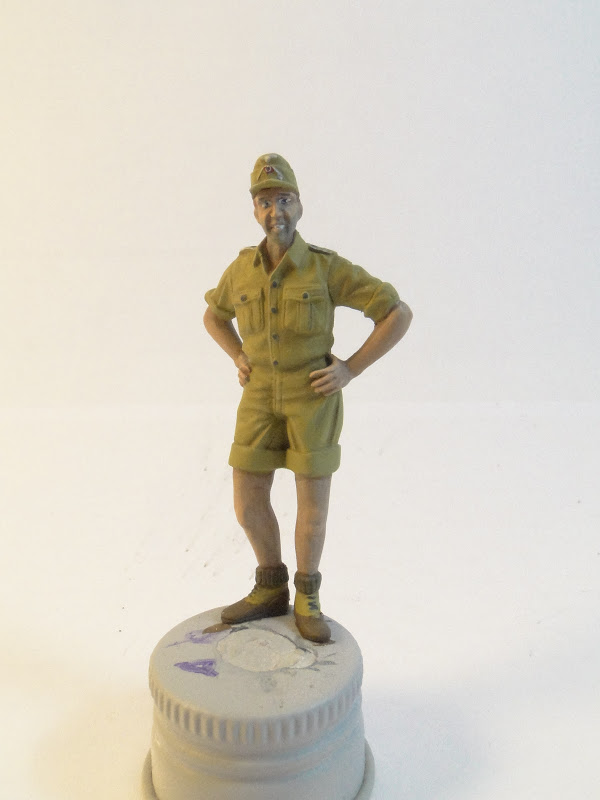
Time for me to chime in here I suppose!
Box and start pics, with my little man Darcy having a look in . . . .
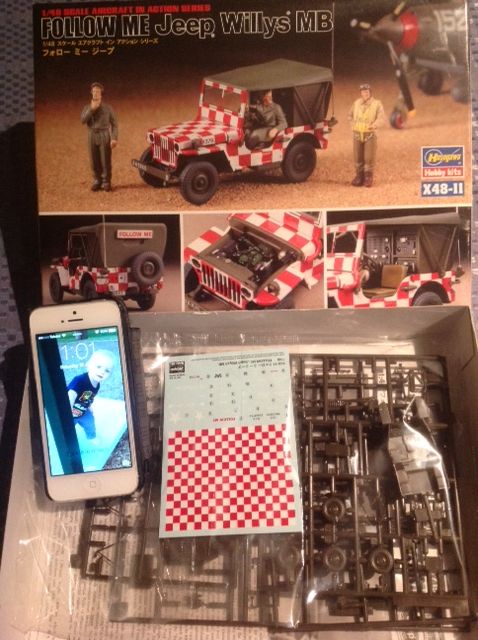
This build will be included in a P-47 Diorama I am starting on now. I am planning to have the top off, driver talking to a pilot, radio operator standing on the front passenger seat barking angry instructions at wayward taxiing Jugs!
I'm using this image as a bit of inspiration.

There will be a Tamiya 6x6 Fuel truck in the mix as well.
Hoping to start on sub-assemblies tonight, fingers crossed.
Cheers, D
ON the bench
Revell 1/24 '53 Corvette (building as '54)
Revell 1/24 BMW 507 Coupe and Cabrio
Italeri 1/48 Me262 B-1a/U1 Nightfighter
Monogram 1/24 '57 Chevy Nomad
Dragon 1/350 USS Frank Knox DD-742
AussieReg
Associate Editor #007
Victoria, Australia
Joined: June 09, 2009
KitMaker: 8,156 posts
Armorama: 194 posts
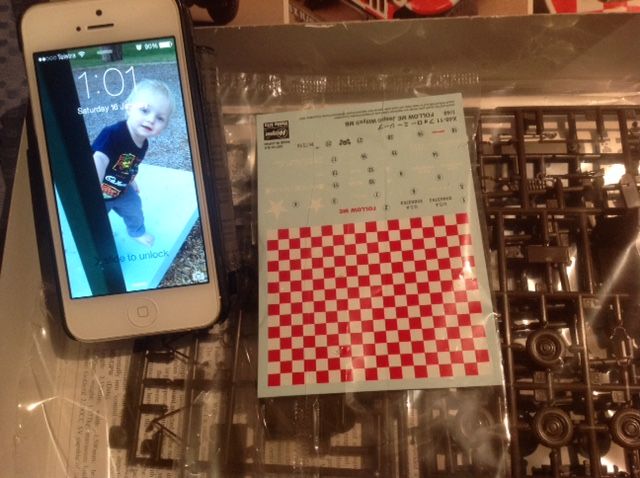
Posted: Sunday, January 24, 2016 - 05:10 PM UTC
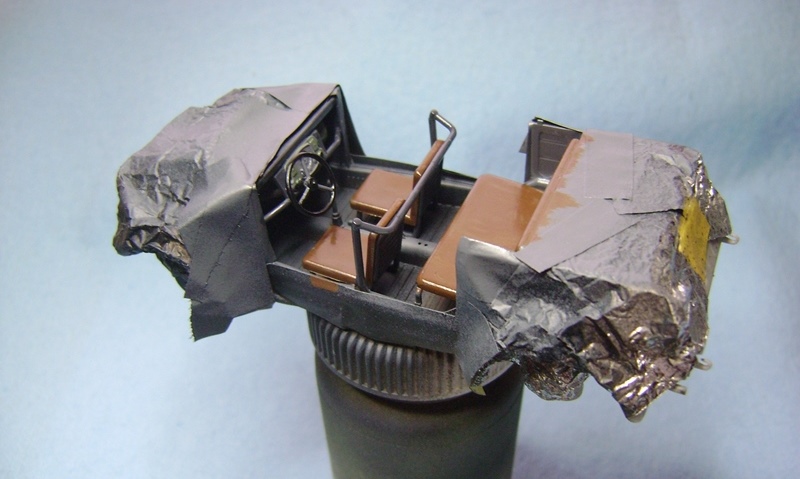
A couple of hours at the bench and most of the sub assemblies are together.

I think the red and white chequer decals on this one will be fun! I need to keep the outside of the body as clean as possible, free from handles, fittings etc. the plan is to paint the interior, dashboard etc, then grey primer and white paint on the outside to give the best base for the decals. Then I can add the fittings inside and out.
I am putting together the sub assemblies of the 6x6 Fuel Truck as well so I can paint both vehicles at the same time.
I am a confirmed noob at armour and soft skins so any and all suggestions, comments and critique gratefully accepted.
Cheers, D
ON the bench
Revell 1/24 '53 Corvette (building as '54)
Revell 1/24 BMW 507 Coupe and Cabrio
Italeri 1/48 Me262 B-1a/U1 Nightfighter
Monogram 1/24 '57 Chevy Nomad
Dragon 1/350 USS Frank Knox DD-742
Noord-Brabant, Netherlands
Joined: February 13, 2011
KitMaker: 322 posts
Armorama: 300 posts
Posted: Friday, January 29, 2016 - 08:14 PM UTC
1 Week of no free time - the chassis is done

Australian Capital Territory, Australia
Joined: October 26, 2012
KitMaker: 58 posts
Armorama: 58 posts
Posted: Saturday, January 30, 2016 - 04:41 PM UTC
Been missing in action for a while, while playing WoT as a tournament player. Now with the new Tier 10 tournament rules, I have quit the game, so more time to model.
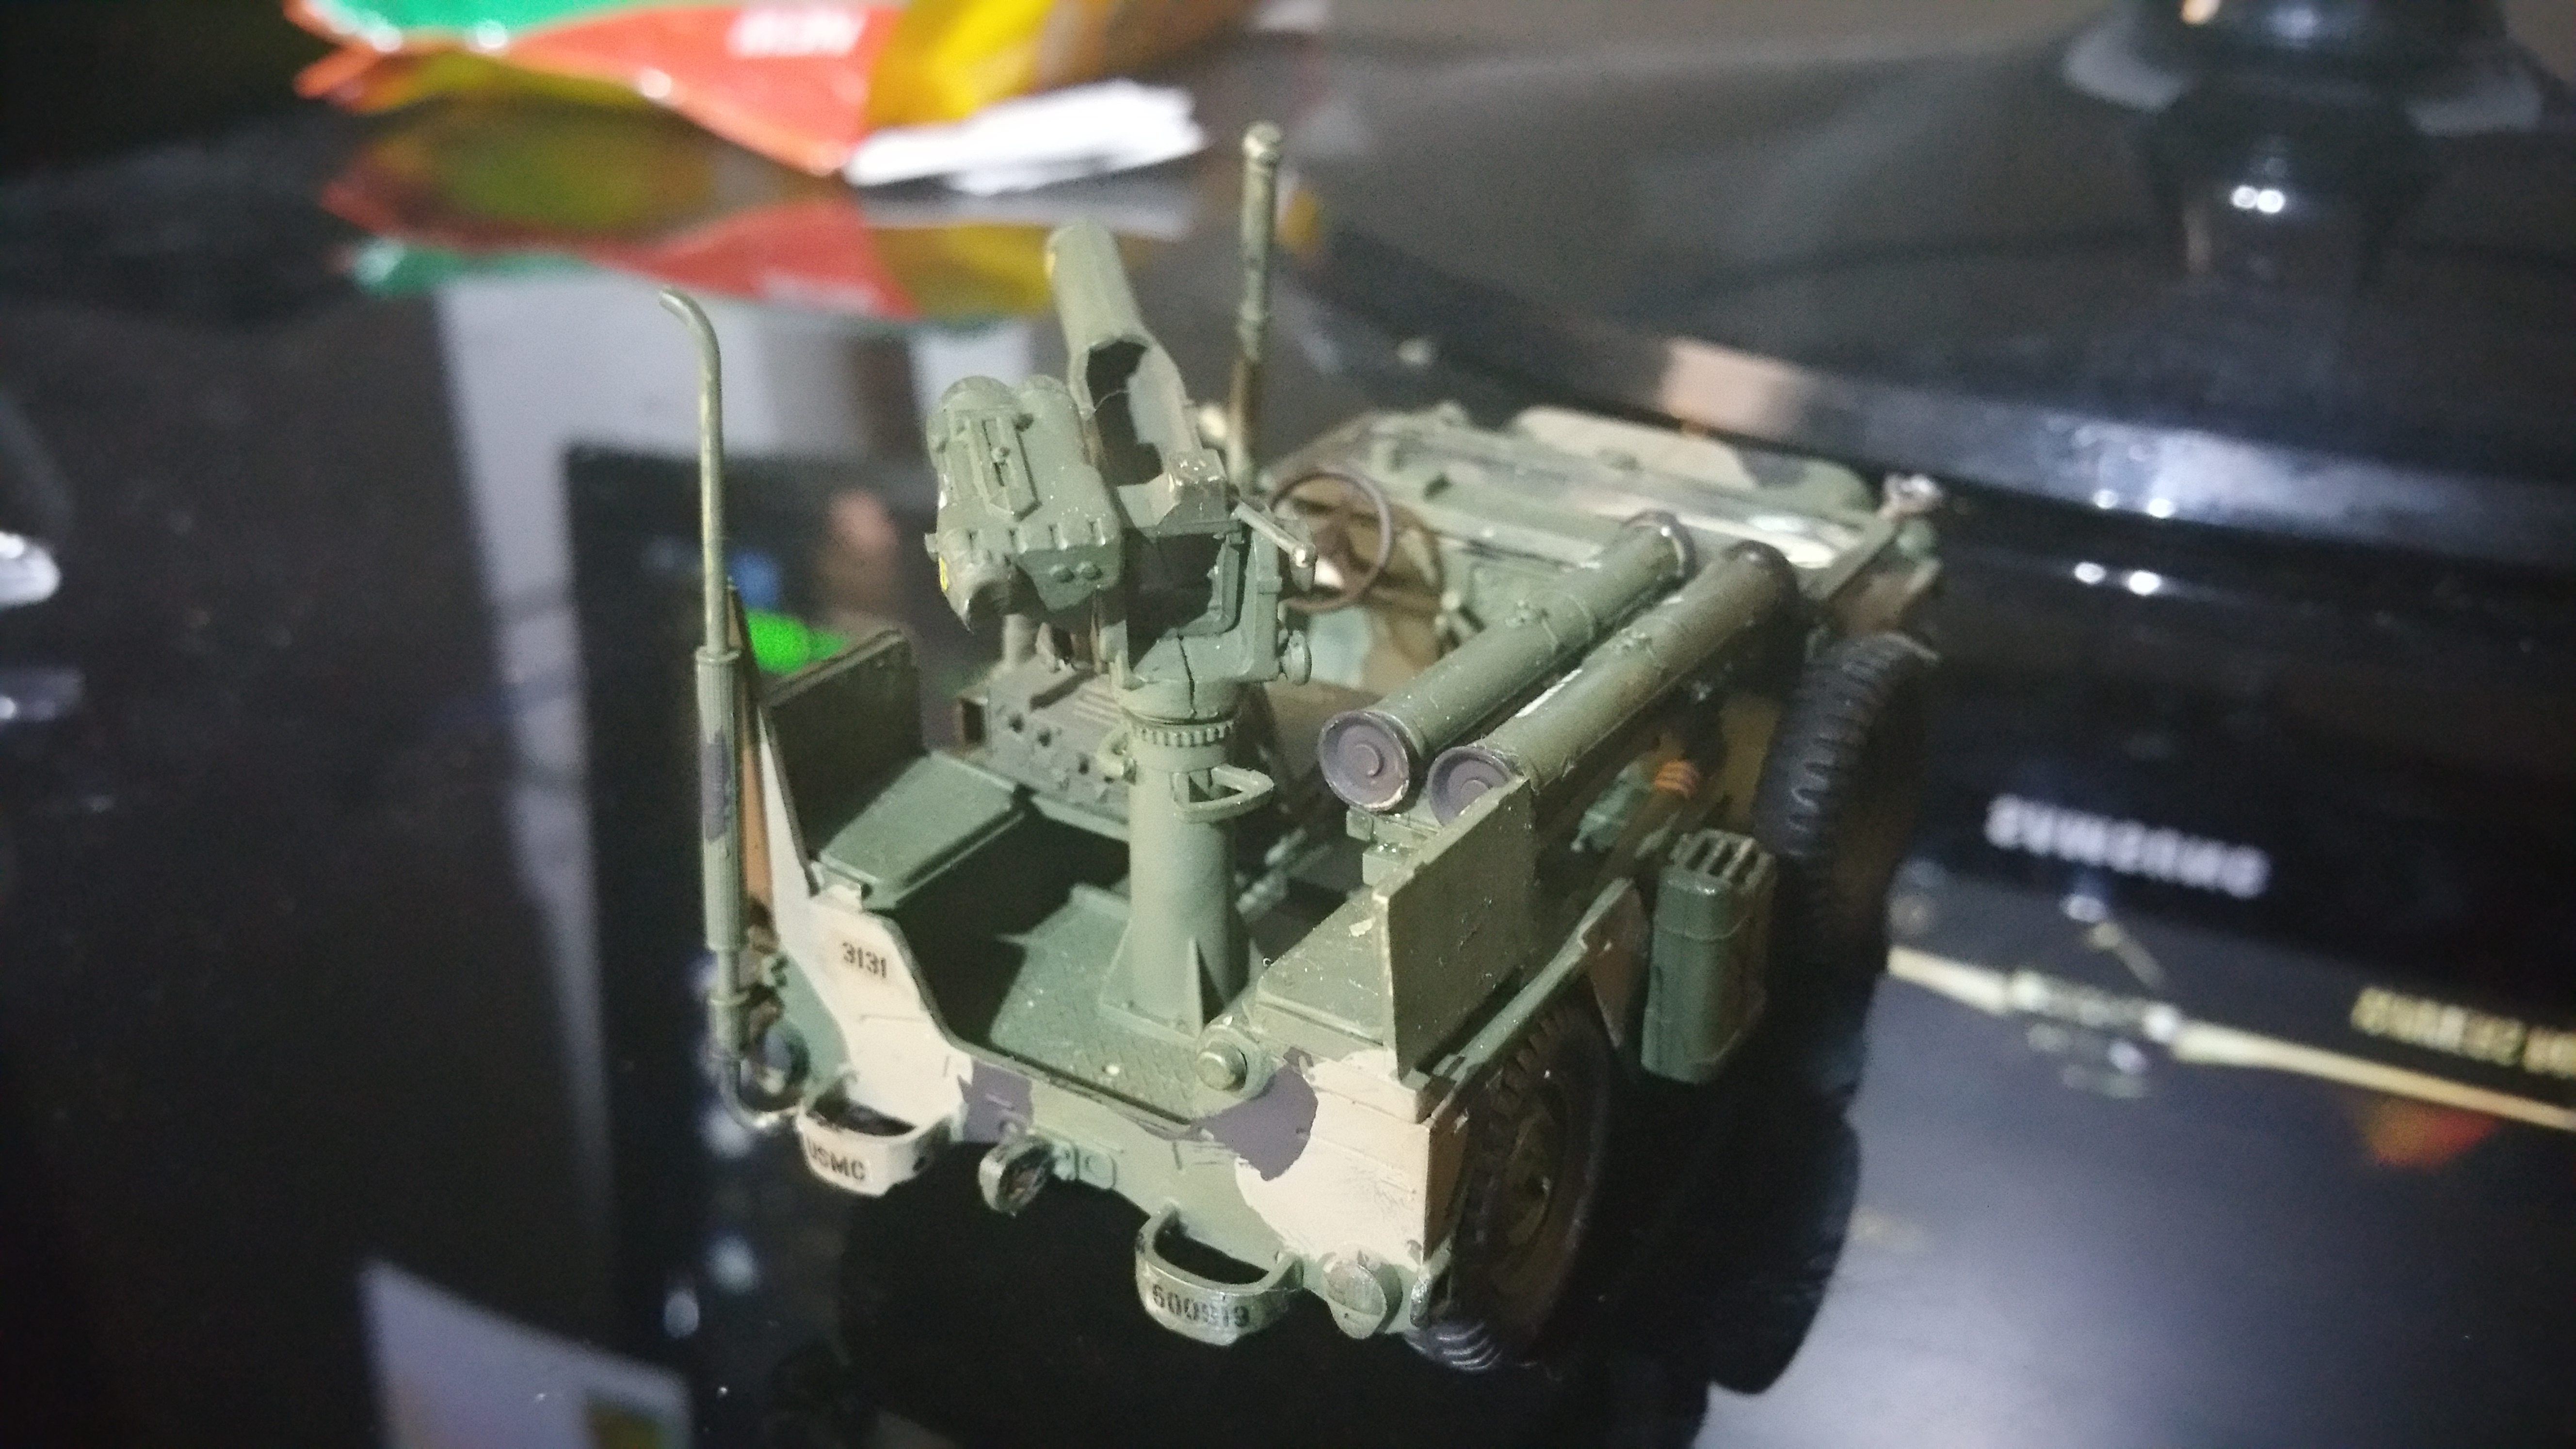
Here is what I will be building for this Campaign.
I will be building this in the USMC design, and it will be OOB to get my eye back in before moving forward with my new purchases.
On the bench currently:
Lots of procrastination!!!!
The most over engineered, incorrectly instructed model I have ever had the displeasure of trying to build. Panda Hobby's M-ATV MRAP
Warszawa, Poland
Joined: October 26, 2012
KitMaker: 65 posts
Armorama: 62 posts
Posted: Sunday, January 31, 2016 - 04:00 AM UTC
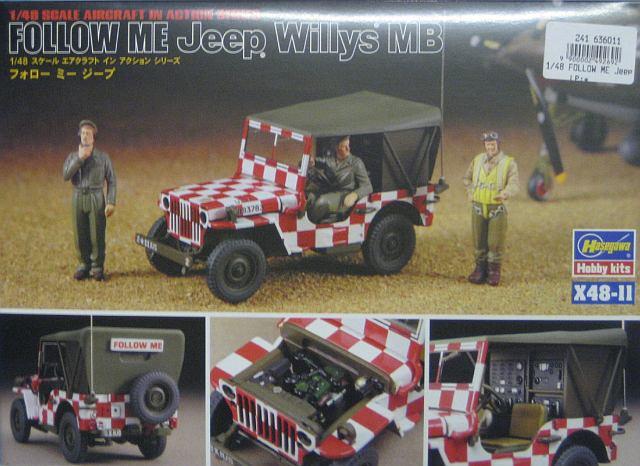
Let me be the first person with the GPA in this campaign.
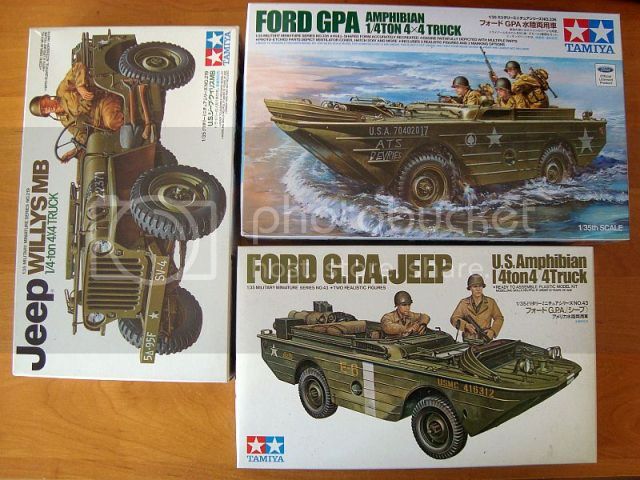

I will use mostly parts from the new release of GPA, wheels and suspension will be borrowed from Jeep and the lower hull is the single part form the old release of GPA. The reason of using this hull is that I already started to correct the tunnel at the bottom before I gave up.
And of course there will be some photoetched parts.
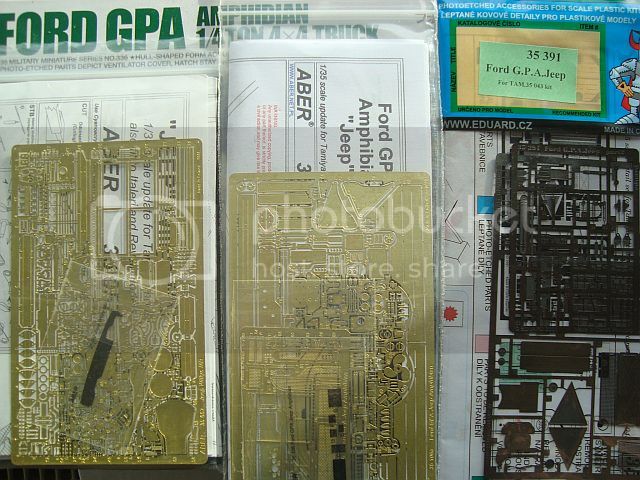
And finally the proof photo:
Marek
Australian Capital Territory, Australia
Joined: October 26, 2012
KitMaker: 58 posts
Armorama: 58 posts
Posted: Wednesday, February 03, 2016 - 10:14 AM UTC
On the bench currently:
Lots of procrastination!!!!
The most over engineered, incorrectly instructed model I have ever had the displeasure of trying to build. Panda Hobby's M-ATV MRAP
MichaelSatin
Campaigns Administrator Colorado, United States
Joined: January 19, 2008
KitMaker: 3,909 posts
Armorama: 510 posts
Posted: Wednesday, February 03, 2016 - 05:55 PM UTC
Great work everyone! Wish I could get off the chassis with my SAS build. May need to switch out if I can't get motivated soon.
Michael

On the bench:
Sorta depends on your definition of "on the bench"...
Removed by original poster on 02/04/16 - 15:21:12 (GMT).
Florida, United States
Joined: March 30, 2010
KitMaker: 139 posts
Armorama: 136 posts
Posted: Wednesday, February 03, 2016 - 08:26 PM UTC
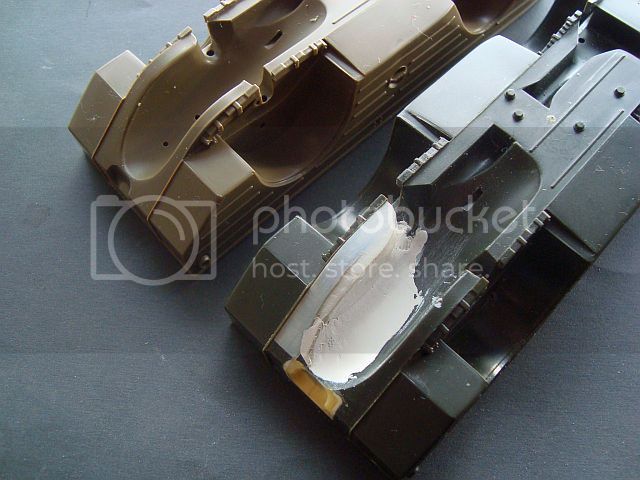
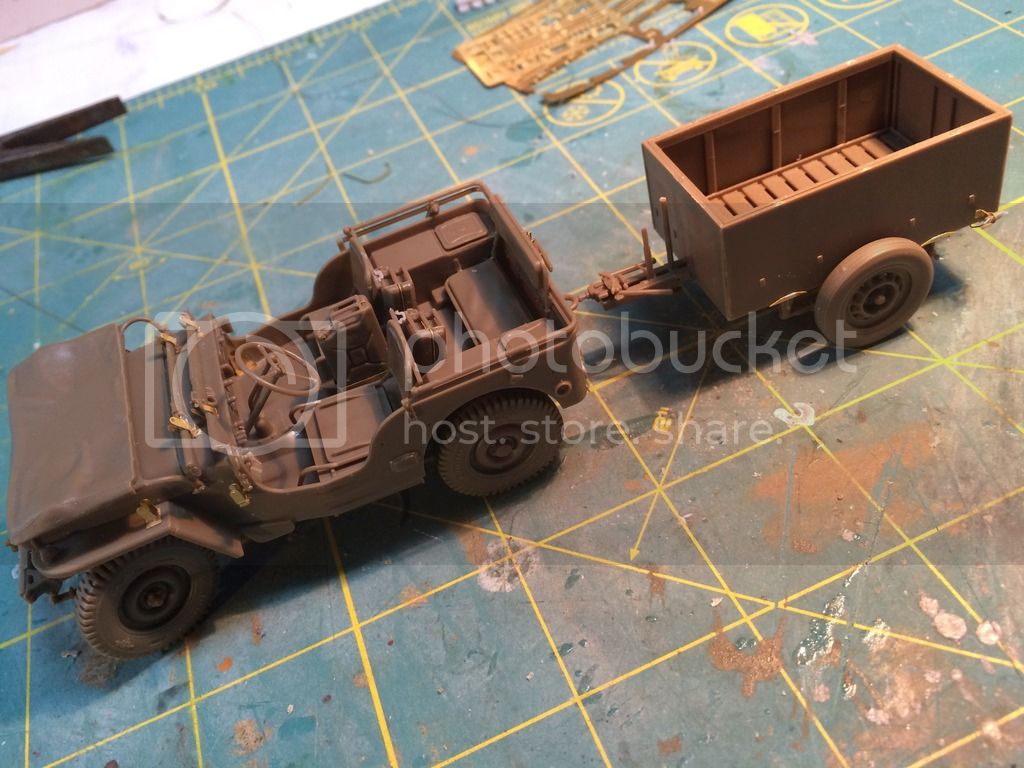
Here's a few more in progress shots. The Bronco jeep is pretty cool, very detailed, with lots of very small parts and PE. Also, a neat thing about this kit is that they have incorporated the specific variations the Brits incorporated into their glider deployed jeeps. The trailer model is a work of art, however, I had a major molding defect, which amazed me, given the degree of fidelity and detail throughout the kits thus far. The trailer axle was missing a large chunk from one of the ends, so I used squa
re Evergreen to fabricate a new axle end. Here you go....
Florida, United States
Joined: March 30, 2010
KitMaker: 139 posts
Armorama: 136 posts
Posted: Wednesday, February 03, 2016 - 08:30 PM UTC
Sorry, wrong pics, but a build in progress shot regardless!

Florida, United States
Joined: March 30, 2010
KitMaker: 139 posts
Armorama: 136 posts
Posted: Wednesday, February 03, 2016 - 08:45 PM UTC
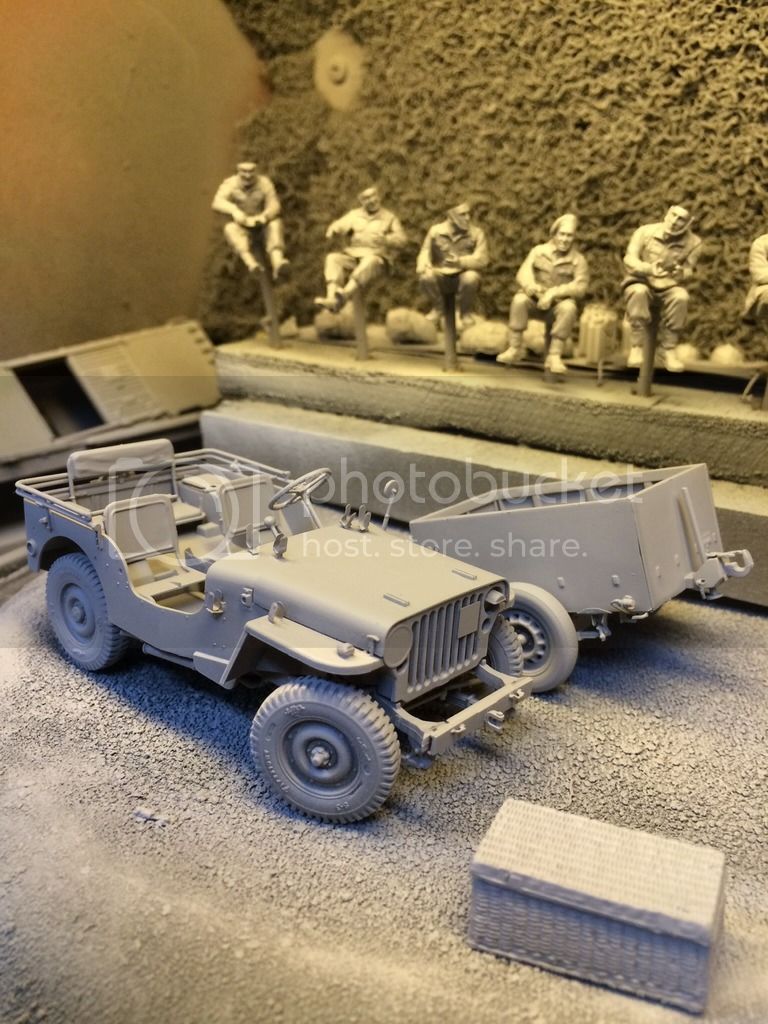
Next step is paint, and the figures. I also need to think about a base, and the final presentation. This whole kit is based on a famous image from Normandy, and Bronco really nailed it.

Australian Capital Territory, Australia
Joined: October 26, 2012
KitMaker: 58 posts
Armorama: 58 posts
Posted: Thursday, February 04, 2016 - 04:44 AM UTC
On the bench currently:
Lots of procrastination!!!!
The most over engineered, incorrectly instructed model I have ever had the displeasure of trying to build. Panda Hobby's M-ATV MRAP
Noord-Brabant, Netherlands
Joined: February 13, 2011
KitMaker: 322 posts
Armorama: 300 posts
Posted: Thursday, February 04, 2016 - 02:50 PM UTC
California, United States
Joined: June 11, 2009
KitMaker: 461 posts
Armorama: 370 posts
Posted: Friday, February 05, 2016 - 02:24 AM UTC
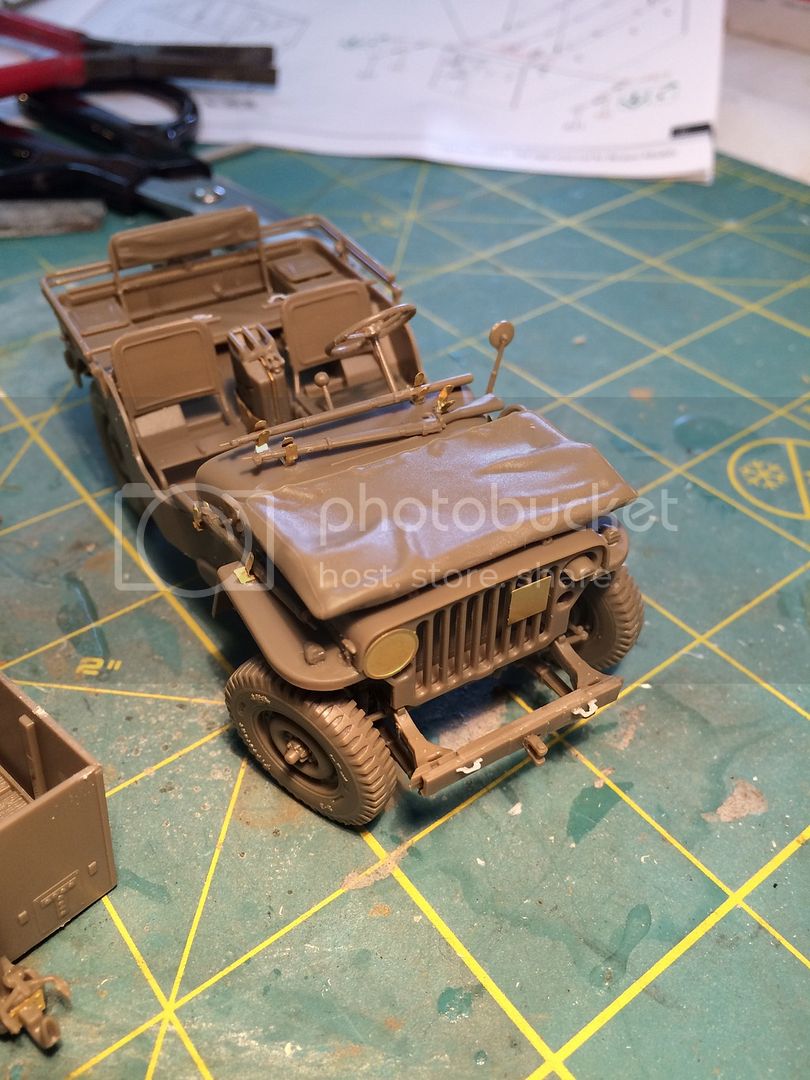
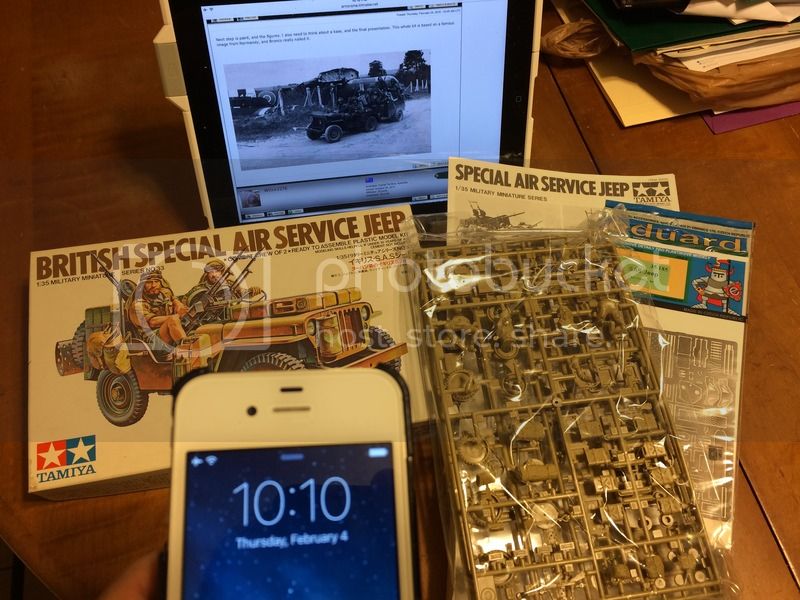
Here is my entry for this campaign, the Tamiya SAS Jeep. I think I will be using figures from the Dragon set though.
Australian Capital Territory, Australia
Joined: October 26, 2012
KitMaker: 58 posts
Armorama: 58 posts
Posted: Friday, February 05, 2016 - 02:09 PM UTC
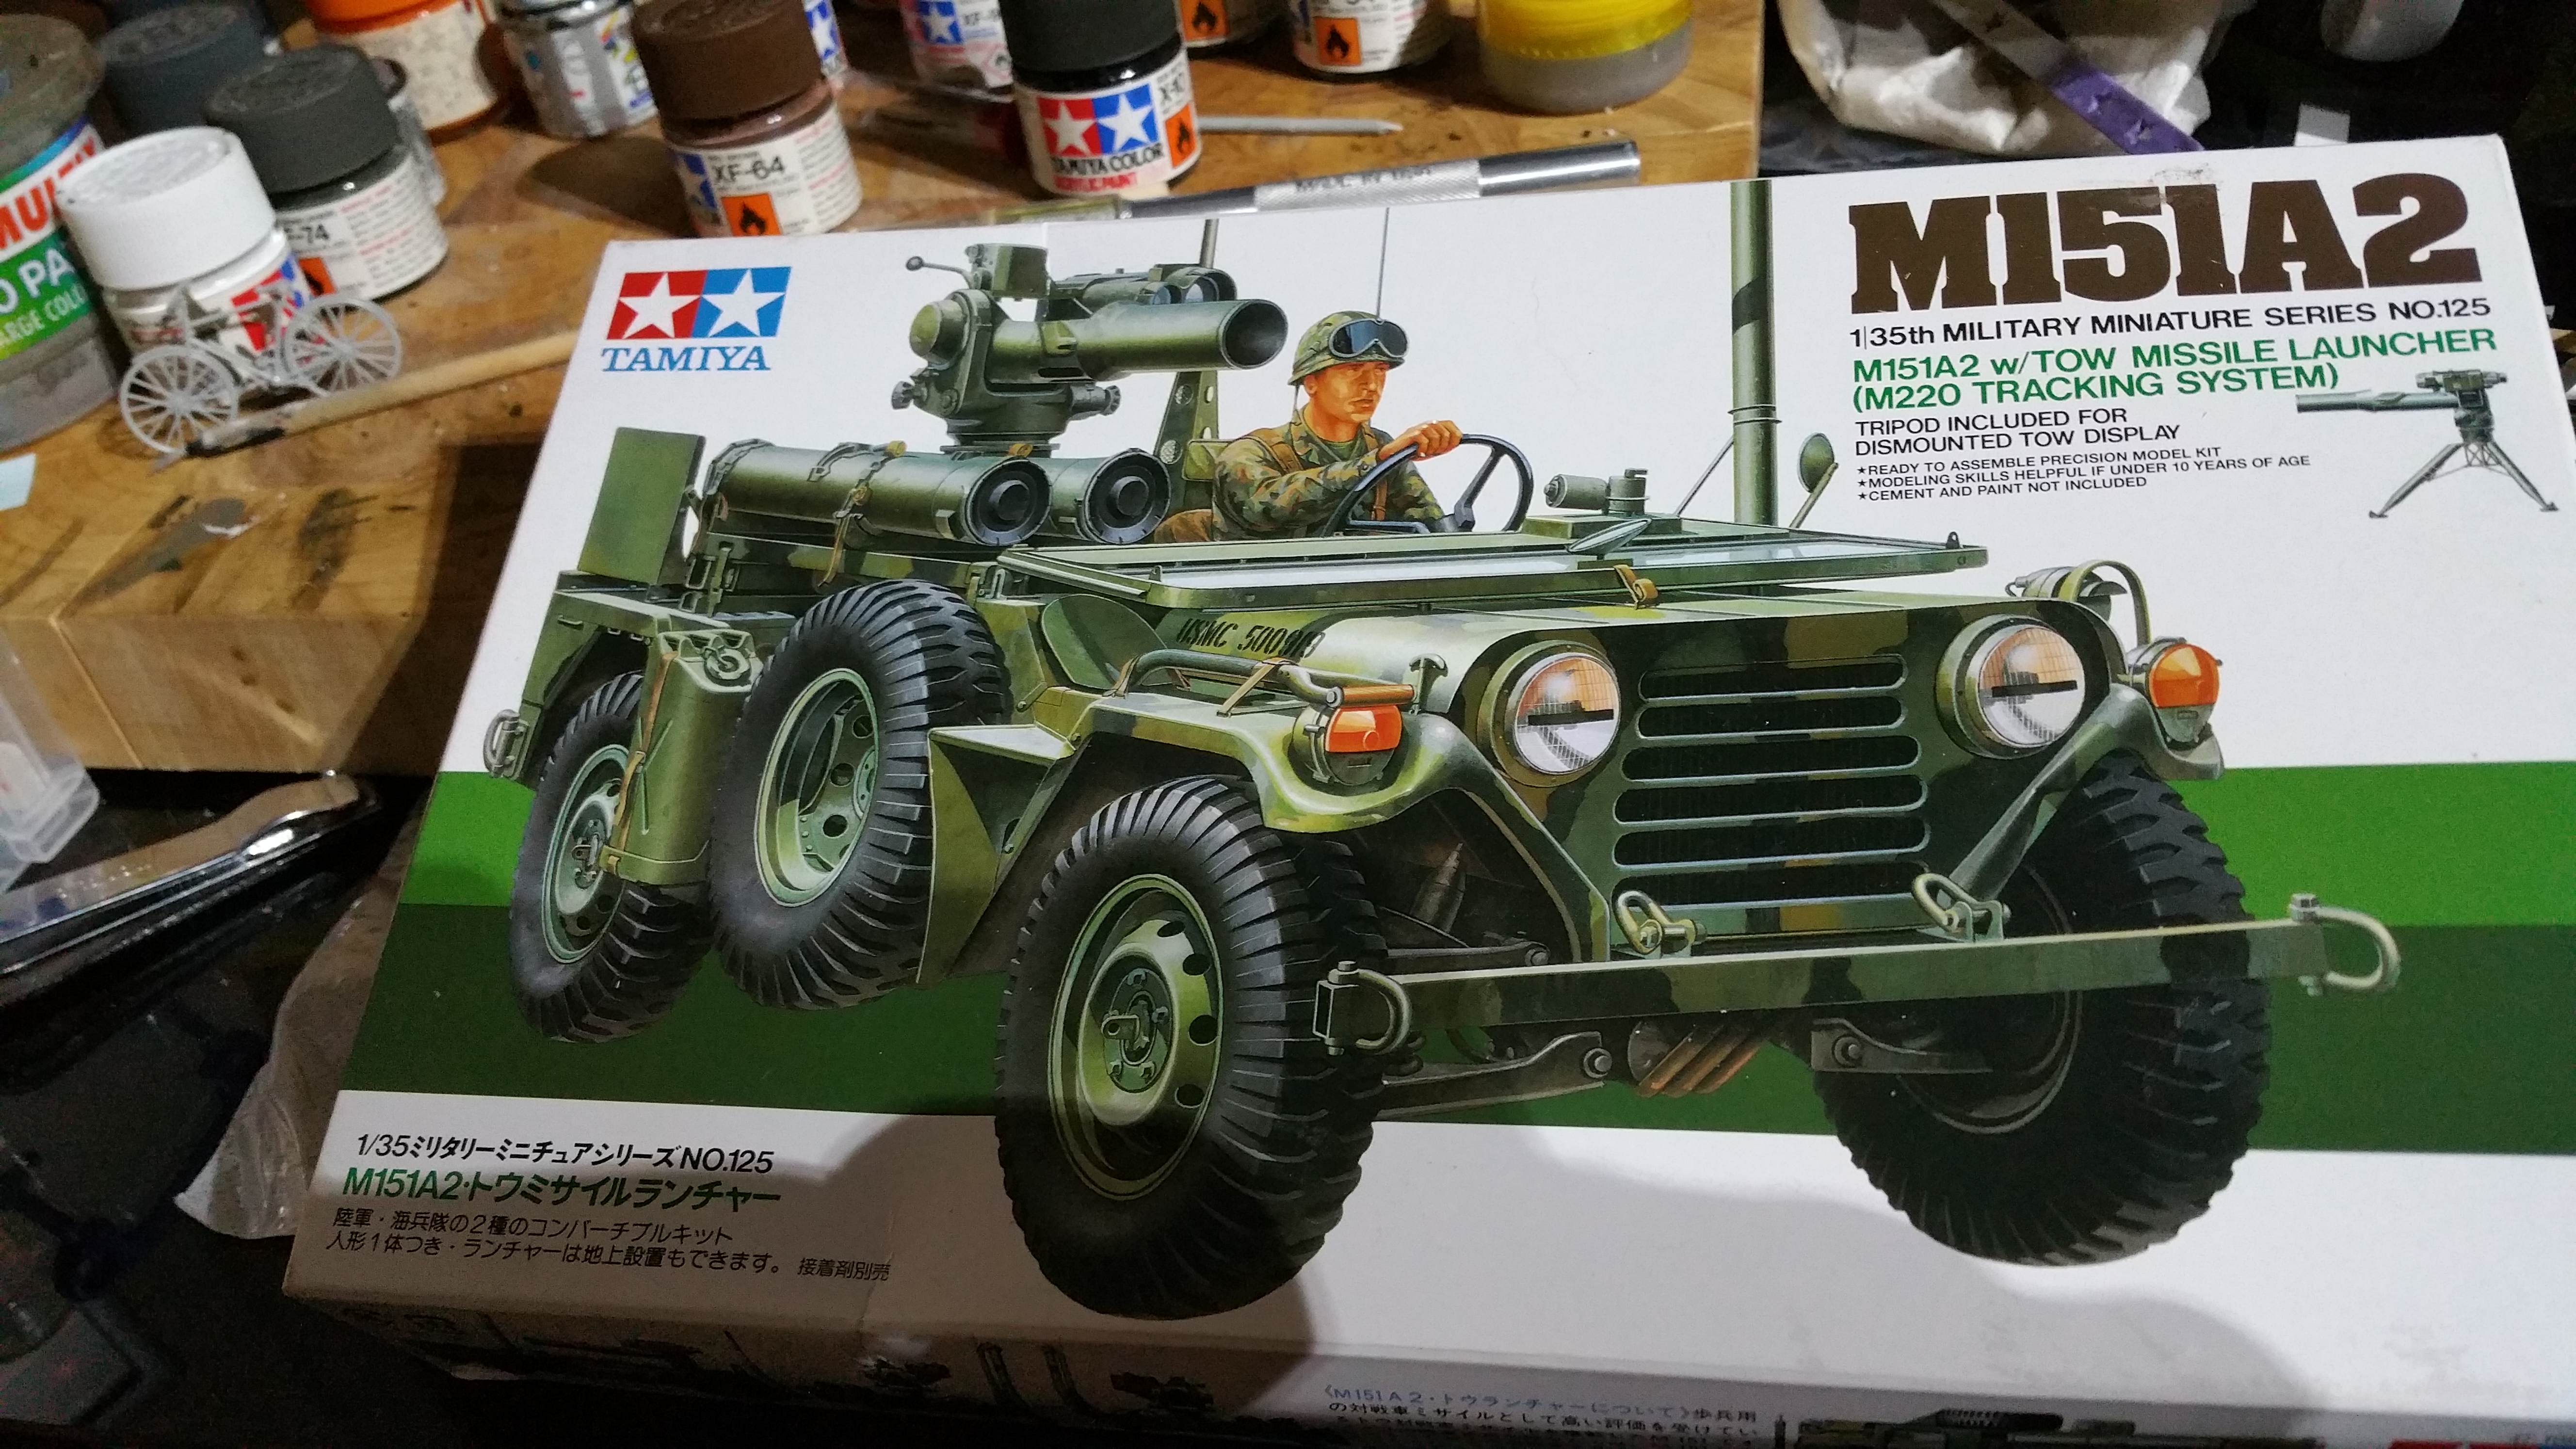
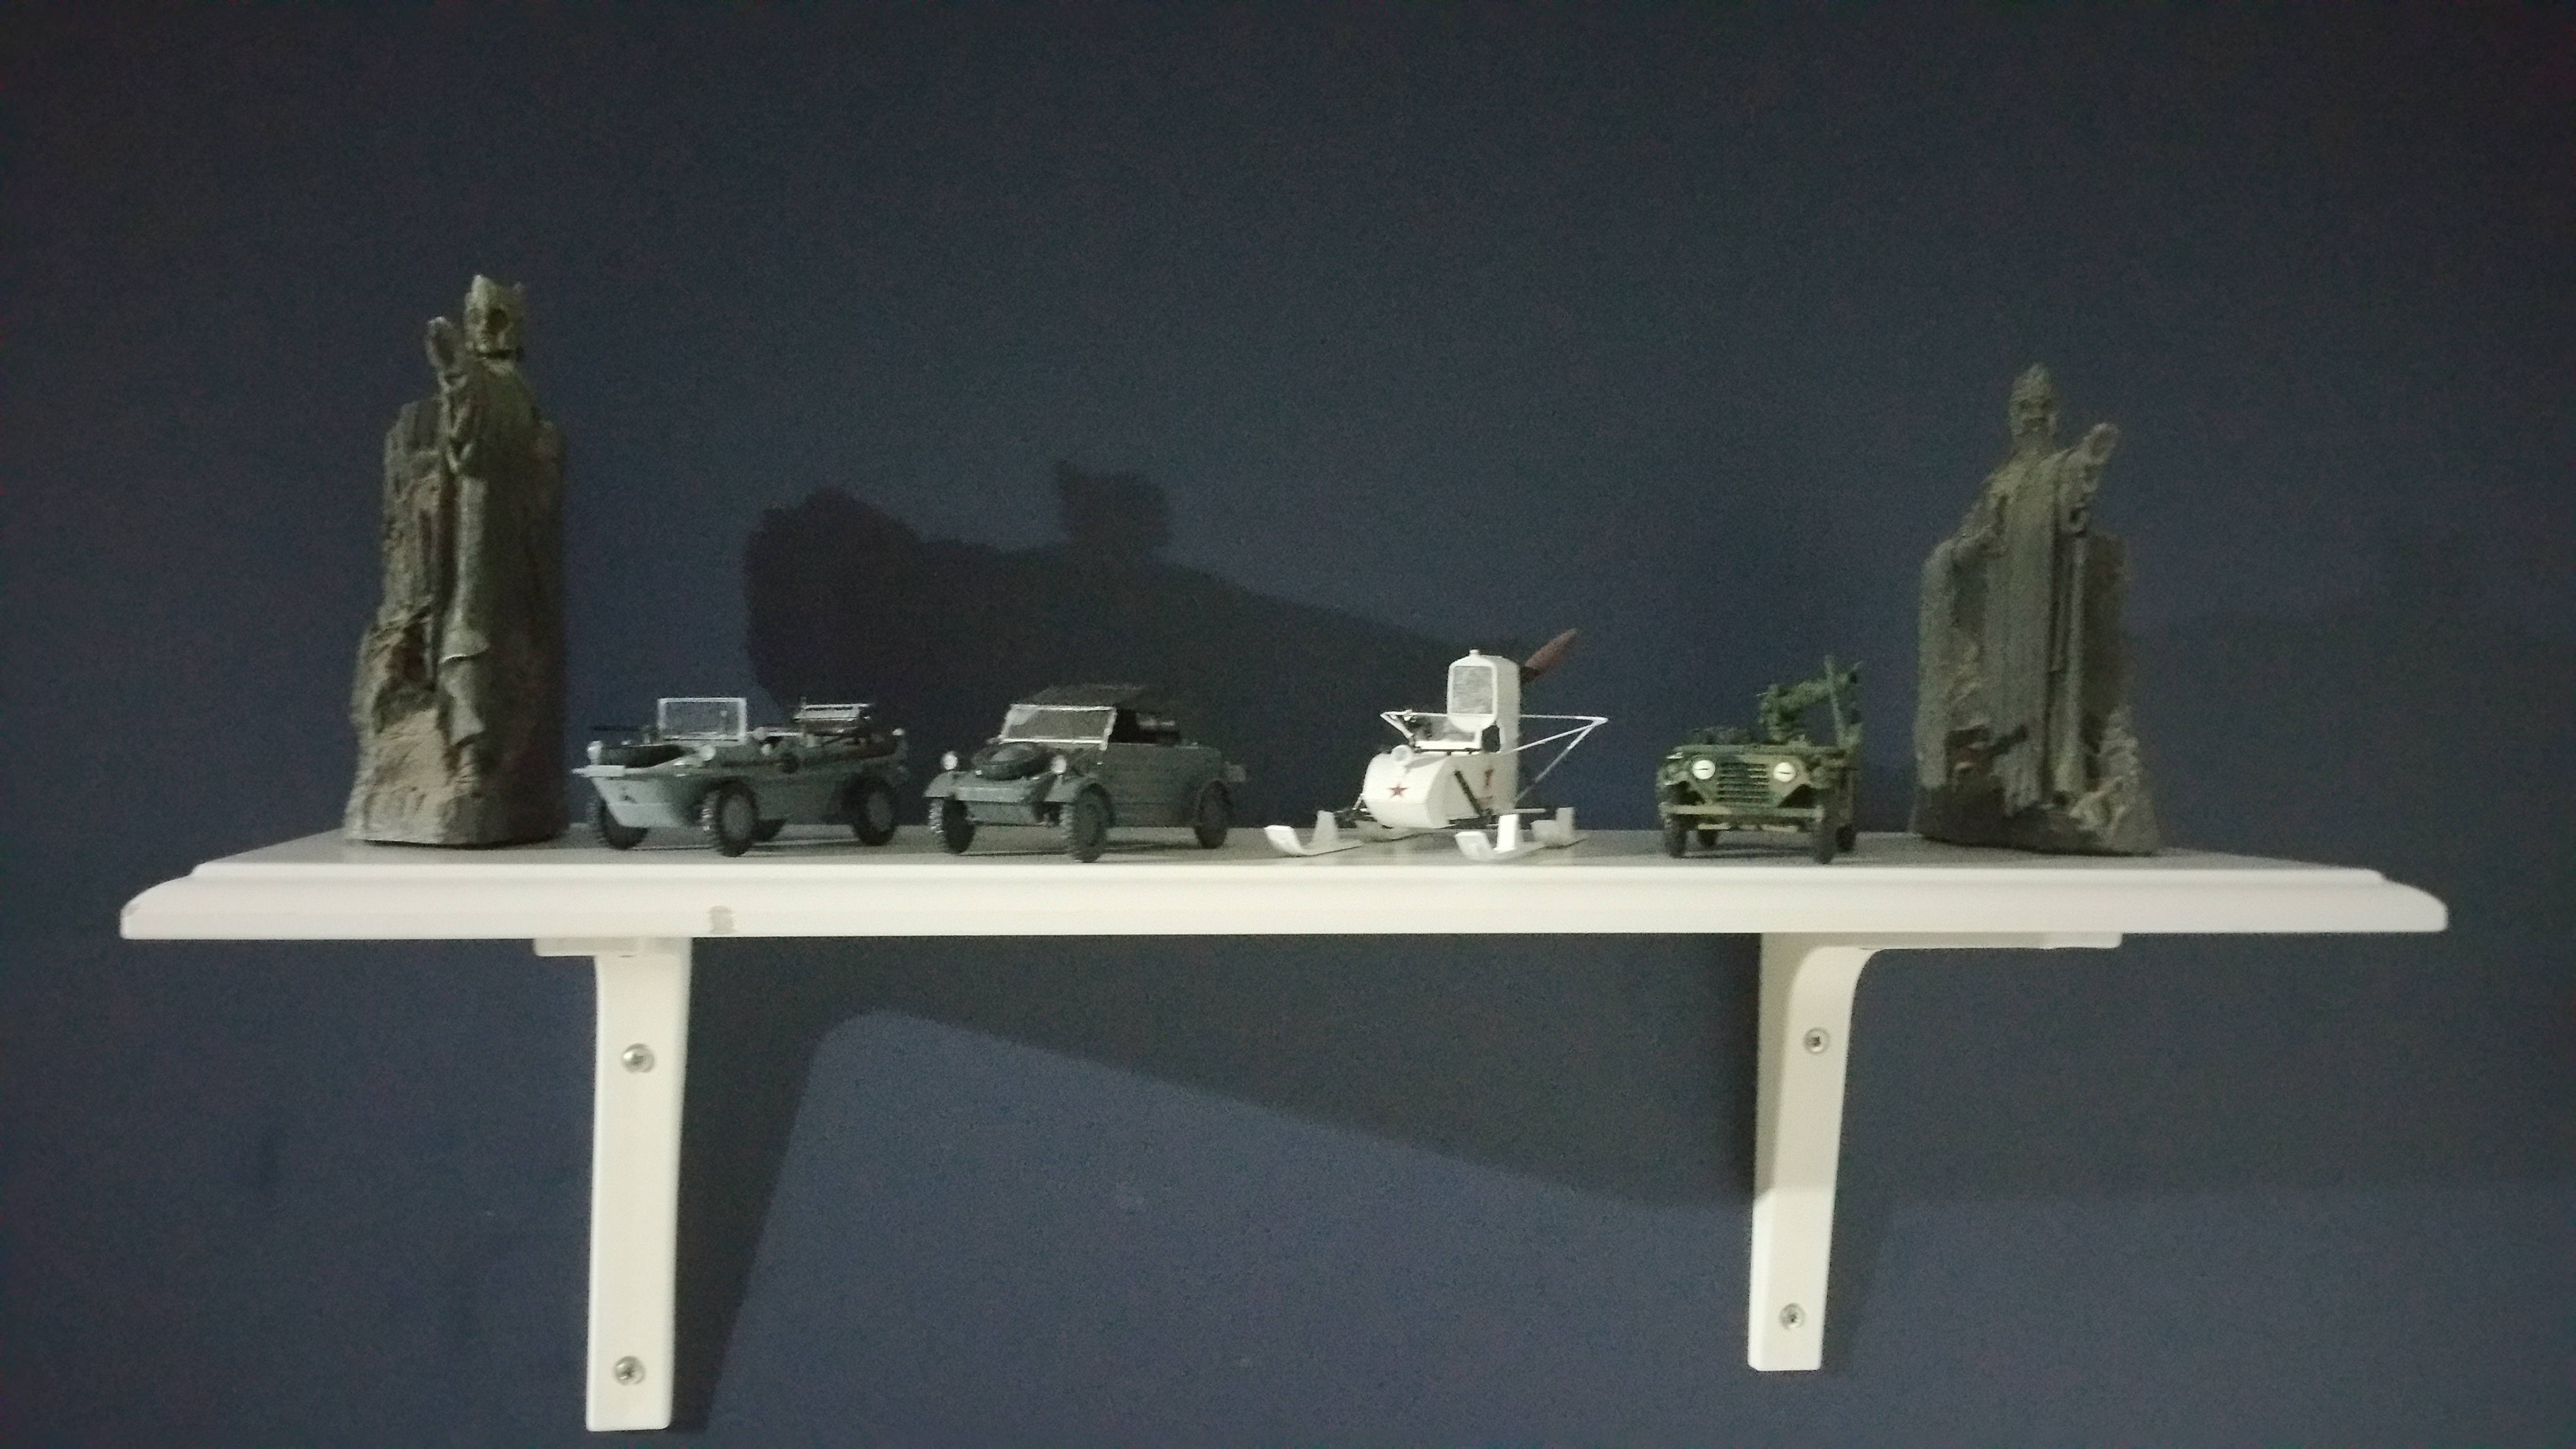
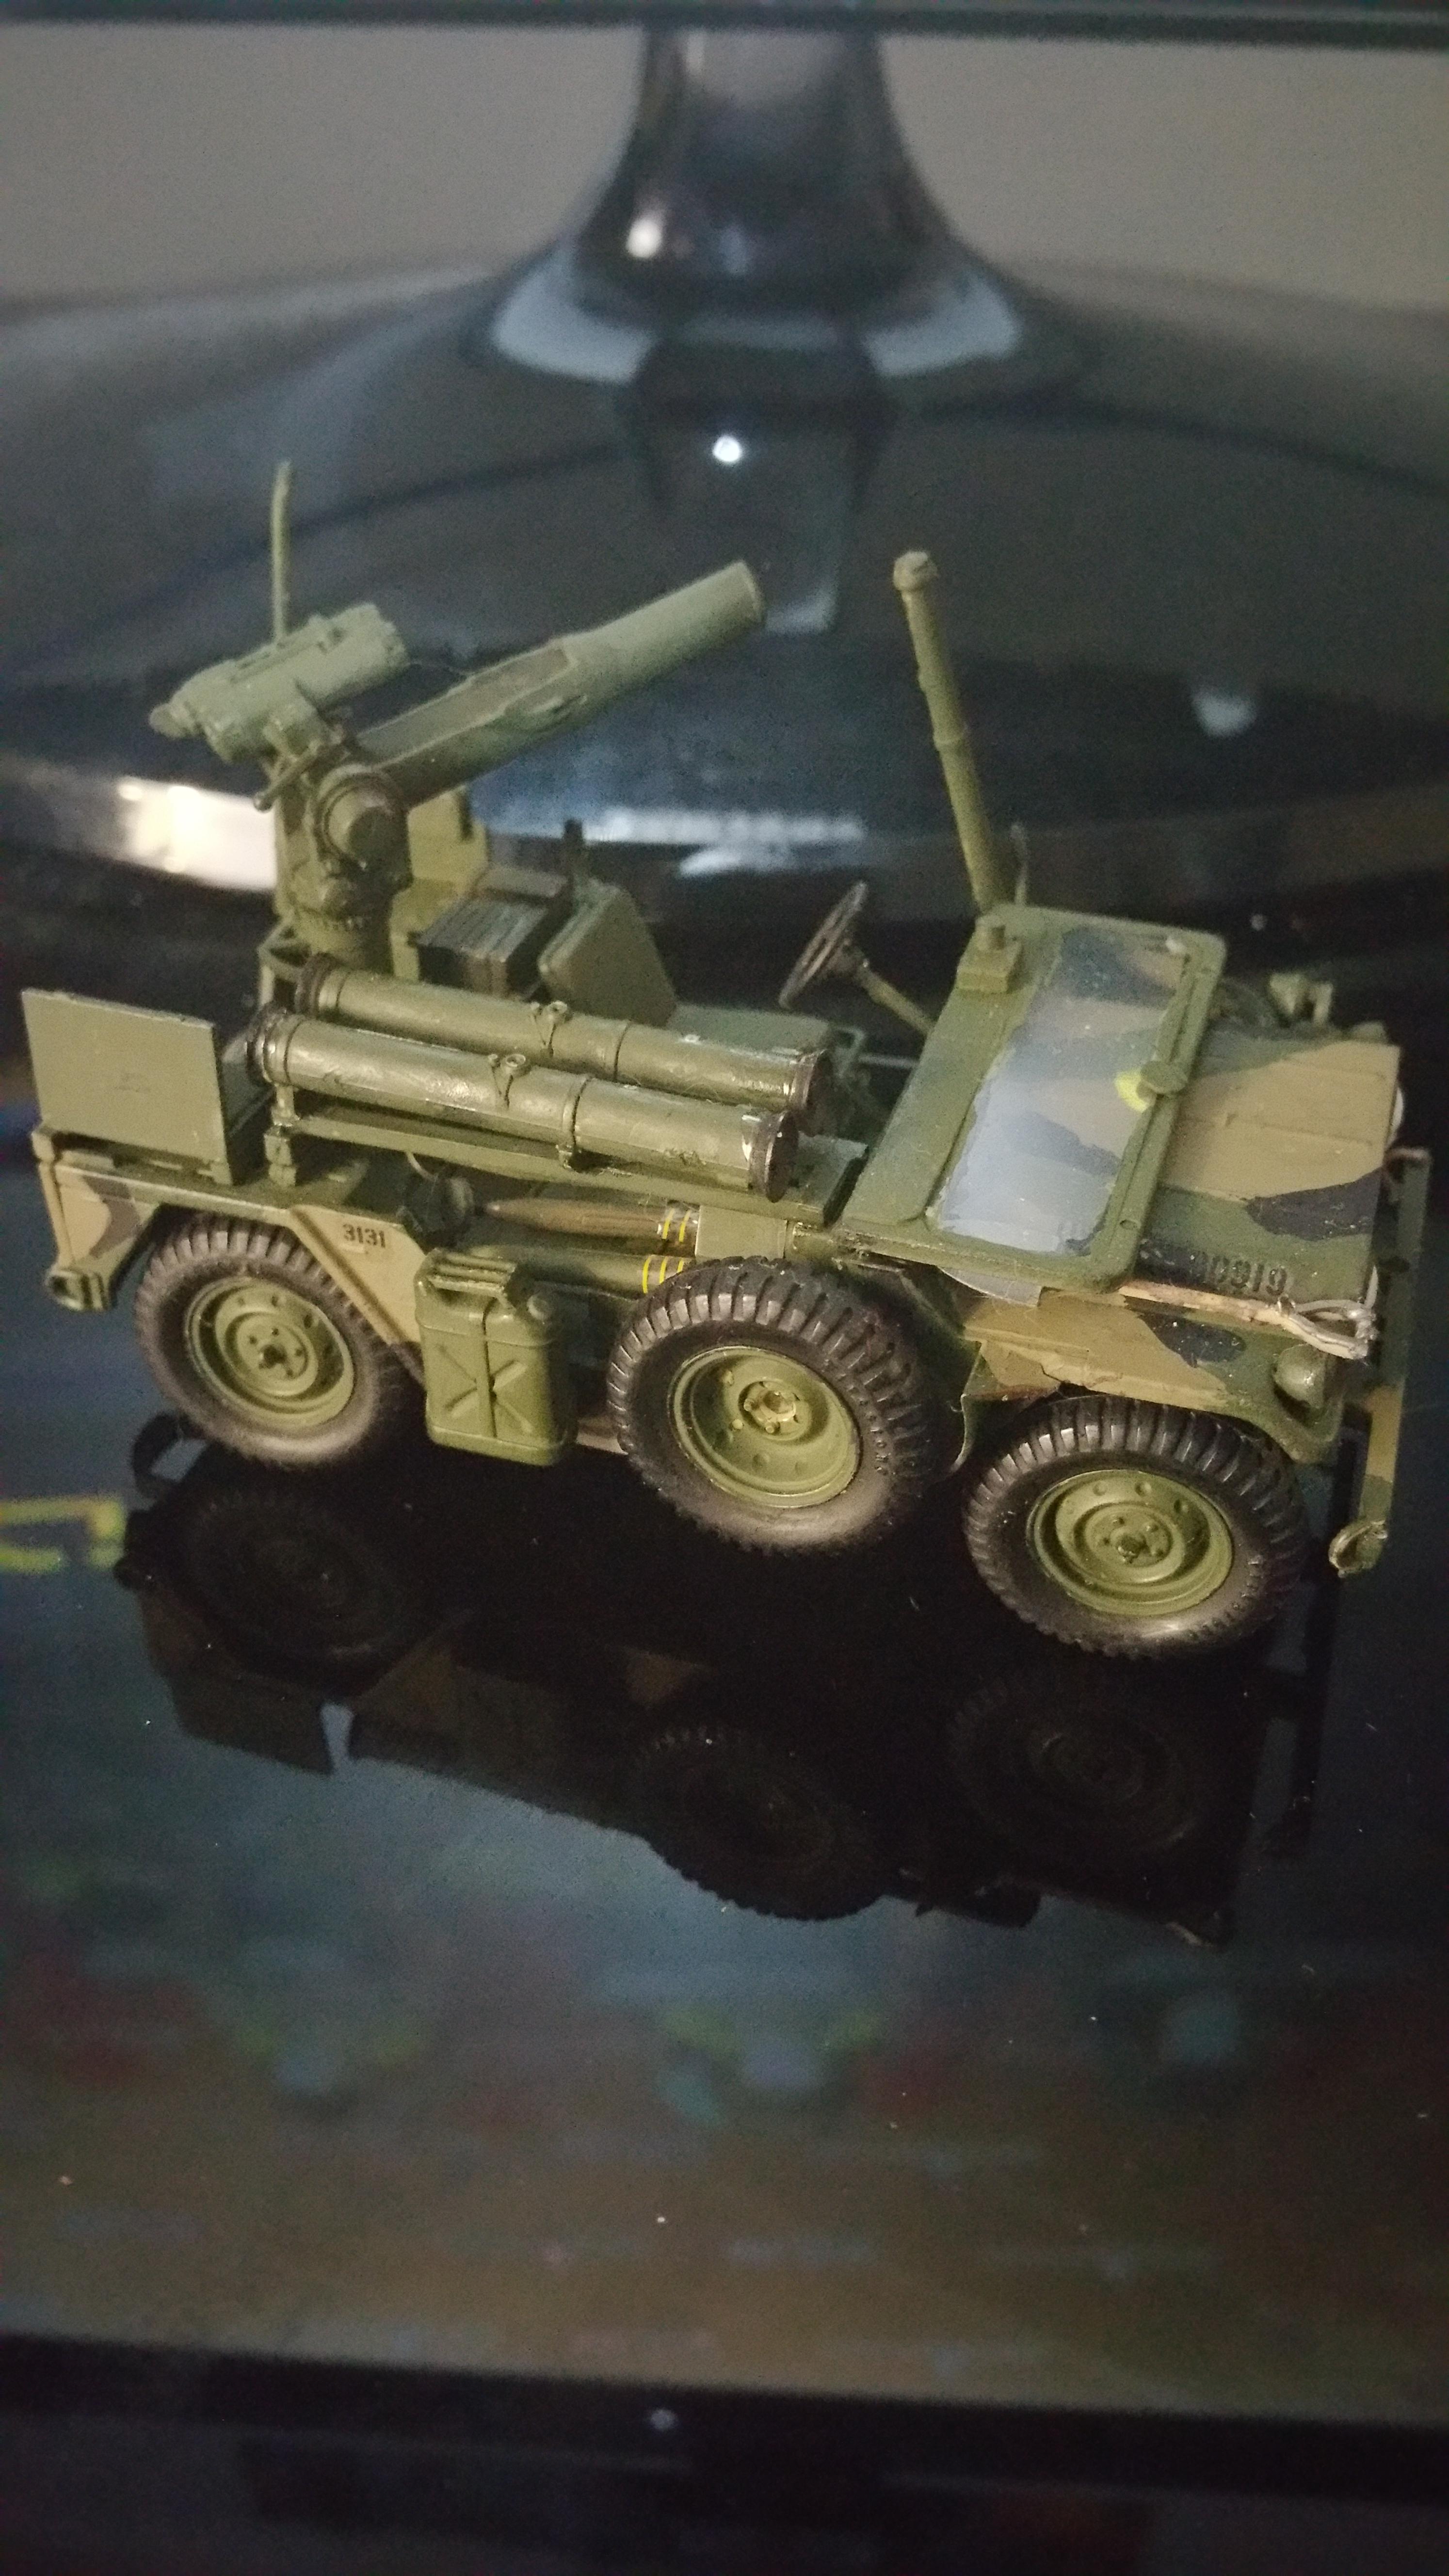
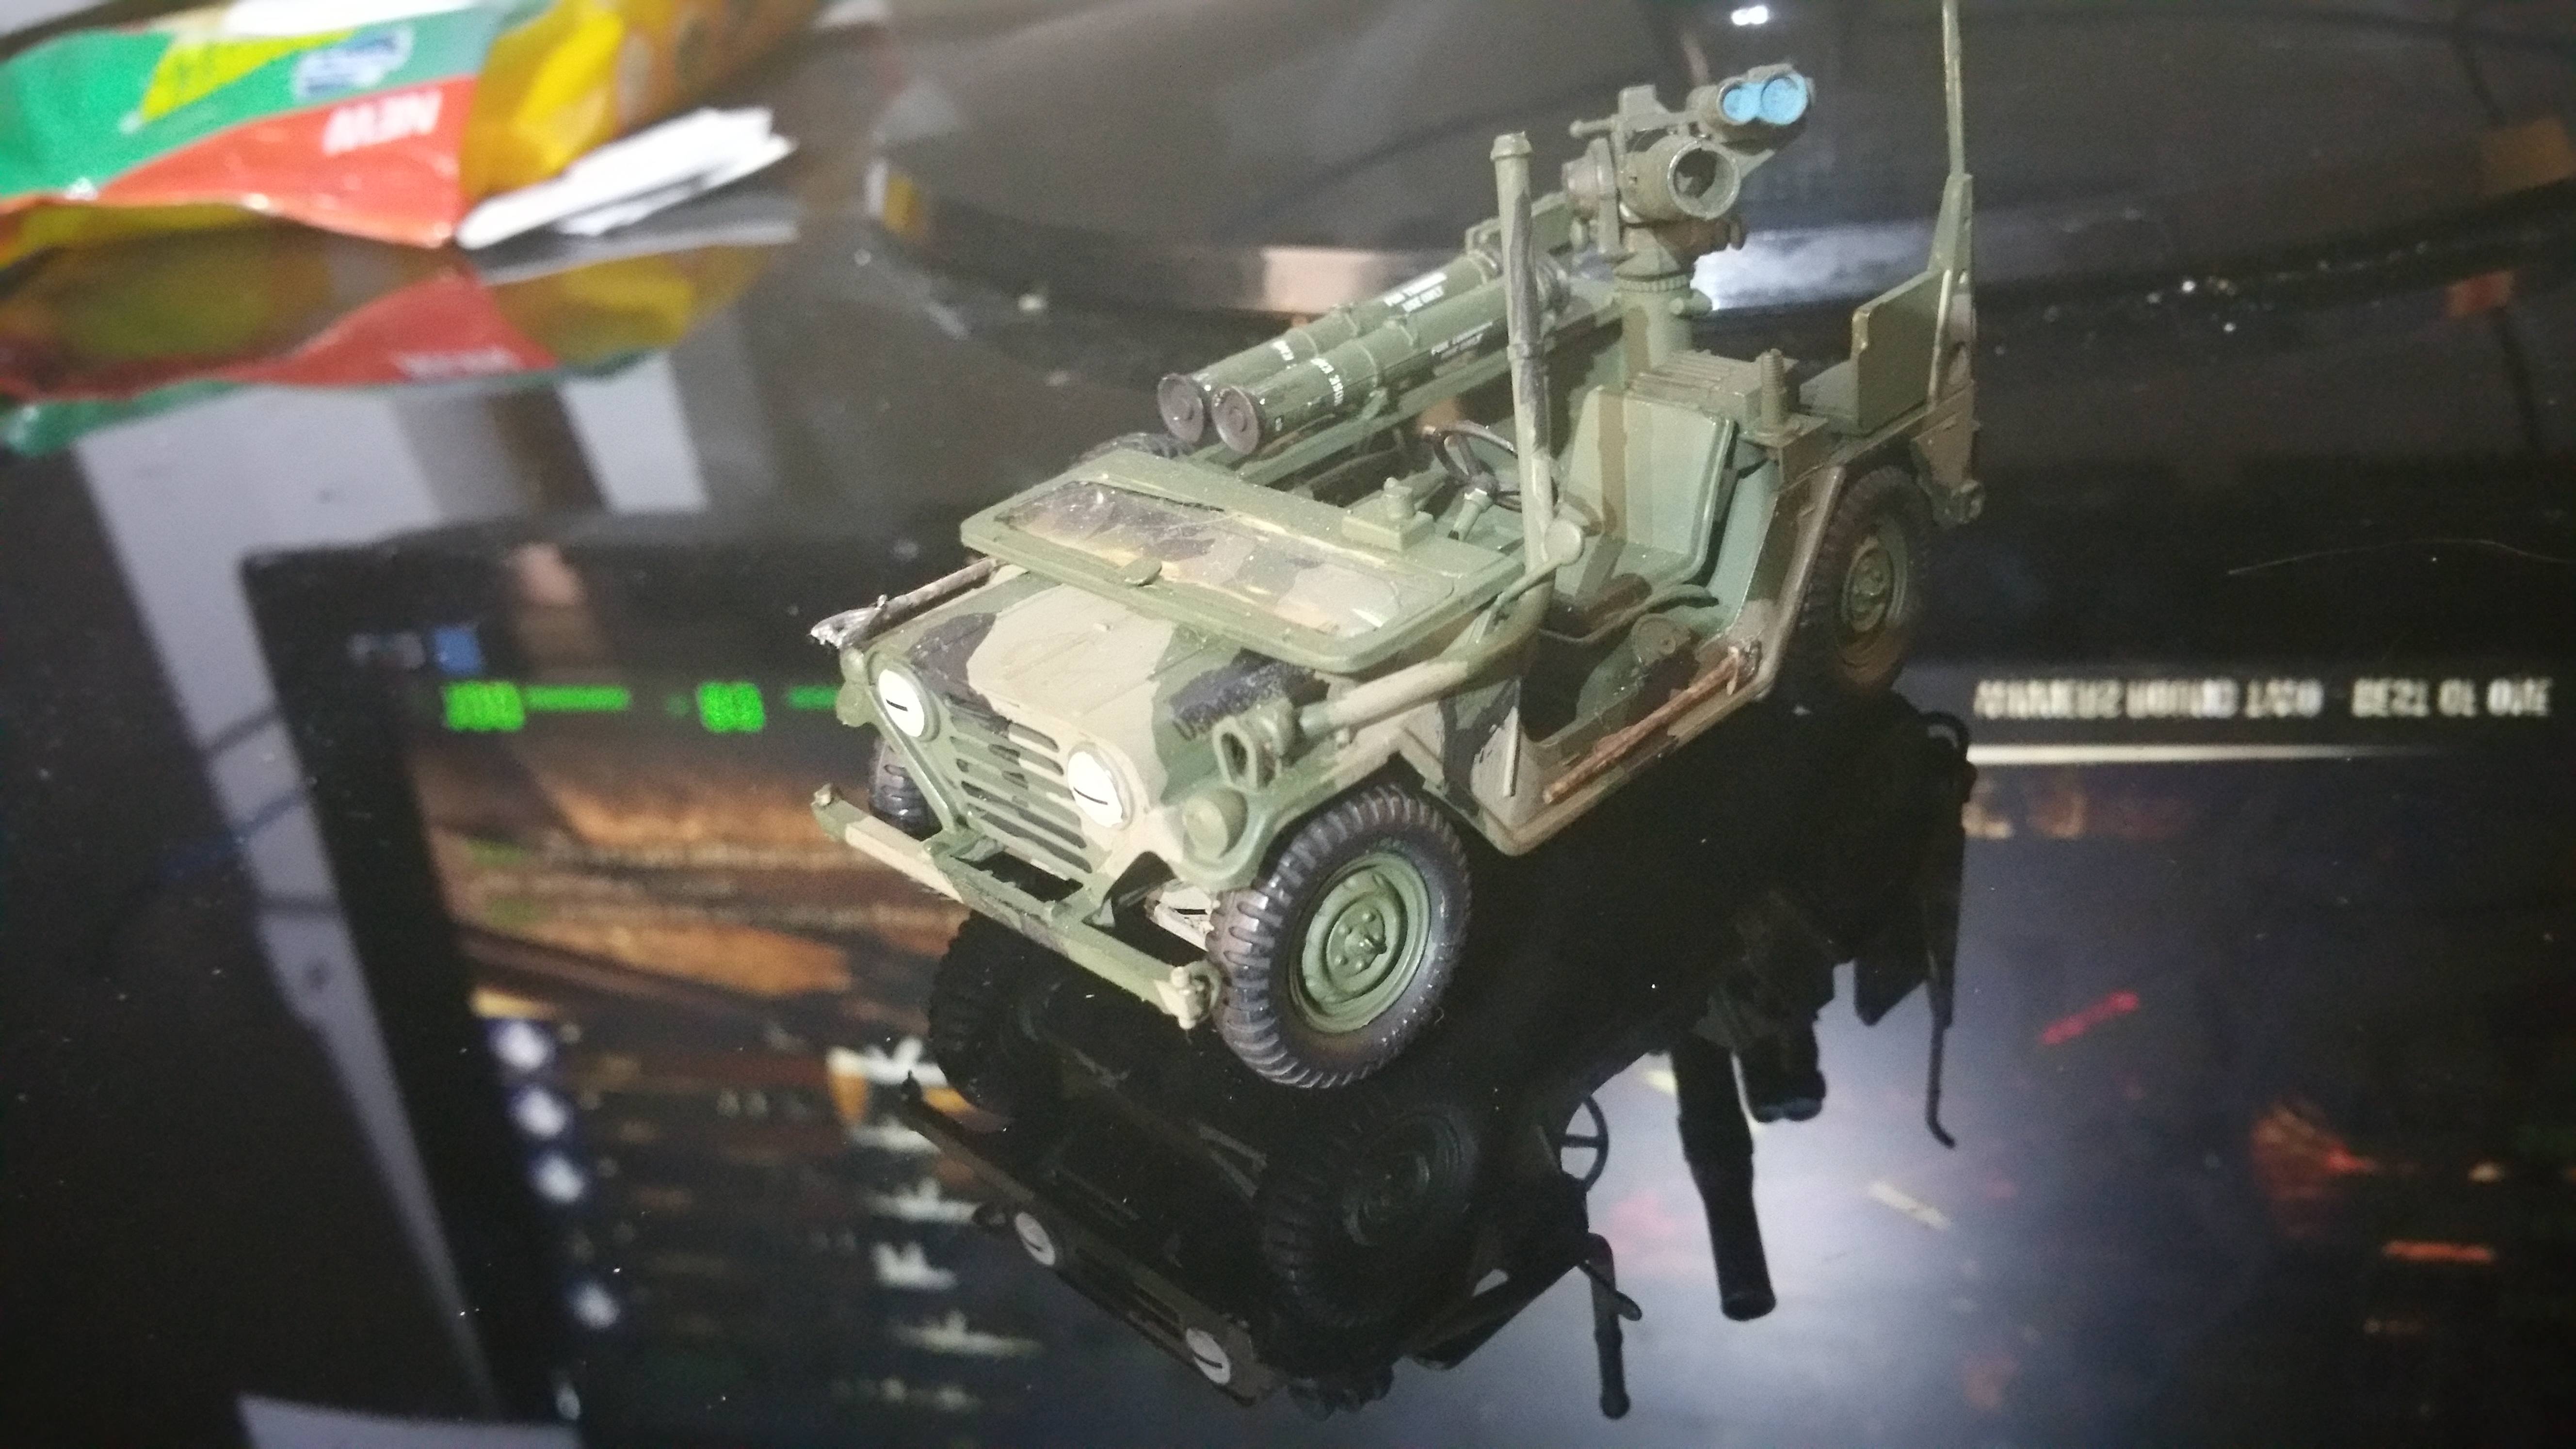
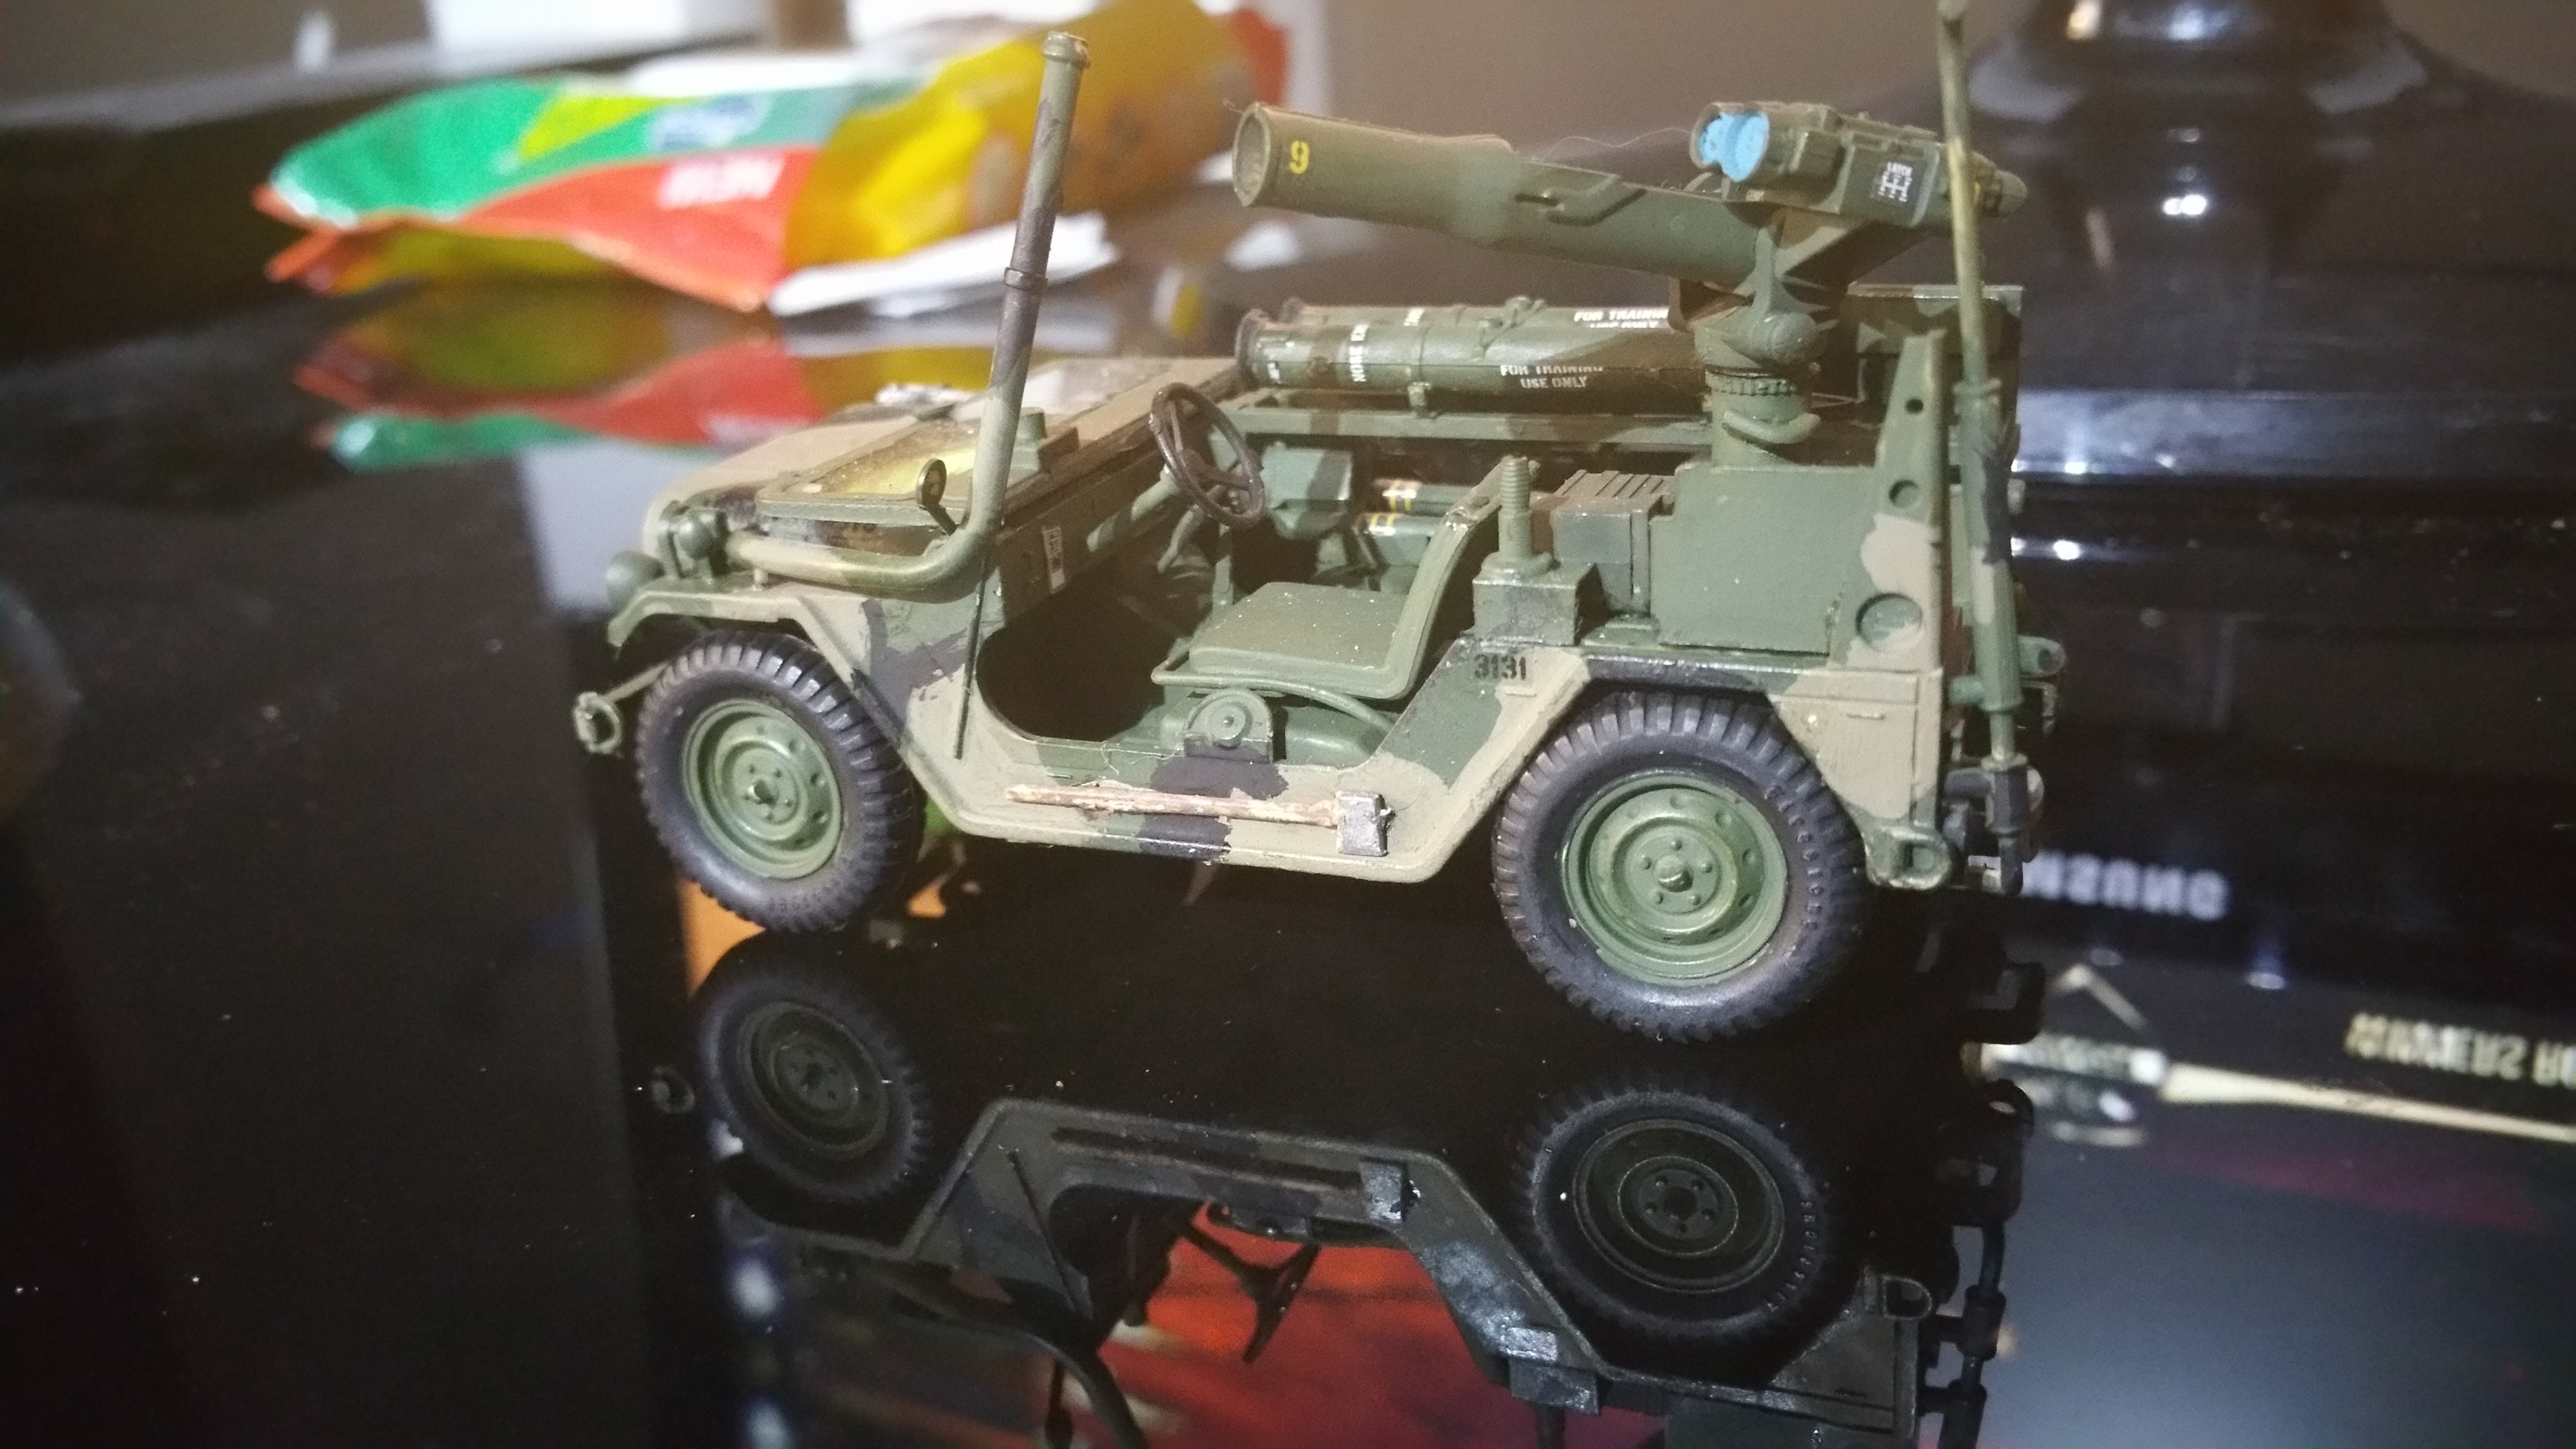
I just put up a new shelf in my office. Specifically for Light Utility Vehicles, including the new build M151A2.
In order, my Kfz.II VW Typ 166 "Schwimmwagen", VK Kdf.z Typ 82 "Kubelwagen", Aerosan RF-8/GAZ-98 and M151A2 w/ TOW Missile Launcher. And of course the Two Kings from Lord of the Rings

On the bench currently:
Lots of procrastination!!!!
The most over engineered, incorrectly instructed model I have ever had the displeasure of trying to build. Panda Hobby's M-ATV MRAP
Wojewodztwo Slaskie, Poland
Joined: October 21, 2003
KitMaker: 529 posts
Armorama: 500 posts
Posted: Tuesday, February 09, 2016 - 04:04 PM UTC
Florida, United States
Joined: March 30, 2010
KitMaker: 139 posts
Armorama: 136 posts
Posted: Tuesday, February 09, 2016 - 07:24 PM UTC
Thanks, it's getting there! I'll put up some more shots here a bit later!
Florida, United States
Joined: March 30, 2010
KitMaker: 139 posts
Armorama: 136 posts
Posted: Tuesday, February 09, 2016 - 07:26 PM UTC
Removed by original poster on 02/10/16 - 14:39:37 (GMT).
Florida, United States
Joined: March 30, 2010
KitMaker: 139 posts
Armorama: 136 posts
Posted: Tuesday, February 09, 2016 - 07:41 PM UTC
Here's the latest....
Florida, United States
Joined: March 30, 2010
KitMaker: 139 posts
Armorama: 136 posts
Posted: Tuesday, February 09, 2016 - 07:45 PM UTC


 re Evergreen to fabricate a new axle end. Here you go....