Campaigns
Where Armorama group builds can be discussed, organized, and updates posted.
Jeep, etc. Campaign?
AussieReg
Staff MemberAssociate Editor
AUTOMODELER
#007
Visit this Community
Victoria, Australia
Joined: June 09, 2009
KitMaker: 8,156 posts
Armorama: 194 posts
Posted: Tuesday, April 05, 2016 - 10:04 AM UTC

Quoted Text

Great paint on that follow me. Looks like your hard work paid off.
As an aside I use glass to cut paint masks. I should say I lay masking tape on glass to cut it. It'll stay cleaner and you can lay it on a grid and use a rule to get the right size.


Thanks Andrew, glad you like it! Thanks for the tip on the cutting technique as well. I have a couple of aircraft builds pending that have chequered cowls and/or tails so I will certainly give it a try.

Cheers, D
BravoTwoZero
Visit this Community
California, United States
Joined: June 11, 2009
KitMaker: 461 posts
Armorama: 370 posts
Posted: Tuesday, April 05, 2016 - 11:16 PM UTC
Here are some update pictures of my two jeeps:

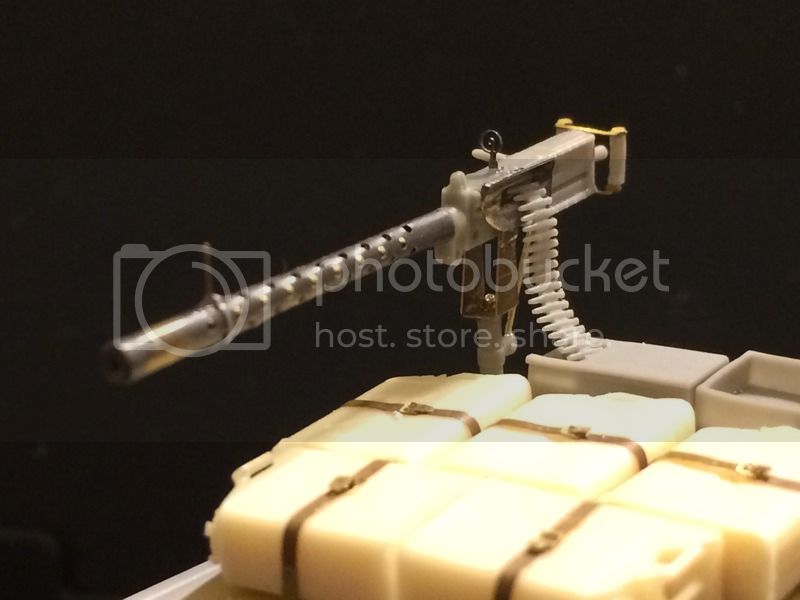
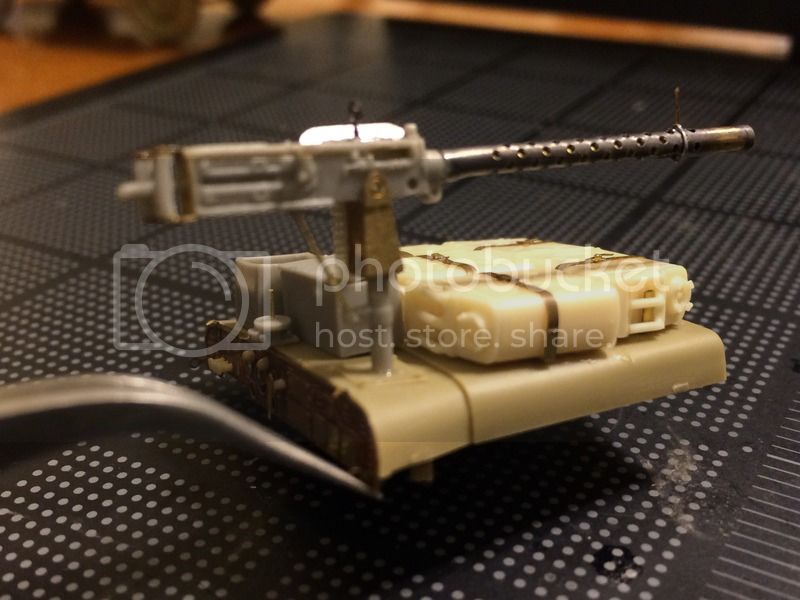
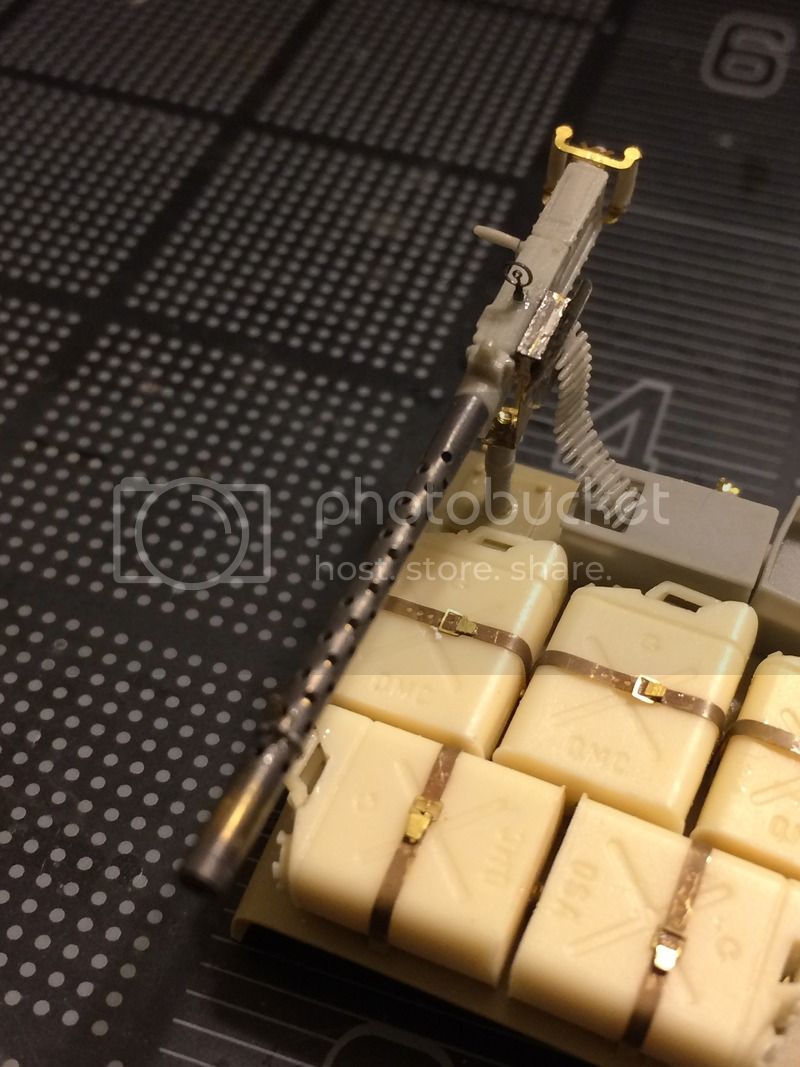
First is a detail shot of the .50 cal MG. This gun is a combination of parts from 3 sets. The barrel, shield and rear sight is from the discontinued Eduard set 35185. I rolled the perforated PE part around a brass tube. The resin parts are from the Legends SAS set and the other brass parts are from the current Eduard set 35797. Here is the result.


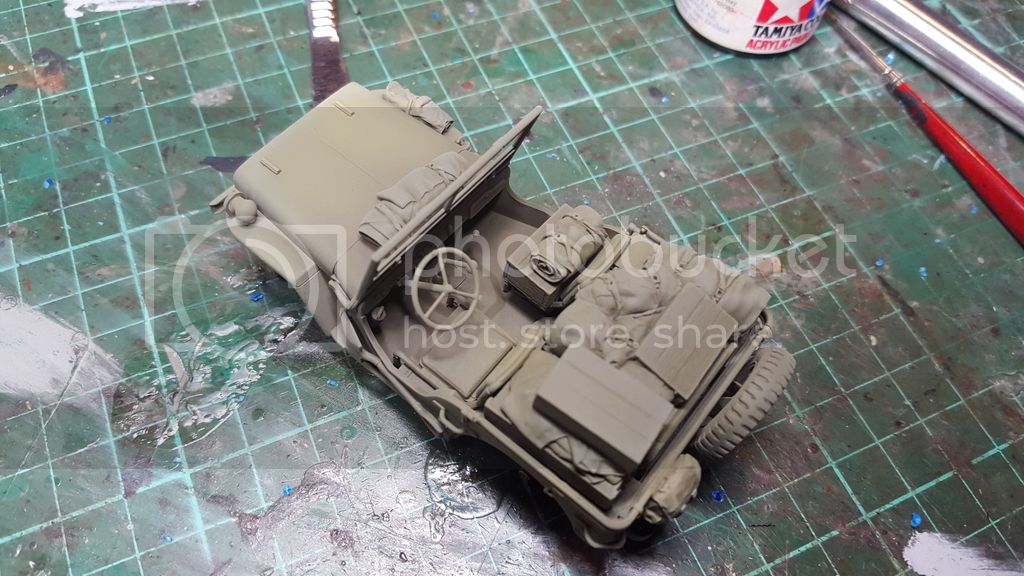
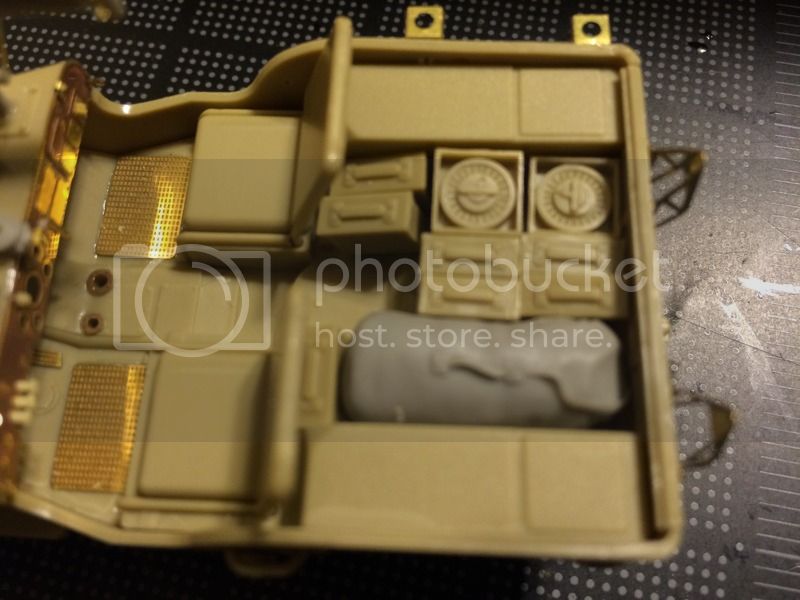
Here are shots of the dashboards:
Discontinued Eduard set


And current Eduard set


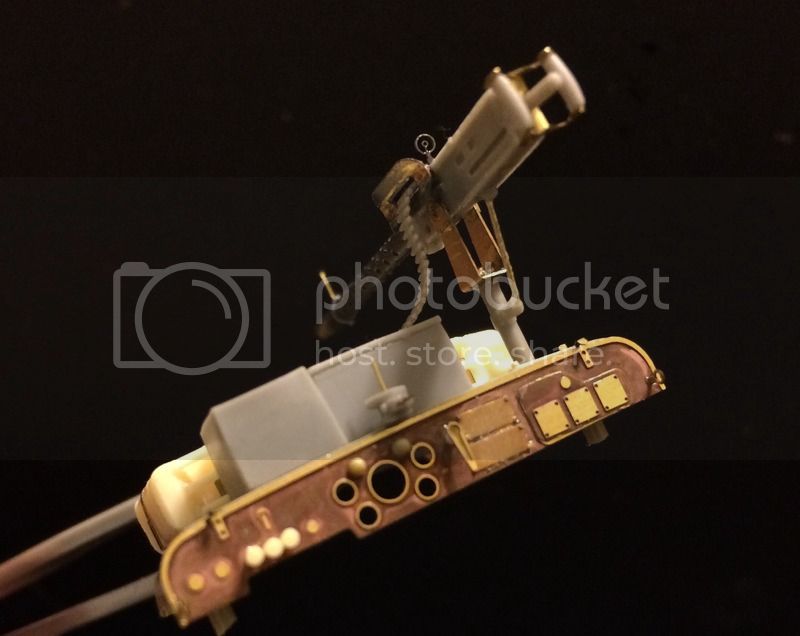
Additional information on the dashboards, the two bumps above the dials are parts that I removed from the Tamiya kit dashboards. I glued them here. The three knobs on the left side are a bit oversized but I preferred to have them here rather than a flat surface. These were taken from a set of 1/350 resin ship bollards.

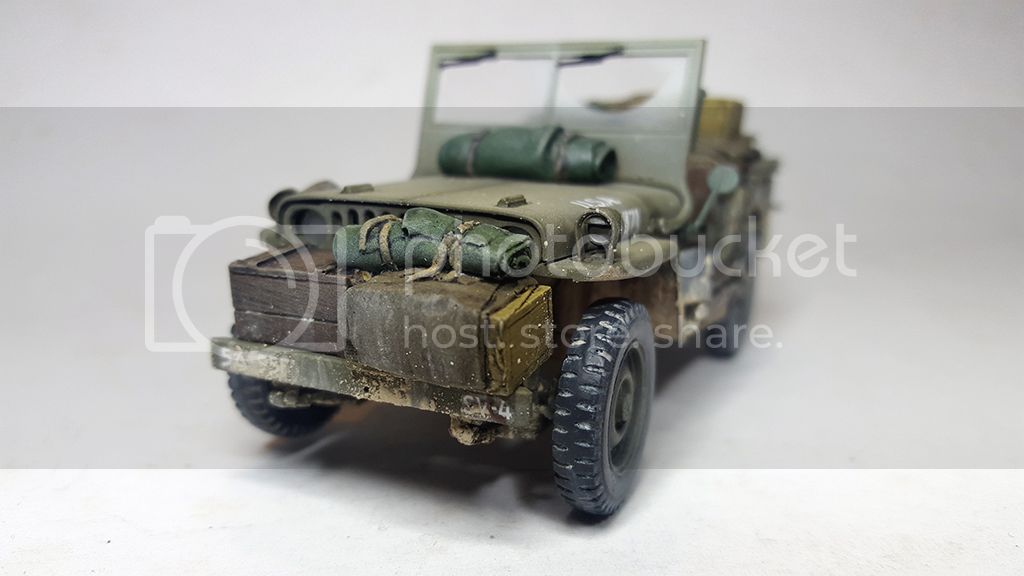
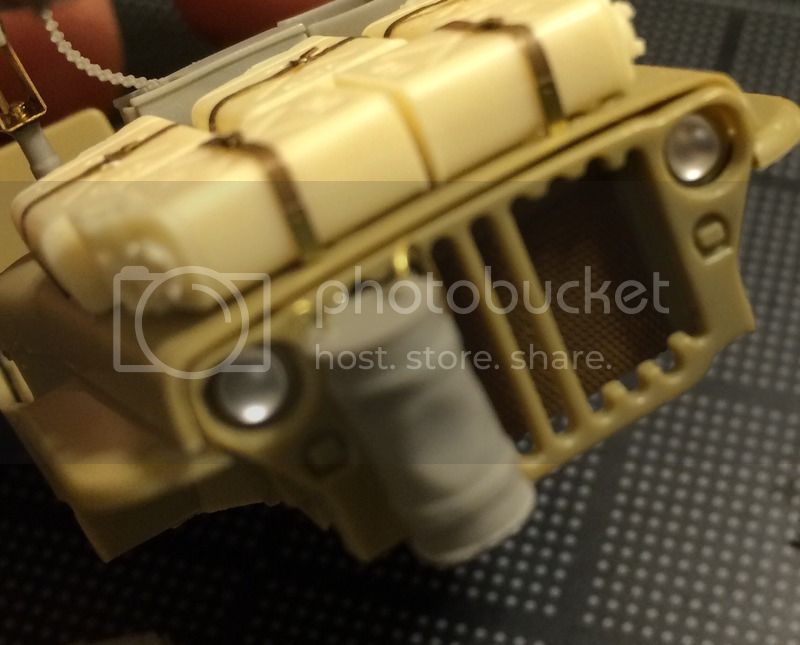
Here is a test fit of the beads as headlights, this time behind the grill.


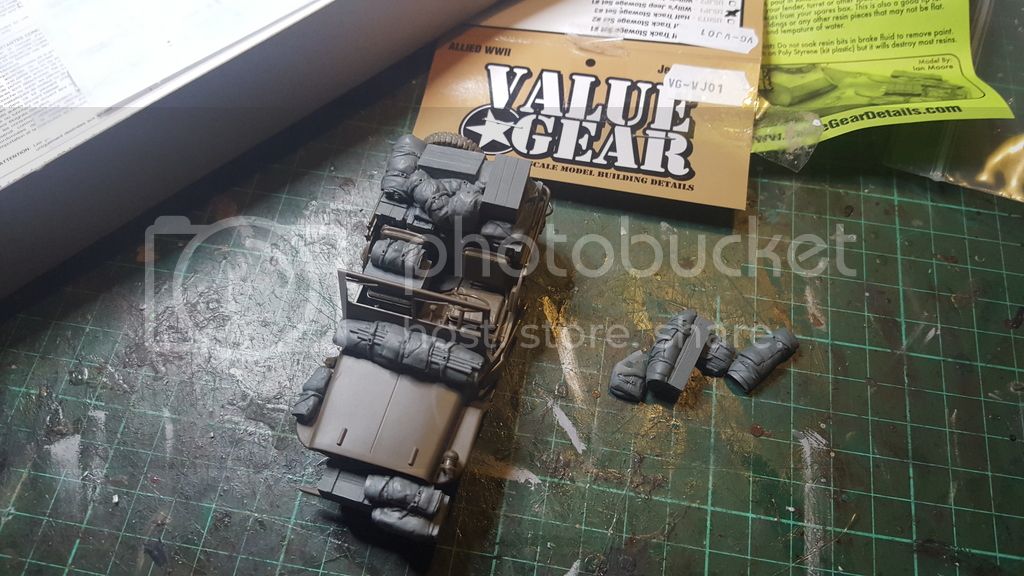
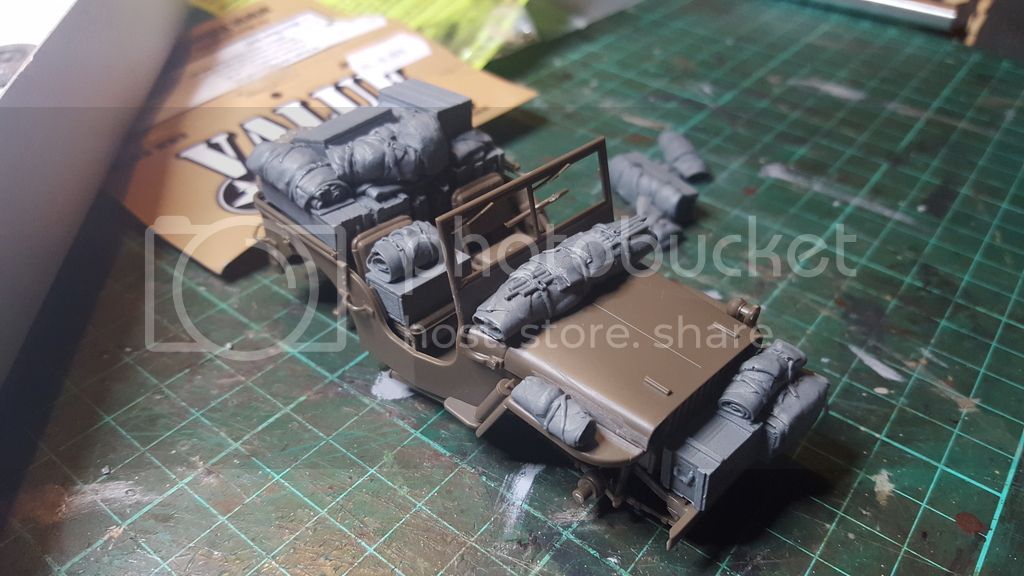
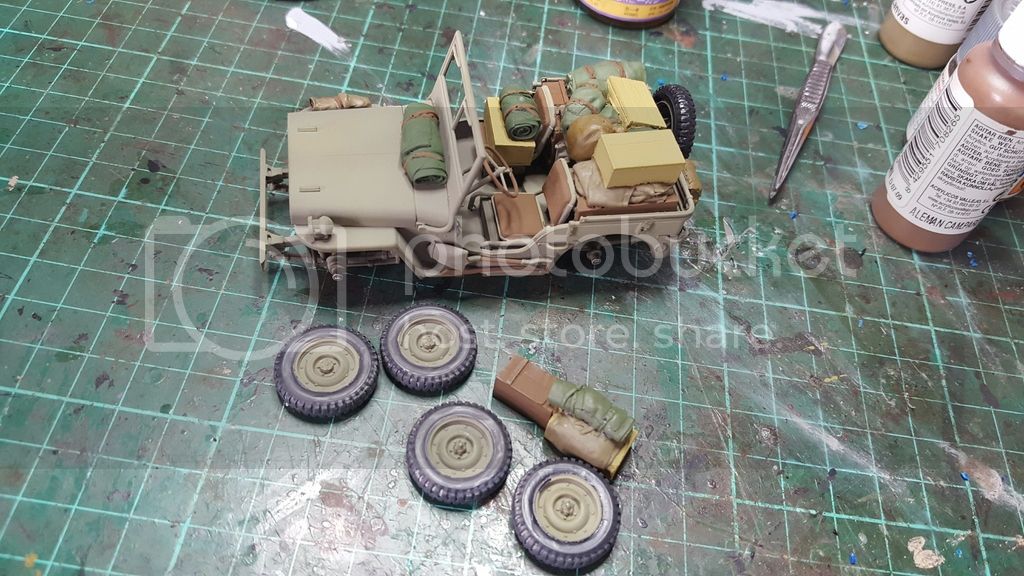
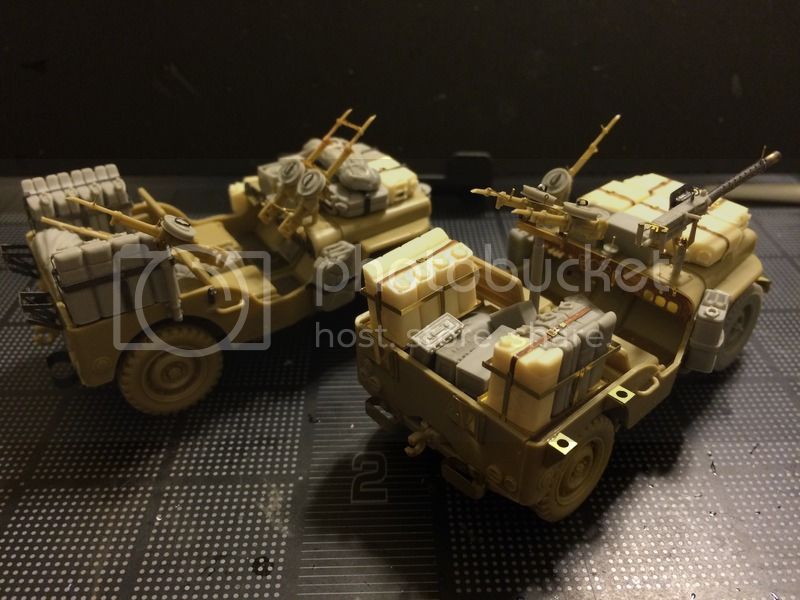
Here are shots of the jeep loads. A one piece resing part from the Legends set


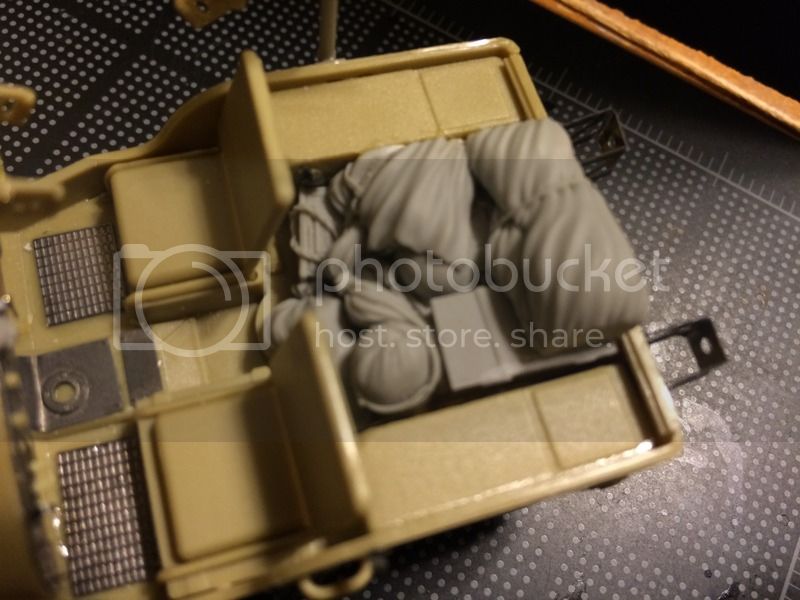
And bits of Tamiya and Legend parts. I am not too concerned about the detail of the Tamiya parts since additional loads will cover these.


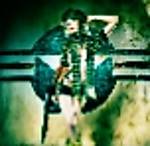
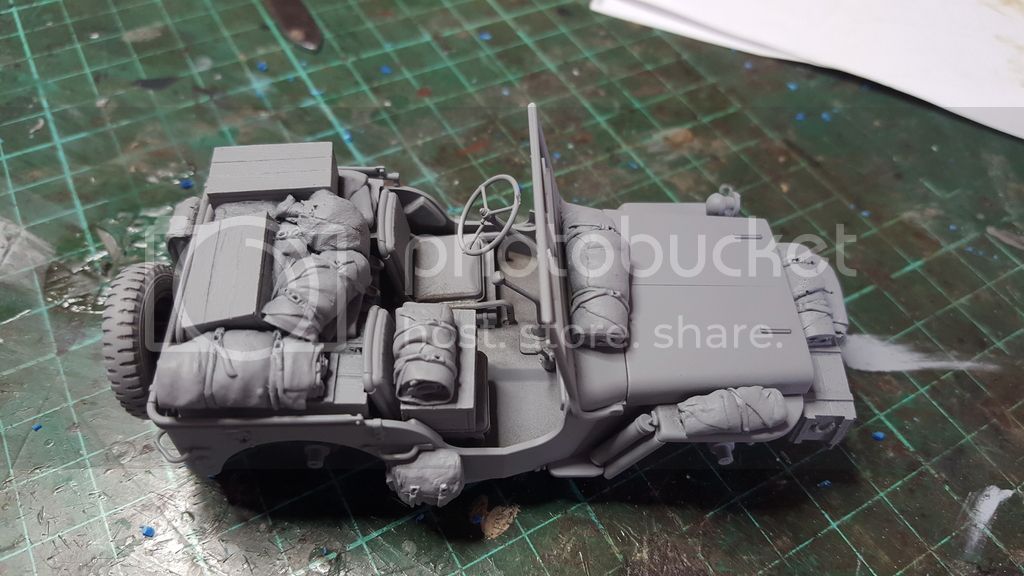
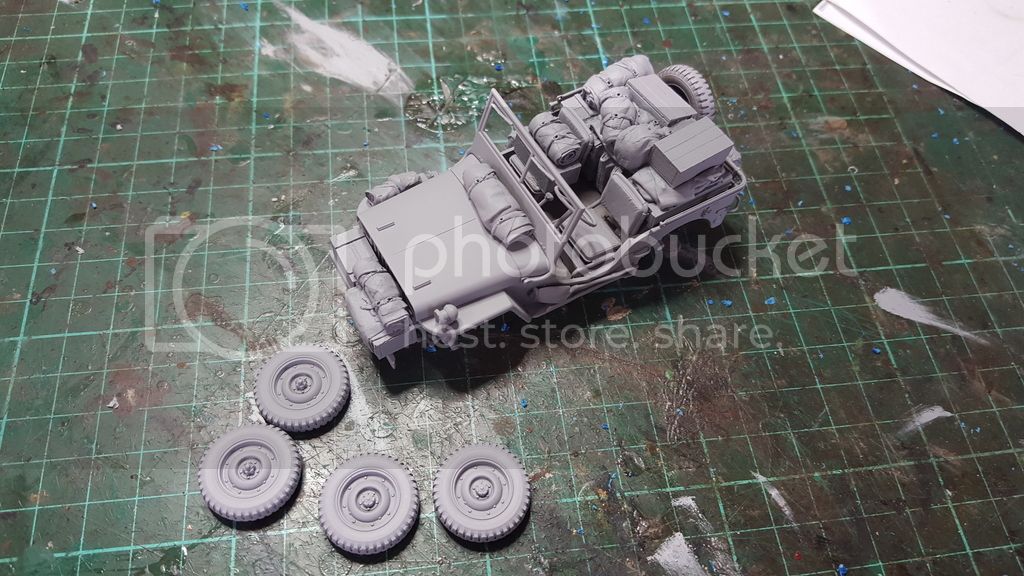
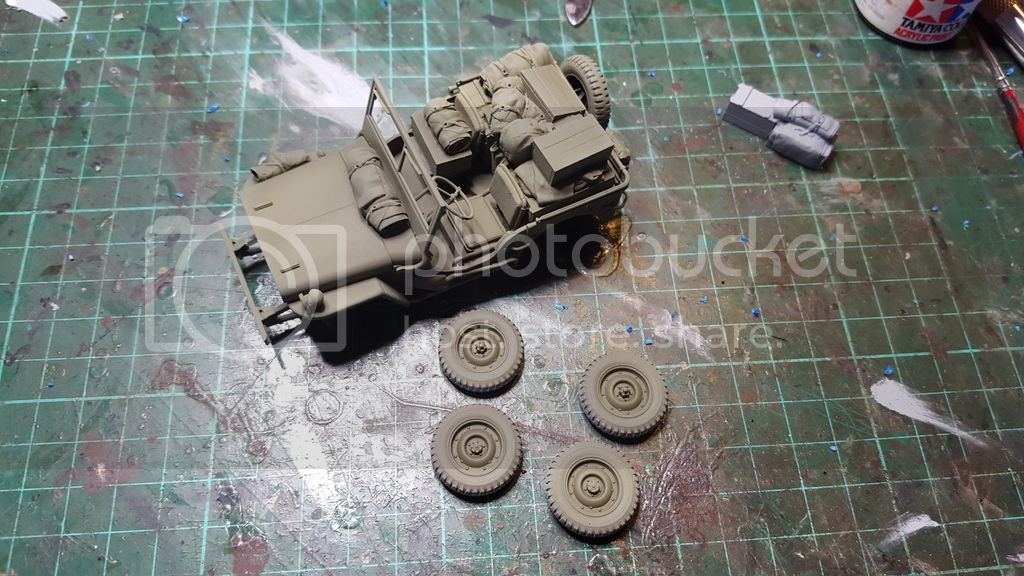
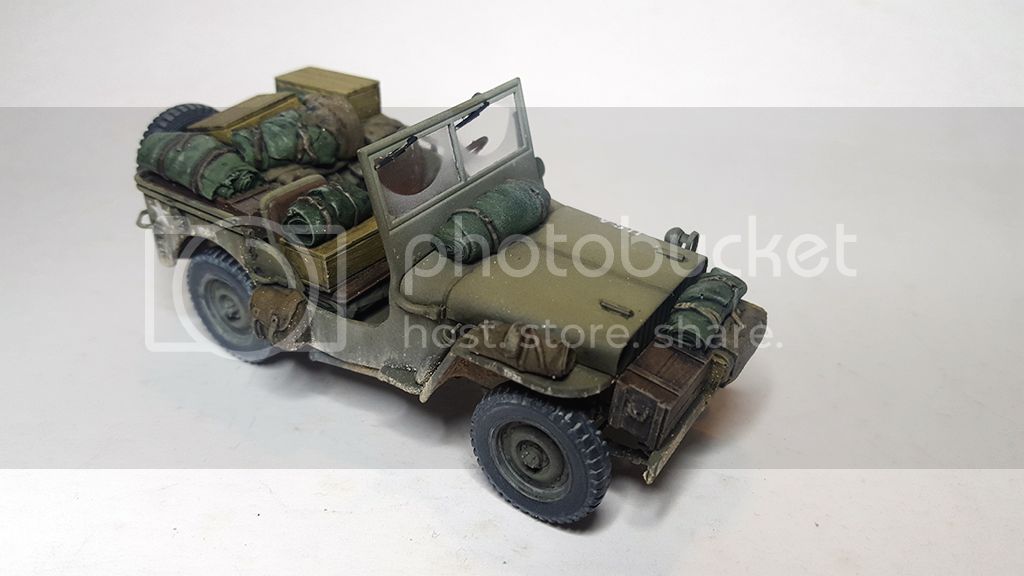
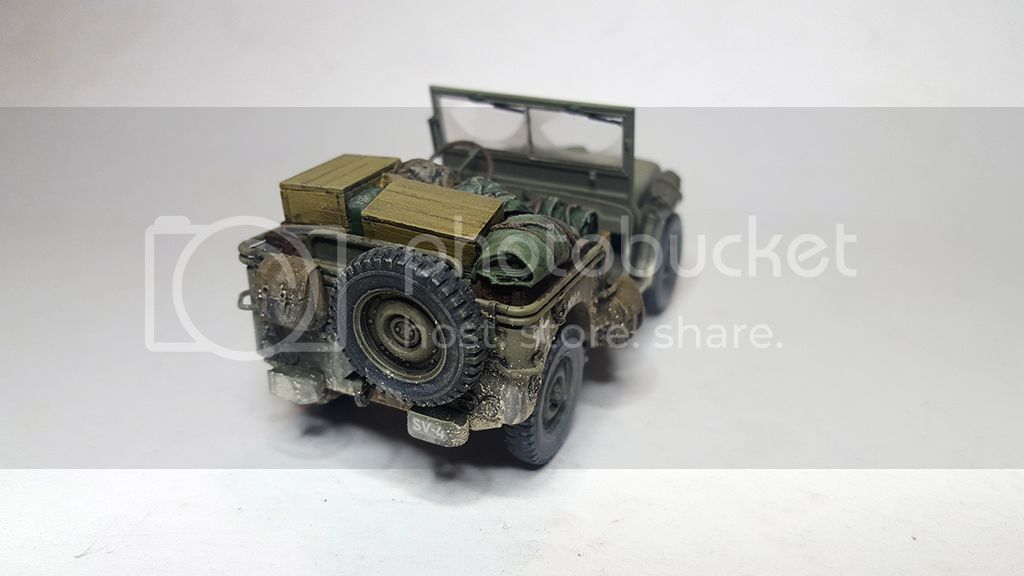
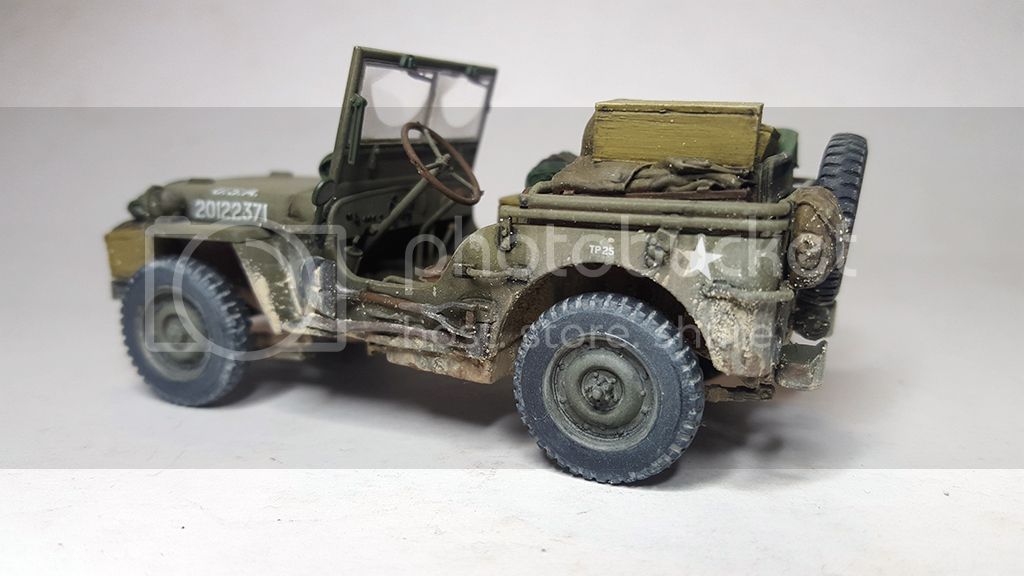
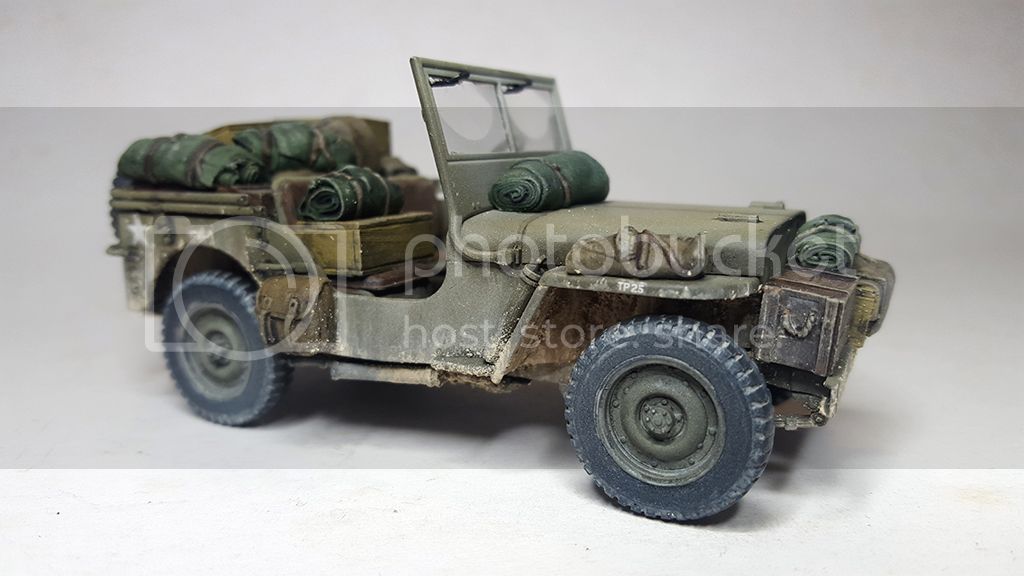
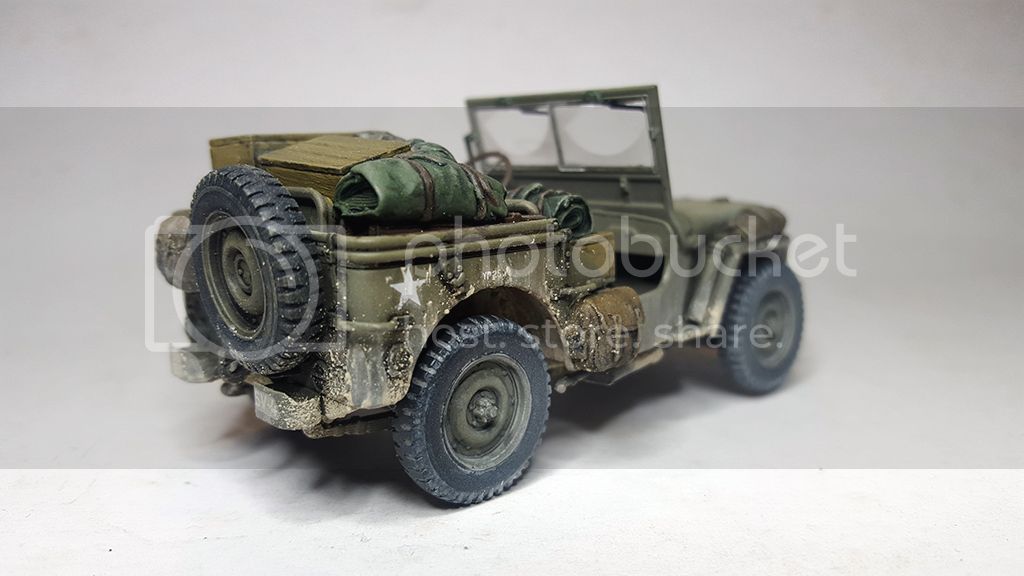
Here are all around shots of the two jeeps with dry fitted parts.


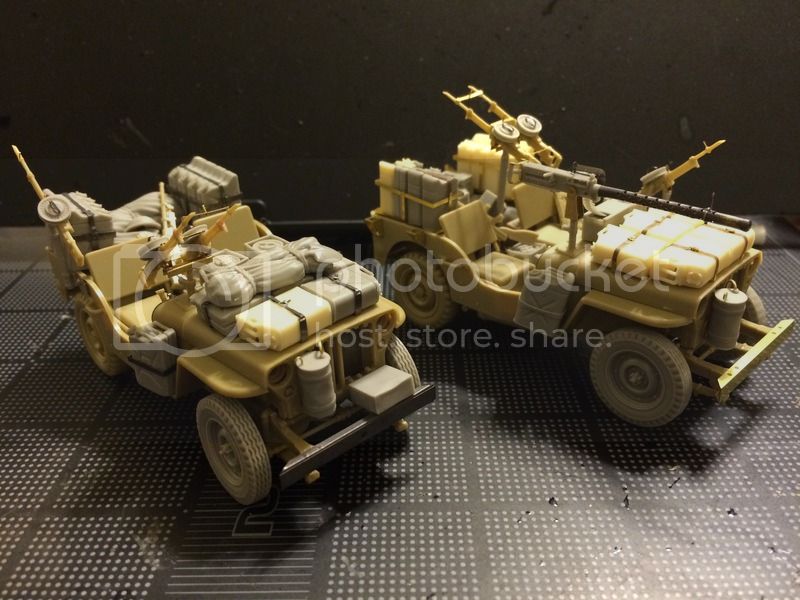
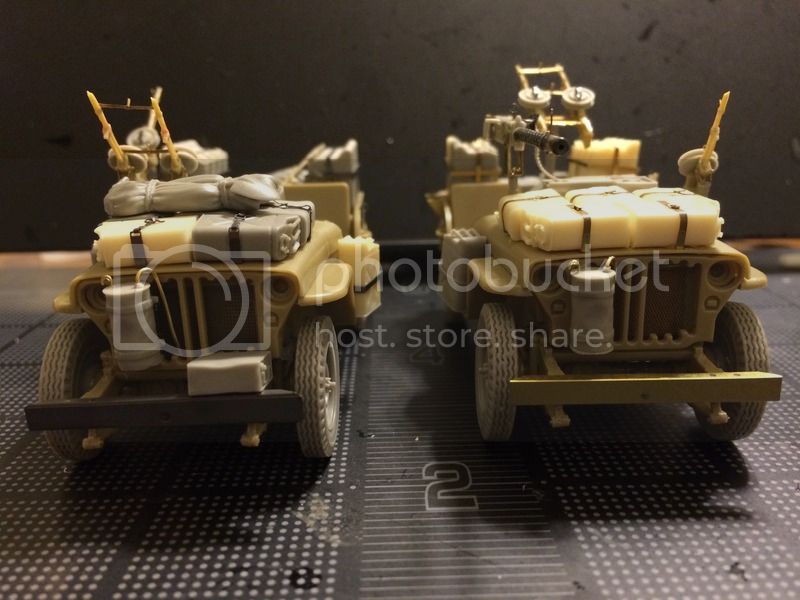
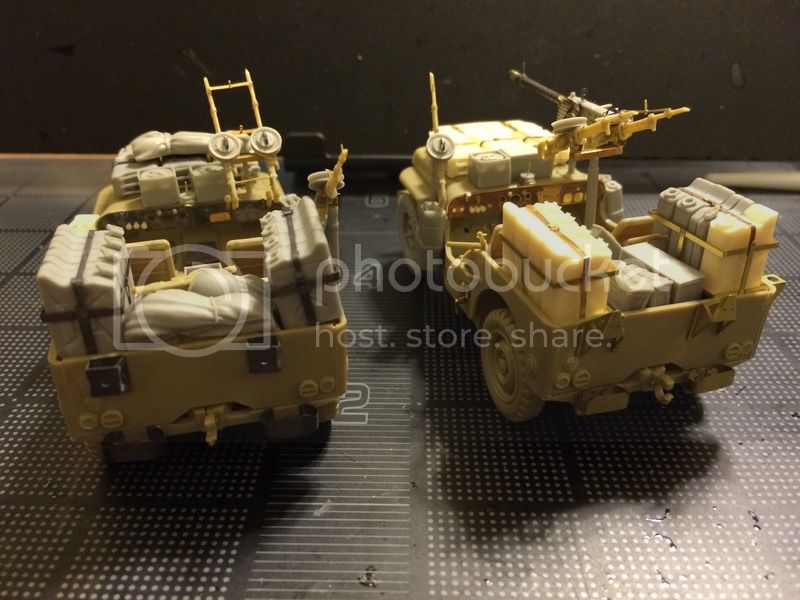
Some more additional parts and I will be apply primer.

I just realized that this post is picture heavy and I may exceed my daily Photobucket data allotment. Just in case the pictures are not viewable, here is a PDF version of this post.

https://drive.google.com/file/d/0Bw3enSRLKgU6UzJEZ1l0NXRqMlE/view?usp=sharing

Thanks,

Joseph
JonDicks
Visit this Community
Queensland, Australia
Joined: October 13, 2009
KitMaker: 223 posts
Armorama: 224 posts
Posted: Wednesday, April 06, 2016 - 04:41 PM UTC
My Value Gear jeep stowage set arrived. Looks good - I will give it a wash and clean up over the weekend.

tatbaqui
Staff MemberNews Writer
ARMORAMA
#040
Visit this Community
Metro Manila, Philippines
Joined: May 06, 2007
KitMaker: 2,713 posts
Armorama: 2,451 posts
Posted: Wednesday, April 06, 2016 - 06:59 PM UTC
Wow, look at those fully loaded jeeps -- nice choices on the accessories Damian, Jon!
Lokis_Tyro
Visit this Community
Wisconsin, United States
Joined: March 08, 2016
KitMaker: 128 posts
Armorama: 59 posts
Posted: Thursday, April 07, 2016 - 12:18 AM UTC
Those loaded jeeps are definitely admirable even in their current unpainted states.

I like the beads. Maybe a little too much depth, but there's only one pic, and it's only my opinion

Good work guys.
justsendit
Visit this Community
Colorado, United States
Joined: February 24, 2014
KitMaker: 3,033 posts
Armorama: 2,492 posts
Posted: Thursday, April 07, 2016 - 12:34 AM UTC

Quoted Text

... beads. Maybe a little too much depth ....


Gotta' go with no beads IMHO ... maybe dig through the spare parts box for some clear sprues and scratch something? It might even be possible to etch-in some lines on the surface.

Nice job guys!

—mike
JonDicks
Visit this Community
Queensland, Australia
Joined: October 13, 2009
KitMaker: 223 posts
Armorama: 224 posts
Posted: Thursday, April 07, 2016 - 11:36 AM UTC
Cleaned and placed the stowage. Spray can primer complete and once dry I will start painting with a Lifecolor olive drab modulation set.

JonDicks
Visit this Community
Queensland, Australia
Joined: October 13, 2009
KitMaker: 223 posts
Armorama: 224 posts
Posted: Thursday, April 07, 2016 - 01:31 PM UTC
Color went on smoothly. Waiting for the paint to cure and will start the detailed painting.
alewar
Visit this Community
Canelones, Uruguay
Joined: December 27, 2006
KitMaker: 773 posts
Armorama: 765 posts
Posted: Thursday, April 07, 2016 - 03:53 PM UTC
Hi, nice jobs! Love the details and loads.
Cheers Álvaro
ltb073
Visit this Community
New York, United States
Joined: March 08, 2010
KitMaker: 3,662 posts
Armorama: 3,078 posts
Posted: Sunday, April 10, 2016 - 12:46 AM UTC
Here is my progress
andromeda673
Visit this Community
Wisconsin, United States
Joined: July 30, 2013
KitMaker: 584 posts
Armorama: 525 posts
Posted: Sunday, April 10, 2016 - 05:50 AM UTC
Well I'm off and running with this

M151A2 W/Tow

I scored this gem today at the hobby store, $9.75 on the closeout rack! This gives me some funds in the pocket for some Def wheels, and other goodies, such as stowage etc.

I'm going to be doing the Marine version.


Thanks for looking, and I'll catch up with you boys later
AussieReg
Staff MemberAssociate Editor
AUTOMODELER
#007
Visit this Community
Victoria, Australia
Joined: June 09, 2009
KitMaker: 8,156 posts
Armorama: 194 posts
Posted: Sunday, April 10, 2016 - 08:24 AM UTC
Base coat on, detail painting and assembly next!


Cheers, D
JonDicks
Visit this Community
Queensland, Australia
Joined: October 13, 2009
KitMaker: 223 posts
Armorama: 224 posts
Posted: Sunday, April 17, 2016 - 02:10 PM UTC
Basic painting finished. Next is a gloss coat, followed by decals, followed by a matt coat then washes and oil dry brushing. I have also just received in the mail some of the new Ammo Splashes range, so will be giving those a go for the first time.
steve-o
Visit this Community
Ohio, United States
Joined: February 05, 2004
KitMaker: 545 posts
Armorama: 295 posts
Posted: Monday, April 18, 2016 - 09:45 PM UTC
I'm getting into the game a little late with a Bantam jeep that just arrived from Ukraine. I'm really impressed with the submissions so far, and hope mine will stack up!


Steve
andromeda673
Visit this Community
Wisconsin, United States
Joined: July 30, 2013
KitMaker: 584 posts
Armorama: 525 posts
Posted: Wednesday, April 20, 2016 - 07:05 AM UTC
made some more progress tonight, with the new addition time at the bench has been a little more tough to come by.


Thanks for looking!
JonDicks
Visit this Community
Queensland, Australia
Joined: October 13, 2009
KitMaker: 223 posts
Armorama: 224 posts
Posted: Wednesday, April 20, 2016 - 02:11 PM UTC
All done and dusted
(please excuse the pun!)
Loved this one.
MichaelSatin
Staff MemberCampaigns Administrator
AEROSCALE
Visit this Community
Colorado, United States
Joined: January 19, 2008
KitMaker: 3,909 posts
Armorama: 510 posts
Posted: Wednesday, April 20, 2016 - 04:35 PM UTC
Some VERY nice work going on here! Nice job Jon, there's hardly room for the driver!

Michael
andromeda673
Visit this Community
Wisconsin, United States
Joined: July 30, 2013
KitMaker: 584 posts
Armorama: 525 posts
Posted: Wednesday, April 20, 2016 - 05:49 PM UTC
nice job on your completed jeep, looks fantastic!
AussieReg
Staff MemberAssociate Editor
AUTOMODELER
#007
Visit this Community
Victoria, Australia
Joined: June 09, 2009
KitMaker: 8,156 posts
Armorama: 194 posts
Posted: Thursday, April 21, 2016 - 02:52 AM UTC
There are a bunch of great builds going on here, and the variety of AM extras is amazing!

Great build Jon, love the weathering!

I have just about finished the detail painting on my bright little build, final assembly and a bit of weathering soon.

Cheers, D
andromeda673
Visit this Community
Wisconsin, United States
Joined: July 30, 2013
KitMaker: 584 posts
Armorama: 525 posts
Posted: Thursday, April 21, 2016 - 07:06 PM UTC
Well cook the man some eggs!!!!!

I should get some bench time in tonight, and will hopefully be getting the base coats down, and then I can start the final coats on my build!

Happy friday boys
AussieReg
Staff MemberAssociate Editor
AUTOMODELER
#007
Visit this Community
Victoria, Australia
Joined: June 09, 2009
KitMaker: 8,156 posts
Armorama: 194 posts
Posted: Thursday, April 21, 2016 - 09:02 PM UTC
Major assembly done, just need to add the grab rails and a couple more fittings and the last thing will be the windscreen glass. This is for an airfield diorama so I will only be adding a light splash of sludge once it has been clear coated.


Cheers, D
steve-o
Visit this Community
Ohio, United States
Joined: February 05, 2004
KitMaker: 545 posts
Armorama: 295 posts
Posted: Friday, April 22, 2016 - 01:43 AM UTC
I know this isn't a top-quality photo, but I thought someone here might be able to tell what kind of jeep this is? Willys? Bantam? It's my grandmother in Belgium, late 1944 or early '45. I'd love to use some of the Miniart figures to make this into a model.

Thanks!

tatbaqui
Staff MemberNews Writer
ARMORAMA
#040
Visit this Community
Metro Manila, Philippines
Joined: May 06, 2007
KitMaker: 2,713 posts
Armorama: 2,451 posts
Posted: Friday, April 22, 2016 - 02:48 AM UTC
Looking at the windscreen frame and slant of fenders, I believe it's a Willys.
Lokis_Tyro
Visit this Community
Wisconsin, United States
Joined: March 08, 2016
KitMaker: 128 posts
Armorama: 59 posts
Posted: Friday, April 22, 2016 - 05:36 AM UTC

Quoted Text


Quoted Text

... beads. Maybe a little too much depth ....


Gotta' go with no beads IMHO ... maybe dig through the spare parts box for some clear sprues and scratch something? It might even be possible to etch-in some lines on the surface.

Nice job guys!

—mike


I came across a few builds that used 5 minute epoxy for lights. That may be another option. They looked real nice imo.
Delbert
#073
Visit this Community
Pennsylvania, United States
Joined: October 05, 2002
KitMaker: 2,659 posts
Armorama: 1,512 posts
Posted: Saturday, April 23, 2016 - 03:40 AM UTC
Hello everyone.. Looking good... compared to some of these mine will be a plain jane..

Hey Steve-o that kit looks very familiar.. just a word of advice, if your chassis and frame don't quite meet up and you need to use a little pressure to get things to meet straight.. glue the front first and then hold and glue the back together.. I held the front and it caused the very very delicate slate grill to break.. :<

anyways I got some painting done.. base of dark olive drab then a lighter coat of Olive drab over that for some shadows and highlights.. here is a photo.. it will prob blend a little more after some weathering..


Also did the tires and wheels.. base of Floquil Weathered Black, followed by the base OD and then the lighter OD to really try and bring out the details.


anyways lets keep it going.. Jeeps and Jeep like things away.............