

Nice camouflage, Dustin. It is coming along nicely.
Mike, great finish on the jeep. Looks great with perfect weathering.
Campaigns
Where Armorama group builds can be discussed, organized, and updates posted.
Where Armorama group builds can be discussed, organized, and updates posted.
Hosted by Darren Baker, Richard S.
Unfinished Business 2016
SGTJKJ

#041

Joined: July 20, 2006
KitMaker: 10,069 posts
Armorama: 4,677 posts

Posted: Saturday, March 12, 2016 - 09:44 PM UTC


Thirian24

Joined: September 30, 2015
KitMaker: 2,493 posts
Armorama: 2,344 posts
Posted: Sunday, March 13, 2016 - 06:12 AM UTC
Thank you Jesper!
I did some stowage mock up. My first time at this.

Cheers,
Dustin
I did some stowage mock up. My first time at this.


Cheers,
Dustin

Charlie-66

#186
Joined: May 24, 2006
KitMaker: 771 posts
Armorama: 750 posts
Posted: Saturday, March 19, 2016 - 03:55 AM UTC
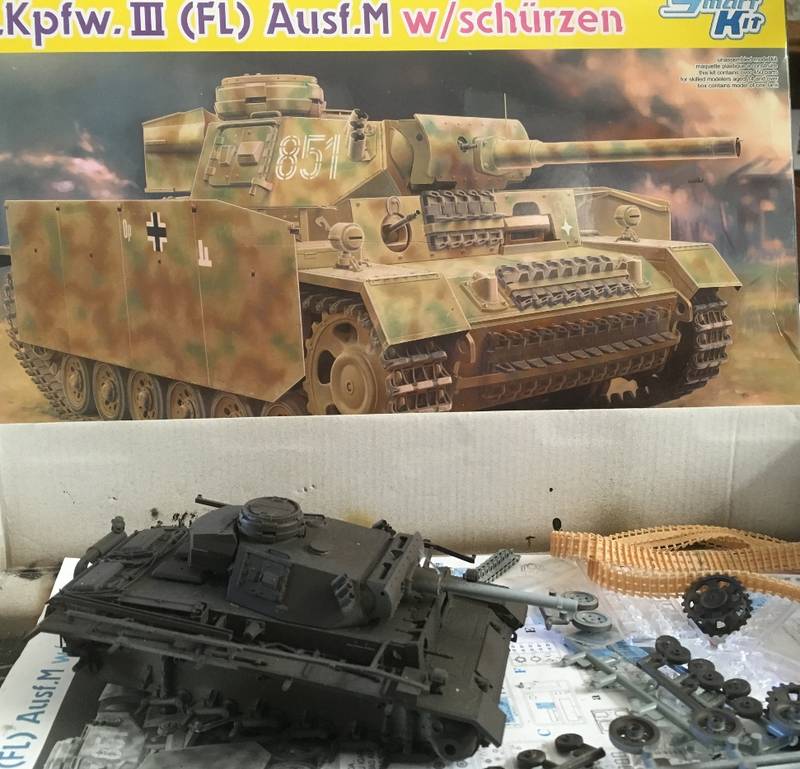
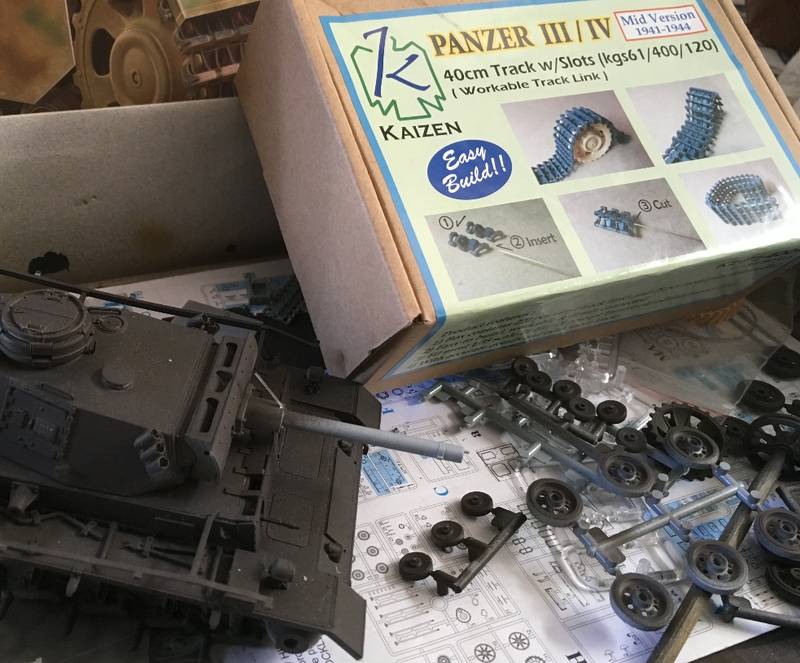
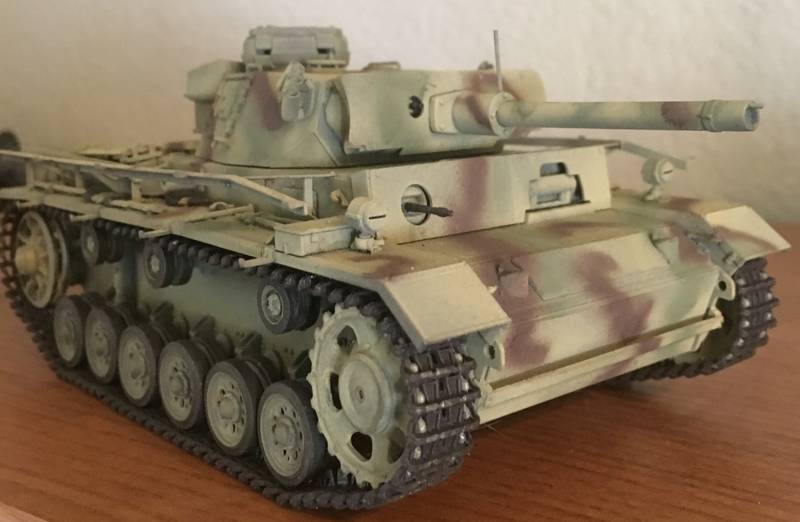
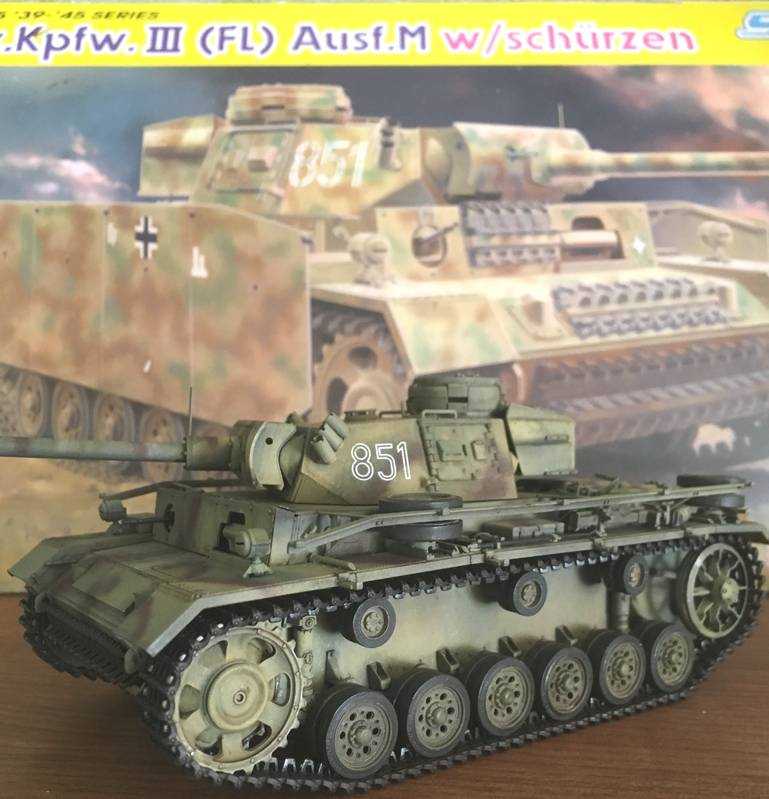
Here is my entry. I started this kit while living in Mexico City. All work stopped when we moved back to the states so now it's time to finish it. I have had a run of bad luck with DS track on my last 3 PZ III builds with the tracks too short. I'm trying the Kaizen tracks on this one. So far they look really good.


Thirian24
Joined: September 30, 2015
KitMaker: 2,493 posts
Armorama: 2,344 posts
Posted: Monday, March 21, 2016 - 08:15 AM UTC
Looks good, Guy. Eager to see your progress.
I painted my ammo crates and that's about it.
Cheers,
Dustin
I painted my ammo crates and that's about it.

Cheers,
Dustin
Charlie-66
#186
Joined: May 24, 2006
KitMaker: 771 posts
Armorama: 750 posts
Posted: Monday, March 21, 2016 - 09:37 PM UTC
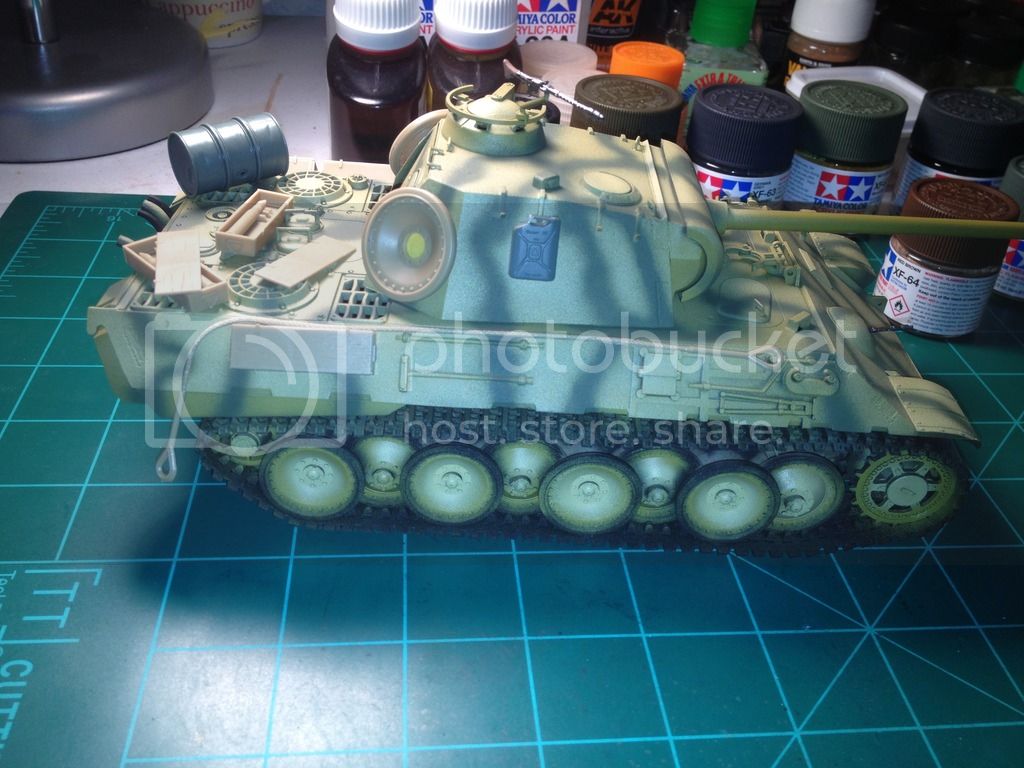
Thanks Dustin,
I finished shooting the tank in burnt umber undercoat, and then the first coat of XF-60 dark yellow. Got one side of the road wheels done as well as one side of the kaizen tracks. Having never worked with Kaizen before I had to experiment a bit. Trying to insert the tracks pins "free hand" was a pain in the neck, and the sections I did that way had a twist in them. I broke out the assembly jig from an old set of Model Kasten tracks and its been smooth sailing since then. I knew there was I reason I never throw spares and jigs out!

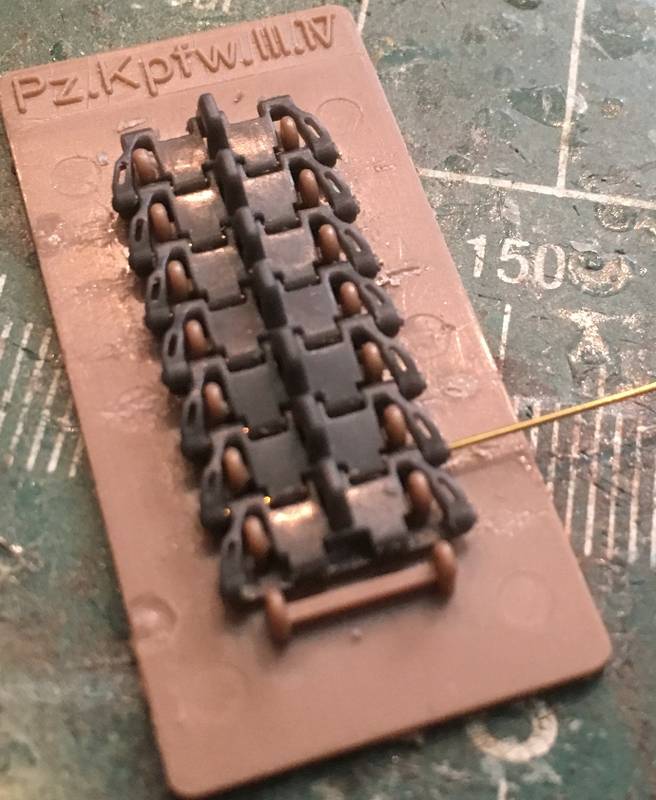
I finished shooting the tank in burnt umber undercoat, and then the first coat of XF-60 dark yellow. Got one side of the road wheels done as well as one side of the kaizen tracks. Having never worked with Kaizen before I had to experiment a bit. Trying to insert the tracks pins "free hand" was a pain in the neck, and the sections I did that way had a twist in them. I broke out the assembly jig from an old set of Model Kasten tracks and its been smooth sailing since then. I knew there was I reason I never throw spares and jigs out!

GaryKato
Joined: December 06, 2004
KitMaker: 3,694 posts
Armorama: 2,693 posts

Posted: Tuesday, March 22, 2016 - 01:19 PM UTC
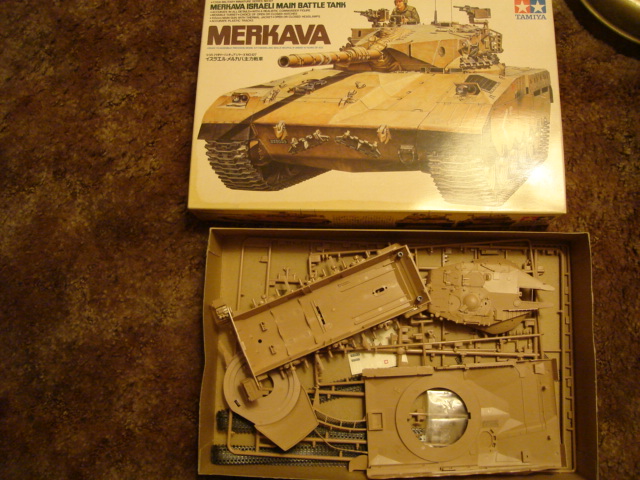
My initial build for this campaign: Tamiya's 1/35 Merkava. Like most of my builds, I don't remember when I started it. I have been working on it lately (among others) and stopped when it became time to glue in the clear parts. My usual M.O. is to work on another kit when I hit a snag. But I will attempt to stick to this one. One of the track skirts broke off when I tried to see how to add one of the driver's periscopes. I also can't tell you how many times I've glued the tow cable hooks onto the turret.
Charlie-66
#186
Joined: May 24, 2006
KitMaker: 771 posts
Armorama: 750 posts
Posted: Thursday, March 24, 2016 - 01:31 AM UTC
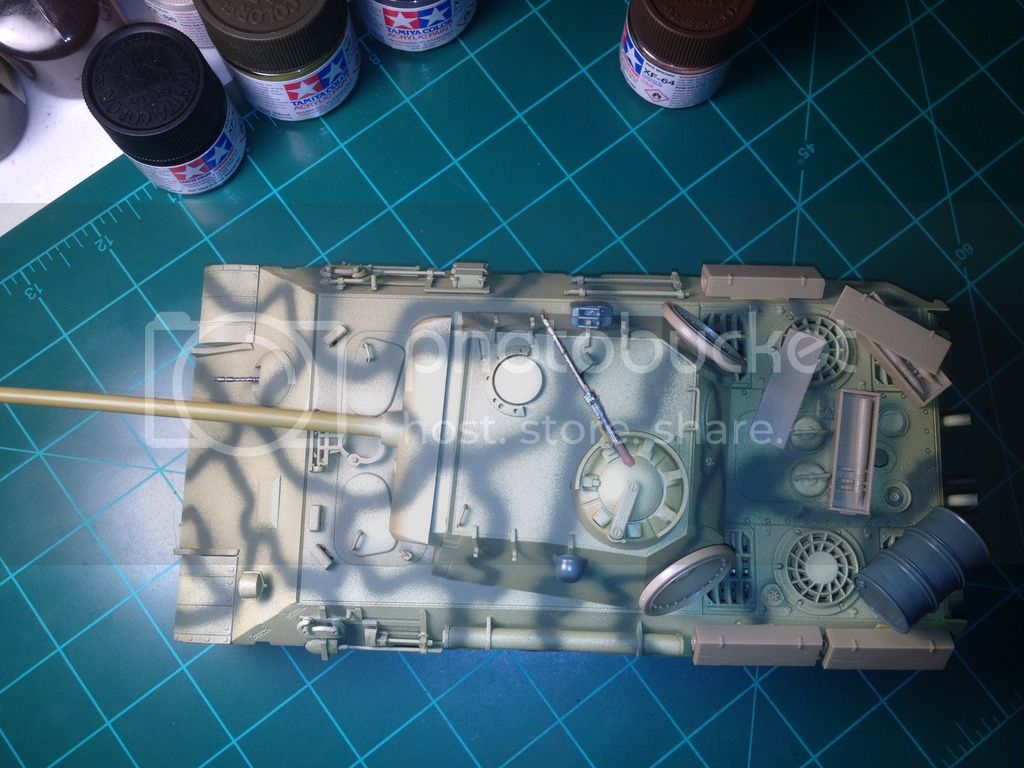
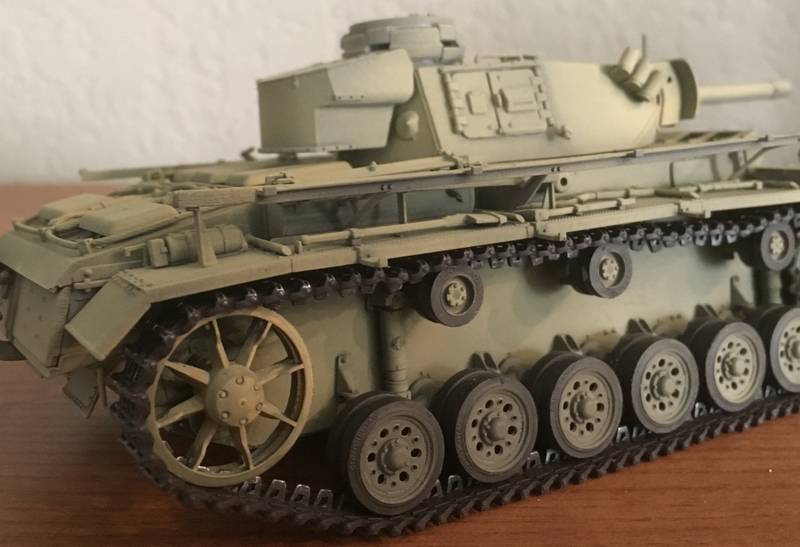
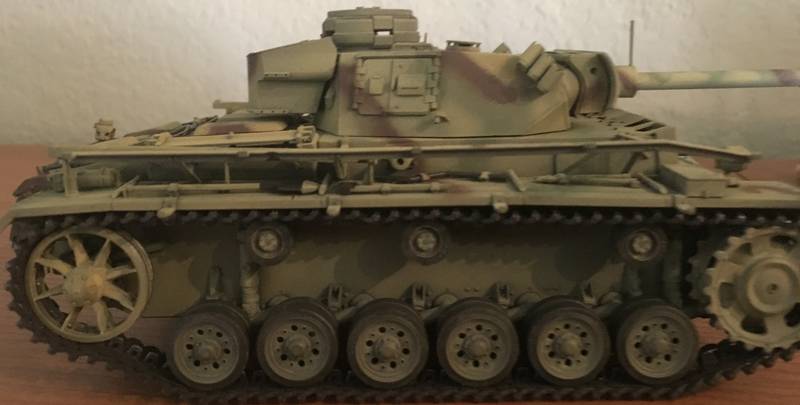
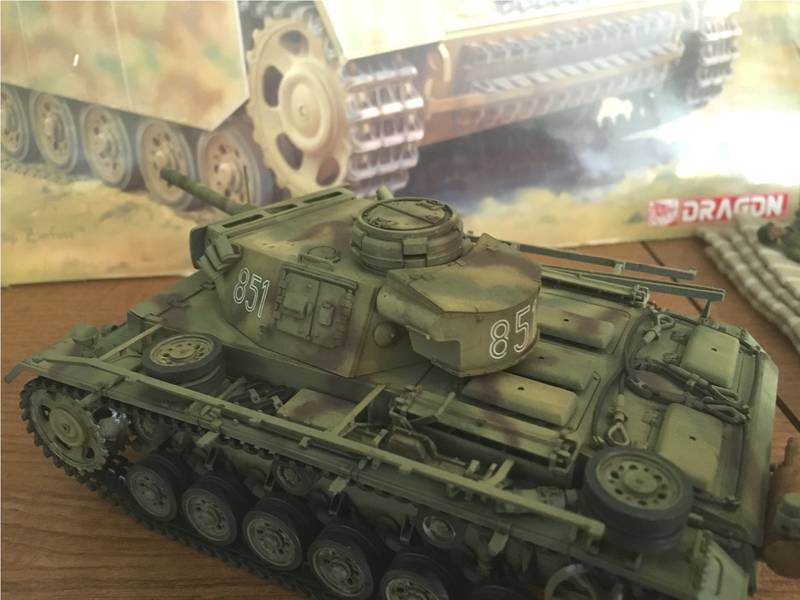
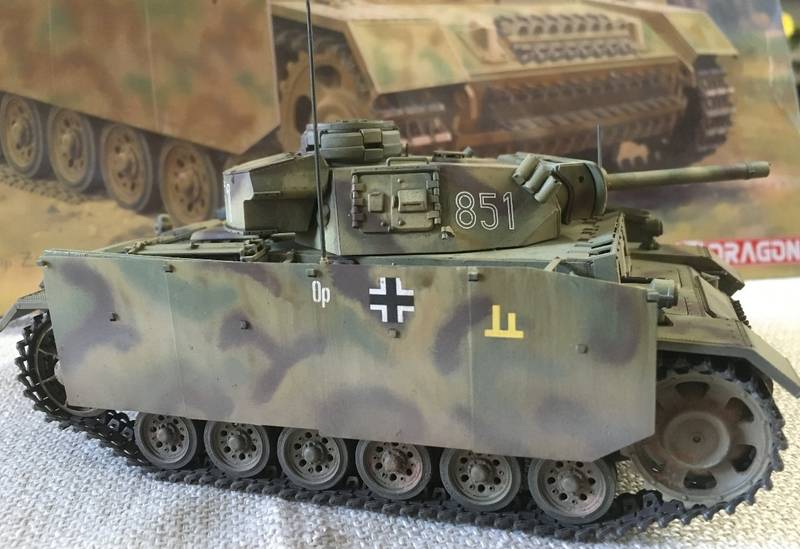
Both tracks are on, and basic 3 color cammo is done as well. I see some touch ups that are needed. Have started detail painting of the tools, muffler etc.
Petro
Joined: November 02, 2003
KitMaker: 984 posts
Armorama: 846 posts
Posted: Sunday, March 27, 2016 - 08:14 PM UTC
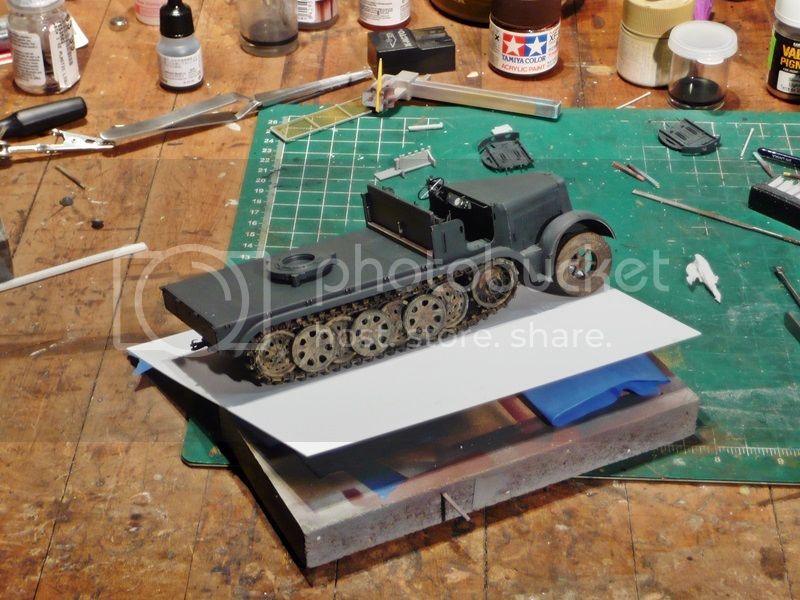
Small update from Me. Working on running gear so i could get the rear deck on. I am so out of practice, i don't know what i am doing ,lol. 
 I forgot to wash the 3 outer wheels. get to that soon.
I forgot to wash the 3 outer wheels. get to that soon.
Sticky
Joined: September 14, 2004
KitMaker: 2,220 posts
Armorama: 1,707 posts
Posted: Sunday, March 27, 2016 - 08:49 PM UTC
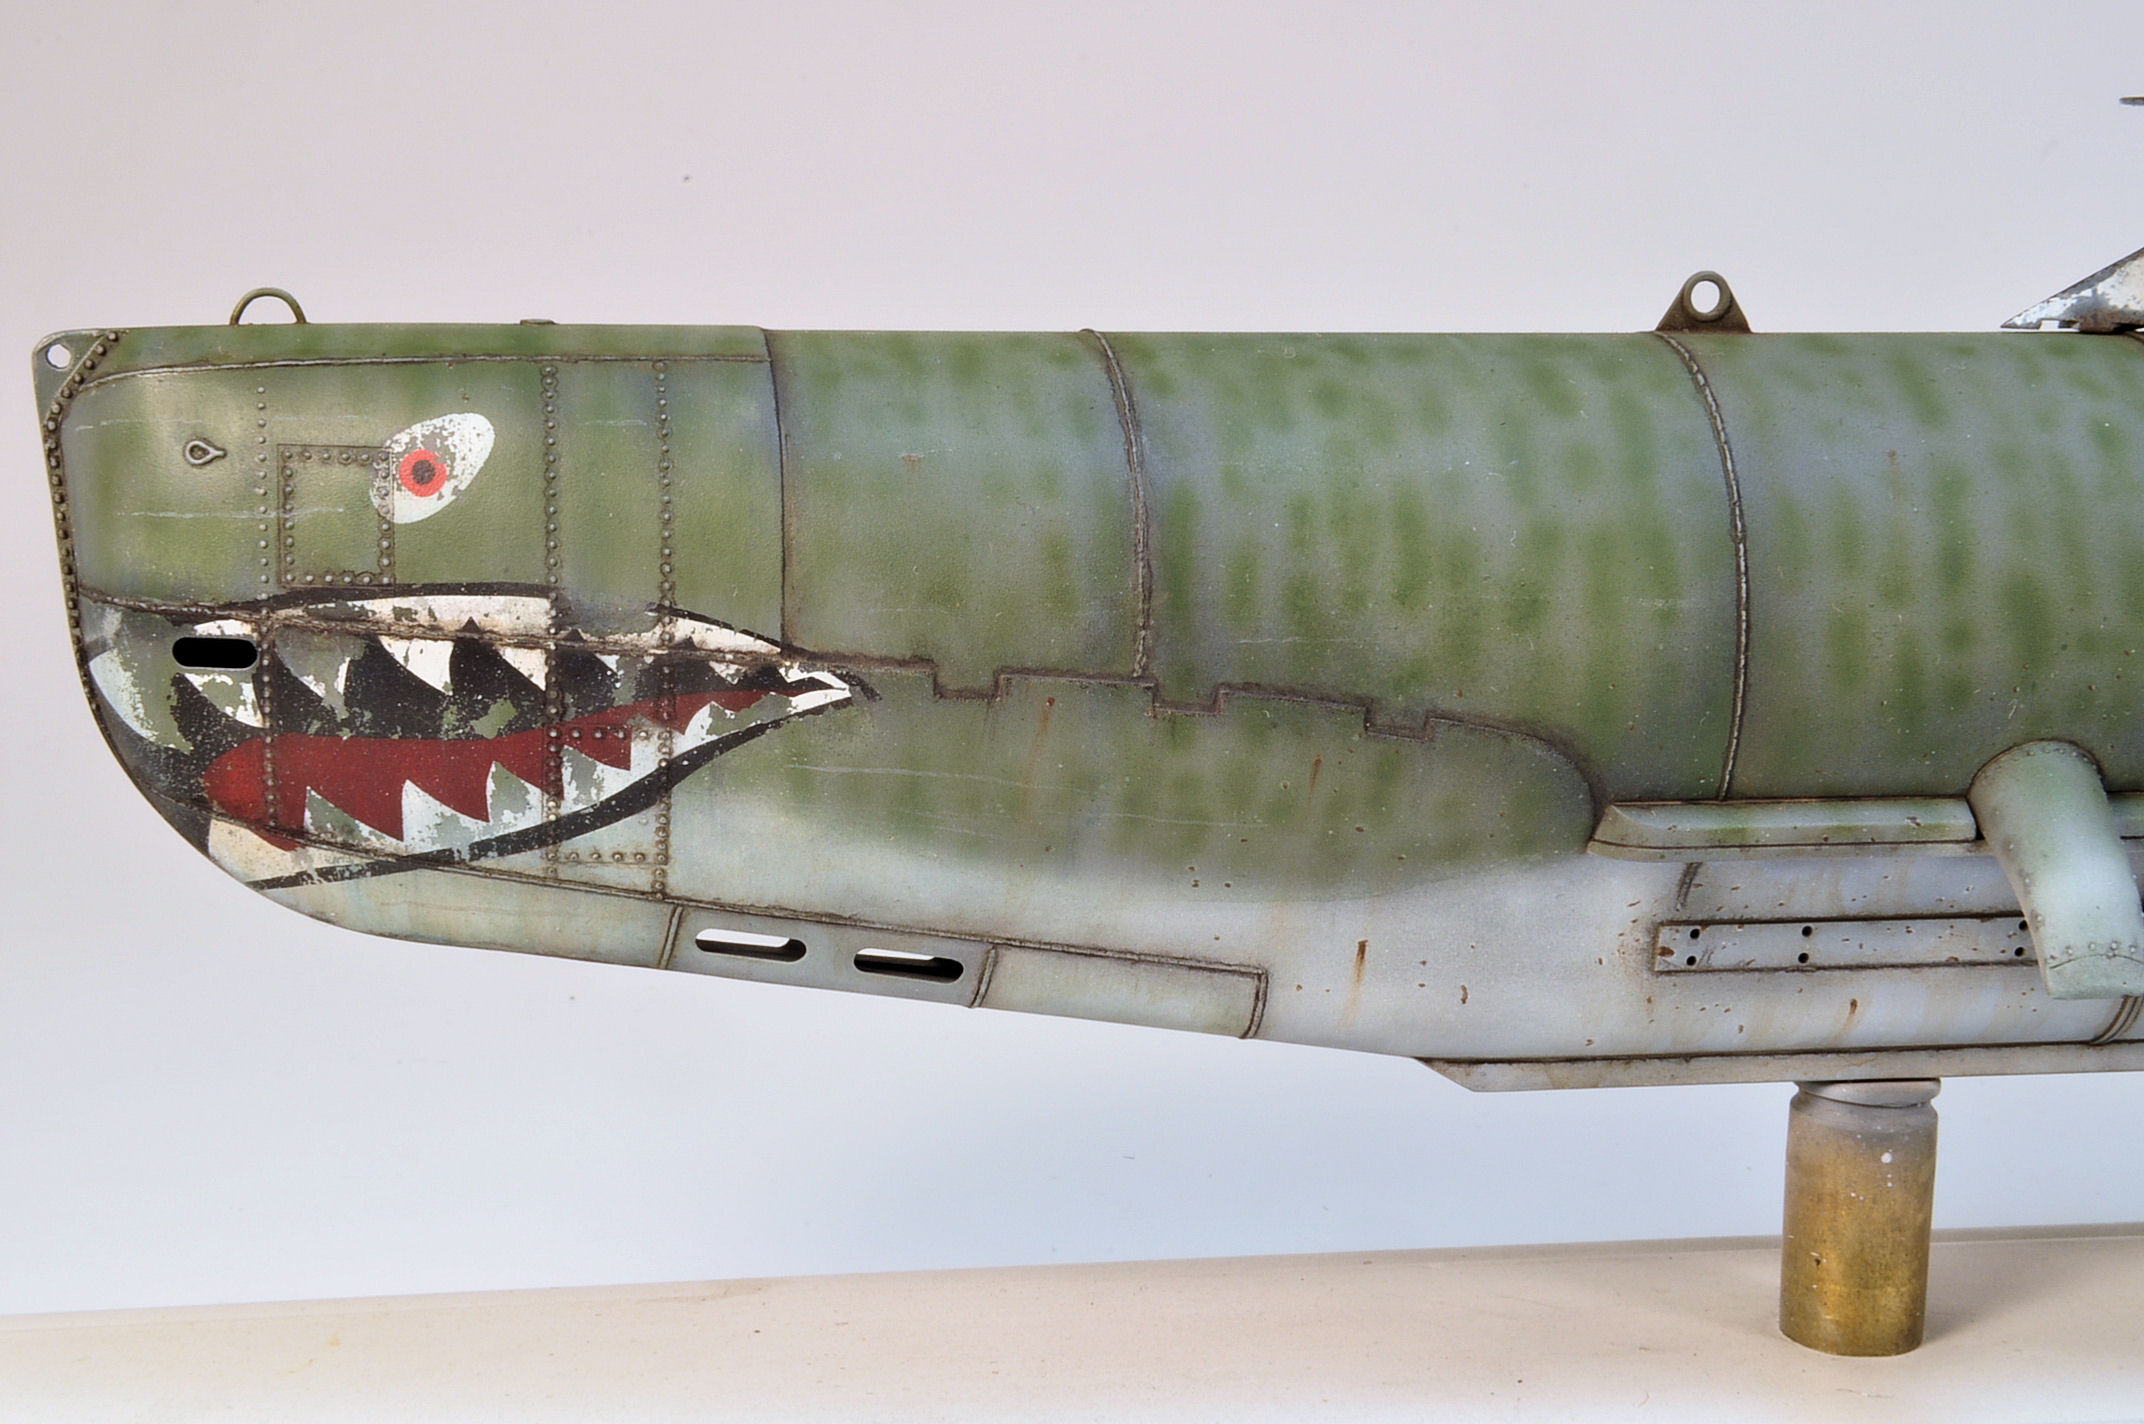
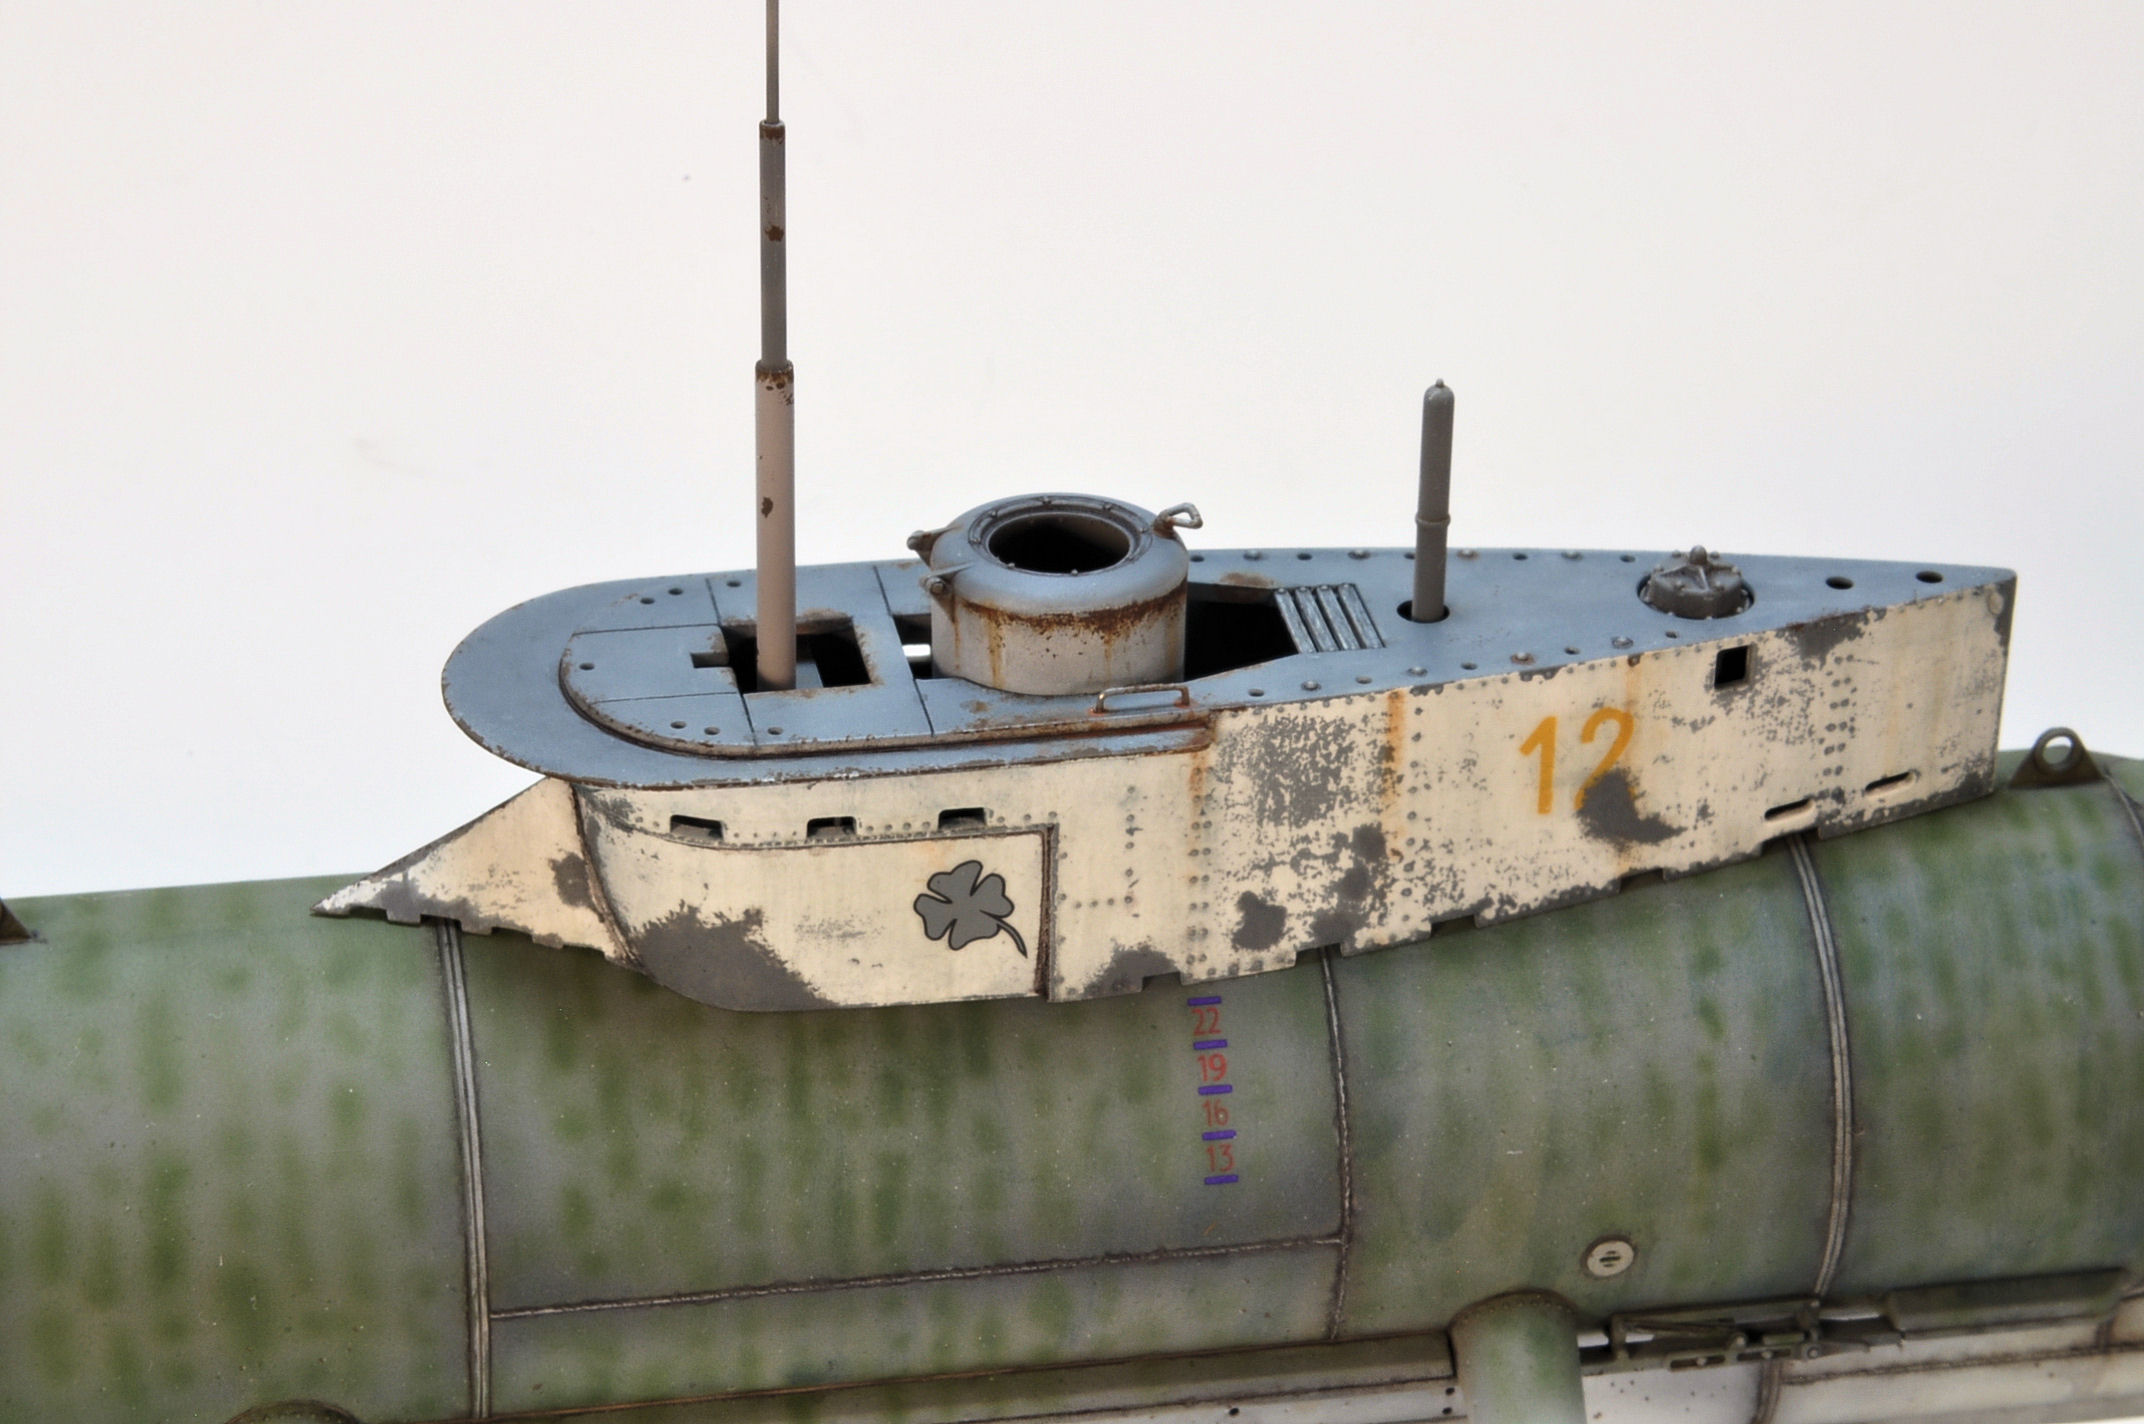
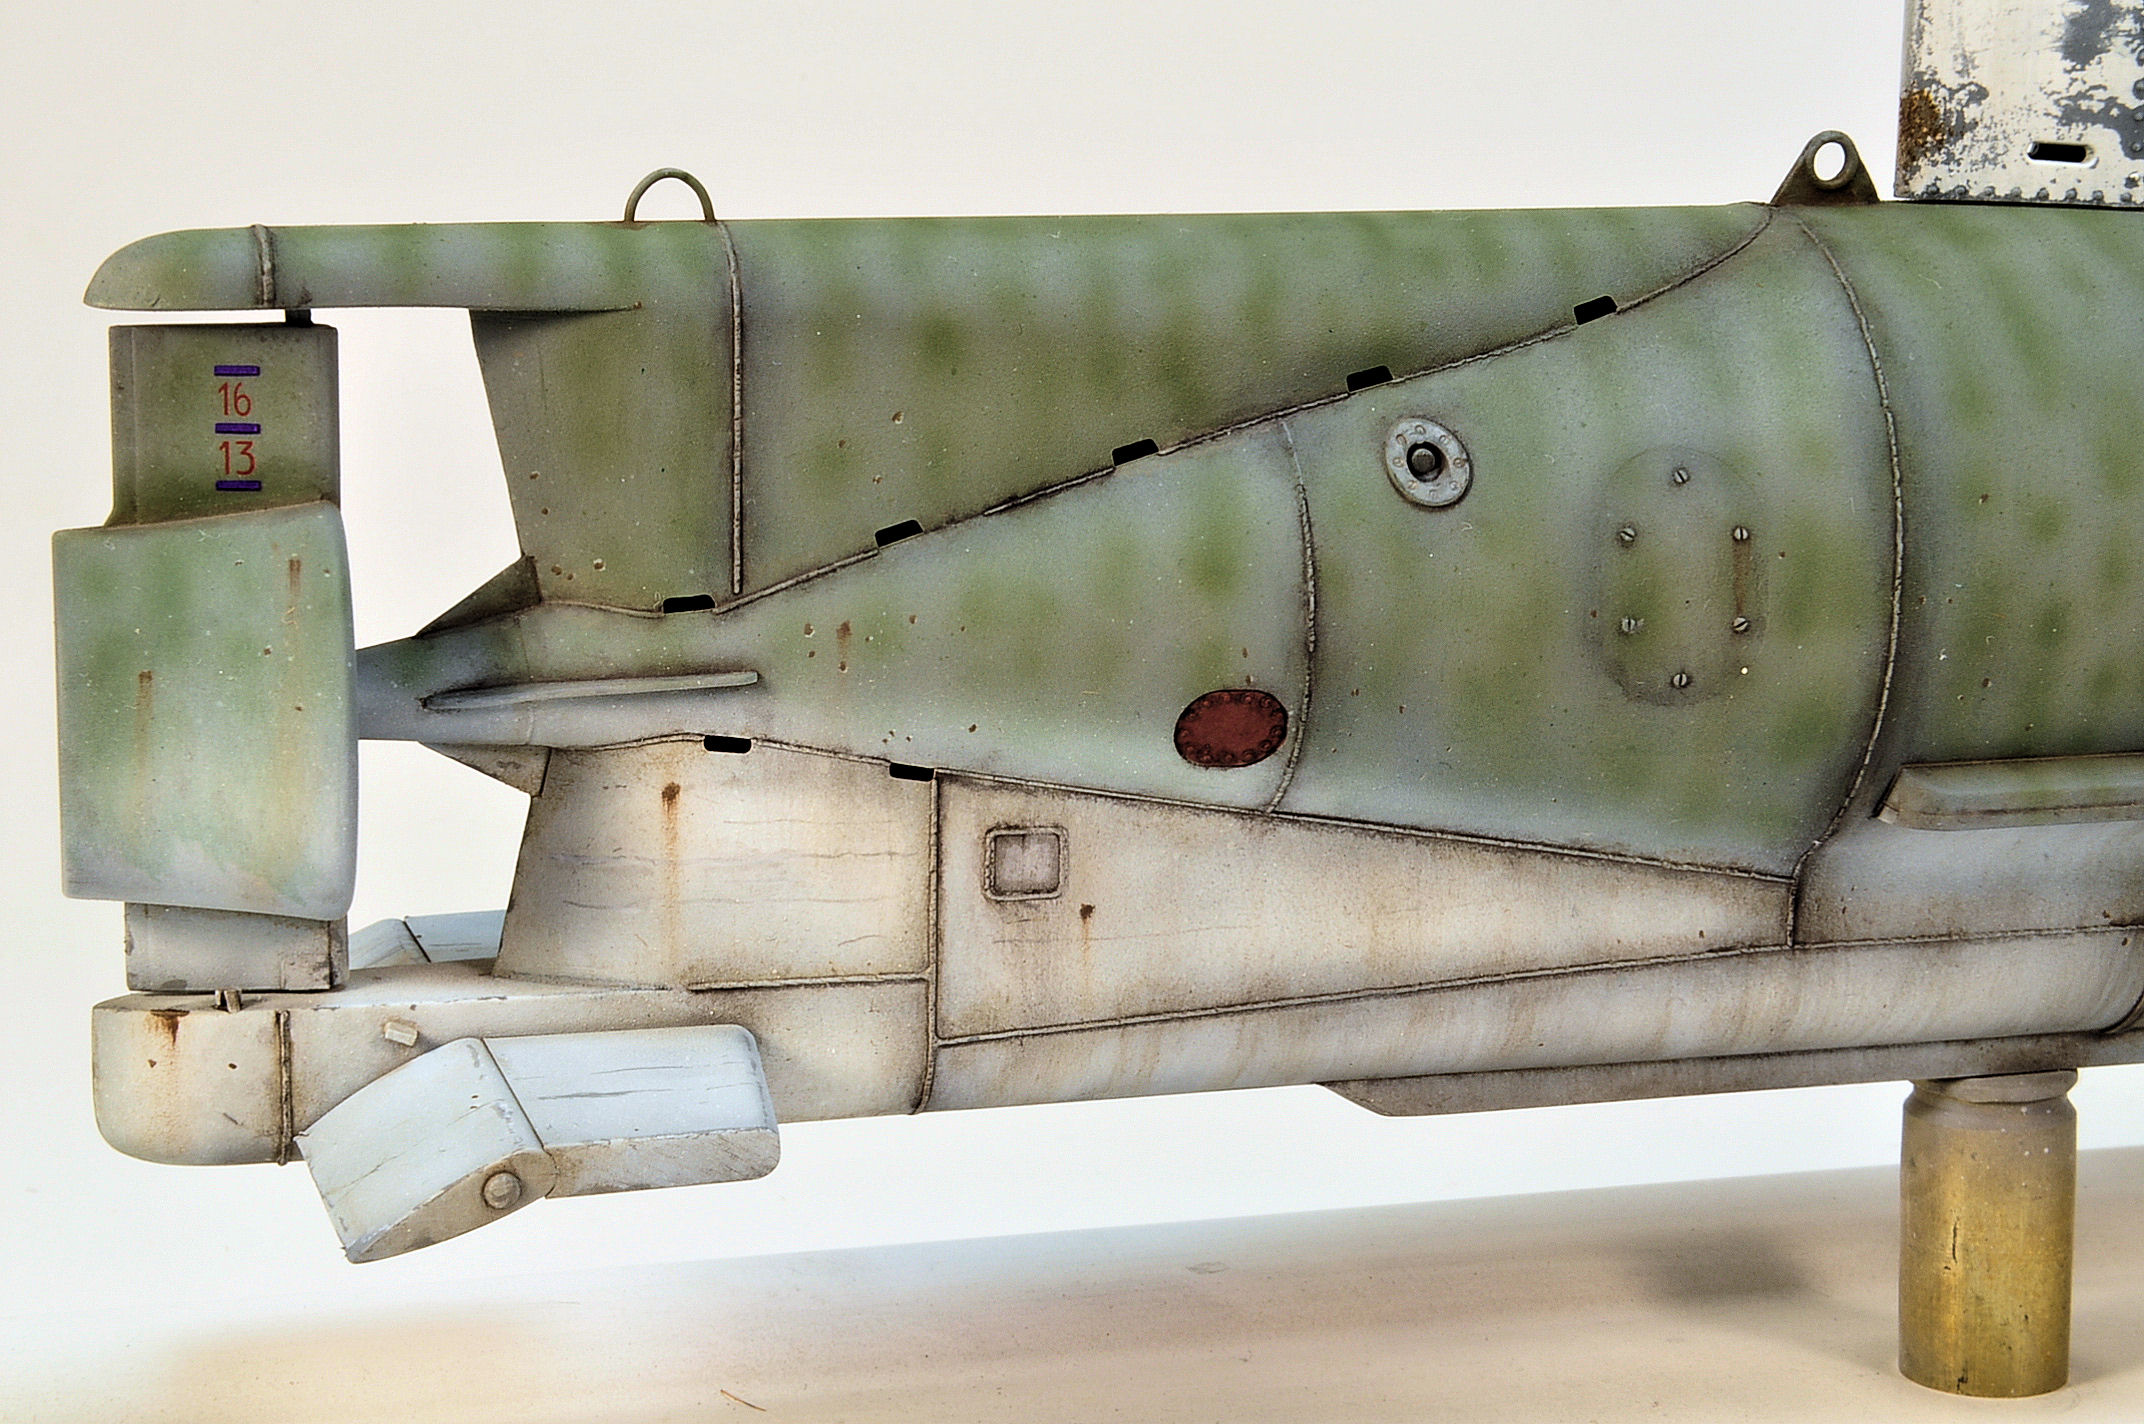
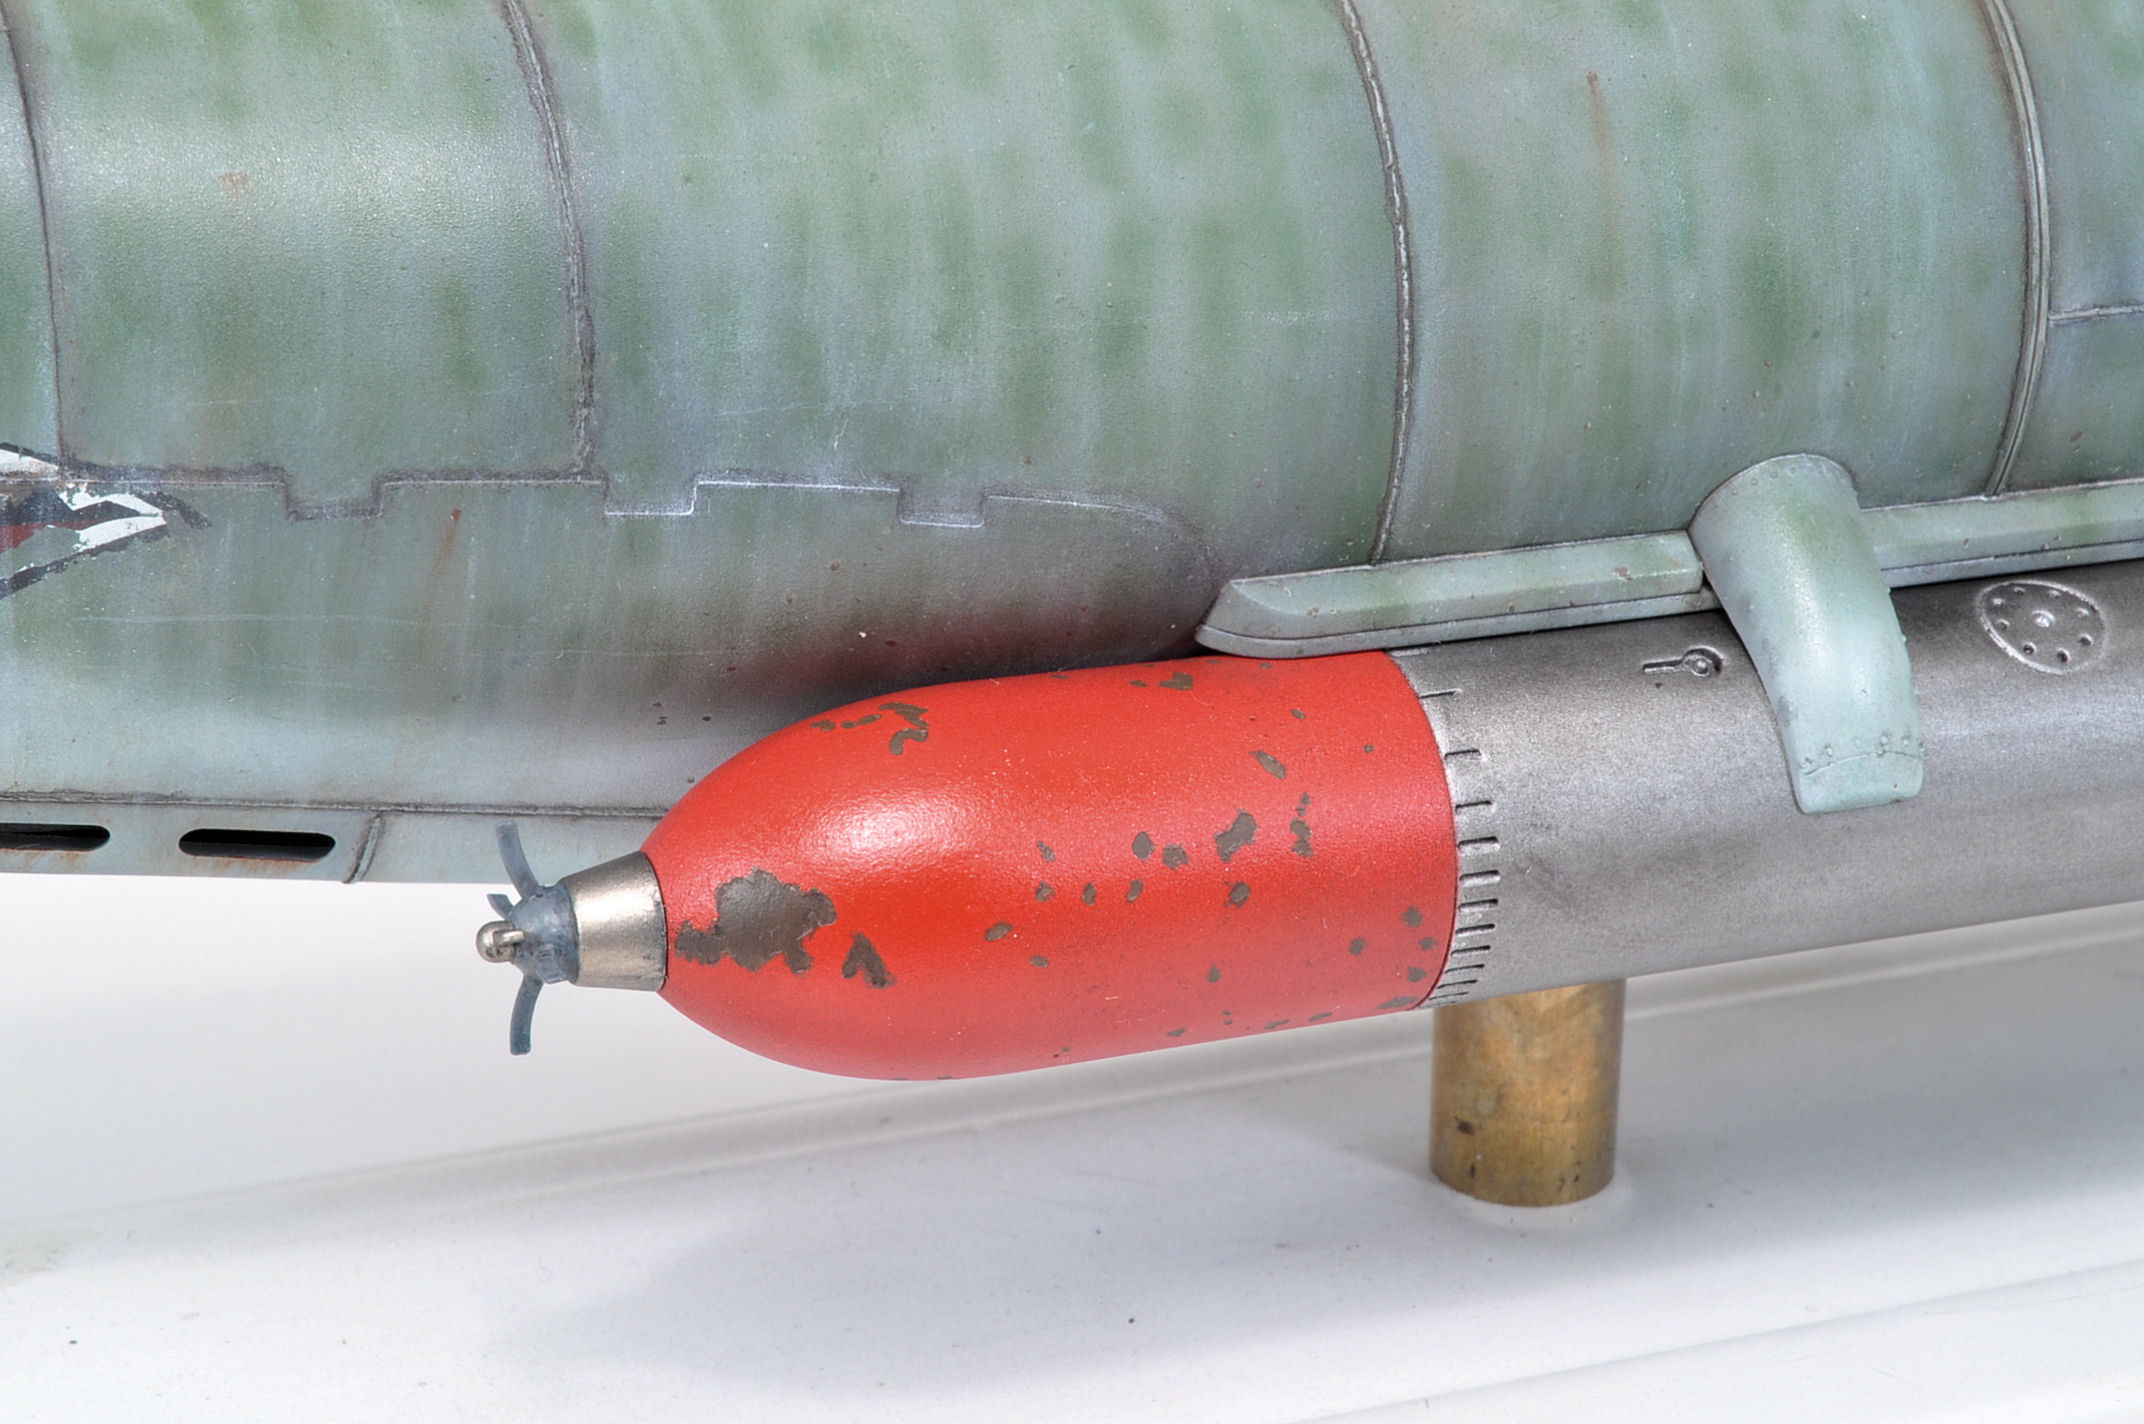
Okay I will play. I started this in 2010. and it just stalled as other projects had to take center stage. I Just finished it over the weekend.

And the Finished Pictures - Minus the base which is on order.

And the Finished Pictures - Minus the base which is on order.
Charlie-66
#186
Joined: May 24, 2006
KitMaker: 771 posts
Armorama: 750 posts
Posted: Monday, March 28, 2016 - 09:57 PM UTC
John,
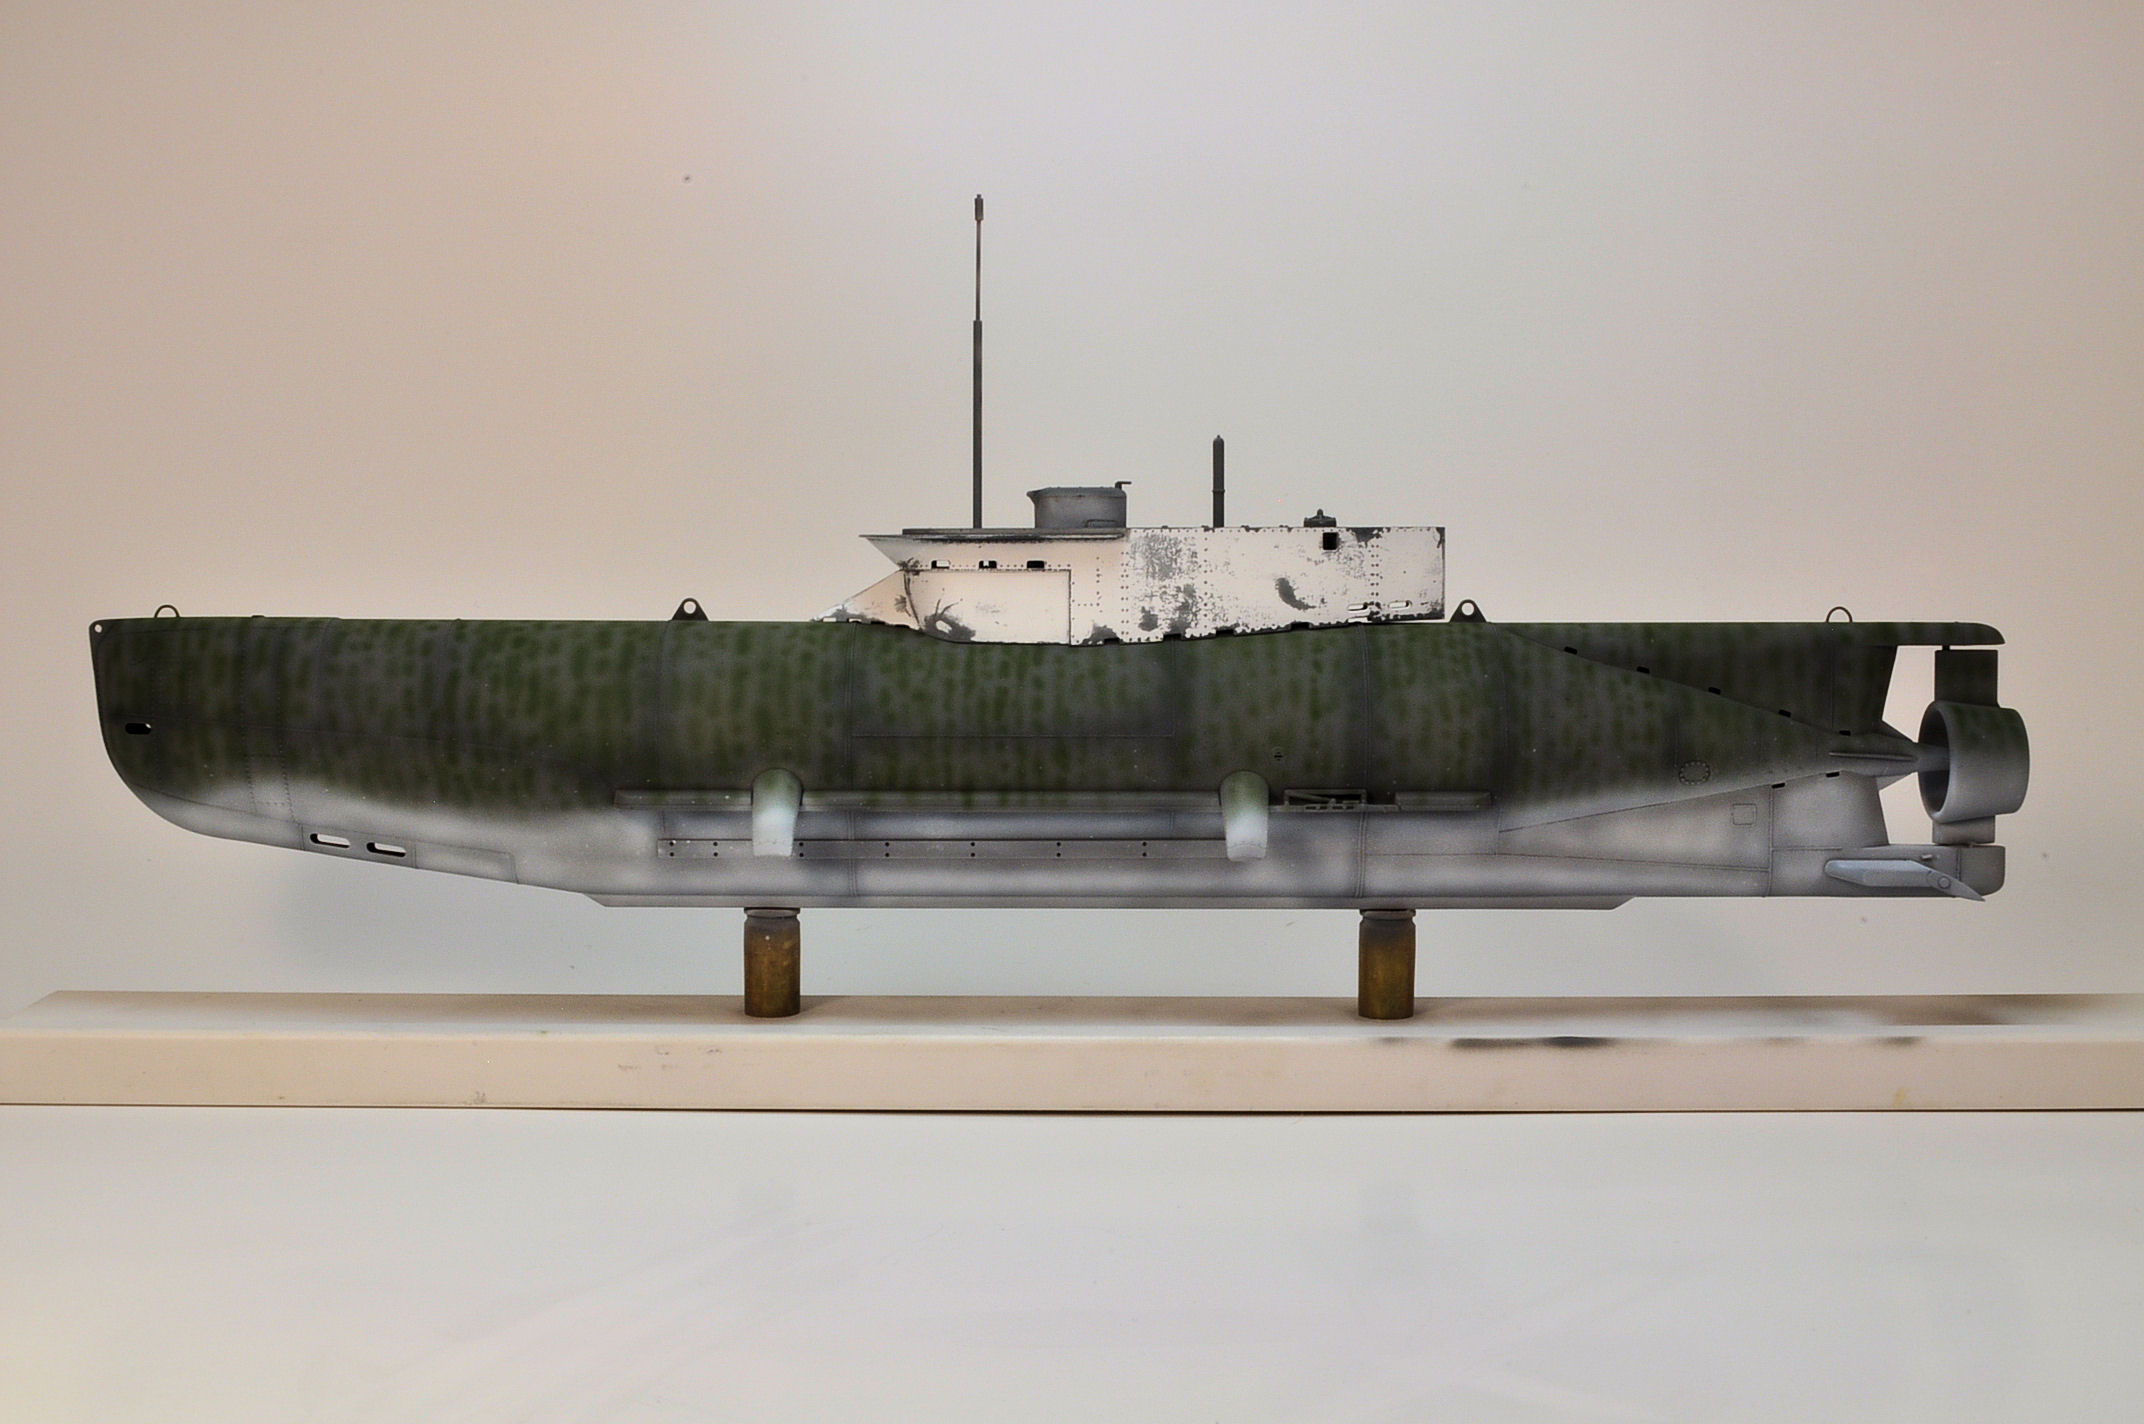
the sub is amazing!
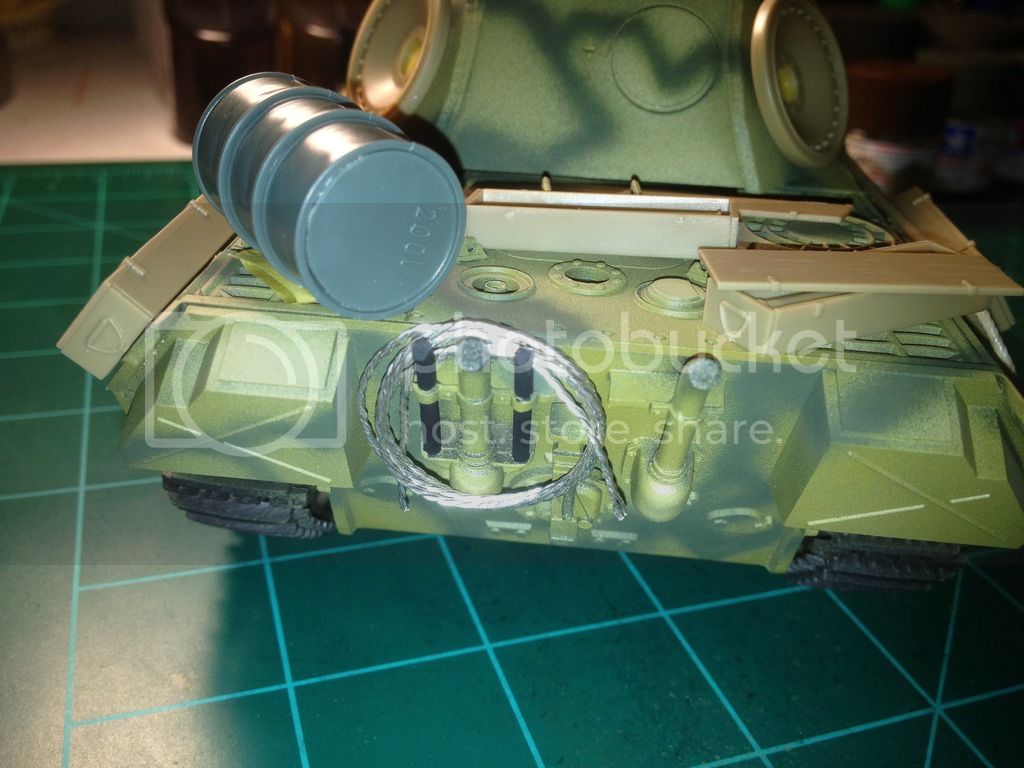
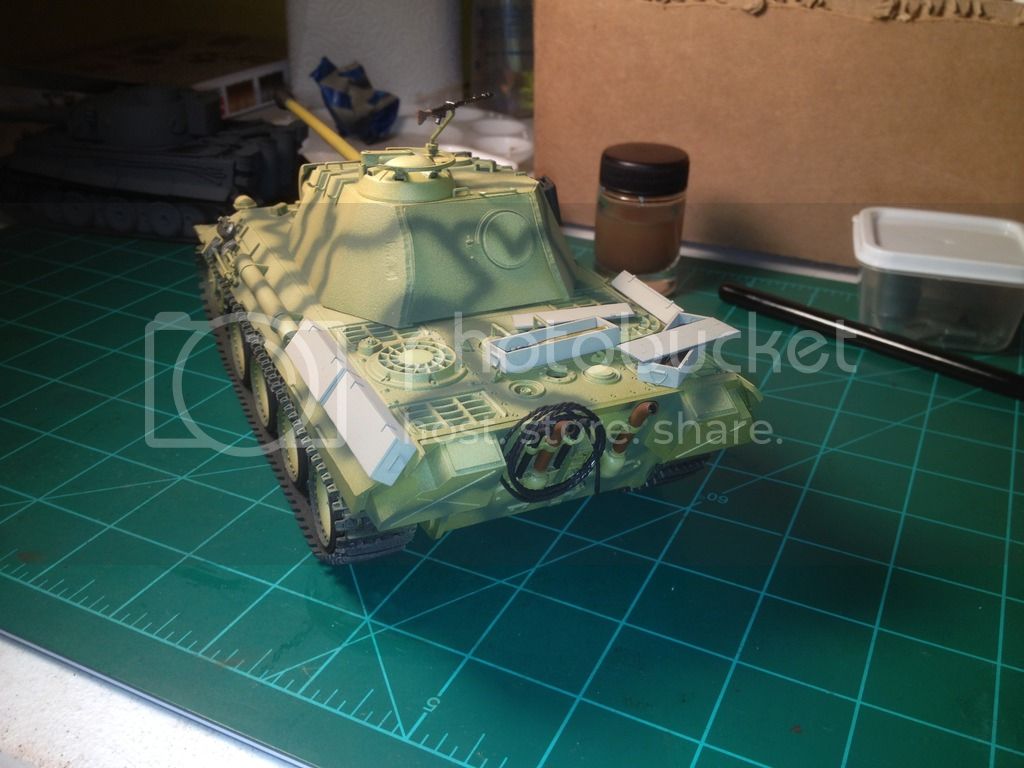
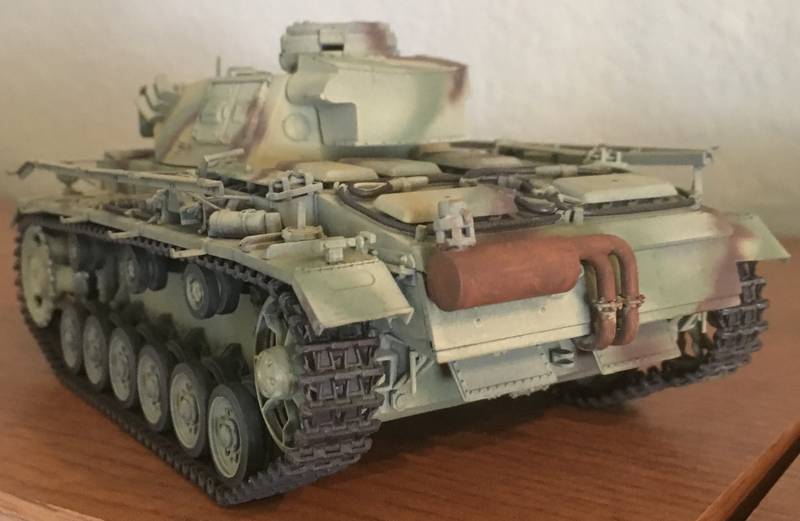
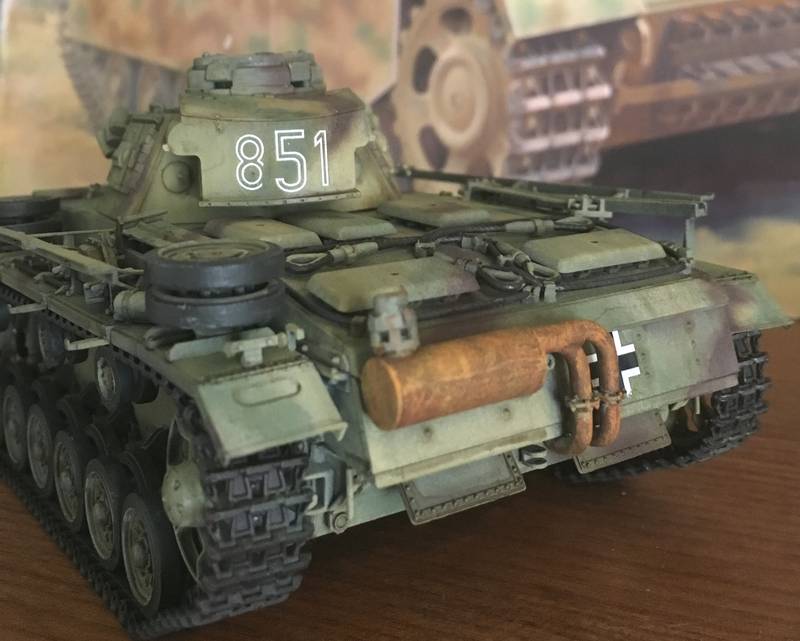
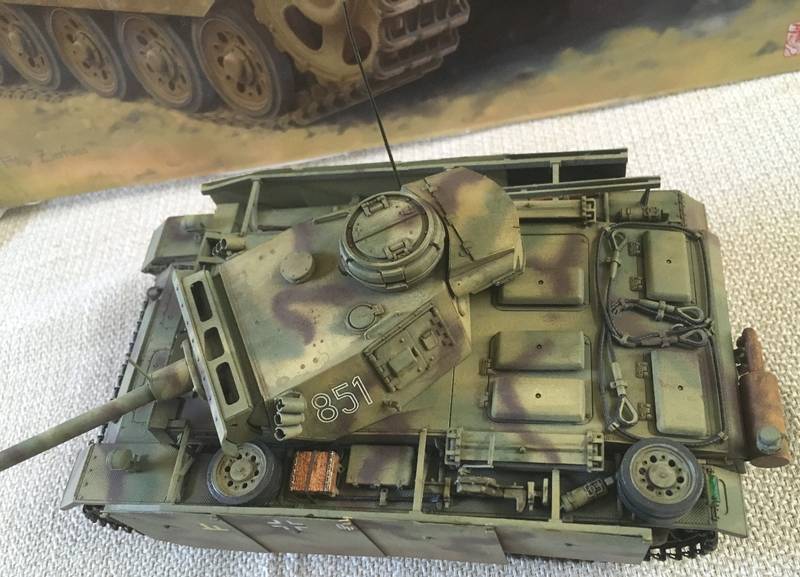
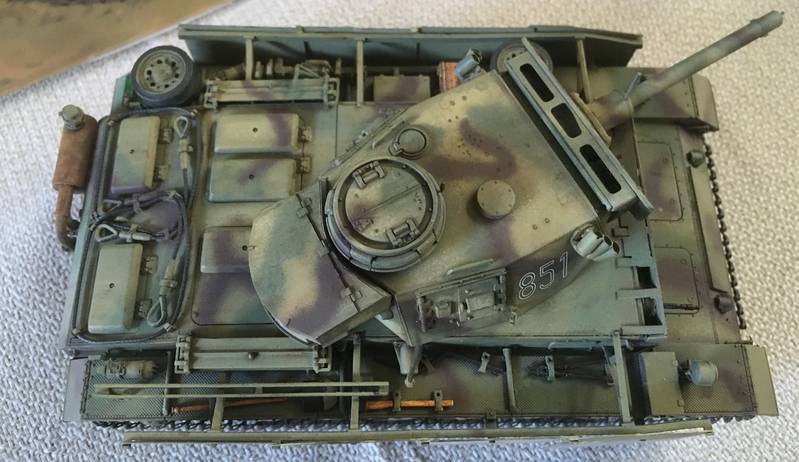
On mine I did the pin wash and dot filter. Next some dirt and dust and I'll be ready to put on the shurtzen. Almost there.
the sub is amazing!
On mine I did the pin wash and dot filter. Next some dirt and dust and I'll be ready to put on the shurtzen. Almost there.

tatbaqui
#040

Joined: May 06, 2007
KitMaker: 2,713 posts
Armorama: 2,451 posts

Posted: Tuesday, March 29, 2016 - 02:18 AM UTC
Very nice Guy, I especially like your shade of the exhaust / muffler.
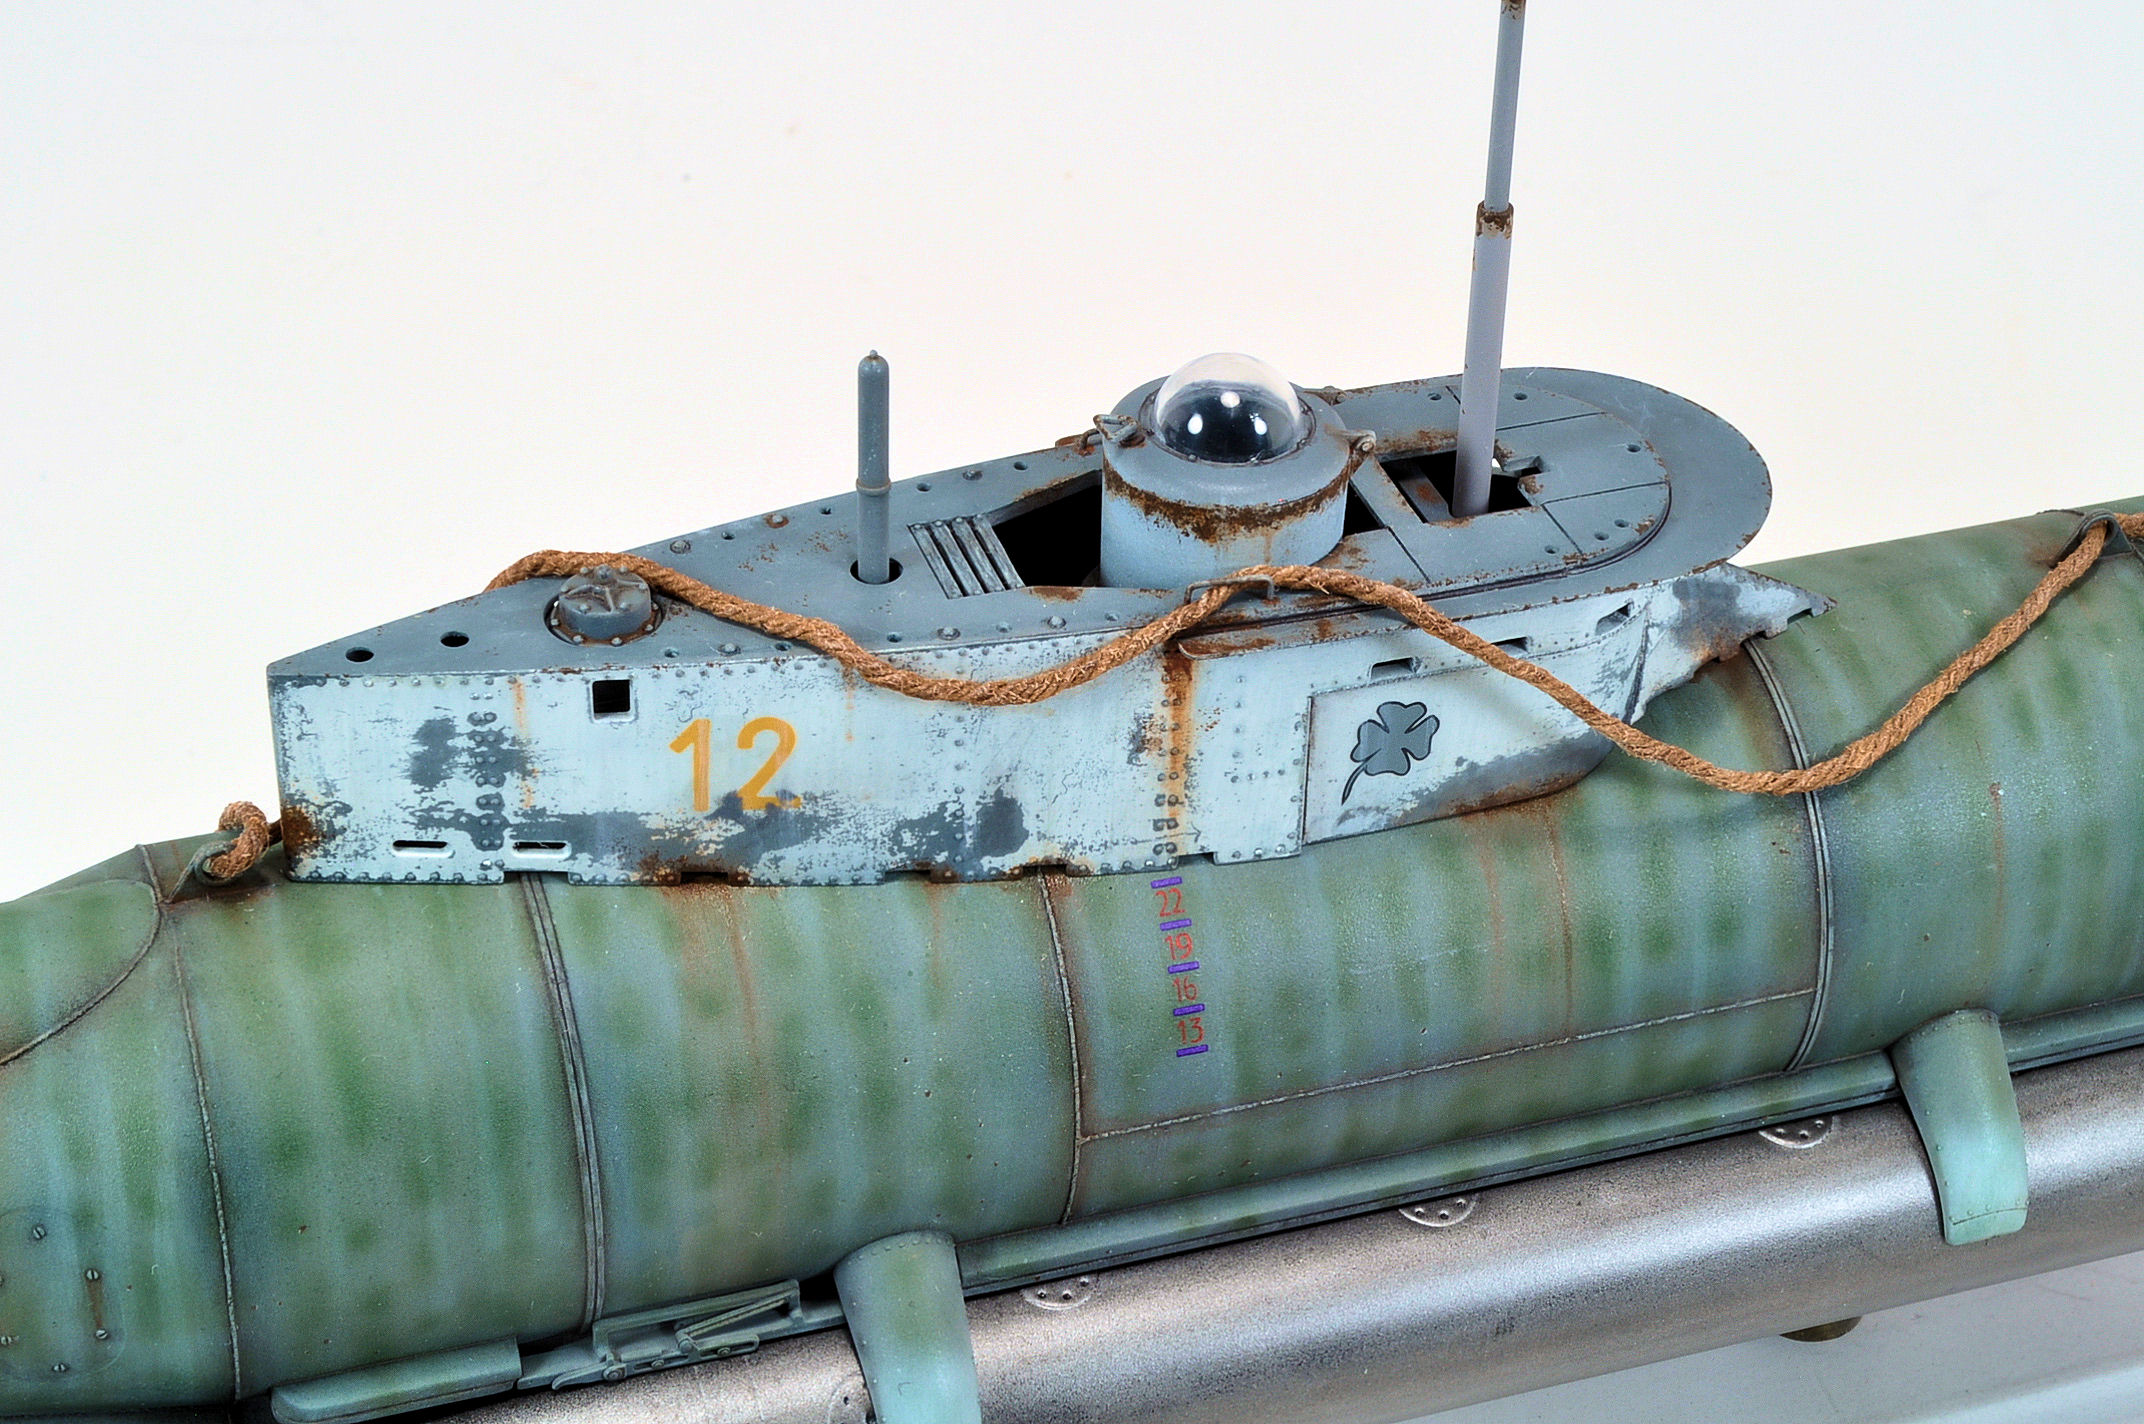
Awesome weathering on the sub John -- is that the Bronco kit? Makes me want to go and start on mine.
Cheers,
Tat
Awesome weathering on the sub John -- is that the Bronco kit? Makes me want to go and start on mine.
Cheers,
Tat
Charlie-66
#186
Joined: May 24, 2006
KitMaker: 771 posts
Armorama: 750 posts
Posted: Tuesday, March 29, 2016 - 03:25 AM UTC
Quoted Text
Very nice Guy, I especially like your shade of the exhaust / muffler.
Awesome weathering on the sub John -- is that the Bronco kit? Makes me want to go and start on mine.
Cheers,
Tat
thanks Tat!
Charlie-66
#186
Joined: May 24, 2006
KitMaker: 771 posts
Armorama: 750 posts
Posted: Wednesday, March 30, 2016 - 03:22 AM UTC
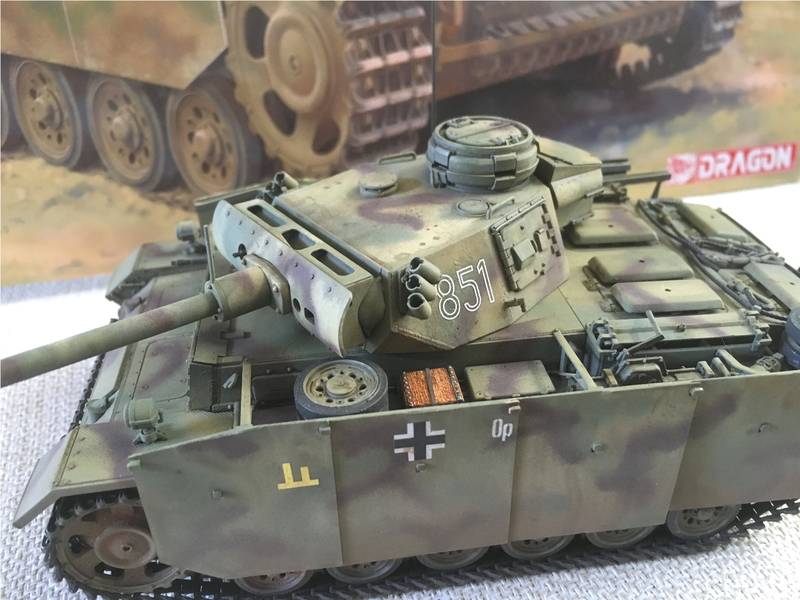
ok fellas, calling this one done. Glad to have this campaign to help me get motivated to finish this. Anxious to see the rest of you guys get across the finish line.

Namabiiru
#399
Joined: March 05, 2014
KitMaker: 2,888 posts
Armorama: 1,920 posts

Posted: Friday, April 01, 2016 - 01:49 AM UTC
Here's my entry:

Academy M3 Lee with all the trimmings, including full Eduard "Big E" PE set, Resin radio and rear exhaust, Bronco Tracks, etc. The tracks alone are 5 tiny pieces per link, 80 links per run, two runs, so hours of fun for the whole family. Originally started this for last year's whole hog campaign, but an unexpected move killed that attempt.
Hull interior is done and exterior ready for paint. Need to get cracking on the turret and the second run of tracks.

MLD
Joined: July 21, 2002
KitMaker: 3,569 posts
Armorama: 2,070 posts
Posted: Sunday, April 03, 2016 - 07:11 AM UTC
Something within striking distance, if not a 'contest worthy' build.
Dml's ancient 1/35 BMP 1 with an SP designs turret.
At this point I am playing around with my paint weathering finishing techniques.
An overall shot of the hull and the turret. There should have been some paint modualtion here, but I obviouslly did not go for enough contrast with the coats.

The turret is base painted, highlighted, and filtered.

The commanders and drivers hatch area has a dark wash stumped in and two tone chips added in a too jade mix of green and lt grey (next time sand and green) with the Vallejo black grey and SS cammo dk brown chips.

The front hull has lt grey dust enamel weathering applied to a thinner wet hull and stippled with a bit of sponge, then stumped back.

The rear hull roof has dust pigment worked into the paint and then scrubbed into the crevices with thinner.

But the angle is too high on this picture and the effect is lost.
Mike

DaGreatQueeg

Joined: August 01, 2005
KitMaker: 1,049 posts
Armorama: 841 posts

Posted: Sunday, April 03, 2016 - 08:11 AM UTC
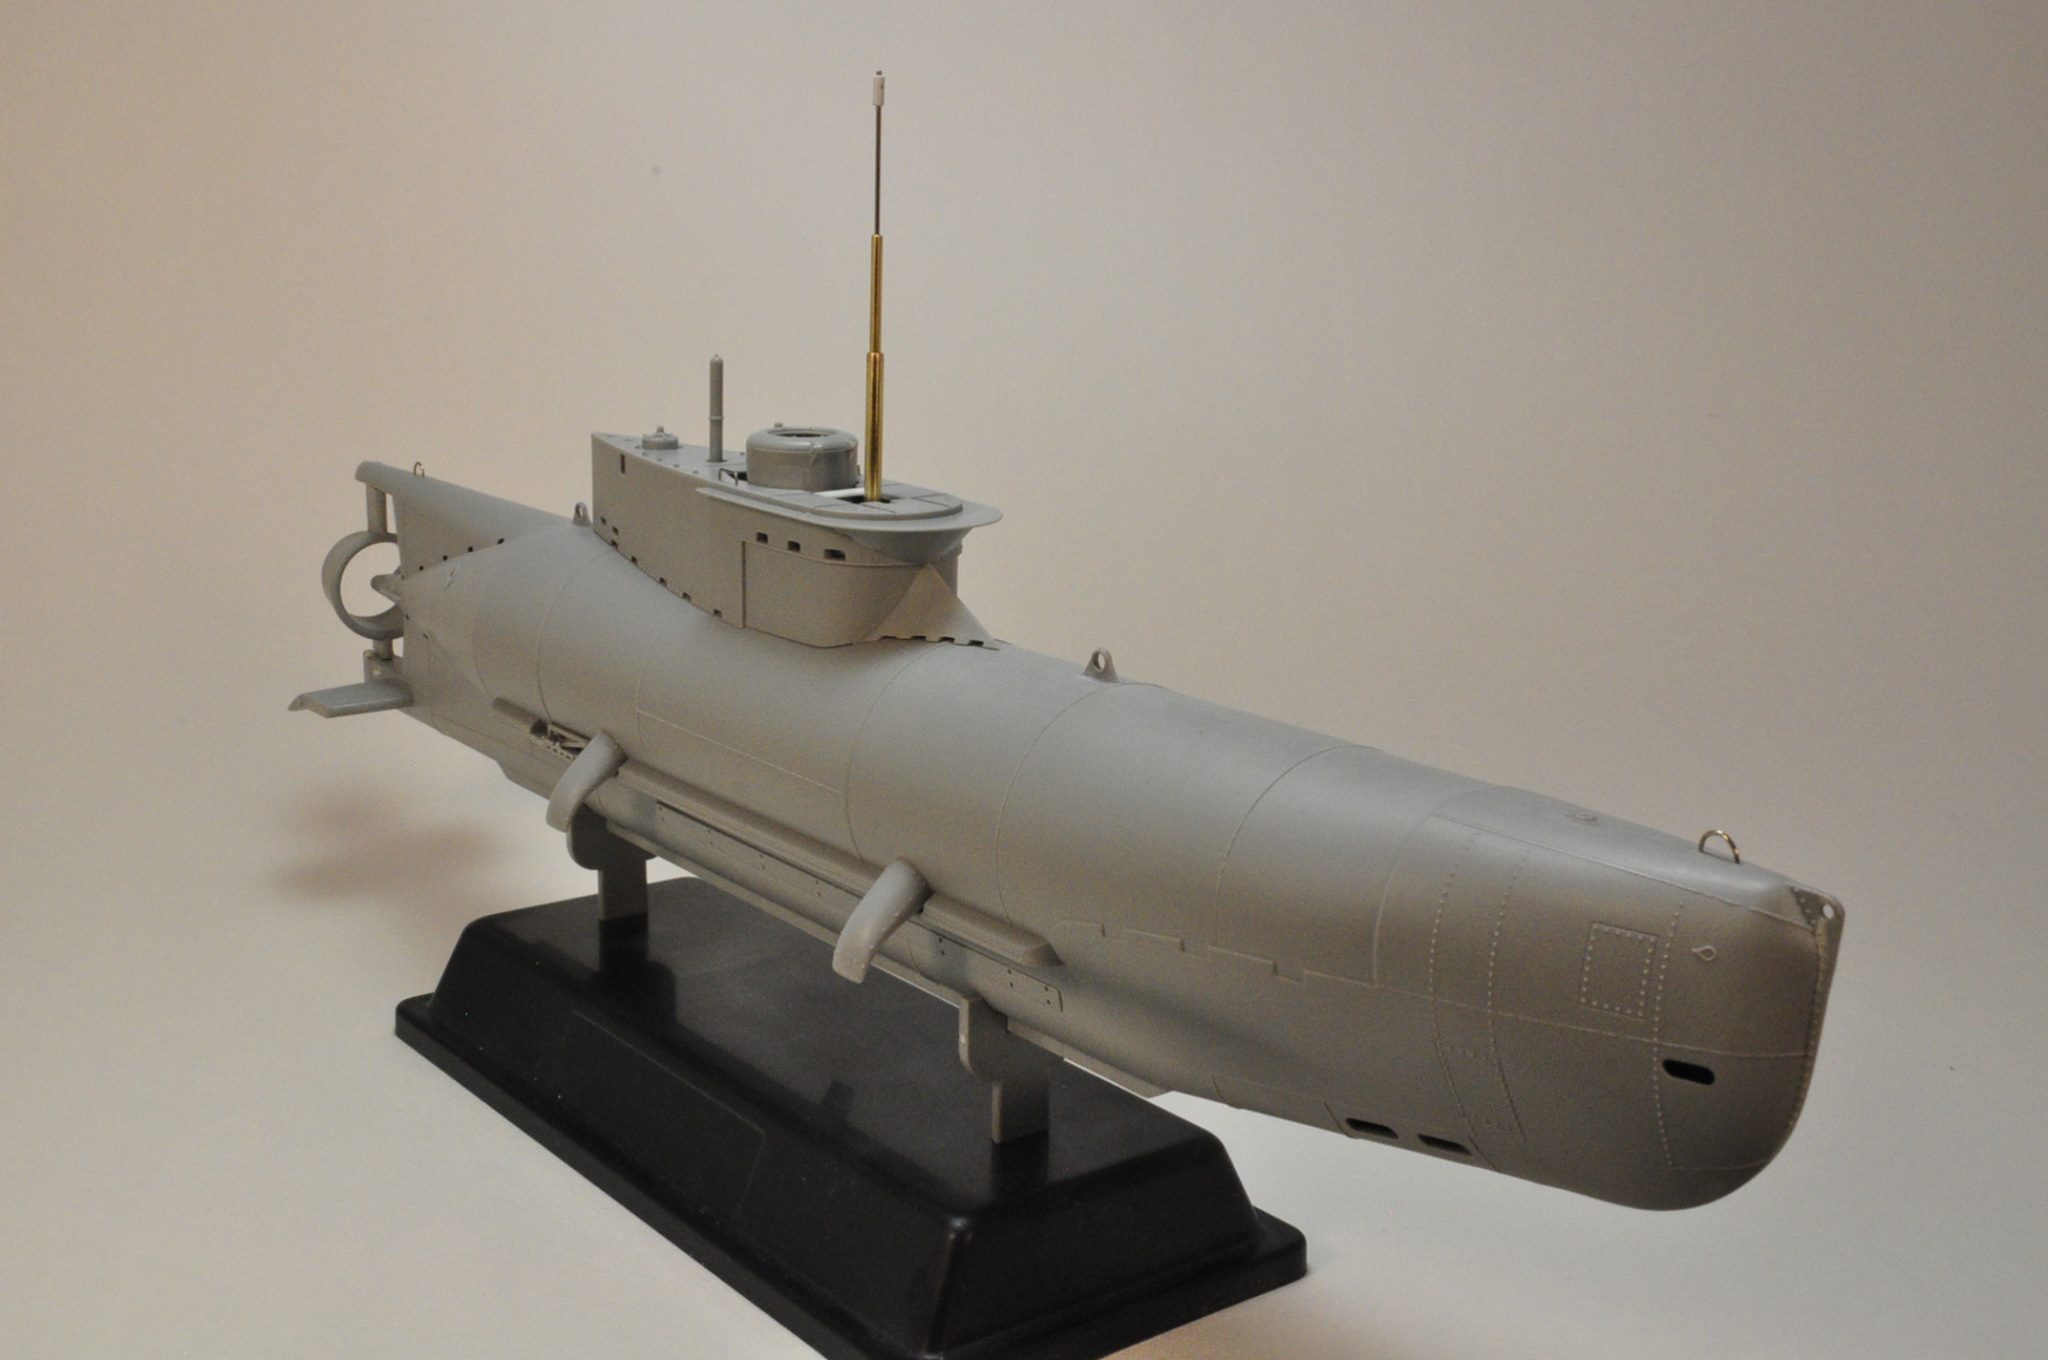
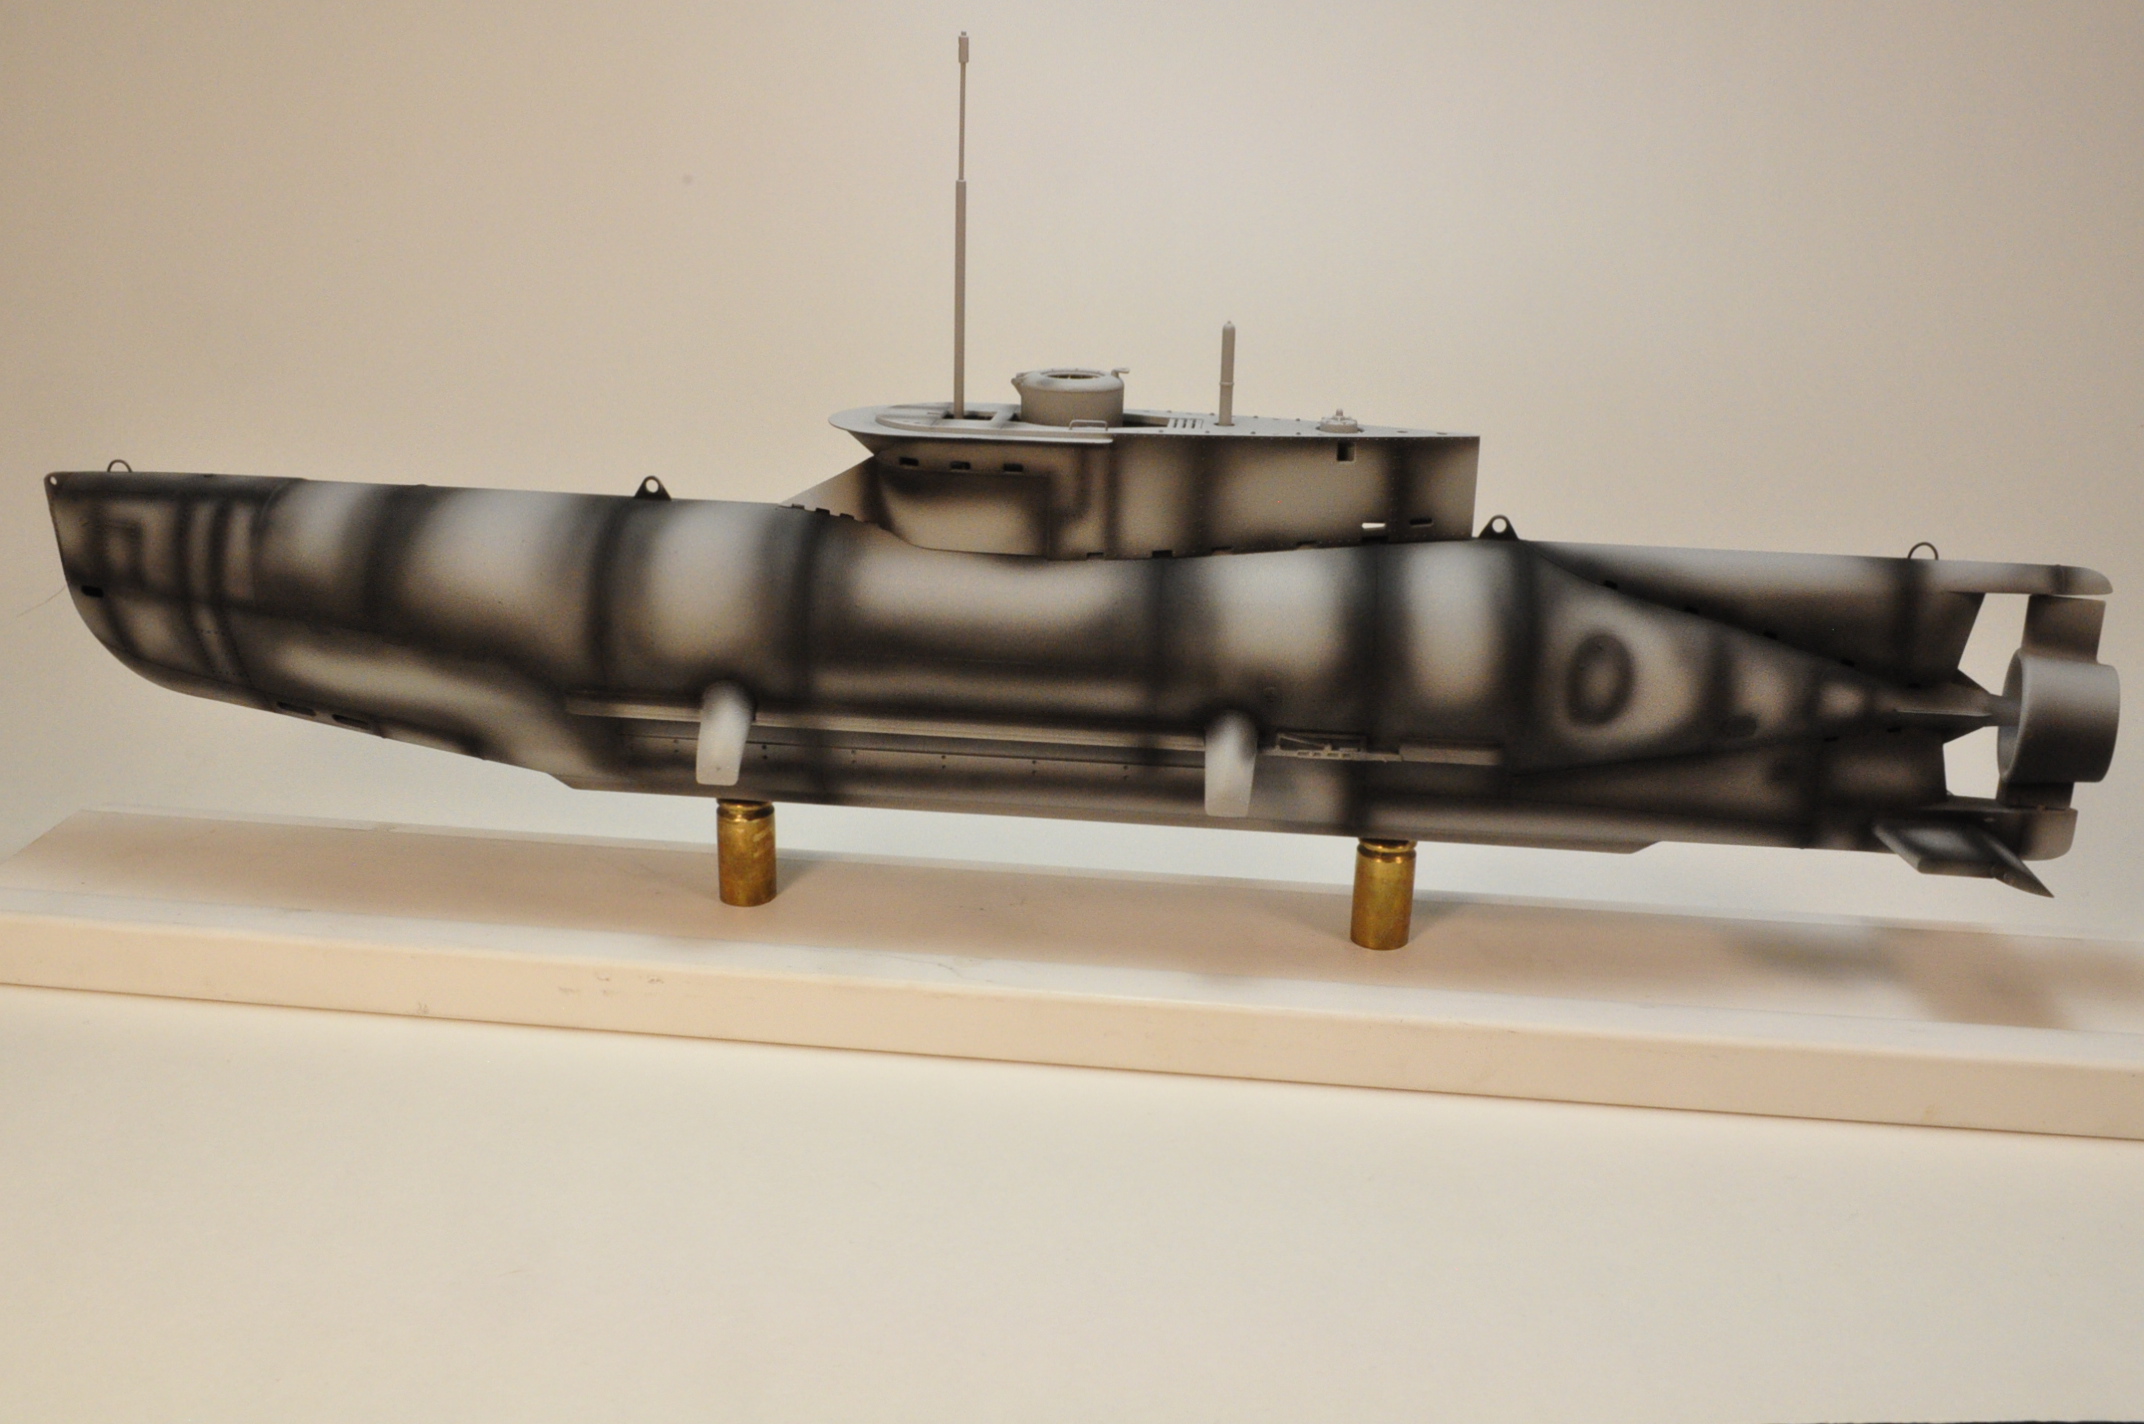
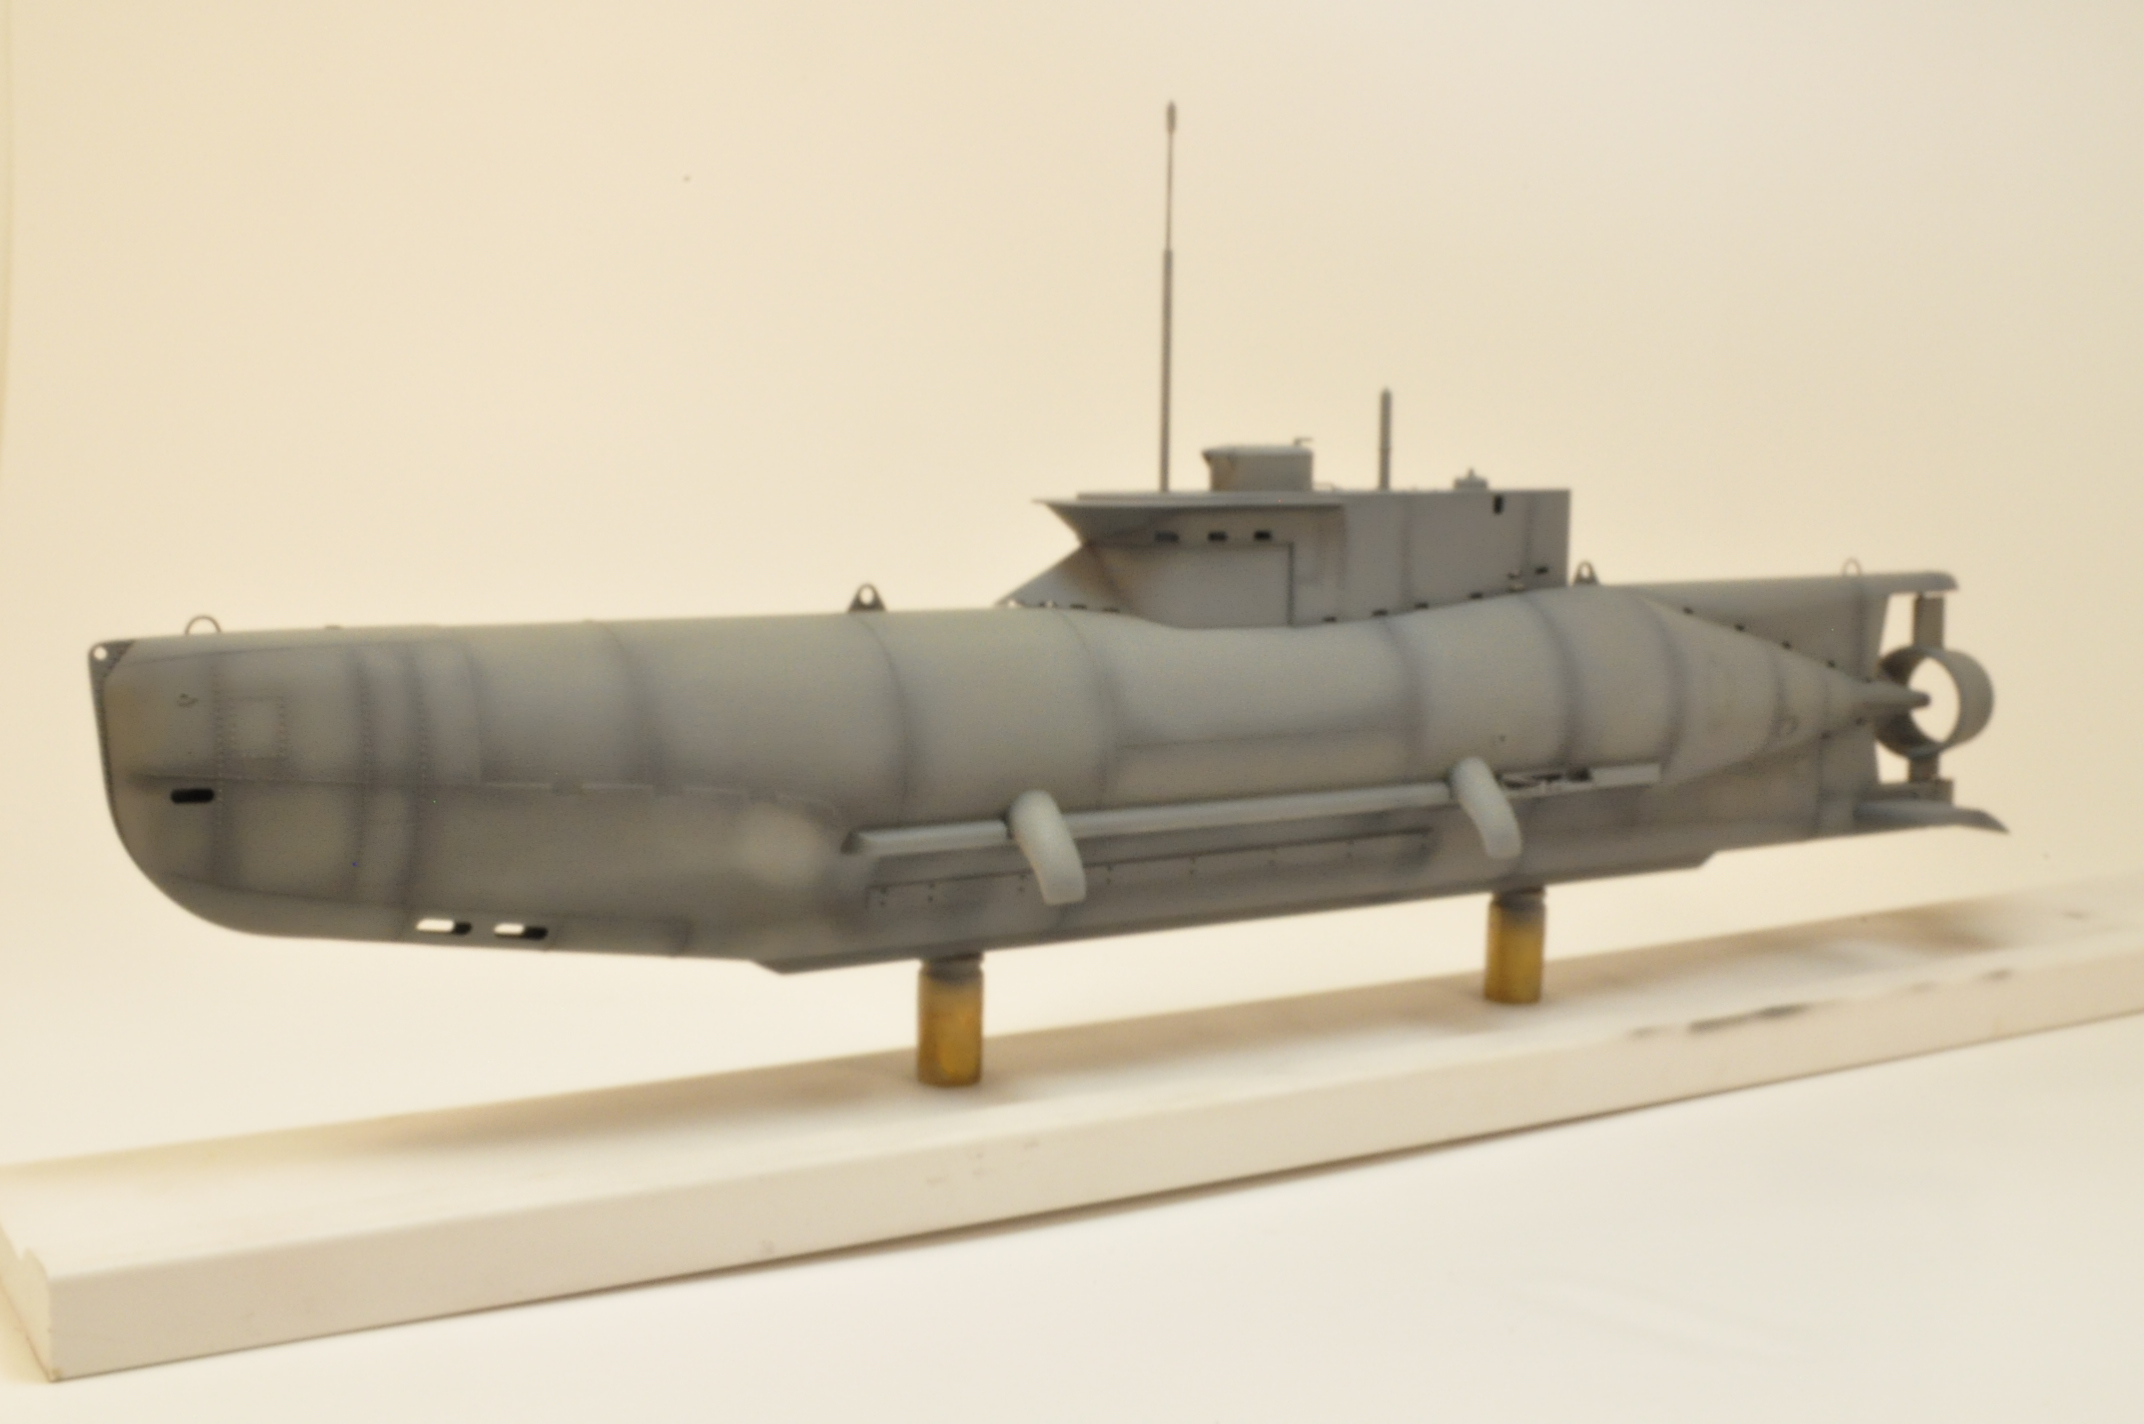
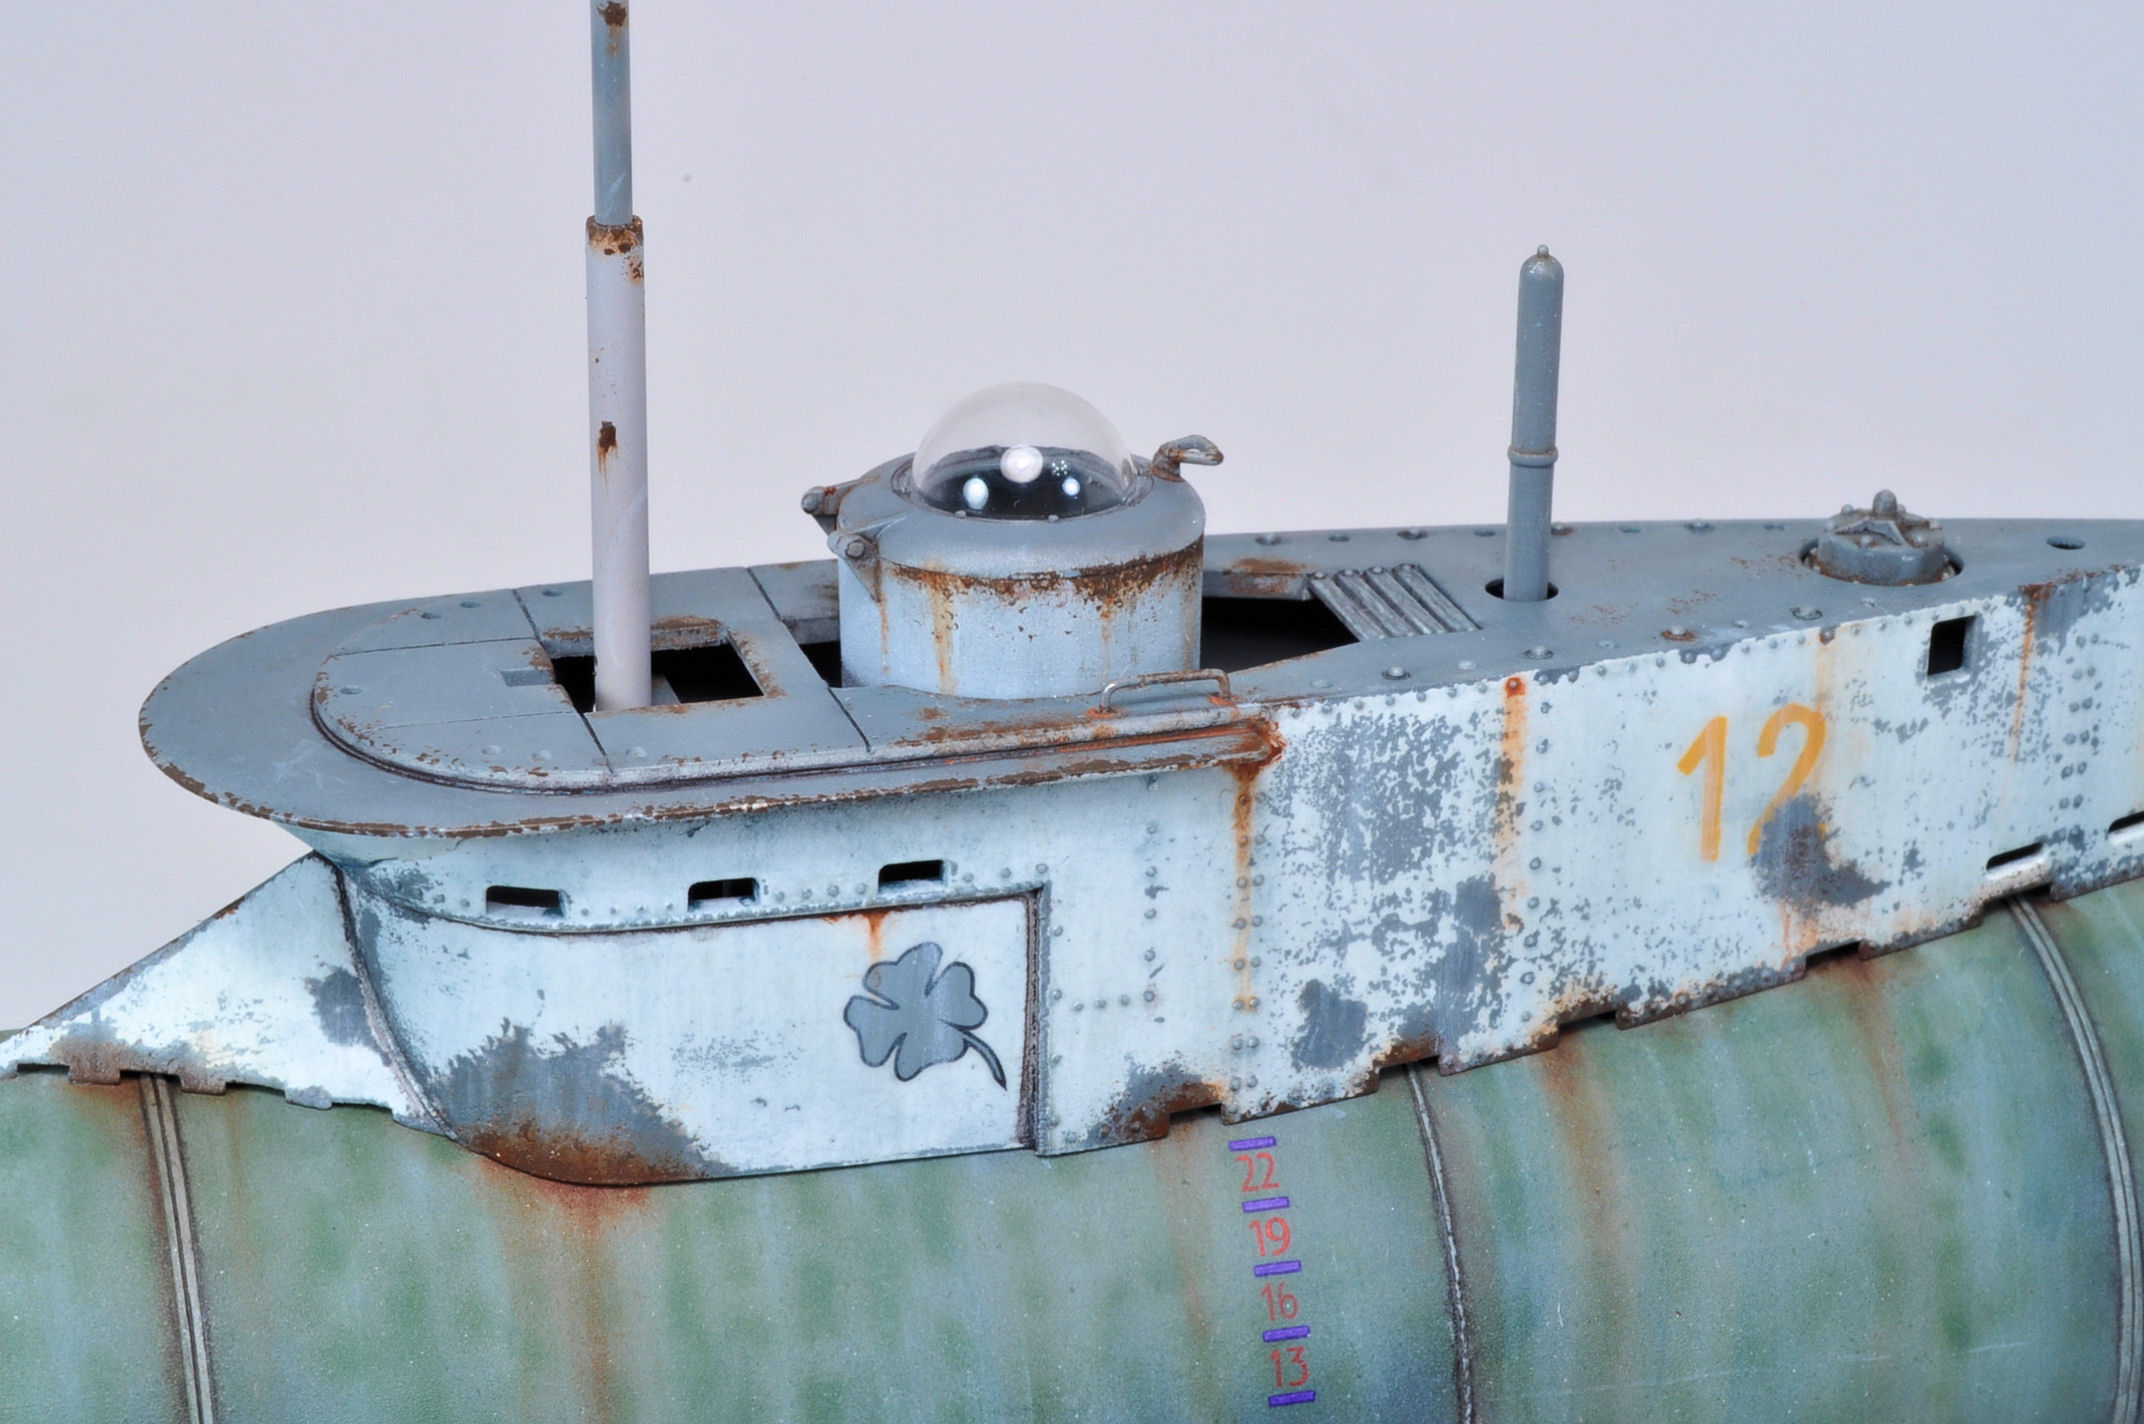
Some really nice work going in the campaign, especially like the Seehund John!
And I'm heading towards the finish line with my 28mm Bolt Action stuff, wips back on page 2 or so I think.
Most of it is at the final stages of weathering so a couple of weeks should wrap it up at last.
cheers
Brent


And I'm heading towards the finish line with my 28mm Bolt Action stuff, wips back on page 2 or so I think.
Most of it is at the final stages of weathering so a couple of weeks should wrap it up at last.
cheers
Brent


MLD
Joined: July 21, 2002
KitMaker: 3,569 posts
Armorama: 2,070 posts
Posted: Sunday, April 03, 2016 - 08:47 AM UTC
Brent, I think I asked before, but I can't remember and can't seem to find it. What manufacturers paint and which shade of green are you using for the cammo there. It looks amazing.
DaGreatQueeg
Joined: August 01, 2005
KitMaker: 1,049 posts
Armorama: 841 posts
Posted: Sunday, April 03, 2016 - 08:59 AM UTC
Quoted Text
Brent, I think I asked before, but I can't remember and can't seem to find it. What manufacturers paint and which shade of green are you using for the cammo there. It looks amazing.
Thanks Mike,
The camo is all GW acrylics, all are hand mixed unfortunately to get the shade variations. The base paint is Catachan Green with various other greens and yellows blended in. Have a shifty at my blog and it should give you a better look at the process and feel free to ask if anything isn't covered there ...
cheers
Brent
https://houseofqueeg.wordpress.com/
Sticky
Joined: September 14, 2004
KitMaker: 2,220 posts
Armorama: 1,707 posts
Posted: Sunday, April 03, 2016 - 05:36 PM UTC
Kewl stuff all.
Brent 28mm Amazing!
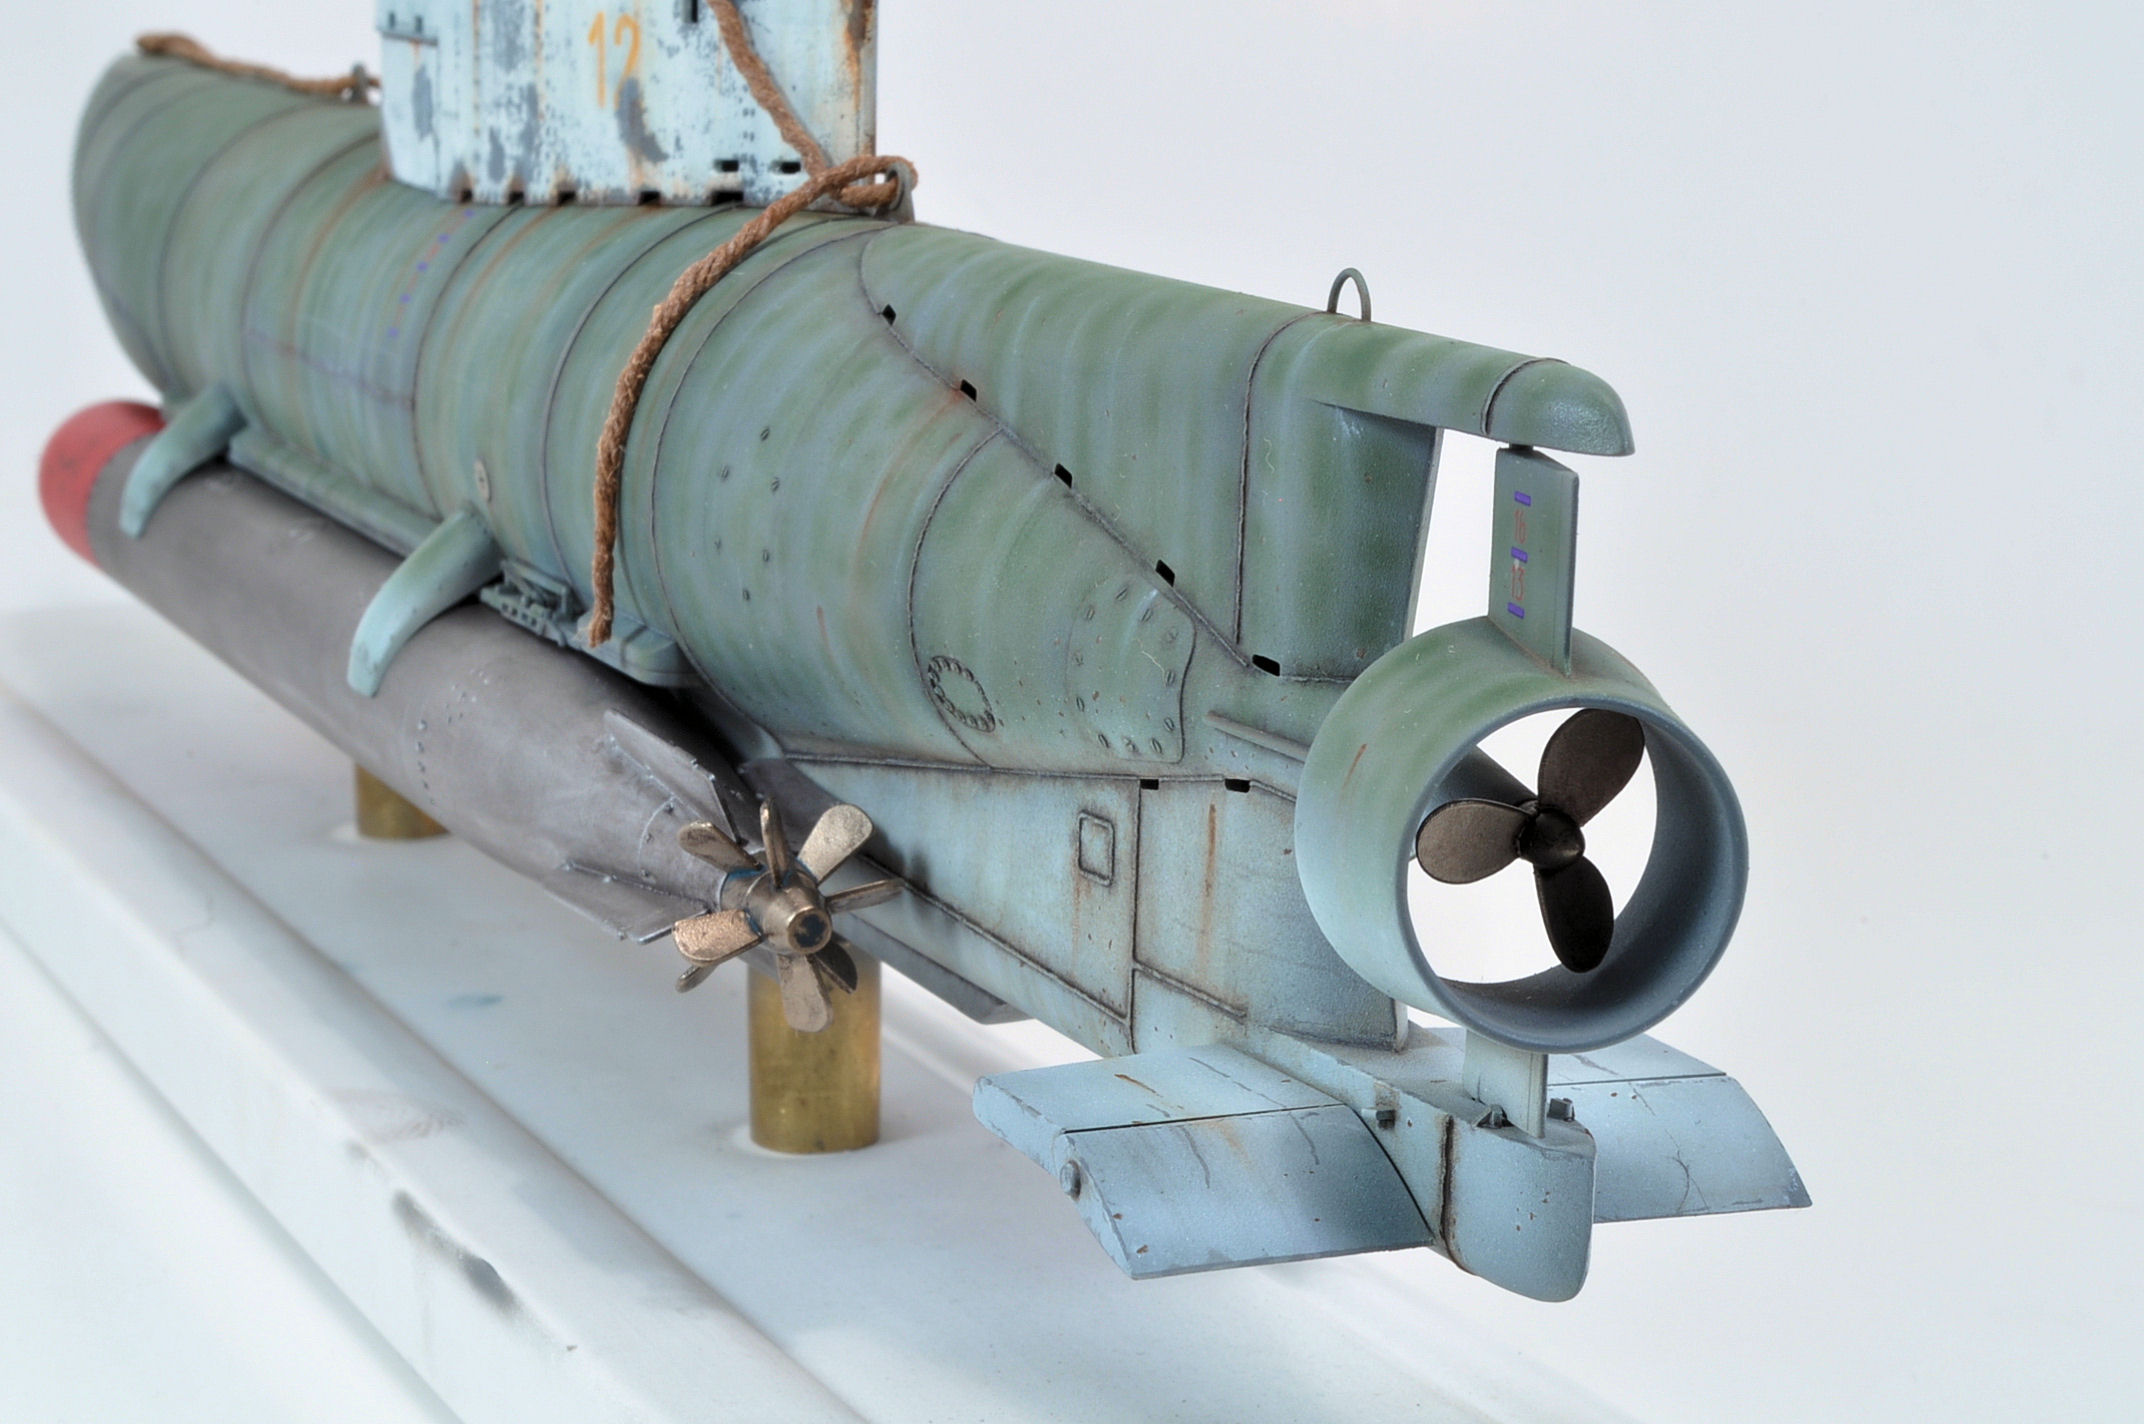
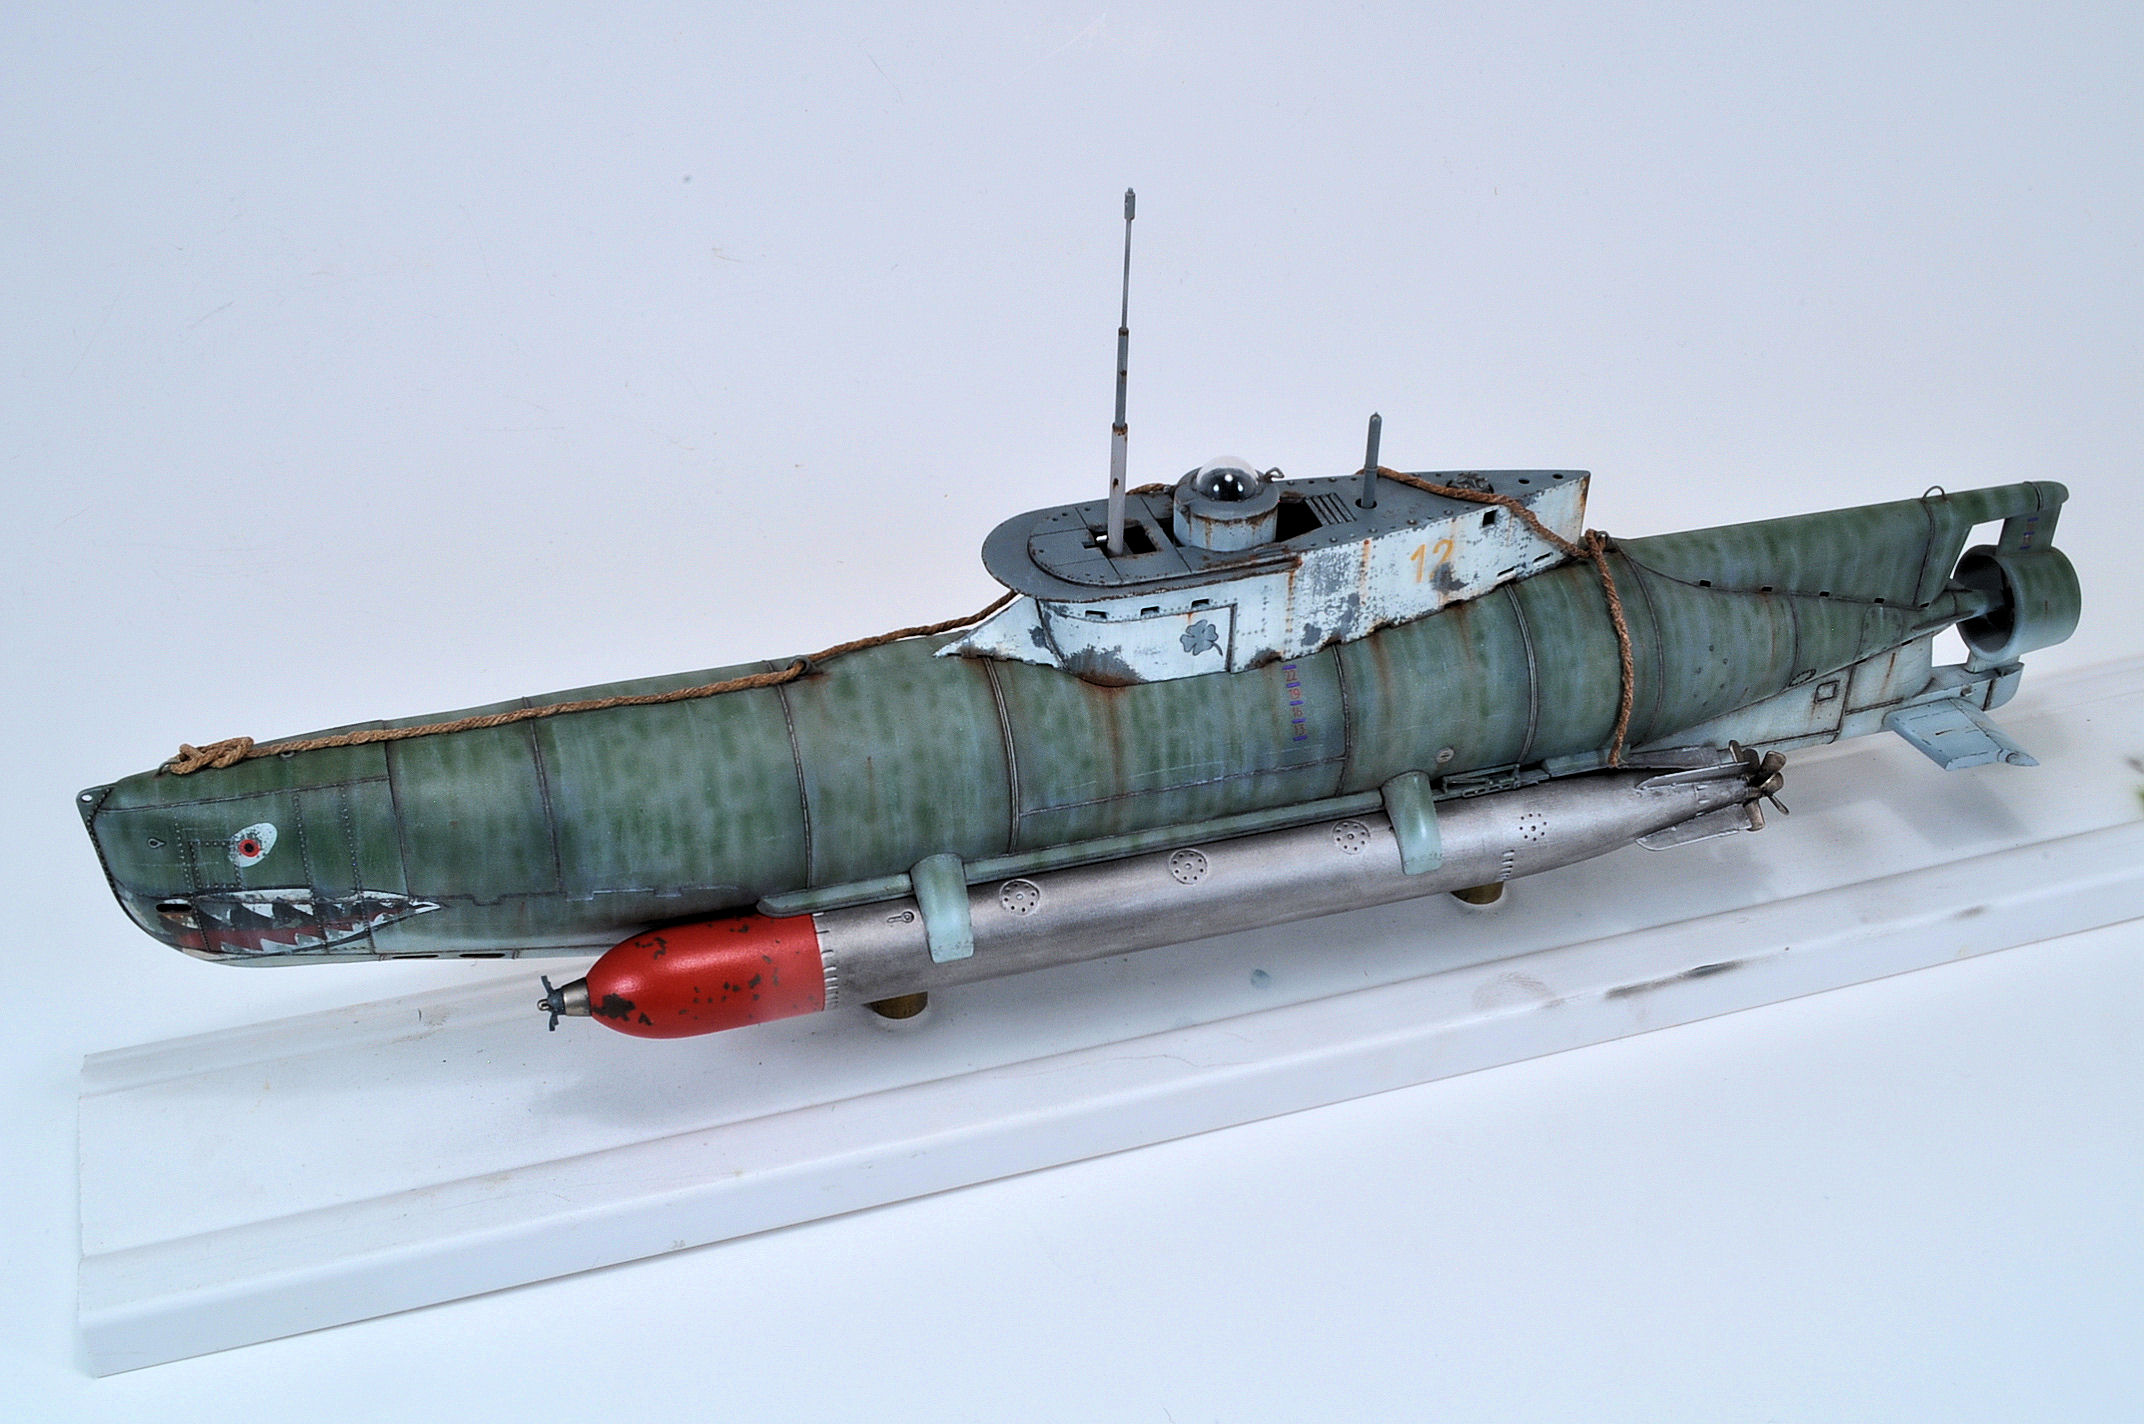
Thanks all who commented, and yes it's the 1/35 Bronco Seehund.
Brent 28mm Amazing!
Thanks all who commented, and yes it's the 1/35 Bronco Seehund.
MLD
Joined: July 21, 2002
KitMaker: 3,569 posts
Armorama: 2,070 posts
Posted: Tuesday, April 05, 2016 - 07:35 AM UTC
Still left the section near the hatches undusted for contrast. Not sure I really like the metallic pigment on the front hull ribs, but am still need to do more mud/dust.


tatbaqui
#040
Joined: May 06, 2007
KitMaker: 2,713 posts
Armorama: 2,451 posts
Posted: Thursday, April 07, 2016 - 04:42 AM UTC
Quoted Text
Still left the section near the hatches undusted for contrast. Not sure I really like the metallic pigment on the front hull ribs, but am still need to do more mud/dust.
Looking good from where I'm sitting Mike, metallic pigment included!
Anmoga

Joined: November 18, 2004
KitMaker: 456 posts
Armorama: 333 posts
Posted: Saturday, April 09, 2016 - 12:21 AM UTC
Hi guys,
My submission for the campaign will be the ancient Tamiya's Tiger I which I will use to improve my painting skills.


I will use oils, pigments and other methods for the first time.
Best regards,
Angel
My submission for the campaign will be the ancient Tamiya's Tiger I which I will use to improve my painting skills.
I will use oils, pigments and other methods for the first time.
Best regards,
Angel
DaGreatQueeg
Joined: August 01, 2005
KitMaker: 1,049 posts
Armorama: 841 posts
Posted: Saturday, April 09, 2016 - 01:27 AM UTC
Quoted Text
Hi guys,
My submission for the campaign will be the ancient Tamiya's Tiger I which I will use to improve my painting skills.
I will use oils, pigments and other methods for the first time.
Best regards,
Angel
Hey Angel, nothing wrong with and old kit cleanly built and finished, good to see!
cheers
Brent
Petro
Joined: November 02, 2003
KitMaker: 984 posts
Armorama: 846 posts
Posted: Monday, April 11, 2016 - 06:35 AM UTC
My current progress. Rear deck and cab assembled. Thought i would break peices trying to get the deck in position on the frame, but it worked out.
I did break off both headlights though, when assembling the engine compartment sides. Should have know better really. 
I messed up the windshield. First, i should have looked at the directions better, as they do give you some masks for painting. I tried to make my own and scratched the windshield. I also didn't pay enough attention to my references. So i painted the two part, driver's windshield incorrectly, then really messed it up trying to remove the paint. So now i need to scratch build one or print up an aerial recognition flag to drape on that section. Lol
I did break off both headlights though, when assembling the engine compartment sides.
Should have know better really. I messed up the windshield. First, i should have looked at the directions better, as they do give you some masks for painting. I tried to make my own and scratched the windshield. I also didn't pay enough attention to my references. So i painted the two part, driver's windshield incorrectly, then really messed it up trying to remove the paint. So now i need to scratch build one or print up an aerial recognition flag to drape on that section. Lol

Hudson29
#460
Joined: September 16, 2014
KitMaker: 1,156 posts
Armorama: 1,024 posts
Posted: Wednesday, April 13, 2016 - 11:47 PM UTC
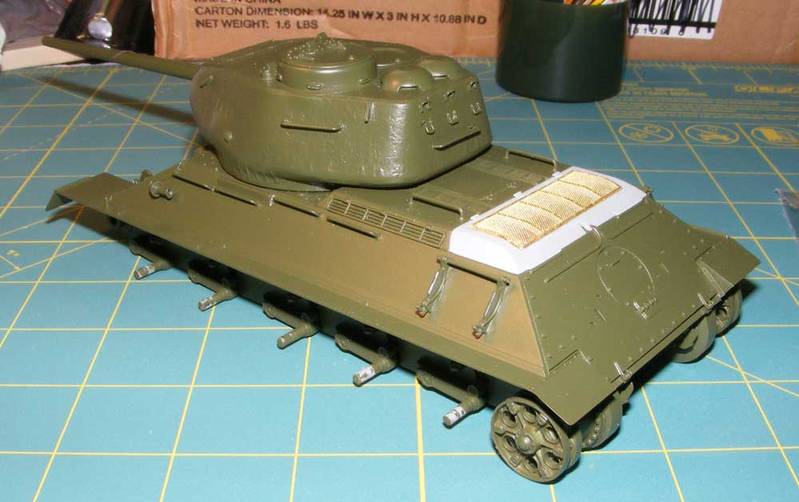
What a nice selection of stalled projects! I too have several of these and have selected one of the to drop kick to completion. The kit is the CyberHobby version of the Dragon T-34/85, 1944 version. I am building it as a Korean War version and that has been the source of a number of the delays.
Information on the Korean War use of the T-34s is hard to come by. There are no decal sets that I could find and most of the photos are either small grainy propaganda shots or pictures of burned out wrecks.
I finally "settled" for a set of numbers from a Soviet T-34 set from Archer Fine Transfers. While not perfect, they look pretty good.
Next was a set of Model Kasten tracks. These are all plastic and turned out to be good looking but very fragile. I ended up drilling and pinning more than a dozen links with surplus Fruil wire.

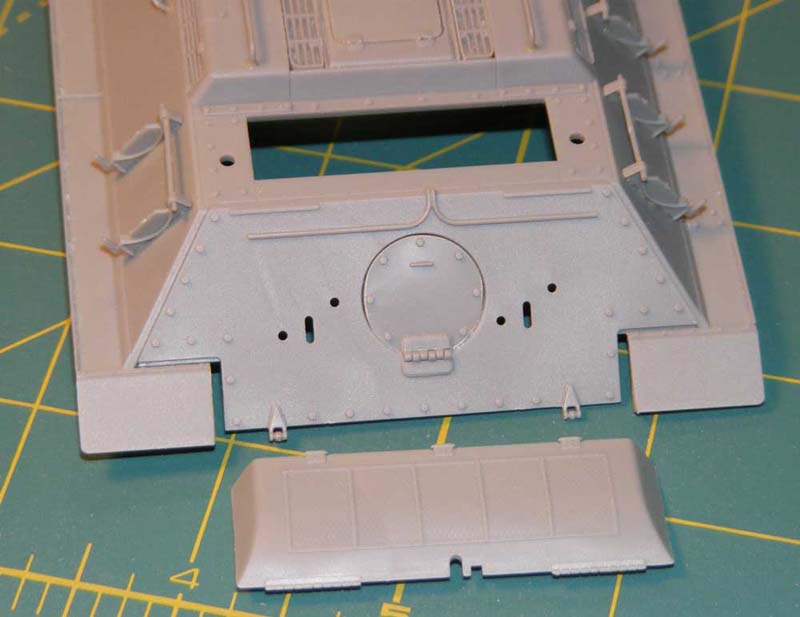
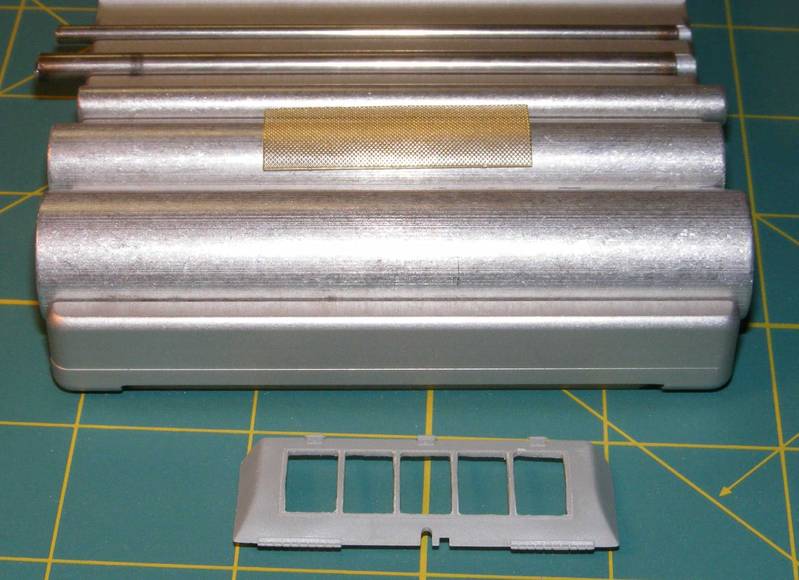
This kit contained no PE and I thought I would try upgrading the look with an AM set. The kit rear cover needed to be modified by removing the plastic screen. This turned out to be a laborious project.

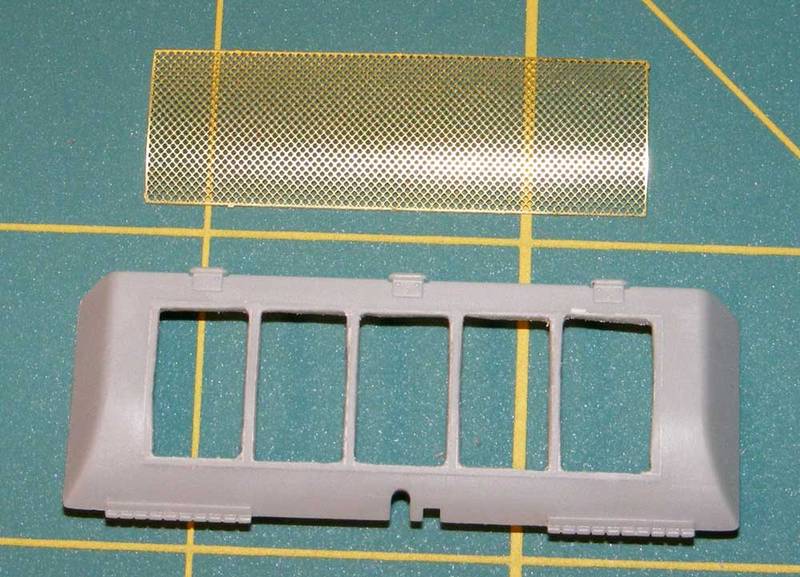
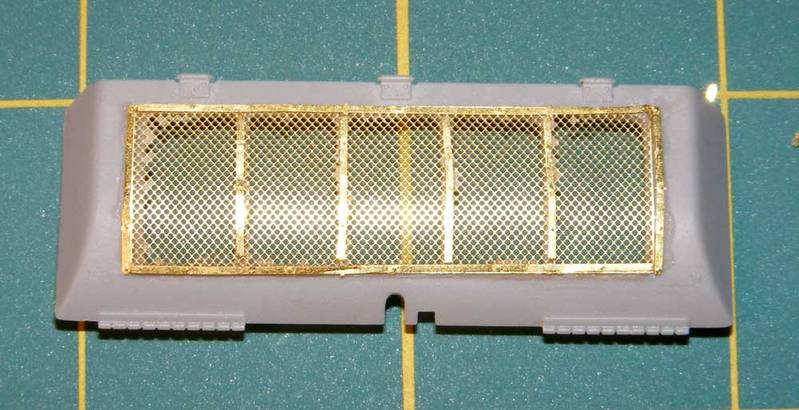
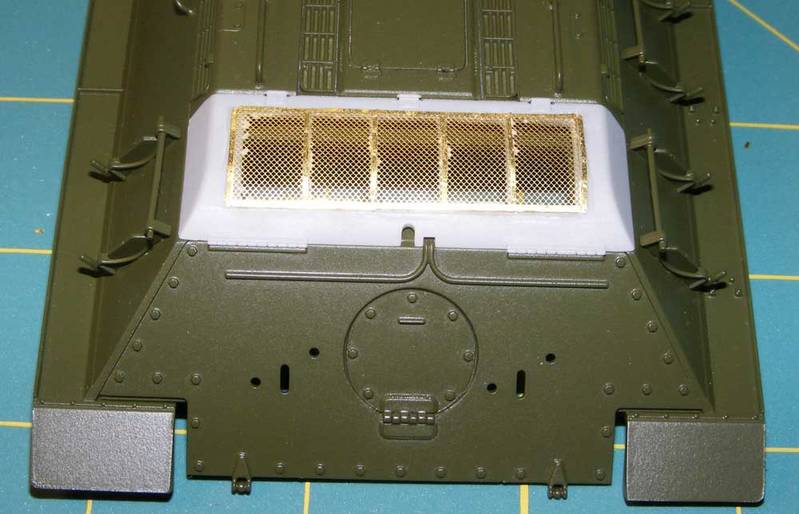
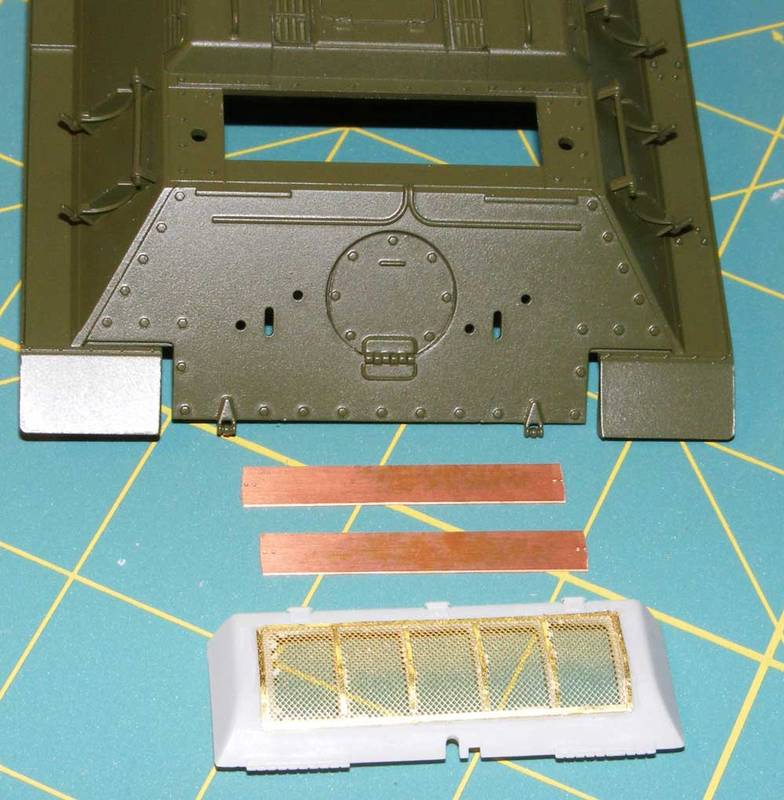
This was my first try of PE and it does look better than the kit part did.
Every step seemed to result in a delay and the headlight was no exception. There are no clear parts in this kit so I started looking for something to replace the solid kit part. Finally I found some jewel like lenses with a silver reflector.
After another delay this project was pushed along toward completion. washes and weathering was applied and I started on the pigments but decided I didn't like the look and stopped, hoping for inspiration to happen like a light bulb going on. That hasn't happened yet.
I was trying for a silty yellowish dust as shown in some of the pictures. My light dust seemed to have taken over and washed out everything else. This is how the T-34 looks now:
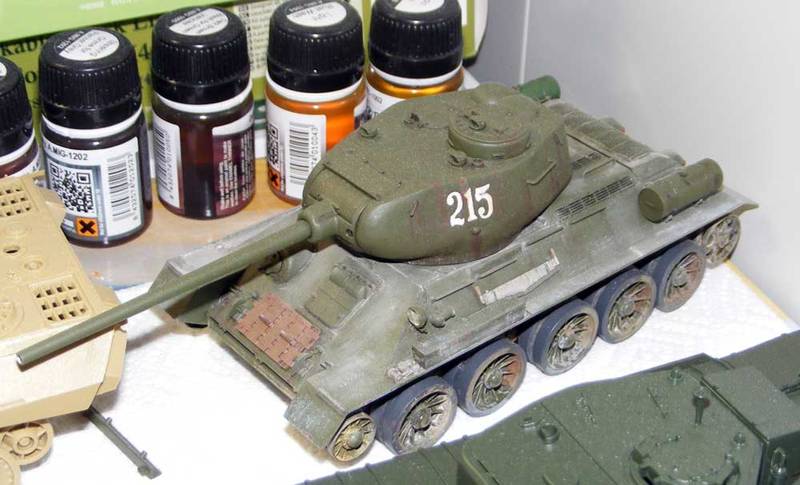
I had some thoughts of trying to remove some of the pigment with a wet Q-Tip. Will this work?
Information on the Korean War use of the T-34s is hard to come by. There are no decal sets that I could find and most of the photos are either small grainy propaganda shots or pictures of burned out wrecks.
I finally "settled" for a set of numbers from a Soviet T-34 set from Archer Fine Transfers. While not perfect, they look pretty good.
Next was a set of Model Kasten tracks. These are all plastic and turned out to be good looking but very fragile. I ended up drilling and pinning more than a dozen links with surplus Fruil wire.
This kit contained no PE and I thought I would try upgrading the look with an AM set. The kit rear cover needed to be modified by removing the plastic screen. This turned out to be a laborious project.
This was my first try of PE and it does look better than the kit part did.
Every step seemed to result in a delay and the headlight was no exception. There are no clear parts in this kit so I started looking for something to replace the solid kit part. Finally I found some jewel like lenses with a silver reflector.
After another delay this project was pushed along toward completion. washes and weathering was applied and I started on the pigments but decided I didn't like the look and stopped, hoping for inspiration to happen like a light bulb going on. That hasn't happened yet.
I was trying for a silty yellowish dust as shown in some of the pictures. My light dust seemed to have taken over and washed out everything else. This is how the T-34 looks now:
I had some thoughts of trying to remove some of the pigment with a wet Q-Tip. Will this work?
 |

WEB HOSTING BY


Copyright ©2021 Armorama and Kitmaker Network, a subsidiary of Silver Star Enterprises
All Rights Reserved. Please read our Conditions of Use and Privacy Policy.
All Rights Reserved. Please read our Conditions of Use and Privacy Policy.