Noord-Brabant, Netherlands
Joined: February 13, 2011
KitMaker: 322 posts
Armorama: 300 posts
Posted: Friday, July 15, 2016 - 09:57 PM UTC
The next update:
Tires, rust, chipping, waiting to get dry for dust.

This is the arsenal that I used


Me and my wife did together the rust with the oils


#041
Kobenhavn, Denmark
Joined: July 20, 2006
KitMaker: 10,069 posts
Armorama: 4,677 posts
Posted: Saturday, July 16, 2016 - 12:22 PM UTC
Nice job, Martin and wife

That is one beat up Hummer!
Campaign'oholic - 252+ campaigns completed
Vermont, United States
Joined: July 21, 2002
KitMaker: 3,569 posts
Armorama: 2,070 posts
Posted: Sunday, July 17, 2016 - 06:29 AM UTC
I think I had this one on progress in the last version of this campaign.
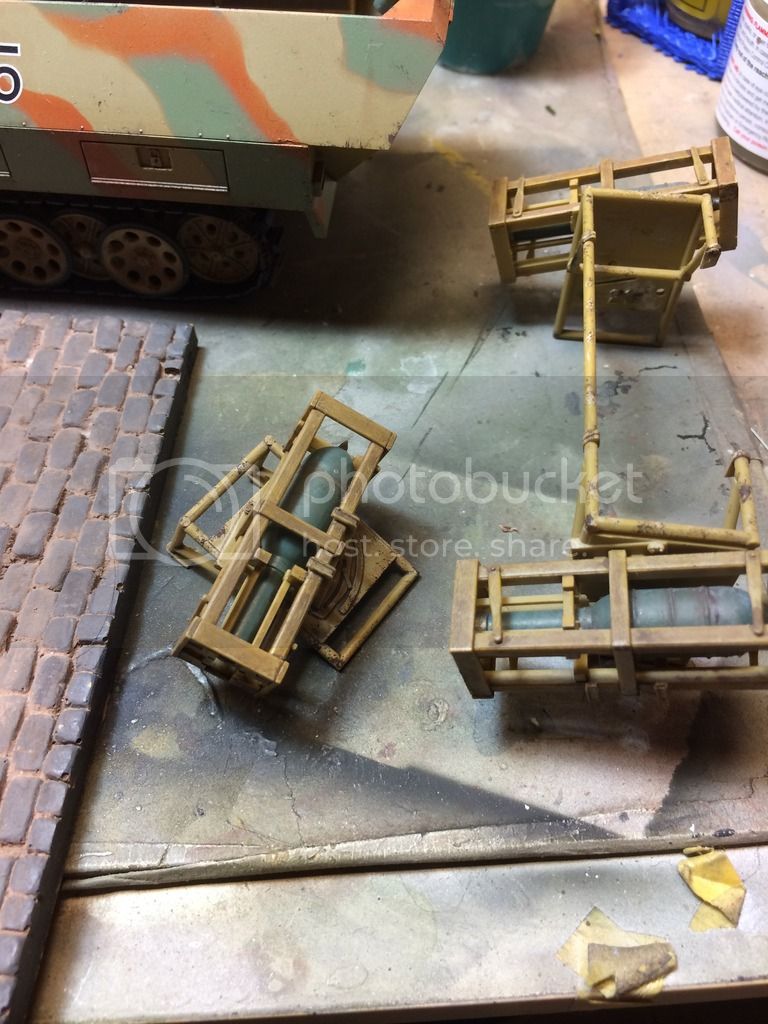
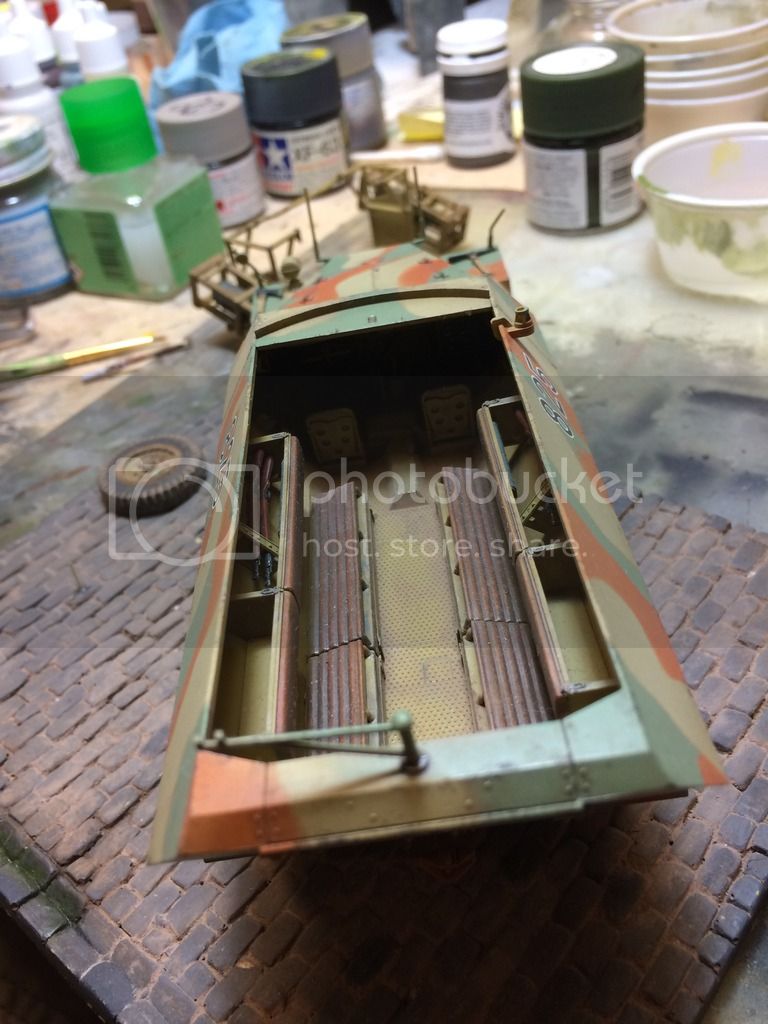
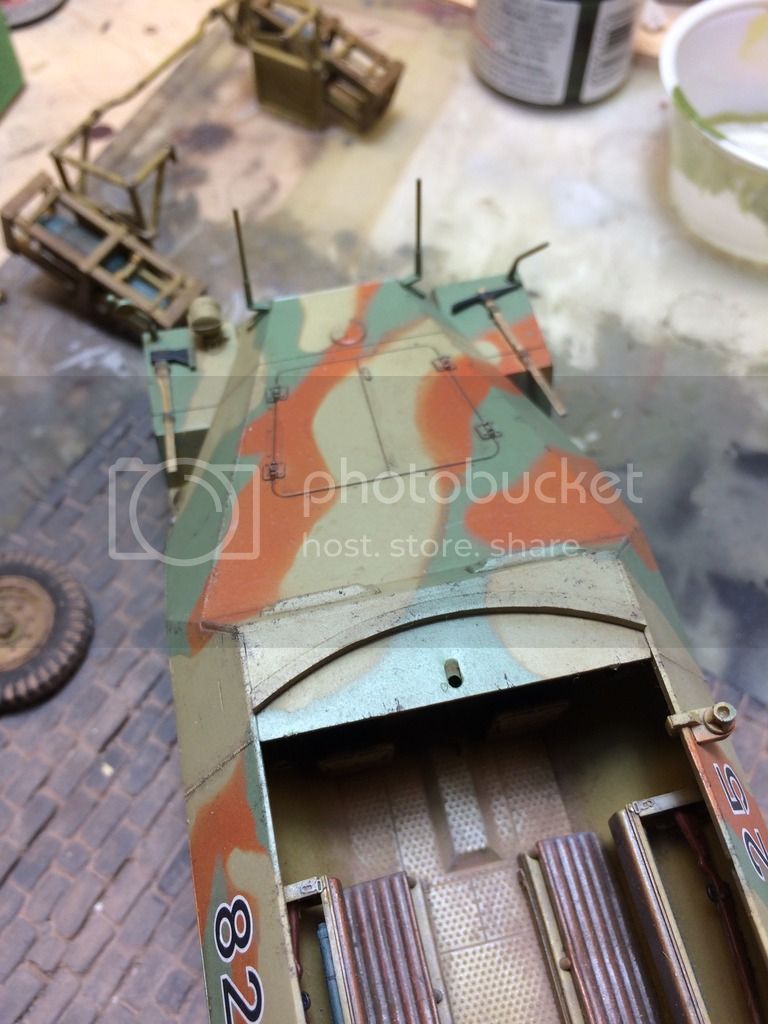
Tamiya Sdkfz 251D Stuka Zu Fuss, painted with the AK late war paints. I really like the dk yellow and especially the green, but the red/brown came out a really odd orange brown that I do not care for at all.
Nearly done at this point.

If you can keep your head when all about you are losing theirs,
perhaps you've misunderstood the situation.
tatbaqui
 News Writer
#040
Metro Manila, Philippines
Joined: May 06, 2007
KitMaker: 2,713 posts
Armorama: 2,451 posts
Posted: Monday, July 18, 2016 - 04:10 AM UTC
Mike,
Except for the hood, and maybe the rear part, the camo will be hidden once the rockets are installed. Maybe you can weather or darken the red-brown part a bit (?). Nonetheless it's a cool build overall.
Cheers,
Tat
#521
Kentucky, United States
Joined: April 13, 2011
KitMaker: 9,465 posts
Armorama: 8,695 posts
Posted: Tuesday, July 19, 2016 - 09:20 PM UTC
Some progress on my CCKW locomotive conversion:
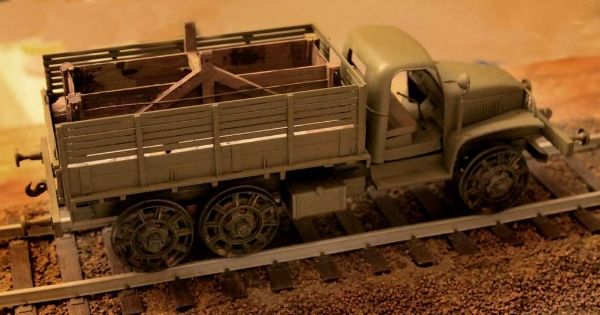

The local stone cutter provided some ballast. The rest will be gravel and old locomotive parts in the center hopper.
____________________________________________________________________________
Unfortunately there has been no further progress on my MAZ-537 Nuclear Missile Hauler/Tractor.
#521
Kentucky, United States
Joined: April 13, 2011
KitMaker: 9,465 posts
Armorama: 8,695 posts
Posted: Tuesday, July 19, 2016 - 09:27 PM UTC
As an alternative to the MAZ Missile Truck I would like to substitute a Skoda RSO conversion I have bee working on.
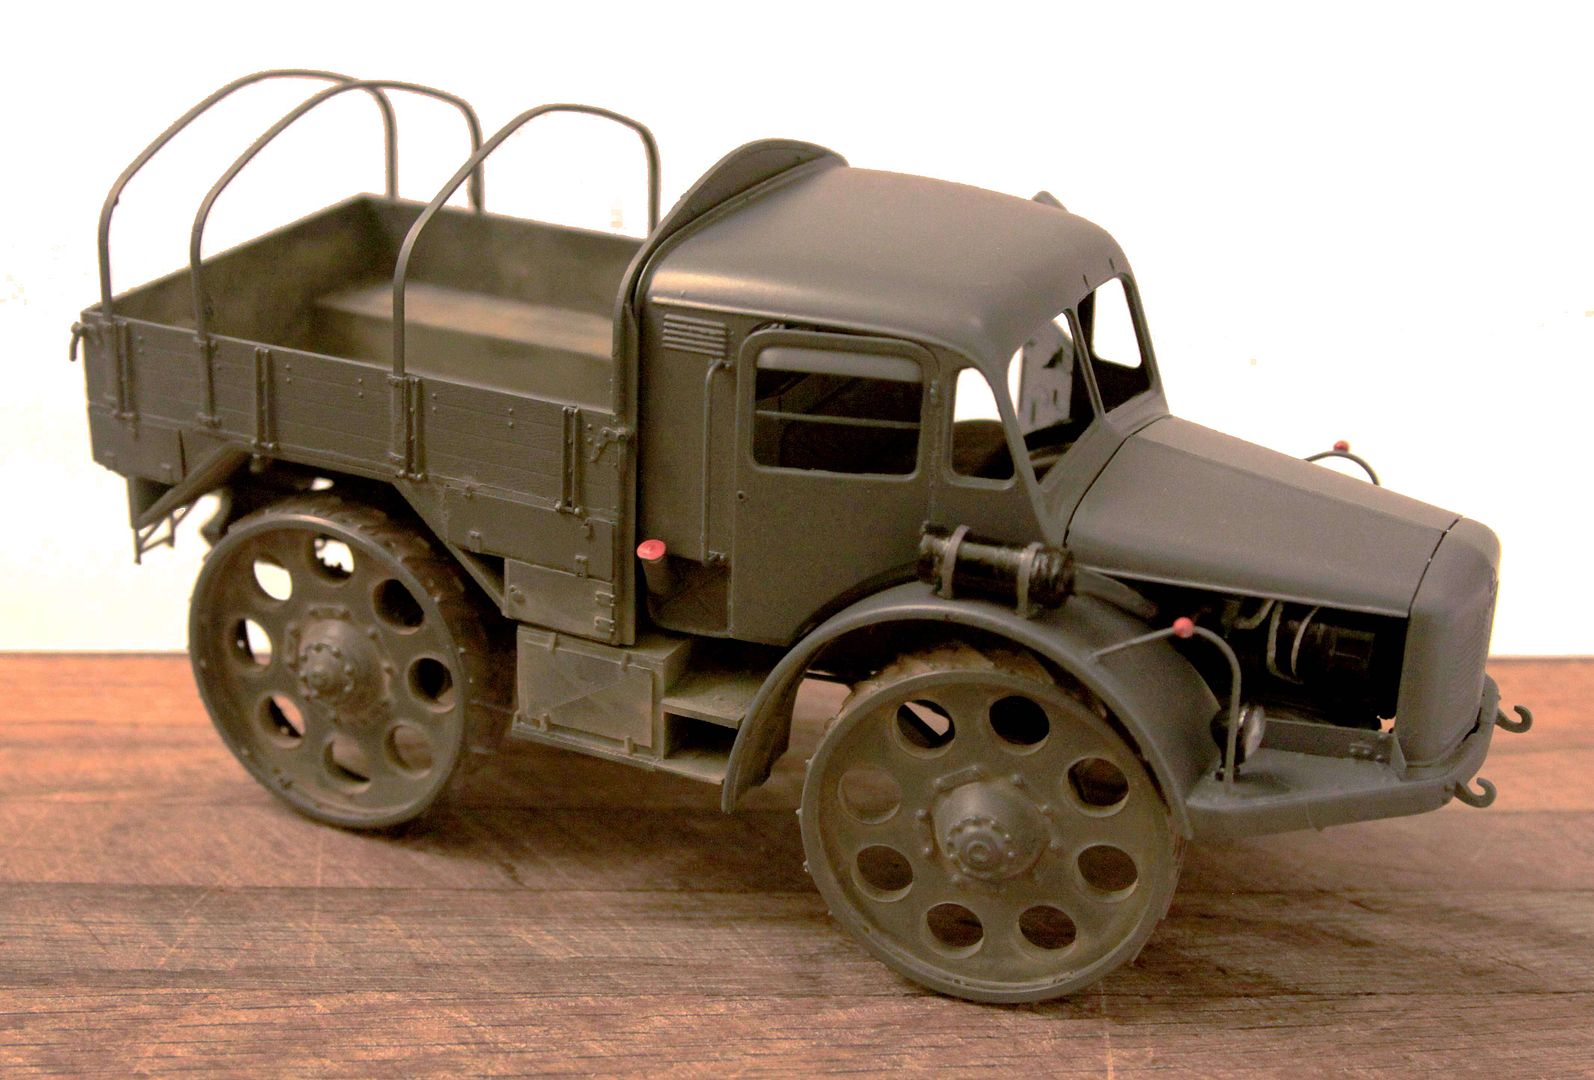
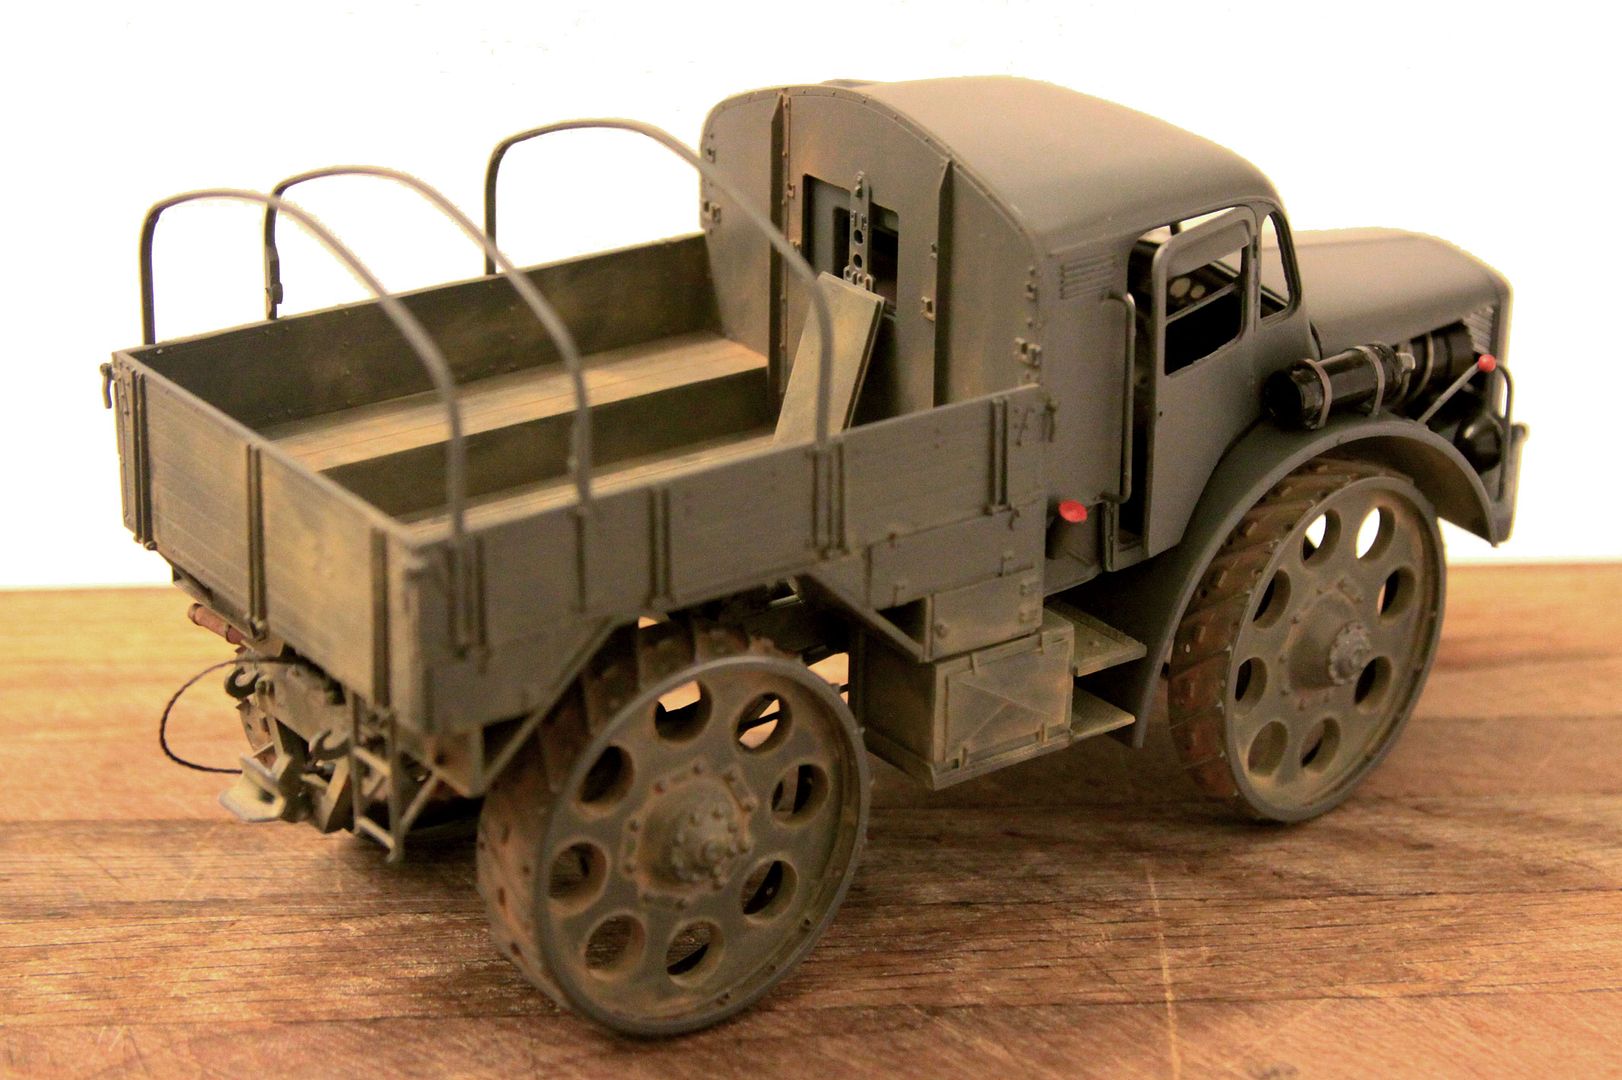
I am back-dating this vehicle to represent the early prototype truck as first submitted for trials to the Wehrmacht.
This involved drilling the holes in the wheels, extending the front fenders, building new lower tool boxes for each side and relocating the air filter/intake from the roof to the right fender.
There has also been extra detailing added to the engine, the brakes, the cab and gas tank.
This project was started prior to April of 2013 but stalled due to health issues.
A build blog covering this vehicle is posted at:
http://armorama.com/forums/205790Noord-Brabant, Netherlands
Joined: February 13, 2011
KitMaker: 322 posts
Armorama: 300 posts
Posted: Thursday, July 21, 2016 - 03:39 PM UTC
England - East Midlands, United Kingdom
Joined: January 17, 2006
KitMaker: 1,694 posts
Armorama: 1,584 posts
Posted: Saturday, July 23, 2016 - 02:49 PM UTC
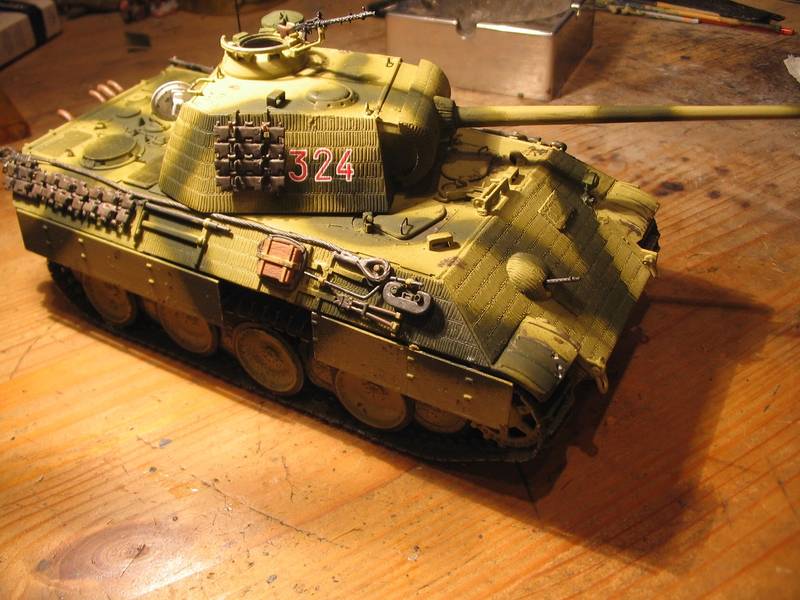
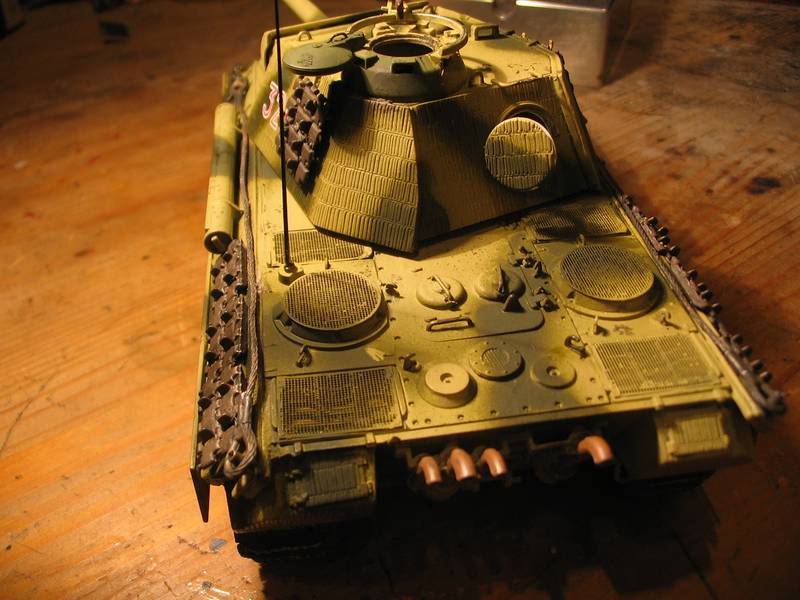
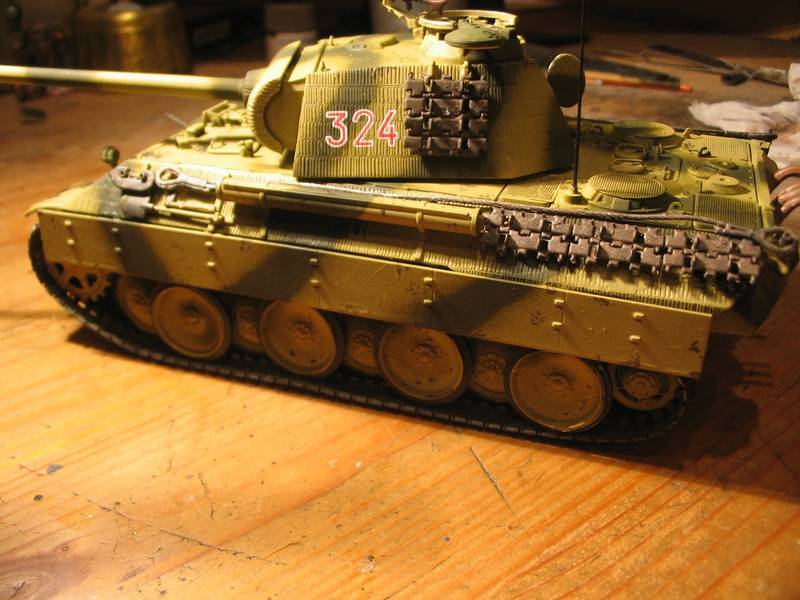
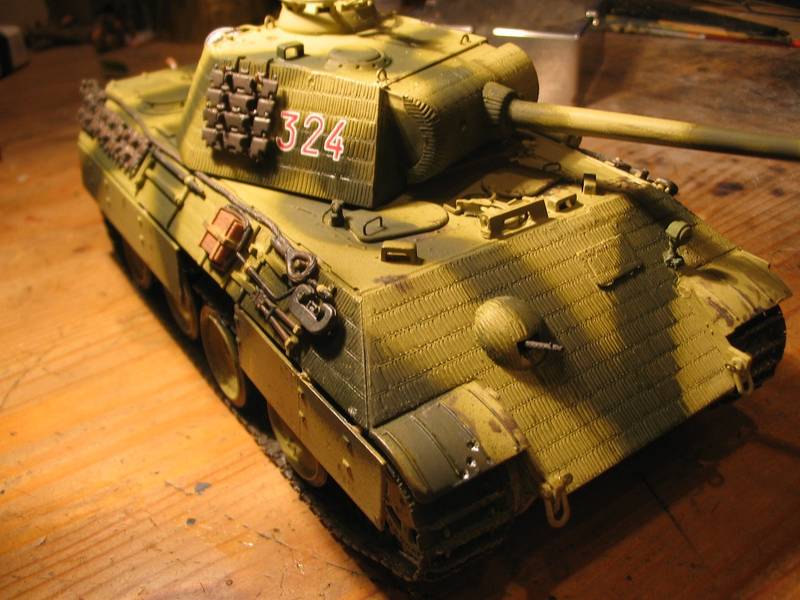
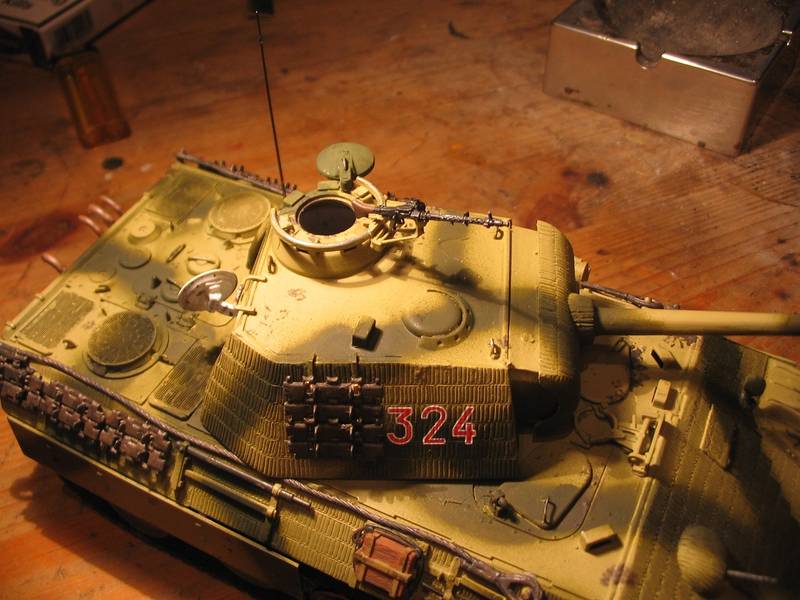
Found something! I'm building a few Panthers for a project and found two in the cupboard which my evil ex managed to smash about 15 years ago. She claimed it was an accident. Hmmm..I wasn't convinced. They weren't that great but with their being two I decided to cannibalise them to make one good one. The damage wasn't too bad. Mainly bits had fallen off and one barrel was snapped so I took the turret off one and mated it with the better hull. The rear wheel on both sides had snapped off (as they're prone to do with elastic band tracks so superglued them back on. Looking at this one I must have started redoing it as some stage as the paints been stripped off (no paint on the belly)then repainted and I've put PE grilles on. I don't remember doing it so it must have been years ago. When I took the spare track links off the original paintwork was underneath so I must have just Mr Muscled it, given it a coat then left it. Funny what you find in the back of the cupboard.
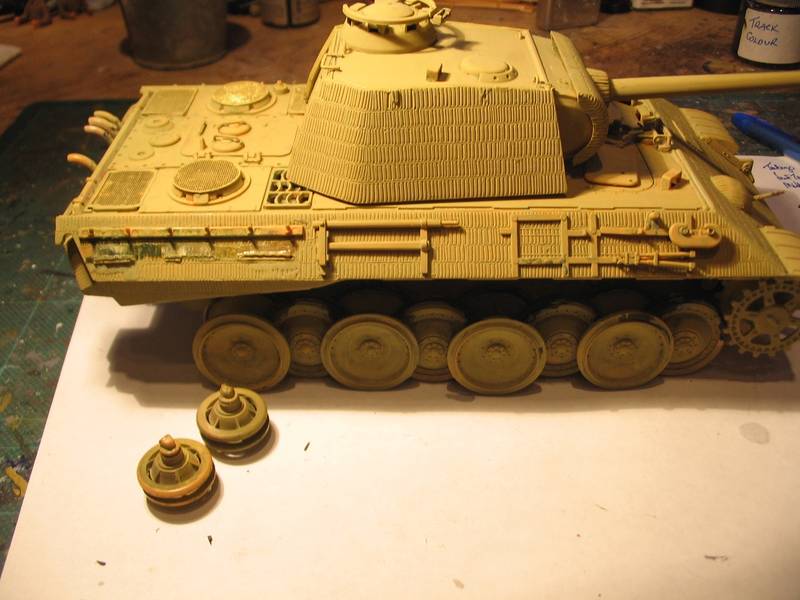
As it was a repair I didn't want to put too much pressure on the wheels plus the tracks were a bit short as they'd got mangled when I was tidying them up so I glued them on with a gap at the top. It won't be seen as it's having the side skirts on fortunately. They can hide a multitude of sins lol
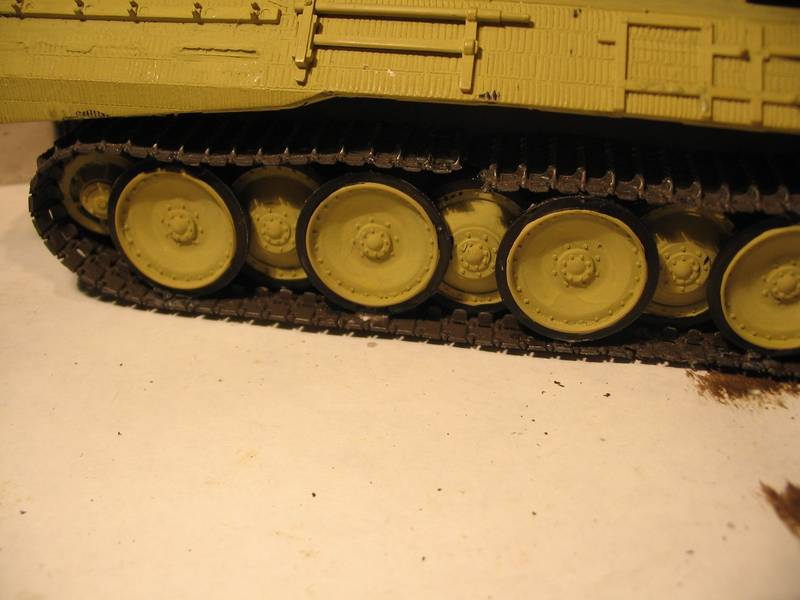
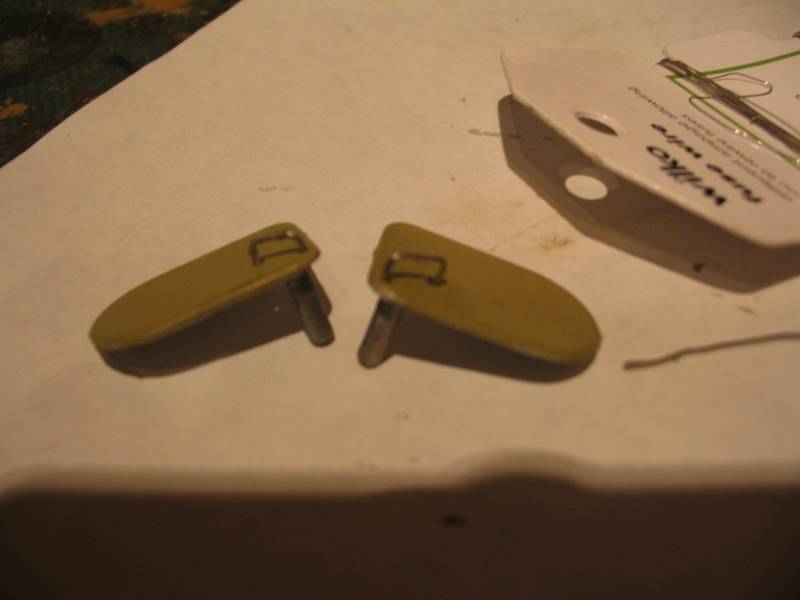
I hate painting road wheels but doing them while they're on is even worse. Both handles on the driver and radio ops hatches had snapped off and I'd not got anything in the spares box that was the right size so I made new ones out of fuse wire and used tweezers to get the bend right. I'm quite pleased with how they came out. I use fuse wire quite a bit. It's cheap and as it comes in three thicknesses on a card so I find it's good for handles, wiring etc.
So that's where I'm up to so far. I'll get the side skirts on, give it another light coat of dunkel gelb to make sure it's all covered properly then I can spray the cam on.
Nothing is so exhilarating in life as to be shot at with no result.
- Winston Churchill
#460
California, United States
Joined: September 16, 2014
KitMaker: 1,156 posts
Armorama: 1,024 posts
Posted: Monday, August 01, 2016 - 01:32 AM UTC
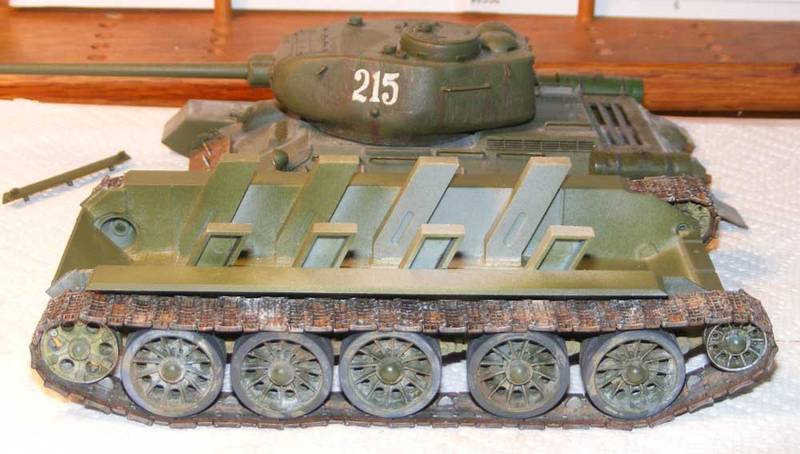
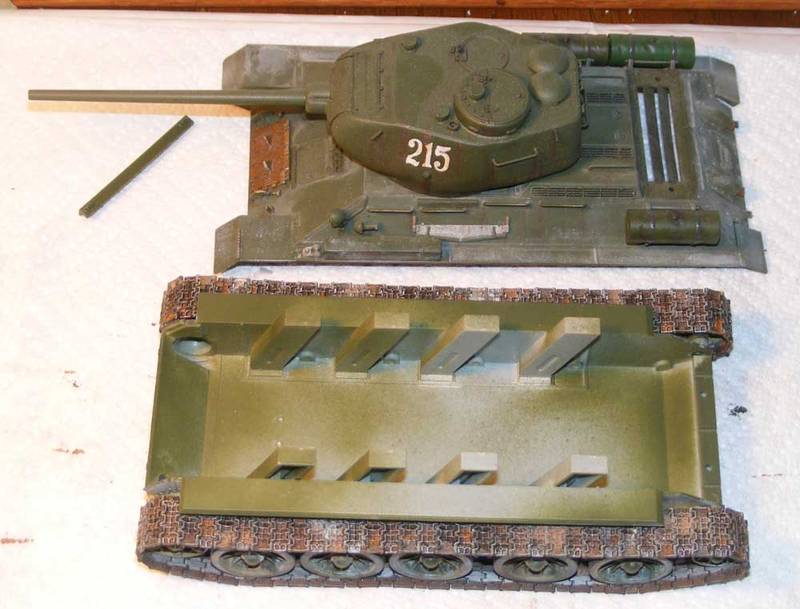
I got the Fruils done for the North Koran T-34/85 project. This is the easiest building set of tracks I have ever built and they look terrific. The MIG burnishing fluid was used as a start with other colors added in enamels. The final bit of color was a couple of pigments added randomly to match the rest of the model. After two years and many delays, the end is in sight!
Vintage Paul
I'd happily live in the past but for air conditioning, the internet, mobile phones, modern medicine & dentistry and, and, and . . .
Illinois, United States
Joined: April 25, 2008
KitMaker: 338 posts
Armorama: 75 posts
Posted: Friday, August 05, 2016 - 11:43 AM UTC
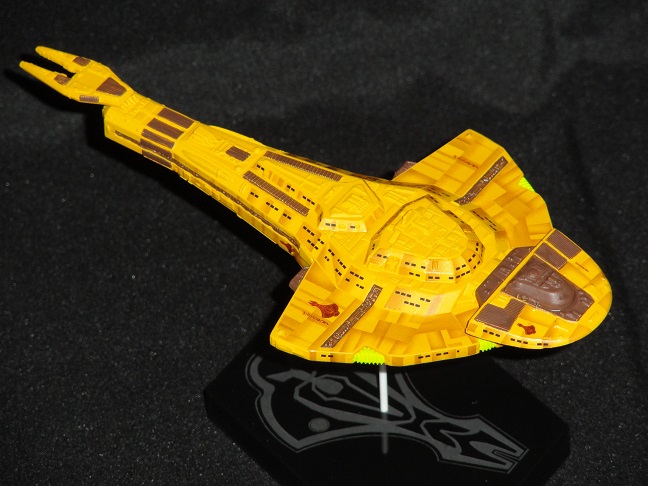
Finished!
These decals were a bit of a pain to properly fit over the contours of the ship, but they were better than other some other models in the same line. Something that really helped was trimming the clear parts of each decal off the sides before soaking and applying them. This will look great next to my Enterprise B.
England - East Midlands, United Kingdom
Joined: January 17, 2006
KitMaker: 1,694 posts
Armorama: 1,584 posts
Posted: Wednesday, August 10, 2016 - 01:10 PM UTC
Nothing is so exhilarating in life as to be shot at with no result.
- Winston Churchill
Oklahoma, United States
Joined: September 30, 2015
KitMaker: 2,493 posts
Armorama: 2,344 posts
Posted: Wednesday, August 10, 2016 - 03:16 PM UTC
Karl, that turned out really nice! I have a weakness for dunkelgelb and green camo schemes. Yours is very nice.
"Only the dead have seen the end of war." - Plato
England - East Midlands, United Kingdom
Joined: January 17, 2006
KitMaker: 1,694 posts
Armorama: 1,584 posts
Posted: Thursday, August 11, 2016 - 12:27 AM UTC
Thanks Dustin. I have to admit I prefer yours though lol. How did you get the grubby look. Was it a wash or pigments? Looks really effective. MIne looks like it's just been through a tank wash at the moment. The plan for mine is (along with it's sister I'm building for the Dog Campaign)is to have them in a farm courtyard being rearmed. I spent last Saturday afternoon painting brass shell heads and ammo boxes for them. I've decided on the crew members for rearming an a few mooching about in conversation. Hopefully now I'm set on the idea I'll get it done as I've got everything I need now apart from some cork for the courtyard.
Nothing is so exhilarating in life as to be shot at with no result.
- Winston Churchill
Vermont, United States
Joined: July 21, 2002
KitMaker: 3,569 posts
Armorama: 2,070 posts
Posted: Friday, August 19, 2016 - 08:33 AM UTC
Boy do I have the MADD (modelers attention deficit disorder) bad!
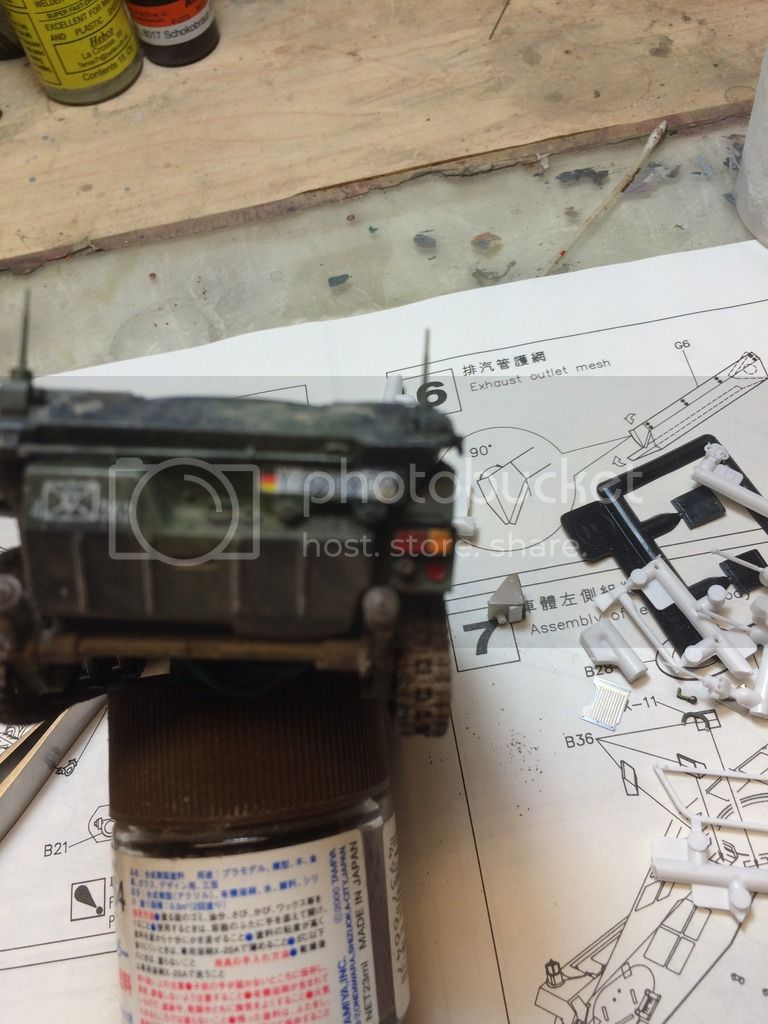
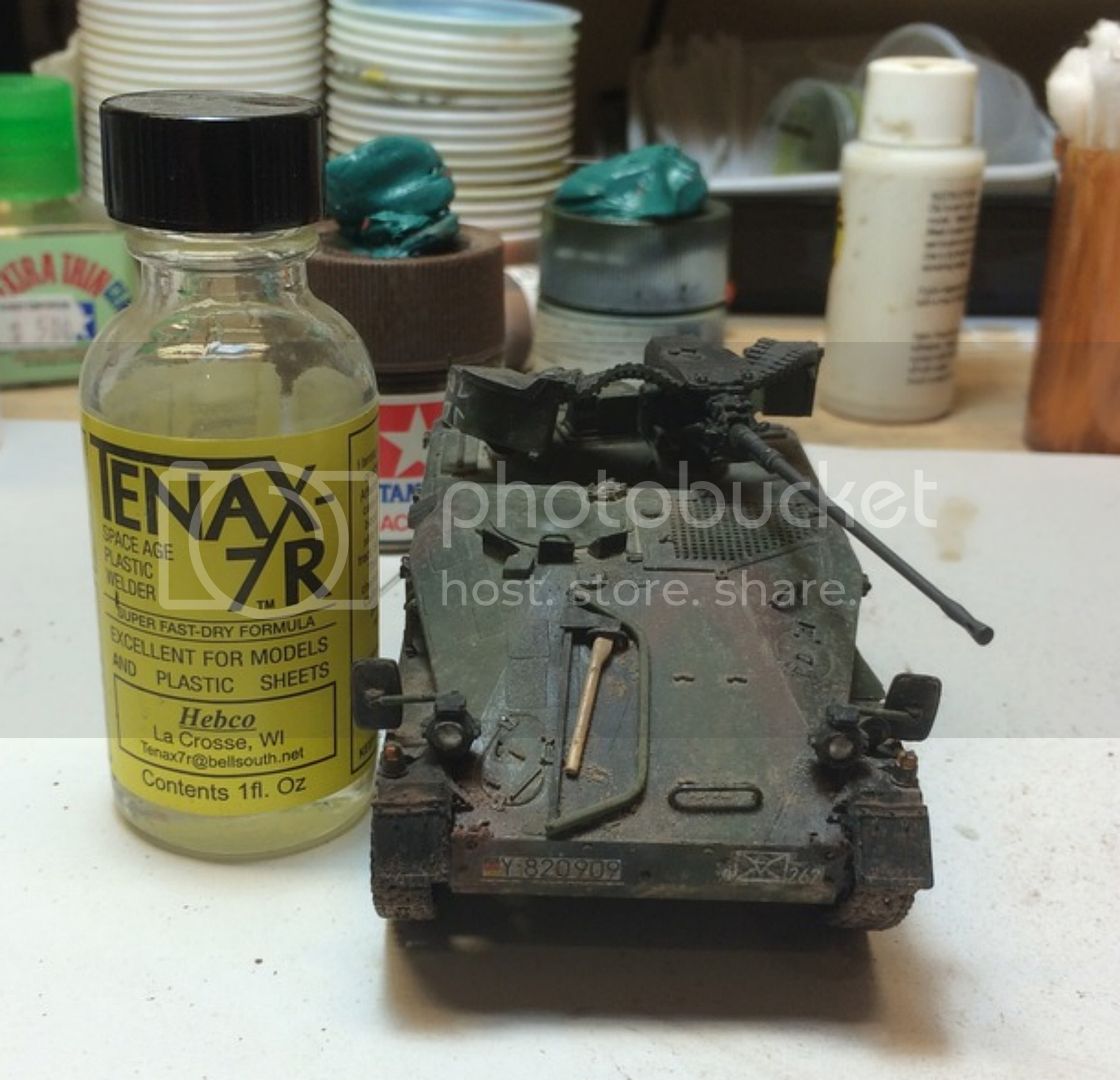
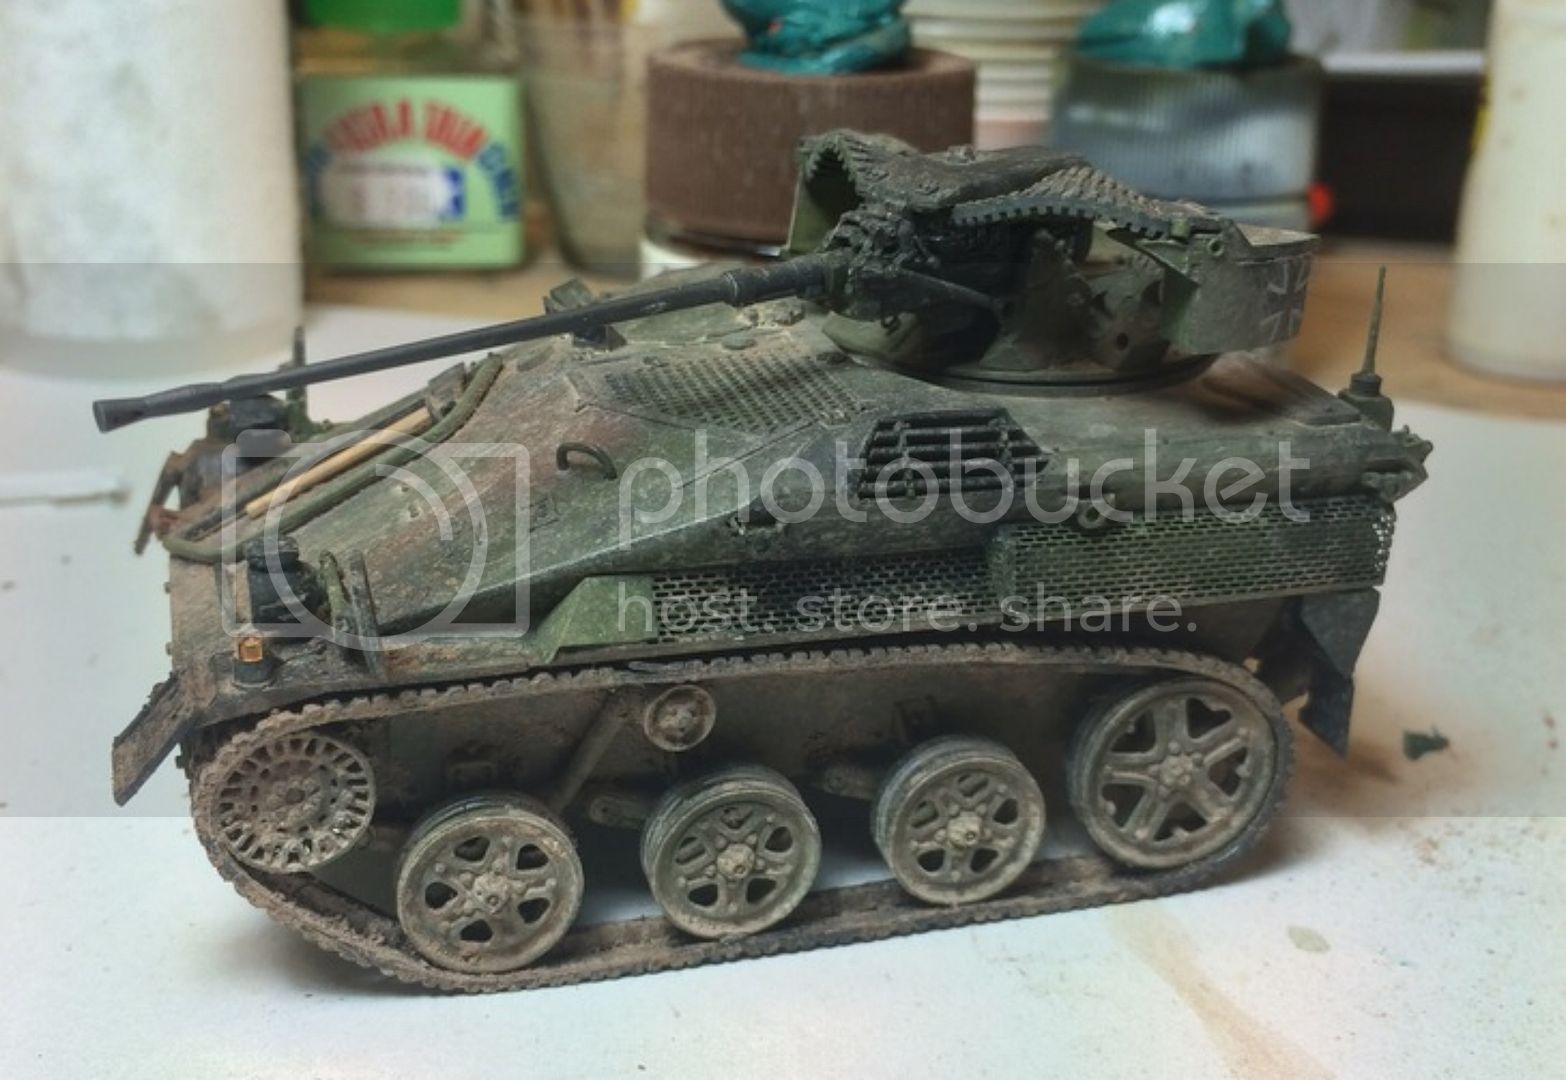
Latest pull from the closet of shame is the AFV Club Wiesel , in-progress (if you can call it that) since it was a new release.
sorry for crappy cell pics
If you can keep your head when all about you are losing theirs,
perhaps you've misunderstood the situation.
Vermont, United States
Joined: July 21, 2002
KitMaker: 3,569 posts
Armorama: 2,070 posts
Posted: Friday, August 19, 2016 - 08:13 PM UTC
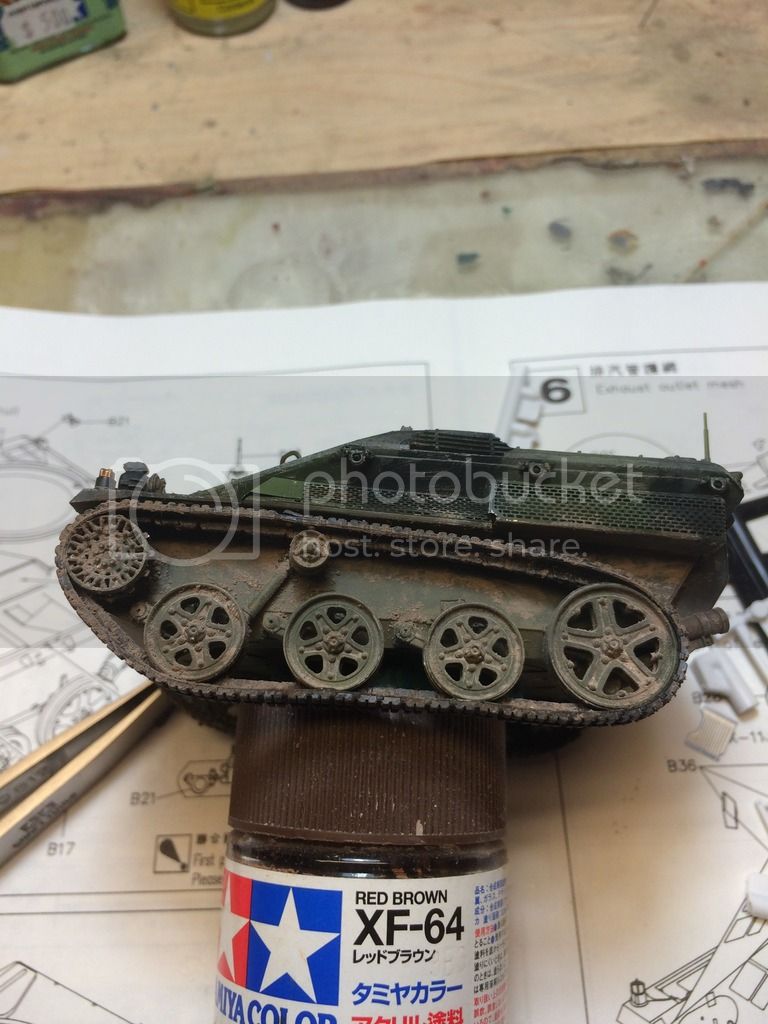
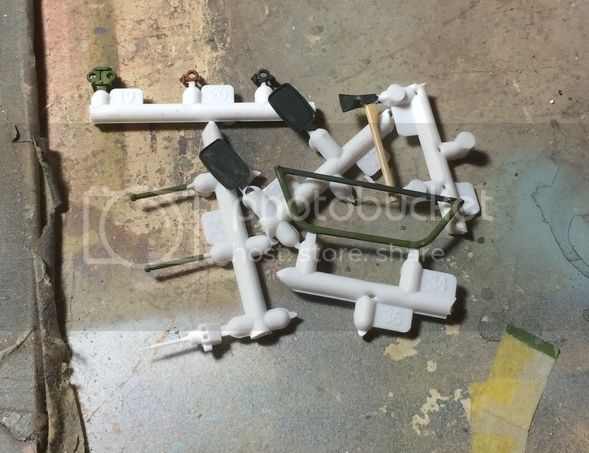
Assorted fiddly bits left to add. Now with paint and ready to go.
I have NO idea why this thing has sat in this state for so long. I was on a Bundeswher kick for a while there when the Tamiya Leo 2A5, RoG Luchs and Fuchs and Pzhaub 2000 and the two to these first came out, but stalled on this one big time.
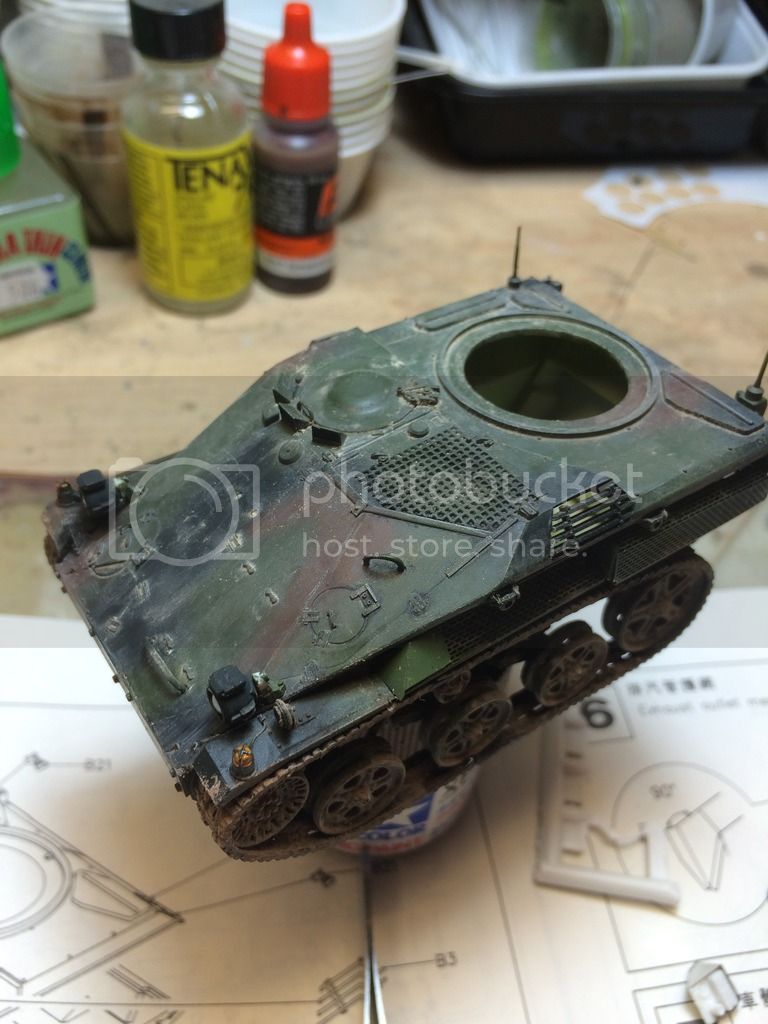
Still have to Bare Metal Foil the mirrors and dust the turret.
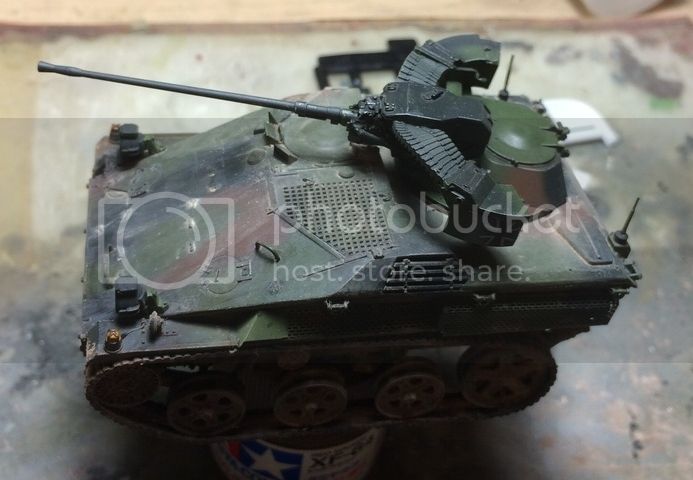
Glad I waited on the mirrors this long. Aside from them being all fiddly and all, I just found this pic in the archives, will be doing 'folded' mirrors.

If you can keep your head when all about you are losing theirs,
perhaps you've misunderstood the situation.
England - East Midlands, United Kingdom
Joined: January 17, 2006
KitMaker: 1,694 posts
Armorama: 1,584 posts
Posted: Thursday, August 25, 2016 - 10:05 AM UTC
I've just been having a mooch about under my desk as that's where I keep the tins and boxes of finished figures for future use. I pulled out an LRDG Chevvy box which I thought the figures were in but instead it was an LRDG Chevvy box that contained a half built Chevvy! I don't know why I didn't finish this one off as it's almost done. Everythings painted, the cab and truck bed are painted with the decals on just not attached to the chassis and there's a few bits and bobs need doing to it to finish it off. It's one of three as I was planning on doing an LRDG/SAS meet for resupply prior to a raid dio but it fell ny the wayside. I'd completed two chevvys and three jeeps and this was the final vehicle for it. I think once this is finished I'll do the dio. Space is always at a premium as you all know but I've had a friend cut me some wood so I can slide my dios endways into my bookcase. I'm getting another one the same to replace my second bookcase so I can actually do the dios I've worked out mentally. In a third Chevvy box I found bits I'd bought for it. Resicast Lewis's and Vickers etc and two spare Bredas amongst other stuff so my unfinished business is more than the Chevvy lol. I also found an Italri Panzer IV ausf H which is half built so I'll do that one as well. This has to be one of the most useful campaigns I've been involved in as it's made me take stock of all the half built kits I've got and there's more than a few! Most times I can't even remember why I stalled. In my upstairs stash I found an Italeri M8 which I'd started about 12 years ago but completely buggared up the rear suspension and never got around to sorting it out as I was losing my temper with it. Now I've found that I can order replacement sprues I'll grab one and get it finished off. At the time as building this I was using the much missed AFV Interiors site to detail the inside and looking at it now I've not done a bad job considering how long ago it was. That was a fantastic site. Unfortunately there were only really floppies about then to save pics so I haven't got any. These days I use 16GB memory sticks to save stuff. Even if I'm not planning on building whatever it is that I find good photos of, I save them just in case. Consequently I've got tens of thousands of saved photos off the net. There are over 6000 photos of Waffen SS in the field in one folder! Then vehicles have their own folders so you can imagine what the photo library's like lol. I'm rambling. My next two entries then will be the Chevvy and a Panzer IV. I'll put some photos up in the next couple of days as to where I am wth them. At least this way I can clear a bit of room for more kits

Nothing is so exhilarating in life as to be shot at with no result.
- Winston Churchill
#041
Kobenhavn, Denmark
Joined: July 20, 2006
KitMaker: 10,069 posts
Armorama: 4,677 posts
Posted: Monday, August 29, 2016 - 11:57 PM UTC
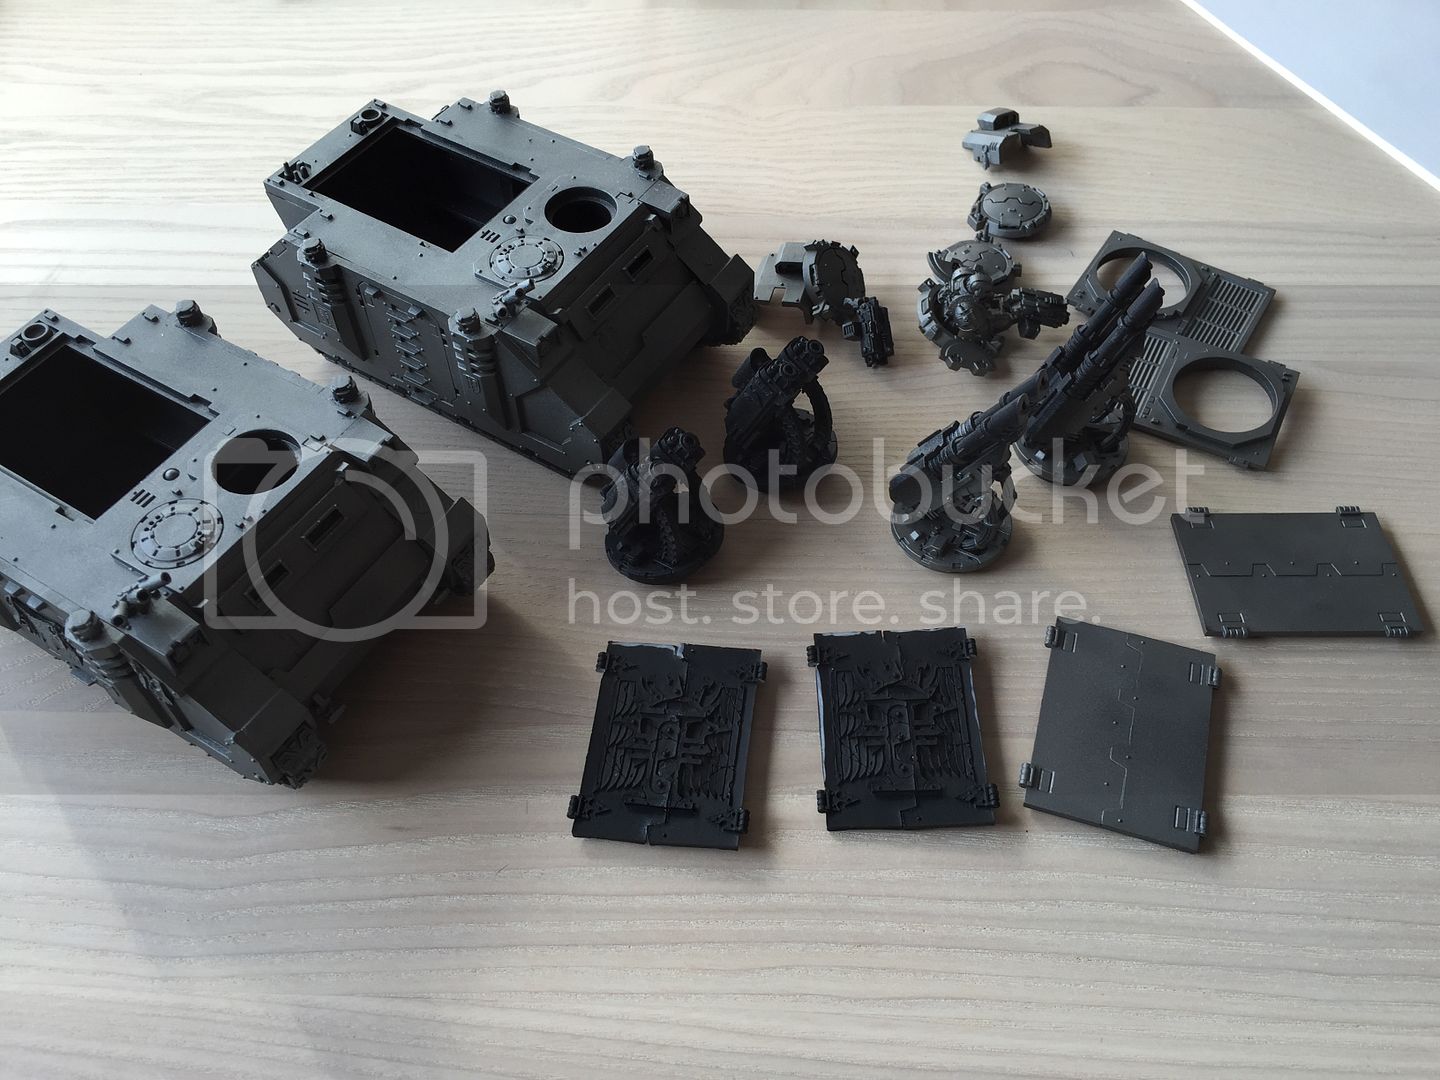
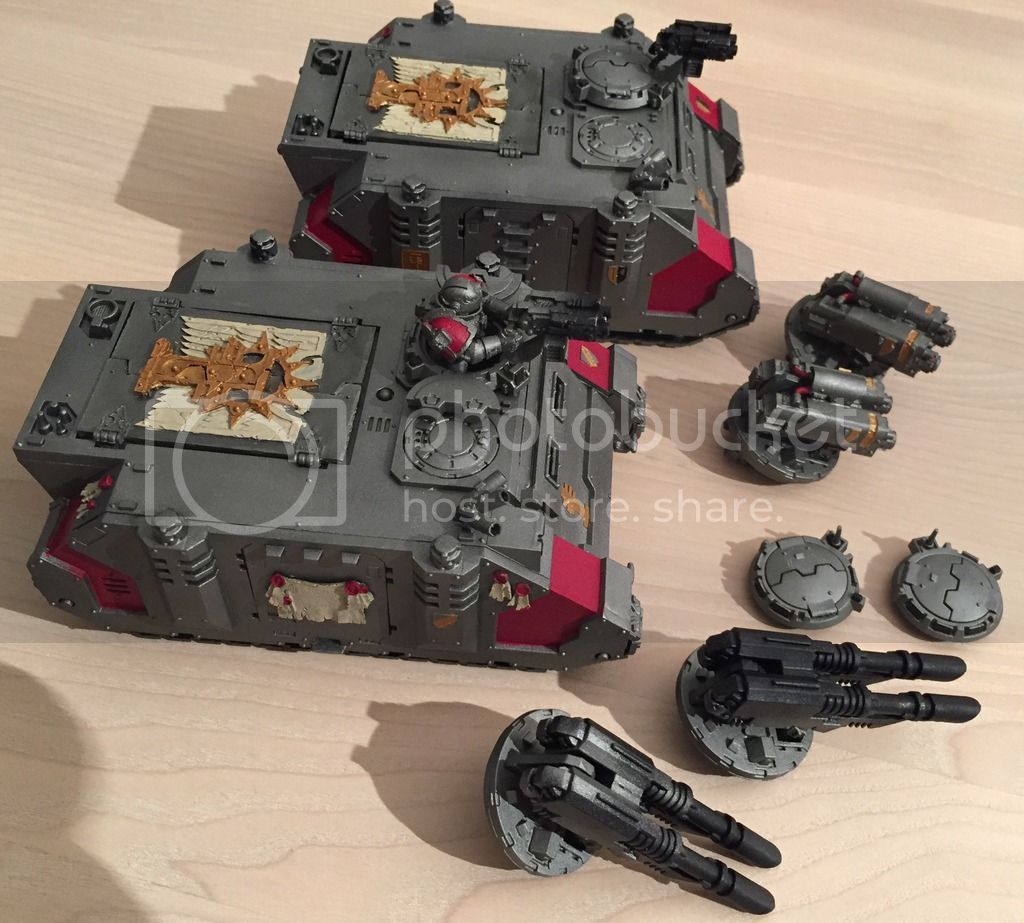
I am going to finish these two Games Workshop Rhinos/Razorbacks. It should be fun and long overdue. I think I left them like this 1-2 years ago.
More to follow soon.
Campaign'oholic - 252+ campaigns completed
Vermont, United States
Joined: July 21, 2002
KitMaker: 3,569 posts
Armorama: 2,070 posts
Posted: Tuesday, August 30, 2016 - 06:34 AM UTC
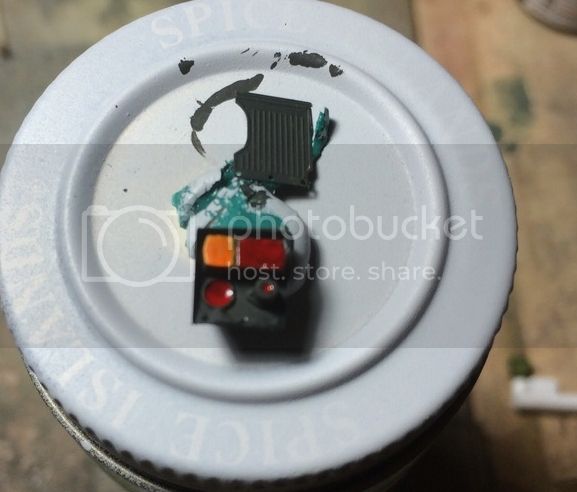
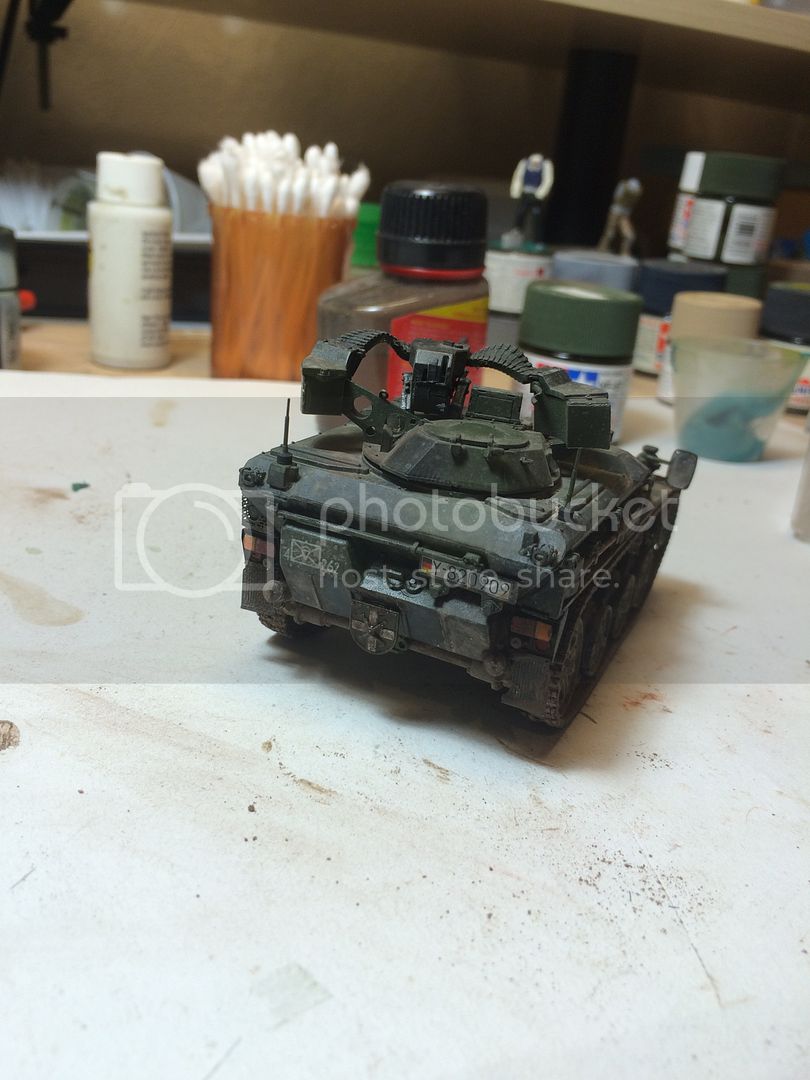
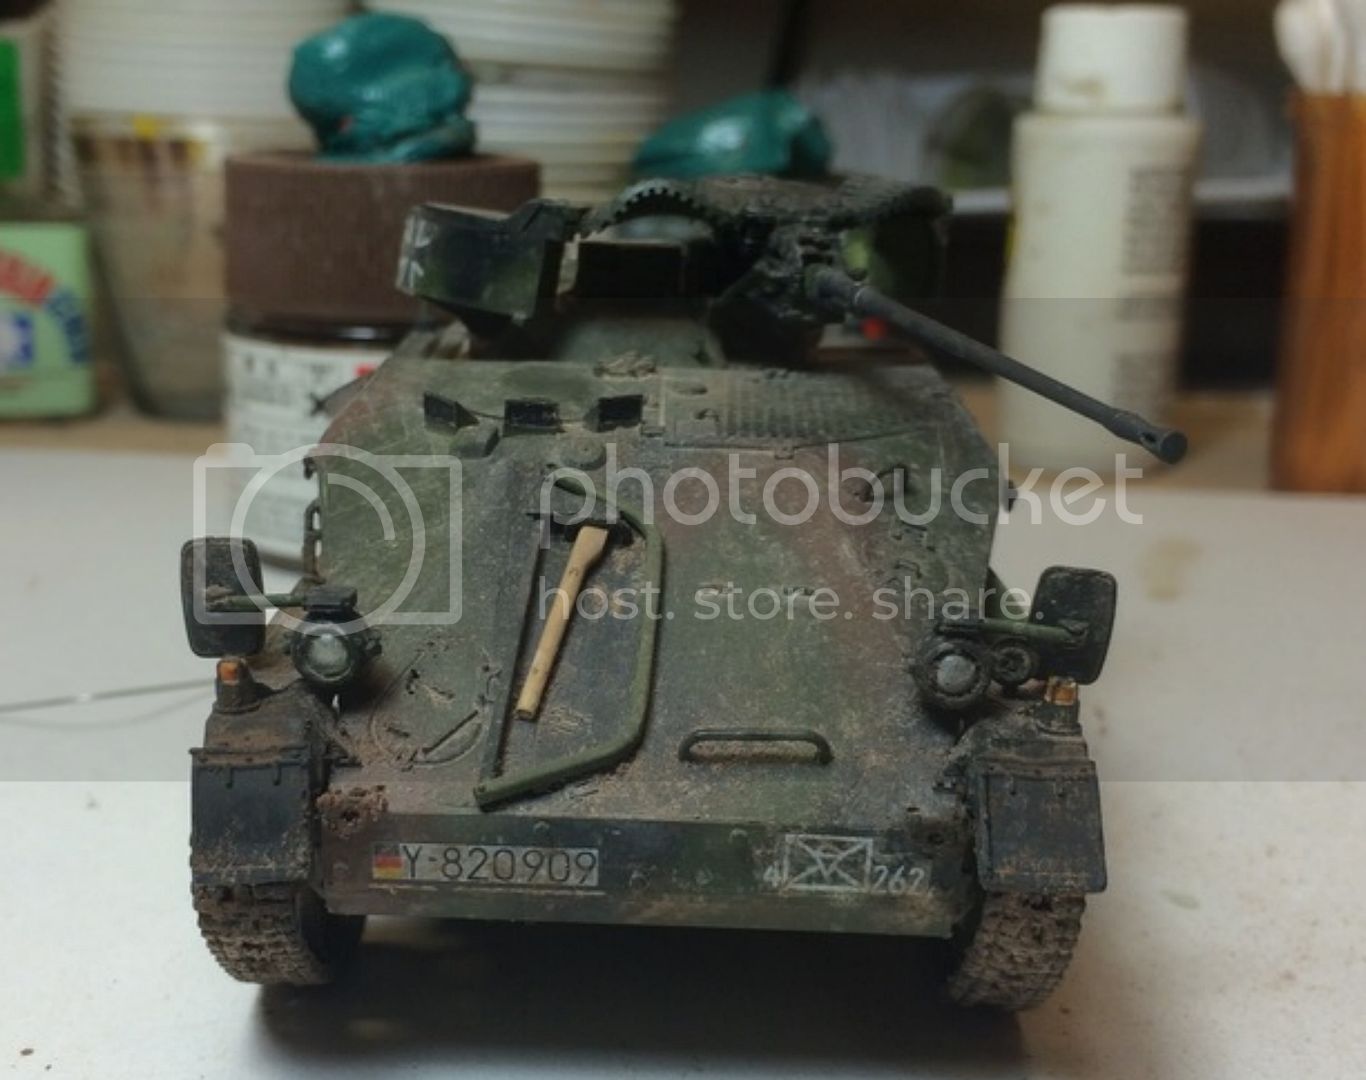
All but done with the Wiesel. The way the AFV Club parts are engineered the mirrors will not articulate the way shown in the picture. Bare metal foil to the rescue.


A little bit more and we're calling this done.
If you can keep your head when all about you are losing theirs,
perhaps you've misunderstood the situation.
Vermont, United States
Joined: July 21, 2002
KitMaker: 3,569 posts
Armorama: 2,070 posts
Posted: Saturday, September 03, 2016 - 05:16 AM UTC
Photos in the gallery. Might even get another one or two in before December.(nvm.. found it)
Anyway the Weisel is done!
This thing is TINY
Hopefully I can figure out the gallery thiing to still get credit.
Mike
If you can keep your head when all about you are losing theirs,
perhaps you've misunderstood the situation.
Oklahoma, United States
Joined: September 30, 2015
KitMaker: 2,493 posts
Armorama: 2,344 posts
Posted: Saturday, September 03, 2016 - 07:29 AM UTC
Quoted Text
Thanks Dustin. I have to admit I prefer yours though lol. How did you get the grubby look. Was it a wash or pigments? Looks really effective. MIne looks like it's just been through a tank wash at the moment. The plan for mine is (along with it's sister I'm building for the Dog Campaign)is to have them in a farm courtyard being rearmed. I spent last Saturday afternoon painting brass shell heads and ammo boxes for them. I've decided on the crew members for rearming an a few mooching about in conversation. Hopefully now I'm set on the idea I'll get it done as I've got everything I need now apart from some cork for the courtyard.
Karl, sorry I missed your reply, sir.
I used a dark wash over the entire thing and wiped away the extra. Then I used streaking effects. For the road wheels And tracks i used pigments to get the muddy look.
To be honest, I love how yours looks over mine. In my head, when I plan a new build, I say to myself that I'm not going to weather it very much at all. Maybe just a tad bit of dust... But I never stay with that plan. It's kit happens that way that it ends up really grungy.
I believe that everybody looks at another modelers models, and says to themselves that they like the other guys work better than their own. Lol
Thanks for the kind words sir.
Cheers,
Dustin
"Only the dead have seen the end of war." - Plato
#041
Kobenhavn, Denmark
Joined: July 20, 2006
KitMaker: 10,069 posts
Armorama: 4,677 posts
Posted: Saturday, September 10, 2016 - 01:12 AM UTC
Slow, but steady progress.
More to follow
Campaign'oholic - 252+ campaigns completed
Vermont, United States
Joined: July 21, 2002
KitMaker: 3,569 posts
Armorama: 2,070 posts
Posted: Saturday, September 10, 2016 - 01:14 AM UTC
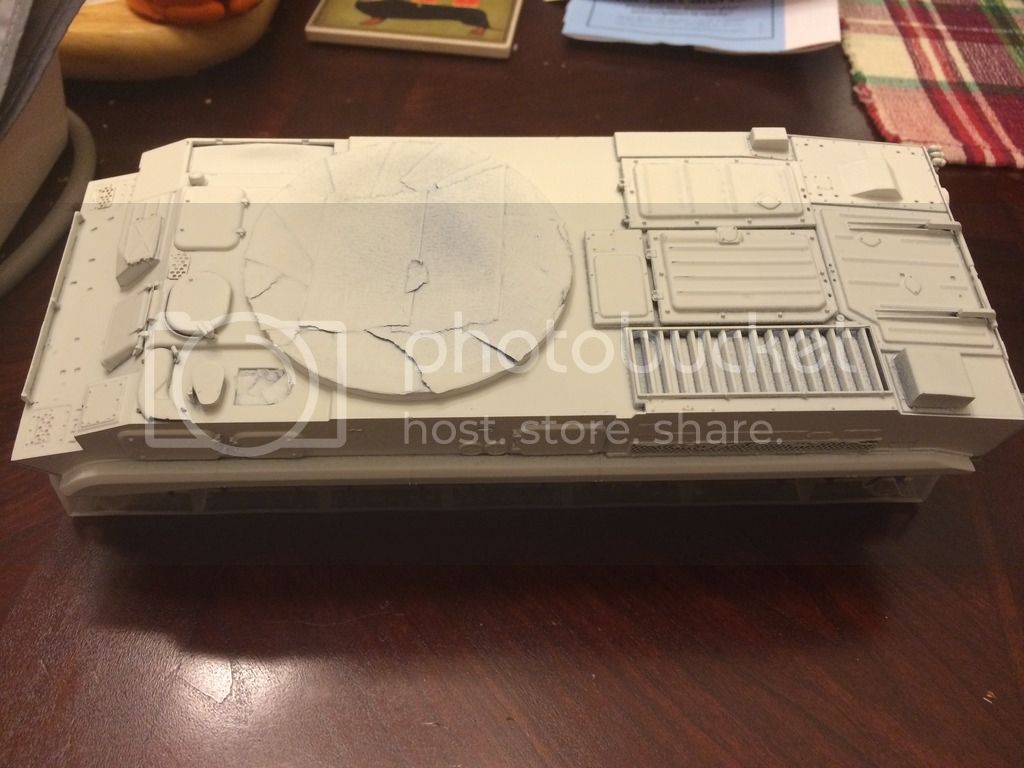
Hobby Boss PLA ZSD90 Apc
WIP for the last couple of years,
Status as of this morning,


And progress 2.5 hrs later.
Mostly fiddly bits

Not a chance in hades of making it to Armorcon, which is what I went downstairs to find something to work on for...
If you can keep your head when all about you are losing theirs,
perhaps you've misunderstood the situation.
GulfWarrior
Campaigns Administrator Texas, United States
Joined: January 05, 2010
KitMaker: 1,051 posts
Armorama: 1,029 posts
Posted: Monday, September 12, 2016 - 08:03 AM UTC
I'm late getting to the party; but here I am.
I've had the Panda 2S6M Tunguska sitting on the workbench for about a year and a half. After my club's contest this past weekend (Fort Worth Scale Modelers' SuperCon) I decided it was time to get it done.
Where am I now: I've got the hull primed. It's going to be a three color Arctic digital camo.

I'm about to start working on the indy link tracks. 115+ two-piece links per side!
Current campaigns:
I Like Big GUNS...And I Cannot Lie (2S1 Gvozdika)
Operation Snow White (Maultier w/ 37mm Flak Gun)
Stryker Campaign (AFV Club Stryker Dragoon)
1st Gulf War, 30th Anniversary (Dragon MLRS)
Vermont, United States
Joined: July 21, 2002
KitMaker: 3,569 posts
Armorama: 2,070 posts
Posted: Monday, September 12, 2016 - 05:04 PM UTC
Richard, how was the build up until this point? I have heard that the Panda kit is quite fiddly and somewhat difficult to assemble (old DML, not Skif) and that the tracks were multi-part menaces.
Your build looks clean and is making me reconsider getting one.
M
If you can keep your head when all about you are losing theirs,
perhaps you've misunderstood the situation.
GulfWarrior
Campaigns Administrator Texas, United States
Joined: January 05, 2010
KitMaker: 1,051 posts
Armorama: 1,029 posts
Posted: Monday, September 12, 2016 - 06:28 PM UTC
Quoted Text
Richard, how was the build up until this point? I have heard that the Panda kit is quite fiddly and somewhat difficult to assemble (old DML, not Skif) and that the tracks were multi-part menaces.
Your build looks clean and is making me reconsider getting one.
M
Overall, the kit isn't too bad! I've finished worse (Skif BMP-3 comes to mind). That being said, so far the worst parts are the weapon systems (guns and missiles) and the tracks. The tracks are just plain tedious. Each link has a separate guide horn that is very, very tiny! The carpet monster got two of them last night!
I'm going to try to put the torsion arms on the hull and put the base coat on this weekend so it can be curing.
If you can find one cheap somewhere, go ahead and pick it up. Don't spend a lot of money on it though. I saw one at my club's contest last weekend on a vendor table for $20. I almost picked it up for spare parts.
Current campaigns:
I Like Big GUNS...And I Cannot Lie (2S1 Gvozdika)
Operation Snow White (Maultier w/ 37mm Flak Gun)
Stryker Campaign (AFV Club Stryker Dragoon)
1st Gulf War, 30th Anniversary (Dragon MLRS)