Armor/AFV: Contests
This group is home to our various contests, promotions and drawings.
Hosted by Darren Baker
Conversions and Scratch Builds
barkingdigger
Staff MemberAssociate Editor
ARMORAMA
#013
Visit this Community
England - East Anglia, United Kingdom
Joined: June 20, 2008
KitMaker: 3,981 posts
Armorama: 3,403 posts
Posted: Friday, July 08, 2016 - 05:32 PM UTC

Quoted Text

CCKW, 3 axle: (The truck chassis is available in 1/35, & 1/48.)


Hi Mike,

What's the wheel/tire combo used on this one? It isn't the standard CCKW rig...

(And is it available in 1:35?)
165thspc
#521
Visit this Community
Kentucky, United States
Joined: April 13, 2011
KitMaker: 9,465 posts
Armorama: 8,695 posts
Posted: Friday, July 08, 2016 - 09:46 PM UTC
Tom, those are what is known as "Super Single" tires. They were more common than most people realize but officially they were used on DUKW's as well as on Bolster Trucks that carried bridging and assault boats. Used anywhere that wet or sandy footing was expected.
165thspc
#521
Visit this Community
Kentucky, United States
Joined: April 13, 2011
KitMaker: 9,465 posts
Armorama: 8,695 posts
Posted: Friday, July 08, 2016 - 11:57 PM UTC


A few examples of Super Single use.
165thspc
#521
Visit this Community
Kentucky, United States
Joined: April 13, 2011
KitMaker: 9,465 posts
Armorama: 8,695 posts
Posted: Saturday, July 09, 2016 - 05:41 PM UTC

Quoted Text


Reaching for the white plastic sheet is just an extension of my standard hobby toolkit...


Tom I totally agree!
165thspc
#521
Visit this Community
Kentucky, United States
Joined: April 13, 2011
KitMaker: 9,465 posts
Armorama: 8,695 posts
Posted: Saturday, July 09, 2016 - 06:19 PM UTC
Simple, straight forward, nearly OOB build of an old classic:


The only changes made here: front wheels canted, canvas (paper) side shields added to the windscreen, scratch built oar and replaced gas cans (Tasca AM), plus custom posed driver/passenger figures.


Photo found online: Photographer Unknown
165thspc
#521
Visit this Community
Kentucky, United States
Joined: April 13, 2011
KitMaker: 9,465 posts
Armorama: 8,695 posts
Posted: Sunday, July 10, 2016 - 02:26 AM UTC
Every now and then even I have to just build something "straight"!

Along the same lines as the GPA above - This time an "in process" build of a simple OOB classic; the venerable Tamiya M20 Scout Car. Not actually a conversion but rather a "maximum effort" stock build.


Rather proud of that paint job on the tank radios.


The only enhancements planned at this time are the canting of the front wheels, the adjustments to the suspension needed to sit on this uneven ground and an upgraded replacement "Jerry" gas can. (Tasca aftermarket.) Also I plan on leaving off the four fenders. I have always felt the M20 and M8's just looked sharper without them. Oh, I also want to include a headset, lollipop microphone and the associated wiring for the radio set.

I have had the good fortune to have driven the M20 at the Patton Museum a number of times in the past. Something about the M20 that is both interesting and disconcerting to the driver: - Given that the engine and transmission are in the rear, the Ford engineers simply turned a stock shifter around backwards to face the rear. Meaning that the shift pattern is totally backwards! (First gear is to the passenger side and at the rear. Nothing is where you expect it to be.) I was used to driving a straight stick, no problem, but still had to picture the pattern in my head each and every time I went to change gears!


165thspc
#521
Visit this Community
Kentucky, United States
Joined: April 13, 2011
KitMaker: 9,465 posts
Armorama: 8,695 posts
Posted: Sunday, July 10, 2016 - 07:00 PM UTC
I remember building the M20 kit back in grade school. Would hate to tell you about all the glue smears I had on it back then! Cannot remember who offered the kit, Renwall, Revell???


Veterans Day Parade: Vine Grove, KY.
This day I was co-driver and the "E-brake man".

The photo, above right shows the location of the emergency brake quadrant. (Borrowed from a junked Dragon Wagon 20 ton winch.) Mine is posed in the "ON" position in the hope that it will show to some small degree from the outside.
165thspc
#521
Visit this Community
Kentucky, United States
Joined: April 13, 2011
KitMaker: 9,465 posts
Armorama: 8,695 posts
Posted: Sunday, July 10, 2016 - 07:14 PM UTC
Back before Mirror Models gave us almost every CMP truck we could ever hope for. . . .

Another kit-bash conversion: CMP 6x6 with scratch built frame and loadbox plus two canvas tops combined.


The model started out rather rough . . .


. . . but cleaned up fairly well in the end.


Once again - scratch building & converting in order to make a model that, at the time, you could not get any other way.
m4sherman
Visit this Community
Arizona, United States
Joined: January 18, 2006
KitMaker: 1,866 posts
Armorama: 1,808 posts
Posted: Sunday, July 10, 2016 - 08:43 PM UTC

Quoted Text

Every now and then even I have to just build something "straight"!

Along the same lines as the GPA above - This time an "in progress" build of a simple OOB classic; the venerable Tamiya M20 Scout Car. Not actually a conversion but rather a "maximum effort" stock build.


Rather proud of that paint job on the tank radios.


The only enhancements planned at this time are the canting of the front wheels, the adjustments to the suspension needed to sit on this uneven ground and an upgraded replacement "Jerry" gas can. (Tasca aftermarket.) Also I plan on leaving off the four fenders. I have always felt the M20 and M8's just looked sharper without them. Oh, I also want to include a headset, lollipop microphone and the associated wiring for the radio set.

I have had the good fortune to have driven the M20 at the Patton Museum a number of times in the past. Something about the M20 that is both interesting and disconcerting to the driver: - Given that the engine and transmission are in the rear, the Ford engineers simply turned a stock shifter around backwards to face the rear. Meaning that the shift pattern is totally backwards! (First gear is to the passenger side and at the rear. Nothing is where you expect it to be.) I was used to driving a straight stick, no problem, but still had to picture the pattern in my head each and every time I went to change gears!


A friend out here has an M20, and I got to drive it once. You had to start stopping long before you normally would. The clutch is hydrolic, and after driving a Jeep I didn't get used to the feel of the clutch. I have a bad left knee which didn't help much. It was very quite compared to the M3 half track.
165thspc
#521
Visit this Community
Kentucky, United States
Joined: April 13, 2011
KitMaker: 9,465 posts
Armorama: 8,695 posts
Posted: Sunday, July 10, 2016 - 08:52 PM UTC
Yep, the M20 is hard to stop! That's why the Patton always required a co-driver. There is a big quadrant style hand brake that can be used by either the driver or co-driver and the Museum's M20 needed both operators just to be on the safe side!


Mike Koenig Photo
165thspc
#521
Visit this Community
Kentucky, United States
Joined: April 13, 2011
KitMaker: 9,465 posts
Armorama: 8,695 posts
Posted: Sunday, July 10, 2016 - 11:05 PM UTC
C'mon guys and gals, someone else is bound to have more scratch builds and conversions. I'm beginning to feel like the lone ranger! It is not my intent to hog this forum but just to keep it moving. - Mike
165thspc
#521
Visit this Community
Kentucky, United States
Joined: April 13, 2011
KitMaker: 9,465 posts
Armorama: 8,695 posts
Posted: Sunday, July 10, 2016 - 11:12 PM UTC
I have heard more than one modeler say something to the affect "as soon as I scratch build a model of it somebody will come out with the same thing in plastic!"

Well here is one such situation that certainly came true:
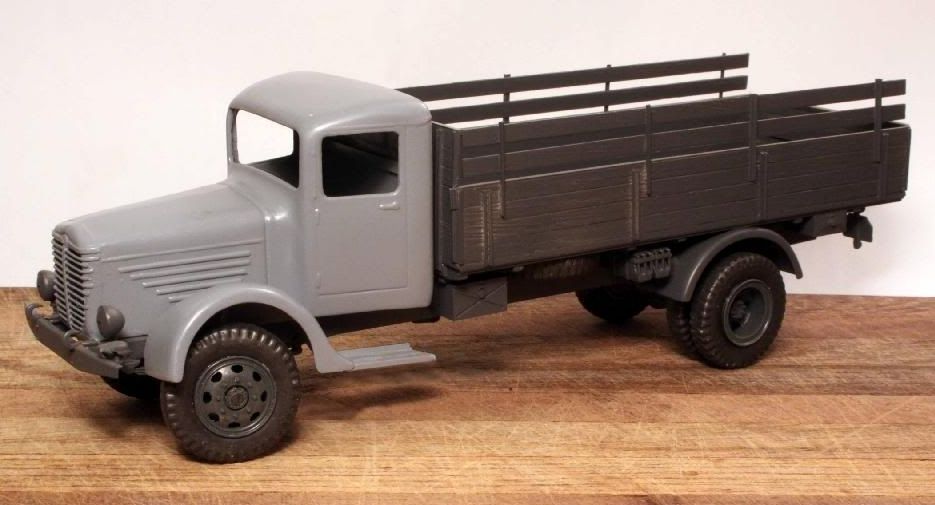
Bussing-Nag L4500A cargo truck:

A good friend of mine gave me a number of old Vac-Form kits that he said he would never get to. Liking heavy trucks as I do I thought I might try my hand at the Bussing-Nag he had in his stash. After some examination of the V-F kit I felt I could scratch the chassis and loadbox and it would look better than the Vac-Form but of course the cab was going to HAVE to come from the Vac-Formed plastic.


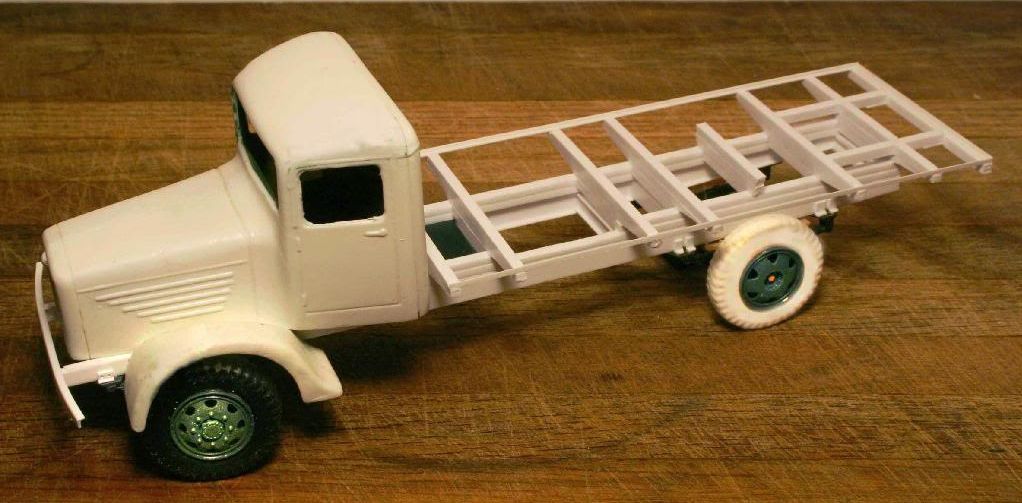
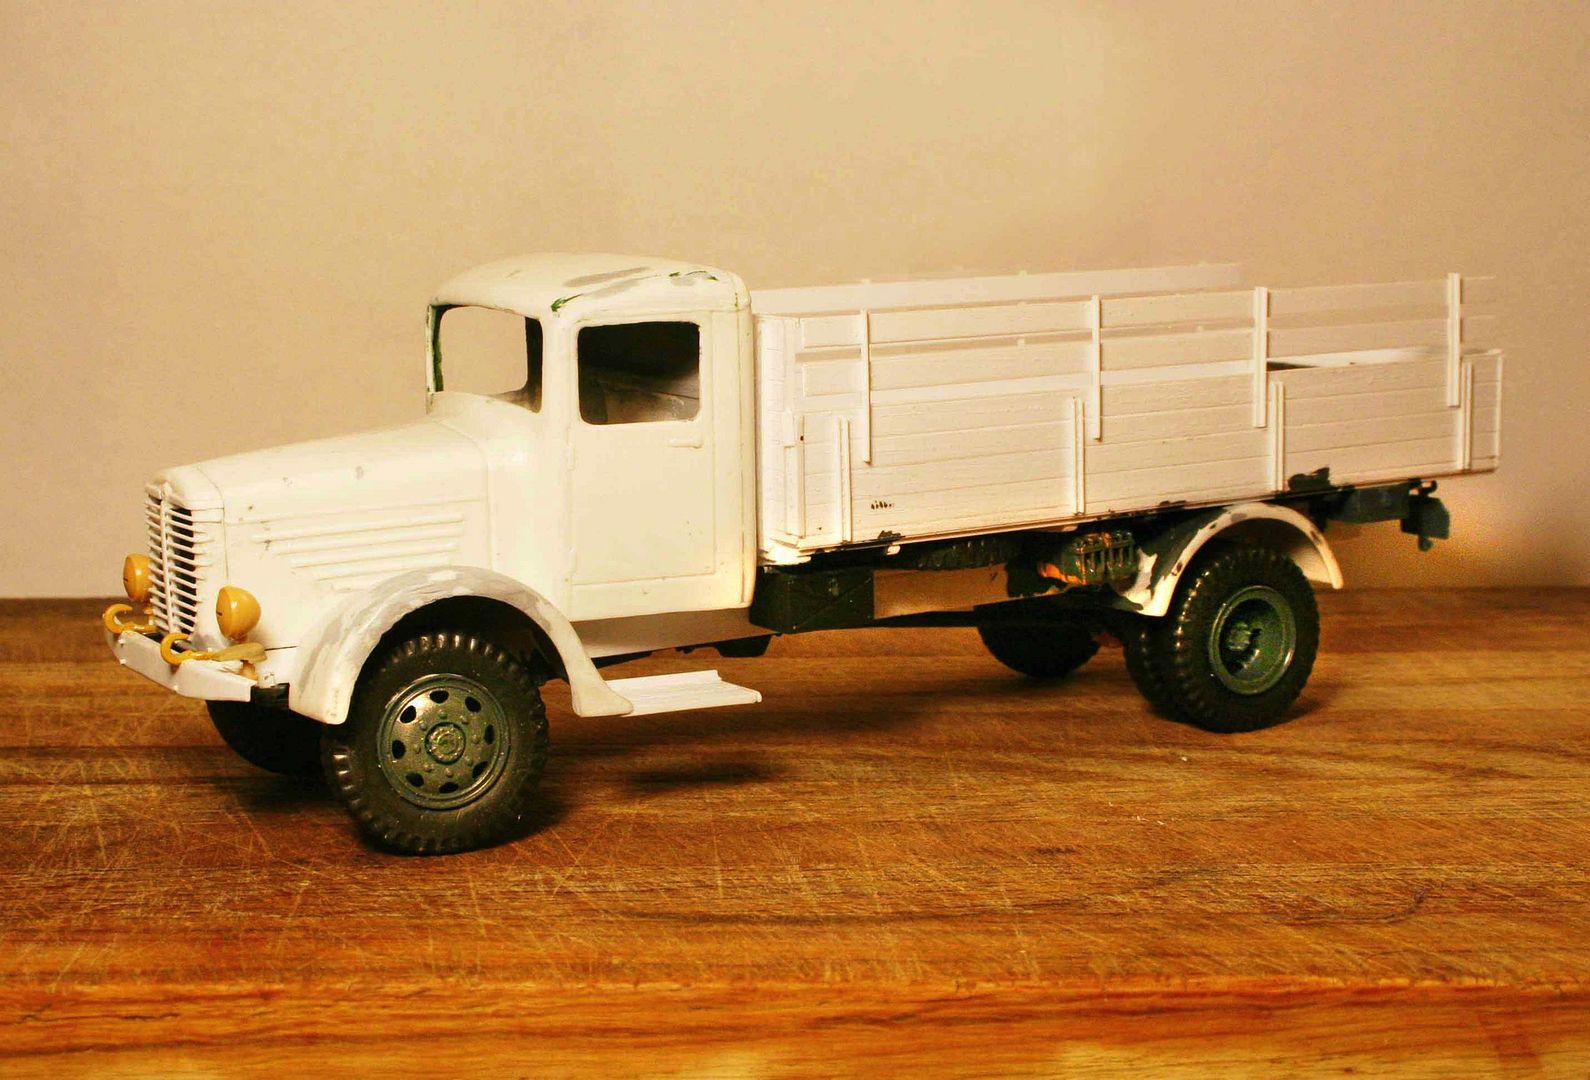
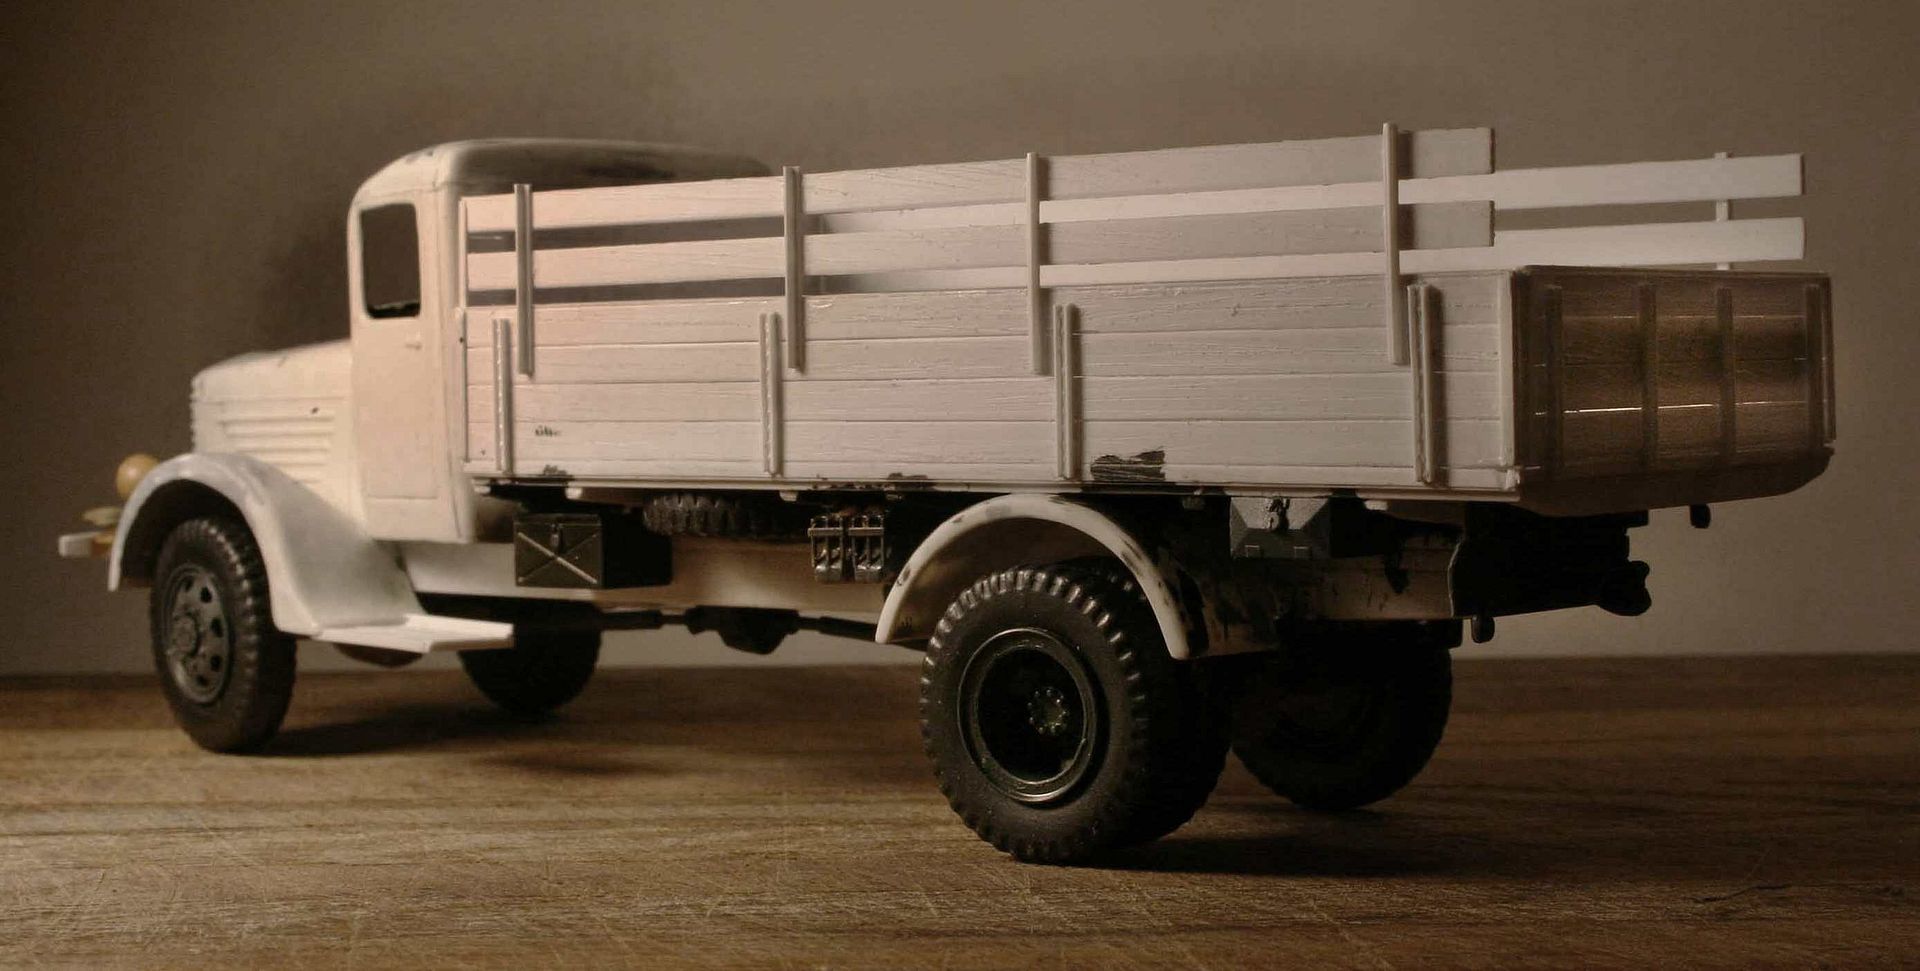
Wheel drums, differentials and a number of detail parts came out of my stash of Opel Blitz parts.


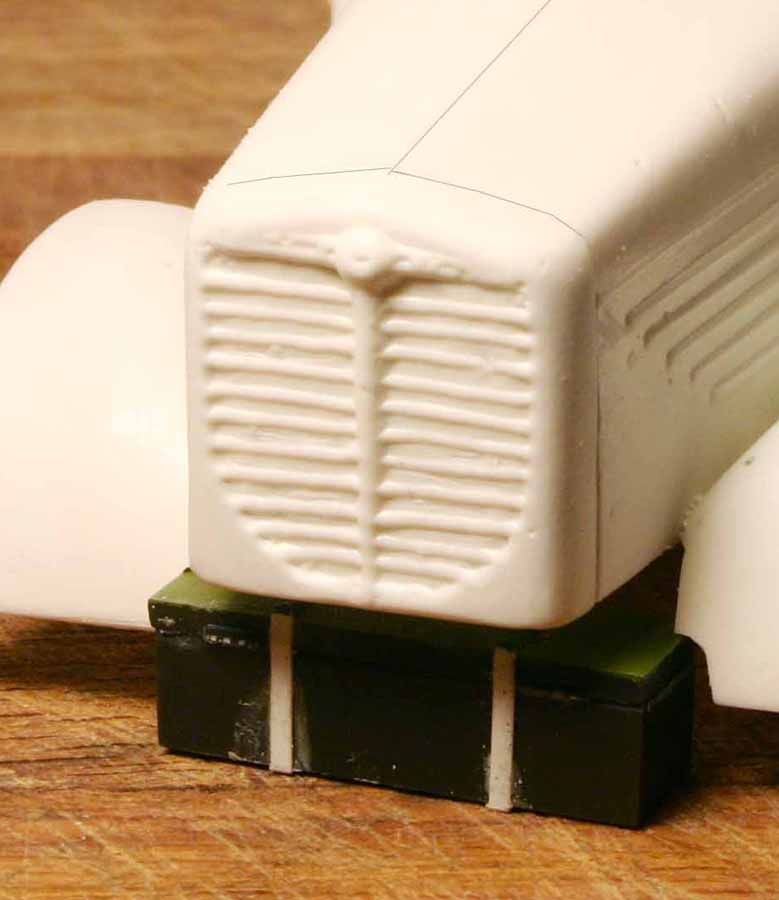
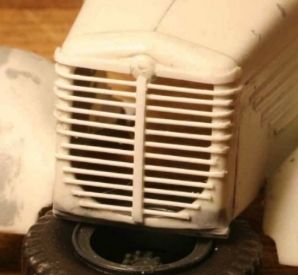
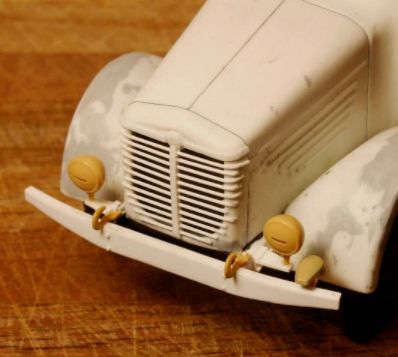
I figured I could improve on the Vac-Formed front grill with a little Evergreen.


I got this far before AFV Club came out with their excellent 2x4 and 4x4 kits of the Nag in 1/35th!

I keep telling myself I will finish it, one day - but I'm not so sure.


p.s. I told you I was crazy - Today I ordered a set of resin tires (from Panzer Art) for this baby so I guess I am going to finish it after all!

___________________________________________________________________________


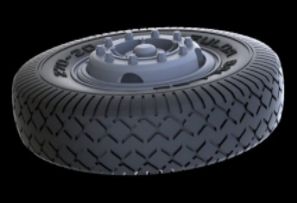
OK, just received the Panzer Art tires today. They are beautiful!
r2d2
Visit this Community
England - South East, United Kingdom
Joined: April 13, 2006
KitMaker: 424 posts
Armorama: 419 posts
Posted: Sunday, July 10, 2016 - 11:28 PM UTC
Hi Michael, enjoying this thread a lot.

Some more of my works....

Small details on this Landy
http://www.armorama.co.uk/forums/176153#1478744


A what if......
http://www.armorama.co.uk/forums/163671#1374646


Done in 2007....error pointed out on the ID plates.
http://www.armorama.co.uk/forums/144517#1208113

Minor scratch building on this one. Done way before all the plastic kits available.
http://www.armorama.co.uk/forums/154604#1295623
165thspc
#521
Visit this Community
Kentucky, United States
Joined: April 13, 2011
KitMaker: 9,465 posts
Armorama: 8,695 posts
Posted: Sunday, July 10, 2016 - 11:50 PM UTC
Val I think your should post some photos directly to this thread of that IDF Merk and also the semi-tractor, they are both right on!

Your treatment of all the chains on the Merk is excellent!
urumomo
Visit this Community
Texas, United States
Joined: August 22, 2013
KitMaker: 675 posts
Armorama: 667 posts
Posted: Monday, July 11, 2016 - 01:06 AM UTC
Why is the edge of the plate on the gun shield scalloped like that ? :

Removed by original poster on 05/14/19 - 02:04:18 (GMT).
r2d2
Visit this Community
England - South East, United Kingdom
Joined: April 13, 2006
KitMaker: 424 posts
Armorama: 419 posts
Posted: Monday, July 11, 2016 - 01:26 AM UTC
Here you go Michael.


barkingdigger
Staff MemberAssociate Editor
ARMORAMA
#013
Visit this Community
England - East Anglia, United Kingdom
Joined: June 20, 2008
KitMaker: 3,981 posts
Armorama: 3,403 posts
Posted: Monday, July 11, 2016 - 01:42 AM UTC

Quoted Text

C'mon guys and gals, someone else is bound to have more scratch builds and conversions. I'm beginning to feel like the lone ranger! It is not my intent to hog this forum but just to keep it moving. - Mike


I've got a bunch of scratch-bashes, but need to find time to prep & post them! (Time is the one thing I haven't managed to make from Evergreen plastic...)
165thspc
#521
Visit this Community
Kentucky, United States
Joined: April 13, 2011
KitMaker: 9,465 posts
Armorama: 8,695 posts
Posted: Monday, July 11, 2016 - 03:17 AM UTC
Good one Tom!
165thspc
#521
Visit this Community
Kentucky, United States
Joined: April 13, 2011
KitMaker: 9,465 posts
Armorama: 8,695 posts
Posted: Monday, July 11, 2016 - 06:51 AM UTC
I have a good friend from the Cincinnati area that while not extremely computer savvy is certainly sharp when it comes to scratch building or conversions. His name is Monte Kelch and he said I could share some of his work here.


V-2 Launch Control Vehicle - scratch built superstructure:


Russian Ambulance - scratch built house body:


French built lite armored CMP, self-propelled gun, mounting a WWI French 75mm - scratch built superstructure and gun:


A real WWI French 75mm - KY Military Museum, Frankfort, KY:


German Horch Ambulance - scratch built upper cabin:


All photos: Mike Koenig
165thspc
#521
Visit this Community
Kentucky, United States
Joined: April 13, 2011
KitMaker: 9,465 posts
Armorama: 8,695 posts
Posted: Tuesday, July 12, 2016 - 09:23 AM UTC
Another creation from Monte Kelch in 1/35th:


Russian shop maintenance truck - scratch built shop body:

There is now an (either 1/48th or 1/72nd) plastic model available of this vehicle.

All photos: Mike Koenig
JPTRR
Staff MemberManaging Editor
RAILROAD MODELING
#051
Visit this Community
Tennessee, United States
Joined: December 21, 2002
KitMaker: 7,772 posts
Armorama: 2,447 posts
Posted: Tuesday, July 12, 2016 - 09:44 AM UTC
Mike,

Great work.

Perhaps the M20 was the Monogram model?
165thspc
#521
Visit this Community
Kentucky, United States
Joined: April 13, 2011
KitMaker: 9,465 posts
Armorama: 8,695 posts
Posted: Tuesday, July 12, 2016 - 05:36 PM UTC
Fred I think you are right!

I just remember building the M20 and the Duster - we're talking 1965 here! Back then I had in no way mastered the art of controlling my glue applications. Of course back then glue came in a tube with a screw in, metal wire "cap"!
165thspc
#521
Visit this Community
Kentucky, United States
Joined: April 13, 2011
KitMaker: 9,465 posts
Armorama: 8,695 posts
Posted: Tuesday, July 12, 2016 - 05:52 PM UTC
Another work in progress: CCKW converted to a RR locomotive.


These converted locomotives (a 1 : 1 scale conversion no less) were used in England during the supply build up prior to D-Day. They handled switching duties in and around the large warehouses to avoid the risk of fire that might be caused by the use of coal fired steam locomotives.


The local stone cutter provided some "ballast" from his bone yard. The wooden
hopper will eventually be filled with gravel and scrap locomotive parts.


The resin wheels come from Scale-Link in the UK.


Showing frame modifications.
165thspc
#521
Visit this Community
Kentucky, United States
Joined: April 13, 2011
KitMaker: 9,465 posts
Armorama: 8,695 posts
Posted: Tuesday, July 12, 2016 - 06:59 PM UTC
You know what I said earlier about "as soon as you try to scratch build something they come out with a plastic model".

Well here is another good example: The Opel Blitz bus!

This was yet another of the Vac-Form "kits" my friend gave me. Of course there are now several beautiful plastic kits offered in both 1/35th and 1/72nd of this vehicle.


This is as far as I got.

Bear in mind, this large Vac-Formed bus body came split lengthwise down the middle. The two halves had to be cut out of an otherwise flat sheet and smoothly joined together plus all the windows had to be cut out by hand.

If you have not had prior experience with Vacuum Formed plastic kits imagine trying to cut a big laundry detergent bottle in half, precisely down the middle and then building a model from it.

(Today's plastic bottles are actually "blow-molded" but the process is very similar.)

This is another of my models I tell myself I will finish someday! (As either an Ambulance or a Radio Van with Generator Trailer.)