Conversions and Scratch Builds

#521
Kentucky, United States
Joined: April 13, 2011
KitMaker: 9,465 posts
Armorama: 8,695 posts
Posted: Thursday, June 23, 2016 - 06:56 PM UTC
Arizona, United States
Joined: January 18, 2006
KitMaker: 1,866 posts
Armorama: 1,808 posts
Posted: Thursday, June 23, 2016 - 09:00 PM UTC
Quoted Text
The new Ford in 1/35th works for me! Then everything built onto the truck would be in the same scale. Might have to drop down to a PAK38 but do give the PAK40 a shot! (so to speak.)
Even as a small child it bothered me that my "Bag O' Soldiers" was in a different scale than the trucks and Jeeps sold in the same bag! Today I only model in 1/35th b/c if someone looks at my display everything is in the same relative size. I don't have to explain "now that T34 is in 1/72 scale but the Tiger is 1/35th."
My Mother objected to the "soldiers" so she got a huge set of cavalry and indians, complete with fort. Ah, the joys of firing rubber bands and trying to pop the riders off the horses with out knocking over the horse. It worked one out of a thousand. I miss those. One of mu Aunts got me some Army guys.
I think the Soviet 76mm could be squeezed on the F250 truck. There is still plenty of those floating around. I saw a pic of one in Afganistan. On a Madd Max all the electronic engine crud would have to go.
I got the M19 tank mover in yesterday. What a box.
I found a nifty feature on the forums called HIDE USER.
I was going to try it on myself and go stealth, but it only works on other users.
#521
Kentucky, United States
Joined: April 13, 2011
KitMaker: 9,465 posts
Armorama: 8,695 posts
Posted: Friday, June 24, 2016 - 07:49 PM UTC
#521
Kentucky, United States
Joined: April 13, 2011
KitMaker: 9,465 posts
Armorama: 8,695 posts
Posted: Friday, June 24, 2016 - 10:39 PM UTC
#521
Kentucky, United States
Joined: April 13, 2011
KitMaker: 9,465 posts
Armorama: 8,695 posts
Posted: Saturday, June 25, 2016 - 01:28 AM UTC
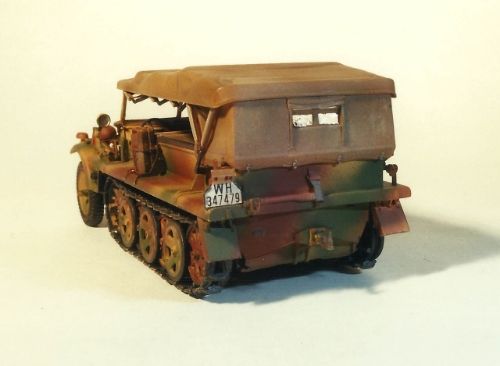
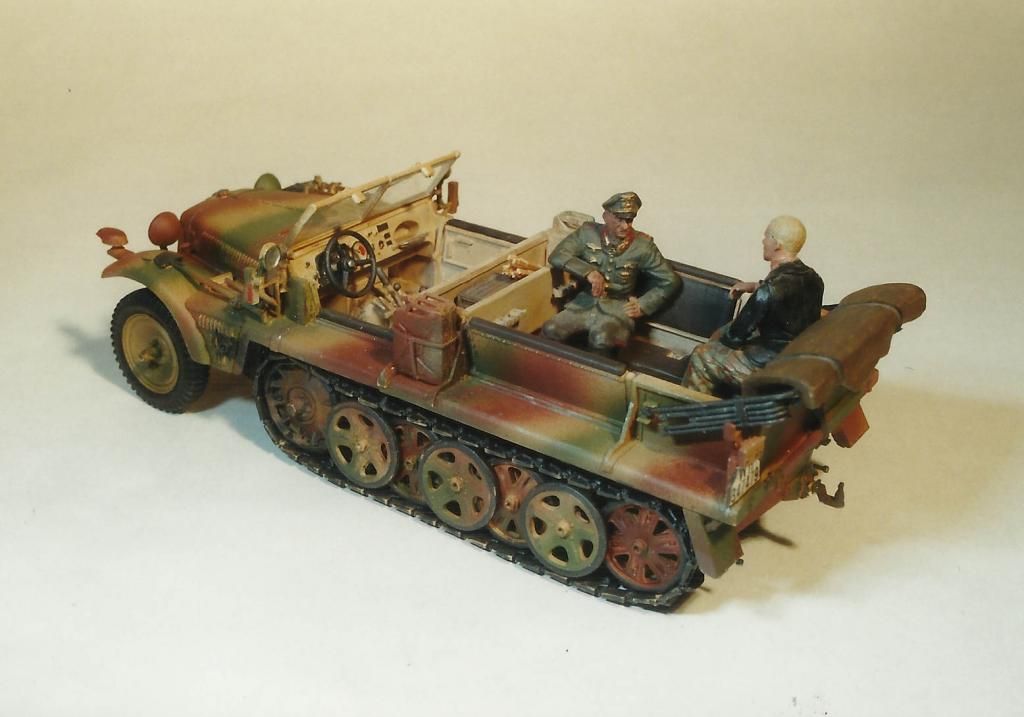
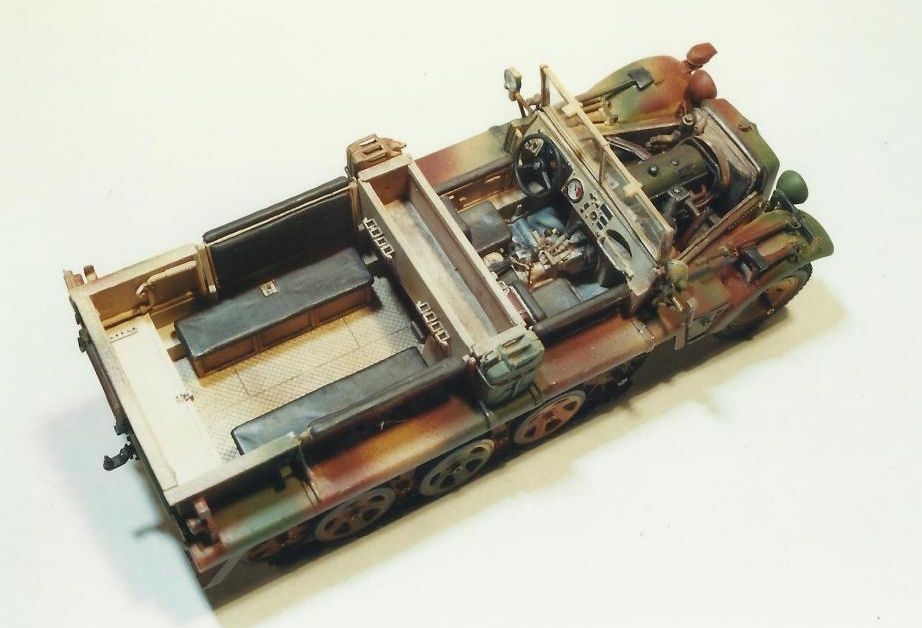
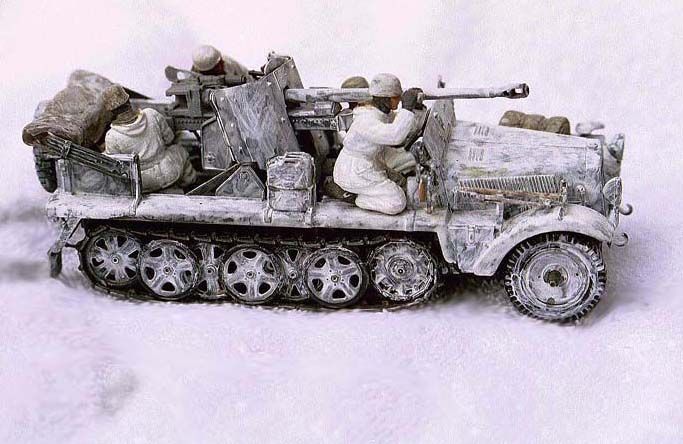
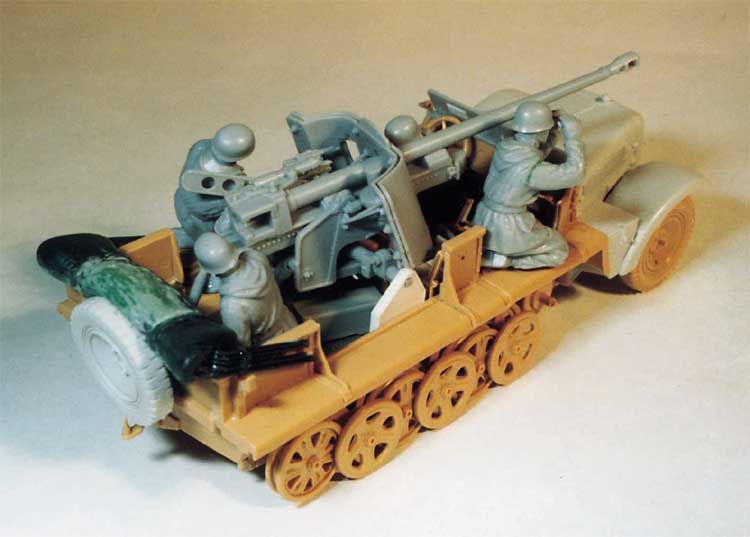
Tamiya German 8ton Semitrack w/20mm Flakvierling Sd.Kfz. 7/1 with a twist: 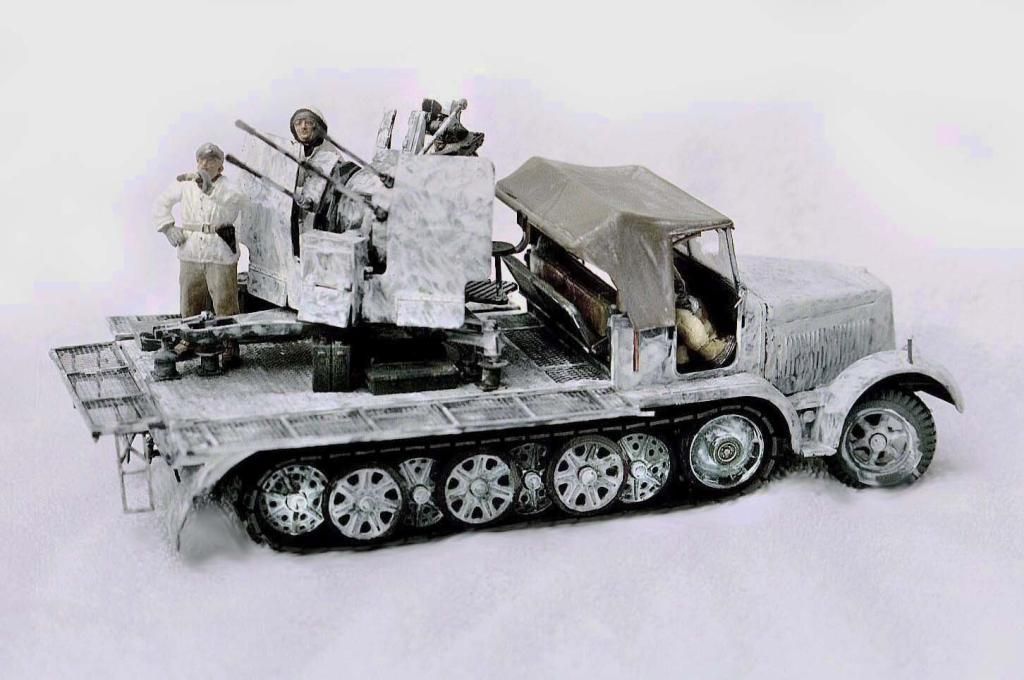
Another of my early conversions but someone is going to have to help me with the proper terminology. The Tamiya kit represents an Sd. Kfz. 7 purpose built with a permanent deck mounted turntable base for the Flakvierling.
I wanted to represent a vehicle that mounted the gun on its' tri-form base where the gun could be dismounted and loaded on a two wheel Sd. Ah. flak trailer when necessary.
Adding the base to the gun made the gun sit higher and made the vehicle (I thought) more visually interesting.
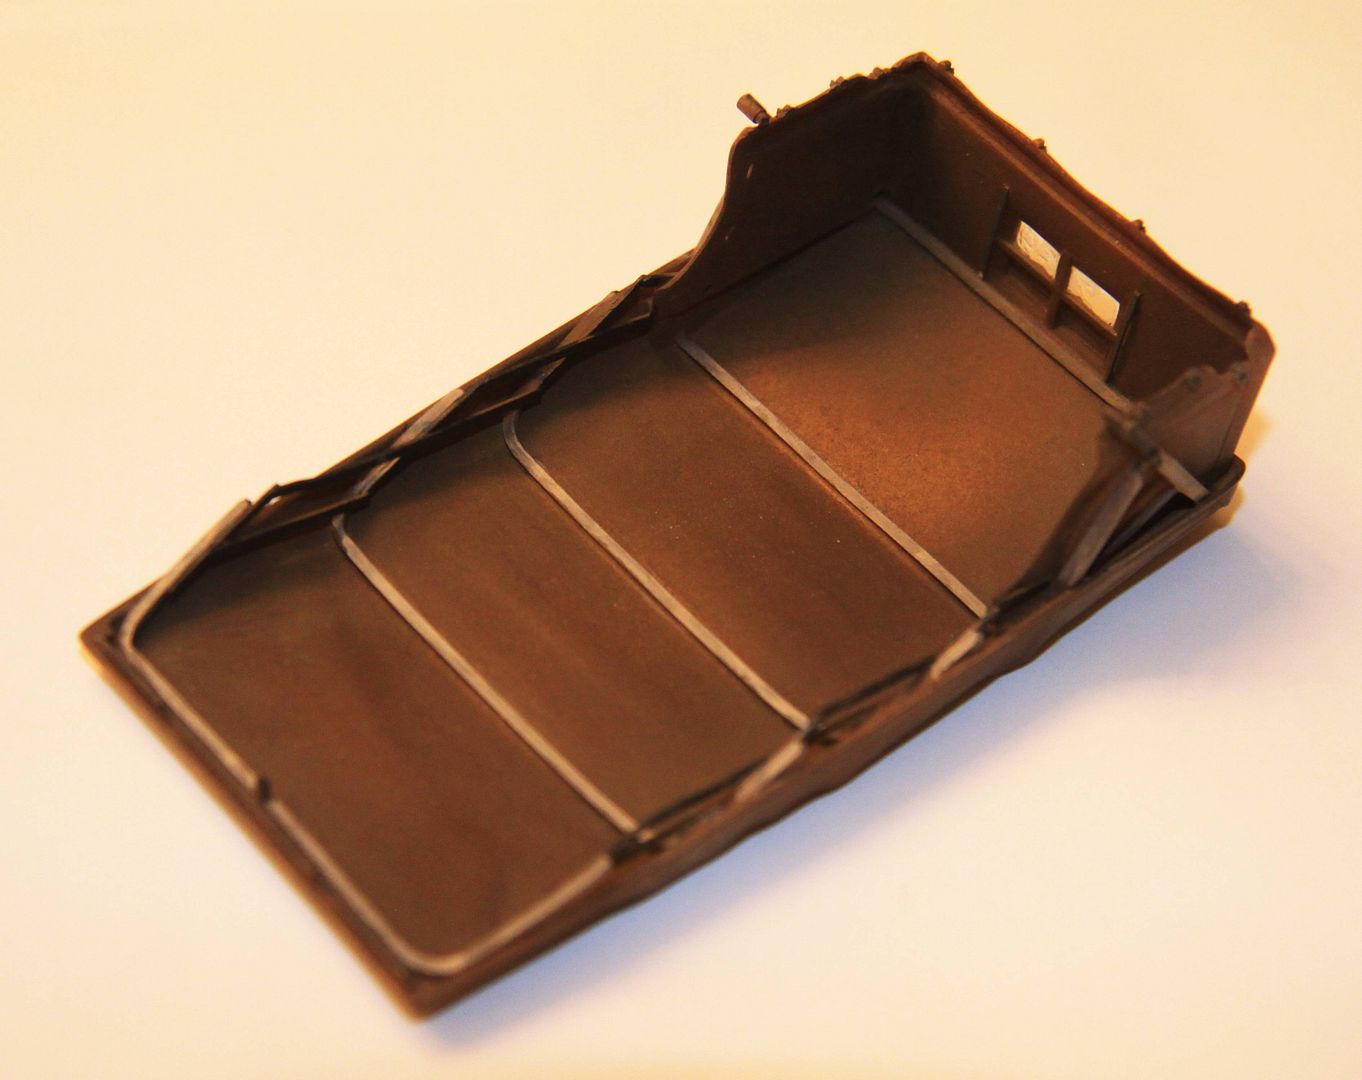
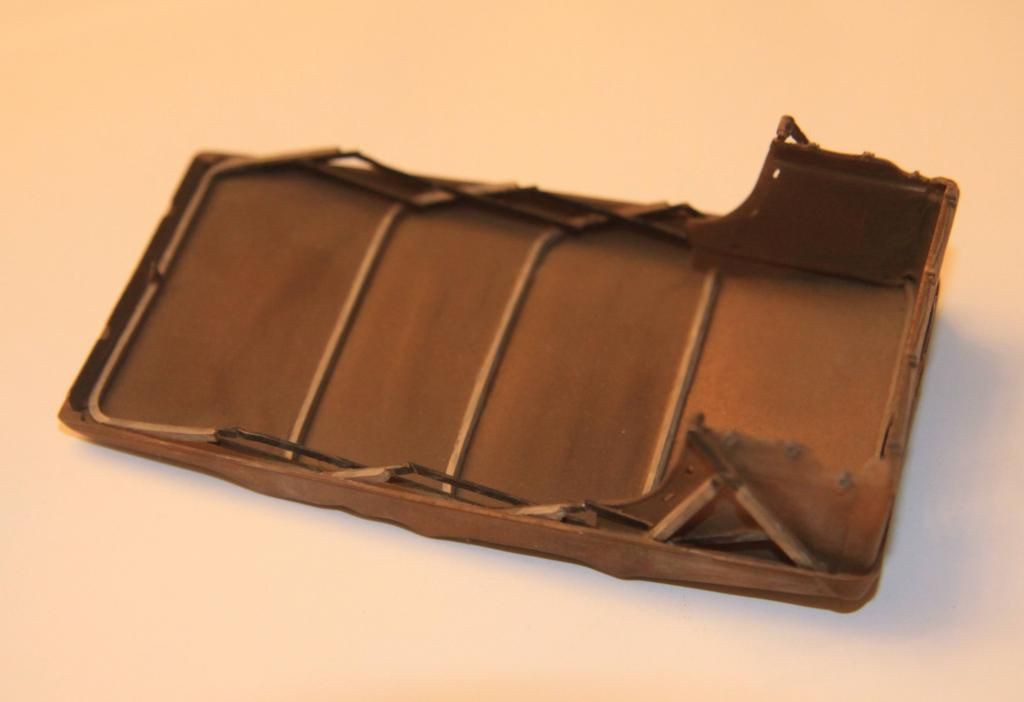
I made sure the folding rear facing seat actually folded up. I also altered the Tamiya cloth top to show that rear bit of the top as unfolded to give the seat some shelter.
The White camo is just water based tempera paint. (I wanted to be able to wash it off if I didn't like it.)
Ontario, Canada
Joined: August 05, 2003
KitMaker: 1,698 posts
Armorama: 1,563 posts
Posted: Sunday, June 26, 2016 - 08:41 AM UTC
Quoted Text
Recently posted elsewhere on Armorama:
My AA60 conversion, in process:
How did you get the sheet styrene to follow the curve of the bulkheads? Is it laminated sheets of .005?
Why plan when you can react?
#521
Kentucky, United States
Joined: April 13, 2011
KitMaker: 9,465 posts
Armorama: 8,695 posts
Posted: Sunday, June 26, 2016 - 11:00 AM UTC
Re: The MAZ AA60 fire truck construction
No Graeme, the skin of the main water tank is a single sheet of thin plastic. As I recall I just started "pre-forming" the sheet by rolling a tall spray paint can across the plastic on a soft surface like a large couch cushion. Then later I switched to a smaller diameter mandrel, using a piece of heavy broom handle to do the same thing to work the plastic into an even tighter curve. That way I progressively "teased" the plastic into a horseshoe shape that was more inclined to follow the shape of the bulkheads.
This process simulates a "three roller press" often found in old water tank foundries or shipyards. They were used to roll heavy metal sheeting into a round tube or to curve it to fit the hull of a ship.
I intentionally used very thin sheet stock because I wanted the ripple affect of the bulkheads to show through the skin once the tank was painted.
I lucked out that the cement used to attach the bulkheads to the inside of the sheet never ate thru to deface the outside surface of the sheet plastic.
Also I put plastic blocks between the bulkheads so the bulkheads were in their final form before I even started attaching the skin. Started attaching the skin along one horizontal edge. I clamped that edge and let the glue dry thoroughly before progressing to slowly attach the rest of the skin on around the bulkheads. Used rubber bands to then hold the skin in place.
Did not try to perfectly aline the skin plastic up exactly with the left and right end wall bulkheads. Just carefully cut off the excess and sanded those edges smooth after everything else had set up.
I hope that helps get you started on your project. Cheers
Mike
#521
Kentucky, United States
Joined: April 13, 2011
KitMaker: 9,465 posts
Armorama: 8,695 posts
Posted: Sunday, June 26, 2016 - 06:26 PM UTC
#521
Kentucky, United States
Joined: April 13, 2011
KitMaker: 9,465 posts
Armorama: 8,695 posts
Posted: Sunday, June 26, 2016 - 06:34 PM UTC
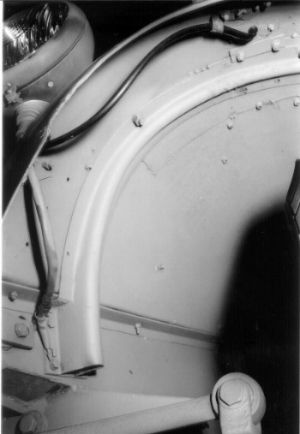
Corrected inner wheelwell profile and added fender supports and headlight/blackout light wiring. Made front suspension workable for better contact with model base. (Not to say the front axle actually springs but if you don't put any glue on that center leaf spring support point and none on that "Y" support rod at the rear of the oil pan. And then if you clip the two front stabilizer bars right behind those heavy supports - just below the radiator - the cross axle spring is still retained but is free to move and rock like a see-saw. This gives the front wheels some vertical play allowing them to adjust to an uneven display base.)
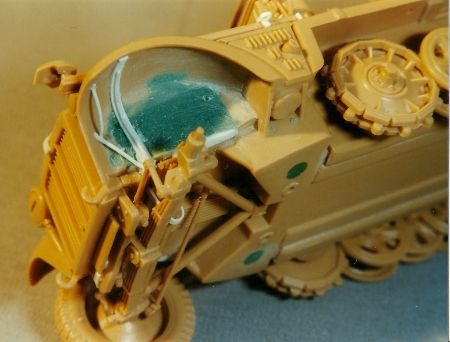
Added wooden top support bows and metal mechanism for folding cloth top.
Used clear airplane window glue to form transparent "plastic" folding rear windows for cloth top.
Added windshield wiper motors from the Tamiya Steyr field car kit as well as the gun racks in the rear compartment.
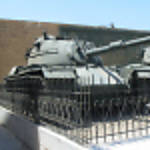
(Note: Some D7 kit instructions sheets actually show that center stowage box turned upside down having a solid top - this is totally incorrect.) Patton Museum's (now at Ft. Benning behind closed doors) Demag D7. Yes, that is also the Museum's PAK 38, Hetzer and Jagdpanzer IV behind the Demag! :-)
If interested, check out my Patton Museum album on Photobucket for many more museum event photos:
http://s1061.photobucket.com/user/165thspc/library/Patton%20Postcards?sort=3&page=1or more photos here on an Armorama thread:
https://armorama.kitmaker.net/forums/215074&page=1I consider myself to have been extremely lucky to have been involved with the Patton Museum and it's very active volunteer organization these many years!
Michael Koenig
All photos copyright Michael Koenig 2002California, United States
Joined: August 09, 2014
KitMaker: 180 posts
Armorama: 180 posts
Posted: Sunday, June 26, 2016 - 07:45 PM UTC
Keep it coming guys; I'm loving this thread!!!
Arizona, United States
Joined: January 18, 2006
KitMaker: 1,866 posts
Armorama: 1,808 posts
Posted: Monday, June 27, 2016 - 02:08 AM UTC
Very nice work on the half track.
I found a nifty feature on the forums called HIDE USER.
I was going to try it on myself and go stealth, but it only works on other users.
#521
Kentucky, United States
Joined: April 13, 2011
KitMaker: 9,465 posts
Armorama: 8,695 posts
Posted: Monday, June 27, 2016 - 04:17 AM UTC
Ontario, Canada
Joined: August 05, 2003
KitMaker: 1,698 posts
Armorama: 1,563 posts
Posted: Monday, June 27, 2016 - 05:55 AM UTC
Quoted Text
rolling a tall spray paint can across the plastic on a soft surface like a large couch cushion. Then later I switched to a smaller diameter mandrel, using a piece of heavy broom handle to do the same thing to work the plastic into an even tighter curve.
Mike
Ahh, that's clever, Cheers Mike. Now, if I can only remember this trick when the time comes to use it!
Why plan when you can react?
#521
Kentucky, United States
Joined: April 13, 2011
KitMaker: 9,465 posts
Armorama: 8,695 posts
Posted: Monday, June 27, 2016 - 05:37 PM UTC
And then you might ask; "What did you do with the second PAK38 that you got the third wheel from?"Well there was a plan a foot!It started with these two photos found in the Patton Library:
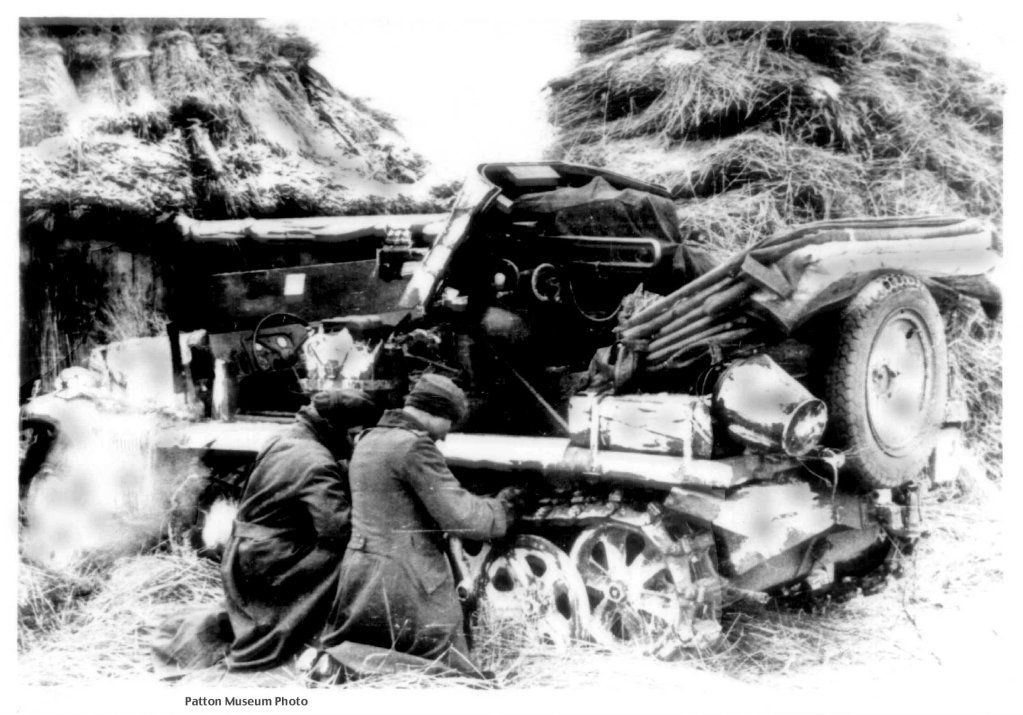
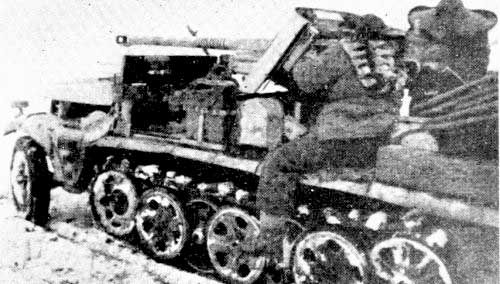 Photos Patton Library
from those two photos came this: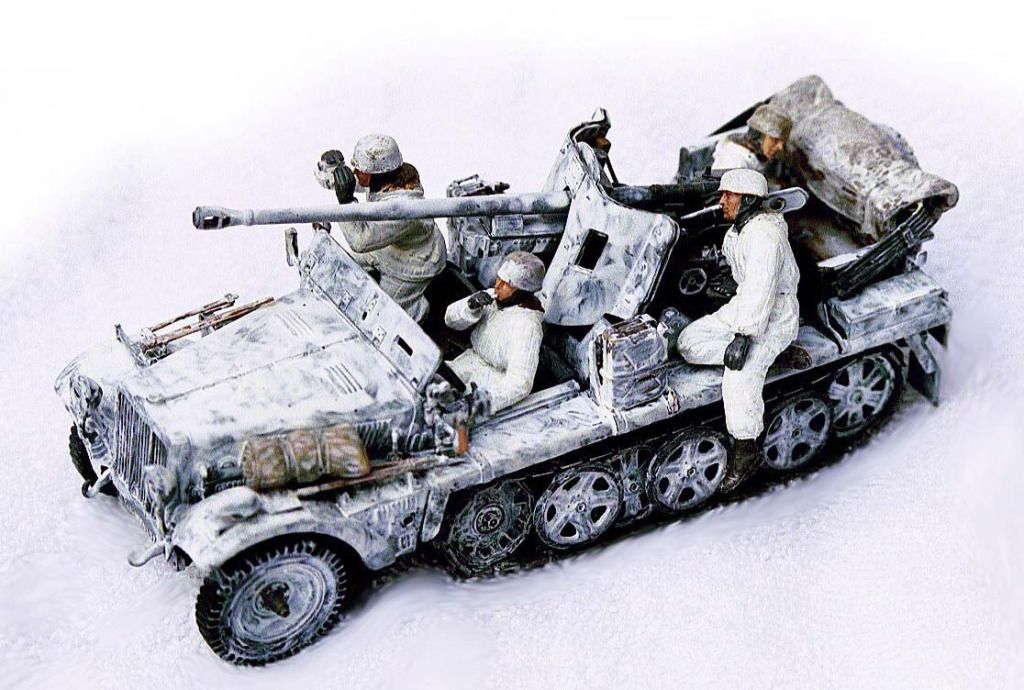
Again this model was constructed well before Italeri came out with their current plastic model of this vehicle.* As someone said earlier; scratch builds and conversions give us the chance to have models not currently available. (At the time.)
The model is a combination of the best parts of both the Revell and ESCI D7 kits plus the excellent Dragon PAK38. I like the look of the front end of the D7 so much that I chose not to model the light metal shielding carried by most of these vehicles. The figures are all the Dragon PAK gun crew but obliviously repositioned to try and match some of the figures in the reference photos.
With the gun mounted this low on the chassis the cloth top could actually be raised to protect & partially hide the gun and the crew. With no windshield to attach the roof to, in those days two leather belts would be used to hold down the front corners of the cloth top when on the move to keep the wind from lifting it..
Once again the snow camo is just grade school white tempera paint.
F.Y.I. "Snow" photos shot simply on a white bath towel.
* One criticism of the Italeri D7+PAK model: The Italeri designers apparently had no concept of how this gun might be mounted to the vehicle. On the Italeri model the gun clearly sits much too high above the armored wind screen and the gun mount itself is just a stepped block of non-descript cheese under the gun. There is no framing or structure to transmit the gun recoil to the frame of the vehicle. In one of the reference photos above you can see a large structural block on each side of the vehicle that the gun carriage is attached to. Then on the top photo you can see some sort of beam running diagonally down to the rear corner of the half-track body. Therefore on my model there are also heavy C channels running downward and out from near the middle of the gun carriage to the rear corners of the D7 body.
#521
Kentucky, United States
Joined: April 13, 2011
KitMaker: 9,465 posts
Armorama: 8,695 posts
Posted: Tuesday, June 28, 2016 - 02:48 AM UTC
A couple more shots of the D7+PAK38 SPG under construction:

ECSI front end (from firewall forward.) Revell/Italeri offering from firewall on back.
#521
Kentucky, United States
Joined: April 13, 2011
KitMaker: 9,465 posts
Armorama: 8,695 posts
Posted: Tuesday, June 28, 2016 - 07:11 PM UTC
Evan & Randall thank you for your support and your comments.
Mike
#521
Kentucky, United States
Joined: April 13, 2011
KitMaker: 9,465 posts
Armorama: 8,695 posts
Posted: Wednesday, June 29, 2016 - 03:31 AM UTC
As said above; With some careful thought as to where NOT to apply glue and just a little judicious cutting almost any of the German half-track models with the transverse mounted front spring can be made to function.
I lost a First Place Trophy once simply because both my front tires were not sitting squarely on the ground (as they SHOULD have been! - I never noticed.) So something like this could make all the difference in a competition.
#521
Kentucky, United States
Joined: April 13, 2011
KitMaker: 9,465 posts
Armorama: 8,695 posts
Posted: Thursday, June 30, 2016 - 05:55 PM UTC
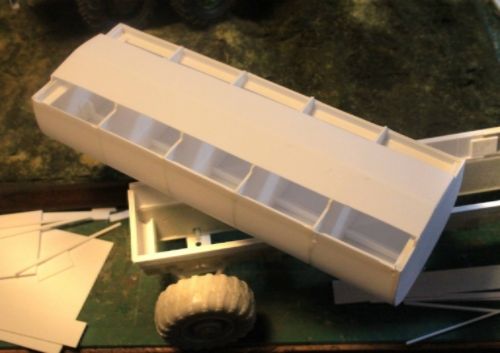
More super detailing in possibly unseen places:
Resin 20 ton flatbed trailer from Scale-Link.
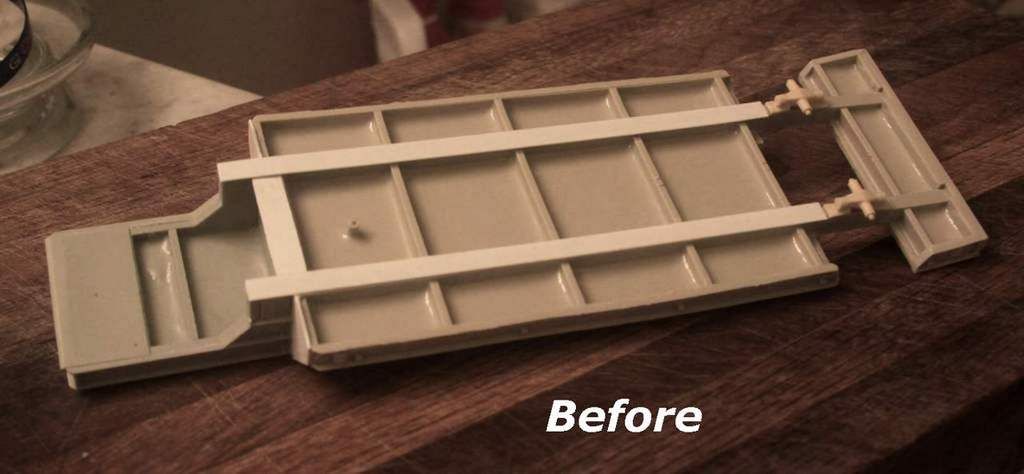
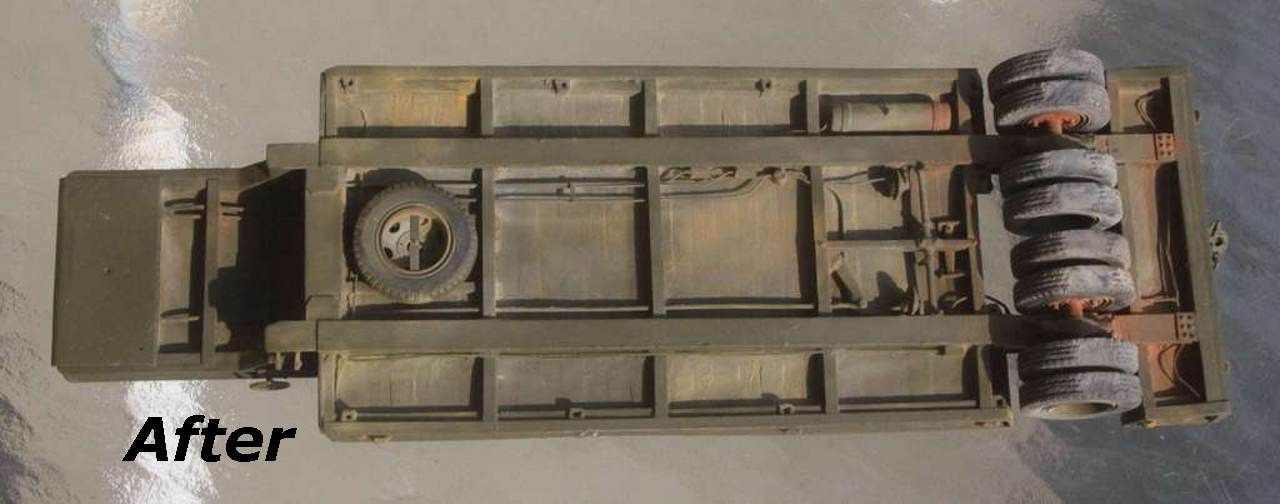
Posed this on a mirror at the Louisville IPMS show, being pulled by my converted White 666 (HobbyBoss) semi-tractor and carrying the (Mirror Models) D7 Bulldozer. The combined 3 part model took a First Place and the "Best Armor" award!
#521
Kentucky, United States
Joined: April 13, 2011
KitMaker: 9,465 posts
Armorama: 8,695 posts
Posted: Friday, July 01, 2016 - 12:20 AM UTC
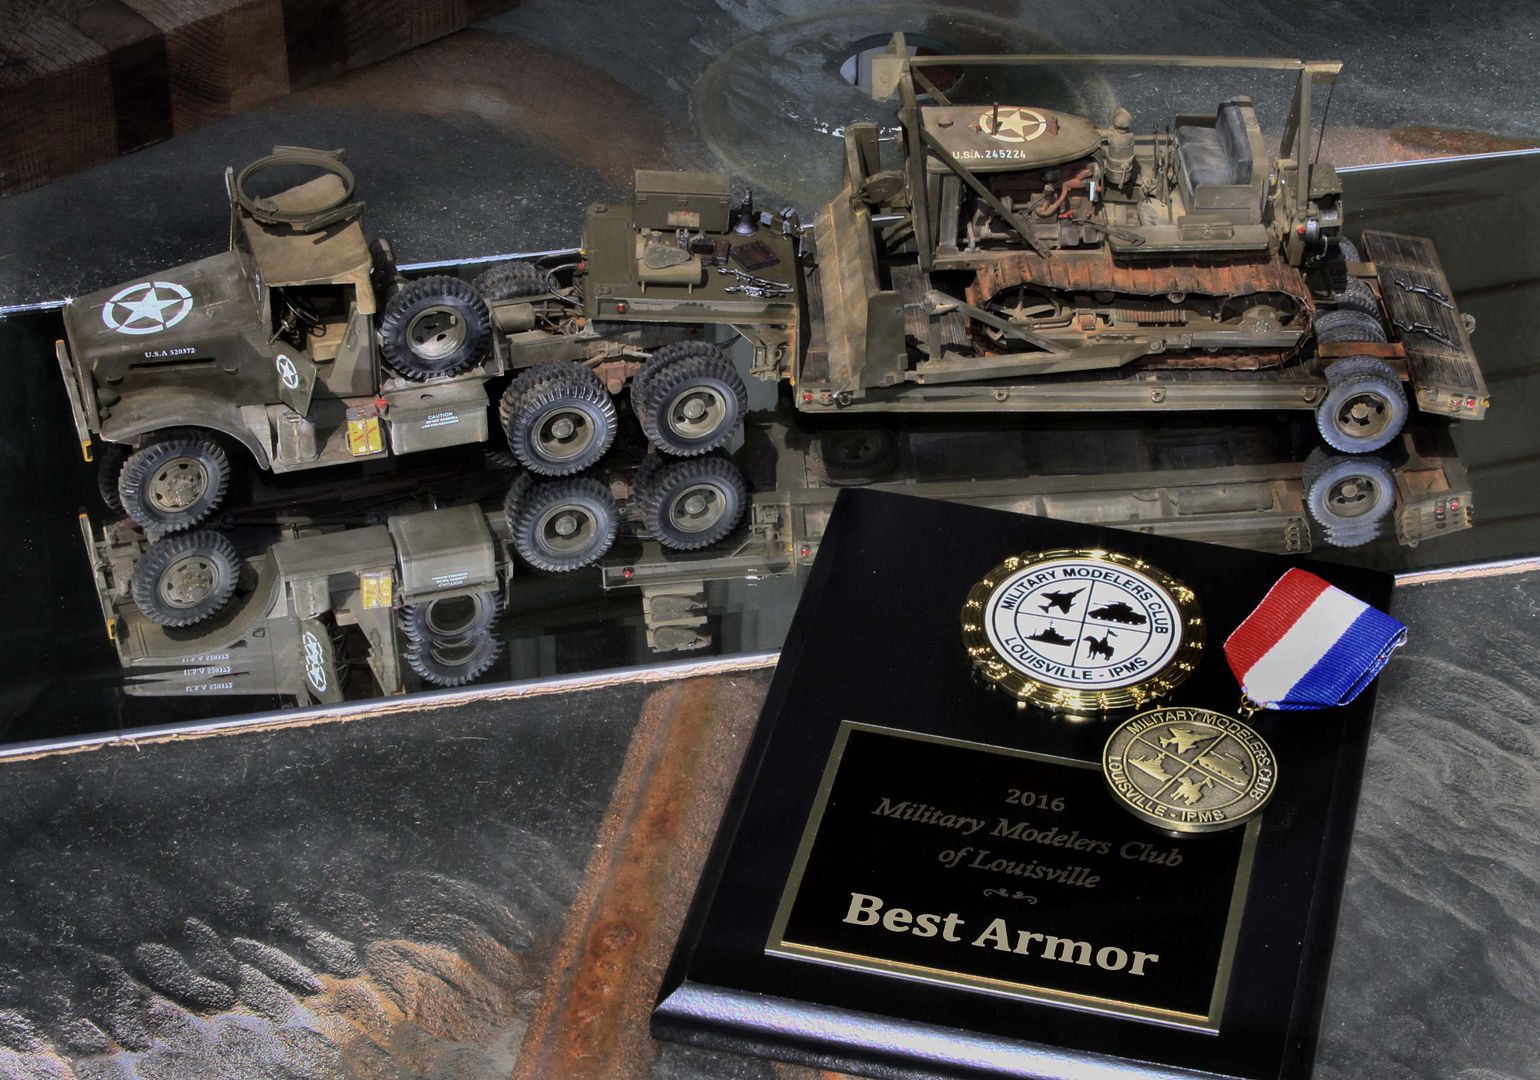 Only the second time in my life I have won a "Best Armor" award. The funny thing is, both times it was with a truck!
#521
Kentucky, United States
Joined: April 13, 2011
KitMaker: 9,465 posts
Armorama: 8,695 posts
Posted: Friday, July 01, 2016 - 04:22 AM UTC
Here's a question: What would be a "normal" run quantity for a popular brand new kit? 2000, 5000, 10,000 units?
I'm sure it varies widely but does anyone have a general idea?
California, United States
Joined: August 09, 2014
KitMaker: 180 posts
Armorama: 180 posts
Posted: Friday, July 01, 2016 - 06:27 AM UTC
Ironic, yes, but VERY well deserved!!! Bravo!
Quoted Text
Only the second time in my life I have won a "Best Armor" award. The funny thing is, both times it was with a truck!)
California, United States
Joined: August 09, 2014
KitMaker: 180 posts
Armorama: 180 posts
Posted: Friday, July 01, 2016 - 06:27 AM UTC
For car models it's about 20,000.
Quoted Text
Here's a question: What would be a "normal" run quantity for a popular brand new kit? 2000, 5000, 10,000 units?
I'm sure it varies widely but does anyone have a general idea?
#521
Kentucky, United States
Joined: April 13, 2011
KitMaker: 9,465 posts
Armorama: 8,695 posts
Posted: Saturday, July 02, 2016 - 02:26 AM UTC
Quoted Text
For car models it's about 20,000.
Quoted Text
Here's a question: What would be a "normal" run quantity for a popular brand new kit? 2000, 5000, 10,000 units?
I'm sure it varies widely but does anyone have a general idea?
Thanks Doc. How about armor models? 20K units sounds high but I may definitely be underestimating the model armor market worldwide.
#521
Kentucky, United States
Joined: April 13, 2011
KitMaker: 9,465 posts
Armorama: 8,695 posts
Posted: Saturday, July 02, 2016 - 06:24 PM UTC
Beautiful VT-34 conversion to be seen elsewhere on this site at:
http://armorama.kitmaker.net/forums/249132I have a particular interest/weakness for Recovery Vehicles!
A lot of great technique to be learned there!
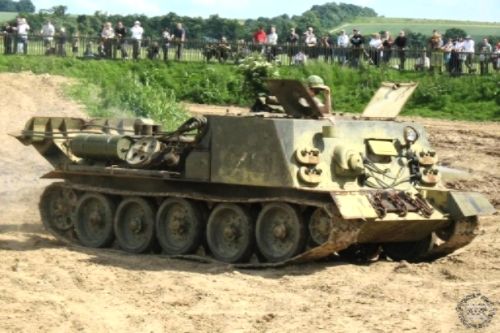 Photo Credit: Trevor Larkum, preservedtanks.com, Imperial War Museum; Duxford.
#521
Kentucky, United States
Joined: April 13, 2011
KitMaker: 9,465 posts
Armorama: 8,695 posts
Posted: Sunday, July 03, 2016 - 07:22 PM UTC
Some serious scratch building going on for an interior of the massive T-28 super heavy assault SPG over at:
http://armorama.kitmaker.net/forums/223527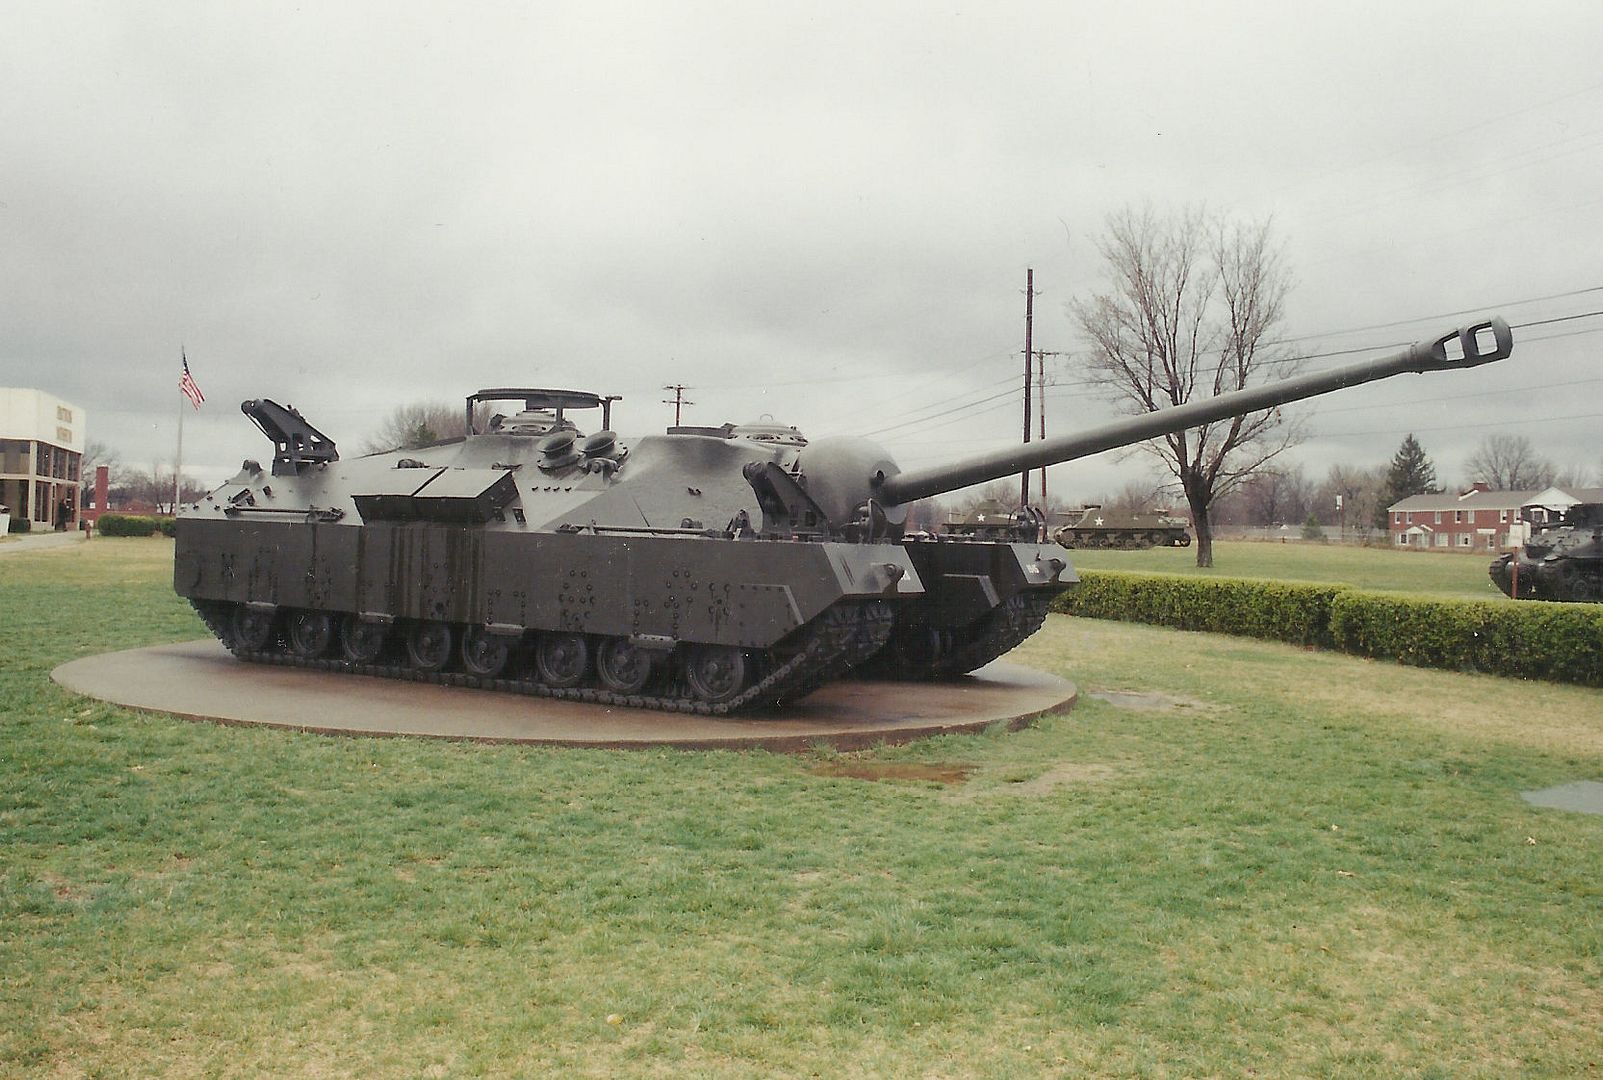 Mike Koenig photo


 Mike Koenig Photo


 Photos Patton Library


