Dustin: nice work on the cameo.
Tim: that bike is beautiful! Even has the seat springs. Wow.
-Zon
Hosted by Richard S.
Tank Hunters Campaign
zontar

Joined: August 27, 2006
KitMaker: 1,646 posts
Armorama: 1,557 posts

Posted: Friday, October 14, 2016 - 10:49 PM UTC
Posted: Saturday, October 15, 2016 - 02:51 AM UTC

Brian,
I'm glad that sewing works well for you. I fear my fumble-fingers wouldn't be up to it. Nice work!
Btw...what's the AFV you're showing here? I don't recognise the running gear.
Cheers,
Gaz
Posted: Saturday, October 15, 2016 - 01:47 PM UTC
Well in a rare foray outside of shipbuilding I have wandered over to Armorama to join this campaign ....with a plane. I have been following this campaign and been waiting to have some time to build this. There is a video on YouTube showing it "in action" which is cool. I don't know how effective it was but it's definitely a tank hunter.
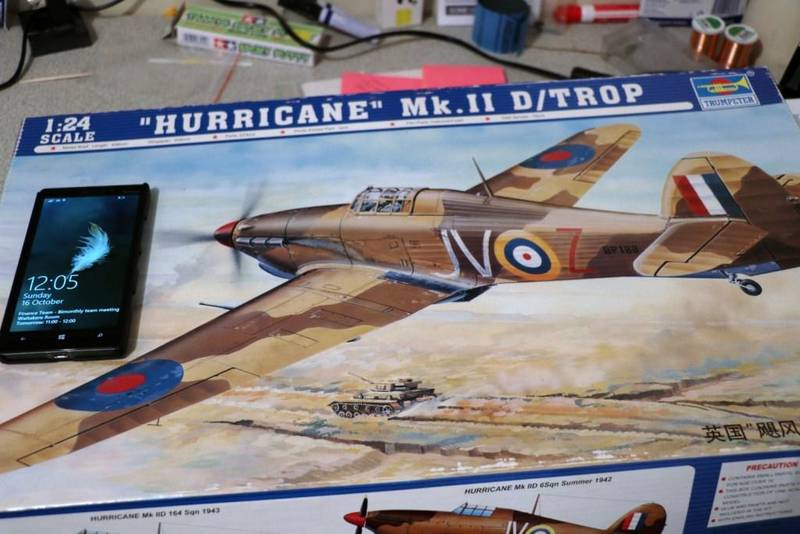
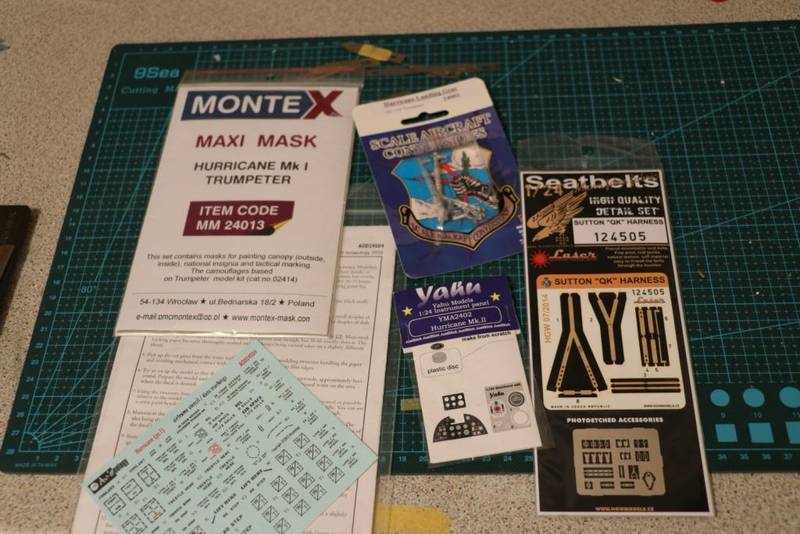
I bought this several years ago at a moving sale because it seemed a bargain. Since then I have collected a few extras for it.
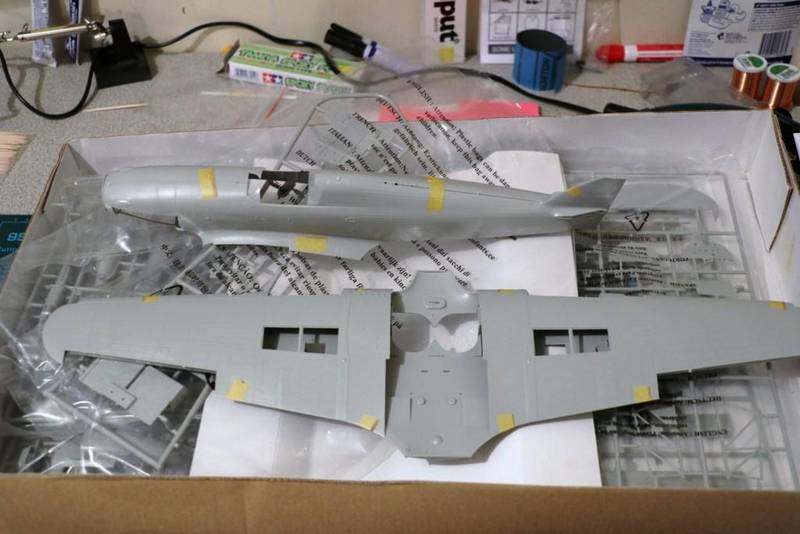
It's one of Trumpeter's earlier efforts so I am not expecting a lot but a benefit is its low part count despite it's scale. The only thing I have done to it before now was a fuselage and wing check to see the fit, which is pretty good on a dry run.
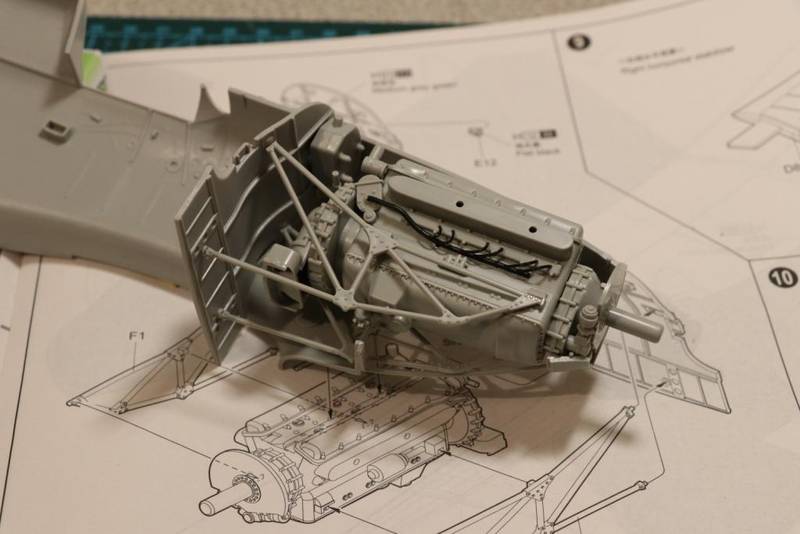
So on a quiet Sunday afternoon I assembled the engine which with a bit of work would look good but since it's all buttoned up it was put together for a bit of fun and the fact I need the propeller stub and exhaust mounts and that seemed the easiest way.
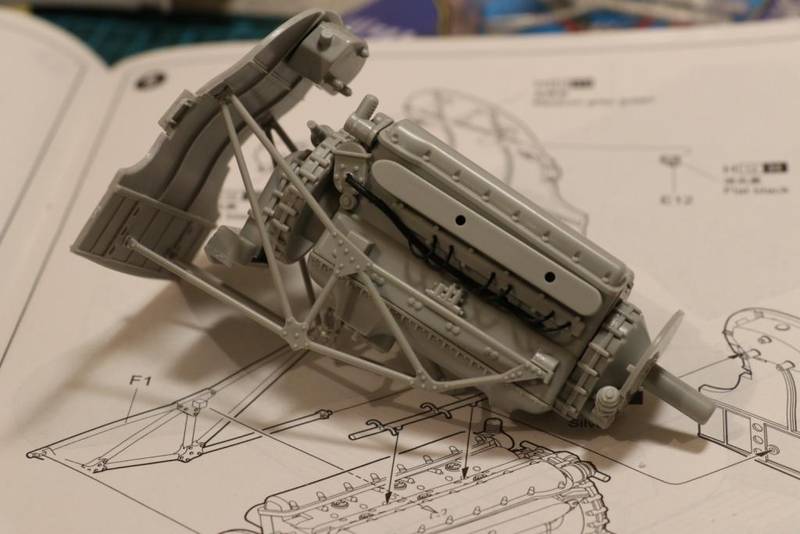
And it fits as well which is great. I may have misjudged T. on this.
cheers
Michael

I bought this several years ago at a moving sale because it seemed a bargain. Since then I have collected a few extras for it.

It's one of Trumpeter's earlier efforts so I am not expecting a lot but a benefit is its low part count despite it's scale. The only thing I have done to it before now was a fuselage and wing check to see the fit, which is pretty good on a dry run.

So on a quiet Sunday afternoon I assembled the engine which with a bit of work would look good but since it's all buttoned up it was put together for a bit of fun and the fact I need the propeller stub and exhaust mounts and that seemed the easiest way.

And it fits as well which is great. I may have misjudged T. on this.

cheers
Michael

Black_sheep

Joined: December 11, 2009
KitMaker: 823 posts
Armorama: 170 posts

Posted: Saturday, October 15, 2016 - 03:54 PM UTC
Hello Mates,
a lot of superb model coming up here! Here is my weekly update: It don´t look that much but it was quite a lot and tedious work for me to clean up and connect 188 single track links together to make two tracks for my Marder. But in the end I was the happy Victor . Only thing is now I need to be very careful as these plastic tracks are, although more easier to assemble than FRIUL in my humble opinion, much more fragile and break apart with more than the slightest tension...


we are proceeding now with the fighting compartment
Cheers
Thomas
a lot of superb model coming up here! Here is my weekly update: It don´t look that much but it was quite a lot and tedious work for me to clean up and connect 188 single track links together to make two tracks for my Marder. But in the end I was the happy Victor
 . Only thing is now I need to be very careful as these plastic tracks are, although more easier to assemble than FRIUL in my humble opinion, much more fragile and break apart with more than the slightest tension...

we are proceeding now with the fighting compartment

Cheers
Thomas
Thirian24

Joined: September 30, 2015
KitMaker: 2,493 posts
Armorama: 2,344 posts

Posted: Saturday, October 15, 2016 - 10:57 PM UTC
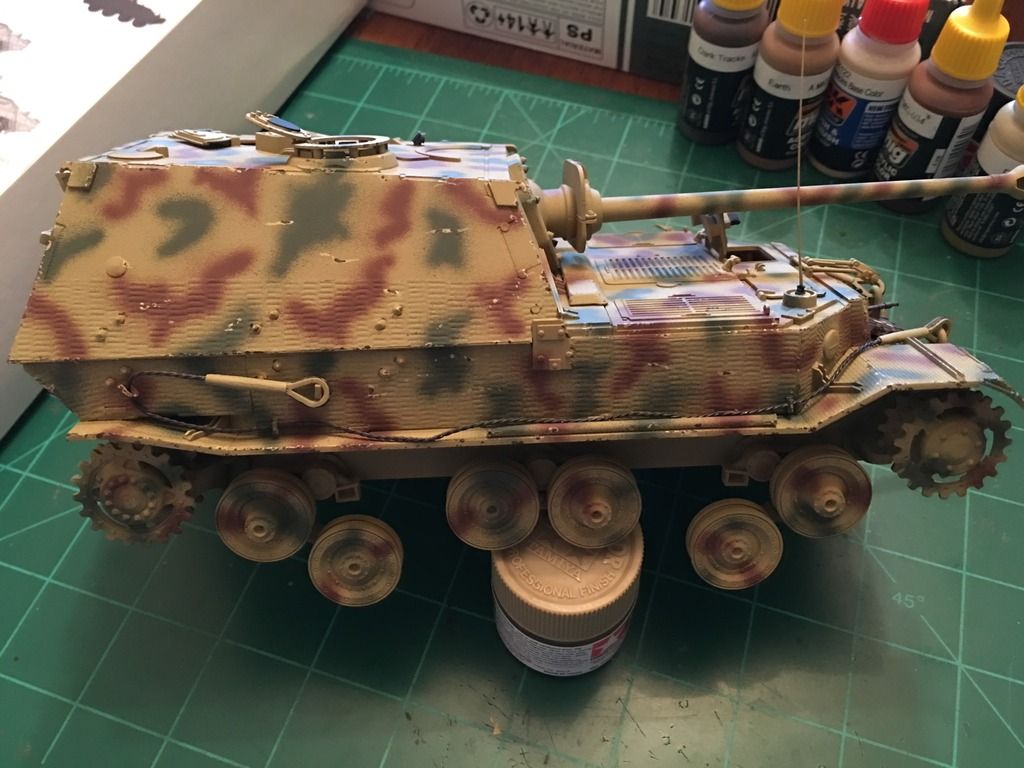
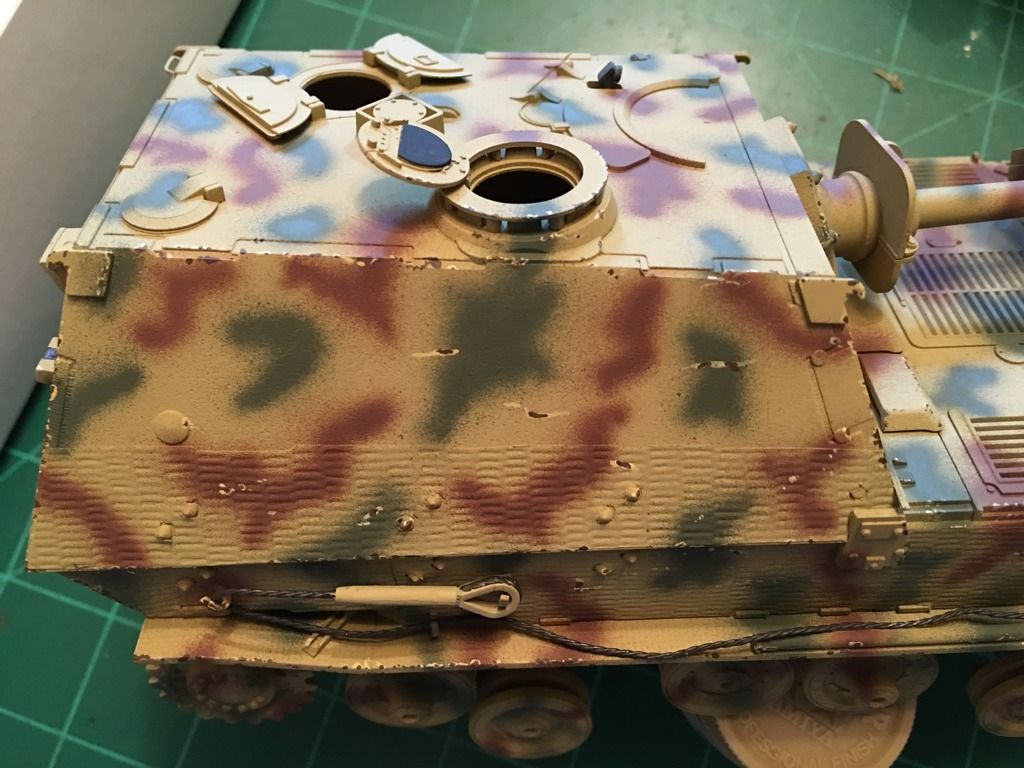
So I decided to try a new technique on this. It's a chipping technique where you use a lighter color of the base coat to add light chips and a dark color in the center of those lighter chips. Doesn't look bad at all.
I only did one side today because I have to get ready to go to work.
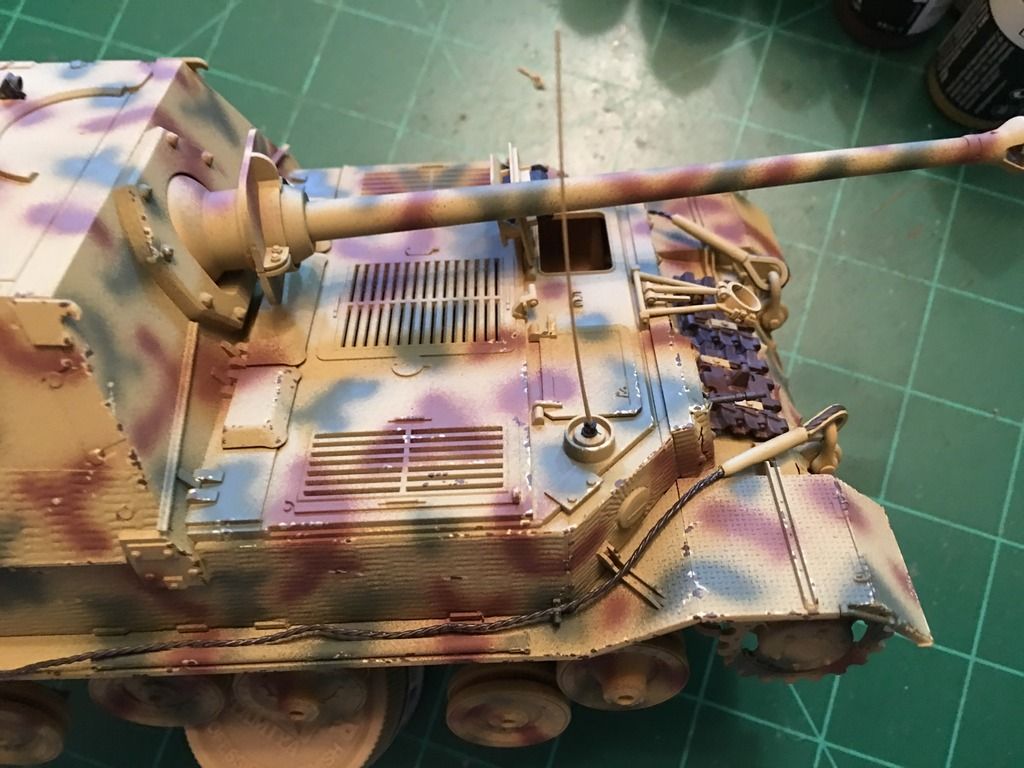
Cheers,
Dustin
I only did one side today because I have to get ready to go to work.


Cheers,
Dustin
Posted: Saturday, October 15, 2016 - 11:38 PM UTC
Michael,
Thank you for submitting your build and joining the campaign. I'm glad to see some more aircraft coming in. I'll be glad to see what you do with it. I've never weathered a plane that big.
Thomas,
Nice work on the Marder. Those tracks came out well and have a nice sag.
Dustin,
Your scratching technique looks cool. On the zimmerit areas, you might want to research some photos to see how it chips. it's really an important effect of the stuff when it comes to making it look real.
Gaz
Thirian24

Joined: September 30, 2015
KitMaker: 2,493 posts
Armorama: 2,344 posts

Posted: Sunday, October 16, 2016 - 04:08 AM UTC
Gary - Thank you sir. I know that the zimm chips off with heavy strikes/damage but I didn't think it would look right being that it's a sticker. I kinda was just going for s paint chip look and thought if I didn't give some to the zimm area that it would look weird.
Klaus-Adler

Joined: June 08, 2015
KitMaker: 1,505 posts
Armorama: 840 posts

Posted: Sunday, October 16, 2016 - 03:57 PM UTC
a brief update on the British Para anti tank team which i plan ot depict in normandy.
i have now started painting the flesh tones on the figures using oil paints as i wish to experiment with them more. sorry i only had time to take this one photo but you get the idea of what i am trying to achieve.
I also need to order up some extra supplies of accessories from historex before continuing as i need more back packs and a sten gun.

Posted: Sunday, October 16, 2016 - 04:53 PM UTC
@Dustin - I like the chipping effect, the whole thing looks like it is coming together very well. Looking forward to more.
Pave-Hawk

Joined: May 05, 2006
KitMaker: 900 posts
Armorama: 510 posts

Posted: Sunday, October 16, 2016 - 05:03 PM UTC
Like that Elefant Dustin, nice work.
If anyone remembers my 11 piece gun sight for the 17PDR, here it is again with all the insanely tiny PE parts attached, for a grand total of seventeen parts for something barely bigger than a number 11 blade.

And this thing is a cake walk compared to the Bishop I am building for the holy orders campaign!
If anyone remembers my 11 piece gun sight for the 17PDR, here it is again with all the insanely tiny PE parts attached, for a grand total of seventeen parts for something barely bigger than a number 11 blade.

And this thing is a cake walk compared to the Bishop I am building for the holy orders campaign!
Posted: Monday, October 17, 2016 - 01:44 AM UTC
David,
Those of us who have little experience and no skill will be grateful for any technique you can share.
Iain,
I'm beginning to think Bronco might be beyond me as I look at your nicely put-together gunsight. The detail is impressive!
Gaz
Those of us who have little experience and no skill will be grateful for any technique you can share.
Iain,
I'm beginning to think Bronco might be beyond me as I look at your nicely put-together gunsight. The detail is impressive!
Gaz
Thirian24

Joined: September 30, 2015
KitMaker: 2,493 posts
Armorama: 2,344 posts

Posted: Monday, October 17, 2016 - 03:13 AM UTC
Kevin & Iain - Thsnk you all for the kind words!
Iain - That gun sight is incredible. That's beyond my skills.
Iain - That gun sight is incredible. That's beyond my skills.
Posted: Monday, October 17, 2016 - 03:22 PM UTC
Hey everyone,
Just a little update on my Marder IIIh.

Just a small point here because I don't understand...
Dragon has gone to a lot of work to make this a highly detailed kit. Heaps of PE, turned metal barrel, and great looking parts...even clear periscope sprue!
But the bogies and the pivot point for the main armament are so sloppy that that it takes extra effort to ensure they dry at the desired angles to the main body.
The gun is dry fitted. And held in place with a blob of Blu-tack. It just seems so incongruous to be so great in so many detail areas but so sloppy elsewhere.
Anyway, rant over. I try to avoid painting before assembly, but I wanted to make sure that I got the barrel assembly painted before adding the trunions.
Happy modelling!
Gaz
Just a little update on my Marder IIIh.

Just a small point here because I don't understand...
Dragon has gone to a lot of work to make this a highly detailed kit. Heaps of PE, turned metal barrel, and great looking parts...even clear periscope sprue!
But the bogies and the pivot point for the main armament are so sloppy that that it takes extra effort to ensure they dry at the desired angles to the main body.
The gun is dry fitted. And held in place with a blob of Blu-tack. It just seems so incongruous to be so great in so many detail areas but so sloppy elsewhere.
Anyway, rant over. I try to avoid painting before assembly, but I wanted to make sure that I got the barrel assembly painted before adding the trunions.
Happy modelling!
Gaz
Pave-Hawk

Joined: May 05, 2006
KitMaker: 900 posts
Armorama: 510 posts

Posted: Monday, October 17, 2016 - 05:46 PM UTC
Posted: Monday, October 17, 2016 - 06:20 PM UTC
Quoted Text
Hey everyone,
Just a little update on my Marder IIIh.
Just a small point here because I don't understand...
Dragon has gone to a lot of work to make this a highly detailed kit. Heaps of PE, turned metal barrel, and great looking parts...even clear periscope sprue!
But the bogies and the pivot point for the main armament are so sloppy that that it takes extra effort to ensure they dry at the desired angles to the main body.
The gun is dry fitted. And held in place with a blob of Blu-tack. It just seems so incongruous to be so great in so many detail areas but so sloppy elsewhere.
Anyway, rant over. I try to avoid painting before assembly, but I wanted to make sure that I got the barrel assembly painted before adding the trunions.
Happy modelling!
Gaz
Looking great, Gary- as to the discrepancy between detail and slop, it has to be that older kits (and engineering) were used with brand new retooled parts. The old running gear here must have looked good to someone in the company while another ordered new guns, etc...Kit manufacturing is a fascinating, if not quirky, industry...
Posted: Tuesday, October 18, 2016 - 04:14 AM UTC
Quoted Text
Looking great, Gary- as to the discrepancy between detail and slop, it has to be that older kits (and engineering) were used with brand new retooled parts. The old running gear here must have looked good to someone in the company while another ordered new guns, etc...Kit manufacturing is a fascinating, if not quirky, industry...
I have often noted the same issue with Dragon kits and speculated it was a case of some parts being updated and other going back to Dragon's Jurassic Age . . .
Removed by original poster on 10/19/16 - 00:56:23 (GMT).
Removed by original poster on 10/19/16 - 00:54:33 (GMT).

69mudbone

Joined: April 26, 2016
KitMaker: 362 posts
Armorama: 285 posts

Posted: Tuesday, October 18, 2016 - 06:00 AM UTC

69mudbone

Joined: April 26, 2016
KitMaker: 362 posts
Armorama: 285 posts

Posted: Tuesday, October 18, 2016 - 06:09 AM UTC
Posted: Tuesday, October 18, 2016 - 11:44 AM UTC
Iain,
The breech on that thing is huge. Wonder if it's a counterweight, too.
Ken,
Huge difference in the barrels. Glad to see it taking shape.
Gaz
The breech on that thing is huge. Wonder if it's a counterweight, too.
Ken,
Huge difference in the barrels. Glad to see it taking shape.
Gaz

Northern_Lad

Joined: September 17, 2012
KitMaker: 462 posts
Armorama: 417 posts

Posted: Tuesday, October 18, 2016 - 11:45 PM UTC
Gary, the Marder looks great. Amazing the Germans got what is quite a large gun into such a small hull.
Here are few progress pictures of the Dragon Stug IV early with moulded on zim.


Time soon to paint the interior and gun assembly before cementing the roof in place. Then again, hardly any of it will be visible as I will add some crew in the open hatches. Sooooo, maybe I'll skip the interior paint job.
Cheers
Matthew
Here are few progress pictures of the Dragon Stug IV early with moulded on zim.


Time soon to paint the interior and gun assembly before cementing the roof in place. Then again, hardly any of it will be visible as I will add some crew in the open hatches. Sooooo, maybe I'll skip the interior paint job.
Cheers
Matthew

69mudbone

Joined: April 26, 2016
KitMaker: 362 posts
Armorama: 285 posts

Posted: Wednesday, October 19, 2016 - 12:55 AM UTC
Hey Guys,
First coat of paint with new airbrush,dual action. I used single for so long There will be a learning curve.
 image sharing sites
First coat of paint with new airbrush,dual action. I used single for so long There will be a learning curve.
 image sharing sites
Posted: Wednesday, October 19, 2016 - 02:19 AM UTC
Guys,
Thank you!
I'm glad to see such great builds happening here.
Matthew,
your StuG is coming together nicely. I'm impressed by the amount of space given to the radios. It must have been a cramped lifestyle the crews lived.
Ken,
Glad to see some paint going on. How many crew did that gun have?
Gaz
Thank you!
I'm glad to see such great builds happening here.
Matthew,
your StuG is coming together nicely. I'm impressed by the amount of space given to the radios. It must have been a cramped lifestyle the crews lived.
Ken,
Glad to see some paint going on. How many crew did that gun have?
Gaz
Posted: Thursday, October 20, 2016 - 01:26 PM UTC
Well a little further on with the build recoilless barrels are in place the new panel lines have been scribed and wheel wells have been painted and a little preshading has been accomplished. One thing I have noticed is that the recoilless barrels aren't perpendicular but slanted inwards due to the dihedral in the wings. But nothing about sanding the mounts themselves or were the actual resin parts adjusted for this. I'm in two minds as to remove them and sand them till they're straight up and down or whether to leave them as is.


 |


