Colorado, United States
Joined: December 25, 2004
KitMaker: 3,770 posts
Armorama: 2,263 posts
Posted: Saturday, December 24, 2016 - 03:45 AM UTC
Started to clean this up this morning - separating the parts from their blocks for the first step. Typical Verlinden as this was not difficult with their small blocks.

Typical resin kits - alignment vs. warpage vs. small parts.

I do like their "multi-level" PE though.

All in all, so far, not a bad small resin kit. Heck, I think it's the only thing out there in 1/35 for this gun other than the Tamiya metal kit. (wouldn't it be nice to see one in styrene?)
Mike

Connecticut, United States
Joined: February 04, 2003
KitMaker: 82 posts
Armorama: 71 posts
Posted: Saturday, December 24, 2016 - 10:07 PM UTC
Always wondered about the Verlinden kits...purchased some of the Civil War subjects for a friend of mine, but never one for myself.
Are you planning on displaying with figures or any vignette ideas on the horizon?
I love the smell of enamel thinner in the morning.
The smell, you know that enamel smell ...
the whole scale modeling room.
Smelled like …Victory
Someday those acrylics will prevail ...
Connecticut, United States
Joined: February 04, 2003
KitMaker: 82 posts
Armorama: 71 posts
Posted: Saturday, December 24, 2016 - 10:34 PM UTC
Pasi,
Soooo looking forward to following your build of the diminutive little Panzer IA.
I purchased this same Tristar kit on Ebay years ago at a price I couldn't pass on. It included a bunch of aftermarket PE, decals and even some tiny brass turret machineguns!
I explored the contents of the ol' box again after seeing your submission pics.
Only now, I fear, I'll have to purchase an electron microscope to have any success at assembling the dang thing!
I love the smell of enamel thinner in the morning.
The smell, you know that enamel smell ...
the whole scale modeling room.
Smelled like …Victory
Someday those acrylics will prevail ...

#460
California, United States
Joined: September 16, 2014
KitMaker: 1,156 posts
Armorama: 1,024 posts
Posted: Sunday, December 25, 2016 - 12:14 AM UTC
Jeff - Your frame is an impressive piece of work! I had never even known there were vac kits of vehicles outside of aircraft. I have a few of those DEEP in the pile somewhere! Let's hope the body & bed do hold things in alignment.
Vintage Paul
I'd happily live in the past but for air conditioning, the internet, mobile phones, modern medicine & dentistry and, and, and . . .

#460
California, United States
Joined: September 16, 2014
KitMaker: 1,156 posts
Armorama: 1,024 posts
Posted: Sunday, December 25, 2016 - 12:20 AM UTC
Goof - Great start on your Panzer II. Its nice to have a simple build once & a while. The tracks a individual links, are they the glue together type of the snap type?
I built a set of Fruils for a Tamiya Panzer II a few months ago and they came out well.
Vintage Paul
I'd happily live in the past but for air conditioning, the internet, mobile phones, modern medicine & dentistry and, and, and . . .

#460
California, United States
Joined: September 16, 2014
KitMaker: 1,156 posts
Armorama: 1,024 posts
Posted: Sunday, December 25, 2016 - 12:24 AM UTC
Welcome Pasi! Your Panzer I kit looks like a fun project. I look forward to your progress shots.
Vintage Paul
I'd happily live in the past but for air conditioning, the internet, mobile phones, modern medicine & dentistry and, and, and . . .

#460
California, United States
Joined: September 16, 2014
KitMaker: 1,156 posts
Armorama: 1,024 posts
Posted: Sunday, December 25, 2016 - 12:31 AM UTC
Irvin - Welcome aboard with your Tamiya Panzer. I just built the old Tamiya Panzer II kit in Afrika Corps markings a few months ago and found it looks pretty good despite its age. Your spanking new kit should be be a huge improvement!
Vintage Paul
I'd happily live in the past but for air conditioning, the internet, mobile phones, modern medicine & dentistry and, and, and . . .
Colorado, United States
Joined: December 25, 2004
KitMaker: 3,770 posts
Armorama: 2,263 posts
Posted: Sunday, December 25, 2016 - 06:06 AM UTC
Quoted Text
Always wondered about the Verlinden kits
Well, as I got further into this and needing to align axles and shields and other things, I've come to realize this kit is a dog. And, the wheels are warped (squished from top to bottom and unsalvageable).
So, consider this thing chucked into the pile of parts. I'll see what else I may have or can come up with.
Oh, and I was wrong...there are several makers of this little infantry gun; from styrene to white metal to resin.
Mike

Zuid-Holland, Netherlands
Joined: April 19, 2013
KitMaker: 179 posts
Armorama: 117 posts
Posted: Sunday, December 25, 2016 - 03:35 PM UTC
Some impressive builds going on. Of course missing quite a few of you, but some reactions:
@Raul: i have built the Italeri 232 a few years back as well. When not worrying about accuracy too much, it's a nice build.
@Jeff: vacuform is something i haven't tried yet... and honestly am not looking forward to either

@Pasi: i have the
Late version from Tristar. Looking forward to see how it turns out.
@Mike: sorry to see the kit go

@Paul: the tracks glue together and aren't workable. They do fit nicely though, after clean-up. Nice to see the guide-horns are hollowed out like the regular thing

Uusimaa, Finland
Joined: October 01, 2016
KitMaker: 514 posts
Armorama: 171 posts
Posted: Sunday, December 25, 2016 - 07:04 PM UTC
Had a few hours to spare on Christmas evening:

Wheels were bit wiggly so had to glue them to the axles, which complicates painting a bit. But otherwise this is easy kit to build. I'm building the tank all buttoned up, but the kit has complete interior which would make it possible to leave hatches open.
Panzer I had an issue with engine cooling and they had air scoops installed. There are two at rear (not visible in photo) and curved armour plate at rear of engine deck. These improved air flow over the engine. I'm not sure whether they were used in Poland, but I assume that might have been the case.
Tracks are as glue-on separate track links. I think I'll order Friul's tracks for easier assembly and painting.
Anyway, seams need cleaning and most of the small parts are missing, which what I'll need to do next.
Tennessee, United States
Joined: April 04, 2002
KitMaker: 1,290 posts
Armorama: 658 posts
Posted: Monday, December 26, 2016 - 01:29 AM UTC
Quoted Text
Jeff - Your frame is an impressive piece of work! I had never even known there were vac kits of vehicles outside of aircraft. I have a few of those DEEP in the pile somewhere! Let's hope the body & bed do hold things in alignment.
Paul, Thanks. There are two major issues with vacform kits: 1- parts with sharp corners, like turrets and stowage boxes, tend to be weak spots as the plastic gets stretched; 2 - The detail is not as sharp as injection molded kits. They also require some minor scratch building techniques to reinforce joints, etc. Below are two photos of a vac conversion, by Tonda, to build a Finnish 6-tonner from 7TP.


Tennessee, United States
Joined: April 04, 2002
KitMaker: 1,290 posts
Armorama: 658 posts
Posted: Monday, December 26, 2016 - 03:09 AM UTC
Pasi - great start on your PzKpfw I!

#460
California, United States
Joined: September 16, 2014
KitMaker: 1,156 posts
Armorama: 1,024 posts
Posted: Monday, December 26, 2016 - 06:22 AM UTC
Mike - Sorry to hear this kit turned out to be a dog. I hope you find something else to build soon!
Vintage Paul
I'd happily live in the past but for air conditioning, the internet, mobile phones, modern medicine & dentistry and, and, and . . .

#460
California, United States
Joined: September 16, 2014
KitMaker: 1,156 posts
Armorama: 1,024 posts
Posted: Monday, December 26, 2016 - 06:28 AM UTC
Pasi - That Tristar kit looks great! Kits that look good in the box don't always build well. Things like the detail on the exhaust pipe leading into the muffler stand out to my eyes.
Vintage Paul
I'd happily live in the past but for air conditioning, the internet, mobile phones, modern medicine & dentistry and, and, and . . .

#460
California, United States
Joined: September 16, 2014
KitMaker: 1,156 posts
Armorama: 1,024 posts
Posted: Monday, December 26, 2016 - 06:35 AM UTC
Thanks for showing the vac Finish 7TP conversion, another one I did not know about.
When I bought my 7TP kit at a model show last year it came with a resin conversion to make a Soviet T-26! The resin bits fit well and look pretty good. I can only guess the last owner saw the new Hobby Boss T-26s and decided to build one of them instead. I have a spare 7TP kit and may decide to do the T-26 just for practice with resin.
Vintage Paul
I'd happily live in the past but for air conditioning, the internet, mobile phones, modern medicine & dentistry and, and, and . . .
Western Australia, Australia
Joined: March 21, 2016
KitMaker: 247 posts
Armorama: 126 posts
Posted: Tuesday, December 27, 2016 - 10:41 AM UTC
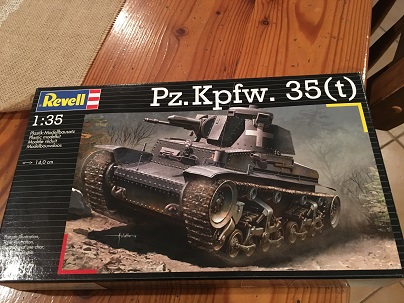
Will be starting soon with Revell's Pz.Kpfw 35(t)

New Jersey, United States
Joined: December 08, 2003
KitMaker: 2,864 posts
Armorama: 2,497 posts
Posted: Tuesday, December 27, 2016 - 11:52 AM UTC
Quoted Text
Thanks for showing the vac Finish 7TP conversion, another one I did not know about.
When I bought my 7TP kit at a model show last year it came with a resin conversion to make a Soviet T-26! The resin bits fit well and look pretty good. I can only guess the last owner saw the new Hobby Boss T-26s and decided to build one of them instead. I have a spare 7TP kit and may decide to do the T-26 just for practice with resin.
I have the Mirage kits of both of those. Mirage did kits of all the Vickers 6 ton variants based on that 7tp kit. The Finnish one is interesting as it was salvaged Russian guns on modified Vickers tanks.(or at least according to my Eastern Front armor book)
Nice starts all around, makes me wish was doing anything other than Mirage/RPM tankettes. Crude and blocky. I am doing the tracks now.
"The only thing a man should take seriously is the fact that nothing should be taken seriously."
Samuel Butler, Victorian satirist
Steve Willoughby

#460
California, United States
Joined: September 16, 2014
KitMaker: 1,156 posts
Armorama: 1,024 posts
Posted: Wednesday, December 28, 2016 - 01:19 AM UTC
Linus - A great subject, these little tanks got a lot of use. How is the Revell kit?
Vintage Paul
I'd happily live in the past but for air conditioning, the internet, mobile phones, modern medicine & dentistry and, and, and . . .

#460
California, United States
Joined: September 16, 2014
KitMaker: 1,156 posts
Armorama: 1,024 posts
Posted: Wednesday, December 28, 2016 - 01:22 AM UTC
Stephan - I'm glad you are sticking with the tankette. They were an important part of Polish resistance and I'm happy to see you bring one to life. How are the tracks going together? They must be very tiny. Have you shot any pictures?
Vintage Paul
I'd happily live in the past but for air conditioning, the internet, mobile phones, modern medicine & dentistry and, and, and . . .
Oklahoma, United States
Joined: September 30, 2015
KitMaker: 2,493 posts
Armorama: 2,344 posts
Posted: Saturday, December 31, 2016 - 10:26 PM UTC
This will be my official entry.


"Only the dead have seen the end of war." - Plato

#460
California, United States
Joined: September 16, 2014
KitMaker: 1,156 posts
Armorama: 1,024 posts
Posted: Sunday, January 01, 2017 - 02:04 AM UTC
Hey Dustin, great choice. I have some of these Eduard kits and have found them to be pretty nice.
Vintage Paul
I'd happily live in the past but for air conditioning, the internet, mobile phones, modern medicine & dentistry and, and, and . . .

#152
Texas, United States
Joined: December 07, 2002
KitMaker: 487 posts
Armorama: 441 posts
Posted: Sunday, January 01, 2017 - 08:56 AM UTC
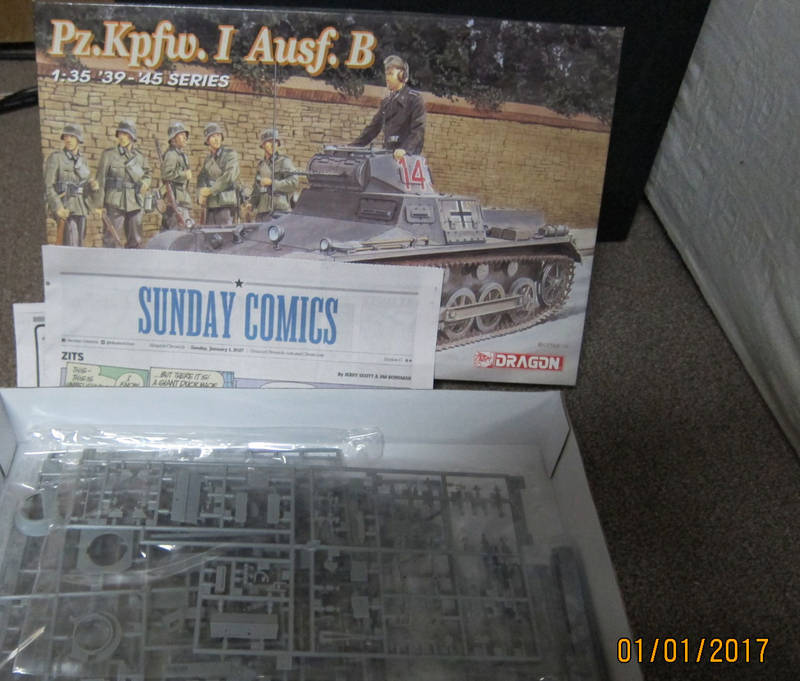
Here are my start up photos.
The Kit is Dragon 6186 Pz I Ausf B


Tom
Long time modeller. Starting when I was a teenager, then I found out about girls and college and work and kids. But now that I have one girl, no school, no work and the kids are grown, I'm back to full time modelling. My prime area of interest is armor, b

#460
California, United States
Joined: September 16, 2014
KitMaker: 1,156 posts
Armorama: 1,024 posts
Posted: Wednesday, January 04, 2017 - 05:16 AM UTC
Tom - That Panzer I is perfect for this campaign. I have a Dragon Panzer I but with a different box sitting on the shelf waiting for its time in the sun. I'm looking forward to seeing your progress pictures!
Vintage Paul
I'd happily live in the past but for air conditioning, the internet, mobile phones, modern medicine & dentistry and, and, and . . .
New Jersey, United States
Joined: December 08, 2003
KitMaker: 2,864 posts
Armorama: 2,497 posts
Posted: Friday, January 06, 2017 - 06:05 PM UTC
"The only thing a man should take seriously is the fact that nothing should be taken seriously."
Samuel Butler, Victorian satirist
Steve Willoughby
New Jersey, United States
Joined: December 08, 2003
KitMaker: 2,864 posts
Armorama: 2,497 posts
Posted: Friday, January 06, 2017 - 06:18 PM UTC
"The only thing a man should take seriously is the fact that nothing should be taken seriously."
Samuel Butler, Victorian satirist
Steve Willoughby

 I do like their "multi-level" PE though.


